Thank you sir. Check out some of my other modeling jobs.
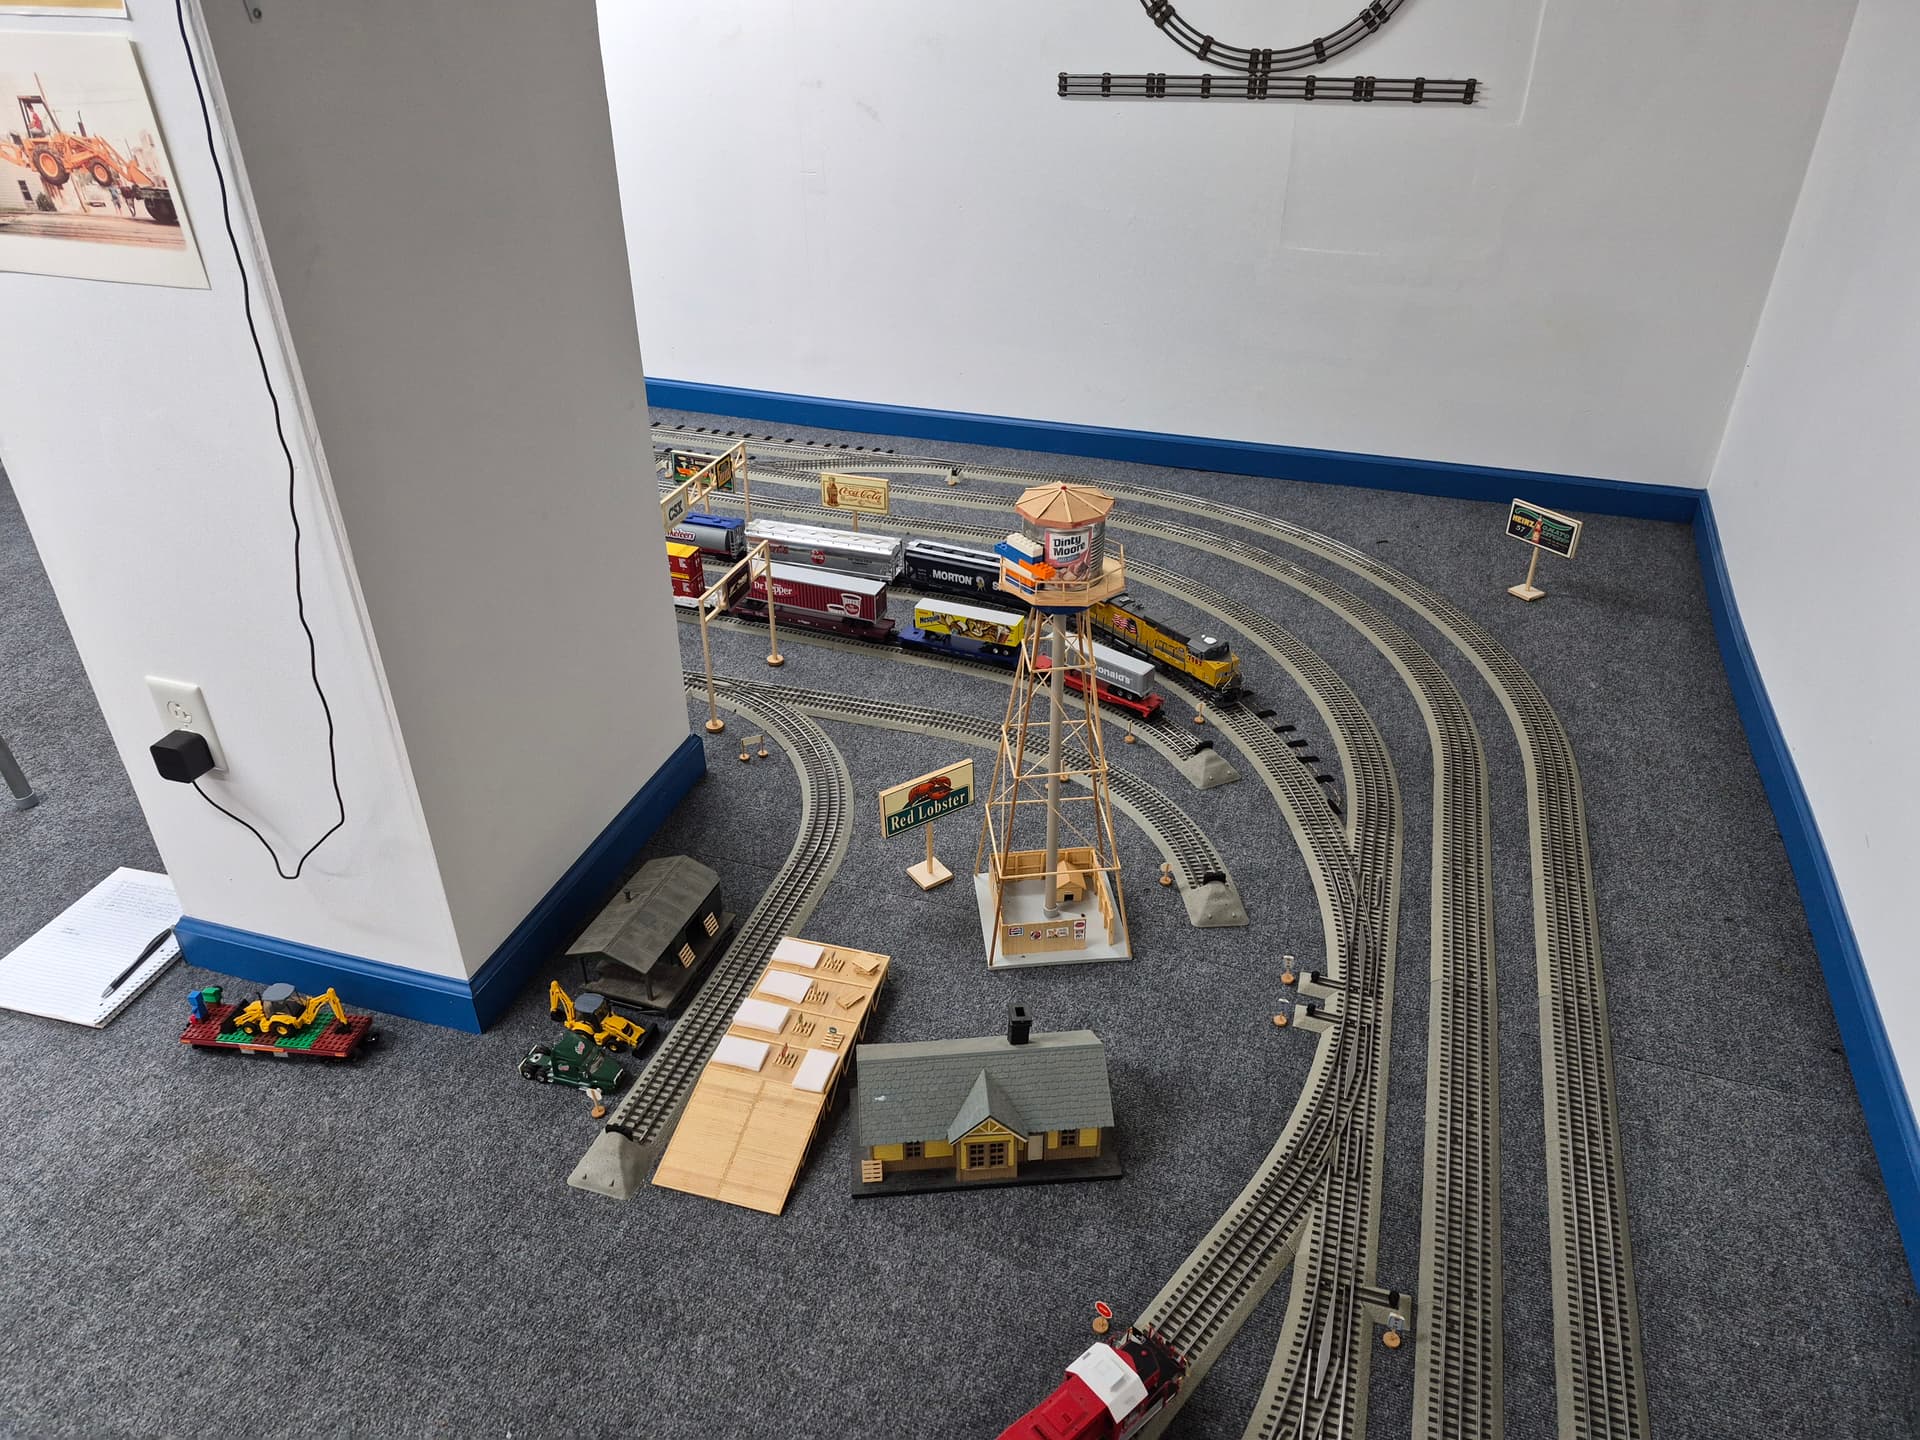
The water tower and one of the loading docks photo, sorry, can’t be enlarged on the site, or I couldn’t. But check out the track clean car to the left near the plug. That’s the one I built for my grandson. He requested it. I built the deck out of lego’s. I glued flat lego pieces to the deck, then added a minecraft person, and that backhoe. The water tower tank is a dinty moore can with a peak roof built to the top of it.
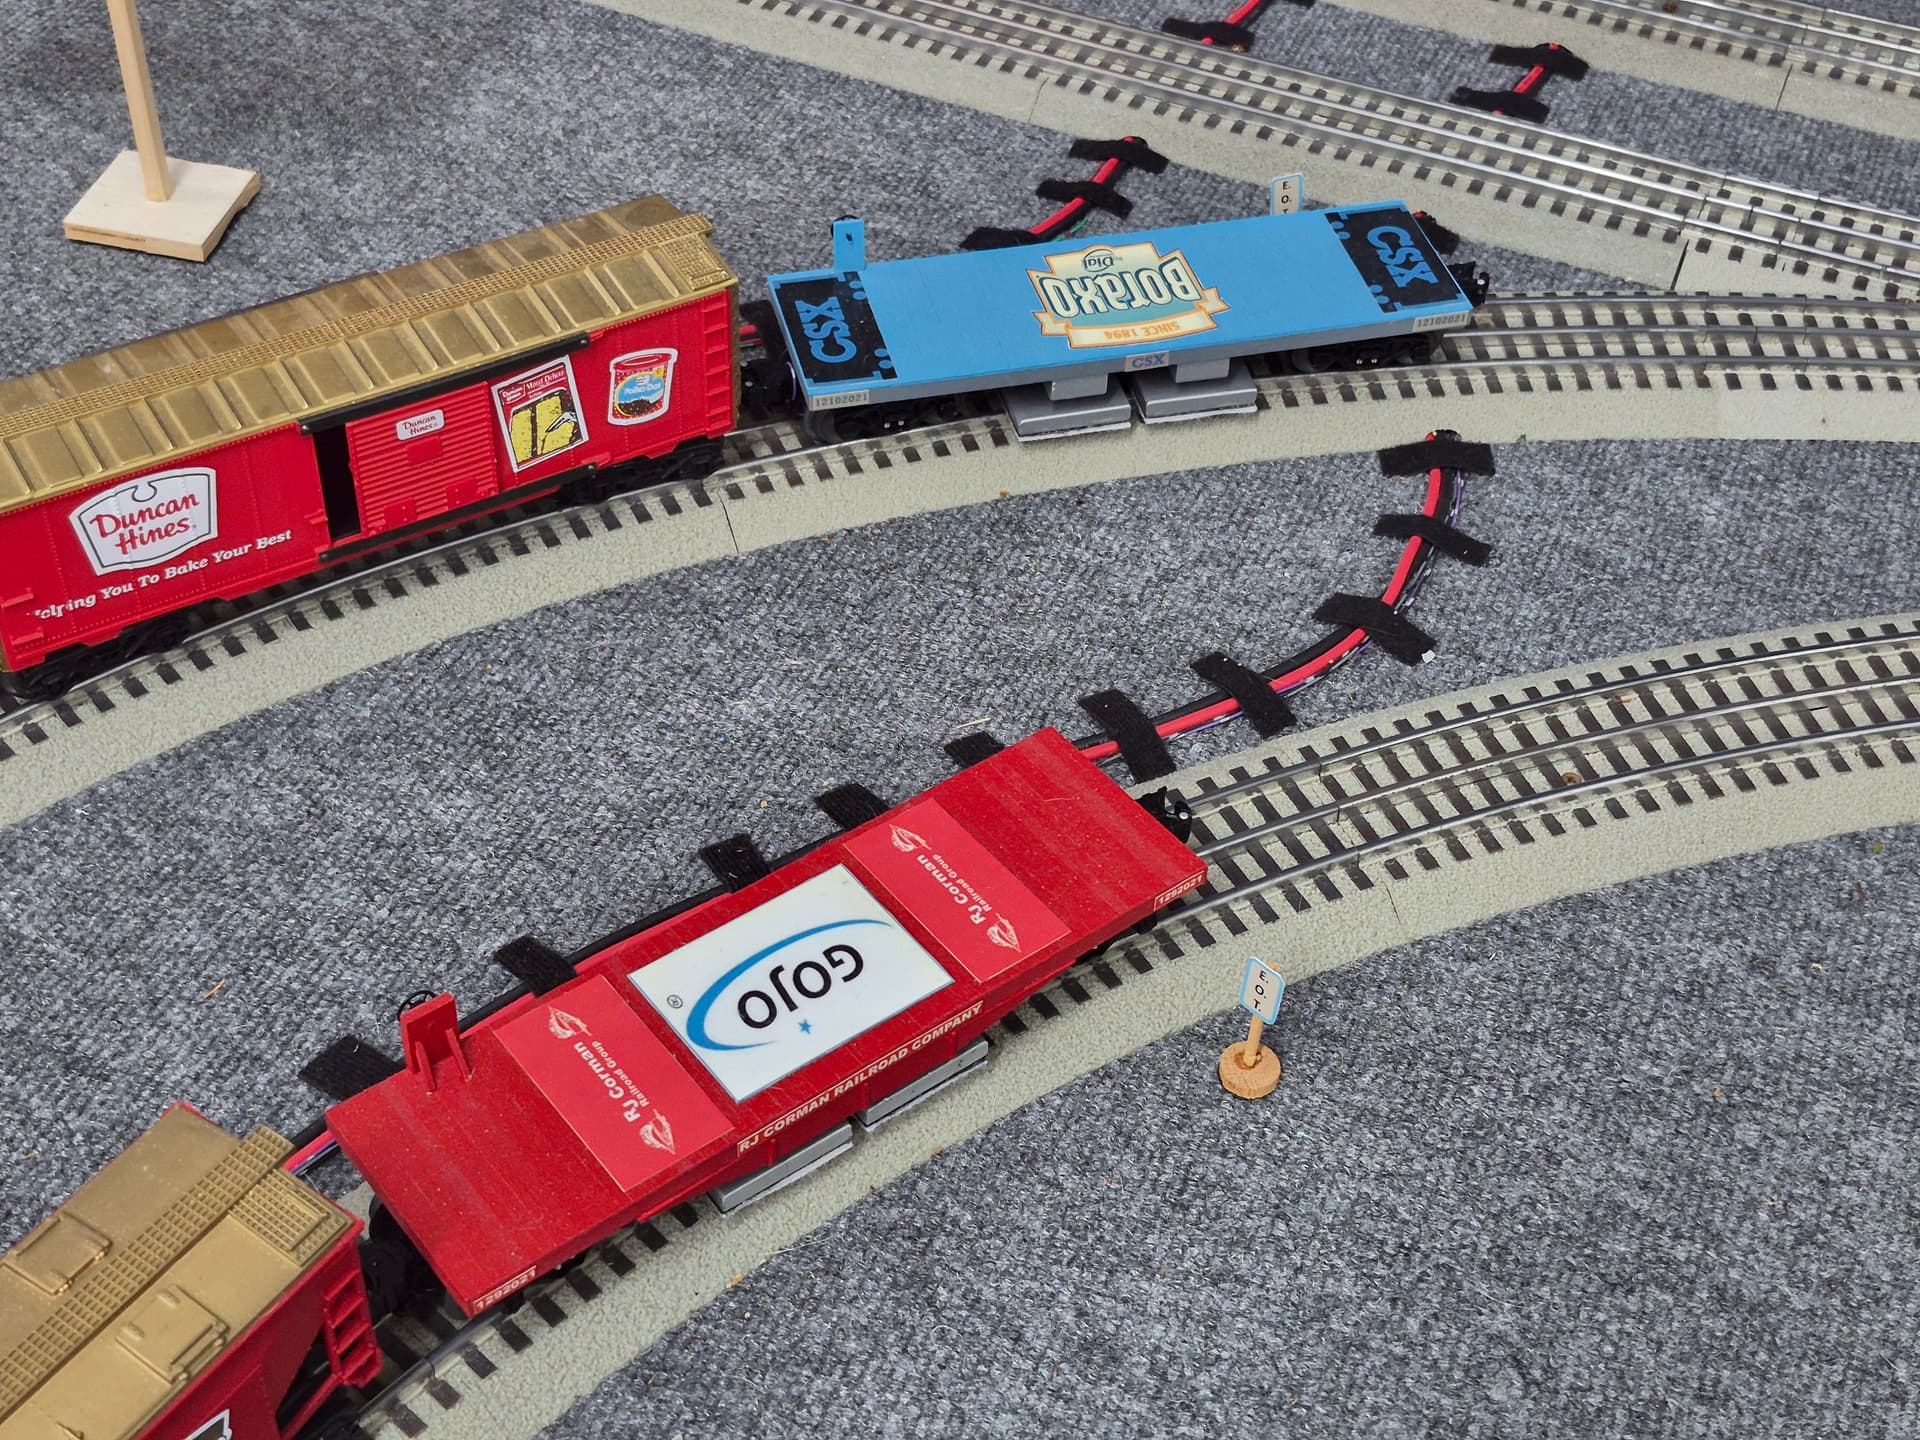
If you look at the two track clean cars Gojo and Boraxo, Boraxo shows the cleaning mechanisms under the car. The car is made of aluminum plate cut to a 10 inch length. So a 40 foot flat car in real world. I added a hand brake wheel attached to nothing. CSX blue, sort of. Boraxo logo is nothing more than a google pic of the logo I liked, printed onto photo paper, covered with laminate to protect it, glued to the deck. The deck is 43 give or take pieces of 1/8 inch wide 1/32 inch thick bass wood sticks cut to width and clipped flush with a set of bull nose finger nail clippers. The trucks are just lionel trucks you can buy. I mounted them under the deck so the screw head wouldn’t foul the deck surface. The cleaning apparatus is more detail than I want to go into. Involves springs.
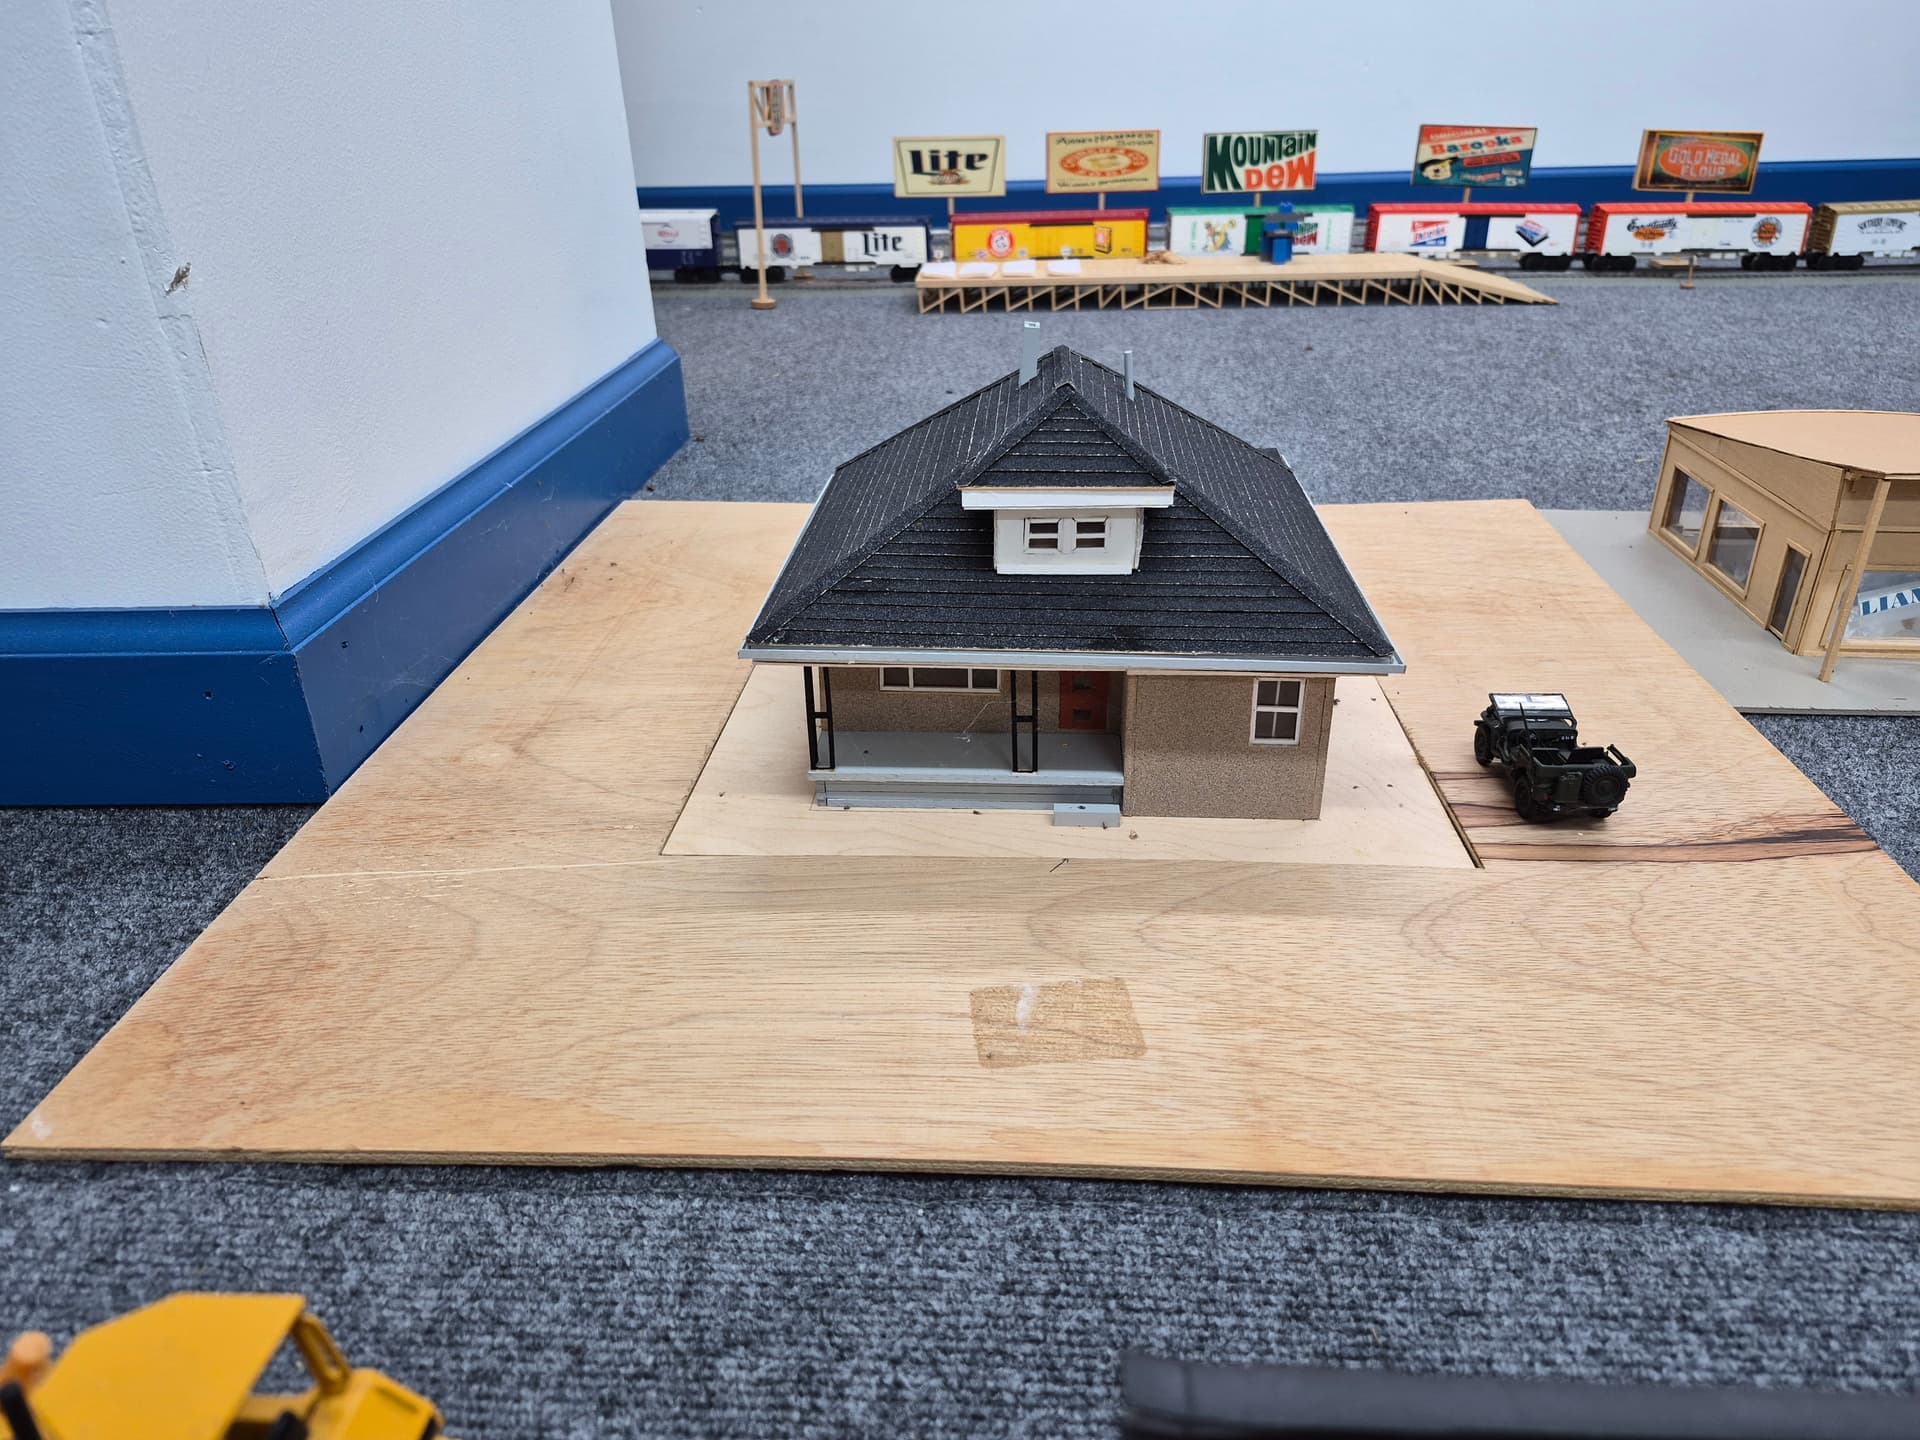
My house, complete with bad chimney and bathroom vapor pipe, dormer, which I caused, and front porch, and back porch but no pic of it, even a carport, and my dad’s old Jeep willis. (You guys are going to have to get over that word) I typed willis to make this send, but get a grip. The industry word used to describe this jeep is not willis. Those shingles are drywall sandpaper cut to strips and layered up. The peak shingles are very very glued down tiny pieces of sandpaper that really didn’t like being bent in half. Yes we had a hard with grass, a fence, gravel drive, and a basketball goal but not ready to go there yet.
1 Like
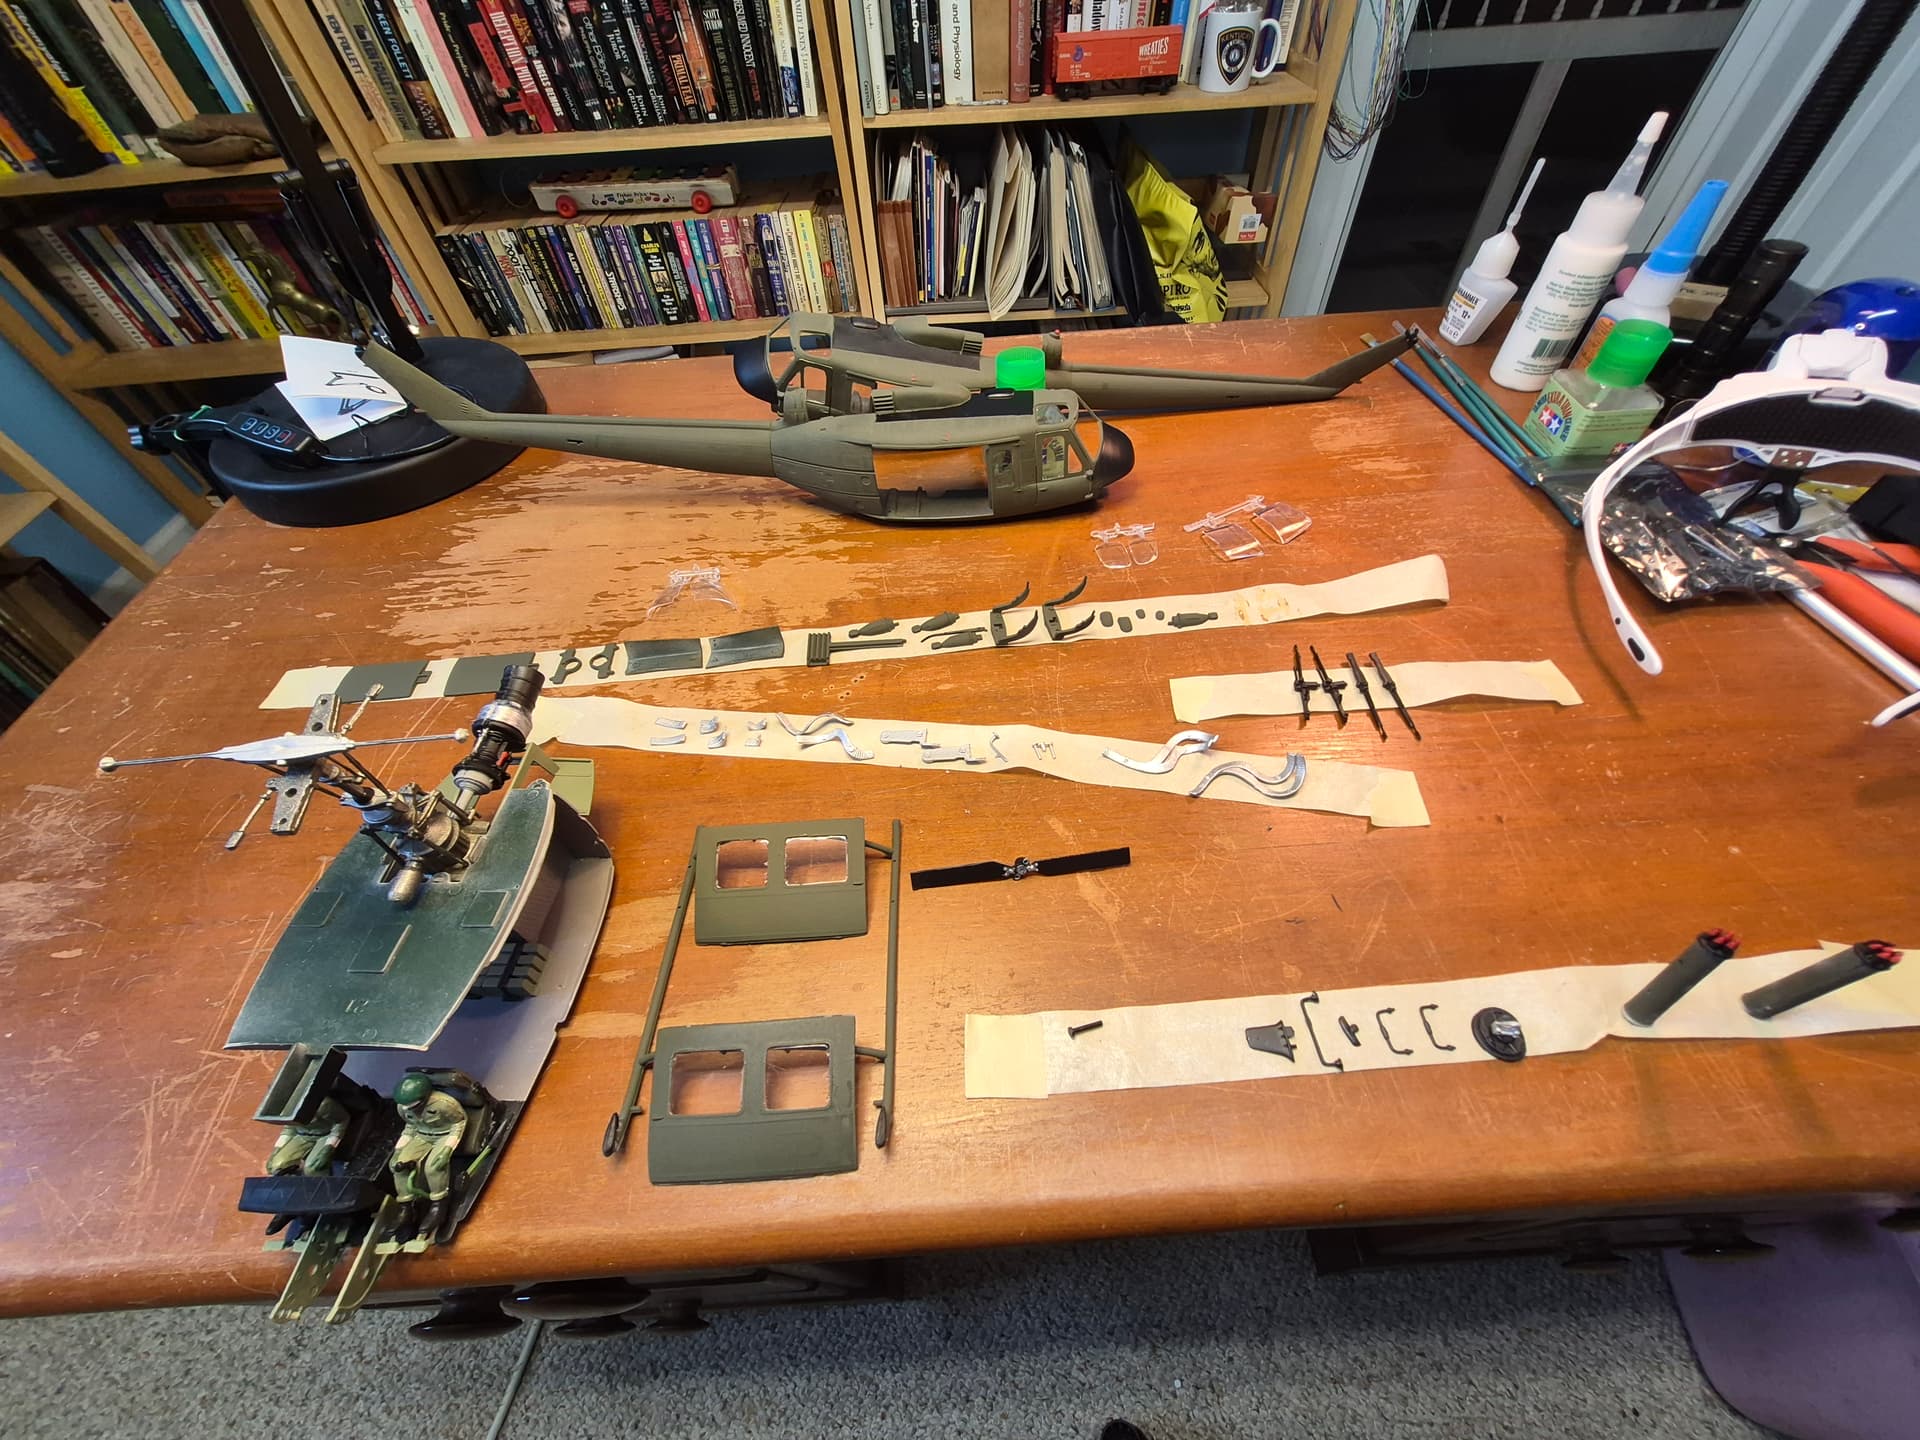
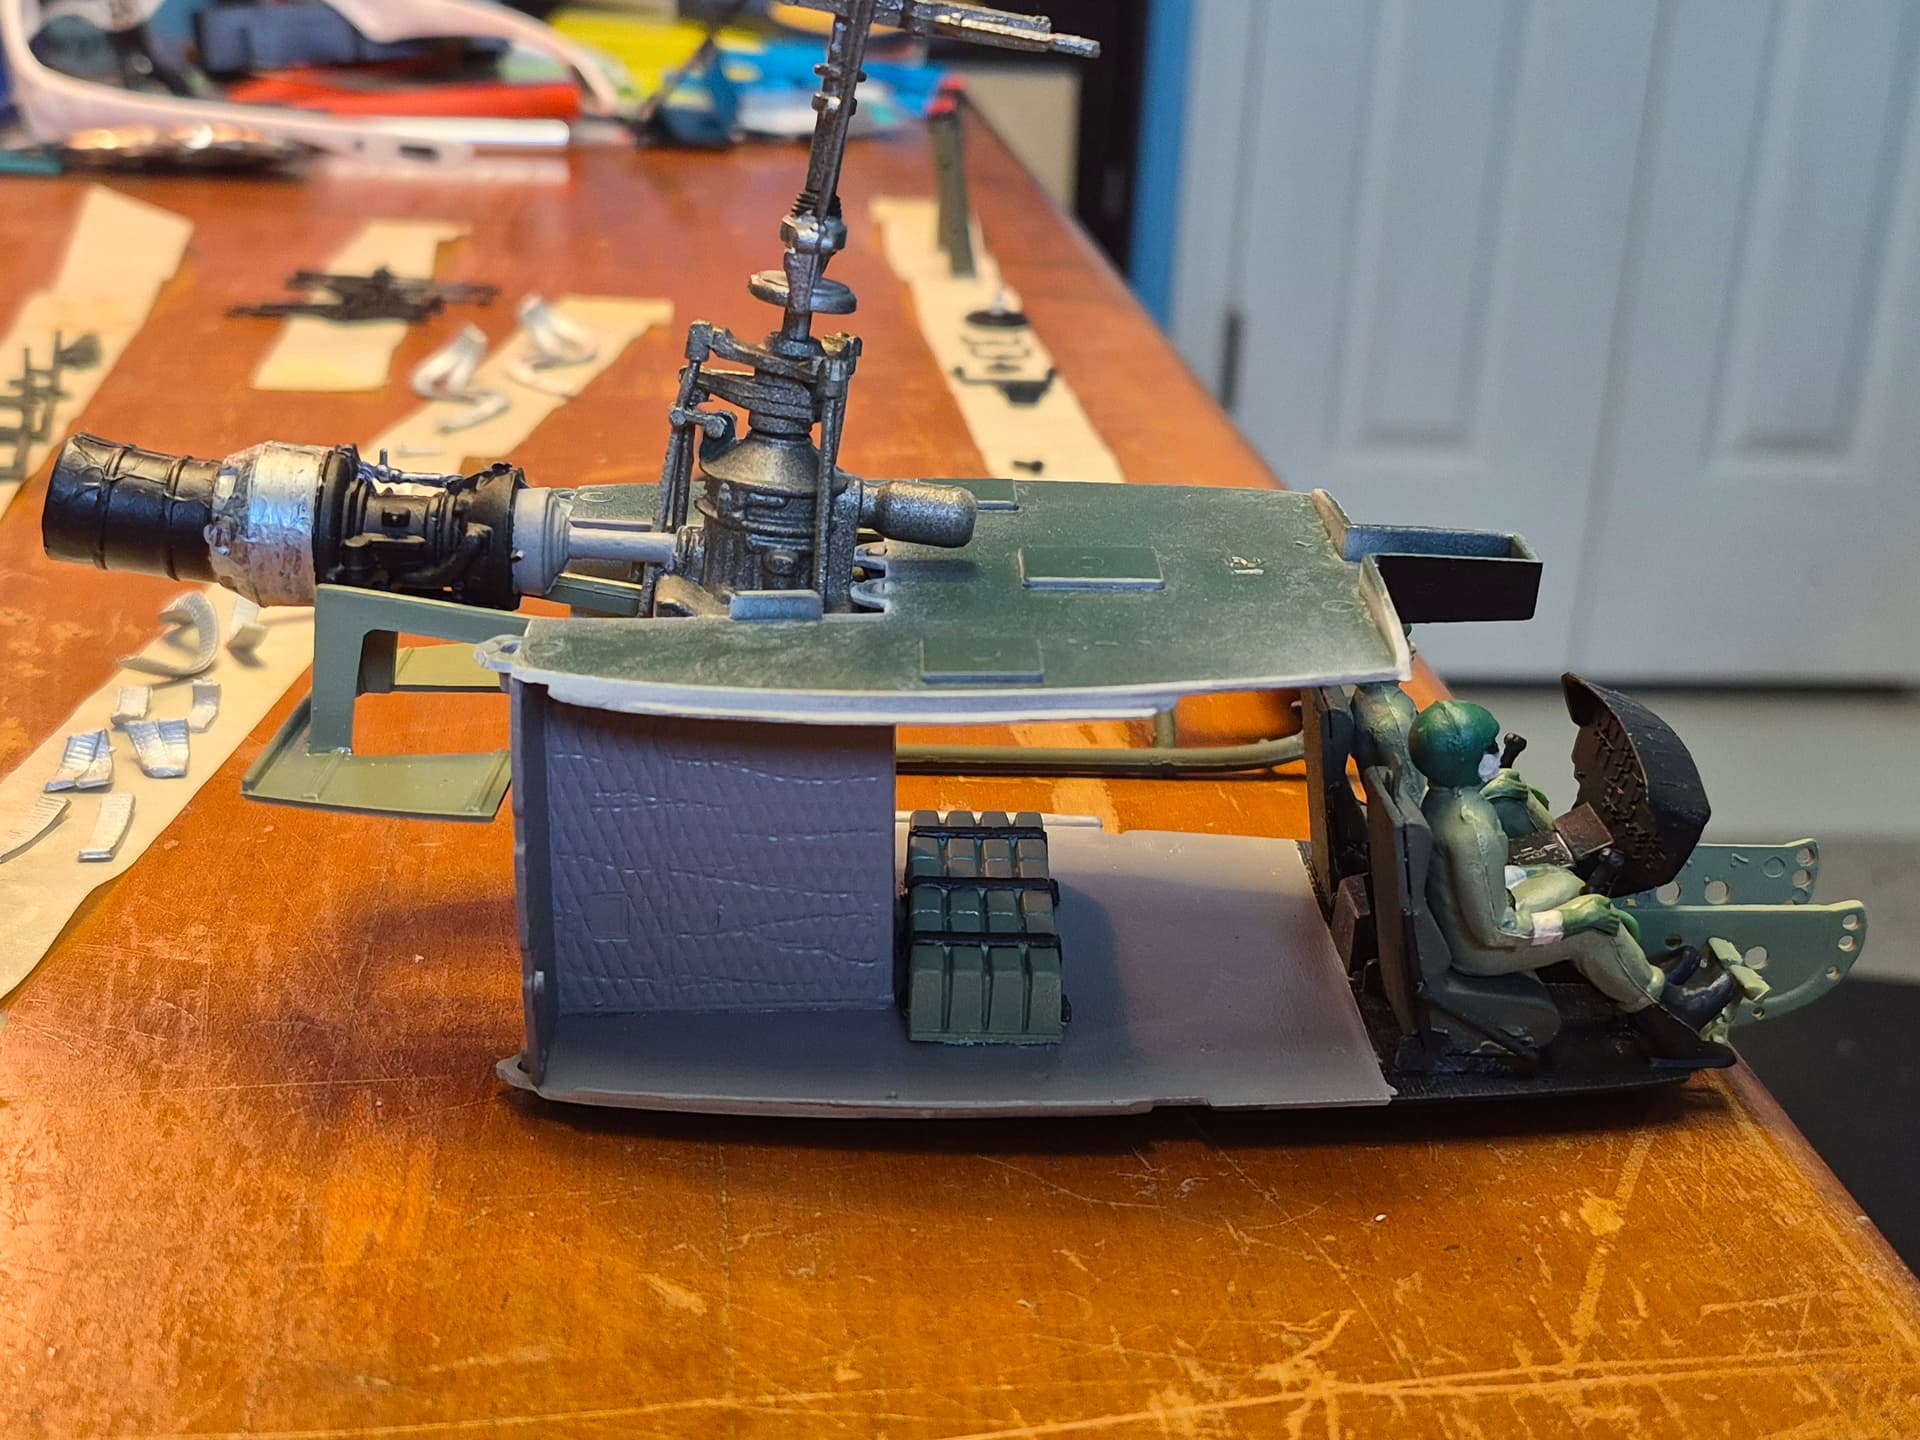
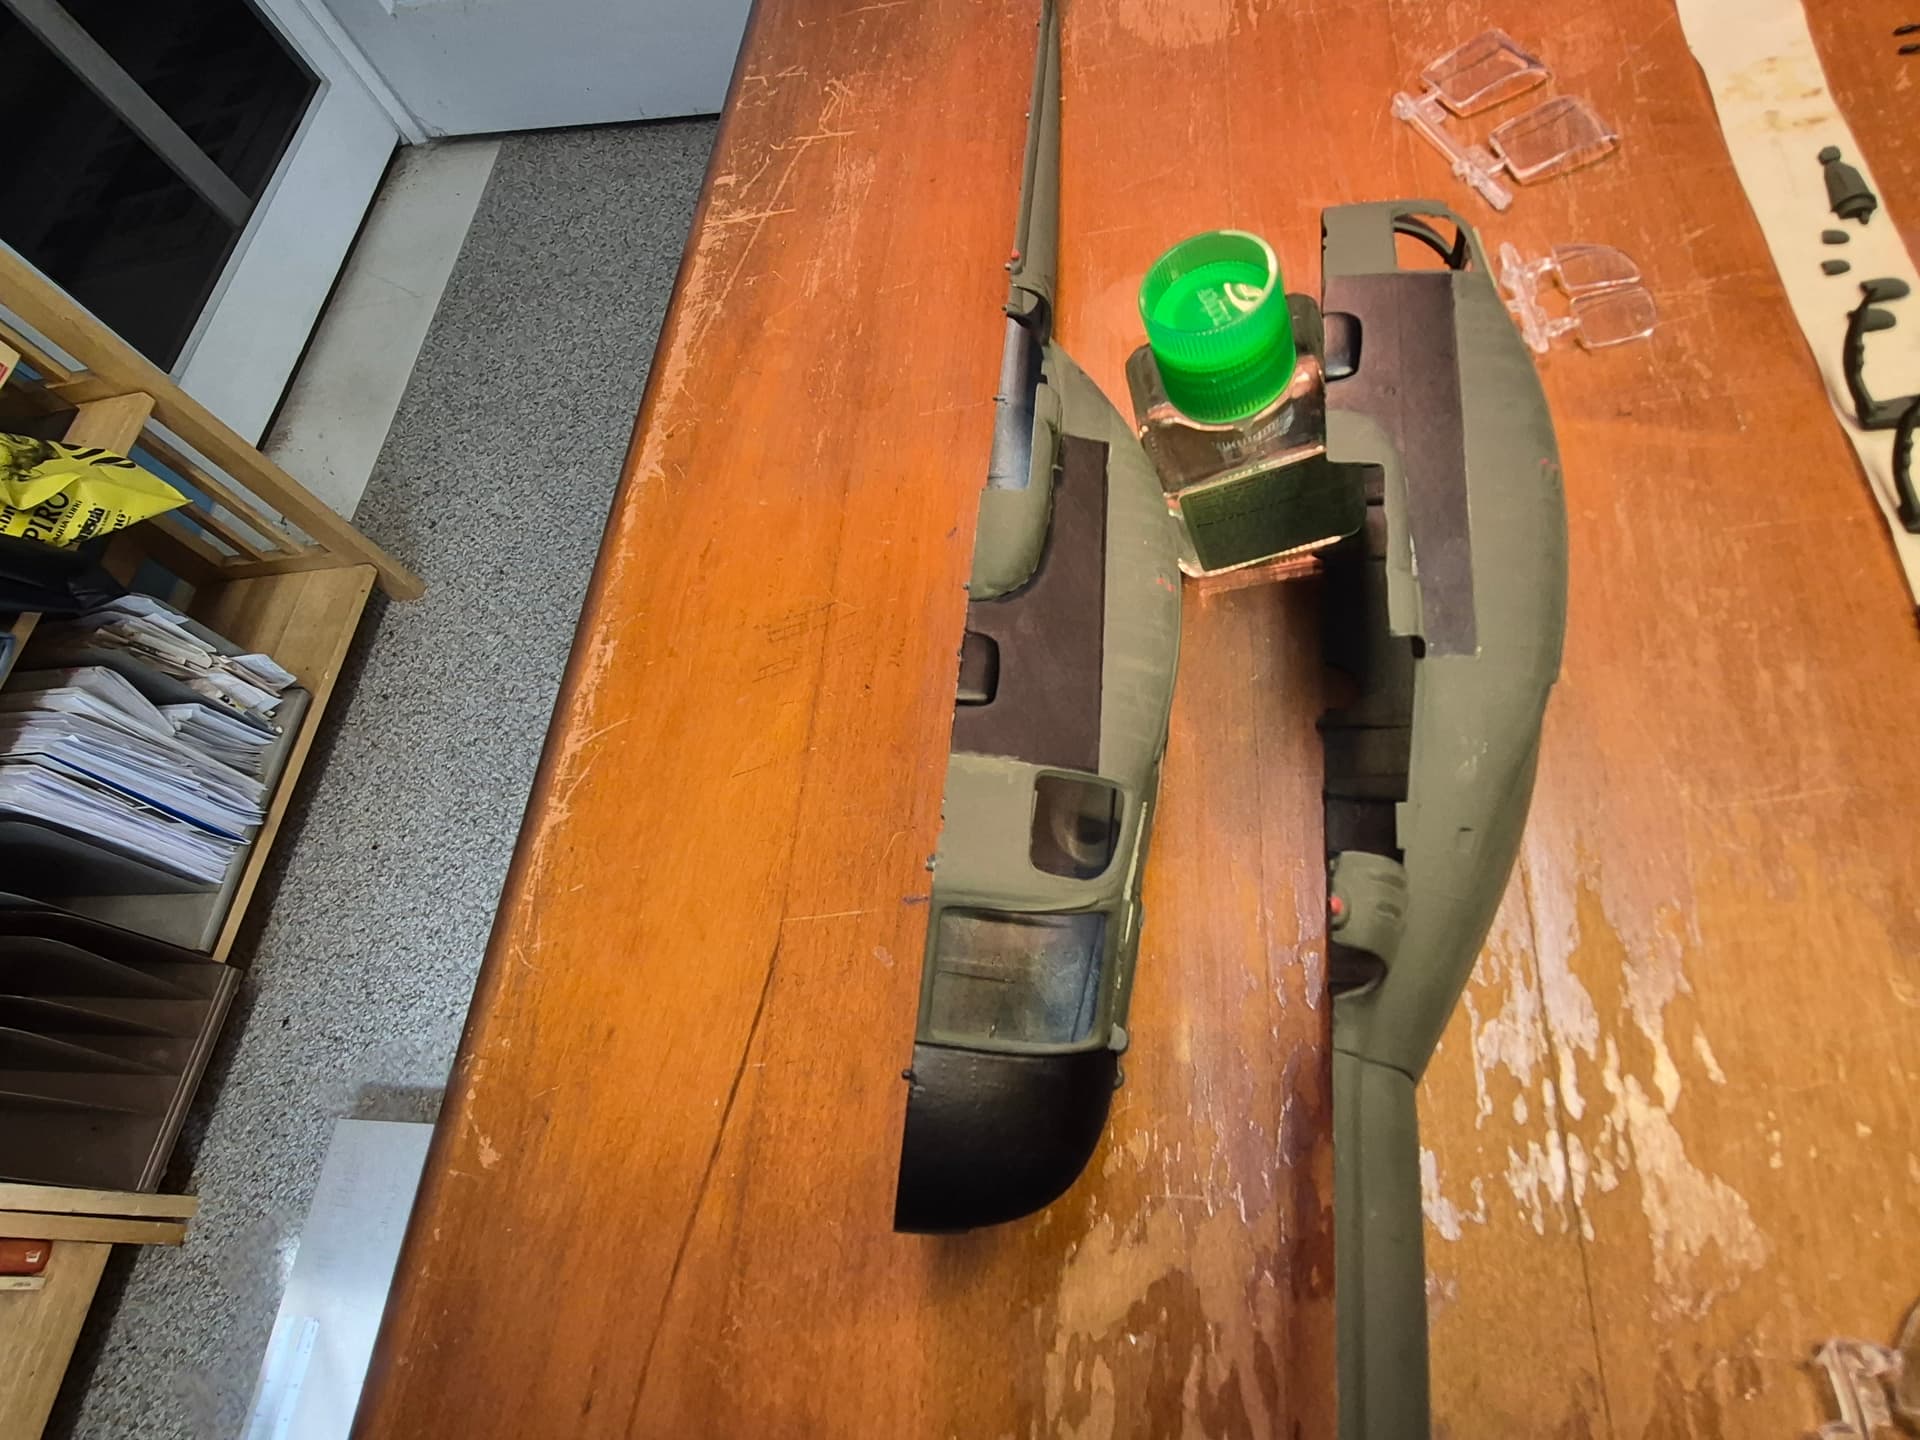
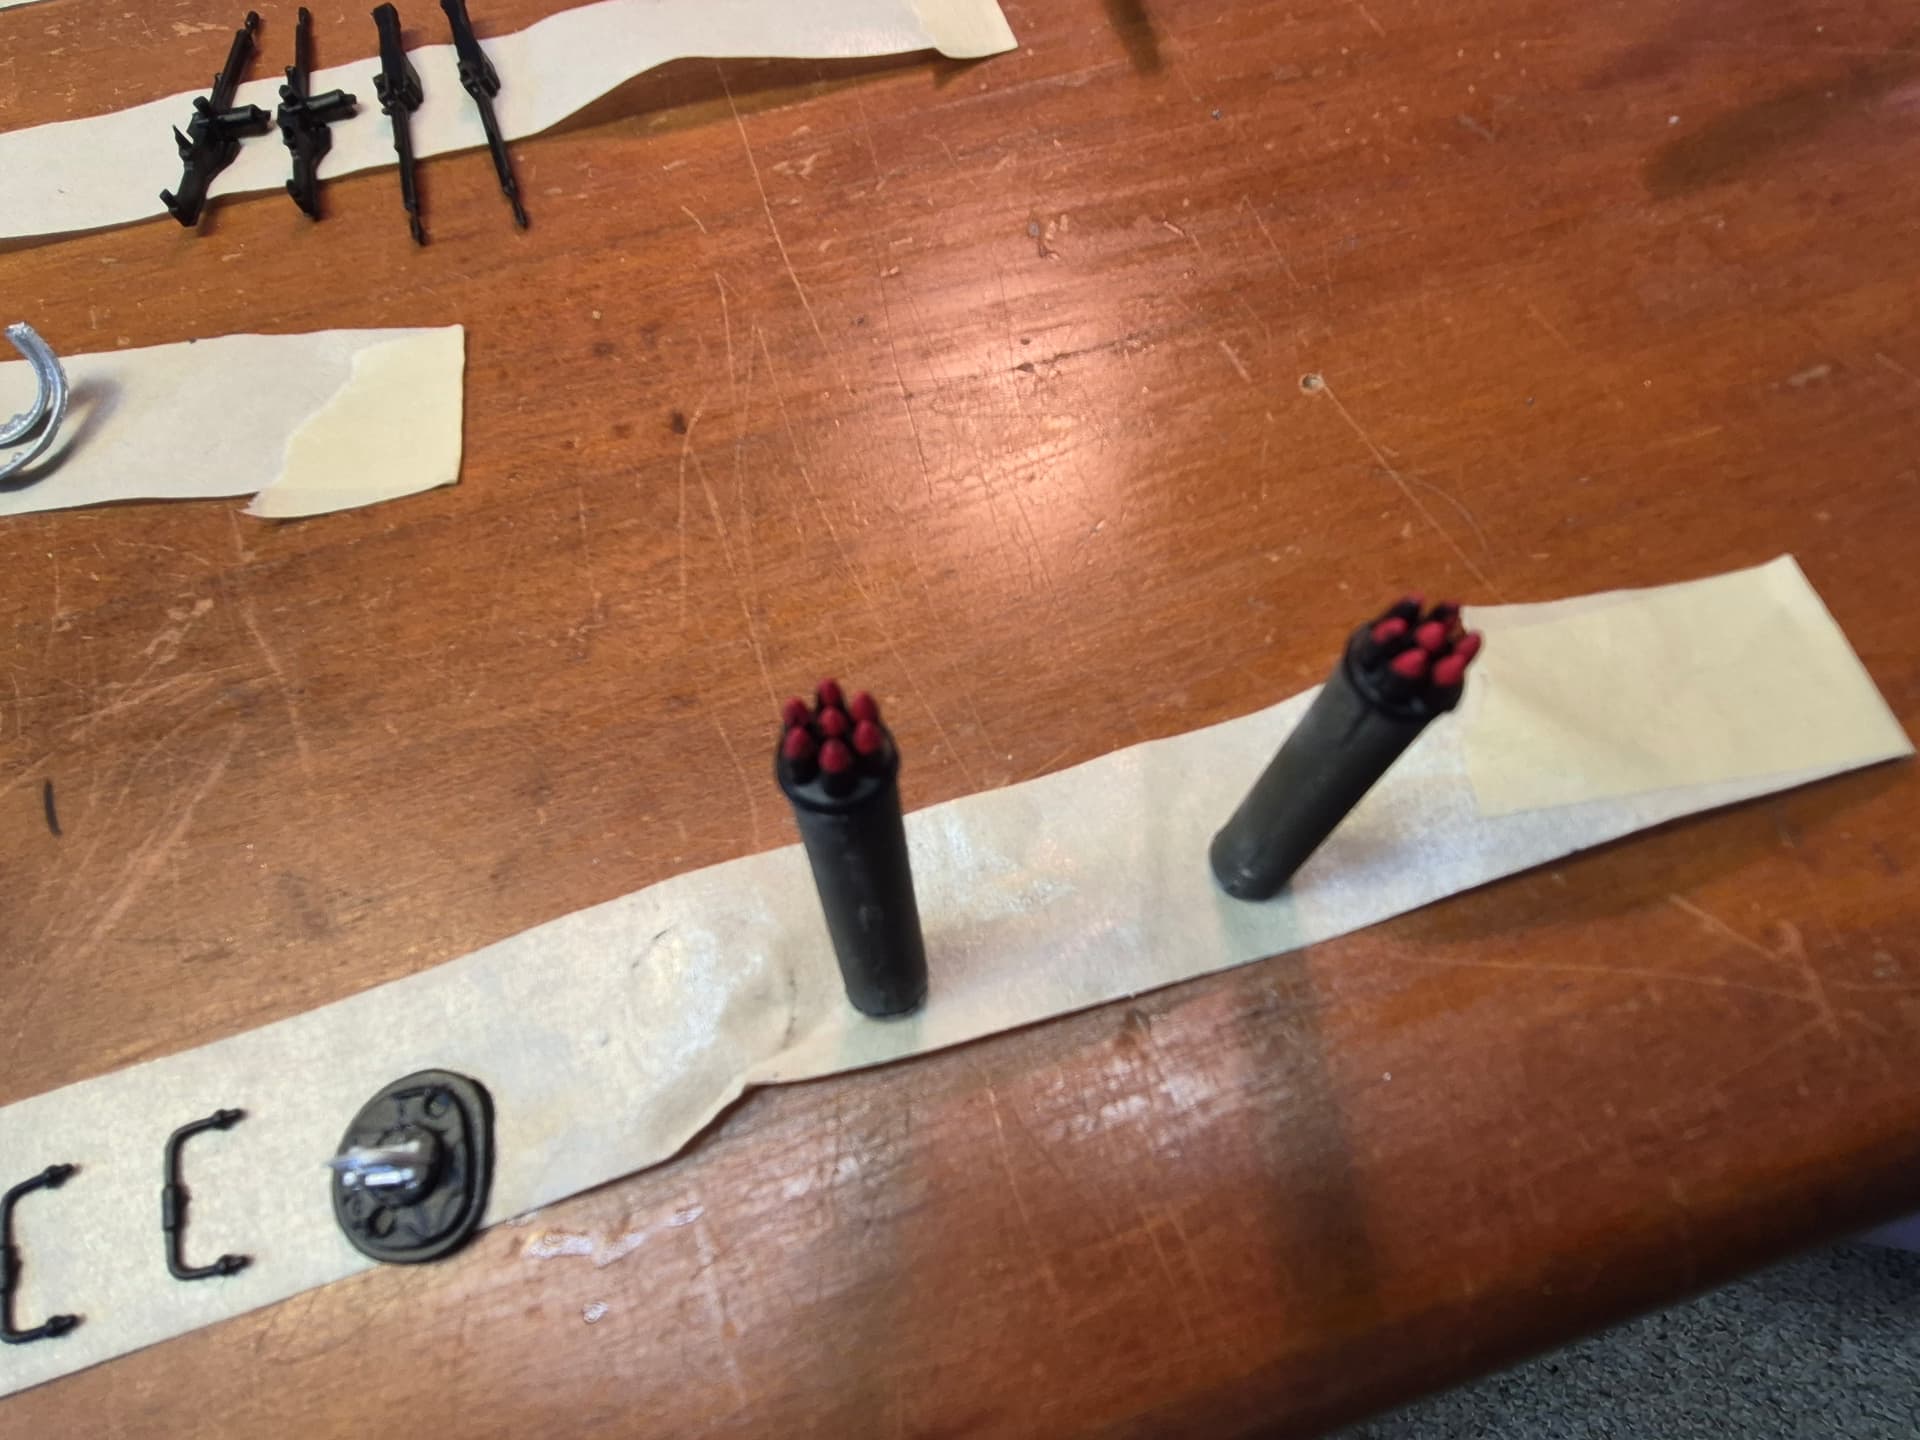
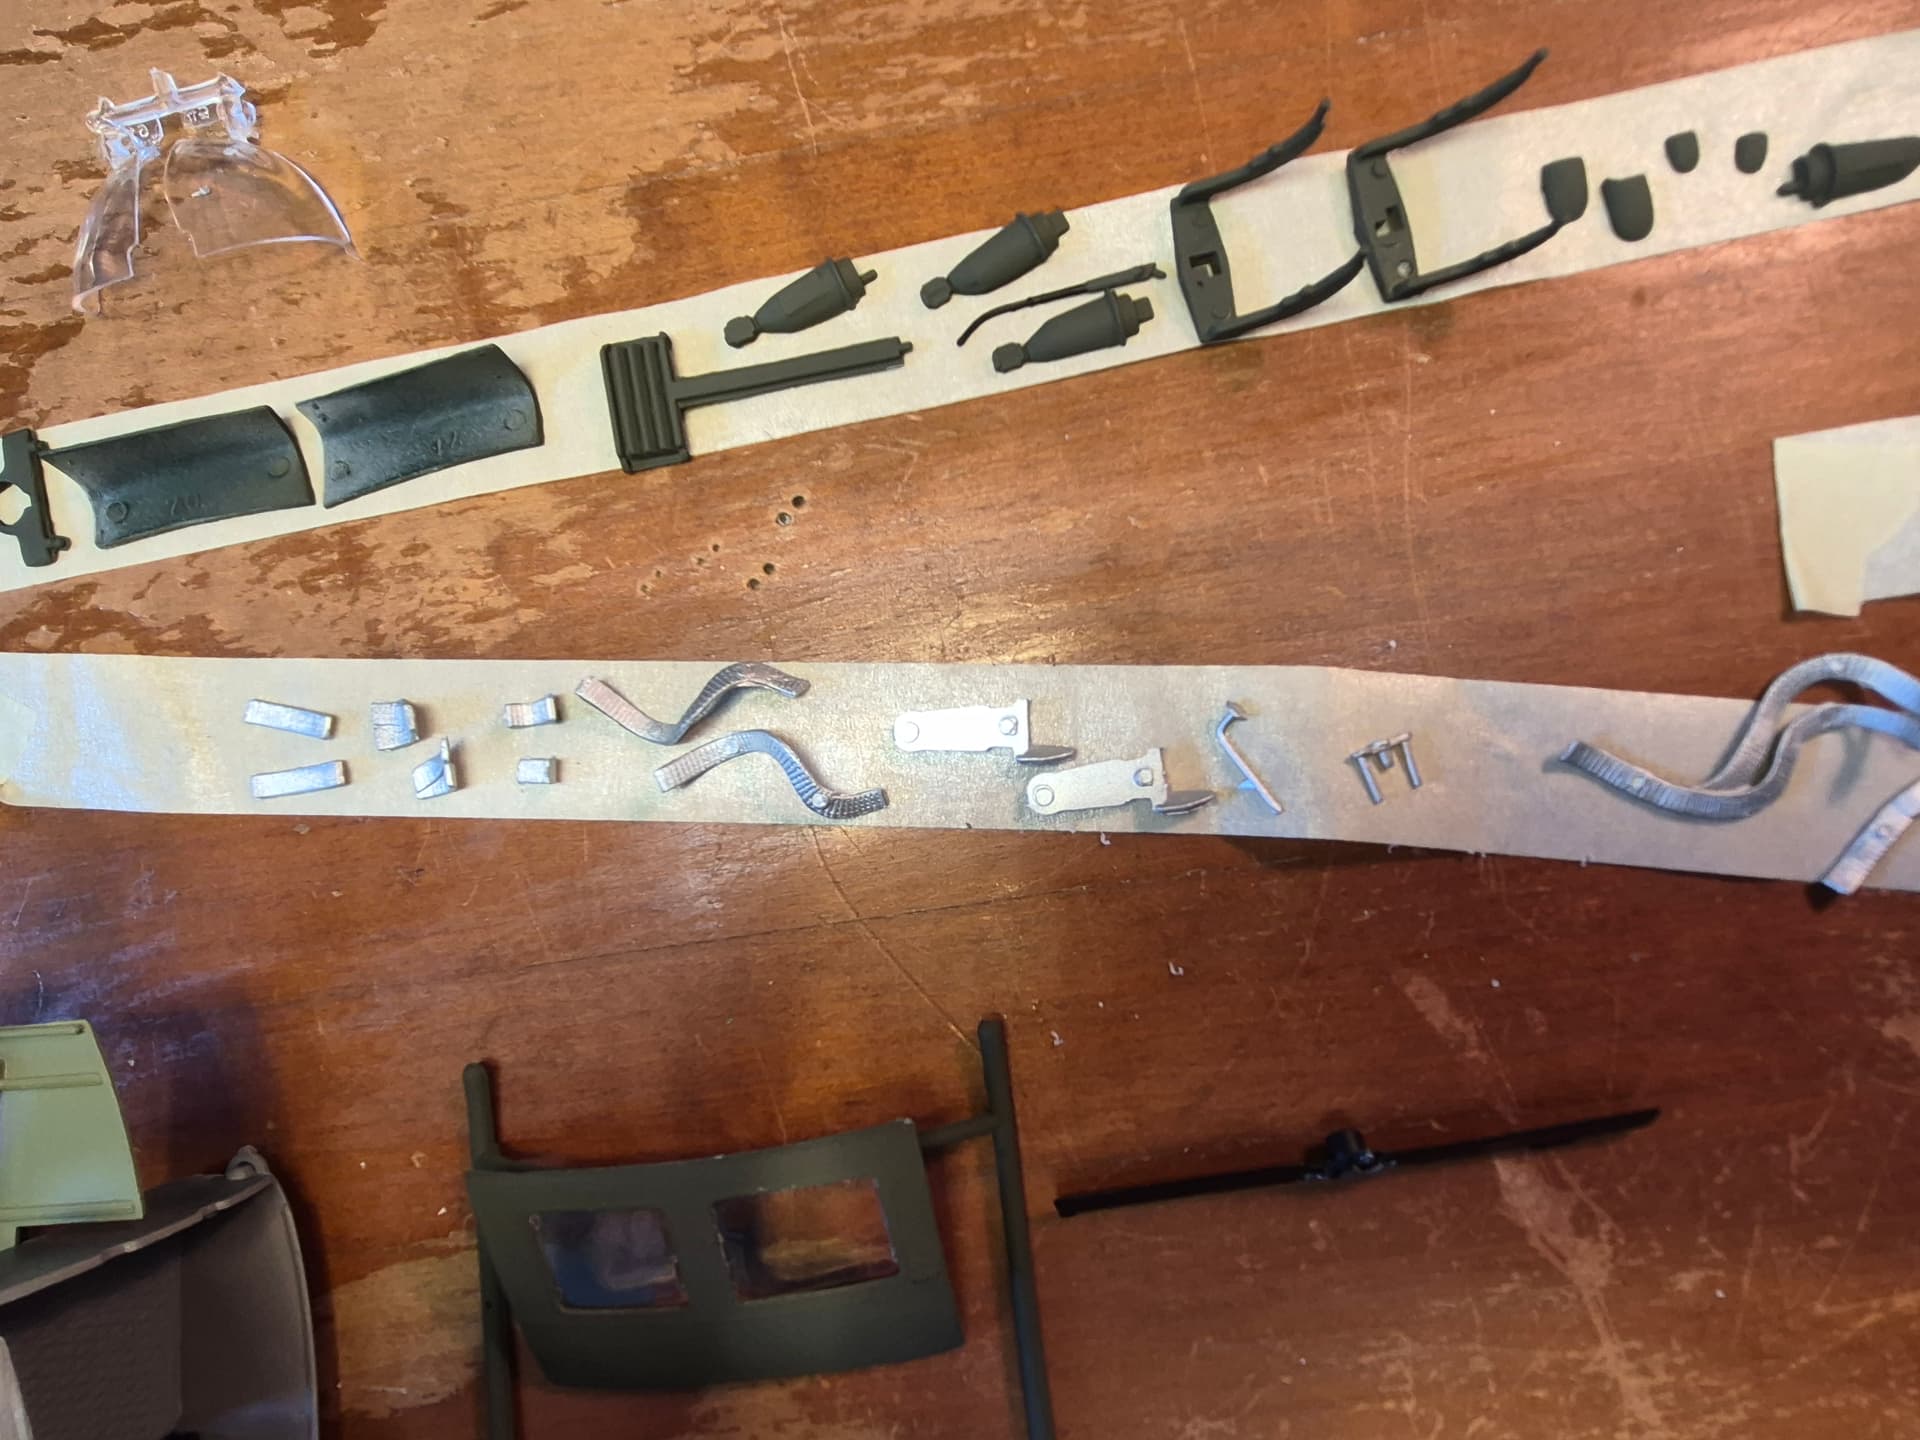
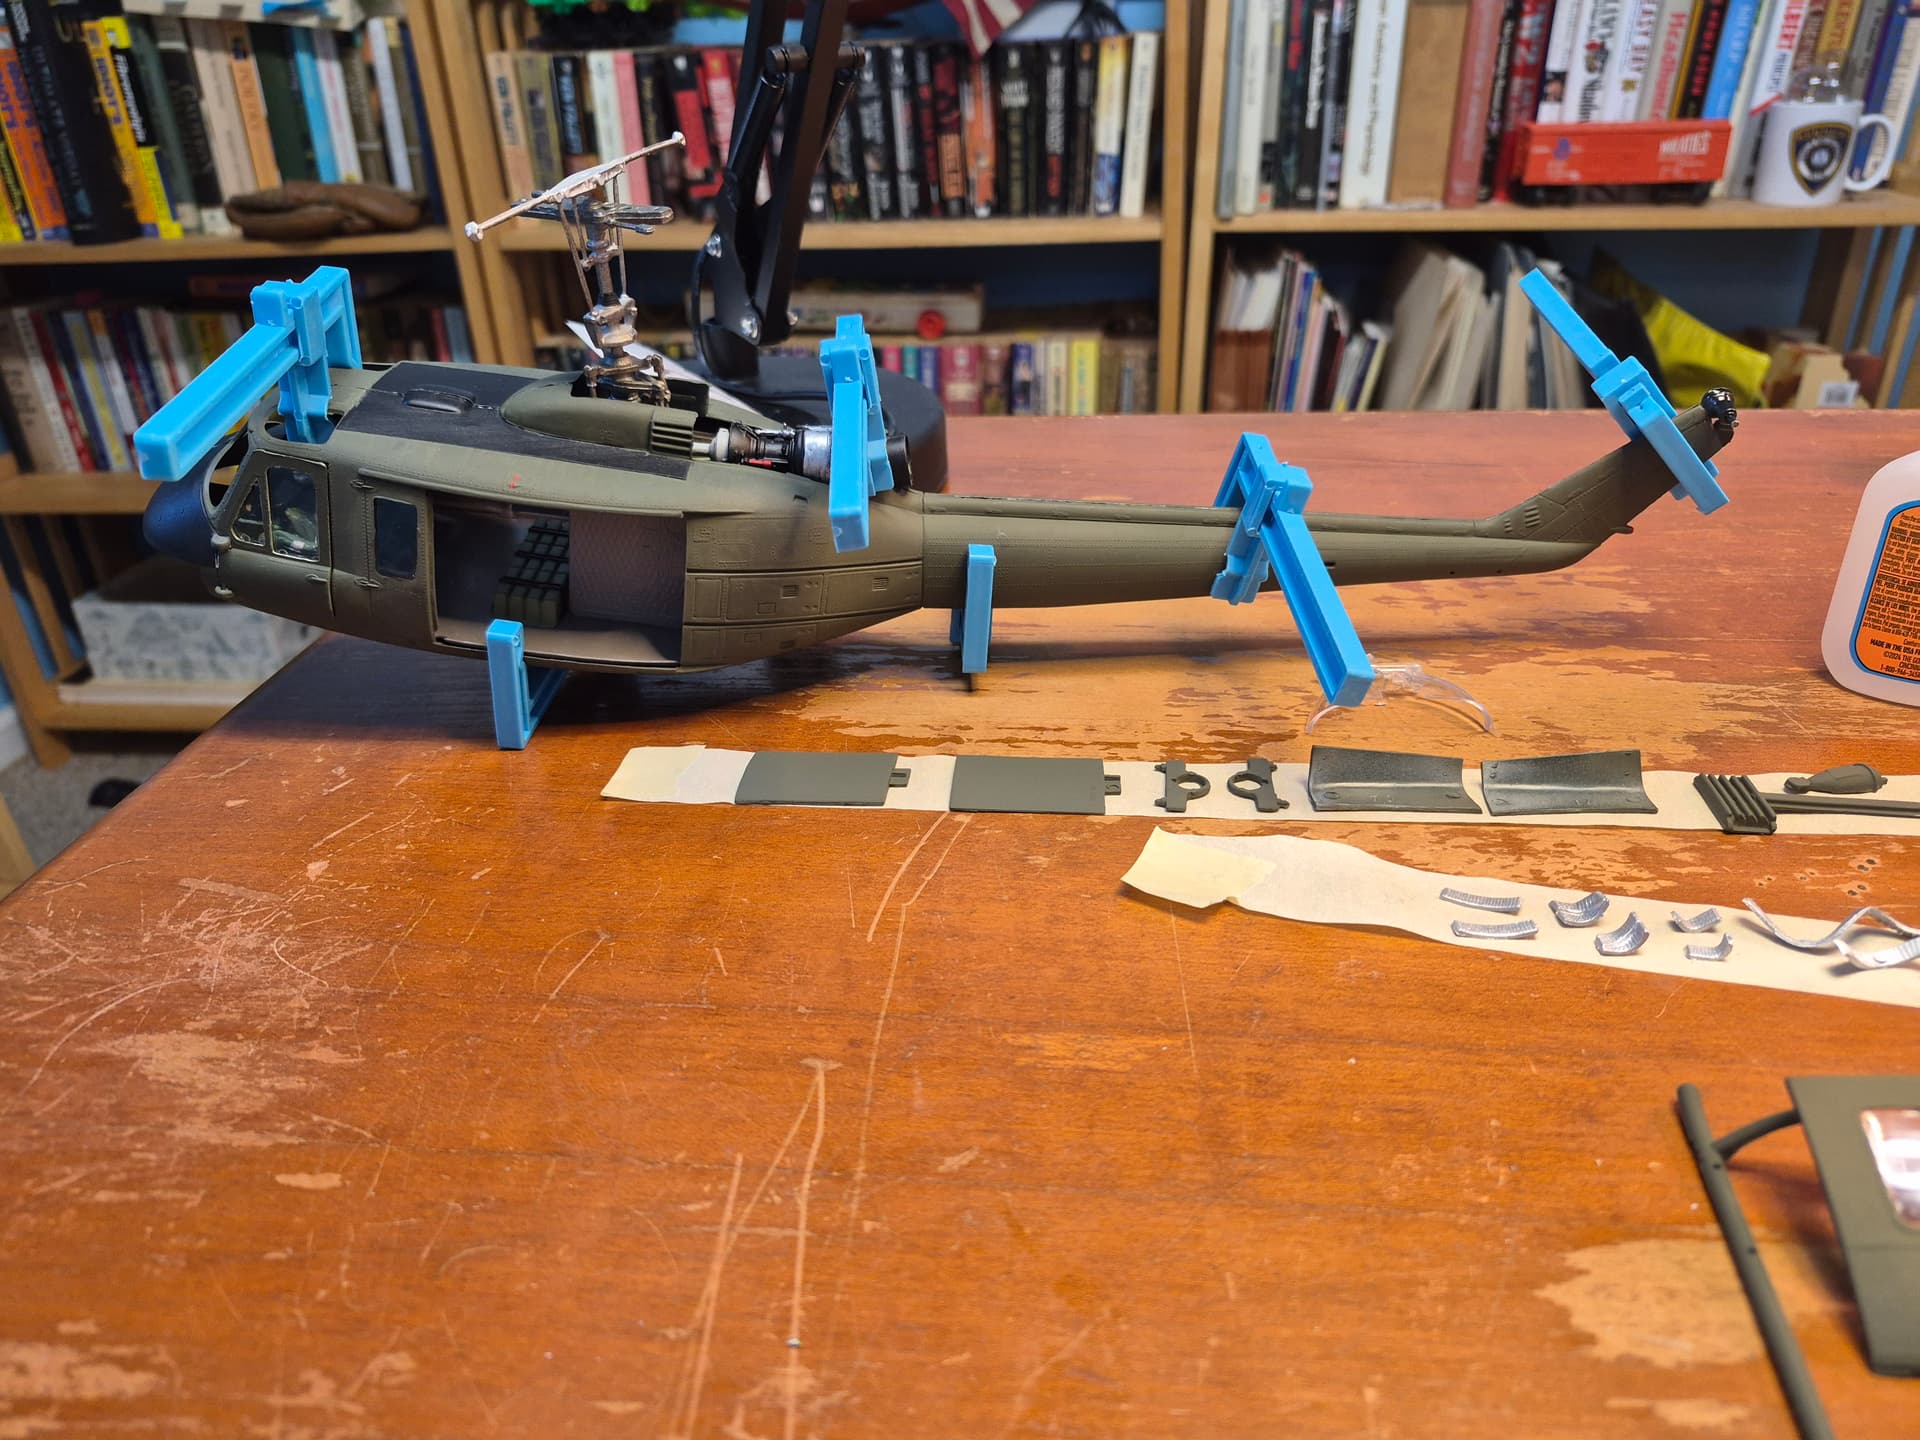
Here is where I am so far. I took photos of the fuselage, parts taped to masking tape to keep up with them, the black nose and walkway on the roof, cabin, cockpit, rotor system assembled, red nosed rockets, etc.

1 Like
That Lindsey Vonn line was just subtle enough that I had to read it twice before I got it. 
And that thing is HUGE! It’s going to be gorgeous when you get it all together. I can’t wait to see the finished Huey.
I’m glad you saw that. Oh, there’s been, thanks to me, a discussion about scale. I finally found a site yesterday that had the specs on a Huey. That, with the new knowledge I have about how total length is calculated, YES, the 1/48 I built is to scale. A Huey is fuselage length 44 feet 1 inch. I did say the fuselage measured 10 + inches.
Now back to thanks for noticing that. That is what a 1/32 scale version looks like. At least in a UH-1D Huey “imagined” Gunship. The 1D didn’t have the juice to carry guns. Barely had the juice to carry more than 4 troops. Nam’s hot humid climate mixed with high density altitude and the shaft horsepower, pilots had to do mind math in a hurry to figure out how many they could take. Not an issue going to the battle, but a real Titanic life boat moment when snatching them up in a hurry under fire. The tiniest pieces in the entire model are two air scoops that just barely give you the ability to pick them up without tweezers or blu tack. Thanks to the colleague who mentioned that. Made installing windows much easier. Oh, Evergreen canopy glue. Elmers in another bottle. No fog, yaaaaay.
Sorry about the Lindsey Vaughn joke, but she’s the most recent athlete who had to be welded back together after yet another disaster on the slopes. He leg looked like they were trying to bend a circle back into a straight line.
1 Like
I have no idea if anyone is going to read this, but if you do, consider it my first after action review of a model.
This is my official, for what that’s worth and a buck fifty, review of the Revell UH-1D Huey “gunship” yea right like they actually existed in reality. Nice idea, Hollywood would love it, but Vietnam never actually made that happen.
It has its problems. I knew that going in, but figured, if he could do it, so can I, minus any scratch building. There’s a 7 part series on how to build this thing on YouTube. I built it in my basement. On a desk. Using spray paint and amazon bought model paint. I used Citadel plastic glue for warhammer fantasy figures and the like, gorilla super glue XL, that thin tamiya paint that brushes on, and canopy glue from Evergreen modeling which as I have stated is Elmer’s in an Evergreen bottle. Probably not, but it’s white glue. I used plastic blue adjustable clamps that I was actually quite fond of. I use gator clips in a couple of places. I used and exacto knife and some sandpaper sticks of varying colors that did a nice job.
The evergreen glue did its job. No foggy windows, dried quick. Warhammer glue did ok, but it has to dry for several hours to be able to hole anything aloft for any length of time into infinity. I used it to glue on my tail rotor and gravity took over almost as soon as I trusted it. I used super glue and now I have a non rotating tail rotor. That’s one of the flaws. The drive shaft is cut too short so not enough really sticks out on the opposite side to allow you to glue the tail rotor to the driveshaft without accidentally gluing the tail rotor to the gearbox.
The most disappointing part was that I didn’t pre-fit the transmission and engine housing mount while I had the transmission cover readily available to do so, and stuck the fuselage together before I found out that I either hadn’t installed the mount fully operational into the back of the cover “far enough”. Then I thought about it. I pushed that entire transmission and engine back into that slot until the two flanges at the rear of the housing were all but touching the back of the transmission cover wings. So all I could come up with was that the front of the housing needed to be trimmed off a bit.
The result is that when you go to mount the engine cowlings and the frame piece that make up the full cover piece for the engine, the frame piece with the engine inlet cover all in one, is too long. You can put the inlet piece on, but the rear of the bracket sticks out past the anti-collision light. The cowling covers needed some engineering as well just to fit correctly. After all that, I now have a huey with two pilots sitting in the cockpit, waiting at the maintenance facility for a new cowling bracket and cover that will never come. Now we know why they are just sitting there doing nothing.
I forgot to glue the cargo hook piece inside the fuselage before I glued the fuselage together, so no cargo hook. Just a hole. I touched up the fuselage with a brush and some spray paint puddles, looks better. I still need to install some windows and mount the guns, then really screw this job up by adding the decals.
I’ll send one last picture of it when it is completed. But my grade for this based on 1-10, ten being the ultimate and one being a piece of Shittillywhomash, …6
1 Like
Sounds like you made it through! Honestly, that sounds like a pretty typical model build — a few glitches here and there, but nothing you couldn’t work through.
Looking forward to seeing how it all comes together in the end.
Well I have to say I’m looking forward to being able to show it to you. I mounted the guns and rockets tonight. Guess what, another addition of glitch in the system.
If I may, for context. If you have ever seen an infantry M60 Machine gun, shooting range, Rambo, actual military vet, you know it has a feed tray cover you have to latch before the belt can be fed through the system and mayhem created. I have no idea what a Nam era gunship machine gun looked like, but if this model is any tell tale sign, it was some form of a modified grunt M60. Based on the instructions, the feed tray cover, apparently, was to mount in the upright position, not turn over to face either side. The guns I mounted, if you can even call them that, barrels with something attached, seem to have been two sets of the same guns. Instead of right side and left side guns, the way they have to hang or sit on the weapons mount forces you by the direction of the barrels to mount them the way you mounted them. Otherwise if you didn’t, the barrels would face backward. Never heard of any choppers getting shot down because the crew chief mounted the guns backwards.
The glitch in this helpful hint is that one set of guns, mounted on the right side (as you face the nose) appear to mount correctly. The guns face barrels forward, that’s a good thing, and, the ammo belt, even though it isn’t really snaked through a hole in the frame, just glue to the bottom of the bird, meets the top gun just right to have the twin belt, too short to fully go down to the bottom gun, so you have to add a skab belt to make it do that. It all lines up visually.
The left side guns don’t do that. Because the left side guns appear to be just another set of right side guns, and the barrels have to face front, when you mount them, you get the opposite side of the guns facing back at you. The wrong side. Now when you add the ammo belt twins, and add the skab belt to finish the run, it looks…wrong…creepy. Anyone out there ever build this model and run across the same issue? Oh, another maintenance issue prolonging our pilots stay at the hangar tent. I threw away my landing light, accidentally of course. So our pilots are not only waiting for a cowling rack bracket, but a new landing light to be shipped from Da Nang to the Firebase.
1 Like
I did a little digging on this because I thought there had to be a better solution than trying to make Revell’s two identical sets of M60s work.
It turns out this has come up before, including right here on FineScale. For a Vietnam-era UH-1D/H slick, what you really want are M60Ds on the M23 door-gun mounts. So rather than cutting up the Revell guns and trying to turn one set into the opposite hand, I’d seriously consider replacing them.
Here’s an old FineScale discussion specifically about the M23 mount and where it goes:
And here’s another old FineScale thread about this exact 1/32 Revell UH-1D/H kit. HeavyArty gets into the weapons issue and points out that the long-body D/H normally carried the M23 door guns when armed rather than the gunship setup Revell provides:
There’s also some discussion here about using 1/35 parts with the old 1/32 Revell kit. Apparently the difference is small enough that people have been doing it successfully:
I found aftermarket 1/35 helicopter M60s still available, so that may be the easiest way out. You’d still have to work out or scratch-build the M23 mounts depending upon exactly what you buy, but at least you’d be starting with much better guns instead of performing surgery on 50-plus-year-old Revell parts.
One other interesting thing I learned while looking through all this: FineScale members were recommending 1/35 parts for this 1/32 kit years ago, including seats and crew, so apparently mixing the two scales on this particular Huey is pretty well-established.
Hopefully that saves you from having to invent a left-handed M60.
Ahoy Chopper Chief. I was a crew chief in Vietnam in 1967 and 1968 crewing UH-1D slicks on my first tour and a UH-1C gunship on my second tour. Find a picture of a Vietnam 4-gun huey and you’ll see that the M-60’s are mounted so that the gun is turned on it’s side with the feed chute coming down from above and the casings being ejected from the bottom. Both the left side and the right side are situated the same way. The cover (or what is normally the top of the M-60) always faces to the right as seen from sitting inside the chopper and facing forward. My slick had the two hand grip M-60 on a pintal mount (the M-23 system) but we discarded the ammo trays and put a Mini-gun ammo box that held four or five hundred rounds and leaned it up against the pintal. We fed the ammo directly up to the gun without the chute. A C-ration can clipped perfectly onto the M-60 chute attachment and gave a smooth round surface for the rounds to travel over into the gun. I used a ham and lima can most of the time because that was the least desirable c-rat. My C model had a free hand Infantry type M-60 that we suspended from the overhead with a bungee cord to take some of the weight. The right side gun dumped its links and empty casing over the side. The left side gun littered the deck with links and brass and bounced some off the pilot seats. Pilots turned up their collars so the hot brass wouldn’t go down their necks. We also used the C-ration cans on our free guns.
Mr. Strongeagle. I would very much like to meet you sir. I knew several crew chiefs from Vietnam, served with them in my Guard unit. We were and AHC with many designations. Every time I turned around we were changing our named, well, having it changed. Combat Support, Combat Assault, just plain old Aviation company.
One man I followed around like a puppy dog was a door gunner/chief on an M model. His company, after he shipped home, was part of Lam Sahn, a secret trip to Laos in the 70’s. It’s all out now, saw it on Ken Burns.
As for the M60 issue, I’m only guessing when it comes to what type of machine gun is on the model. It appears to be a modified version of the grunt M60, you’d know better than any what that means. I used Delta models. The two handle type with the big triggers you pulled with your index and middle finger. Guess you could say when you fired those you were giving the enemy the bird.
We mounted them on blackhawks, but on the Huey’s, when we had them, we used the M23 mount. Similar to the mounts on the model from a "how they mounted underneath look, but just a pole made to marry up with the under belly of the machine gun. Once mounted, you had a field of fire left and right that kept you from killing the pilots or shooting off the tail rotor, very little upward movement, and only so far down but not all the way down to where you could fire directly at the ground under the aircraft. When not in use the gun naturally just titled forward and stopped where it was supposed to and hung there. We used the ammo bags. Hard to mount, heavy, looked slick as heck, but filled up quickly. I only got to experience guns at the range. We had to account for our brass. Plus we didn’t need it all over the bird blowing in the wind.
I have seen the C rat can idea. Being in combat and having to shoot violently to protect the aircraft and provide cover, you aren’t too worried about “accounting for your brass.” Now a days the 160th uses Mini Guns. Pilot pushes in the circuit breaker, guns go hot, all kinds of mayhem happens when you open up with one of those babies. They just trough the brass downward into the wind.
But back to the subject. And hopefully this acknowledges Scott’s reply, I have tried to find those after market kits, but all of them seem to be over seas. I wanted a nice pilot, co-pilot, gunner/chief kit, but I can’t find anyone who sells that stuff over here. A Kittyhawk model builder had one on his YouTube channel. I would love to depict a crewchief and gunner using pole mounted 60’s on a D model, but all revell has are those two manikins with blank face masks and a bad pair of goggles sitting zombie still in the cockpit. Those kits have one pilot pointing and the other, get this, actually holding the cyclic. Who knew.
The guns on this model are the same four guns. One set points in the correct direction to accept the ammo belts, the others, by virtue of going on the other side, point in the wrong direction (in reference to side to side, not barrels to front) so the belts connect awkwardly.
I was great friends with a pilot who was awarded the DFC for actions at dusk in a HOT, VERY HOT, SURFACE OF THE SUN HOT, LZ involving a company of South Vietnamese Rangers. Guy was hard to get to know, but teach him how to use a spreadsheet softward and he’s your friend for life. I flew with him every time he went out, he requested me. Flew Cobras too.
2 Likes
Was just browsing ebay. Saw where this model is for sale from various person’s selling on ebay. Advertised the model fully assembled, 3 photos, one of them the box of course to show you which one it is. Anyway. One photo of the 3 was of the armament on the left side, as you face the nose. The guns on this particular build, are turned opposite each other. The one hanging off the mount is turned feed cover facing toward the door. The one sitting on top of the gun mount is feed tray facing toward the camera. So, it appears, if this is correct and not just their version, you alternate the guns to where you have one facing in, and one facing out. I admit it looks better.
1 Like
I looked at my instructions and all it says is to use parts 92 and 93. 92 is the gun that fits on top, and 93 is the gun that fits on the bottom. I think if you use the 93 that faces the opposite direction on one side, you’ll get the same on the other. But all I did was use the 93 with the barrel facing forward. I still say it works out that one fits correctly and the other fits incorrectly. I’ll have to see when or if I assemble this model again. Ebay has one for $34 plus tax but free shipping. I just spent over 80 bucks for a limited addition goodbye huey on ebay, so I’ll have to wait and hope that one is still in stock. Ebay charges way too much shipping for things. The same chopper from Hobbylinc coming out of Georgia I think, was only around 6 bucks shipping.
1 Like
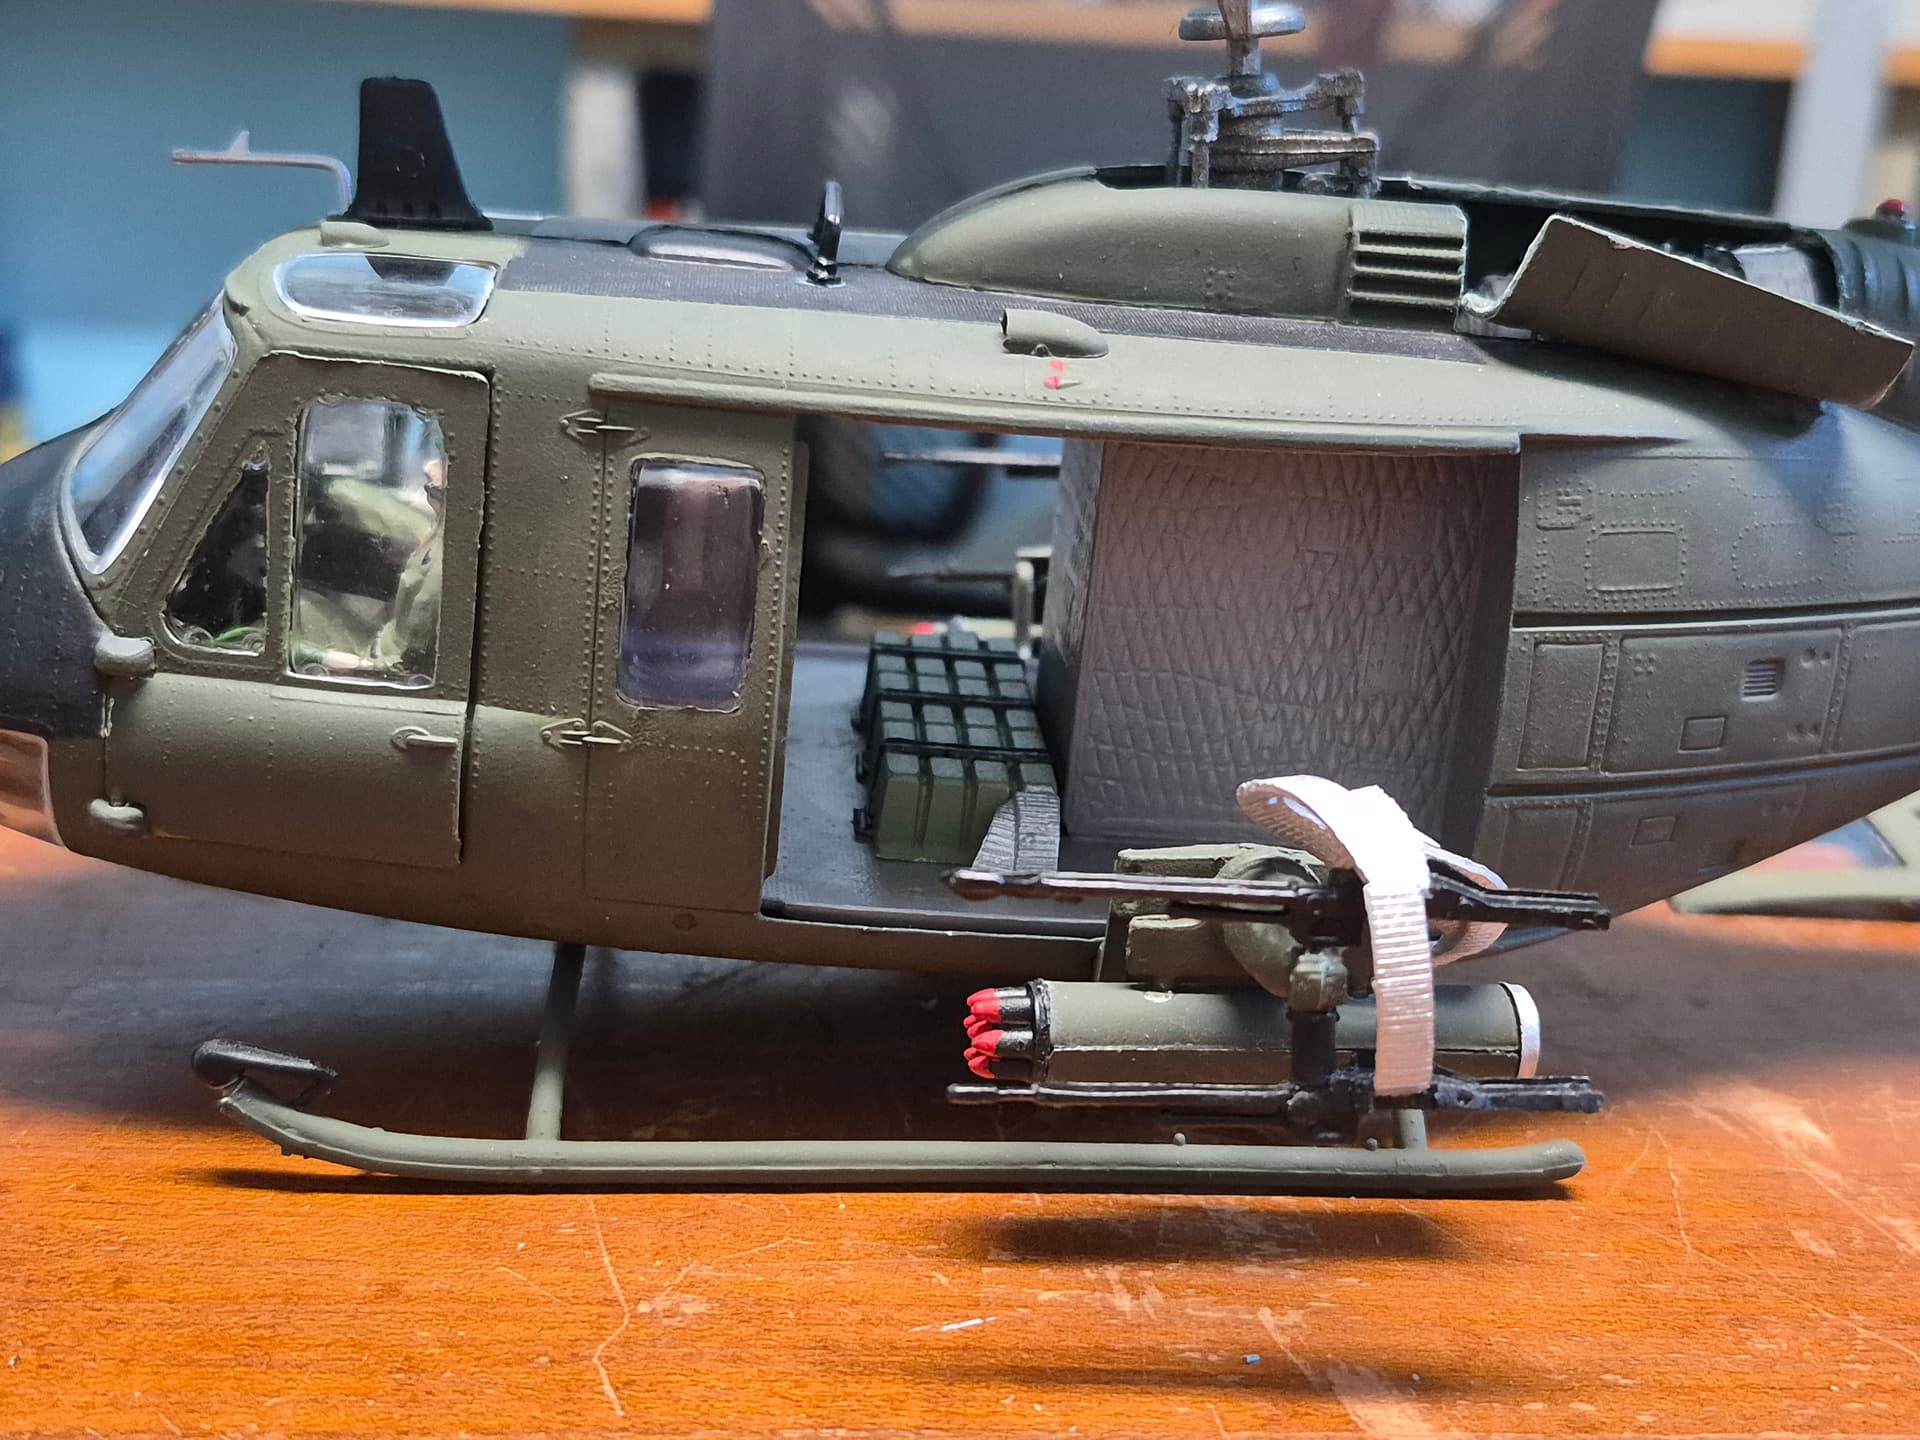
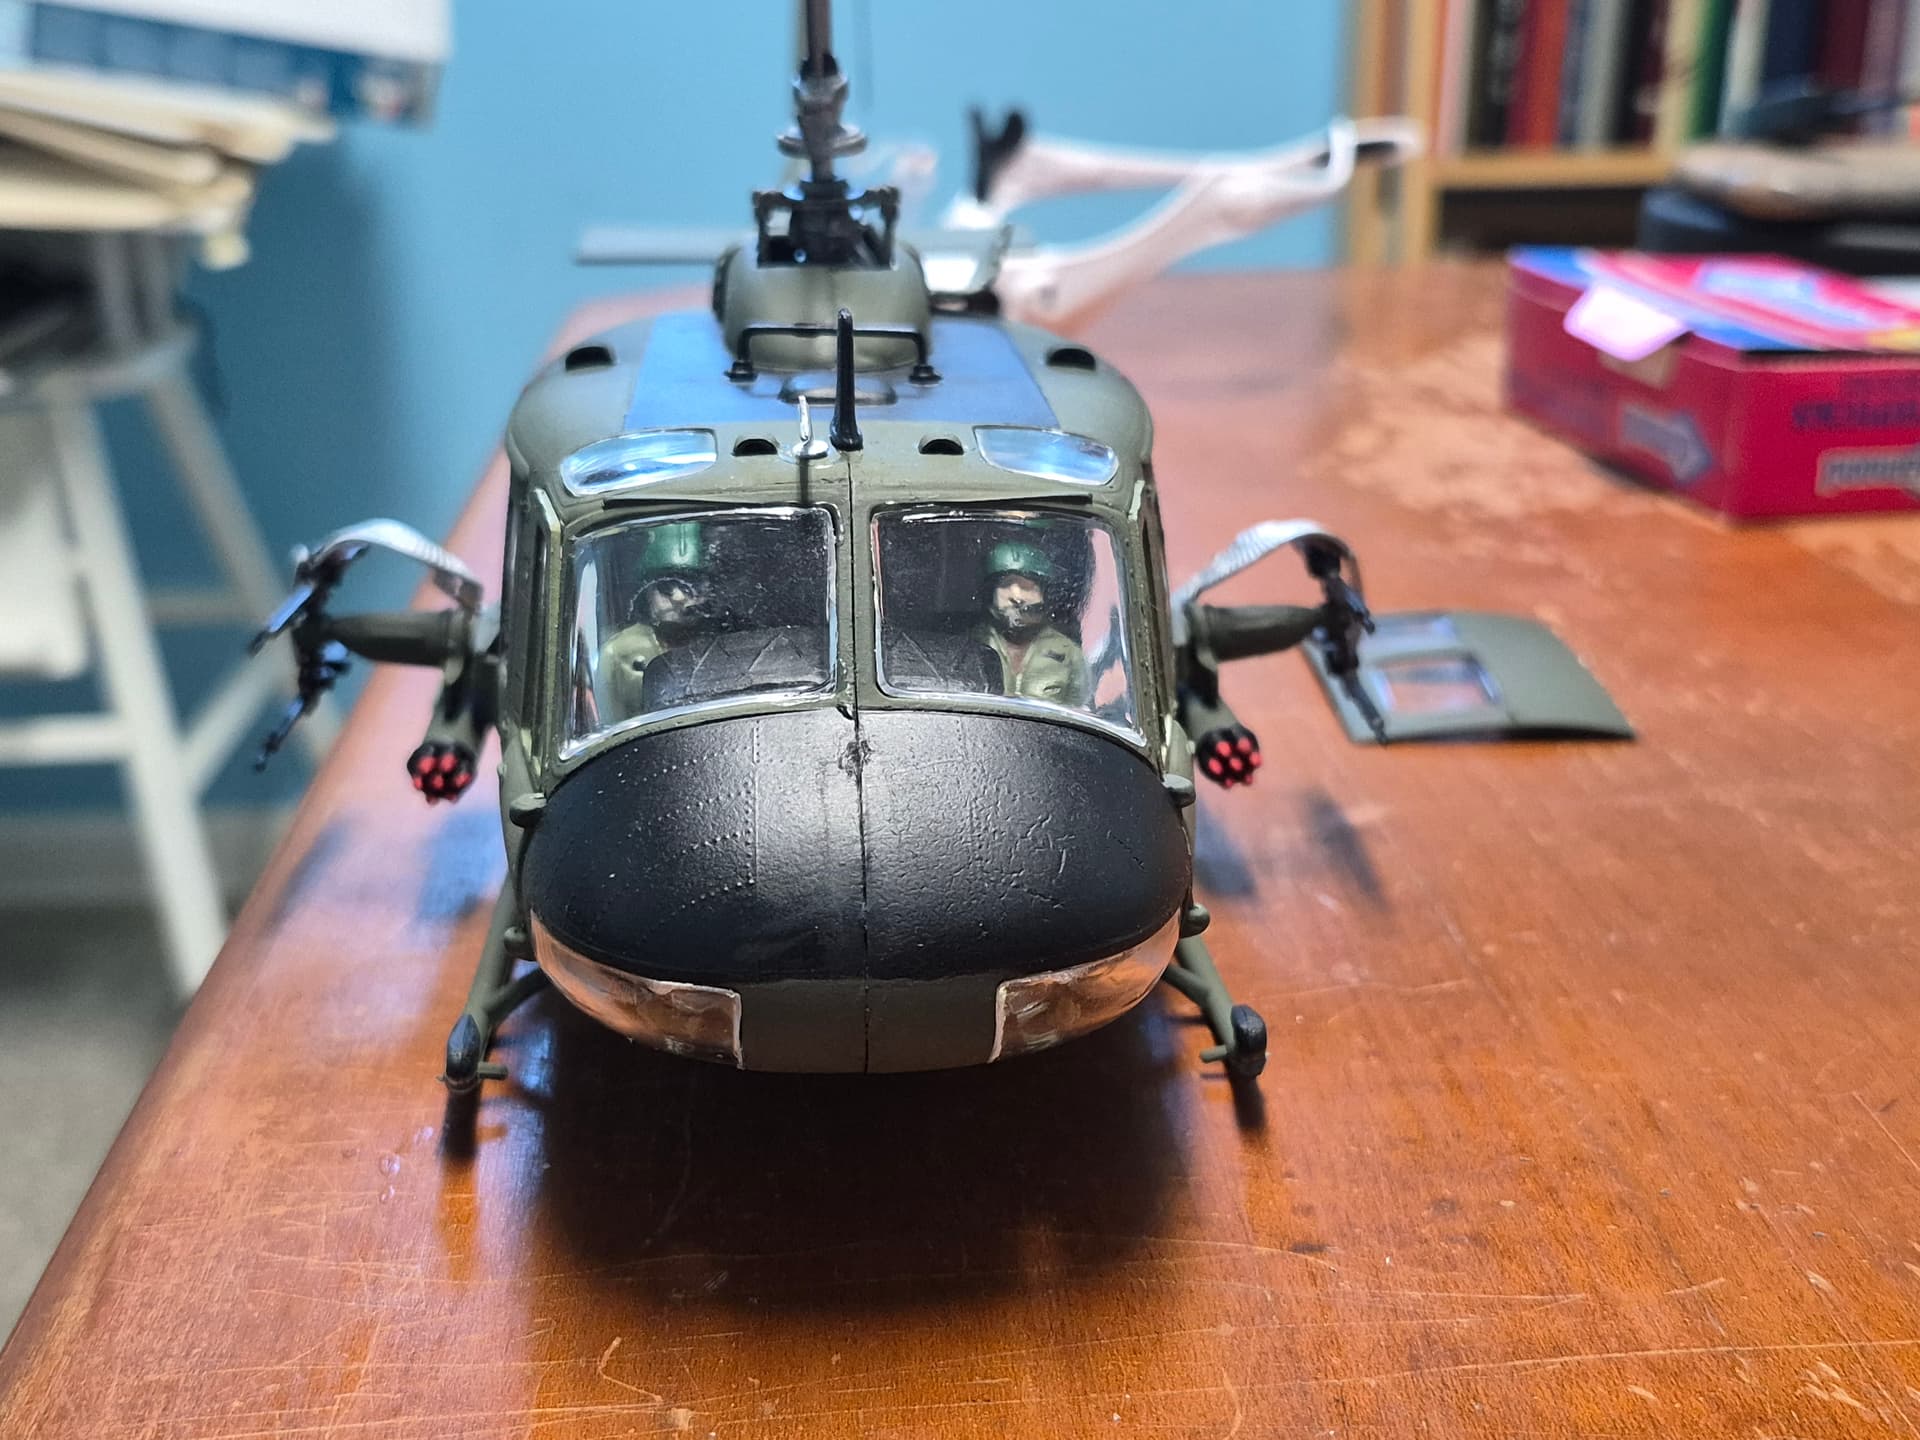
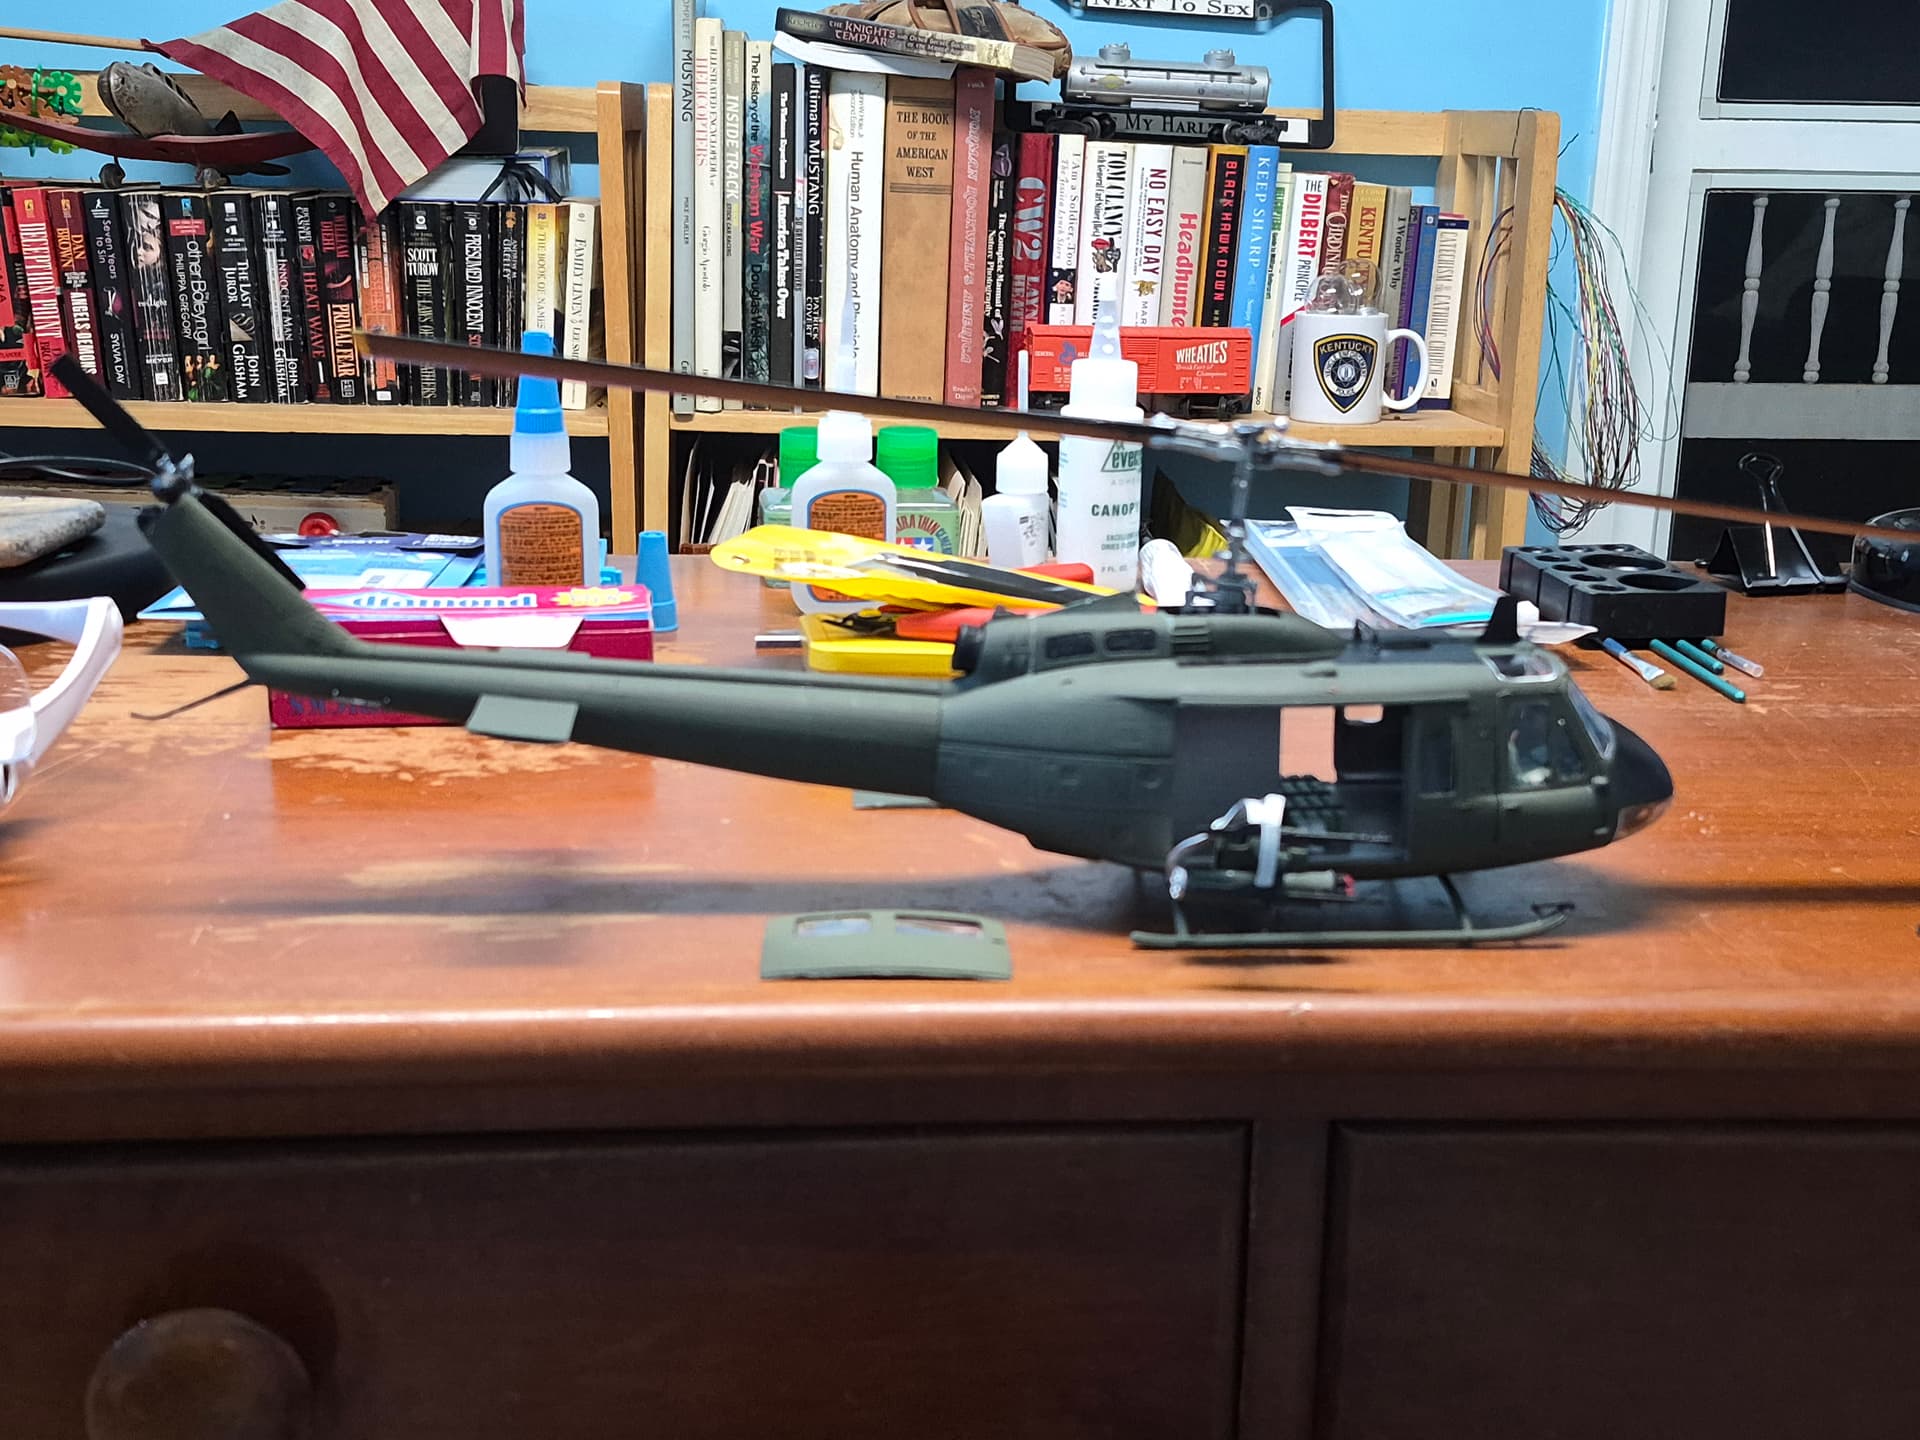
This is what it looks like completed with no decals and the cargo doors off until it gets decals. Missing the cowling bracket, landing light, and cargo hook.
3 Likes
It’s John again. I’ve been walking the balance beam traversing a river of hungry crocodiles and started putting decals on the model.
Nose was easy, 888 was easy, also nose, United States Army was challenging but I got them on acceptable. First Cavalry logos were a breeze. Tail number on one side was easy, the tail rotor side was harder because, well, my tail rotor is glued in place. See previous post if you want to know why. Danger Arrow was a problem but, I did it. Now, as for decals like “Turn and Slide”, or “Emergency Exit”.
I’m finding with every decal that my hands are my worst enemy, yet my only method of holding them. Tweezers have become those bent, mangled unrecognizable metal things buried in the wall. I finally got me a gator clamp and cut me enough room to clip the decal to in the jaws. Hands are still a problem, but i can at least hold the decal in place as I fight with the decal using toothpicks and cotton swabs in relay to move them off the cardboard and then set them and soak up the water. Yes I do use the set and sol twins. I did find yet another misfire when it comes to this model.
The instructions, visual numbers game with lines running in all directions, shows “turn and slide” and “emergency exit” as being applies on the OUTSIDE of the cargo doors. I crewed Huey’s. You turn the sliding door handle down, it releases, you slide the door backward until you are satisfied or all the way back and latch it.
Emergency Exit is painted under the door handle on the INSIDE of the aircraft. Might want to keep that in mind if you decal this model. I’m just practicing now. I’ve applied all the decals I wanted to apply. Under a magnified set of glasses you can read the words like they are written in bold text. As for Micro Set and Sol, the decal twins, I am setting first, removing water, then giving it a minute and Sol gets to do his job. As for the amount of time I am leaving the decal in the water, 2 minutes seems to be the time it takes to get the sticky stuff to finally give up and let you slide the decal into place. The decal does let me position it, but it’s tricky.
I guess this is where I ask, anyone want to teach me some tricks on how to apply microscopic decals?
1 Like
Decal instructions have been the bane of just about every build I’ve done over the last year and a half. I’ve learned the hard way that if you follow them exactly, there’s a pretty good chance something is going to be wrong. It’s a drag having to check references for everything, but that’s what I’ve ended up doing.
Your firsthand knowledge of the Huey is really useful here. I never would have known those handle decals were in the wrong place, and I’m planning to build one myself at some point.
As for the really tiny decals, I just went through a ton of those on my F-4EJ Kai. I use very sharp pointed tweezers, but I don’t actually grab the decal with them. I use the tip to gently slide it off the backing paper and onto the model. I also put plenty of setting solution down first so the decal can float around a little while I get it exactly where I want it.
I’ve seen people use an X-Acto blade or other sharp point to do the same thing, but I like the tweezers because there’s less chance of accidentally poking or damaging the decal. At least for me, that worked really well with the truly tiny ones.
1 Like
X-Acto blade, toothpicks, cotton swabs, finger, tweezers – hmm what else have I used? It’s been a good long while since I had to deal with decals. I think I’ve even used the end of a shaved down sprue to get those doggone things in place.
And, yes, lots of liquid compensator on the model so you can get them there before they stick. Nothing worse than being half way to placing it and it sticks there instead. You can always squeeze out the liquid with a gentle touch and roll of the swab.
1 Like