thanks Ben just hope I can keep her looking good through weathering. Next up is getting the cockpit painted and several hundred strands of fiber optic cable ran.
Okay ;
where can I find a used Corellian freighter for myself that I can get cheap and large enought to stand in ? Then of course I would want your shipyard to do the refit .Looking good !
thanks TB, a few guys somewhere in the Ozarks I believe are building a 1:1 not sure how far along they are now been a few years since I seen the story.
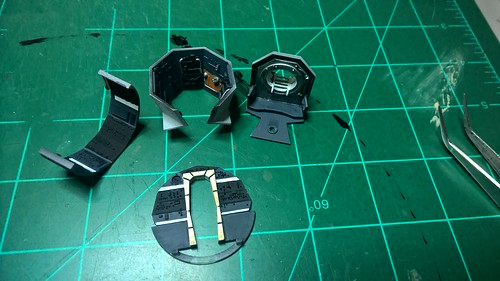
I’ve got alot done and I’m really excited to show my progress. First I got the cockpit and top gun tub painted using vallejo paints and my wet pallet.
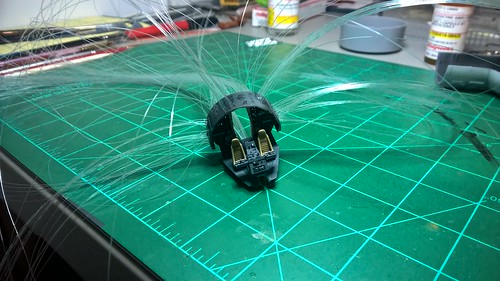
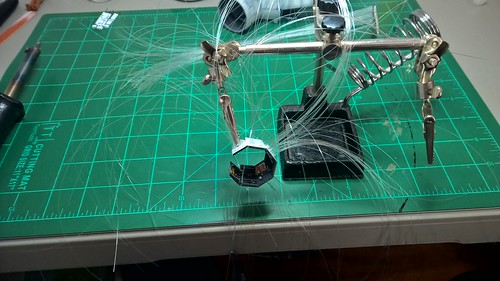
Next I got all the fiber optics ran in place and lit! I lost count a bit but there are around 500 strands in the rear wall, top controll boards, center control console and the gun tub. Out of a 500ft. roll I have about 50-60ft left. All are being held in place with matt Modge Podge I’ve read that CA glue isn’t good for them and the test I did proved it, the CA disintegrates them. 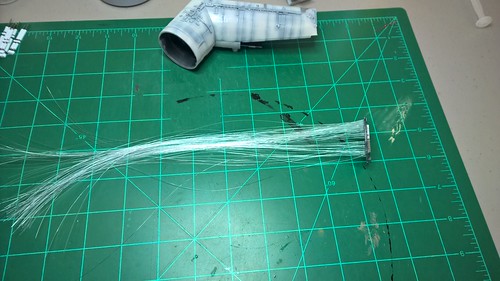
What really bums me out tho is since I have so many fiber optics ran that I now don’t have room to use the hallway section behind the cockpit that I got from Shapeways. So instead I’m using a decal from the outerspace outfiters set that shows the hallway. It’s not as good looking as the Shapeways part but with the cockpit all closed up your not focusing on it anyway. After I got the gun tub and cockpit tube welded onto the top hull I started cleaning up the fiber optics.
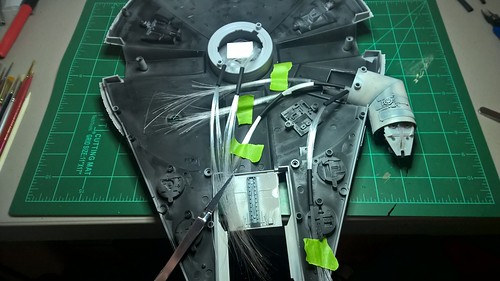
Hooking up all the + and - leads I used some springs to trap them then tacked them into place.
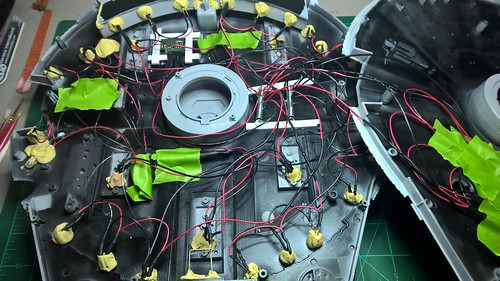
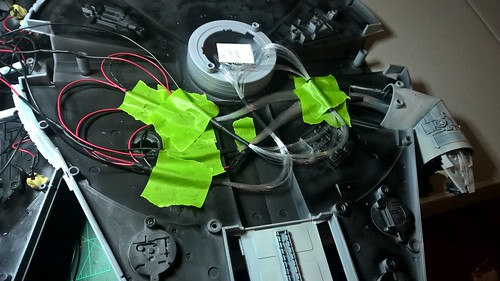
I know it looks like a mess in there but it’s a controlled chaos. Last a short video of the lights on. I know alot of people don’t watch videos on forums but to get the entire experience of this build I figured I need to post one on here.
brilliant work. I’m following this with great interest.
Beautiful work. I have a dumb question. Did all that lighting come as a kit? Or are you scratch building it?
Thank you glad to have you along for the ride
Thank you. To answer your question yes and no. The engine lights, outside red marking lights, boarding ramp lights and the two lights between the mandibles are part of the madman lighting kit. The 22 landing light leds and the 6 blinking leds to give a more random pattern are my design.
No, not at all. I was going to comment what a nice neat job you are doing with the wiring. All the fiber optic lines are mind boggling (I’ve yet to do that, all my lit models were wires back in the old days.
And back to the very beginning you asked about the grumpy old man in the hobby shop, two things; 1) I agree with Timmy, parts is parts and 2) old guys who hang around in hobby shops tend to fall into two catagories-very nice fellows (majority) and creepy old grumps (minority). I hope I never turn into a number “2”.
Oh, and I see you are one of those guys who can paint a pretty straight panel lines with an airbrush. Phooey on you, Cllnt.
Thank you Greg, to me it’s not neat at all but most of my electrical knowledge is about running house wiring. This is my first model that I’m lighting and my first time using fiber optics but not the first time of lighting stuff with leds. I agree I hope I don’t turn into number 2 as well. As for the panel lines I use my iwata eclipse at around 20psi and work close and slow some hot tea beforehand never hurts too.
Thanks for advising. What you are doing is a major project, it is unbelievable, really. I can’t wrap my mind around how much fiber optic filament you have used. It makes me chuckle, in a good way.
[Y]
I love this!!!
It’s amazing how big a mass of spagetti the fiber optics cable to light up any model can expand to!!!
All I can say is wow!
It just kept getting to be a bigger and bigger mass. I was surprised that I could get it into controlled bundles.
Thank you I’m trying the best I can with this piece of junk lol
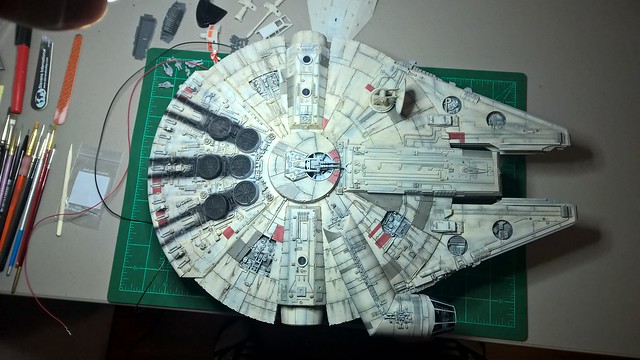
Finally back I’ve been locked out for about a week like a lot of us have. Got some of the weathering done I still need to work on the exhaust stains I’m not happy with them. I’ve started working on the base too nothing to show yet just got done cutting the wood.
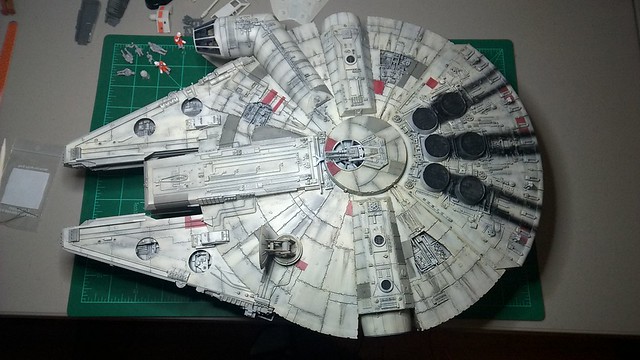
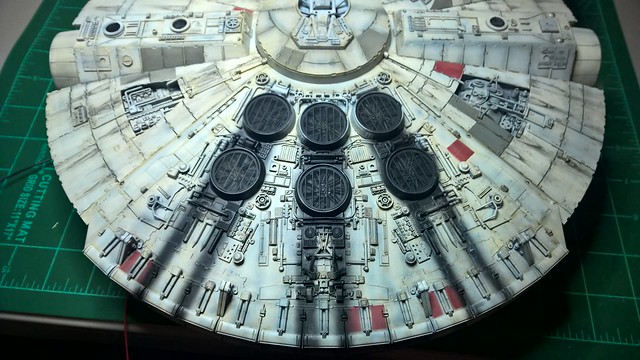
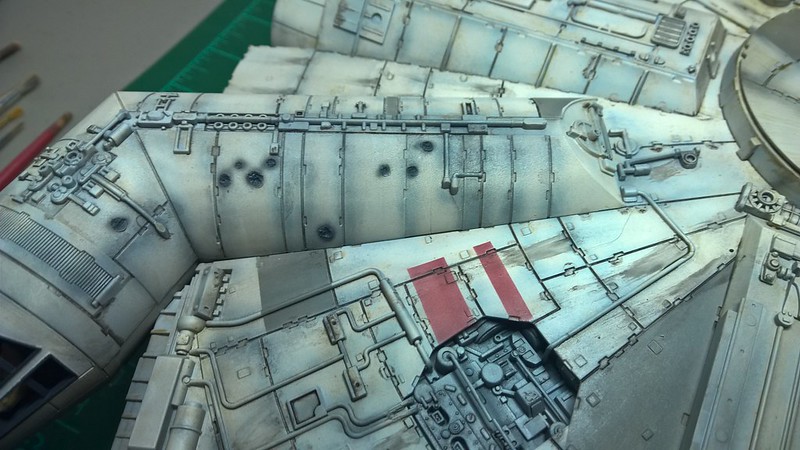
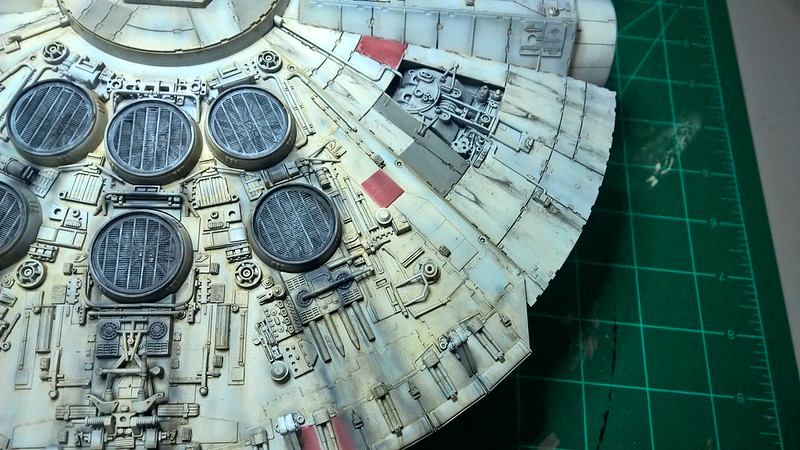
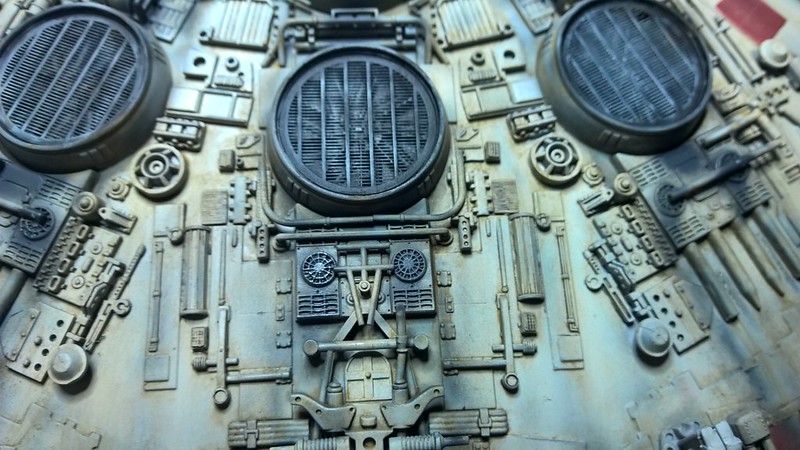
The weathering started with a filter of MIG The Filter Brown for Desert Yellow on some panels and others picked out with MIG The Filter Grey for Dark Yellow. Then streaking using MIG oil and fuel stain wash, MIG dark rust, and MM Burnt Umber. The last thing was a pin wash over all the panel lines and details using MIG dark wash. Thanks for looking in let me know what you guys think.
Not sure I’d ever call the Falcon a beautiful starship but you’re doing a beautiful job on her! [ht]
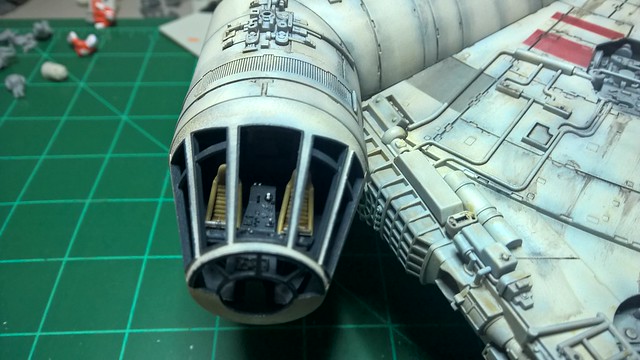
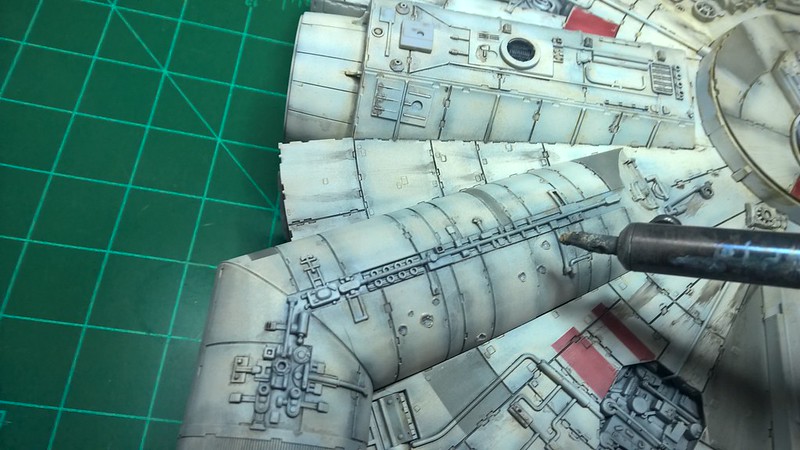
Started back on finishing up the weathering by adding the blaster hit marks by the dish, top turrent, and the cockpit tube. I used my soldering iron with a old nasty tip in to create the hit marks.
next I started to fix the engine exhaust so I tried to scrub it off with some isopropayl but I guess I had sealed it in with Mr. Super clear didn’t think I did. Instead I went back with the base color and sprayed it over the streaks. I feathered it in as best I could then went back in with the MIG filters I used and again feathered it in with out trying to over do it. To finish it off I thinned some Tamiya XF-63 German Grey (1:3Thinner) and put in some new light shorter streaks. I couldn’t get rid of the old ones completely but after blending for awhile I’m happy with the way it looks might not be screen accurate but I’m keeping it for now. While I had the XF-63 in the airbrush I hit the blaster hits. 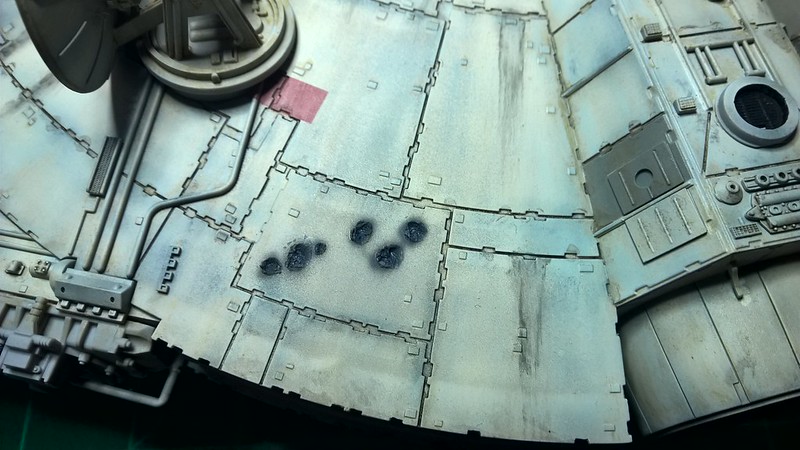
Thats all for now Thanks for looking in.
To me she’s the most beautiful hunk of junk in the galaxy! [:D]
A bold move with the soldering iron indeed, and to good effect. I like it! Great job. [Y]