That looks good Mark! Great problem solving on your part.
2 Likes
Nice! An awesome solution to the problem.
1 Like
Time for an update.
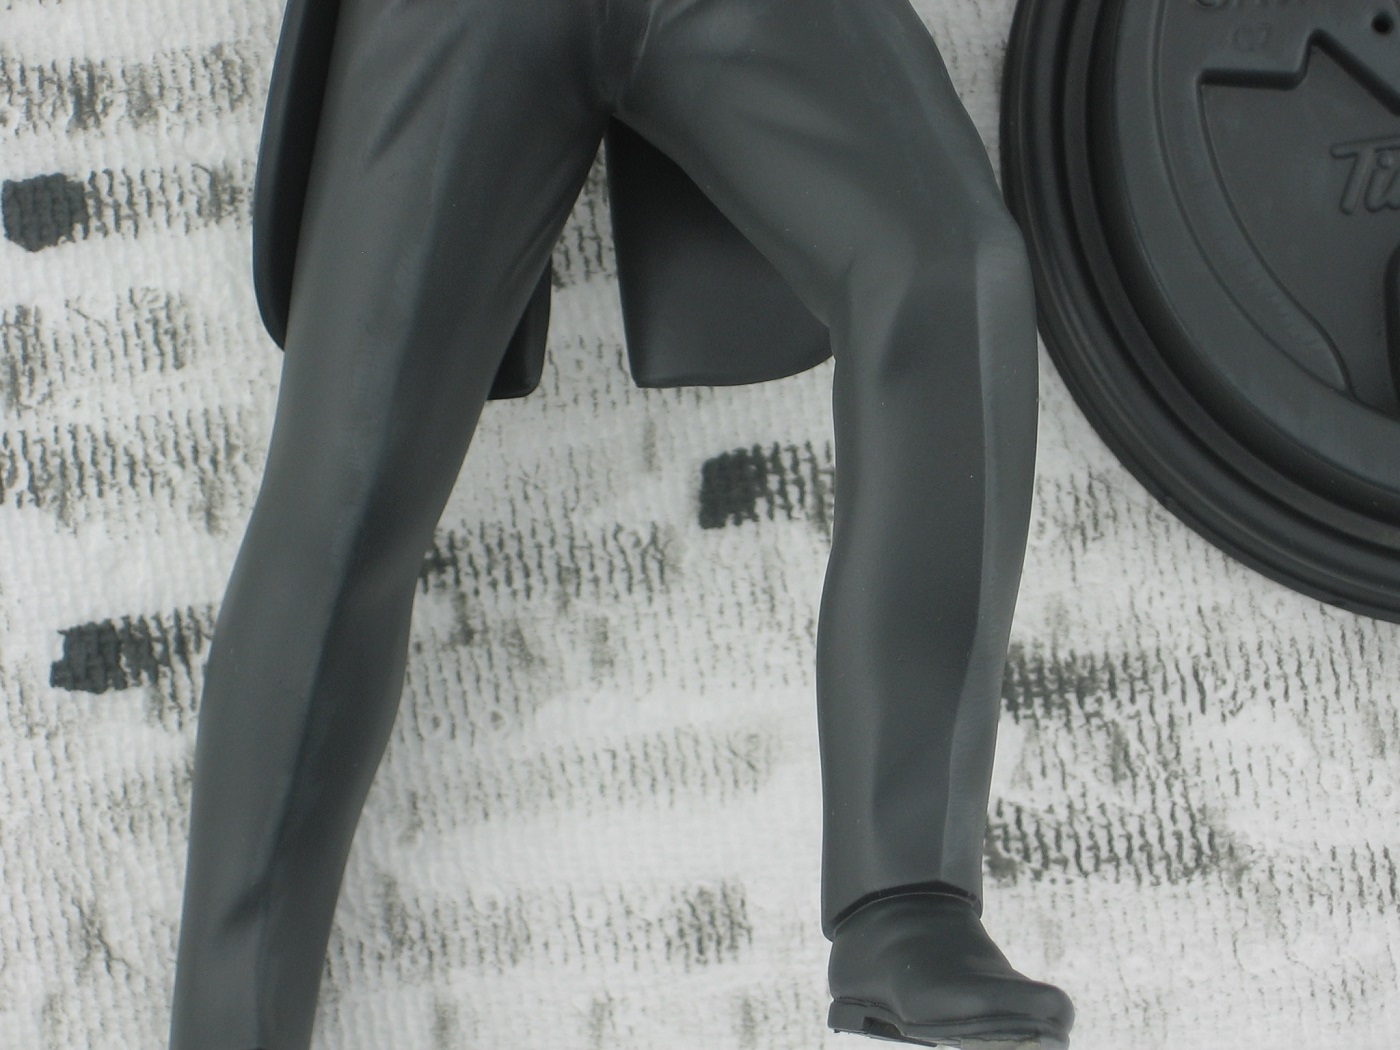
I tried dry brushing the suit again. This time, highlights. I just don’t get it. In the FSM Scale Model Basics video on the subject, the brush is touching the model a lot. Not just the raised detail, but the surrounding areas as well. Granted, it’s a different model (tank, not figure), but I don’t understand how overspill on the surrounding areas does not happen (in the video), as it happens to me. As far as I can tell, I’m doing everything right. Wiping the brush off on a paper towel until only a trace is visible and then transferring to the model. Perhaps I don’t have the mix of the base coat color lightened enough and then tend to overbrush until I can see results. By then, it’s too late and the overspill is done. I don’t know ![]() . Maybe using the wrong type of brush?
. Maybe using the wrong type of brush?
Hard to make out in a pic, but here one is for context.
I have watched one other video on YouTube (by Artis Opus) on the subject and the procedure in that video is not only different, but quite a bit more complicated than the FSM video procedure. And one side note…it seems to me most YouTube videos on dry brushing are about dry brushing miniatures. Not sure if it matters and/or the principle is the same, but I’m not into miniatures.
Having said all that, I’m done trying to weather this guy by dry brushing. Perhaps if and when I gain the skill I can take him off the shelf and re-visit it in the future.
In the meantime, I had another idea. What about getting him dirty with a wash? While applying a second wash to the base (more on that later) I tried applying a wash to a Panzer Greyed and gloss coated coffee cup lid. Didn’t turned out so well in that many brush strokes were left behind. So then I had an expanded idea. What if I airbrushed the wash? I’ve Panzer Greyed another coffee cup lid and will gloss coat it tomorrow. I’ll try airbrushing a wash onto the lid the next day. We’ll see. If anyone has any comments on this, I’m all ears.
The Distorted Base:
Applied primer touch ups.
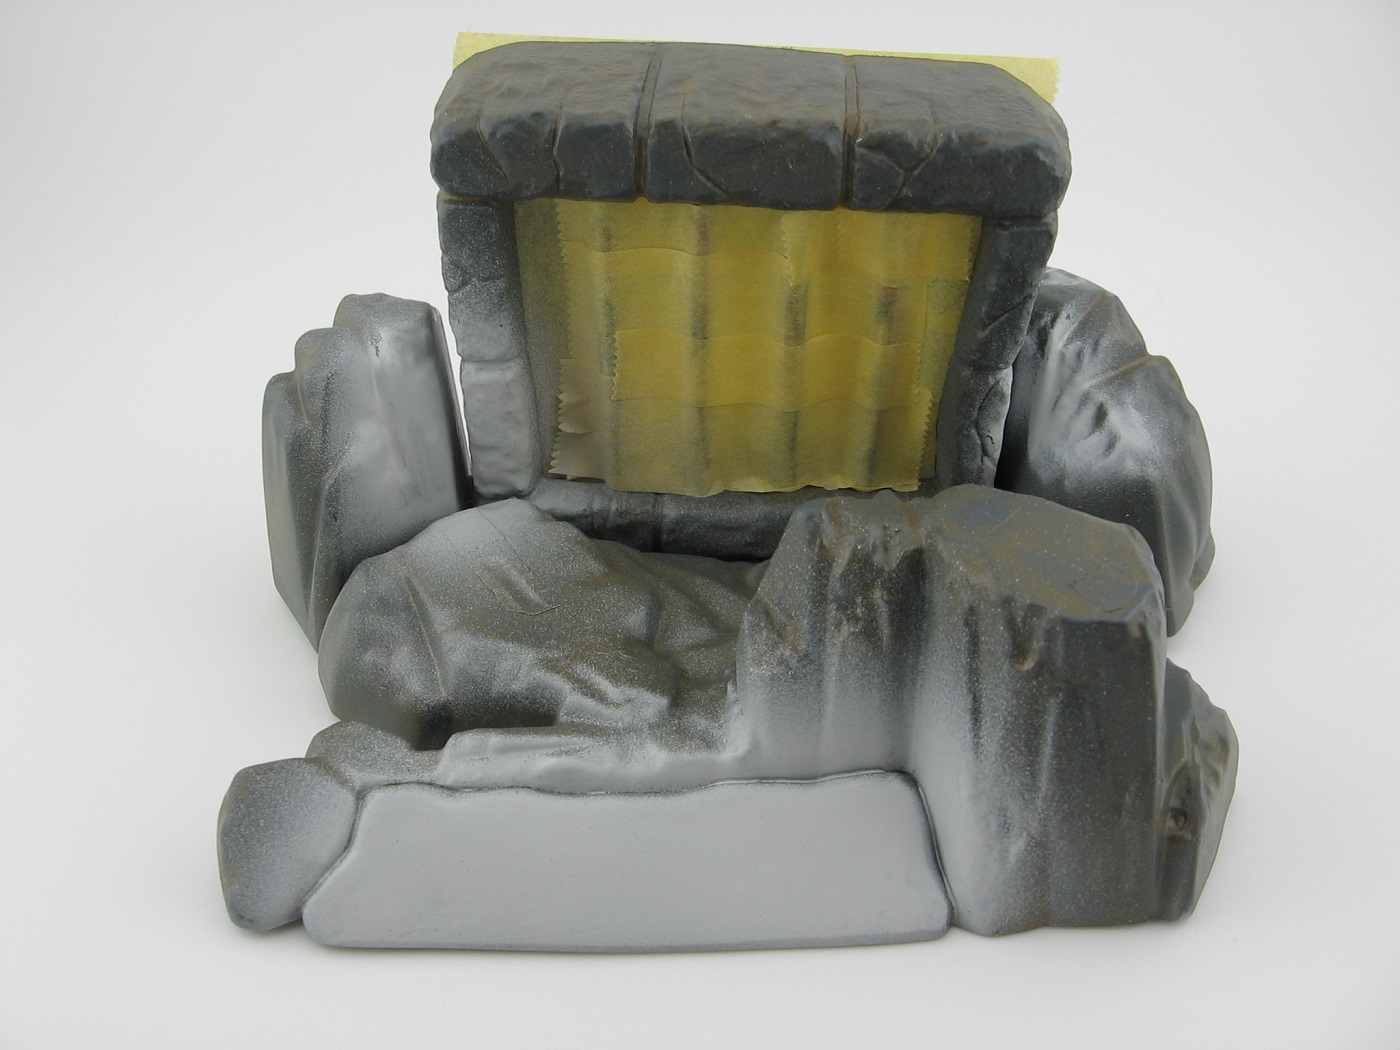
Applied another base coat. Vallejo Model Air 71.047 Grey.
Applied another gloss coat, in prep for another wash.
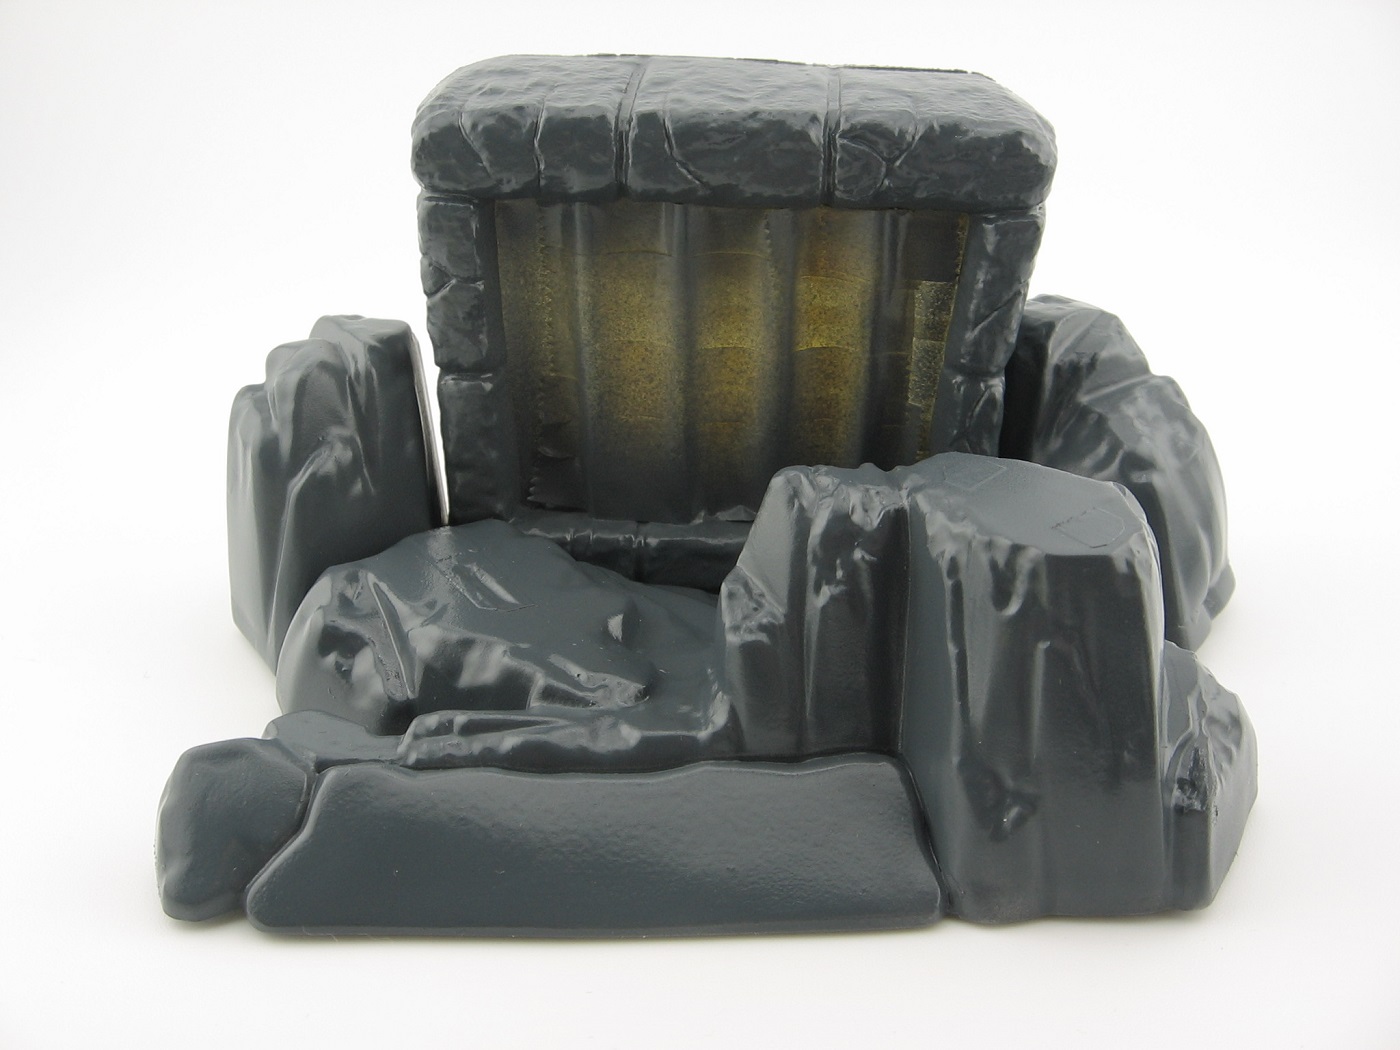
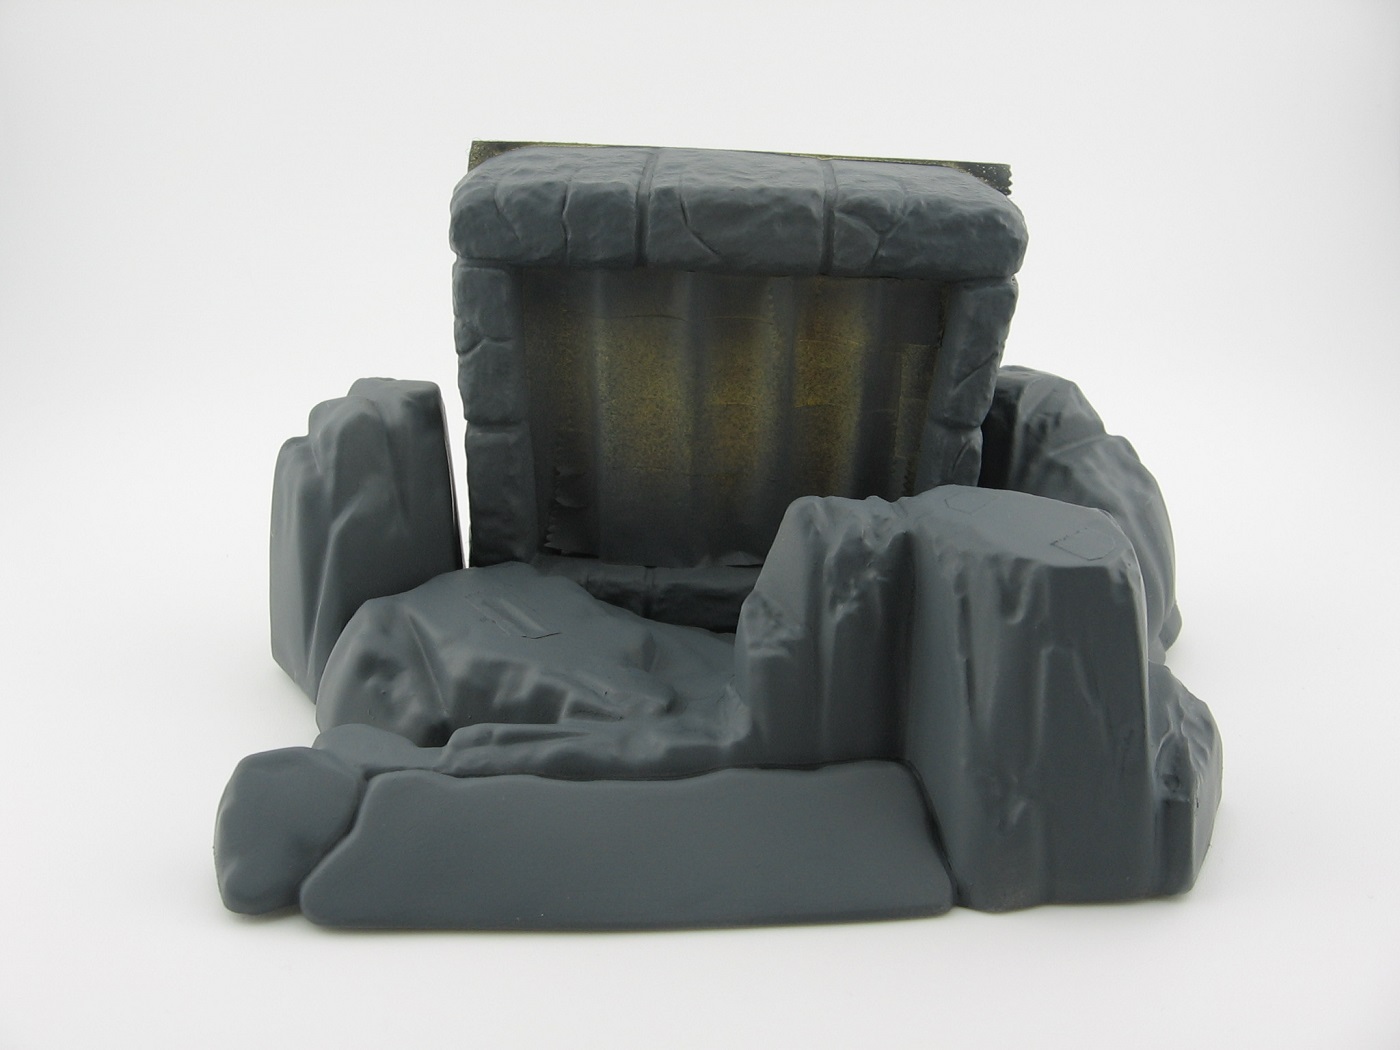
Applied another wash. Same as before, pre-mixed AK 078 Damp Earth, but this time diluted with brand consistent AK White Spirit. Neglected to take a pic of this in sequence, but it is visible in the second to next pic.
I’m somewhat happy with the wash to the base, so I decided it was time to glue in the nooses.
Here’s a pic of the scene in the 1925 film showing Ledoux (on the left) and Raoul (on the right) after falling into the torture chamber. Note the ropes in the background.
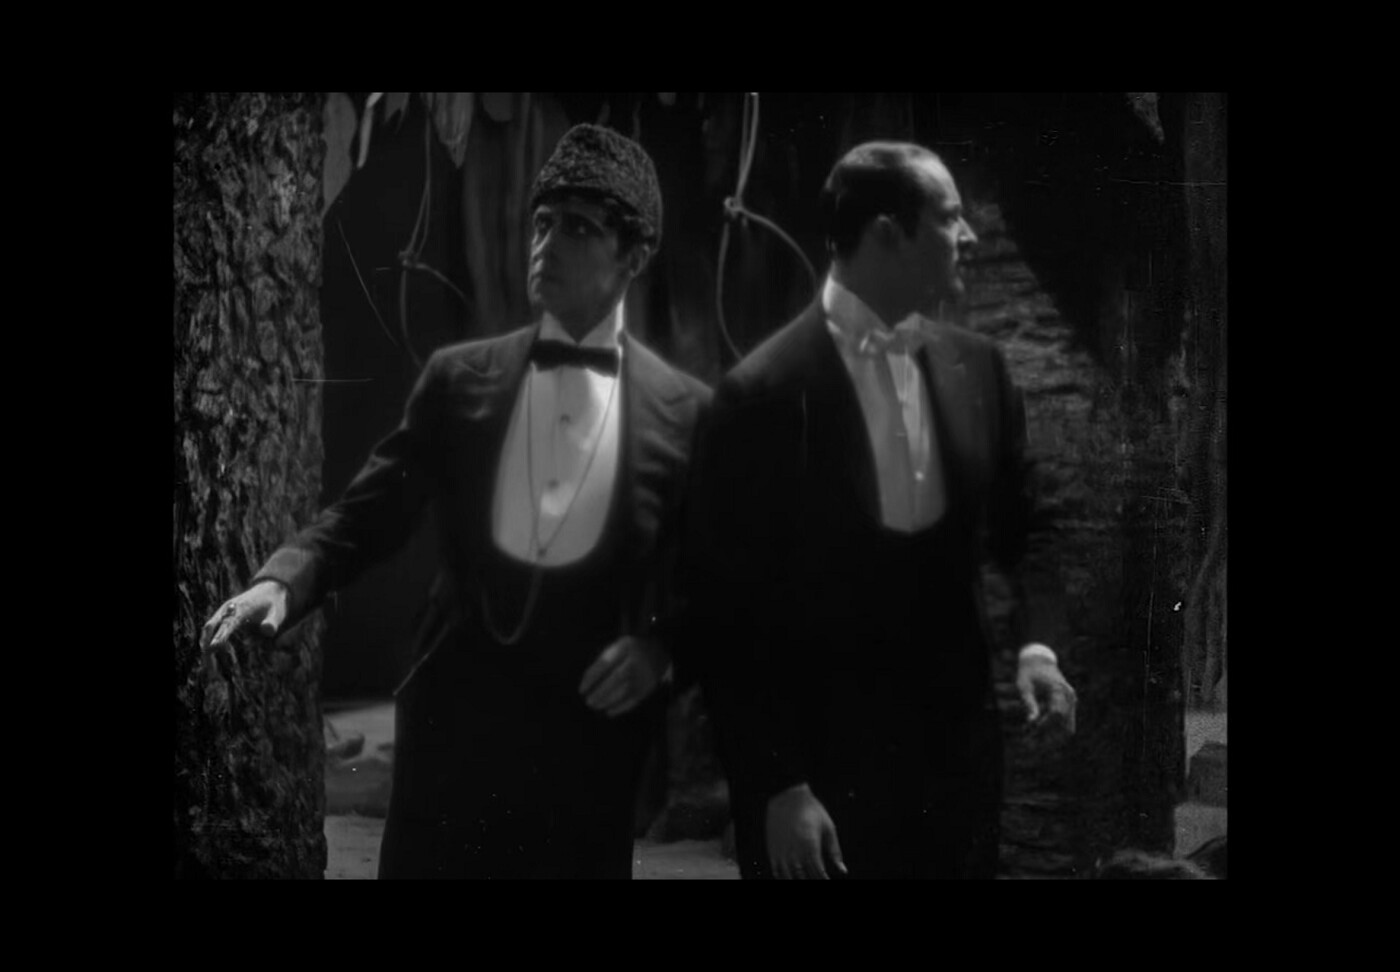
And here’s my rendition of it.
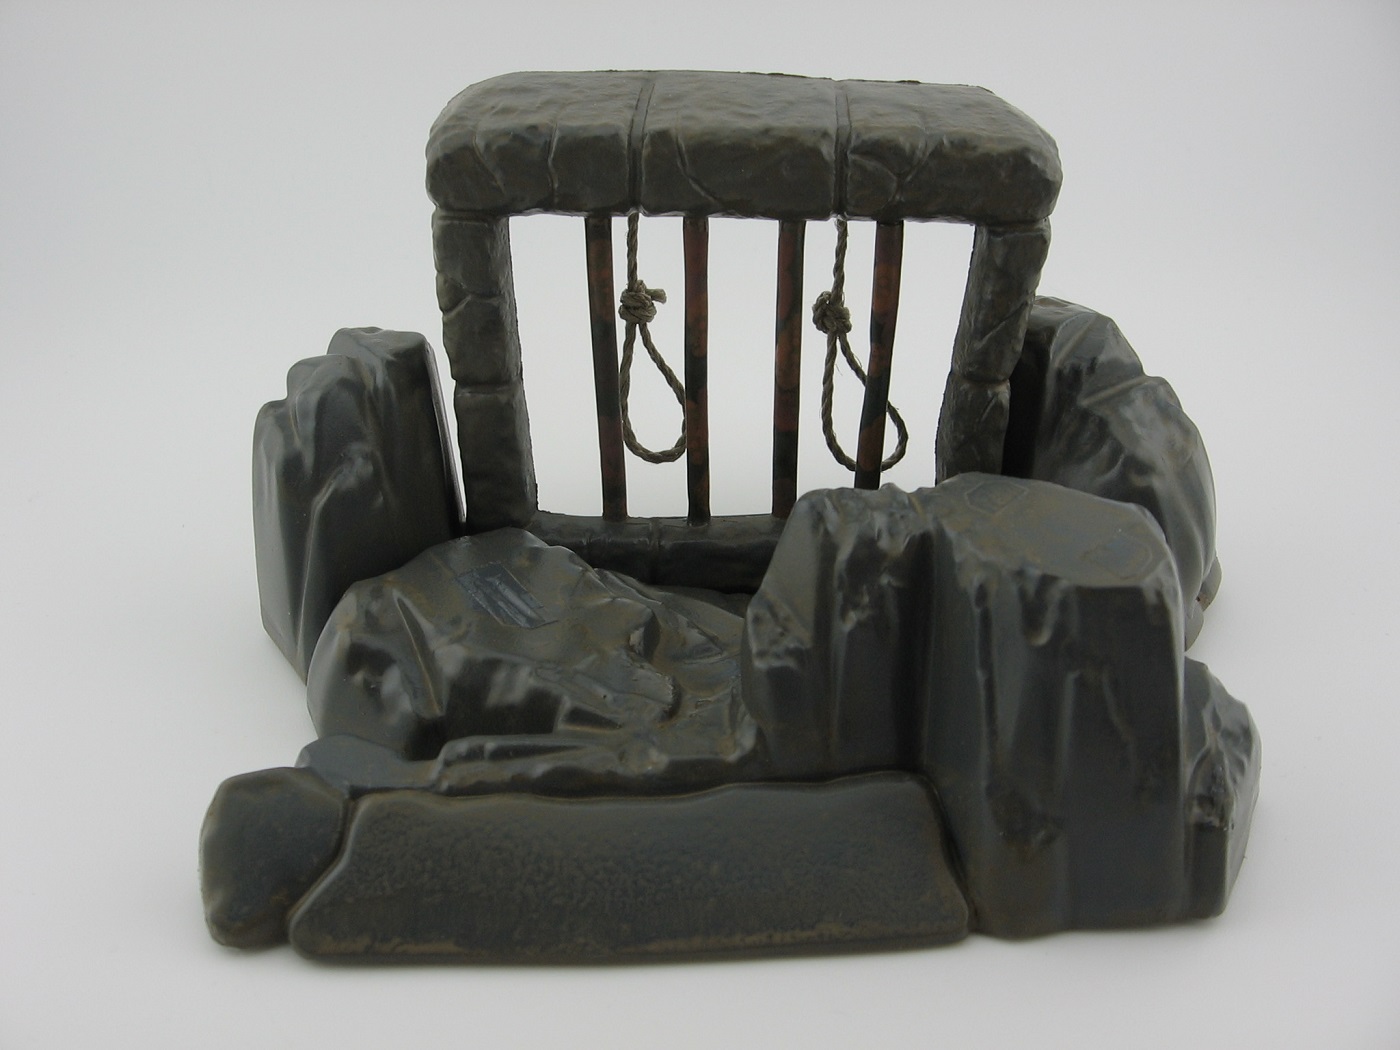
Attached using CA glue. The twine is 1.2mm Corel Modellismo. I worked it out as adequately close to scale. Initially, I had intended to use a Hangman’s Knot, but changed my mind and went with a Slip Knot instead.
I’m so happy I remembered to glue those in before attaching the modified cell wall.
Also of note, in the previous pic is the second wash results. I’m not very happy with how the “nameplate” area turned out. Another plan I have with the base is adding a few accumulations of dirt, in the form of pigments. I have a mind to amend the bare nameplate with some pigment applications. We’ll see.
I’m intending to fill the gaps, sparingly, with black Milliput, if required.
That’s about it for now. Thanks for looking. Suggestions are welcome.
Cheers,
Mark
4 Likes
I’ve always been an airplane and car guy, but this build thread might be my favorite right now. I’m going to have to try a kit like this.
It’s looking great, Mark.
2 Likes
Seriously?! OMG! I don’t know what to say. Thank you so much. I often think I ramble too much, so for you to say that means a lot. Thank you.
I try to remind myself that, hey…it’s a build log. It’s supposed to be detailed.
Cheers,
Mark
2 Likes
Just an absolutely amazing job Mark. With the little set backs you have dealt with you have persevered with outstanding results. Well done Sir ![]()
![]()
1 Like
I agree with what the others have said about this being a great project and learning experience for you. You’ve persevered and can now see the light at the end of the tunnel. Well done Mark!
1 Like
@Schmidty13 @ScaleModeler66 @MR_TOM_SCHRY
Thanks for the kind words. It means a lot.
Today I airbrushed a gloss coat onto a coffee cup lid, in advance of experimenting with airbrushing a wash.
As for the distorted base saga, here’s some pics showing the gaps along the torture chamber wall, allowing light through.
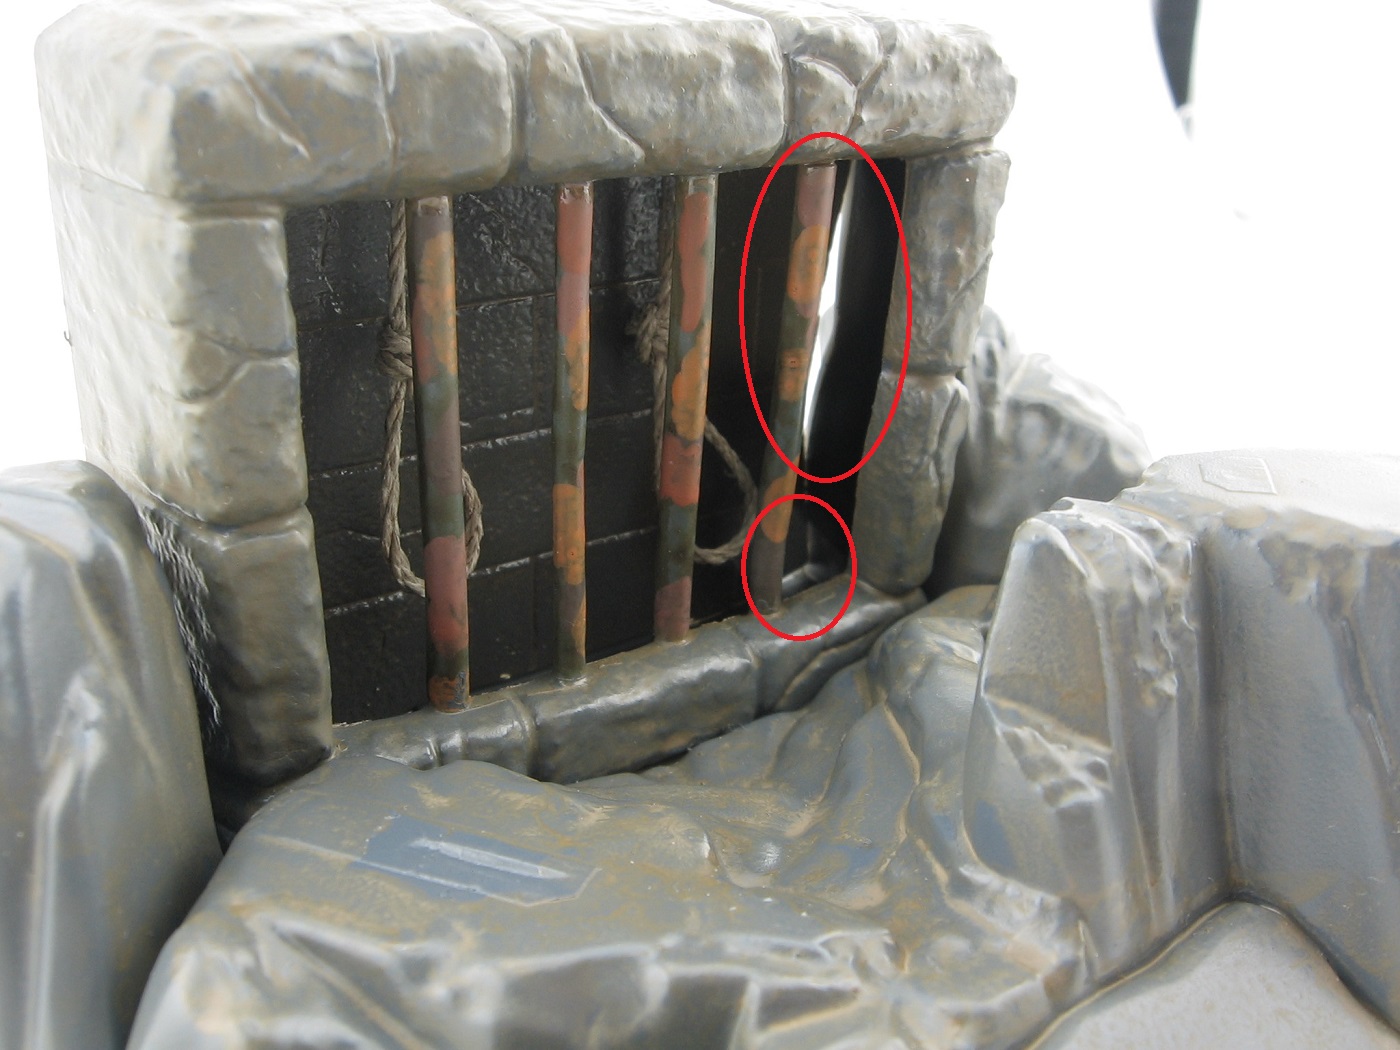
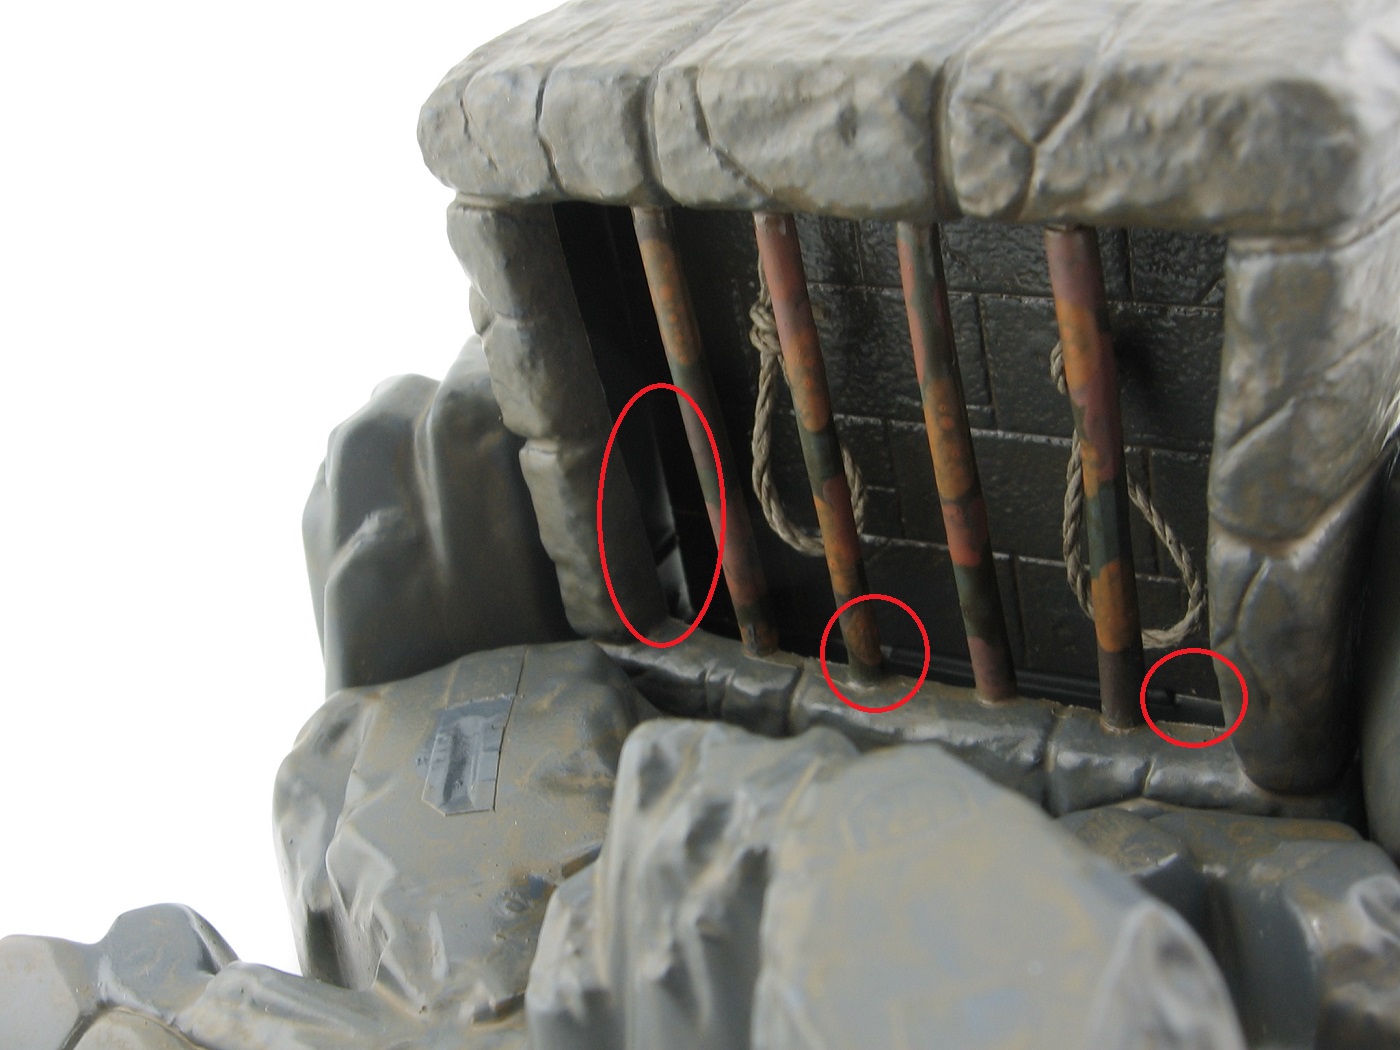
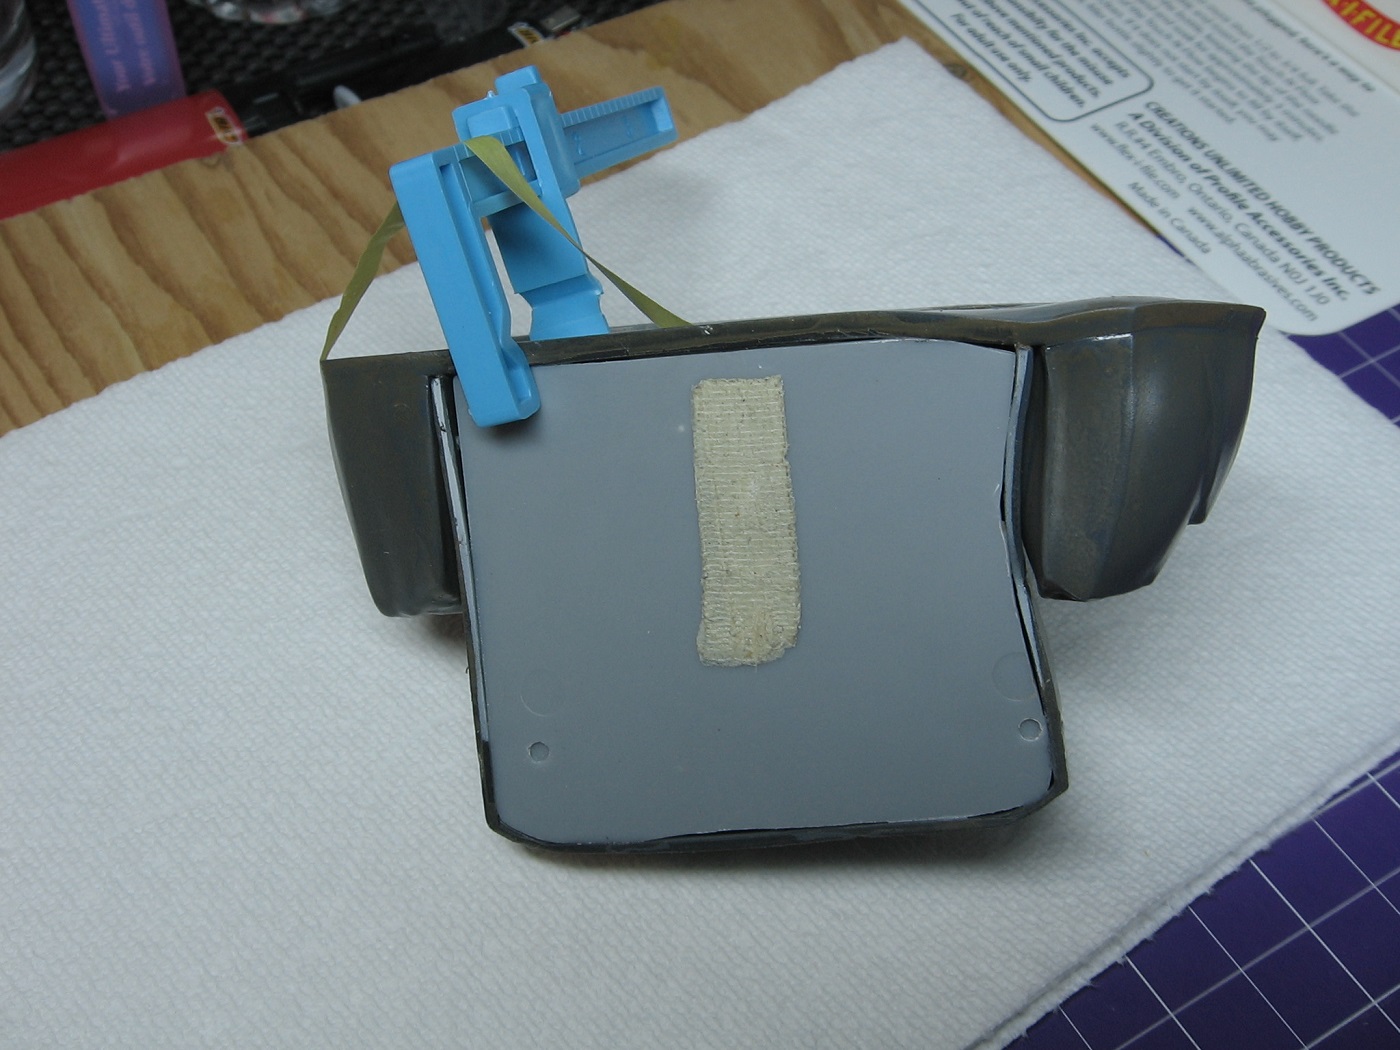
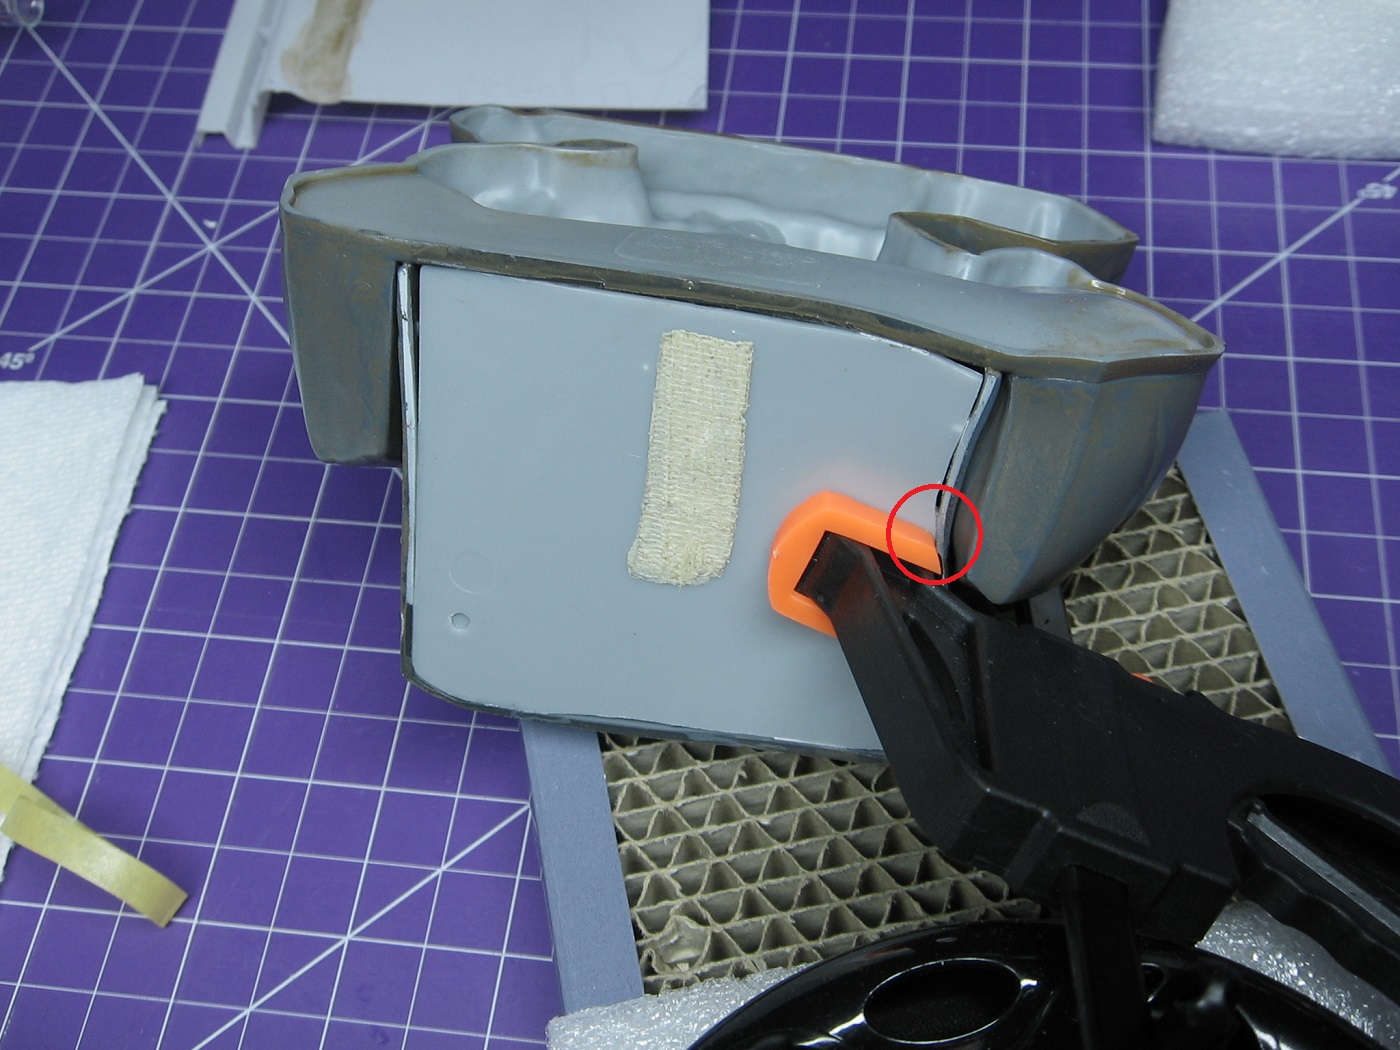
Trying to squeeze the back wall further in to minimize that huge gap on the right. Hopefully there’s enough surface contact at the point indicated for the plastic cement to do it’s thing. Used Tamiya Extra Thin.
I’ll use black Milliput to fill any remaining gaps.
Also, I forgot to flat coat the wall before cementing it in. Dang. So much to remember. So now I need to form a plan with that. I was not wanting to get a flat coat on the nooses, so airbrushing it on the wall might be out of the question. I’ll test spray some flat coat onto a piece of mule twine and see how it turns out, but I’m might just have to hand brush the flat coat on the back wall.
Cheers,
Mark
4 Likes
This continues to be a very interesting thread to follow. Your approach to these challenges is refreshing and inspiring to watch.
Those nooses are reallly nicely done, and the iron bars look nice and rusty. The flat coat on the stonework will bring the thing to life.
I can’t remember what flat coat product you’re using, but I’ve found that the Vallejo Ultra Matte poly varnish brushes very nicely, if you decide to go that route. I probably would, just to avoid any airbrush problems trying to spray around the bars and still get good even coverage.
1 Like
@Toimi_Tom Thanks very much. Vallejo Ultra Matte is exactly what I’ll be using (eventually). Online order should arrive by Wednesday.
Today, I had to re-glue the back wall in the one spot. The previous glue job held upon removing the clamp, but at some point thereafter, it let go. I used Revell Contacta, for the second gluing.
I also applied a wash via airbrush to the coffee cup lid, but I’m not happy with the coverage. It’s too much. Looks more like thin brown paint, rather than a dirty thinner wash. Started prepping another lid for another attempt with a thinner wash. I’m going to try hand brushing it again as well. I’m now thinking the previous hand brush test I did was too thick as well (thin paint, rather than dirty thinner). Hence, the brush strokes that occurred with that test.
Cheers,
Mark
1 Like
Success. The second gluing on the right side held. Big gap no longer big.
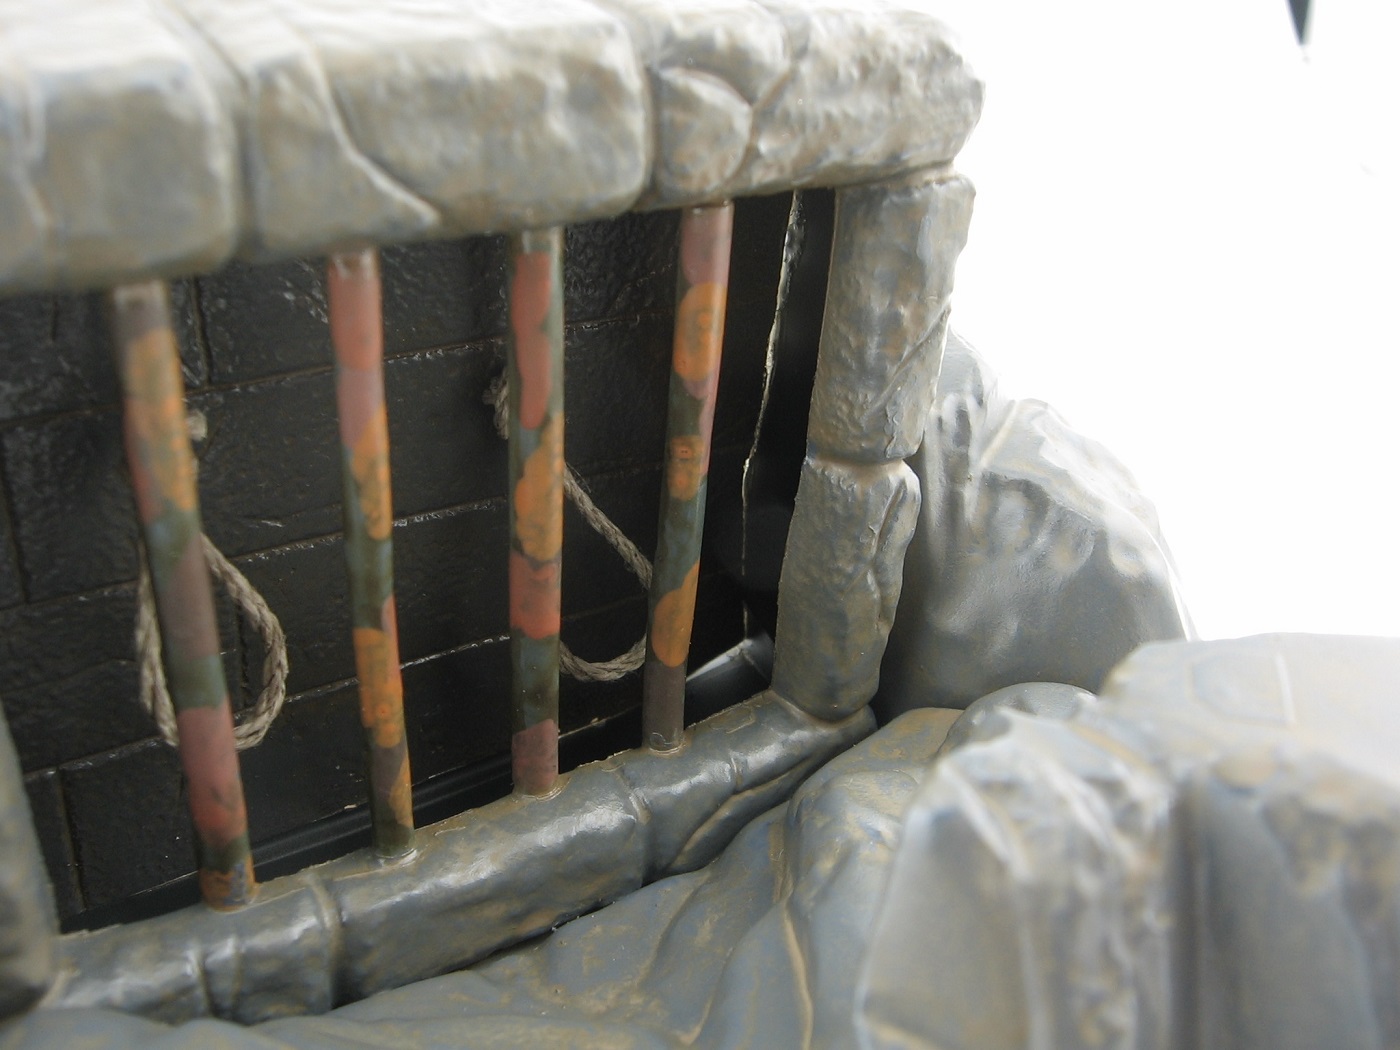
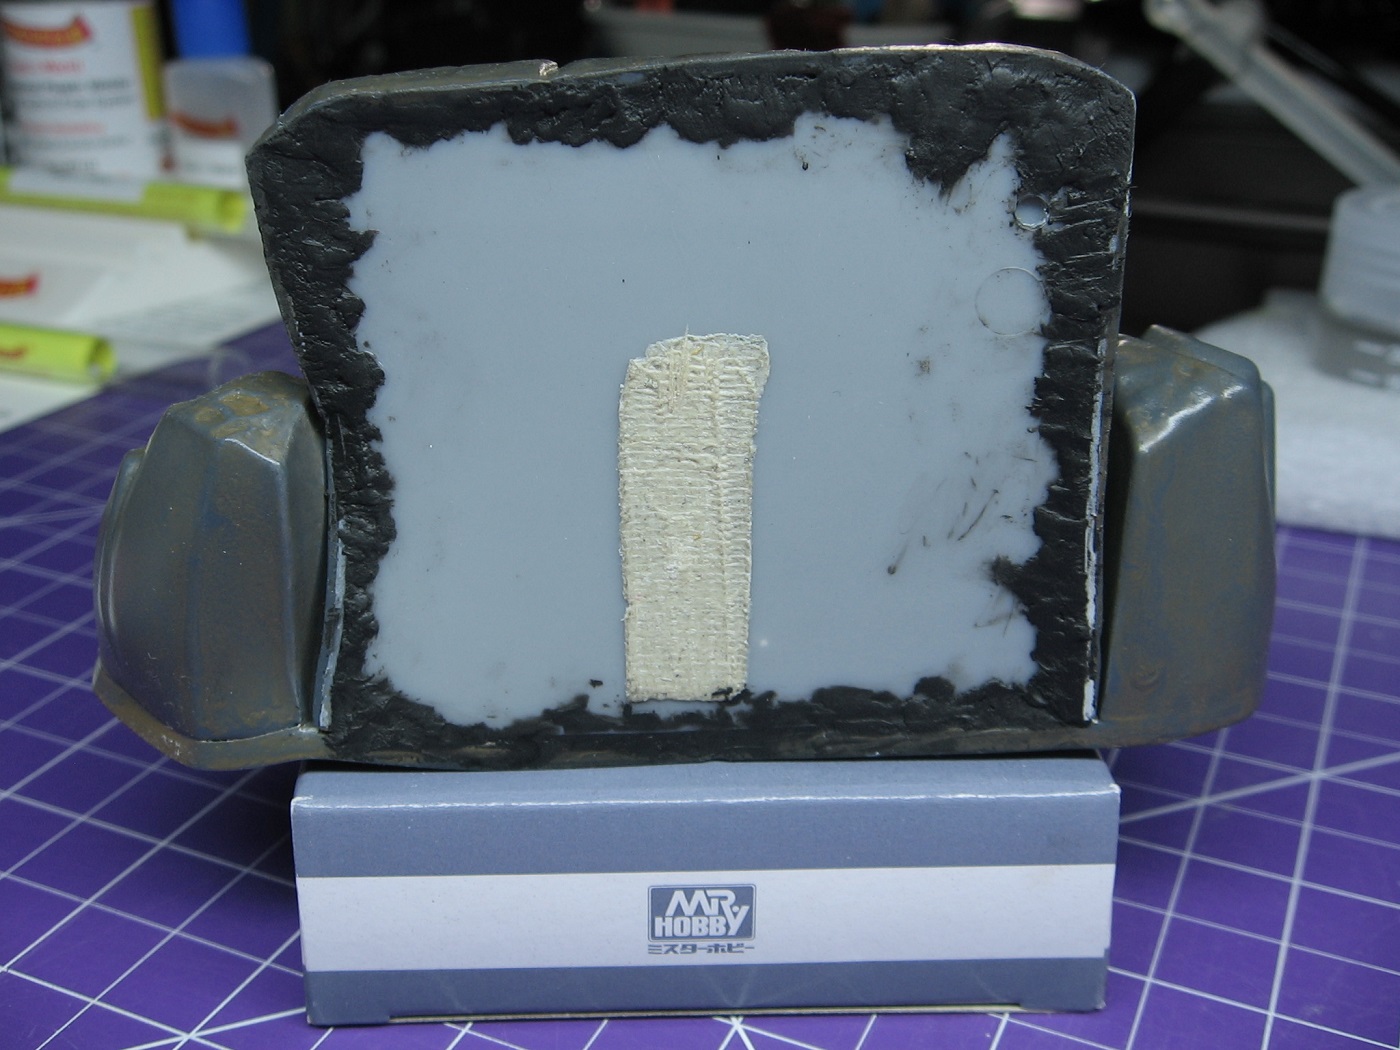
Black Milliput applied to block out light. Not pretty, but it doesn’t have to be.
Another consequence to the distorted base discovered yesterday. I did a dry fit of the body, cape and head. Just wanting to get a feel of how it will all look without the suit weathered.
And I noticed this…
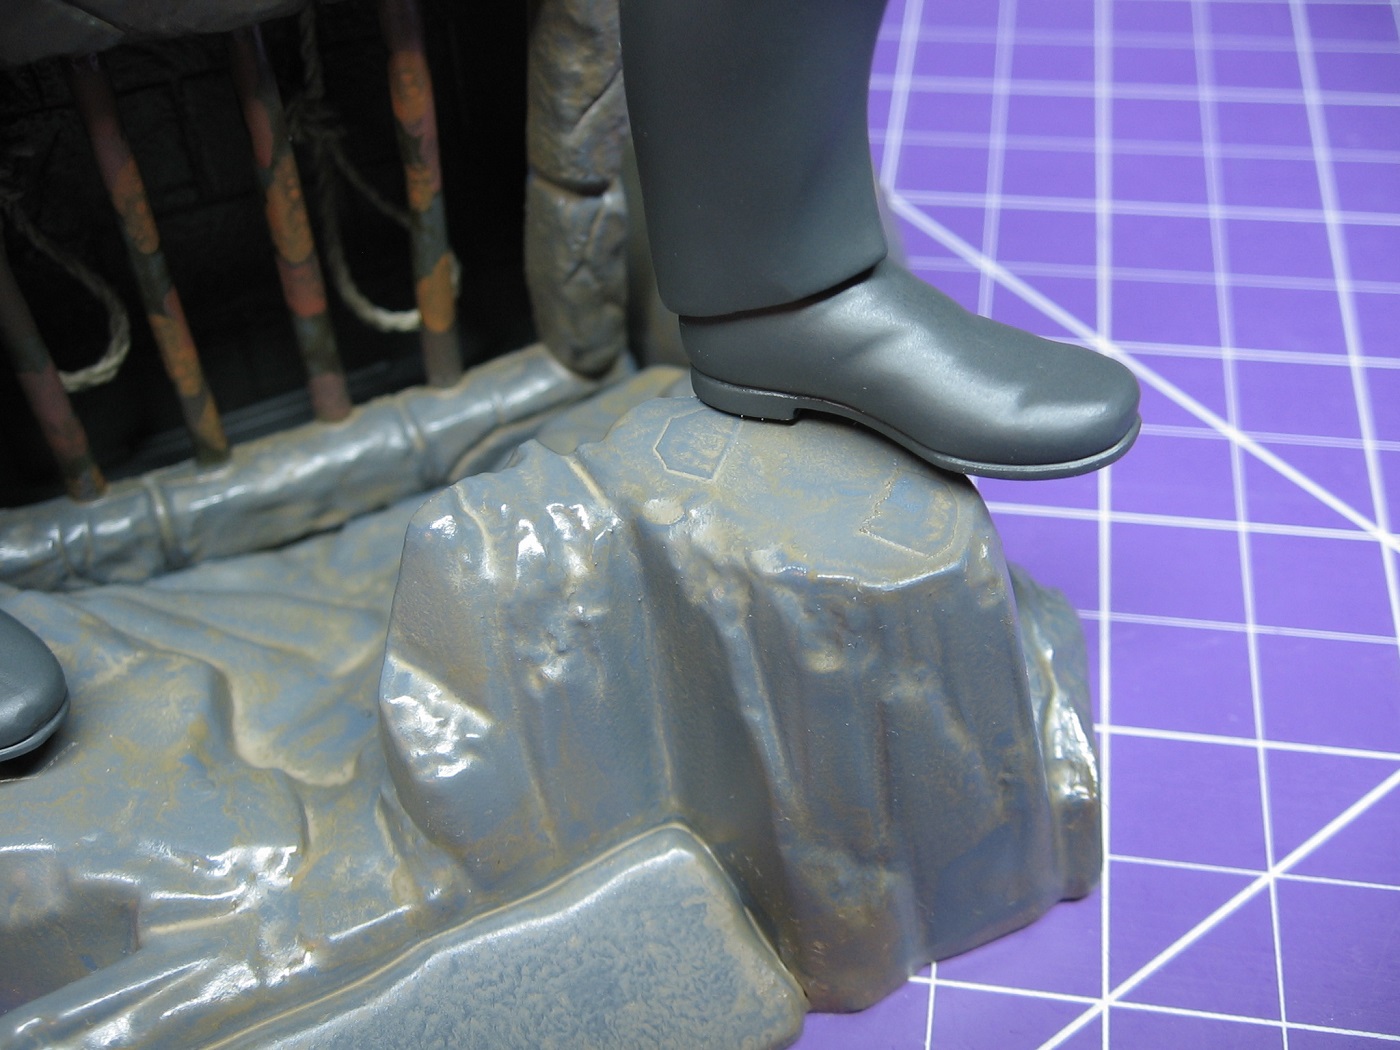
The left foot no longer lines up with where it is supposed to. The intent of the masking tape was to keep the contact points plastic to plastic, for a cement bond.
Tape lifted off and masking lines sanded down.

I’ve got a coat of primer down and one coat of the base coat. Just hand brushing this. Looks like one more base coat layer will be required, followed by a gloss coat and wash touch up. I’ll be attaching the left foot to the base with CA glue instead.
As well, today, I airbrushed a gloss coat onto the second coffee cup lid, in prep for another (hand brushed) wash test.
Thanks for looking. Suggestions are welcome.
Cheers,
Mark
6 Likes
Awesome problem solving going on. I’ve filed that trick with the template away for later use. I’ve no doubt I’ll have a need for it at some point.
The nooses look like they were always part of the presentation. Excellent work!
I also like the slightly offset placing of the left foot. For some reason that looks more natural to me.
2 Likes
@PhoenixG Thank you so much. Your encouragement to reconsider the distorted base prompted me to a thought process that recollected a challenge I had with my Titanic build that involved templating from a negative. Same theory implemented here. Cheers.
Golf season has officially arrived in my neck of the woods. I’m not intending to neglect this project for months on end, moving forward. To the contrary, I’m still motivated very much with continuation on it in the present. It’s just a matter of time management at this point.
Having said that, updates are likely to be a little fewer and farther between for the next while.
Thanks and cheers,
Mark
3 Likes
Golf claims another good modeler.

![]()
Seriously though. Have fun on the course! Enjoy your other hobbies!
3 Likes
@PhoenixG Not going anywhere fast. Pulled a muscle in my left hip on the driving range this morning. I’ve decided to take a week off to allow it to heal, rather than try to continue, and make it even worse.
Updates forthcoming.
Cheers,
Mark
Getting of the sofa is dangerous ![]()
1 Like
I knew I was getting old when I went to bed feeling fine and woke up with a sore knee. ![]()
![]()
Best wishes on the hip, Mark.
1 Like
MisterMeester, I hope that you recover quickly. Always a good idea to take a “break” from the workbench to engage in a different interest. You’ll probably come back to the workbench with a newly charged enthusiasm.
1 Like
Well shoot. May you have a quick recovery so you can get out there again and enjoy the green.
1 Like
My back is pretty stiff in the AM, I have a very physical job, anyways 4am I get up, still kinda hunched over waiting for everything to kinda loosen up and I sneezed, hurt my back so bad I about fell to my knees. Didn’t last but a few minutes but getting old sucks.
1 Like