1/8 Atlantis Phantom of The Opera

This is amazing work you are doing on the Phantom.

I’ve considered grabbing this Atlantis kit, as it would be re-visiting a part of my childhood when I built the old Aurora kits, but I tend to shy away from figures with faces since I do faces so poorly. But maybe I’ll go ahead and get him anyway. And the Mummy.

1 Like

Thank you so much for the kind words.

That’s one of the primary reasons for me building it. This kit was a favourite of mine back in the day. I never planned on building it again. It was simply an opportunistic and impulse purchase that I immediately went for upon seeing it in my LHS.

Cheers,
Mark

Little update.

I don’t want the Phantom’s clothing to be pristine as, the way I see it, he’s in a dirty environment.

I tried doing a dry brush to the suit using Vallejo Model Color 70.950 Black, but it did not go so well. It was my first time trying dry brushing and I’ve decided this is not the model (or, at least not the part of this model) to start learning dry brushing on.

Hard to see in the photo, but it did not go on as I wanted it to. The portion within the circle is an example, but it’s hard to see.

So I airbrushed another coat of Panzer Grey on and after that dried overnight I tried doing a light filter using Tamiya XF-64 Red Brown enamel mixed at a ratio of 1:15 with Tamiya Enamel Thinner. But that didn’t turn out either. It just kept blending into the base coat, and I kept putting more on and it then became a very heavy filter that was going nowhere. This is the first time I’ve tried filtering. Perhaps Panzer Grey is too dark a color for that.

So, I’ve airbrushed yet another coat of Panzer Grey on in prep for my next attempt at some kind of weathering for this guy. My next plan is to airbrush a gloss coat and try a wash. The wash I’m going to use for the base is AK 078 Damp Earth, so I’m going to try that for the suit and shirt. If I like it, I’ll do the same to the cape.

Speaking of wash…I tried a pin wash on the test mule face.


I forget what color I used for this and I neglected to make an entry on this in my paint log. Anyway, doesn’t matter as I don’t like the results. Again, not the right model for me to be learning how to apply a precise pin wash to a difficult subject. I’ll be leaving the face as is.

And the last thing I’ve been up to is the cell bars.


I did this based on a tutorial on pages 97-98 of Vallejo’s “Airbrushing and Weathering Techniques” book. Colors used (overtop the base coat) are Game Color Sepia Wash, followed by Model Color Saddle Brown, Burnt Umber and Red Leather, and finally Model Color Orange Brown.
This, I’m happy with. Perhaps a bit too busy, but I think it won’t stand out so much with the Phantom standing in front of it.
I’m hoping to get a wash on the base and back wall of the cell tomorrow.

Thanks for looking. Suggestions are welcome.

Cheers,
Mark

4 Likes

The bars look fabulous. Overall it’s coming along nicely.

Reading through the post a couple of things come to mind that might help with this or future builds.

Dry brushing is typically used to highlight raised parts of the model with a lighter color. It’s meant to simulate light. For the suit this would be best accomplished with a lighter grey. You could do it simply by mixing in some white with the panzer grey to get a lighter shade of it. For the suit the best place to apply it is at the top (narrow edge) of the creases of the arms and legs. The edges will will naturally pull the pigment off the brush. It can be difficult to tell if there is too much paint in the brush just by looking at it. To verify, I test it first by by brushing against one of my fingers (I wear gloves). It should leave just the barest hint of color on the glove. If more than that shows up, run the brush along the paper towel or sheet of paper a few more times and test again.
The dry brush should produce results similar to this. Apologies upfront for the quality of the pics they are heavily cropped so resolution is minimal.
Before:

After: This is after going over the creases several times using a dry brush.

Regarding the pinwash on the head. It’s hard to tell from the photo but was a gloss coat applied first? A gloss coat is typically applied first to help minimize the amount of wash that wicks out from where it was placed. It also makes it easier to clean up any excess with a damp cotton swab.

To make the suit look dirty you’ll need a color that is lighter in color than the panzer grey. As you discovered a similarly dark color will just blend in. I would suggest trying a dry brush again, with the color you wish to use to show dirt/grime. To make it easier to correct or adjust any color added I’d also recommend giving the suit a gloss coat first. Doing so should allow you to remove most everything with a damp cotton swab. Obvious places for dirt and to appear at the pant and jacket cuffs. Those are also easy places to use a dry brush technique. I’d recommend trying a brush stroke that starts at the edge of the cuff and works up towards the paint leg or jacket arm. The hard edge of the cuff will naturally pull more pigment and it’s also where the most dirt tends to accumulate.

Good luck and happy painting!

1 Like

Nothing to add to @PhoenixG’s excellent drybrushing and “pin wash” info. The cell bars look properly rusty, and you’re making steady progress. Thanks for keeping us updated!

1 Like

Thanks!

@PhoenixG Sorry, I should’ve made clear. The dry brushing attempt to the suit was step one of two. I tried dry brushing shadows into the creases first, based on advice given earlier. That’s what didn’t go so well. I’m not sure what the word is. Similar to overspray in airbrushing was my result. I didn’t even bother trying the highlighting due to this failure.
So I shouldn’t be dry brushing shadows in at all then?

In the meantime, I’m going to apply the wash to the base and cell wall.

ETA: Yes, to a gloss coat to the head prior to the pin wash. That was applied.

Thanks much.

Cheers,
Mark

Impressive. You did very well with the details and color layout. :slight_smile:

Much as I enjoyed seeing Andrew LLoyd Webber’s stage version of Phantom, I was utterly disenchanted with the movie. IMHO, it’s yet another example of Follywood’s continuing inability to tell a story decently. And the makeup on Butler looked more like a minor skin irritation than a monstrous disfigurement.

Oh, and for anyone who’s in convenient driving distance to northwest Ohio, the Model Con 419 show is going to be held on Saturday, May 24. At the contest, I will be presenting the Black Swamp Modelers award for Best Silent Horror Film Subject, in honor of the centenary of Lon Chaney’s 1925 classic. I hope to see some Phantoms there!

Heya @MisterMeester,

No worries. Personally, I’ve never tried to drybrush in shadows around the folds. The technique I use is placing some wash in the folds to settle in there and add the shadow. For dark on dark I’ll usually make two to three applications to ensure it’s good and dark in those shallow spaces and help even out the coverage. Because the panzer grey is so dark the shadowing will be very subtle. However, finishing with dry brushing the highlights will help emphasize the difference.
Regarding the look of the dry brushing you did attempt. It was hard to make out in the photo, but going by the description you gave I’d say that isn’t unexpected. Acrylics don’t always apply smoothly when dry brushed. Speckling to some degree isn’t uncommon.

1 Like

Wash applied to the base and cell wall yesterday, late afternoon.


The picture does not show the wash as well as in person. There’s more brown on there than the picture shows.
I used AK 078 Damp Earth pre mix enamel wash. IMO it was too thick for what I wanted so I added ~ 4ml Tamiya enamel thinner to ~ 2ml of the AK pre mix.
This was applied yesterday, about 17 hours ago. It’s still tacky this morning. Is that normal? I haven’t used enamel model paints much since 1973’ish.
Also, I suppose I should wait until it’s fully cured before laying down a flat clear coat on it?

@PhoenixG I haven’t abandoned your dry brushing advice. I’ll get around to it soon.

Thanks for looking. Suggestions are welcome.

Cheers,
Mark

3 Likes

Mistermeester, from what I can tell it looks fine but the photo is very dark so that makes it difficult to distinguish the wash. Your progressing very well on this build.

I was able to zoom in on the photo and the damp earth wash looks great.

As for it still being tacky 17 hours later. In my experience that is unusual. It’s possible the AK wash and Tamiya thinner didn’t play nice together. If it’s still tacky, try hitting it with a hair dryer on low heat for a few minutes. See if that will trigger it to cure. I’d be wary of applying anything on top of paint that is still tacky.
The suit already looks great, you could just call it good and try dry brushing on a future project. Or like many of us have done. Come back at a later date after gaining some more experience and try it then. It’s your build. Do what makes you happy. :+1: :grin: :+1:

Disastrous setback.
Major rookie mistake committed.
Cardinal scale modeling rule #1, PATIENCE, broken, with devastating results.
Common sense ignored.

This is very embarrassing. I can’t believe I did something so stupid. But for this build log to continue to the end, I pretty much have to own it.

@PhoenixG I read your last post rather quickly and neglected to go back and read it again a second time. What registered was “hair dryer”. What did not register was “on low heat for a few minutes”. I tried a hair dryer. I started at medium heat on medium fan. Did that for about 10 minutes. Didn’t seem to be doing anything. The wash was still tacky. Turned the hair dryer up to full blast high, full blast fan. Another 10 minutes. My bad.
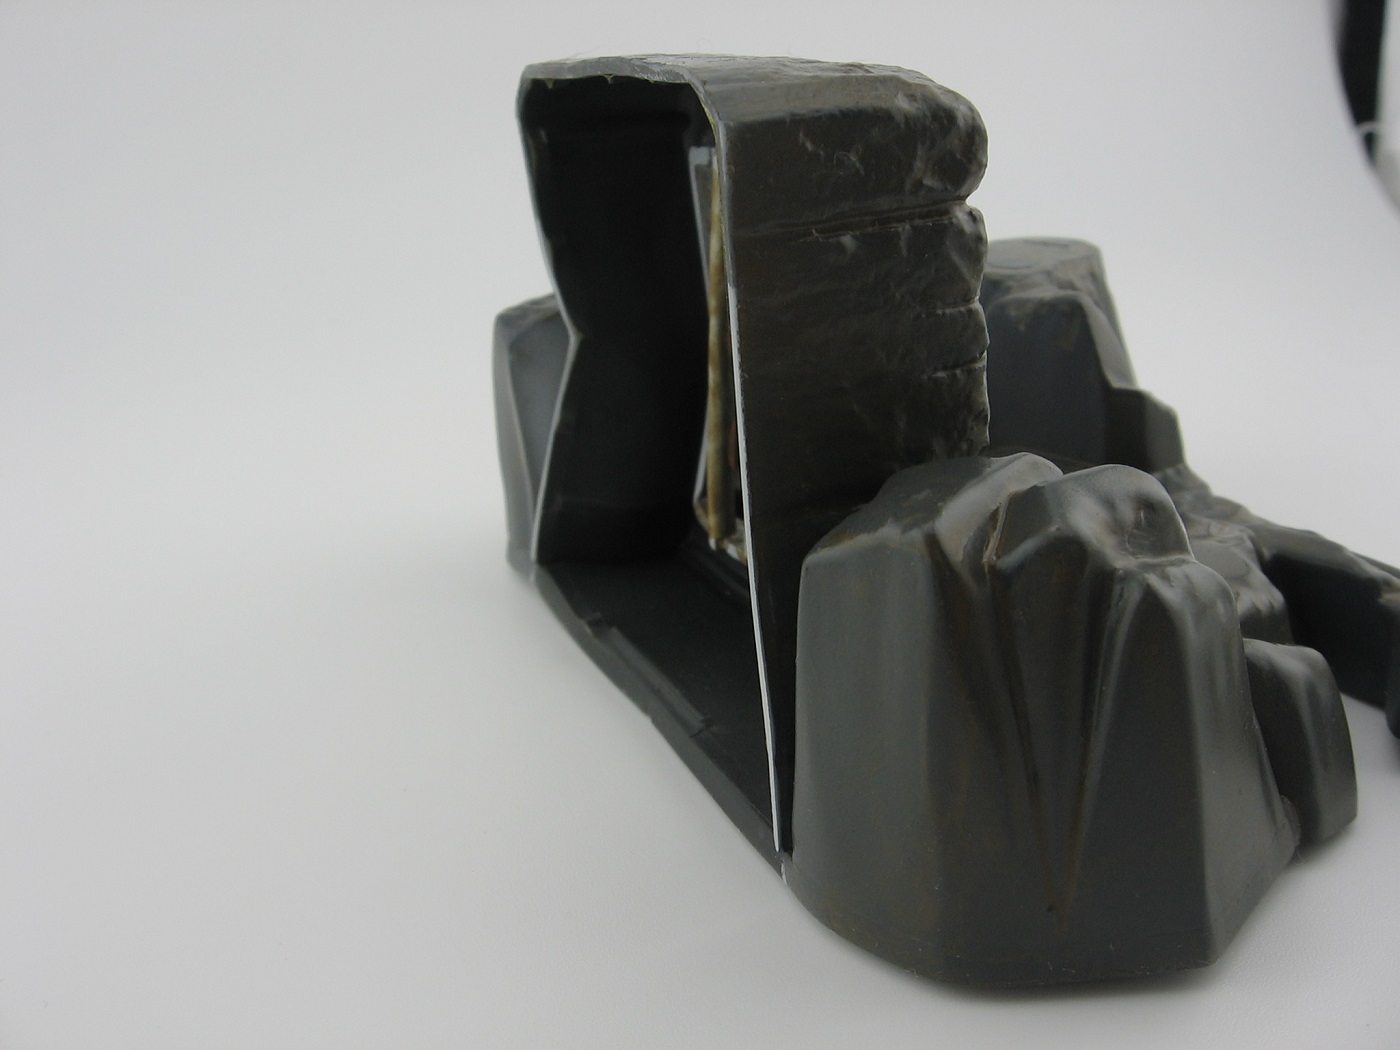
Here’s the result.


I didn’t notice the distortion until ~7 hours later. Obviously, to me now, the base got very warm, if not hot. Enough to cause the distortion. It must have distorted while it cooled, I believe. I didn’t notice it right after applying the heat.
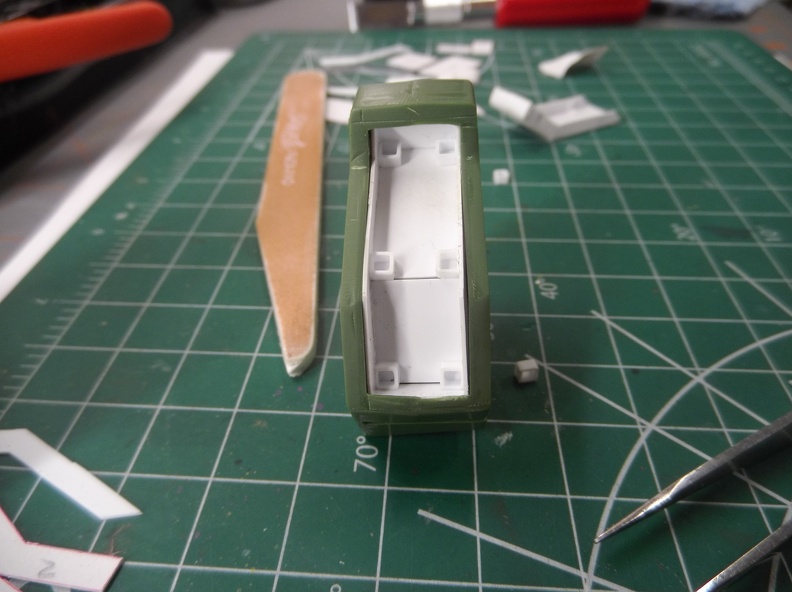
Honestly, my first reaction was that it looked kinda cool and added character. Then it soon hit me. “Wait a minute…the cell wall has to fit in the back”.
So, I did some dry fitting to see if it’s salvageable. Not going to happen. During the dry fitting I also discovered that it no longer lays flat on a table. I’ve been quite depressed since.

So, I got to wondering what contributed to this mistake in the first place? Specifically,… why was the wash still tacky after 17 hours? I attribute this to four collective possibilities.

  1. As mentioned, I thinned the wash with Tamiya enamel thinner, but the wash was made by AK. Perhaps the dissimilar brands do not like each other.
  2. I put the wash on quite heavy. This wasn’t originally intended. I just kept playing with it too much.
  3. Temperature. It’s generally about 18C in our basement during the day. With the heat turned down 4 degrees at night, it likely gets down to 16C or 17C overnight down there.
  4. It rained the night before I applied the wash. I didn’t check the humidity at the time, but it was likely higher than usual.

So, what can I learn from that wash application and do differently next time?

  1. Don’t slop a heavy wash on. Lay it down light. Then, after it dries, if I feel it needs more, then apply another light coat.
  2. Take the part upstairs after application to dry, where it’s warmer. (Talking about this with the wife…apparently she takes her earring makings upstairs, sometimes, for the clear coat to dry. Leaves them up there for a day or two. Who knew? :man_shrugging:)

Of course the main contributor to this fiasco was my impatience. I was just wanting to get the wash dried so I could proceed with a flat coat. Early to mid March, I had thought I would have this project finished by the end of March. I was hoping to get it done well before golf season (which is still two weeks away where I live) so I could shift focus on getting my 53" 1/200 Titanic hull ready, during April/May, for painting outside in the summer.
I suppose another lesson learned here is to not put a deadline or timeline on finishing a build.

All this being said, I ordered another Phantom kit last night, for replacement parts for a new base. I’m going to keep the old base as perhaps I’ll do a Phantom kitbash someday, what with all the extra parts I’m going to have.

The second kit won’t get to me for another 7-10 days, I expect. Golf season will be close to full swing by then and my Titanic build is going to take priority over this build as well.
I might get a chance to putter with the new base during the summer. We’ll see.

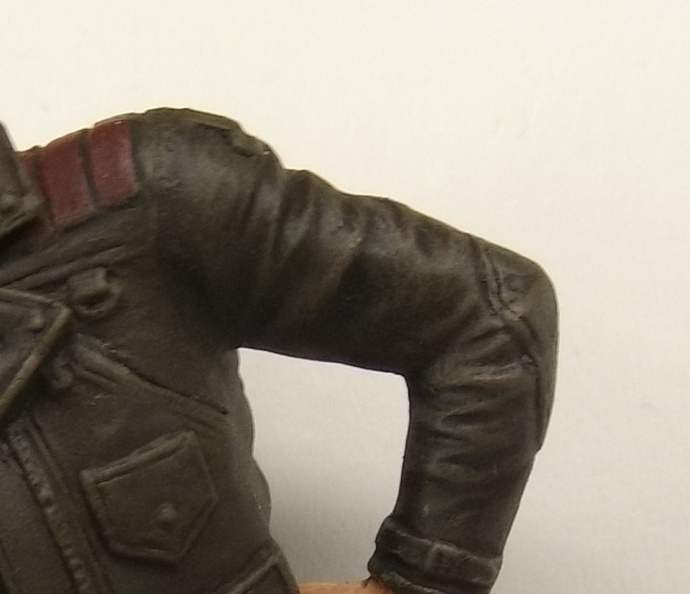
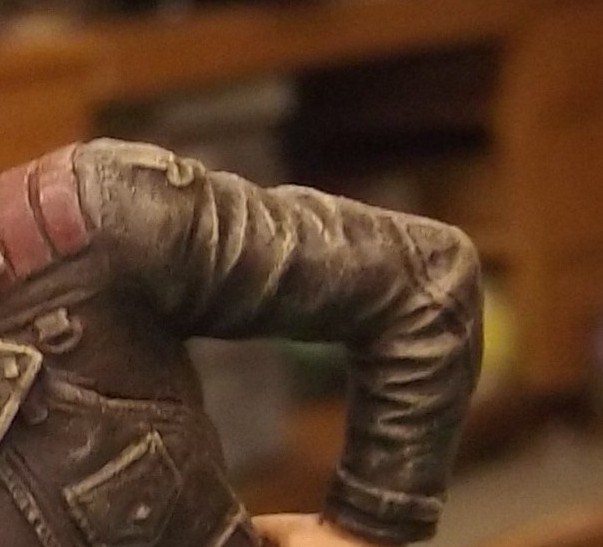
In the meantime, I’ll see what I can do about dry brushing of the suit.

What was intended to be completed two weeks ago, is now probably not going to be completed until the Fall. There I go implementing a timeline again.

Anyhow, sorry for the lengthy post. Thanks much for looking. Suggestions are most welcome.

Cheers,
Mark

3 Likes

How about something like plaster of Paris, Sculptamold, or air dry clay to make a custom base. The base seemed pretty basic from what I remember.

2 Likes

Aw man, so sorry that happened to you.

You’re not alone in applying too much heat. Like last year when I turned this,


Into this. :roll_eyes:

While the base of your Phantom is slightly warped in places it doesn’t look bad. If the Phantom still fits, consider finishing it. I think there’s plenty there to be proud of and worthy of display. :grin:

Now the most important question of all…
Did the wash finally cure? :wink:

2 Likes

Thank you for the suggestion. I will consider this.

Cheers,
Mark

Aw, crap. Thanks for sharing that. I don’t feel so bad now.

Yes, I think the Phantom would still fit, but it all boils down to the back wall of the cell. That definitely will not fit. I’m satisfied with my decision to purchase a second kit and build a new base with lessons learned.

Yes. For the most part. I still sense an ever so slight tackiness, but nothing like what it was. So, essentially, the heat worked in that regard. Just the plastic was not too happy about it.

Got a coat of Panzer Grey on a coffee cup lid today, in preparation for testing dry brush highlights for the suit. Will apply a flat coat tomorrow.

Cheers,
Mark

So sorry that happened Mark. We’ve all done something similar during our modeling years. Mine was leaving the desk lamp on and my models too close to it.

1 Like

That sucks. Time for some inventive repairs or scratchbuilding.