1/8 Atlantis Phantom of The Opera

@Demolition My back is usually my main worry during golf season. I see a chiropractor once a month just for maintenance. This left hip muscle pull thing is right outa left field and completely unexpected.

On the model front. Ugh. So today, I go to touch up the spots, previously masked for the left foot, with a wash, having base and gloss coated over the last two days. Just a simple hand brushing. I used my reserve wash that I had already mixed. AK Damp Earth Wash mixed with AK White Spirit. But I suppose some of the White Spirit had evaporated from the mix, because it went on heavier than what was already applied. So, in the moment, I decided to just keep applying the wash over the entire base. I’m not happy with the result. It’s too much. Ugh. It’s like one problem just keeps leading to another problem and I can’t seem to get anything right or get a break.
Tomorrow, I’m starting over, yet again, with the base paint job. I’ll mask off the cell and airbrush yet another base coat. Then, another gloss coat for yet another wash coat. Hopefully, I get it right this time.
Pics of the heavy wash forthcoming tomorrow.

Thanks for looking.

Cheers,
Mark

1 Like

I’m finding this model to be quite the learning curve, and very humbling. What I’m sure appears to be a simple model to most is proving to be quite the challenge for this novice.
Here’s a pic of the unintended heavy wash on the base.


As mentioned in my previous post, this was supposed to be just a simple touch up, for the area within the red circle. But the wash went on thicker and heavier than what was already laid down. Truth be told…instead of calmly getting some clean White Spirit and a Q-Tip and clean it off and dilute my wash mix and reapply, I kinda panicked a bit instead, and proceeded to just cover the whole base again. As mentioned, I don’t like it. It’s too much. Needs a redo. Which, of course, has led to yet another roadblock in the way of fixing it.
That roadblock being…how do I mask off the cell now that the back wall is cemented in place? Ugh.
Here’s my solution. I’m hoping it works.

I used some cardstock, cut in two pieces horizontally. I laid down double sided scotch tape around the perimeter. I then poked nine holes, strategically placed, in each piece, and ran a string of thread through each hole. Each thread has a stopper knot on the backside. The idea here is to pull the cardstock via the thread, and the double sided tape will hold the cardstock up against the inside edge of the cell walls. Easier said than done. Took me about three hours to do this, and the tape didn’t really hold that well. I had to fill some gaps. I just used paper towel for that. Despite the tape not sticking in other spots, the threads are useful, albeit a bit awkward, to pull taut while airbrushing.
Fingers crossed that this will keep any overspray into the cell to a minimum. I’m expecting not, but I expect what overspray might get in there I can touch up with hand brushing. The ultimate goal is to prevent any overspray from getting on the nooses. Time will tell.

I figured I should start over (short of stripping all layers off) so I got a fresh primer coat sprayed on this afternoon.

Thanks for looking. Suggestions are welcome.

Cheers,
Mark

3 Likes

That’s an engineer’s solution to a problem. It might work better than you expect, but be patient while spraying and holding the strings at the same time.

1 Like

Still enjoying the thread, Mark, and sorry to hear about your hip! So far, you’ve put up some fantastic solutions to whatever has been thrown at you, it’s inspiring to know that the fixes can be there. I sometimes give up after such simpler issues, now I want to focus efforts on how to overcome whatever I just did!

1 Like

@gomeral Thanks! And, honored to be an inspiration! Cheers!

Yesterday I sprayed another base coat on the base and today I got it glossed again.


Going to try and get a wash on it tomorrow.
The masking will be left on until after the final flat coat is applied.

Thanks for looking.

Cheers,
Mark

1 Like

Second (Third?) wash applied to the base. I’m happy with this.


Will ultra matt coat it soon and then I intend to apply some pigment here and there for dirt piles. Not sure about that yet. I have only two weathering pigments on hand and, at the moment, and I still need to do a color comparison with the wash.

So, I applied a wash to the Body, Cape, and Cravat as well. The intent, here, is to make the clothing dirty, like the environment the guy lives in. But not quite as dirty as that. This wash was much more diluted than the Base wash.
Results:


So, this is a major learning experience for me. I realize, from my research, that doing a wash on a figure is unusual. My take on the results are:

  • The shirt and shirt cuffs turned out phenomenally. Couldn’t be happier with that.
  • The suit. Meh. It’s dirtied up somewhat, but not as much as I wanted.
  • The cape. The inside red. As the suit, meh. Same conclusion. It’s dirtied up somewhat, but not as much as I wanted.
  • The cape. The outside panzer grey. What a bleeping disaster. Ugh.

After reflecting/pondering on what to do (read: another fresh Panzer Grey coat and subsequent dry-brushing?), I worked on ā€œcleaning upā€ the suit and the cape, by way of some Q-Tips and White Spirit.
Here’s the result of the cape after ā€œclean upā€.


It looks much better, but I’m still on the fence about it. Perhaps the more I look at it, the more it will grow on me.
Lesson learned with this (to me) is…washes don’t really work so great with black or, in this case, a very dark grey. I mean, going on wet, it looks fine. Then it dries and ugh. Testament to this observation is, the inside cape red, and the white shirt and cuffs look fine. Not the Panzer Grey.
Honestly, I want this model done. I’m all for learning and intend to delve into learning how to dry-brush properly in the future. I just don’t have the patience to learn that on this model now, and I really don’t want to put the model on hold for that either.

Having said that, I’m inclined to finish it as is.

Thanks for looking. Suggestions are welcome.

Cheers,
Mark

4 Likes

Mark, you’re doing an AWESOME job on this model kit. Your base looks terrific with the washes you’ve applied and your work on the cape looks good. I know that you want this kit to be completed but you’ve worked so hard on it don’t rush just to finish it.

1 Like

Mark, I’ve done a couple Phantoms, the last one was 25 years ago, which I did as an out of the box project. I feel your pain, been through similar struggles off and on since 1963. May I offer a few suggestions? The first is to congratulate you on having the stones to admit that you threw your most valuable tool out of the box: PATIENCE. No modeler can play ā€œBeat The Clockā€ successfully! Next, having been stuck with warped base parts, I think you climbed out of the hole okay. If you mentioned your method for making the warped base sit flat, I missed it. But it would be a simple matter to cut a piece of sheet styrene (ā€œcard stockā€ north of Ohio :smile:) large enough for the base to sit on, apply a worm of Milliput to the underside of the base, and push it down onto the styrene. Any excess putty could be cut away before the epoxy sets up. Before you do any of that, there’s a way to fix the Phantom’s foot issue. You could use your Excel saw blade to cut the raised section on which the Phantom’s left foot rests away from the base. Use the figure to reset the position of this piece, which you’d glue to the styrene substrate, and then fill the resulting gaps with epoxy putty. You’d get to bring your sculpting skills to bear, in order to blend the putty into the contours of the base. Once all the putty work was dry, you’d trim the excess card stuck away from the perimeter of the base. Now the base sits flat and the Phantom’s foot lines up where it’s supposed to.

2 Likes

Thank you so much. I won’t. A promise to myself.

Cheers,
Mark

1 Like

Thank you so much for your reply.

Absolutely. I’m always open to suggestions. Having said that, please don’t feel slighted (this goes for anyone) if I don’t use them. The way I see it, this build log, and the request for suggestions, isn’t necessarily just for me. It’s also a record of how things went, some right, some wrong and if someone can learn from this log to prevent their own mistakes, be it a Phantom build or whatever, then that’s a good thing.

Completely agree.

Thanks. I have not mentioned a method for making the warped base sit flat, so no, you didn’t missed that. Having said that, I did come up with a solution weeks ago (just haven’t mentioned it yet). My wife has some poly foam sheet (similar to what would be used in an aquarium filter; I suppose it’s about 1ā€ thick) and some black fabric. I’ve asked her if she could sew up a small piece of the poly foam in the black fabric. So, the idea here is that the model will be sitting on a little flat pillow, so to speak, and the weight of the model itself will sink into the pseudo pillow, thus hiding any imperfections of the distorted base in relation to laying flat. Hoping it works. Having said THAT, your idea is awesome and I will be filing it into my memory bank. This isn’t my last monster model. More to come. Some of which use a similar ā€œrockā€ base. I intend to do The Wolfman next winter. That has a ā€œrockā€ base as well. Not to say I’m going to make the same mistake again with that base, but I definitely appreciate the suggestion. It’s a good one.

As for the left foot, again, thank you so much for the idea. That sounds like a very plausible solution. Having said that, I’m okay with the offset. As long as the foot is on the ā€œpedestalā€ it works for me.

Today, I airbrushed an ultra matte coat on everything. Post airbrush session, I didn’t have much time to look at results, as I had to clean up hurriedly before heading out to a Mother’s Day feast. But a quick glance at that back of the Cape rendered me pleasantly surprised at the results. I’ll get a better look at it tomorrow.
Also, I realized that I had neglected to get a wash on the shirt lapels.
In addition to that, I still want to look at possibly adding some pigment to the base, simulating dirt piles.

Finally, I feel like I’m in the far turn, and heading for the homestretch.

But not forgetting the #1 rule. Patience, Grasshopper.

Thanks for looking.

Cheers,
Mark

1 Like

Mark,
I’ve always said that whatever the builder considers the right way to build a model IS the right way to build a model. So by all means, take what you want from my suggestions and have fun!

2 Likes

Quite busy lately. Not much bench time.

Got a better look at the back of the cape. I’m very happy with how it turned out.

The masking for the torture chamber worked. No overspray entered within. Super happy about that.
The red arrow indicates where I want to add some pigment, aka weathering powder, to the base. Fill the gap, so to speak, where the torture chamber meets the base.

I have only two pigments and two binders. Tested both.
The blue circle is AK042 Europe Earth with AK048 Pigment Fixer.
The red circle is Vallejo 73.108 Brown Iron Oxide with Vallejo 26.233 Pigment Binder.


The Vallejo Pigment Binder took forever to cure. I lost track of time, but at least a week, if not nine days. The above picture was taken a few days ago. The Vallejo test is no longer glossy. It’s flat now.

Regardless, neither color is right. I have 12 Monroe weathering powders coming from my latest Trains.com gift card purchase. Hoping they get here soon and hoping one of the colors will match the Damp Earth wash. I’m in the process of preparing a coffee cup lid test mule for more tests when they get here. Got a gloss coat on the lid today. Might get the wash on it tomorrow. Then, I’ll be ready for the powders. Canada Post is poised to go on strike midnight Friday so, fingers crossed they get to me before then.

In the meantime, I started putting Erik together and he’s currently in solitary confinement.

Not much left to do. The pigment powder to the base; glue the mask on; glue the rat on; glue Erik to the base; have a little base pillow sewed up by the wife; and one more minor addition.

Thanks for looking.

Cheers,
Mark

4 Likes

Monroe Models weathering powders received a few days ago. Commenced testing and color matching these pigments this evening.


Initial observation indicates the ā€œDry Mudā€ is the closest match to the Damp Earth wash.
Also, the AK Fixer ran into the right Dry Mud as well, when applied to the left Dry Mud first.

Comments on the Vallejo binder…I don’t like how this binder interacts with the pigment. The pigment does not absorb it well, but rather, the binder beads off. The inclination is to keep adding binder to the point that there appears to be way too much. I suppose it’s meant to be mixed into a slurry, but I don’t want that as I want the pigment to remain coarse. Anyone with experience with this binder please chime in.
Based on my first test, I expect the Vallejo Binder to take a good week to cure.

Curious to see how both binders/fixers will take an Ultra Matte clear coat hand brushed on once cured.

Thanks for looking.

Cheers,
Mark

I guess I like making mistakes and then fixing them, haha!
My latest rookie blunder involves the base again. Applying pigment, this time.


Decided the Medium Earth was the best match to the wash.
I’m happy with how it turned out in the central depression, although I still need to add a bit more to fill those two gaps.
Where I’m not happy with it is the front.
Removing the lettering from the nameplate rendered this part of the base smooth, making it difficult to hold a wash the way I want it to. Thought I’d try dirtying it up a bit with pigment. Despite reminding myself of the ā€œless is moreā€ advice given in the FSM Scale Model Basics video on the subject, I went too far. To the point that I tried removing some of it and, well, the poor result is obvious. I then tried blending the mistake in by taking it to the surrounding areas but that was just making it look even worse.

Needless to say, I’ll be masking the back area off, base coating the front again, gloss coating again, washing again, flat coating again, and then go from there. Maybe I can get a better wash on this area this time.

Thanks for looking. Suggestions are welcome.

Cheers,
Mark

Base coat applied. A couple of runs. Ugh.

Cheers,
Mark

1 Like

Mistakes is part of the fun :grin: I like your, try again, attitude.

1 Like

So I got the front of the base re-washed. Hard to tell in the photo as it’s much more evident on the bench. I’m happy with that.

Removed the masking tape and, ugh. My latest dilemma is that said tape had some sort of reaction with the Ultra Matte coat. Or perhaps the tape simply lifted said coat off where it was in contact with it. Regardless, the result can be seen in the photo.

Took just over an hour to get it cleaned up as best I can with a sanding stick. Some spots were easy while others were not.

I think I’ll do some very fine touching up with more wash to try and hide what still shows.

Thanks for looking.

Cheers,
Mark

2 Likes

Main parts attached over the last week and a half. Final touch ups applied two nights ago. Pictures taken yesterday. I’m very excited to announce that this project is complete.

Before I forget, I want to thank everyone (including lurkers, if any) who followed this build log. Many thanks to all comments, advice, ideas, encouragement and support. Without you guys, I’m not sure how this model would have turned out. I learned so much during this build, but still have lots to learn. Such as dry brushing. Never did get that right for this project.
I totally own that it’s not award winning work and I’m okay with that. For my second completed model in approximately 52 years, I’m very happy with it.

Here’s the run down of the final stretch and finish line…

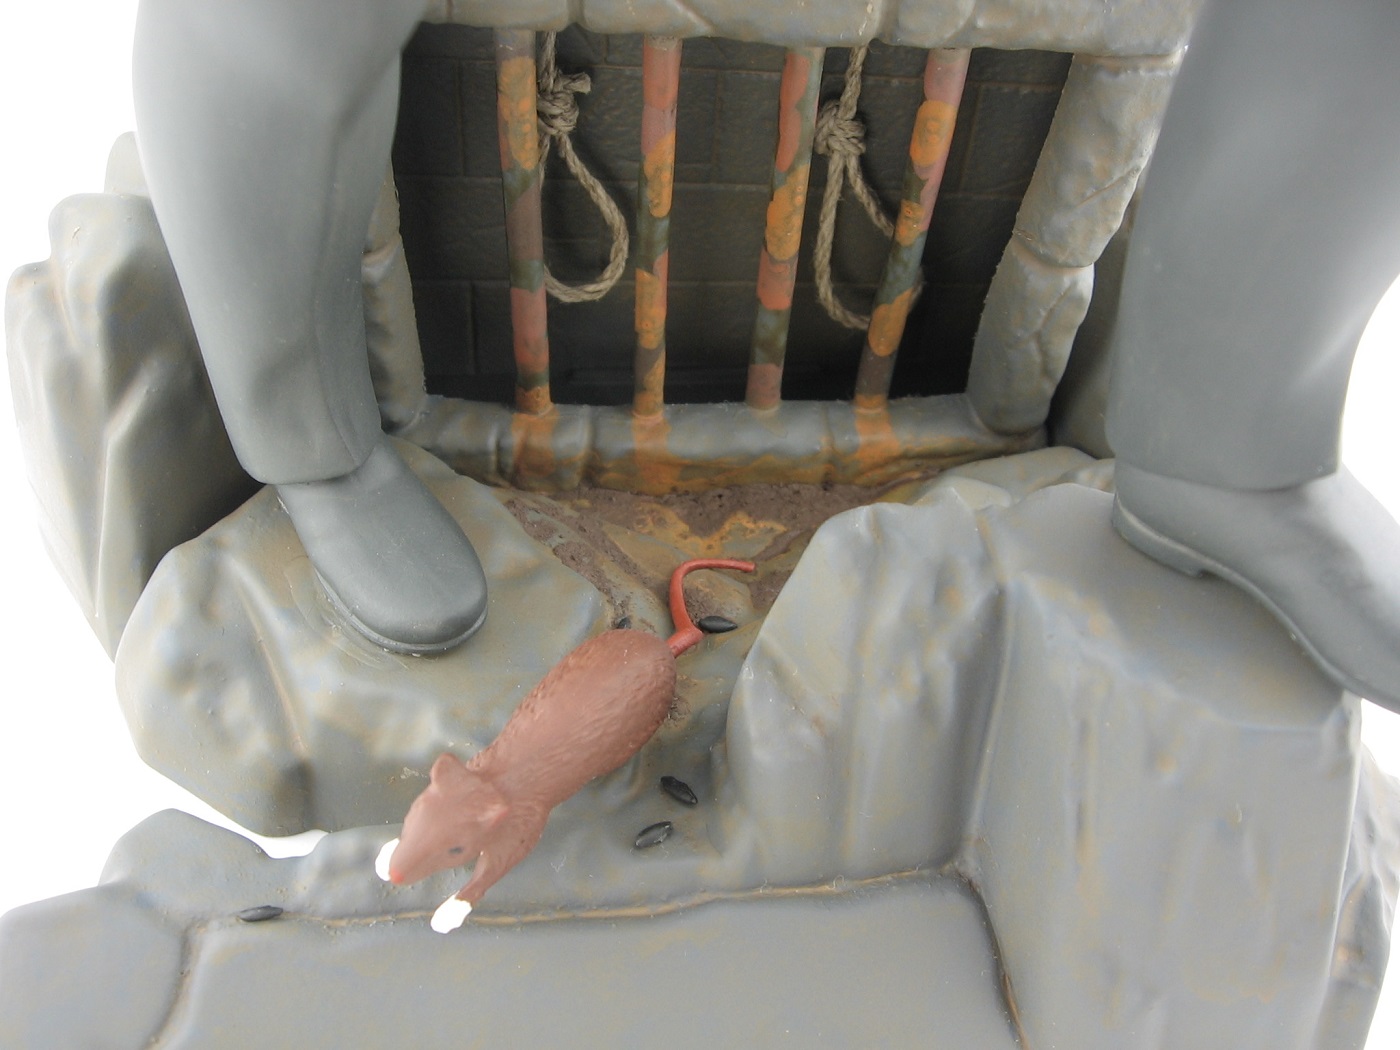
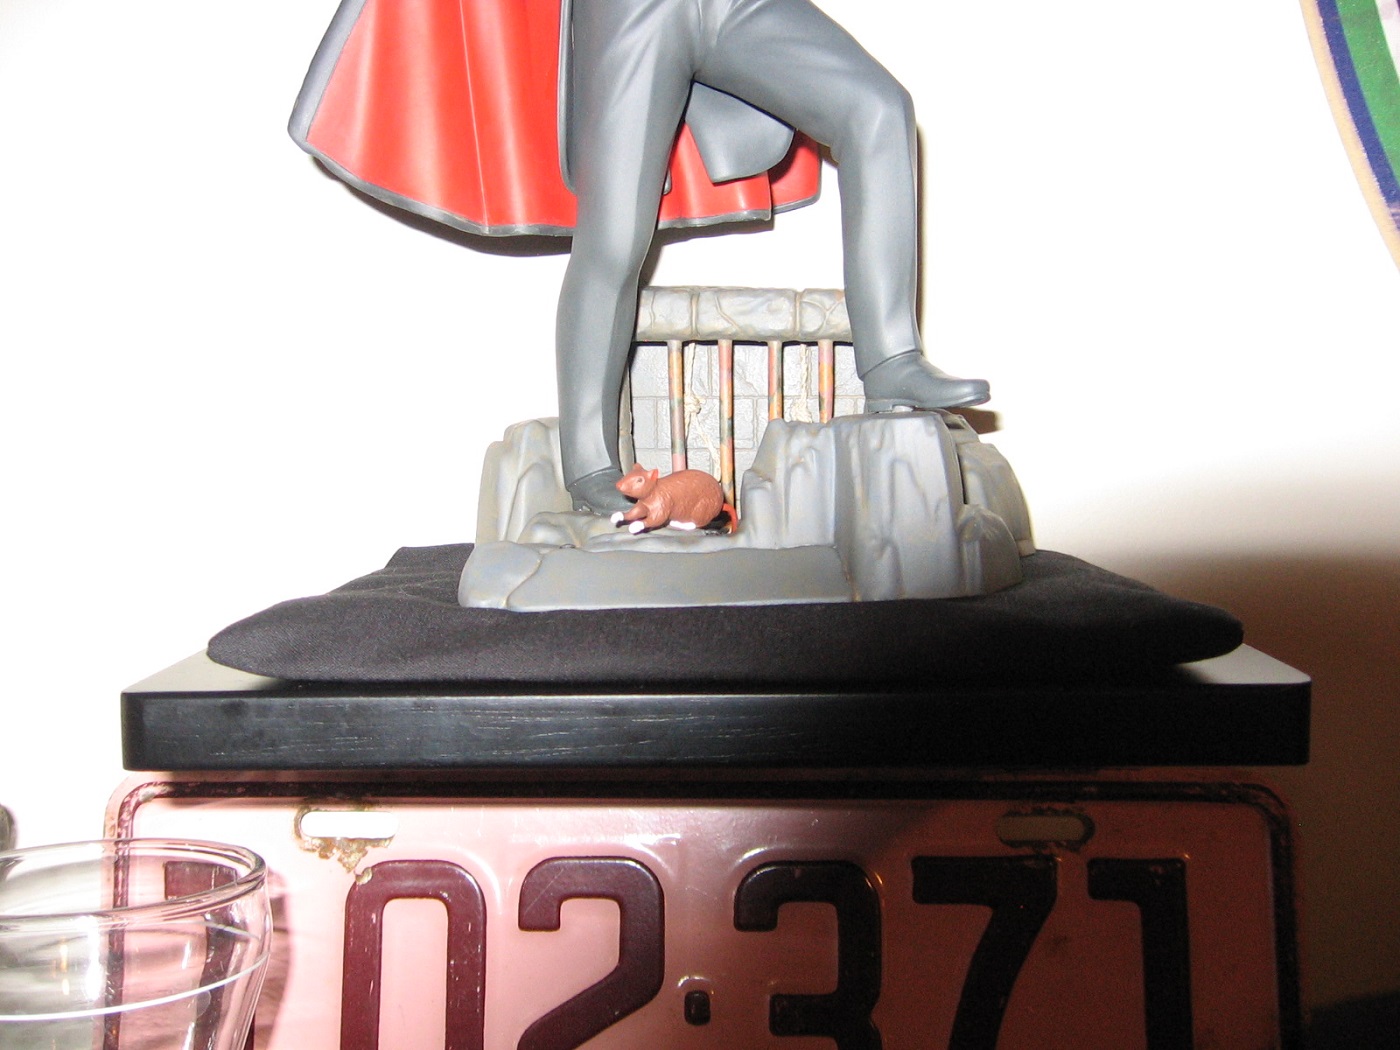
I applied Monroe Models Medium Earth Weathering Powder into the depression of the base to simulate accumulated dirt. It resulted in two colors. Brown (expected) and orange (unexpected). Fortunately, this orange is remarkably similar to the orange I applied to the torture chamber bars. So, to explain, rhetorically, where the orange in the depression came from, I decided to add orange ā€œrustā€ bleeding down from three of the four torture chamber bars, using Vallejo Model Color 70.981 Orange Brown.
Of course the close up shot shows every imperfection and dust speck, but I digress.


Also in this shot, obviously, is the rat, and, surprise(!), rat poop! Where there’s a rat, there’s rat poop, no? Research on rat poop taught me that it is ~12-18mm in size. I went with the 15mm median and worked out 1/8 scale of that is 1.9mm. If memory serves me correctly (I made them months ago) these turds are slightly bigger than that, but hey… if Erik’s best friend was a rat then it was probably well fed. Haha!

Next slide please…


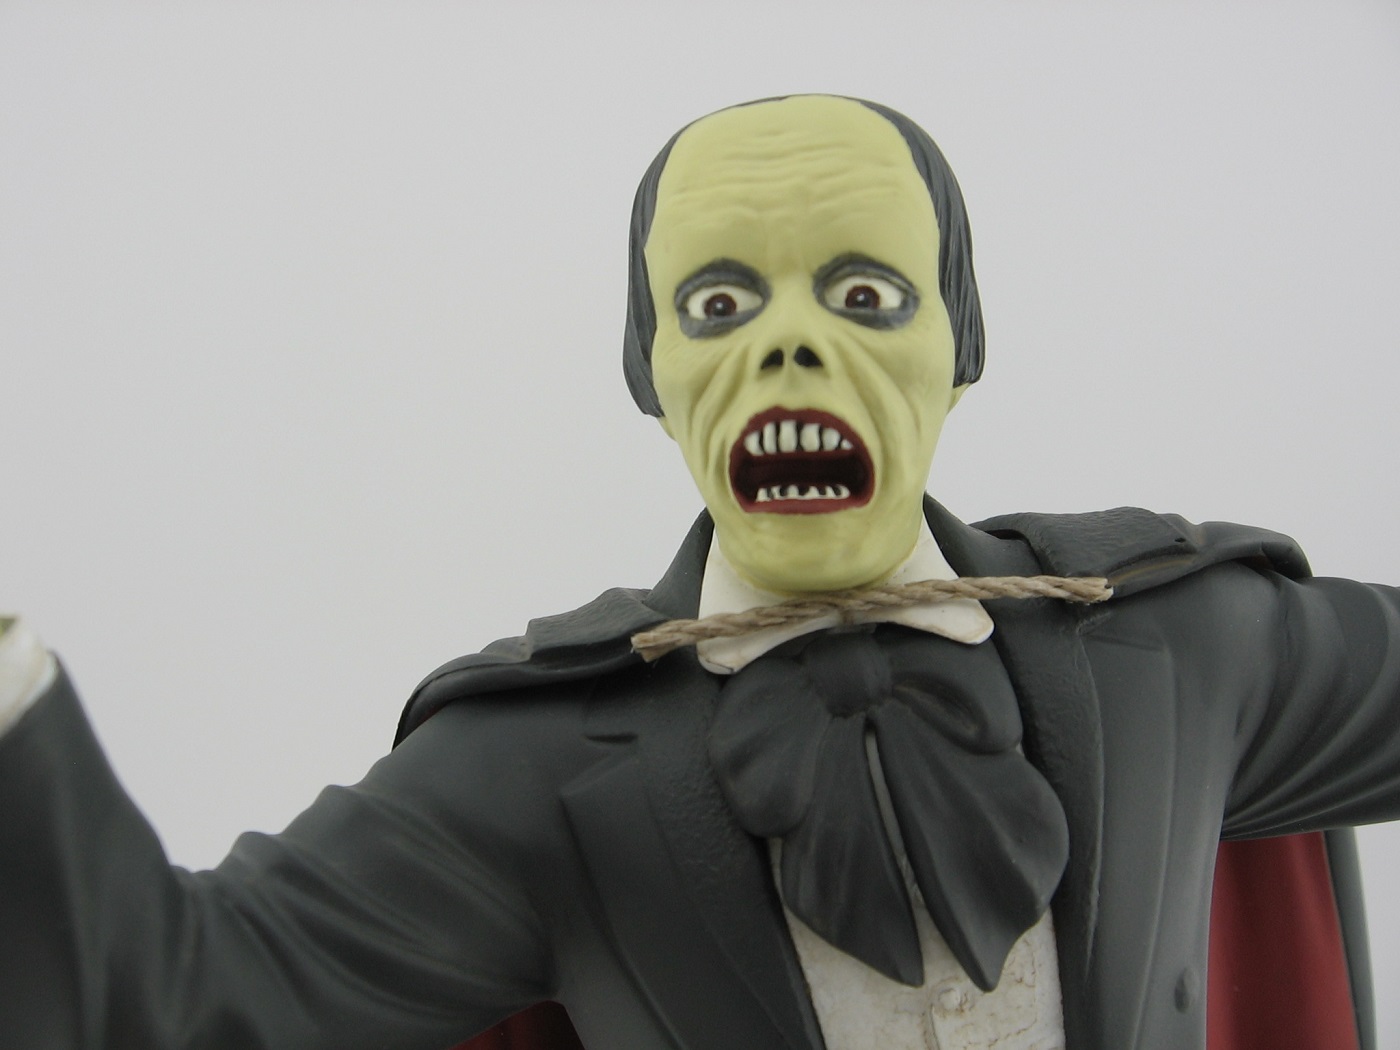
Slightly out of focus, but not bad. I didn’t like how the kit provided cape tie was positioning, so I decided to use a piece of the same rigging thread (Corel Modellismo 1.2mm) I used for the nooses. Hand brushed with Vallejo Ultra Matt Polyurethane Varnish. I’m glad I did this as I really like it and like the resulting juxtaposition (is that the right word?) with the nooses.

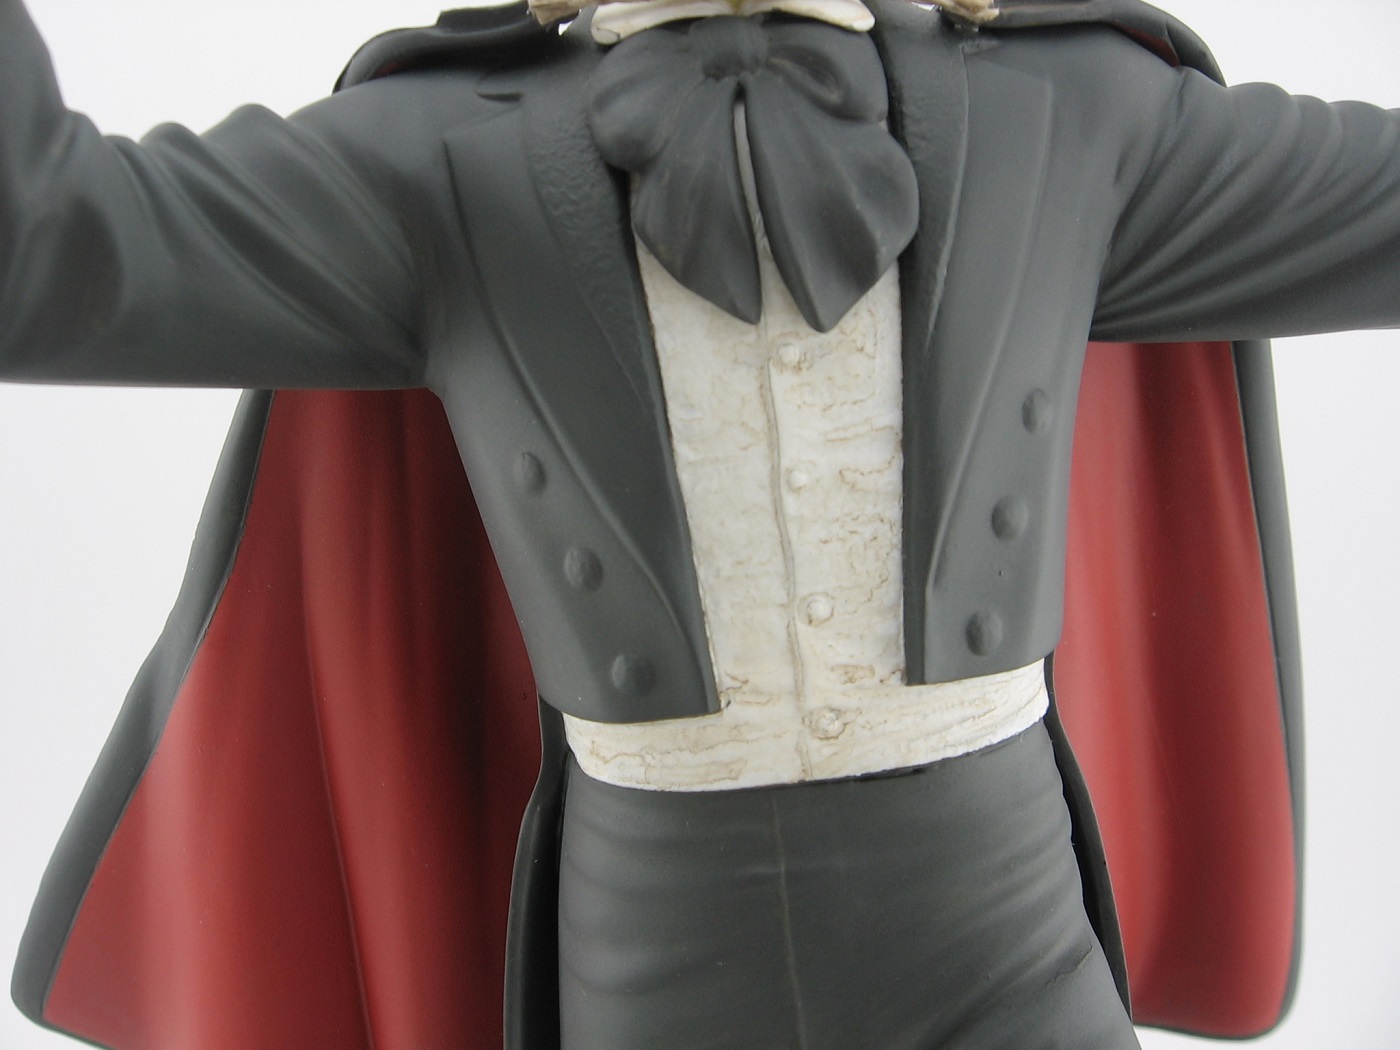
This picture shows how the weathering of the shirt turned out (cuffs and collar were done too). I used AK 078 Damp Earth enamel wash.

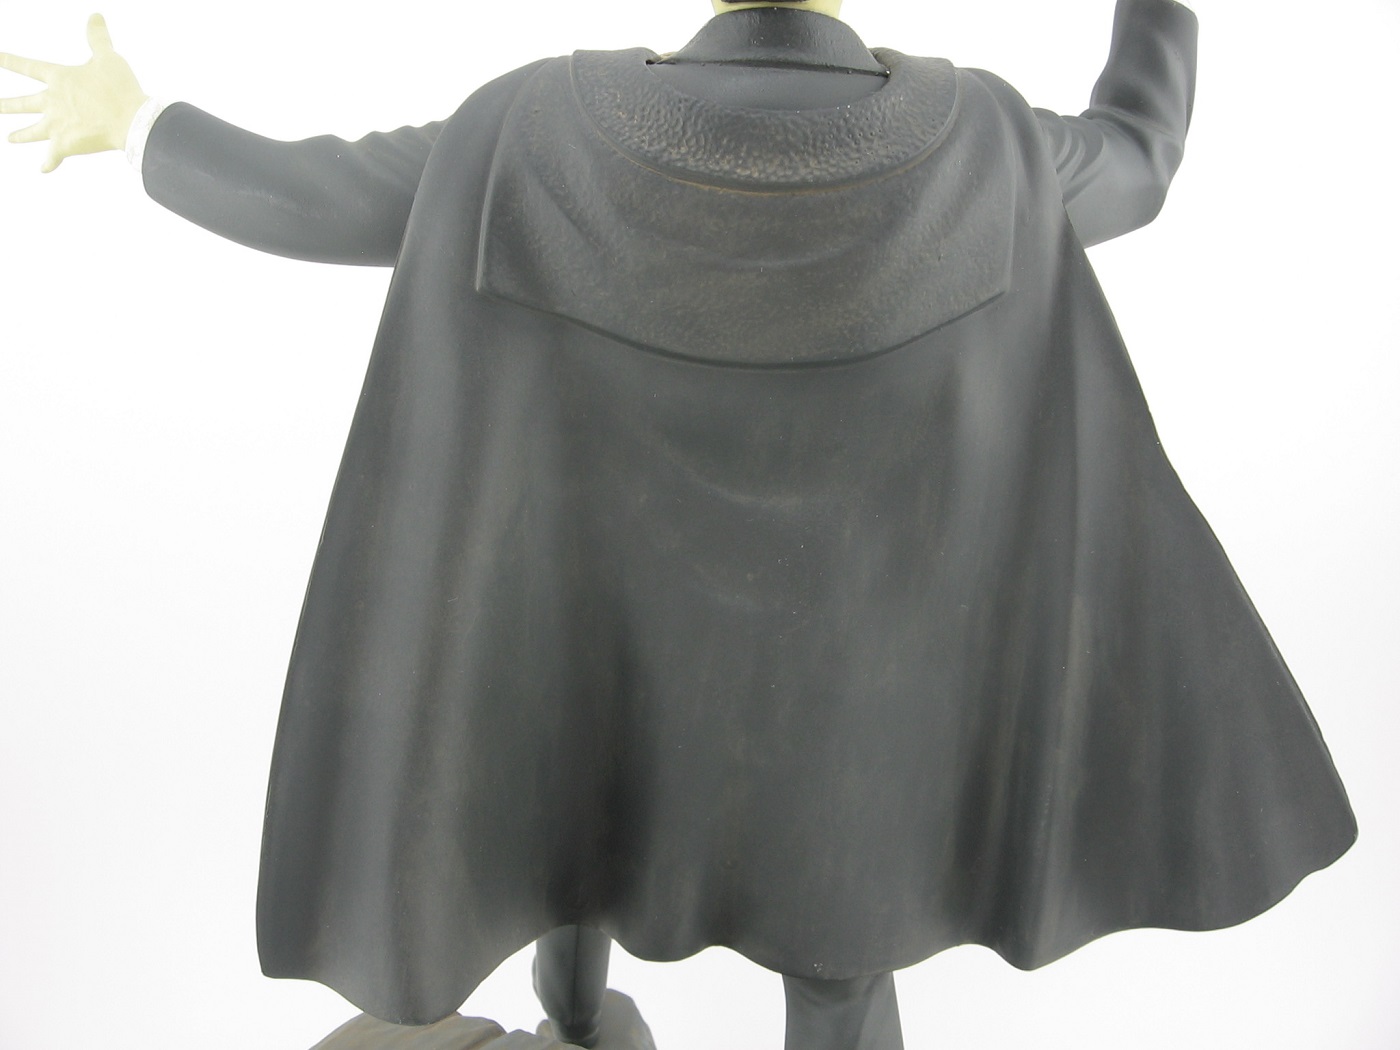
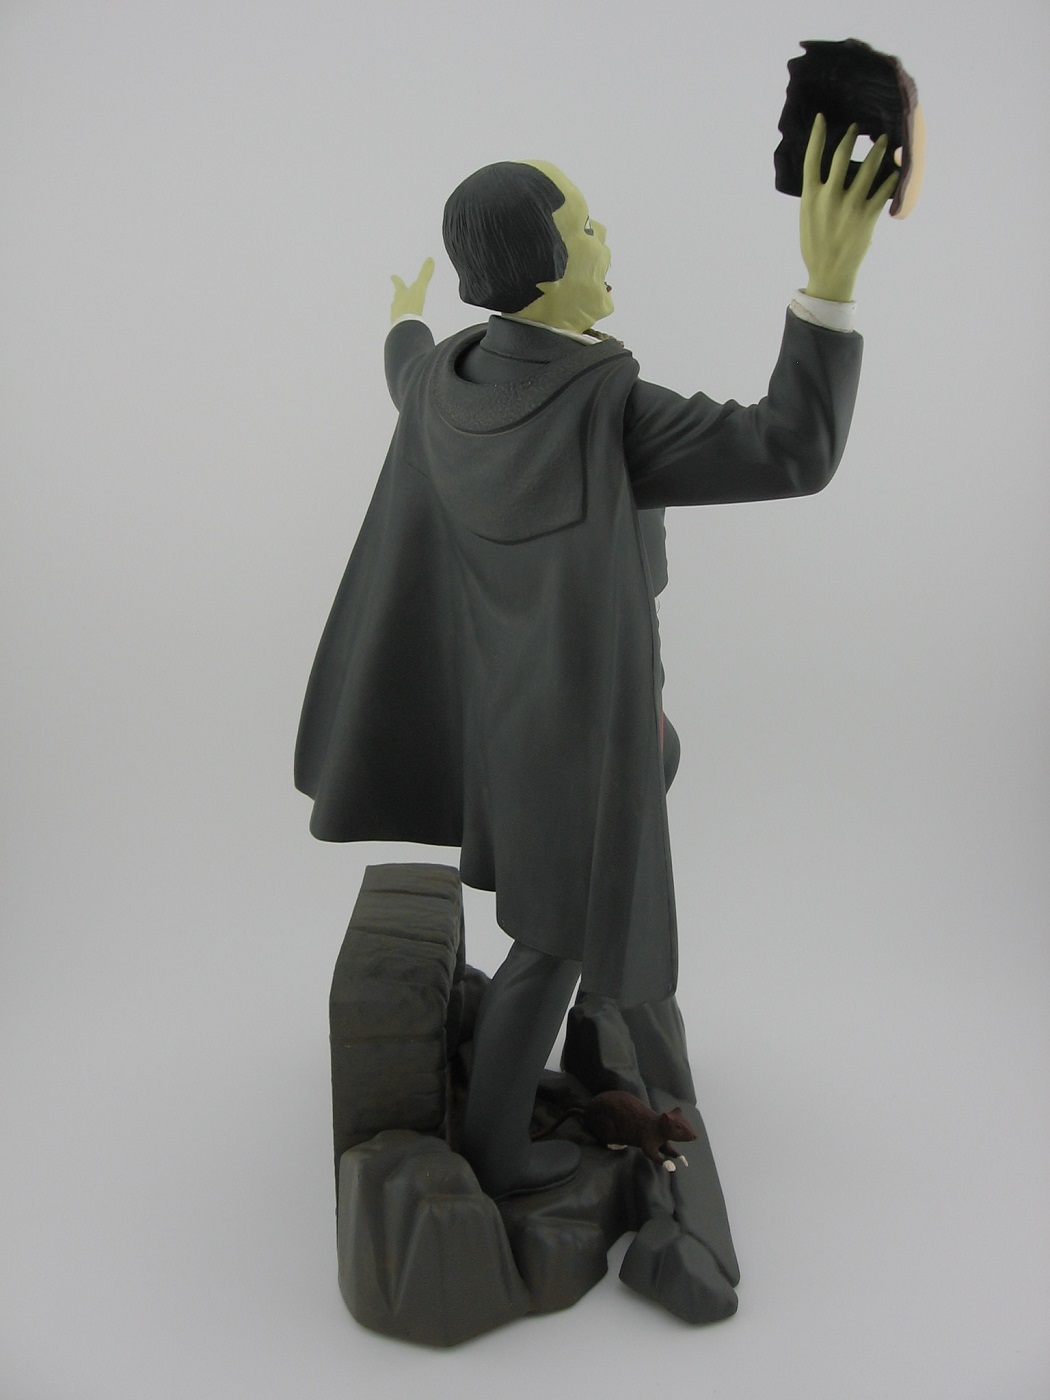
And the weathering of the cape. AK 078 Damp Earth wash used here too. I was pleasantly surprised how this turned out.
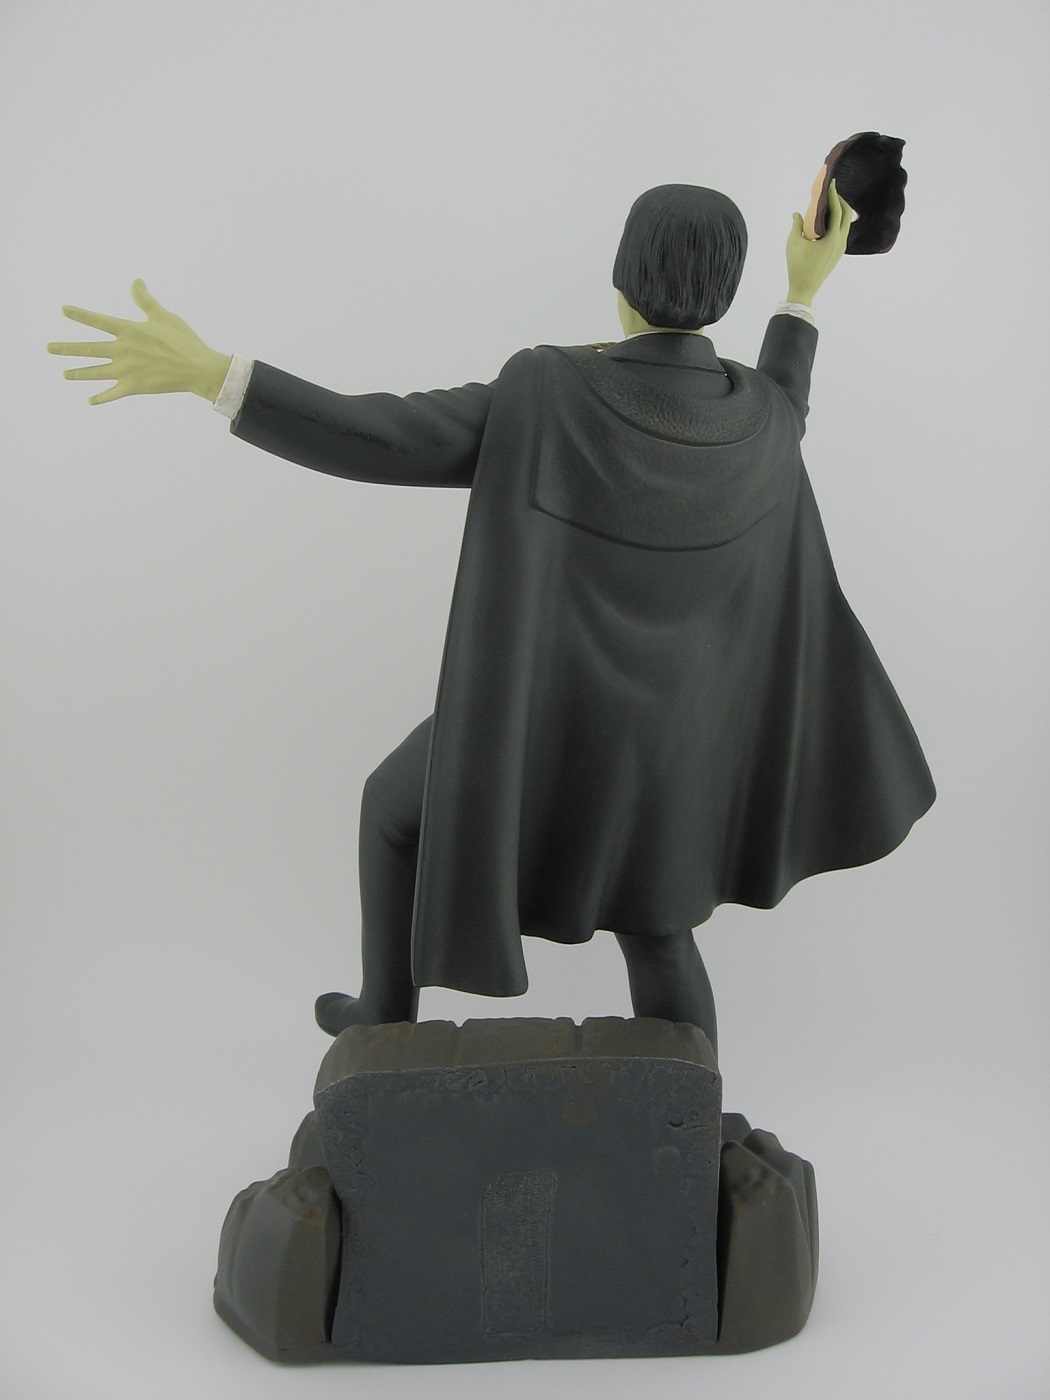
Full rear view.

Full side view, right.

Full side view, left.

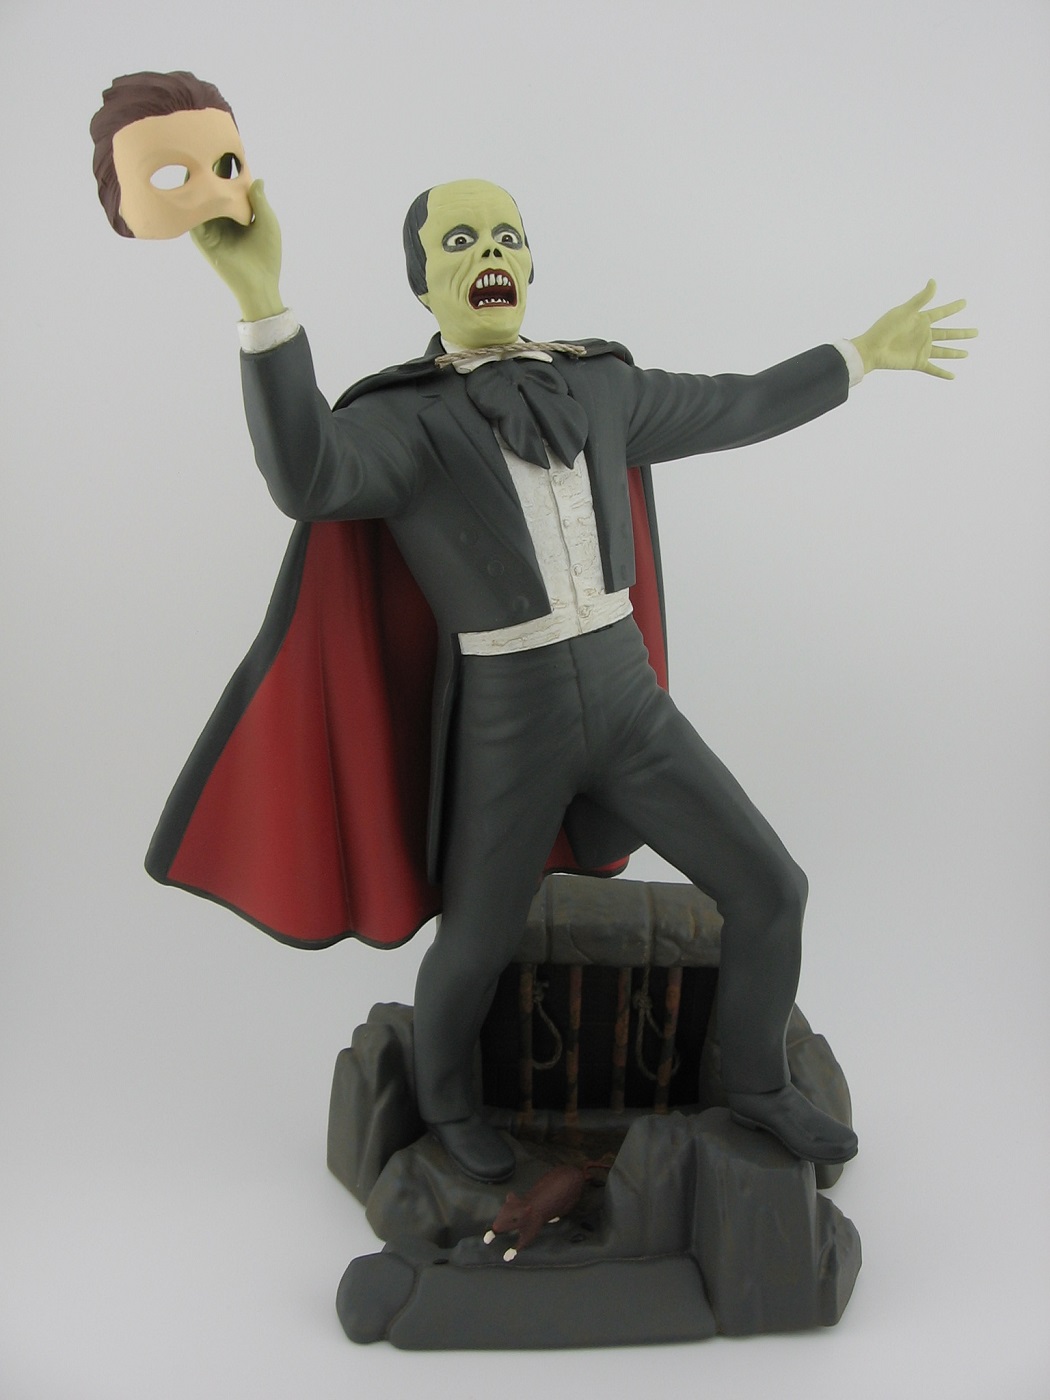
Full front view, angled.

Full front view, straight on.

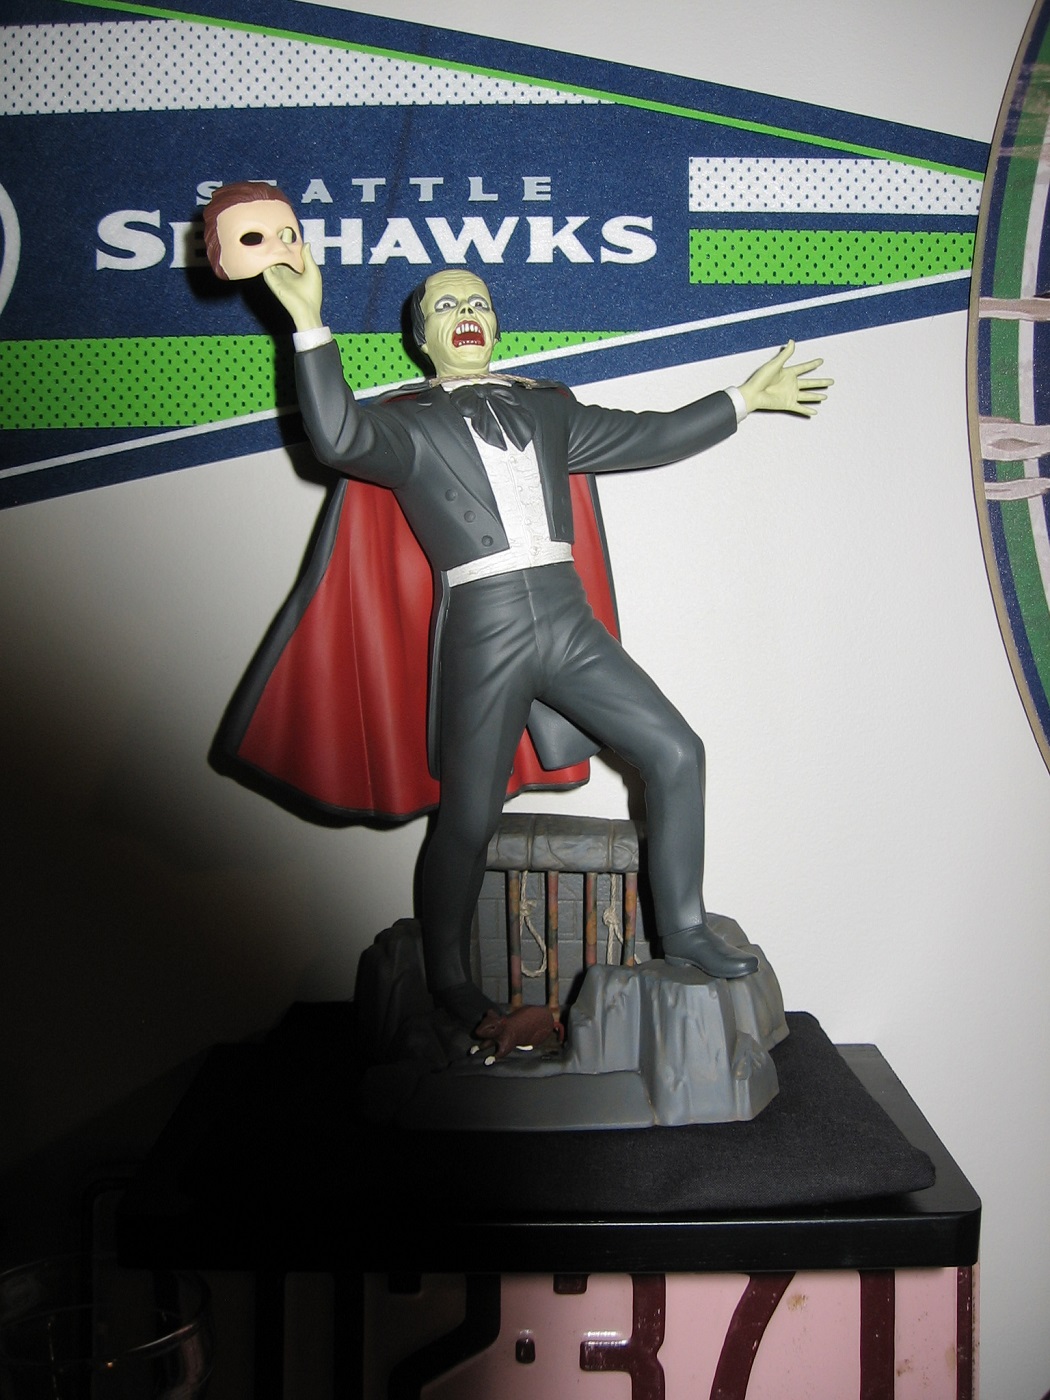
This shot shows the little pillow my wife sewed up for me, for the model to sit on and help disguise the distortions created from my hair dryer faux pas. It just sits better on this too. Not wobbly.

On the floating shelf.

Erik right at home in the Man Cave.

Colors used:

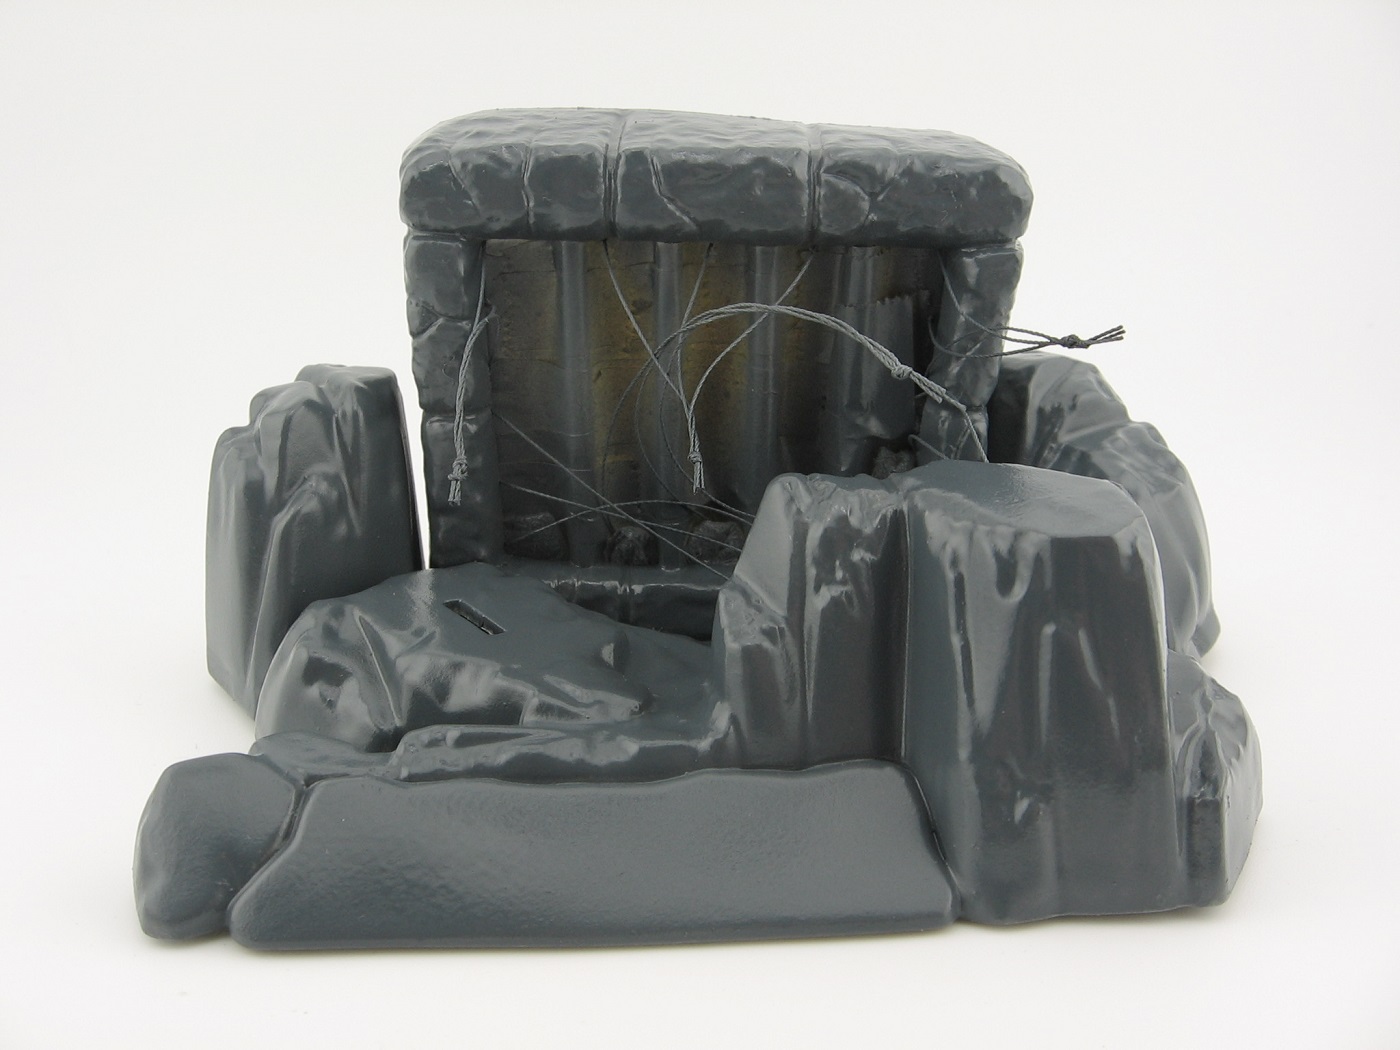
Everything, except the cape tie and nooses, was primed with Vallejo Surface Primer Grey.

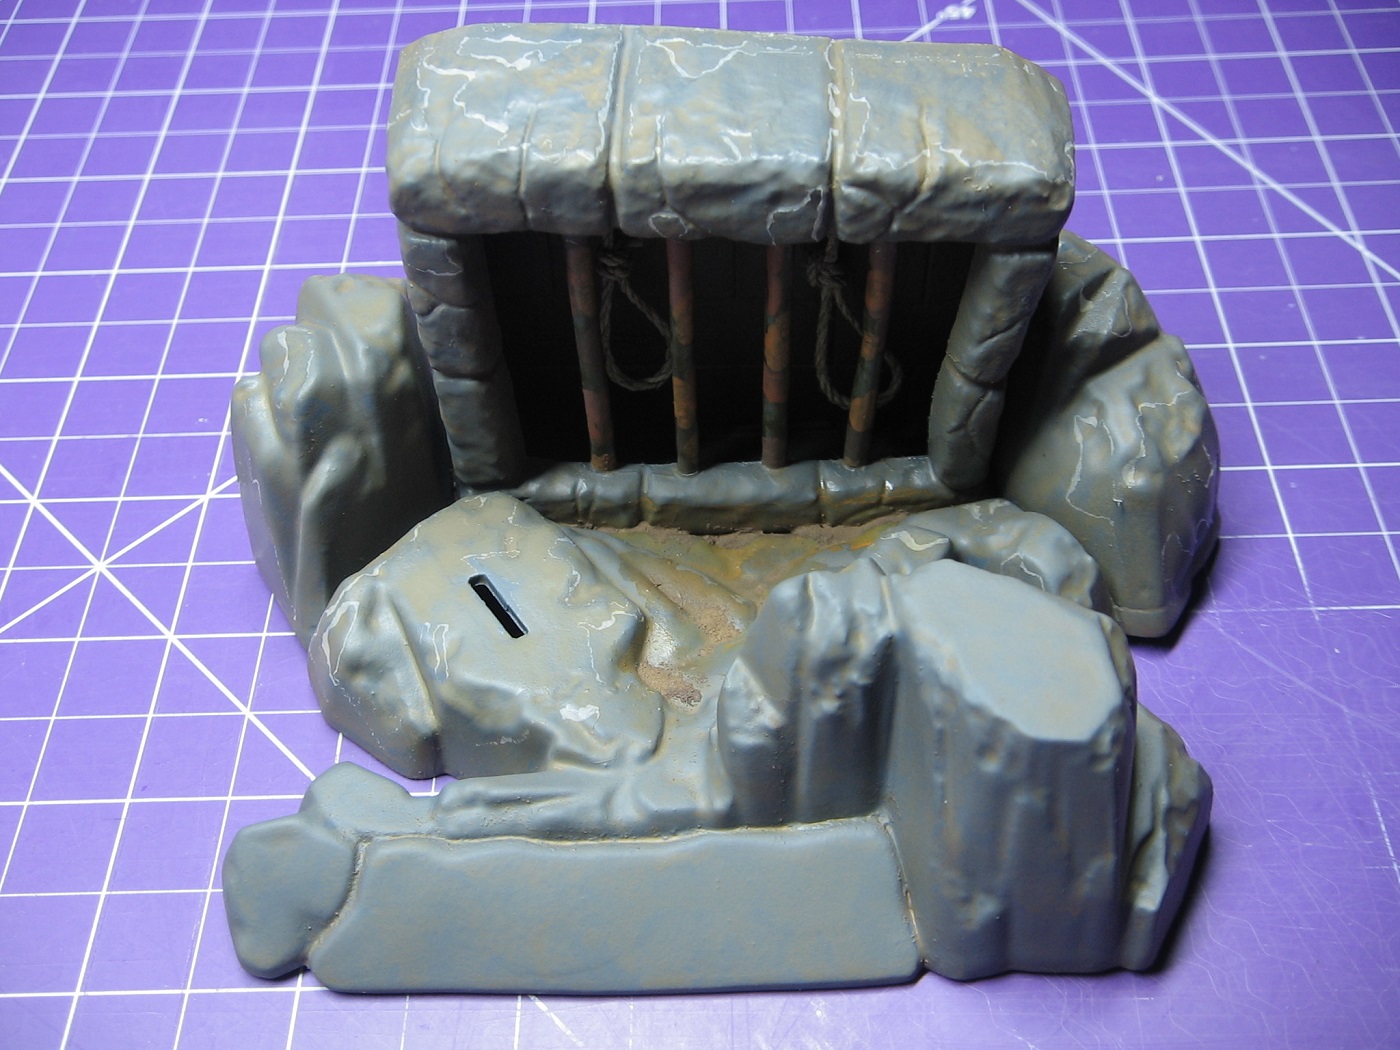
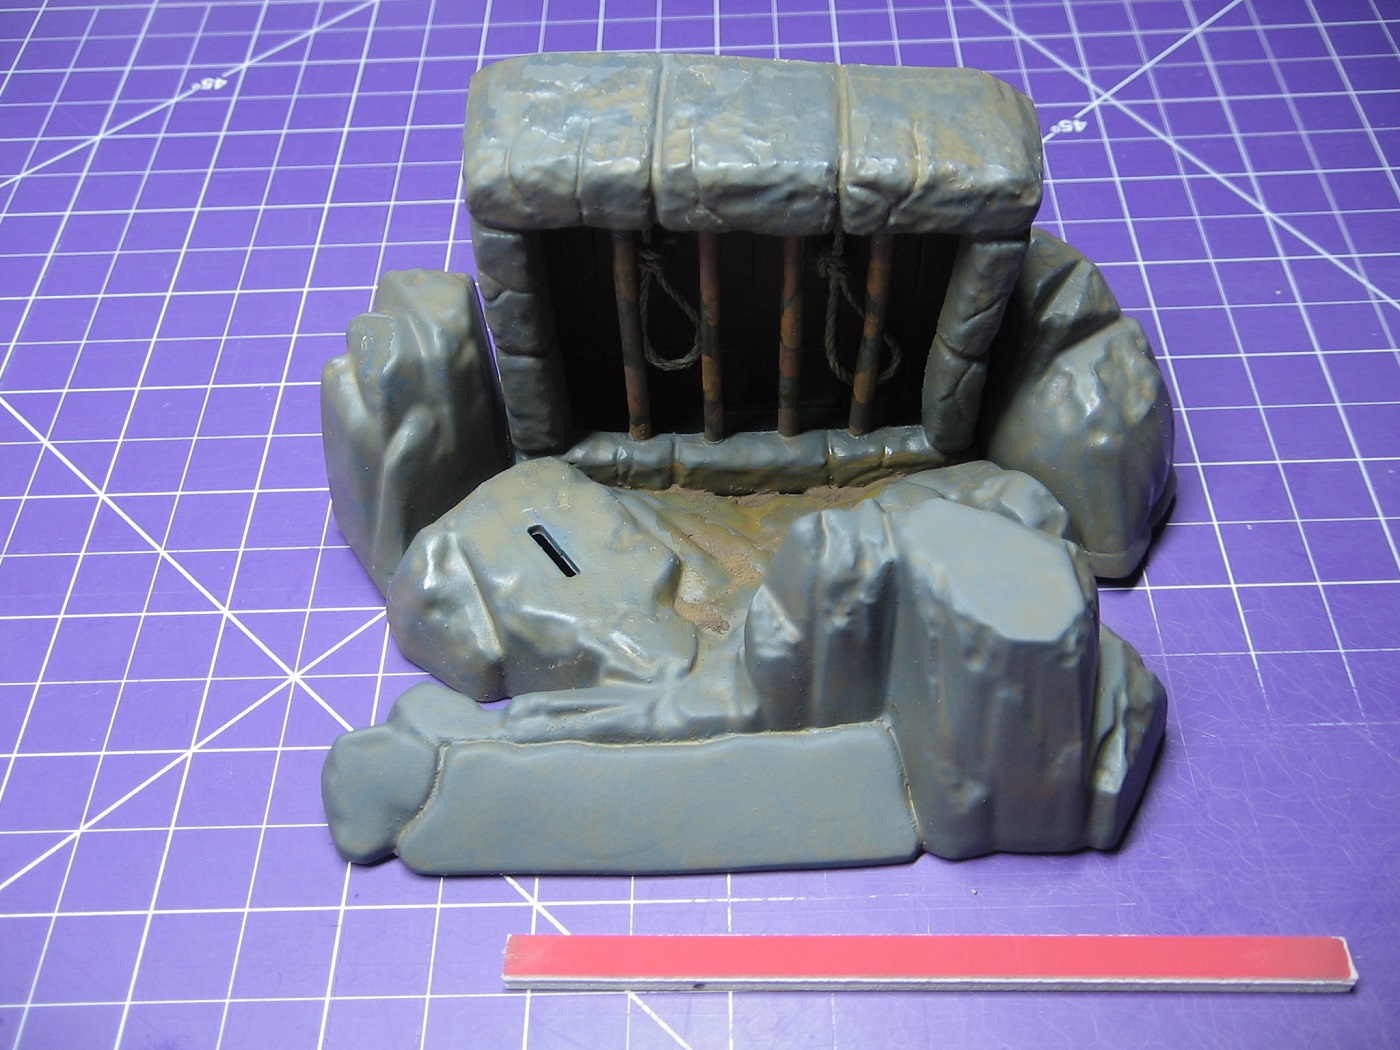
Base and Torture Chamber Back Wall:

  • Vallejo Model Air (VMA) 71.047 Grey
  • AK Interactive 078 Damp Earth Enamel Wash (thinned)

Torture Chamber Bars:

  • VMA 71.047 Grey
  • Vallejo Game Color 73.200 Sepia Wash
  • Vallejo Model Color (VMC) 70.940 Saddle Brown
  • VMC 70.818 Red Leather
  • VMC 70.941 Burnt Umber
  • VMC 70.981 Orange Brown

Face and Hands, (Jaundice effect):

  • VMA 71.106 Ivory (75%)
  • VMC 70.951 White (25%)

Hair:

  • VMA 71.056 Panzer Grey

Eye Whites:

  • VMA 71.106 Ivory (25%)
  • VMC 70.951 White (75%)

Irises:

  • VMC 70.984 Flat Brown

Pupils:

  • VMC 70.950 Flat Black

Eye Catch Lights:

  • VMC 70.951 White

Raccoon Eyes:

  • VMA 71.047 Grey

Teeth:

  • VMA 71.106 Ivory (12.5%)
  • VMC 70.951 White (87.5%)

Teeth Gaps:

  • VMC 70.950 Flat Black

Nostrils:

  • VMC 70.950 Flat Black

Mouth and Lips:

  • VMC 70.982 Cavalry Brown

Shirt (including lapel and cuffs):

  • VMC 70.951 White (75%)
  • VMA 71.119 White Grey (25%)
  • AK 078 Damp Earth Enamel Wash

Suit, Cape (back), Shoes, Cravat:

  • VMA 71.056 Panzer Grey
  • AK 078 Damp Earth Enamel Wash

Cape (inside):

  • VMA 71.003 Red
  • AK 078 Damp Earth Enamel Wash

Mask:

  • VMA 71.076 Skin Tone
  • VMC 70.984 Flat Brown

Rat Fur: VMC 70.984 Flat Brown
Rat Paws: VMC 70.928 Light Flesh
Rat Ears, Tail, Nose: VMC 70.982 Cavalry Brown
Rat Eyes: VMC 70.950 Flat Black
Rat Poop: VMC 70.950 Flat Black

Some final thoughts:

  • If there is anything that I would do differently, that hasn’t already been mentioned, is perhaps the torture chamber bars are a little too busy, with too many colors. I think moving forward with other models, I will tone rust weathering down a bit. Learn to do more with less.
  • I was hoping for the weathering of the suit and inside of the cape to turn out more like how the back of the cape turned out, but I didn’t want to push it. I fully intend to learn dry brushing (I have a plan) and my next monster model (Wolfman) will (hopefully) be dry brushed, not washed.

Thanks, once again, so much. Off to continue my 1/200 Trumpeter Titanic now.

Cheers,
Mark

4 Likes

Very nice finish. I like your added details such as the nooses and rat poops :grin:

1 Like

Congratulations!! An incredible display. You nailed the painting, especially the face.

1 Like