Fab blast curtains Russ!
I can see the details inside, even though that is a dark interior!
Nice ‘scruntch’ ! Very convincing,
Dom
Fab blast curtains Russ!
I can see the details inside, even though that is a dark interior!
Nice ‘scruntch’ ! Very convincing,
Dom
Thanks, Dom! [:D]
Hi, All,
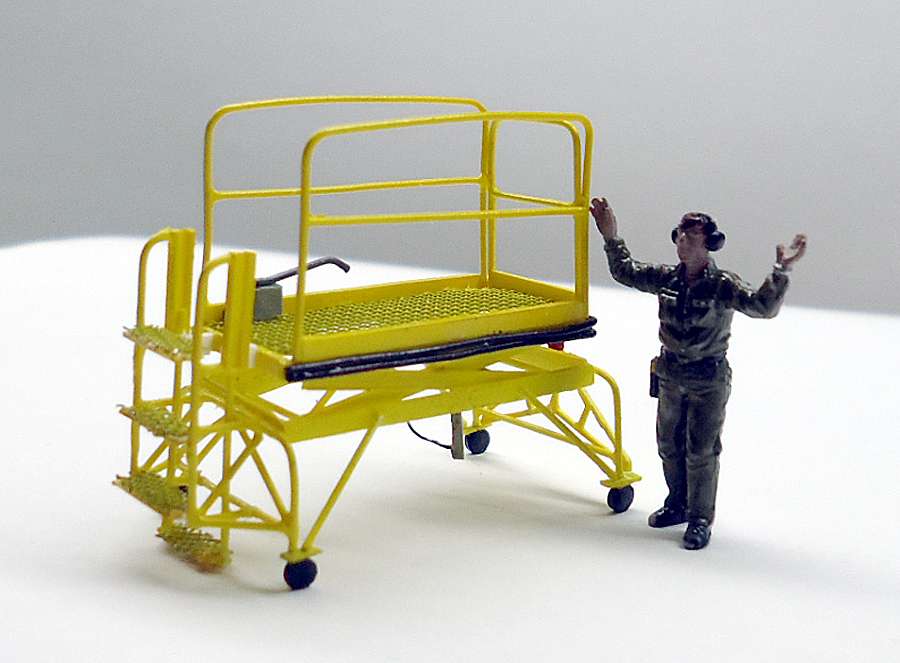
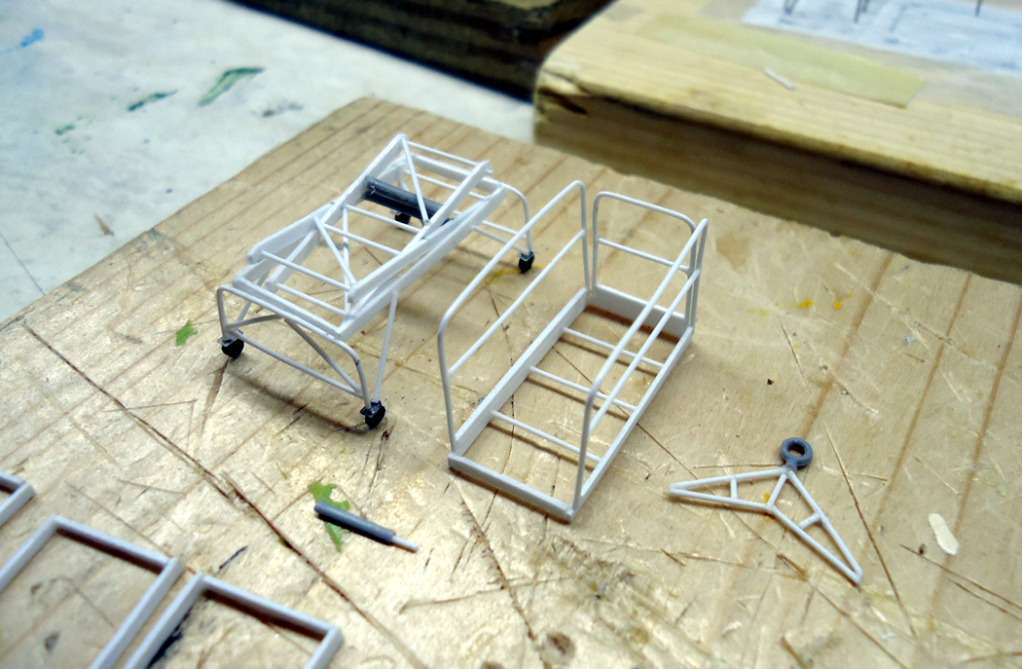
Below is the first of three B-4 maintenance stands I’m building for the maintenance scenarios in my diorama. This one is in the fully retracted position and will be positioned at the 47 Section hatch. The other’s will be at various heights and will be positioned at the chin radome and the display engine. I also plan to build a B-5 stand for the turret maintenance scenario.
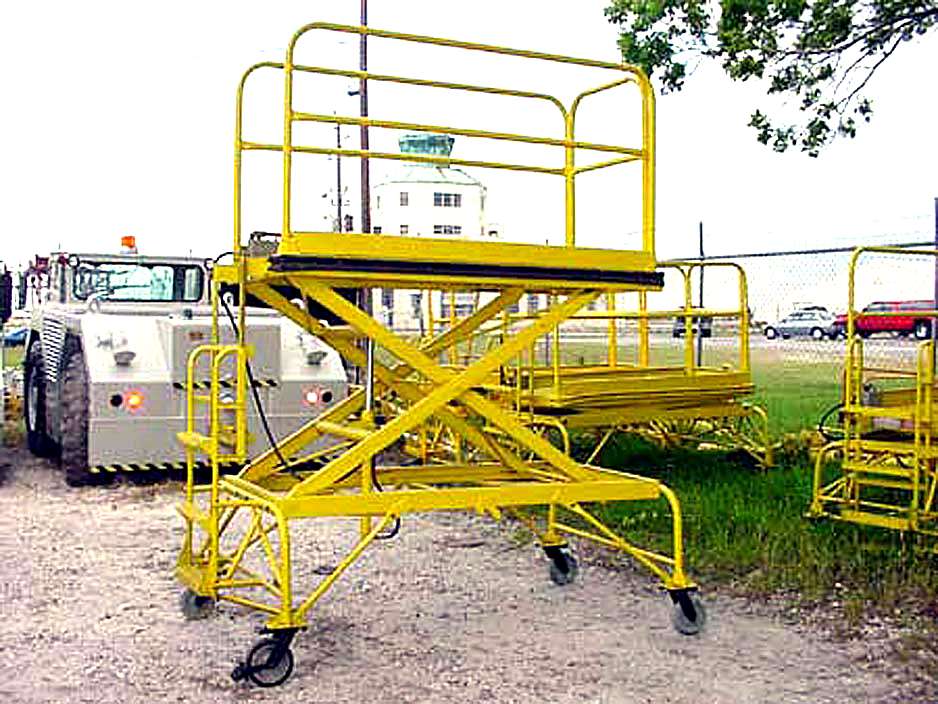
The second picture shows what a real B-4 stand looks like. These stands were really rugged and used everywhere, and are still in use today. I wouldn’t be surprised if there is a B-4 stand somewhere that has been in service since before the B-52s rolled off the assembly line [:D].
Cheers, and have a Happy Holiday!
Russ


Some more stunning work. I wasn’t even aware of those blast curtains. I am guessing they were to protect the crew when dropping nuclear weapons. Where they still fitted to the aircraft in Vietnam?
Thanks, Bish. Yes, the curtains were used to shield against nuclear flash and were still installed even in Viet Nam. Remember, this was still the cold war era and the B-52s were really on loan to the SEA theater, so they had to maintain what nuclear capability they still had.
Makes sense. Thanks for all the info. This is going to come in very useful at some point in the future. A really great build to follow.
Russ:
Great work, you sure you don’t want to “kit” those and sell them…lol…
Lol! Thanks, Dom! Interesting thought but that sounds too much like work - and I’m retired [:D]
Russ
My pleasure, Bish. And thanks for the good words.
Well Russ, I sure am disappointed man.
We was’ hopin’ you would just keep going,
and build a huge multi-scale AFB so we-all could populate it
with all kinds of BUFF’s, Thuds, F-111’s…lol…
I guess we’ll just have to look at your incredible work…[:P]
and wonder what might have been…[whstl][t$t]
Dom
Ahh no my friend, the wife would never forgive me lol [:D]. But thanks for the good words!
Russ
Hmmmm… That does give an idea though…
If you are really feeling froggy, you could build a giant display with several aircraft of this caliber and donate to a museum. I bet the AF museum in Dayton, or the former SAC museum in Omaha, etc would LOVE something like this!
Lol, I don’t know if I’d ever feel that froggy, sub. I’m already having to build the base for this one in the garage because it won’t fit through the door of my house! [:D].
Thats one reason i never got to finish my first BUFF, no where to put the Dio. I did see one years ago where the guy could split the board in half so he could take it to shows and stuff. As soon as i get some room, i am going to get mine done as well. But really glad i didn’t do it years ago or i would have missed these great ideas.
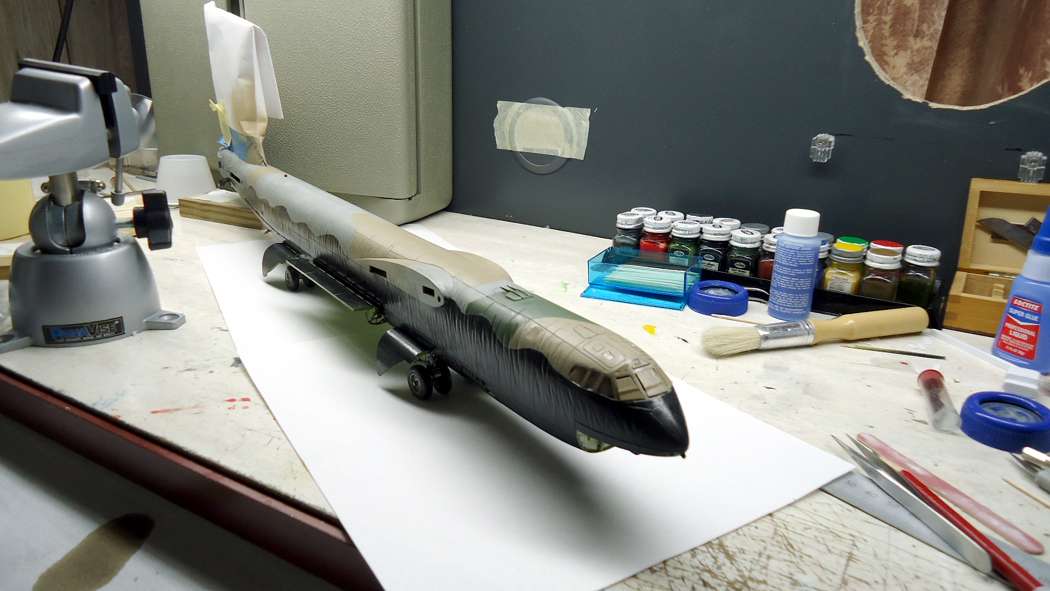
Well, I took the plunge and did the first stage painting of the fuselage. Since I like to have my tires flattened, I didn’t glue the wheels on. I built up the axels with super glue then sanded them so the wheels fit snuggly but still rotate. That way, I can be sure all of the tires are “flat” on the surface [:D].
Cheers,
Russ


Nice work once again Russ! You are to the point now you can see the light at the end of the tunnel. I can’t wait to see this when you put it all together!
Ken
Thanks, Ken! I’m as anxious as you are [:D].
Russ
Inserted 9/12/19
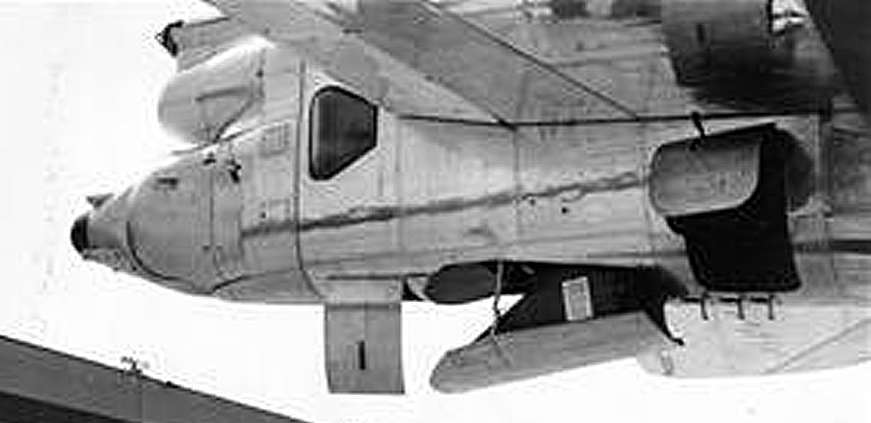
The B-52’s massive wings were so far forward and had so much lift that the plane could not reduce landing speed by flaring like most aircraft. A drag chute was needed to slow it down enough so the brakes could be used without burning them up. The drag chute on the D-model was stored in a compartment in the bottom of the tail section, just forward of the gun turret, as show below. The drag chute tray was almost always extended while the aircraft was being turned around for it’s next mission.
Determine how you are going to install the tray in the fuselage as this will determine the total height of the side and end panels. The simplest way is to glue one or more strips cross-wise up inside the fuselage and attach the tray to them.
The drag chute tray door is already outlined on the model. Correct any distortions in the outline and cut out the door.
The cut out door is 2 mm thick, which is too thick for the tray door so you will need to use it as a template and make a new door out of 0.5 mm thick sheet stock.
Once the new door is cut out, bend it slightly to conform to the curvature of the bottom of the fuselage.
Determine the length of the side and end panels so that the sharp angle in the front of the side panels will be about even with the door opening when the tray is installed, then cut out the side and end panels according to the dimensions below.
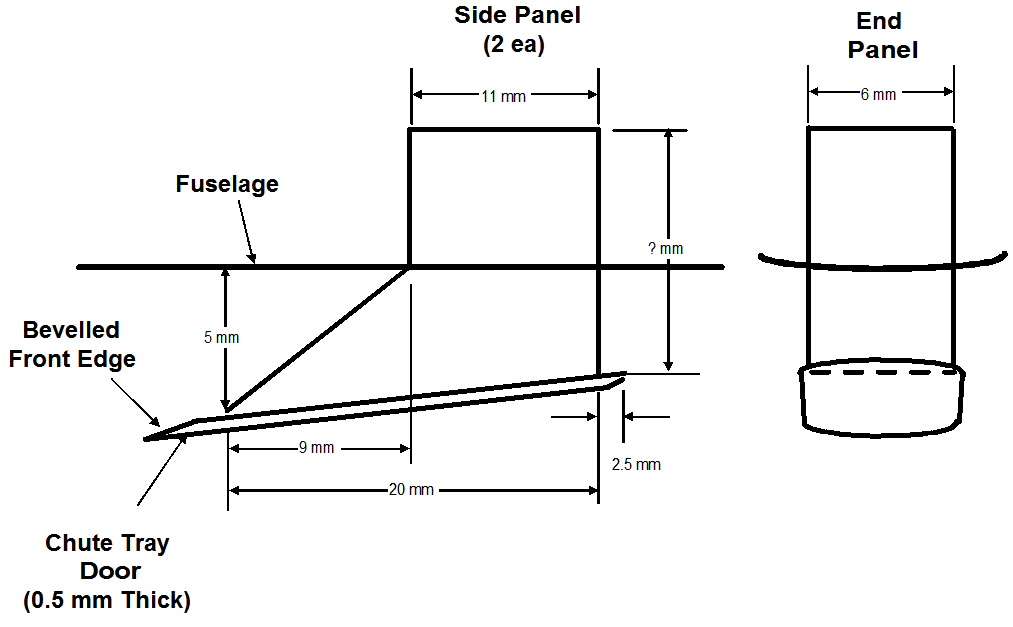
Glue the end panel to the inside edges of the side panels.
Glue the assembled panels to the inside of the tray door according to the dimensions shown above.
Paint the side and end panels and the inside of the tray door green zinc chromate or olive drab.
Glue the assembled tray up inside the fuselage.
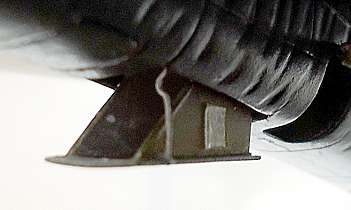
Construct the actuator arm from 0.5 mm/.020" plastic rod (Plastruct #90720) or equivalent as shown in the photo below. NOTE: The total length of the actuator arm will depend on the height of your side and end panels. The arm had a half-moon shaped kink in it near the door opening. Glue the long end of the arm to the door outside the side panel and the other end to the edge of the door opening.
There was also a placard on the right side panel which probably contained safety instructions. You can replicate it as I did with a thin piece of paper cut 3 mm x 4 mm.
Construct the actuator arm from 0.5 mm/.020" plastic rod (Plastruct #90720) or equivalent as shown in the photo below. NOTE: The total length of the actuator arm will depend on the height of your side and end panels. The arm had a half-moon shaped kink in it near the door opening. Glue the long end of the arm to the door outside the side panel and the other to the edge of the door opening.
There was also a placard on the right side panel which probably contained safety instructions. You can replicate it as I did with a thin piece of paper cut 3 mm x 4 mm.
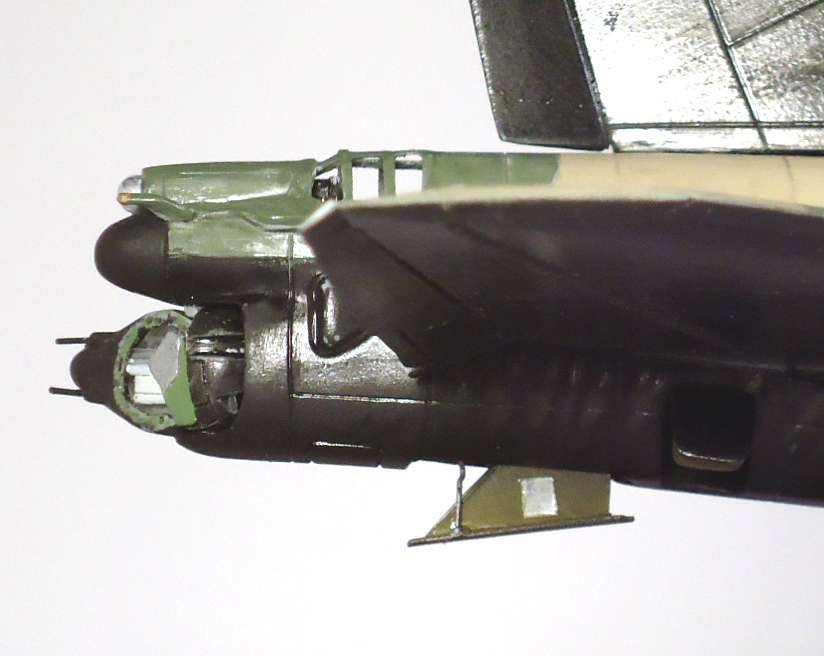
Paint the outside of the chute compartment door to match the underside of the aircraft. The finished chute tray is shown below.
Russ,
When I was a volunteer at the Pima Air and Space Museum in Tucson, AZ, I took pictures of their B-52D ‘Lone Star Lady’ without her under-nose radome (it was removed for repairs). Could you use the pictures? The radar dish was removed, but the surrounding structures and details are still there. How can I forward them onto you if you want them?
-Beau
Hi, Beau. That would be great! Please post them here if you can - I’m sure others would be interested in them too.
Many thanks!
Russ
Hi, All,
Hope you’re all having a great Christmas Day. I know I should be letting model building alone today but… I just had to finish this B-4 maintenance stand. So here it is [:D].
Cheers,
Russ