To distract myself from the Pagani fiasco… figured I should get somewhere…
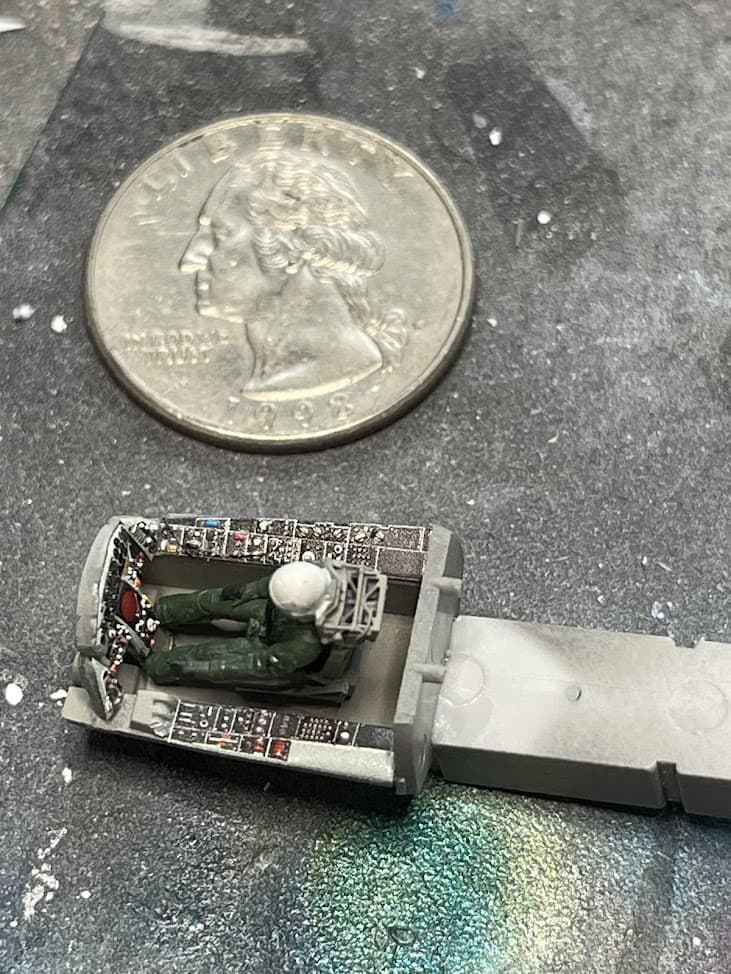
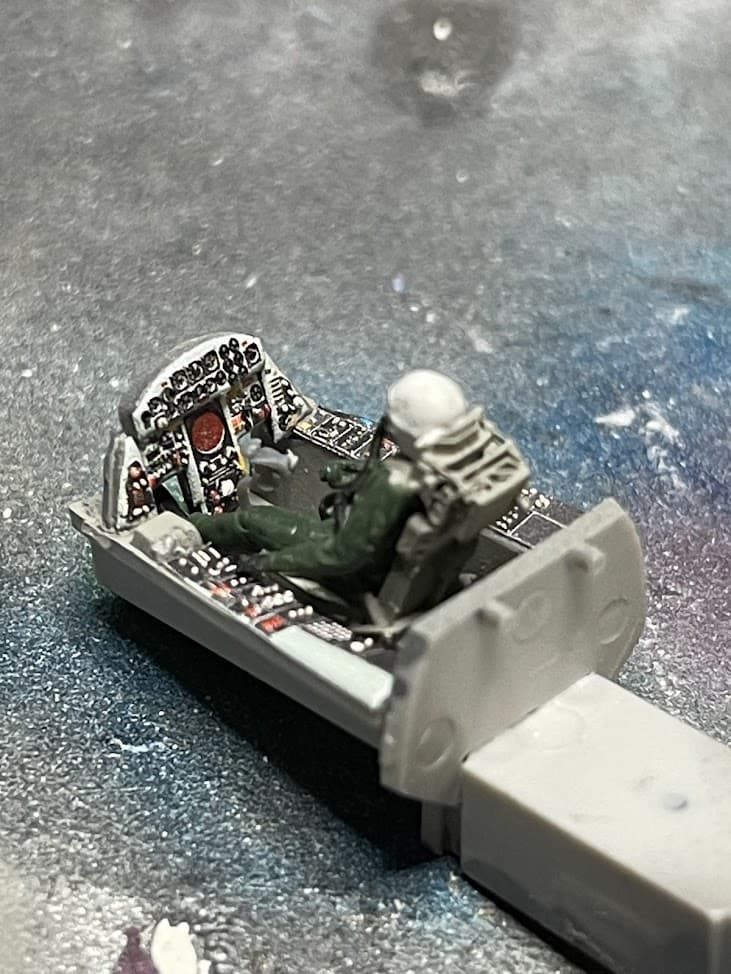
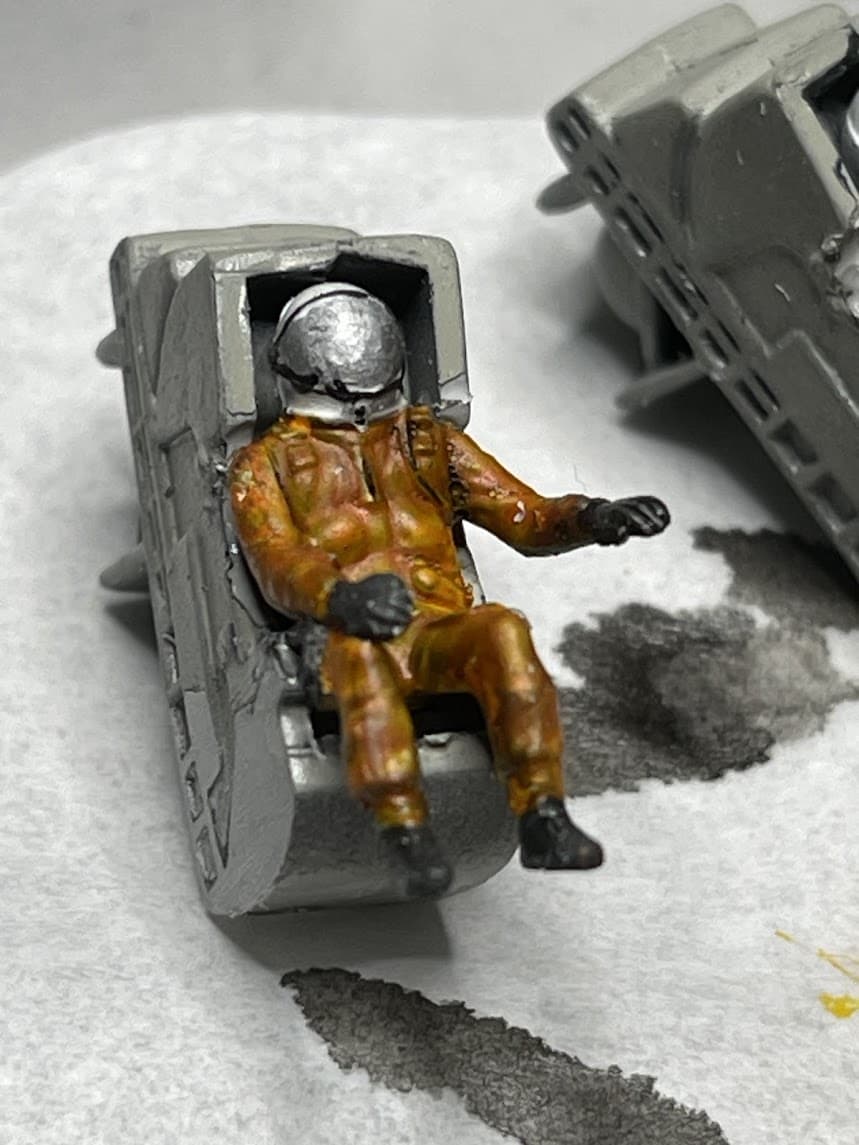
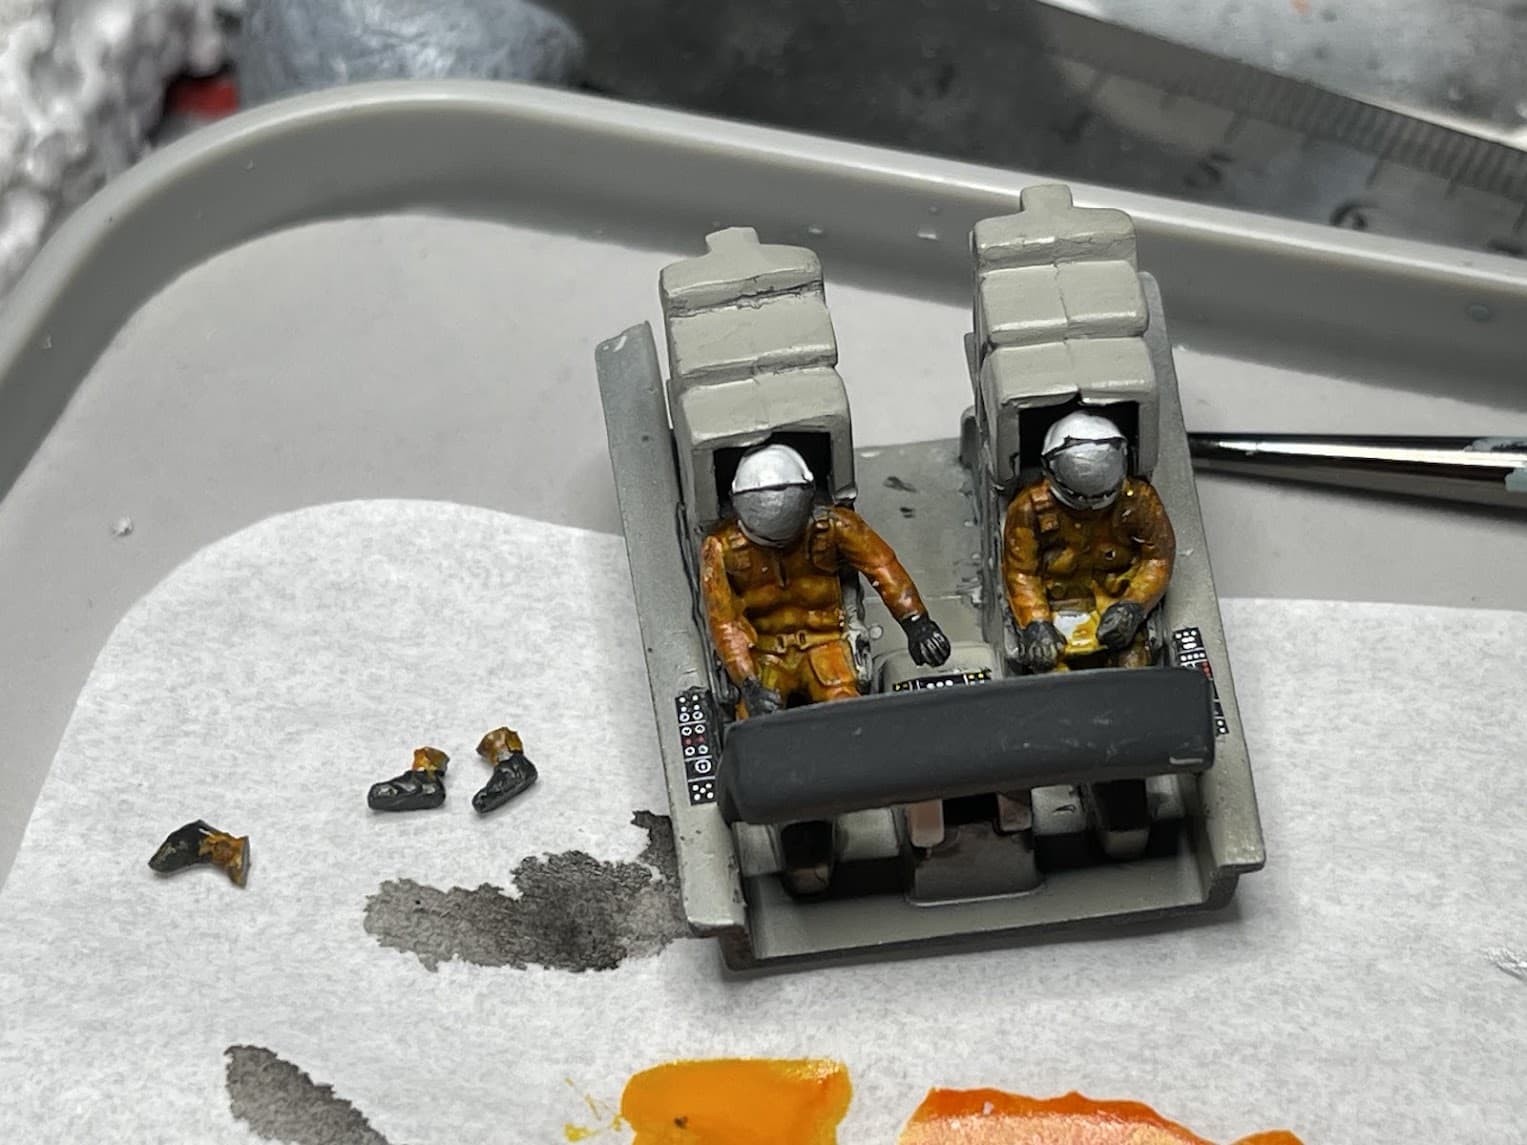
Starting with the pilots I snagged from another kit I was using for parts
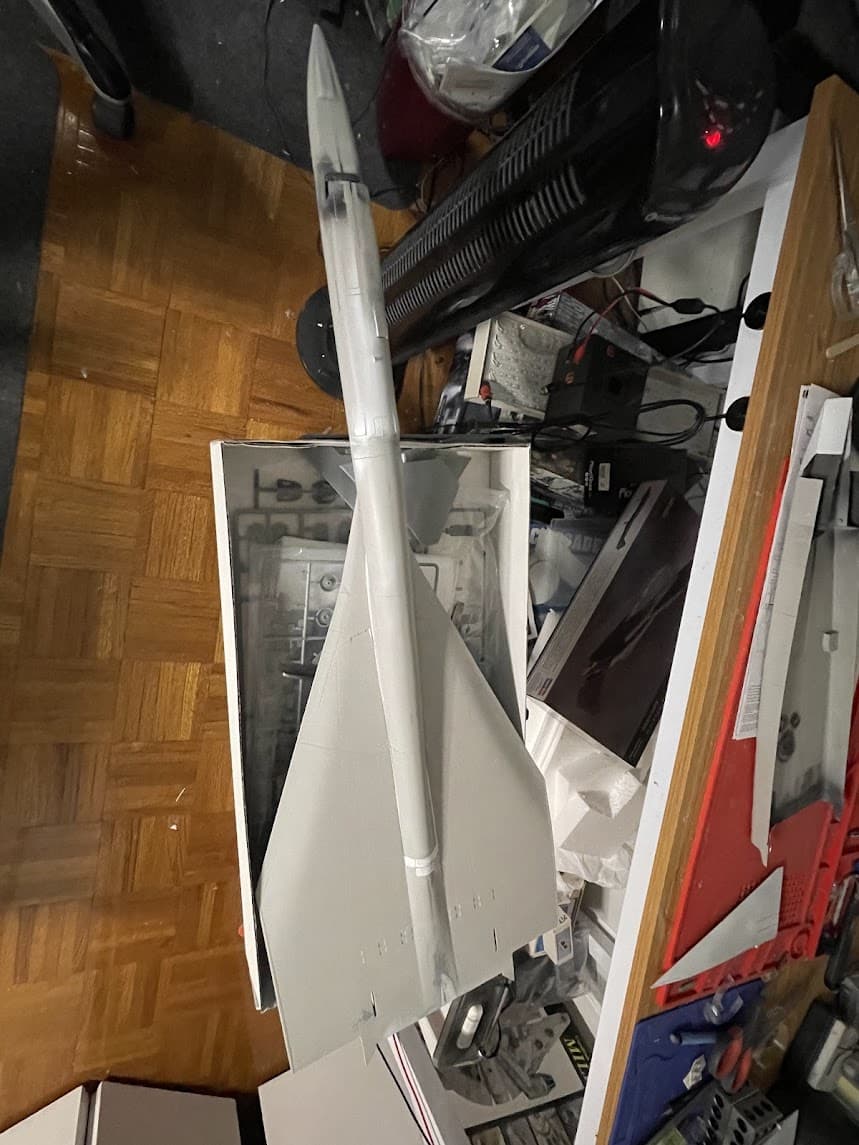
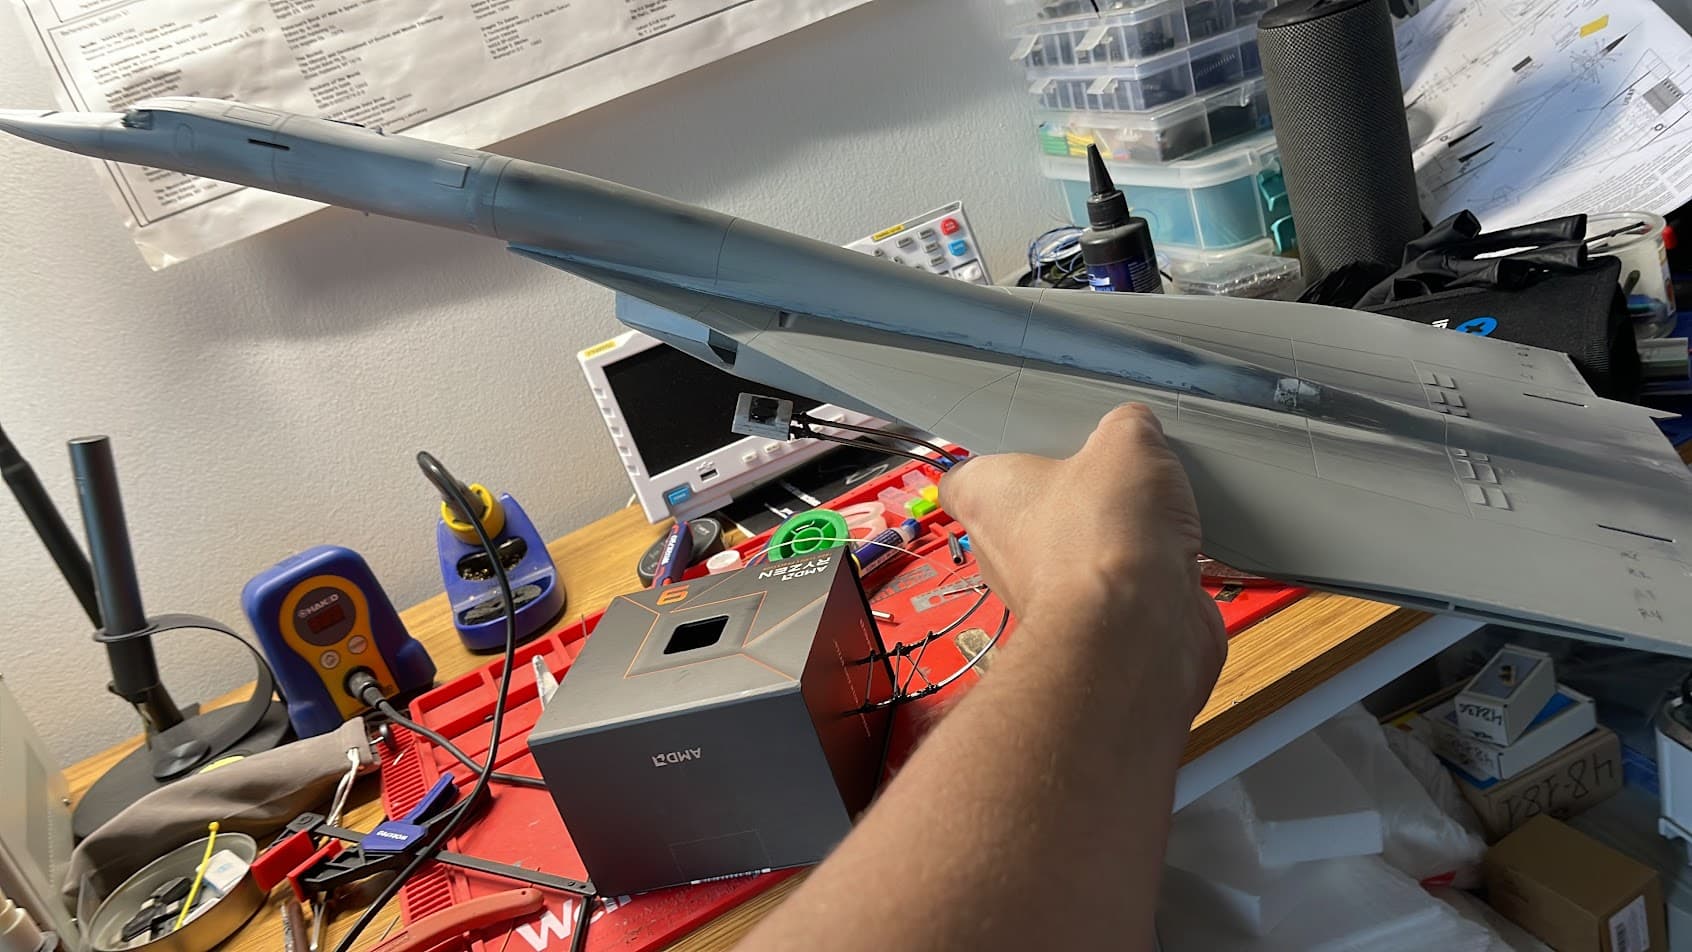
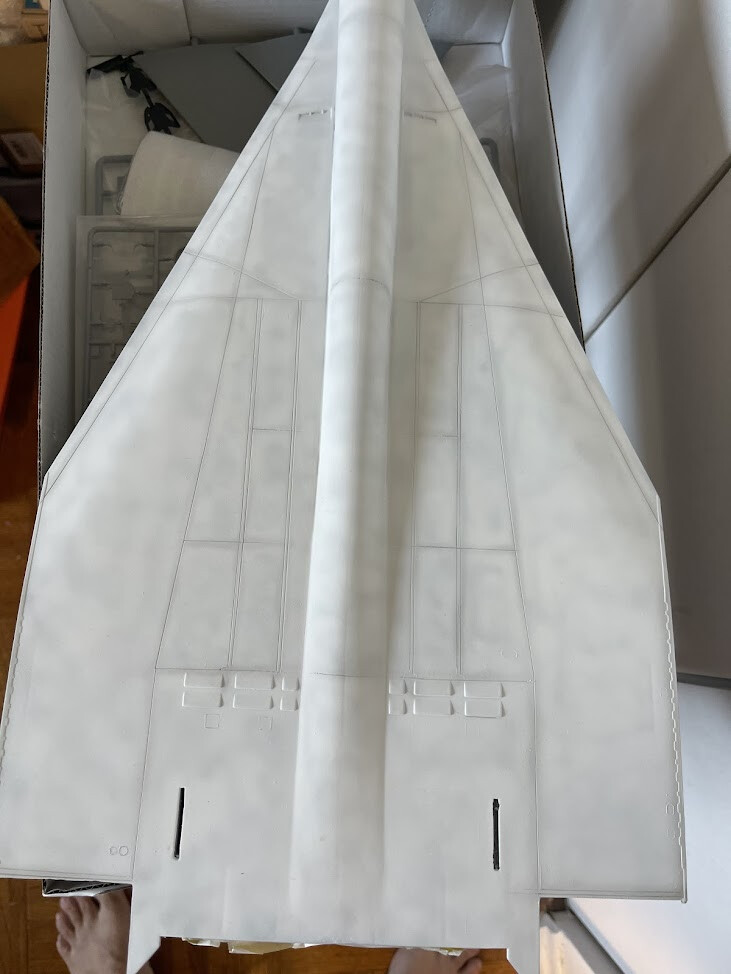
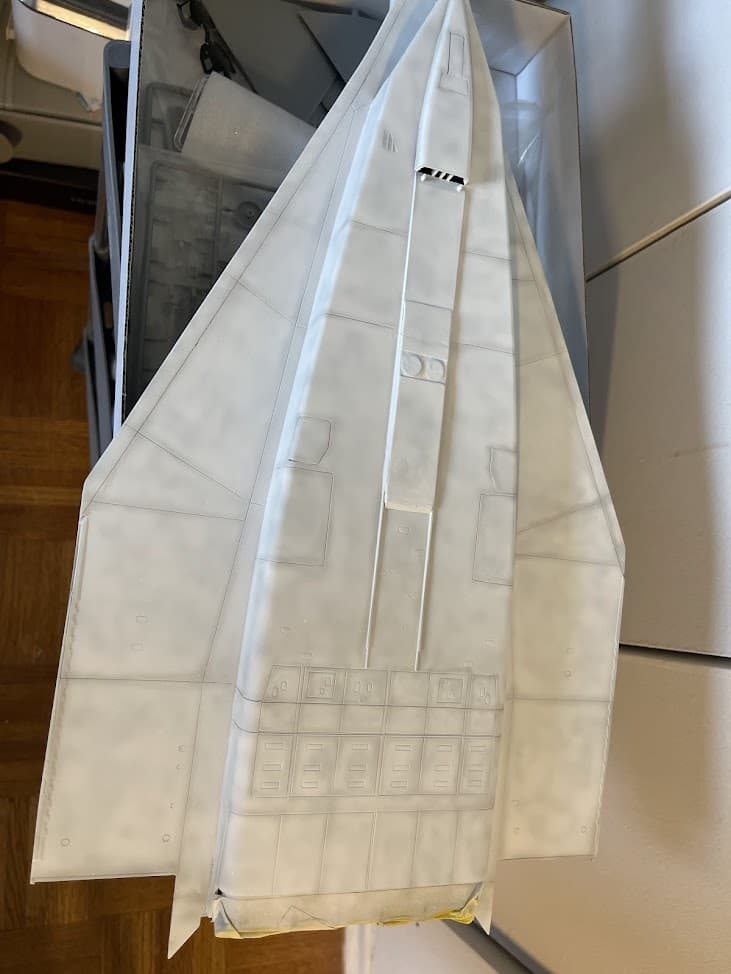
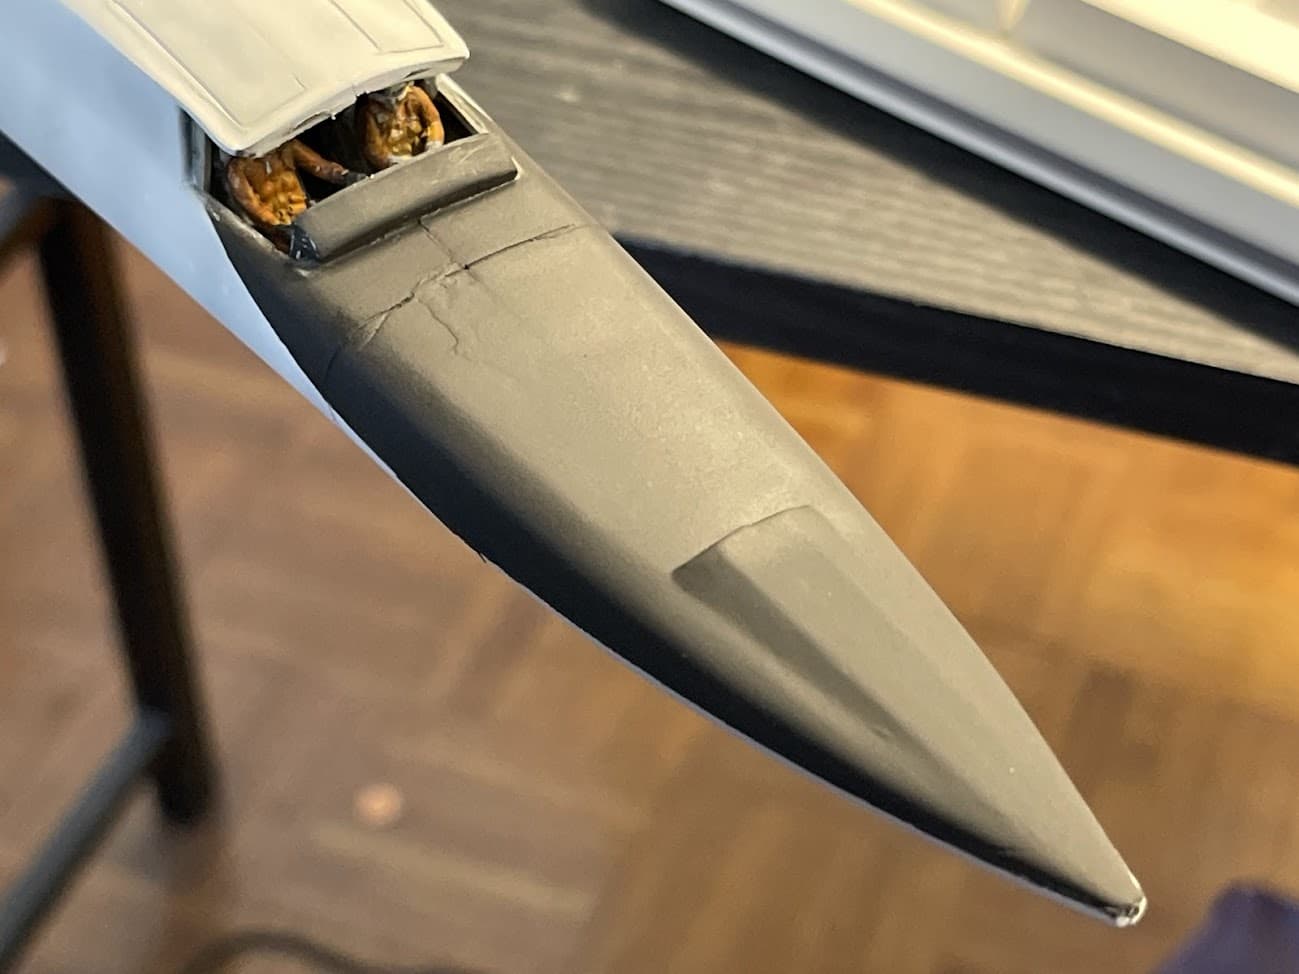
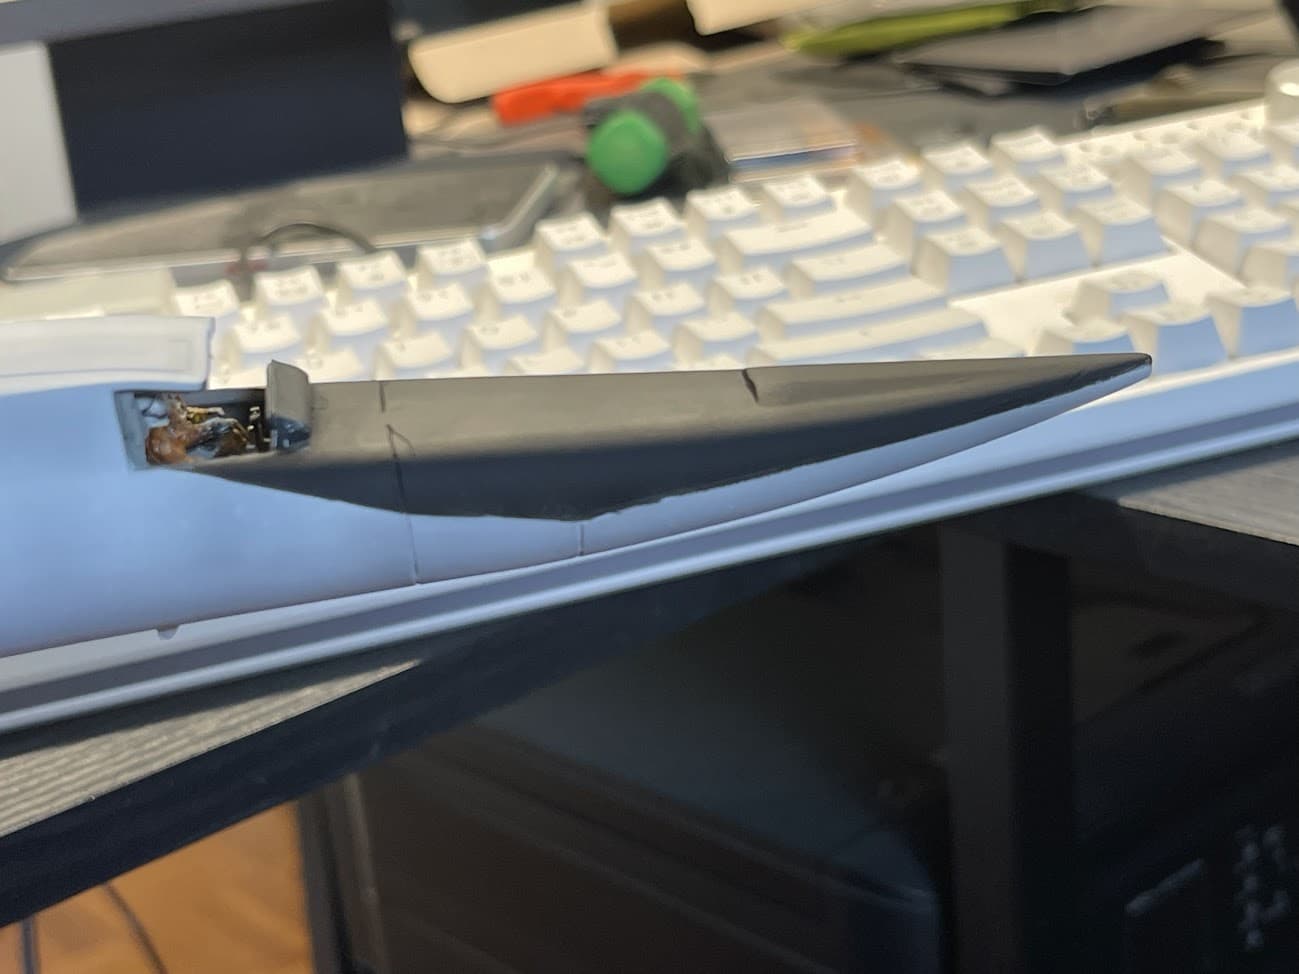
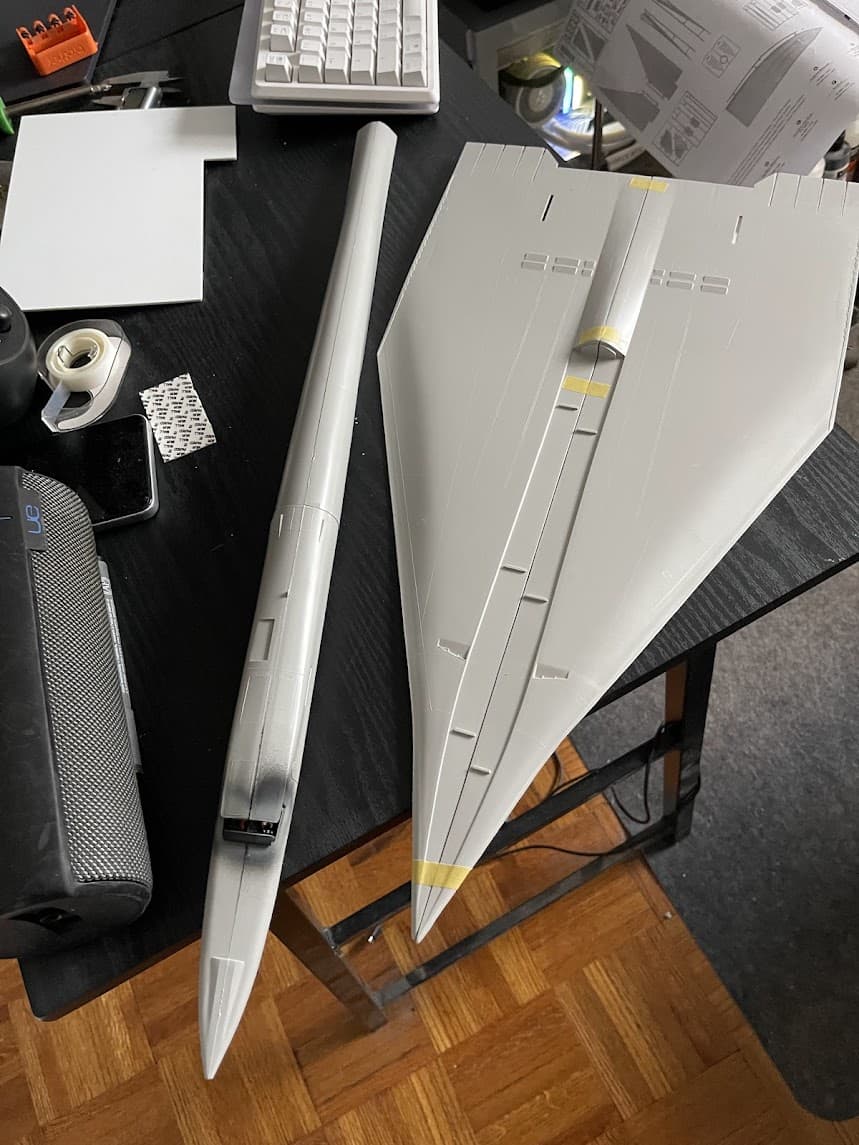
This thing is huge, trying a test fit
Clearly not the greatest fit
To distract myself from the Pagani fiasco… figured I should get somewhere…
Starting with the pilots I snagged from another kit I was using for parts
This thing is huge, trying a test fit
Clearly not the greatest fit
Cockpit looks great, but I see much putty and sanding in your future! It’s a shame the fit of the kit isn’t engineered better. I’m certain you’ll overcome the challenge!
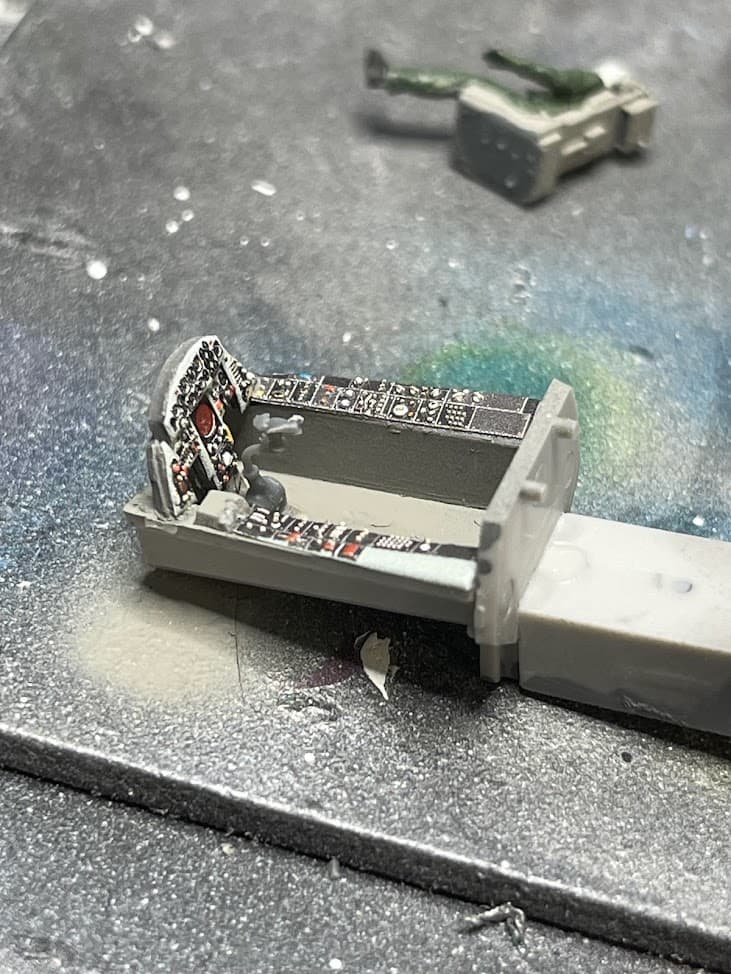
Yeah the I’ve been doing lots of sanding. Sigh, whoever designed the mold or however that was done was pretty sloppy.
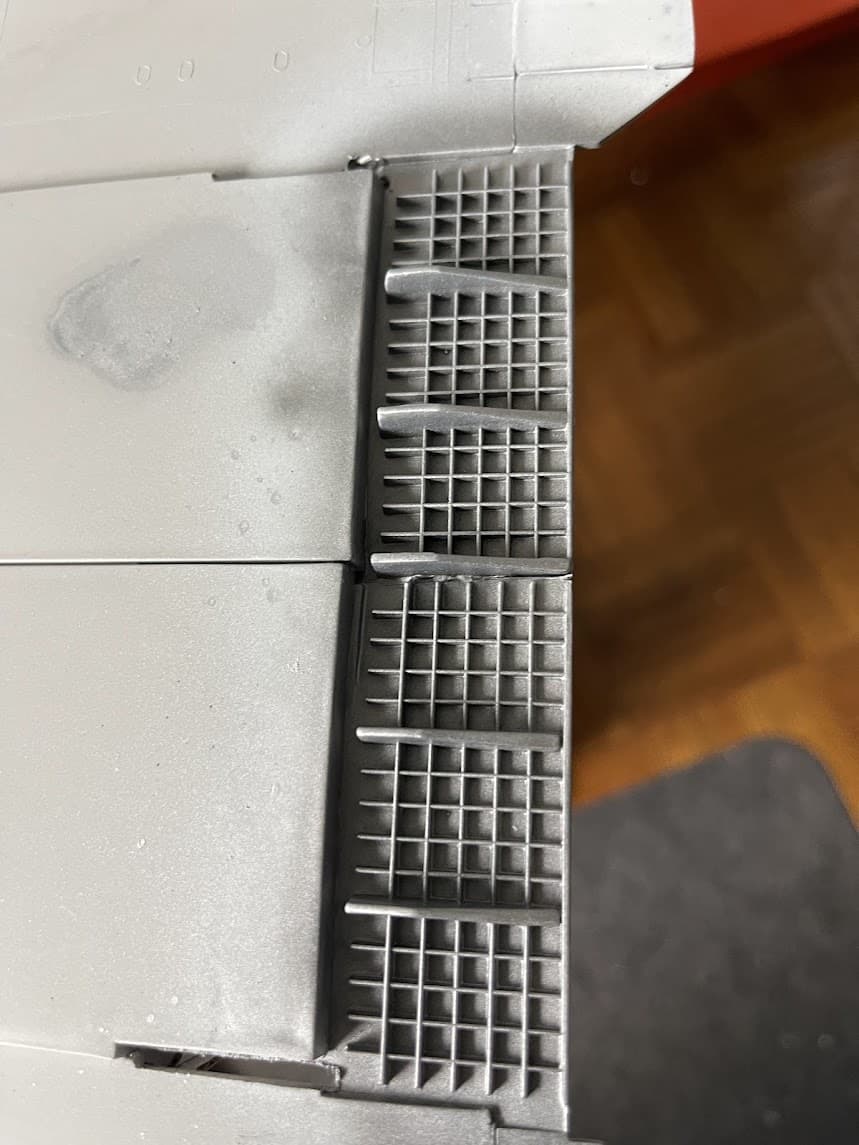
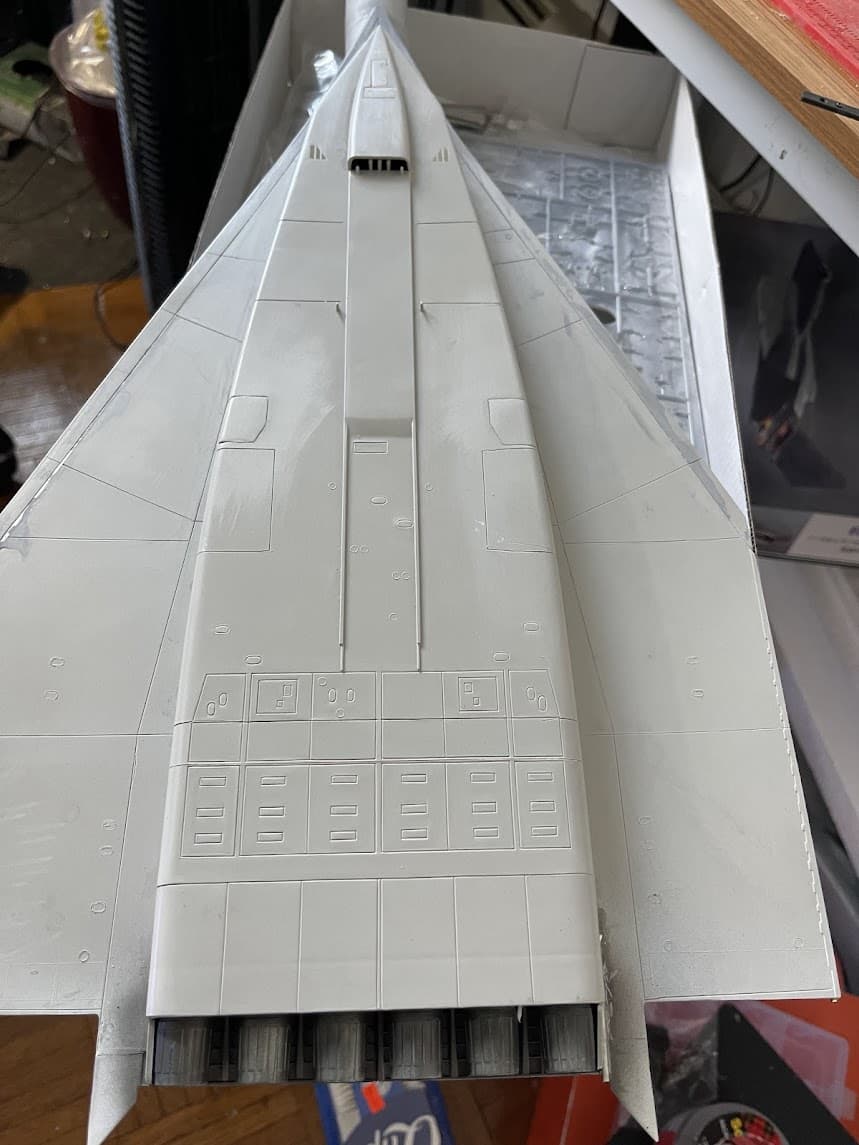
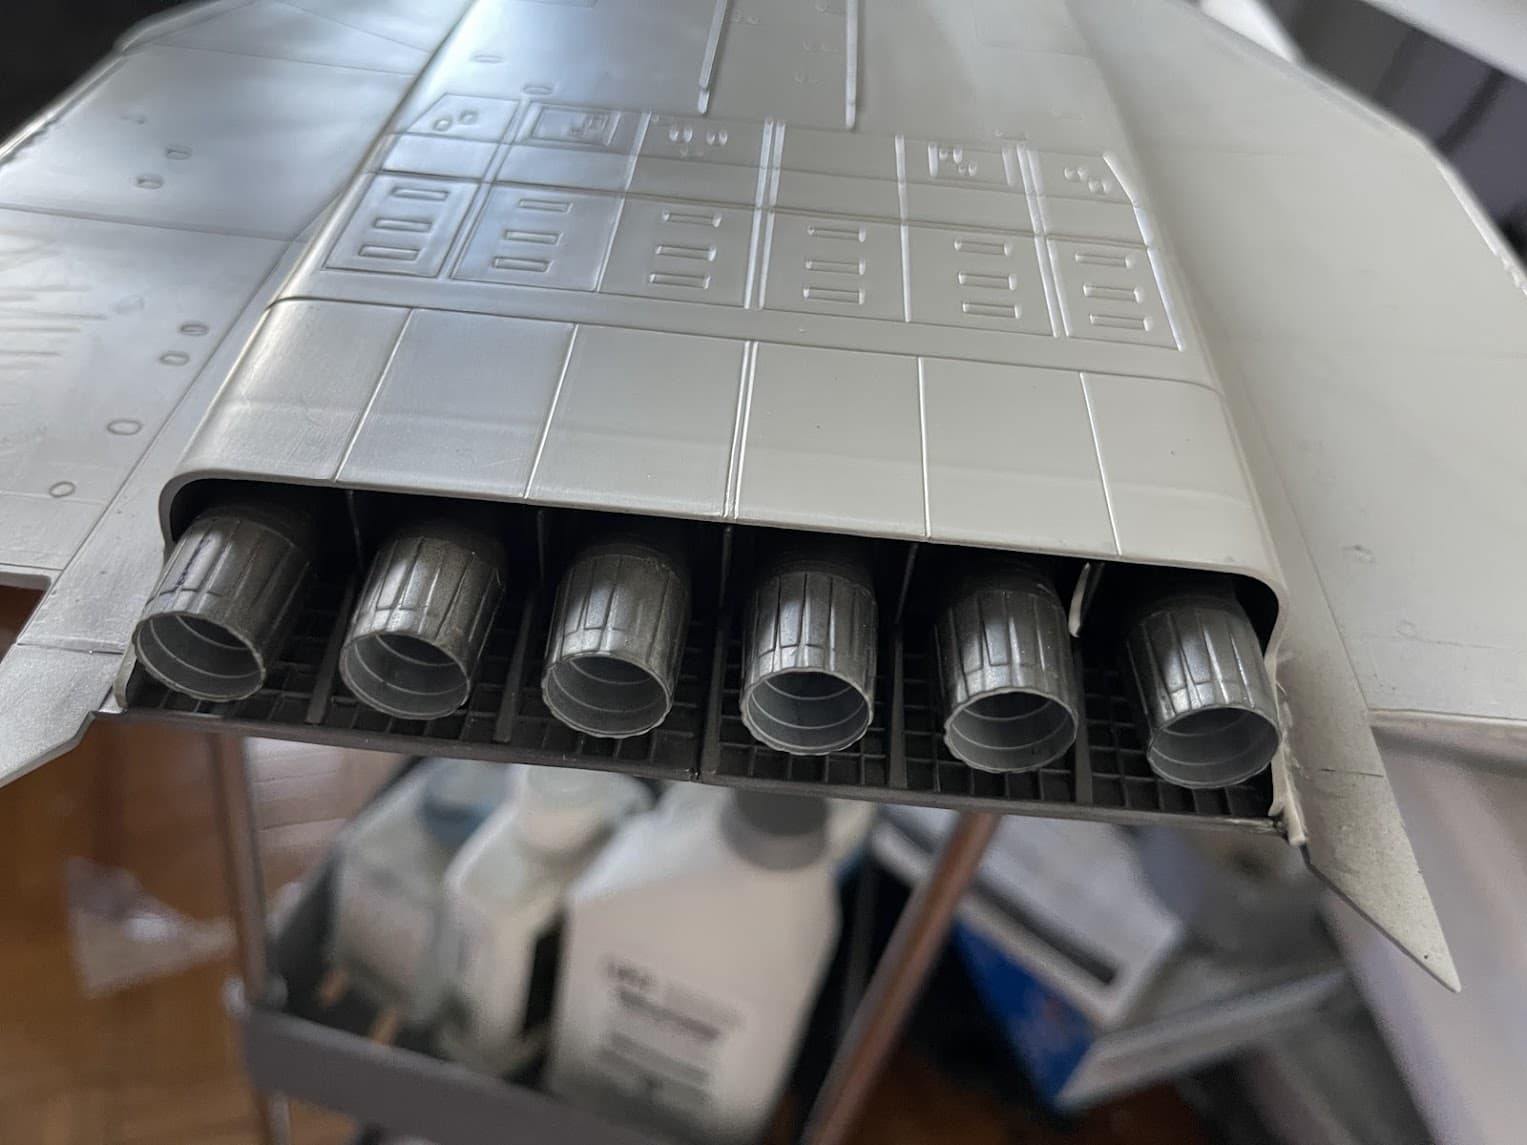
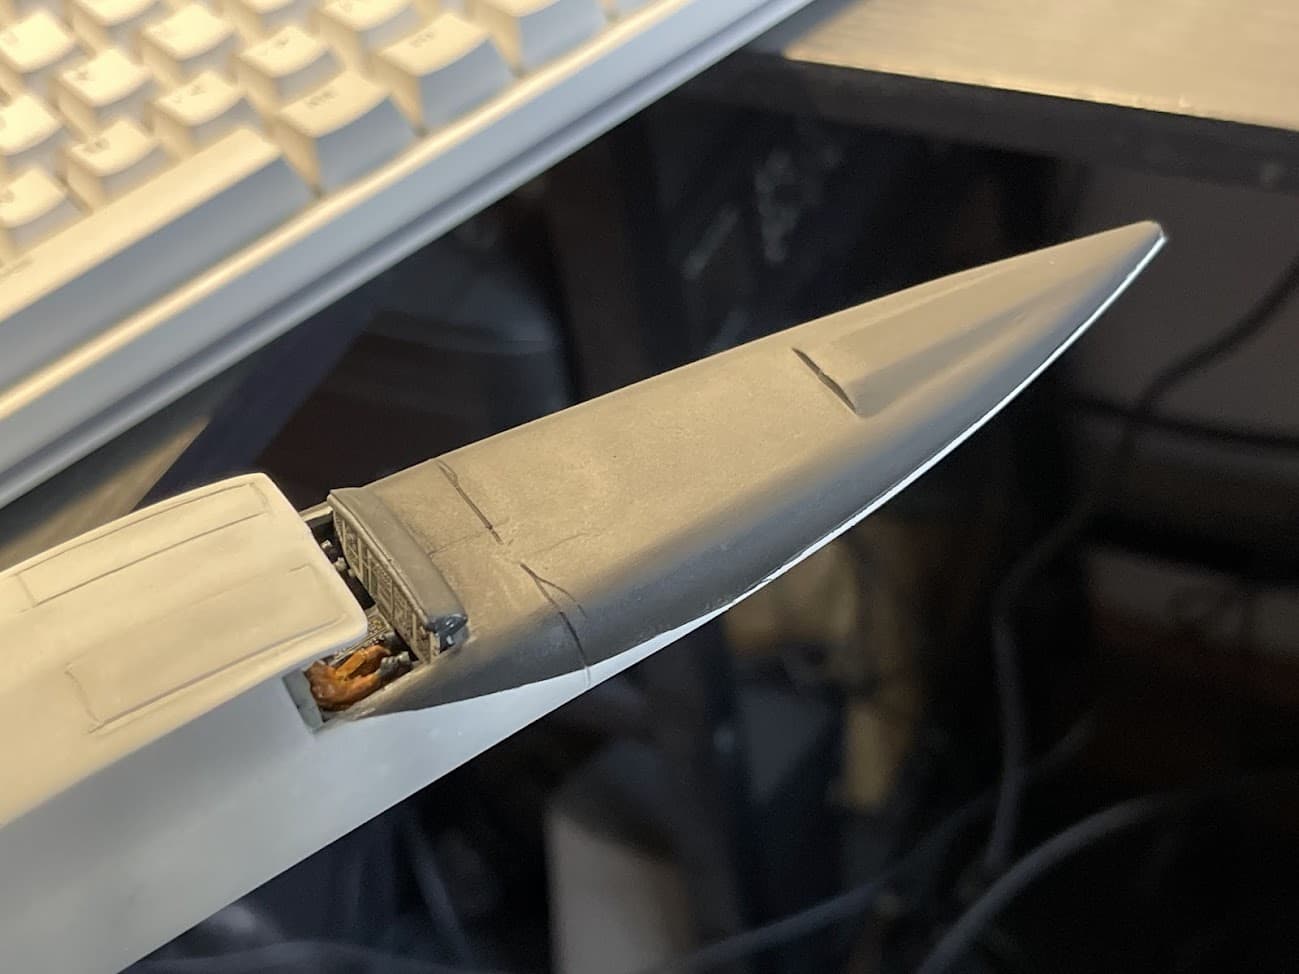
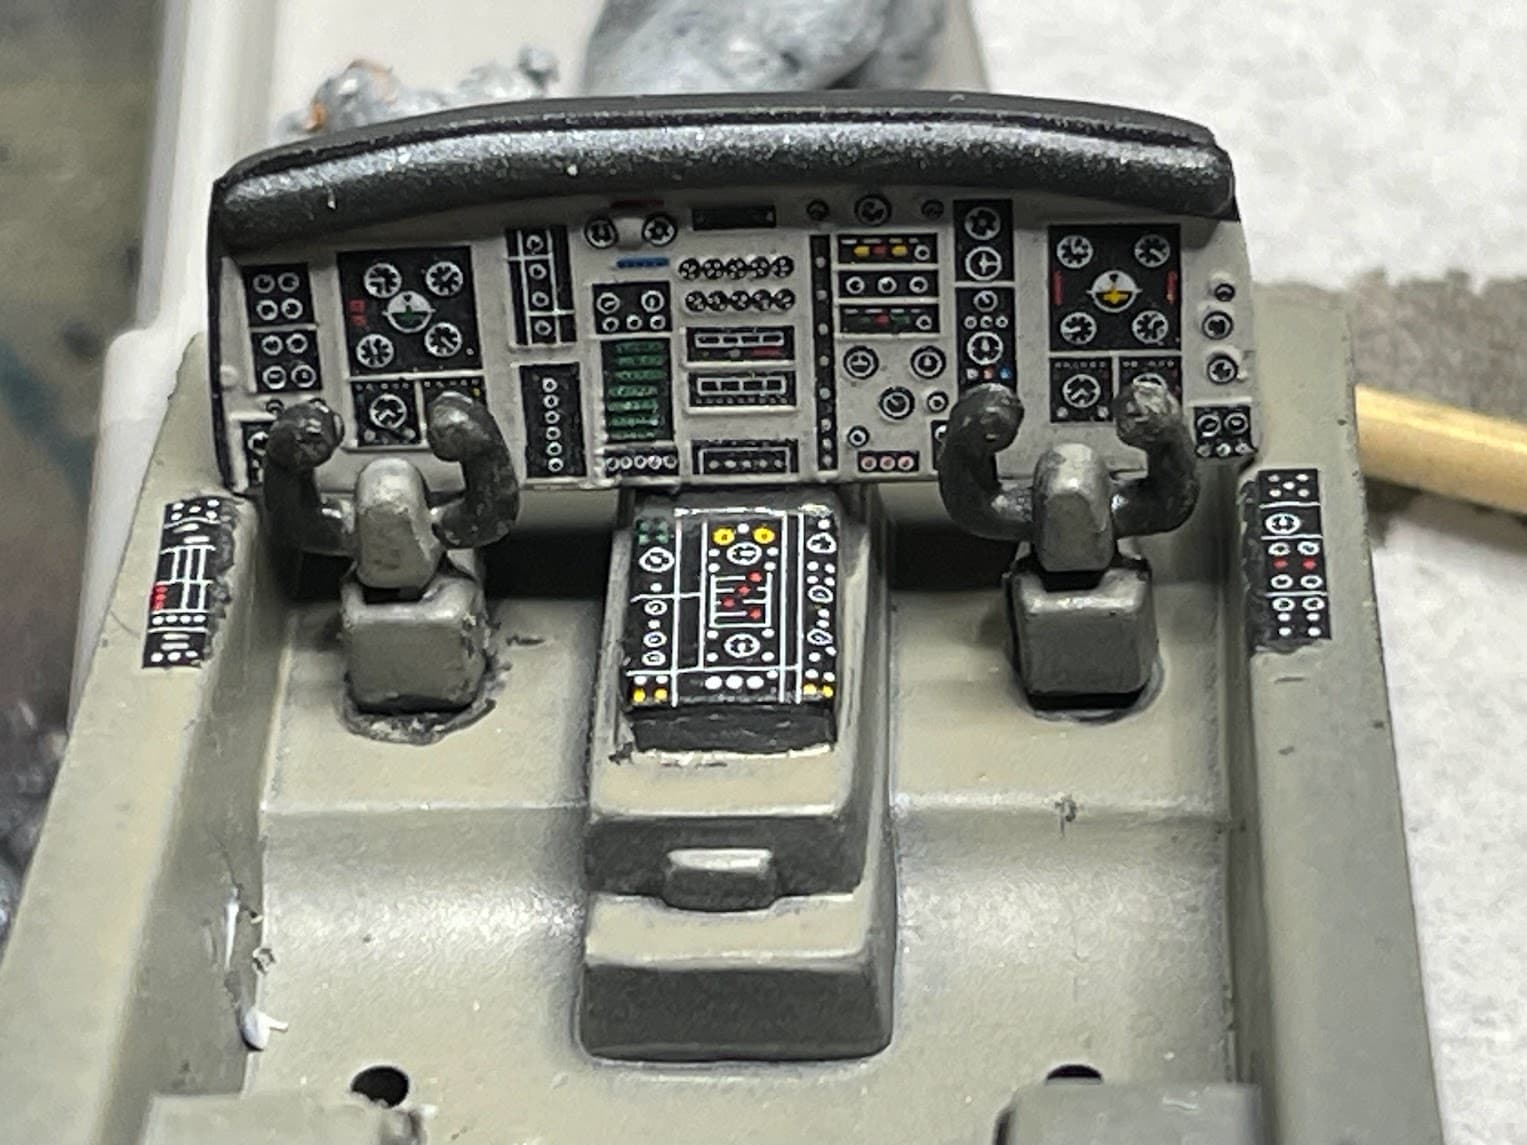
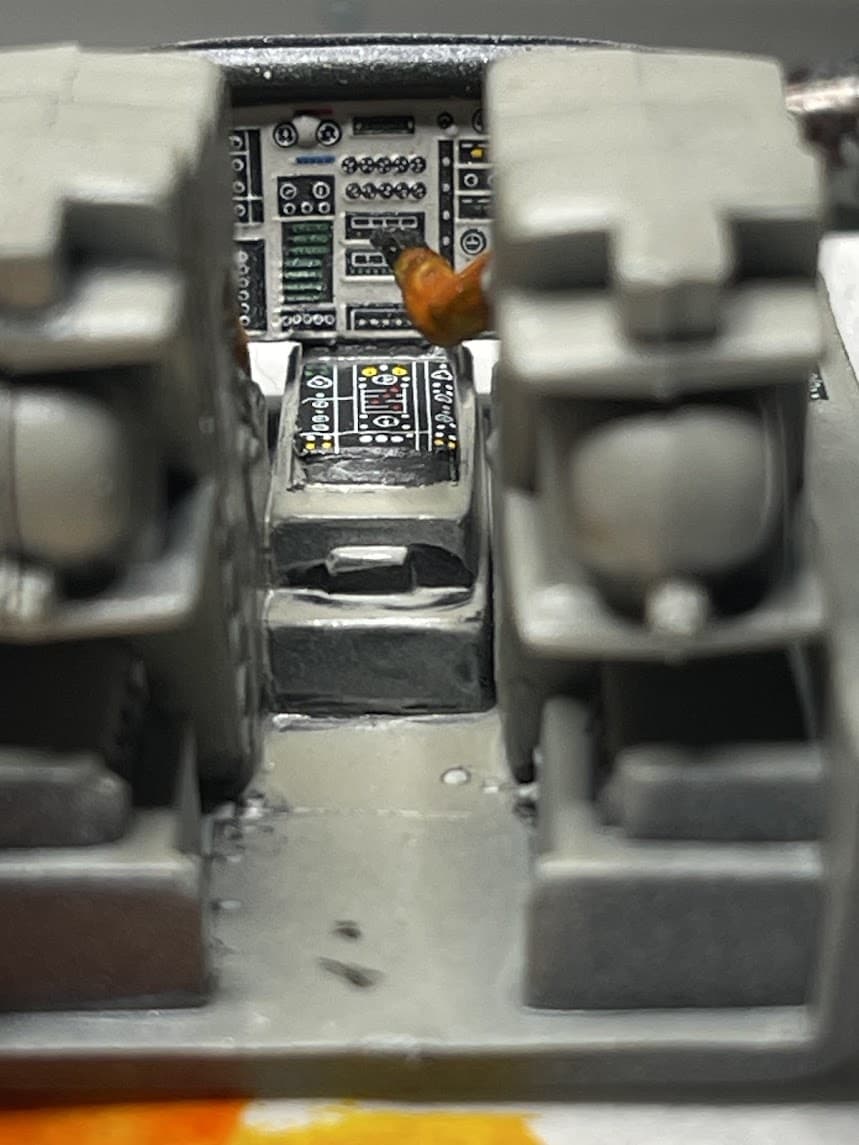
Engine bay paint
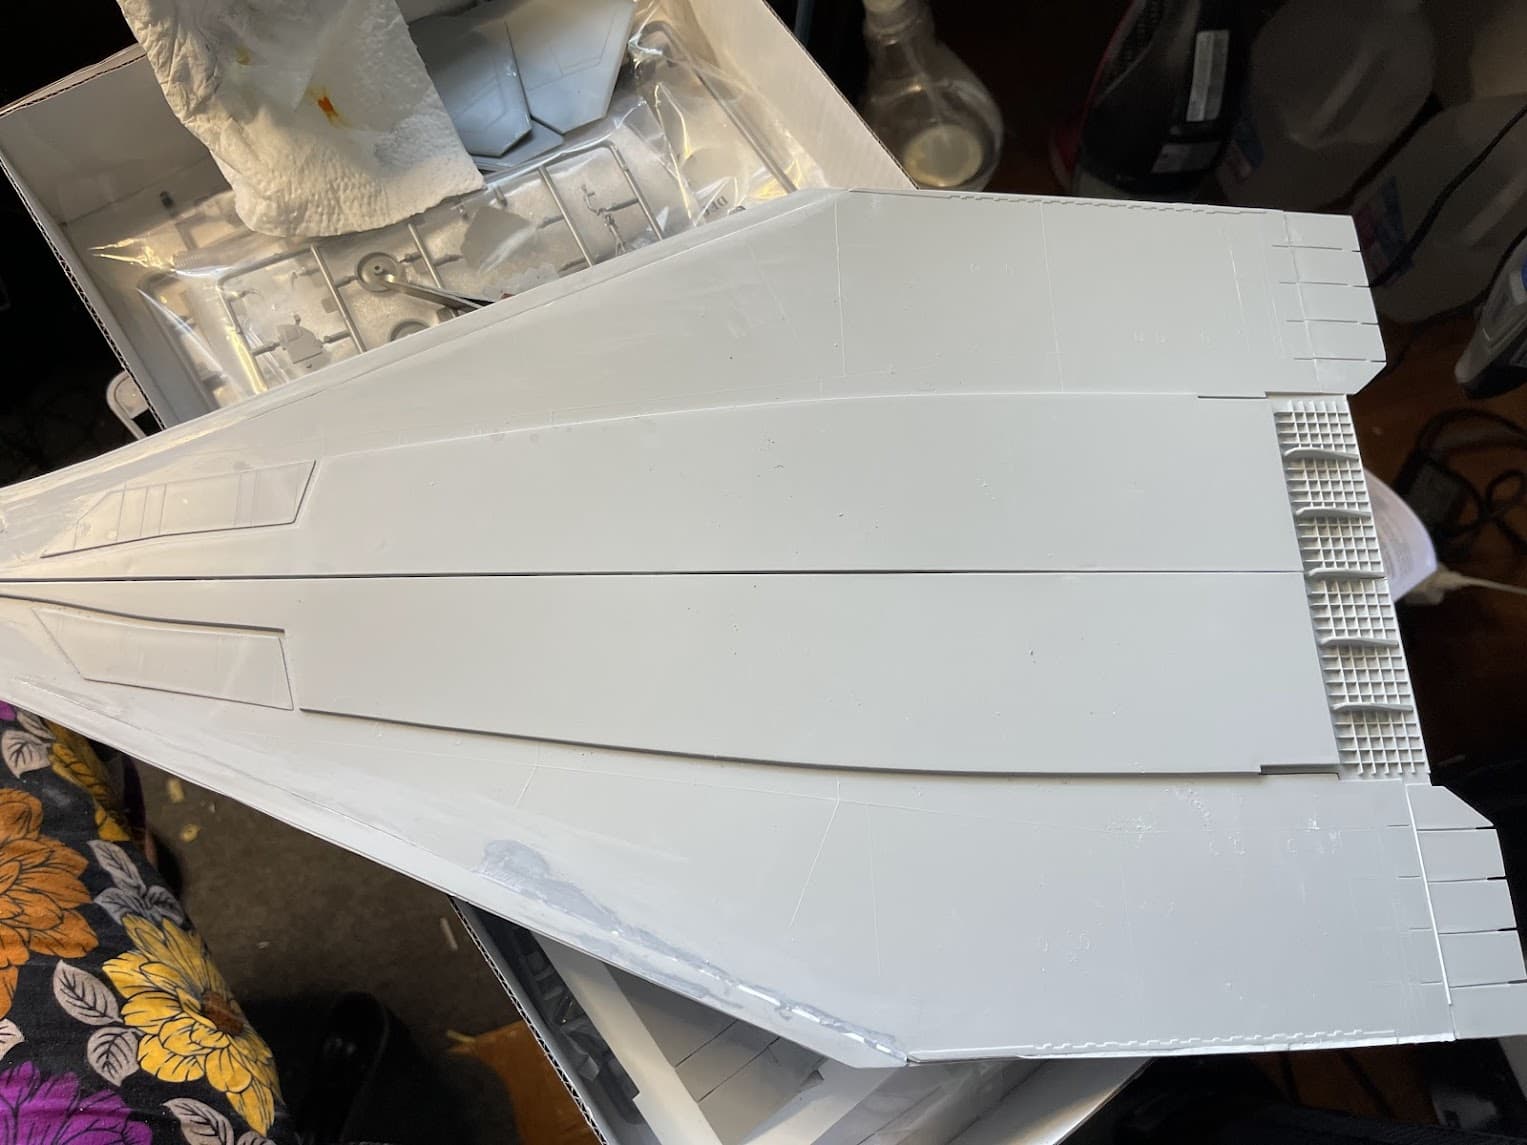
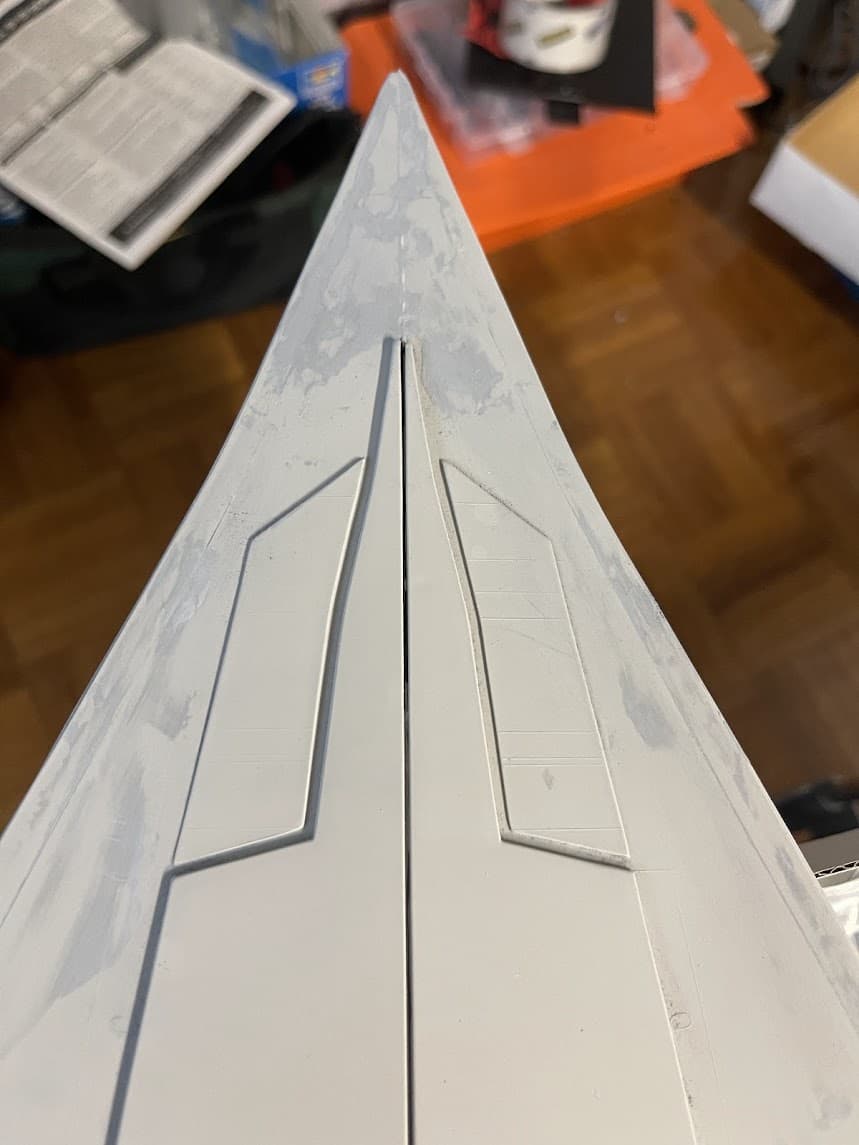
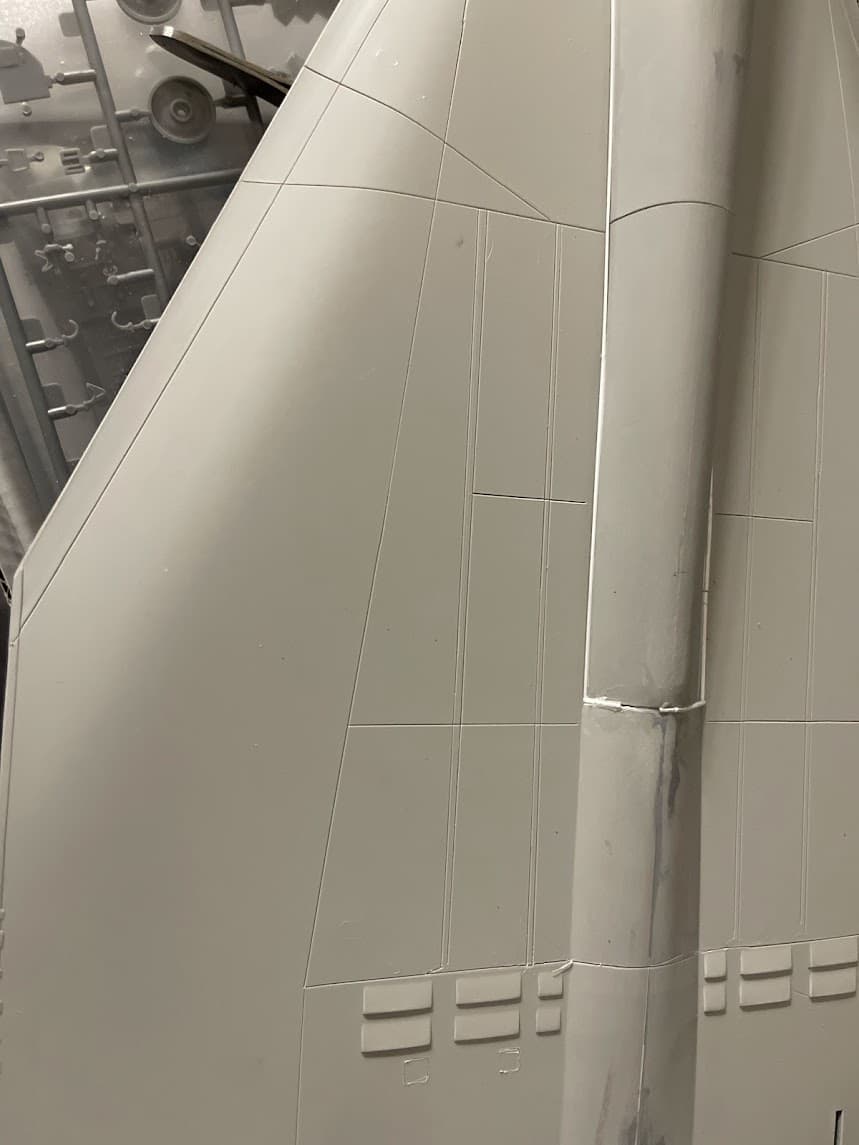
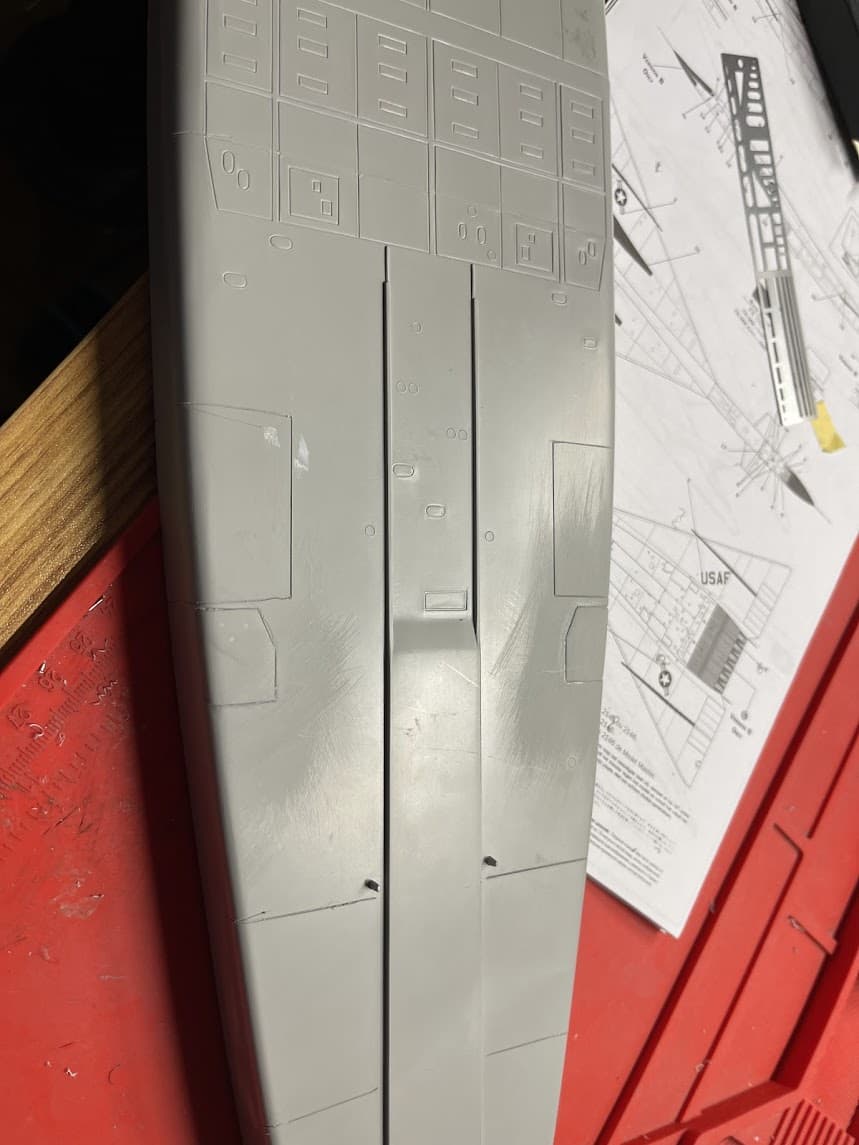
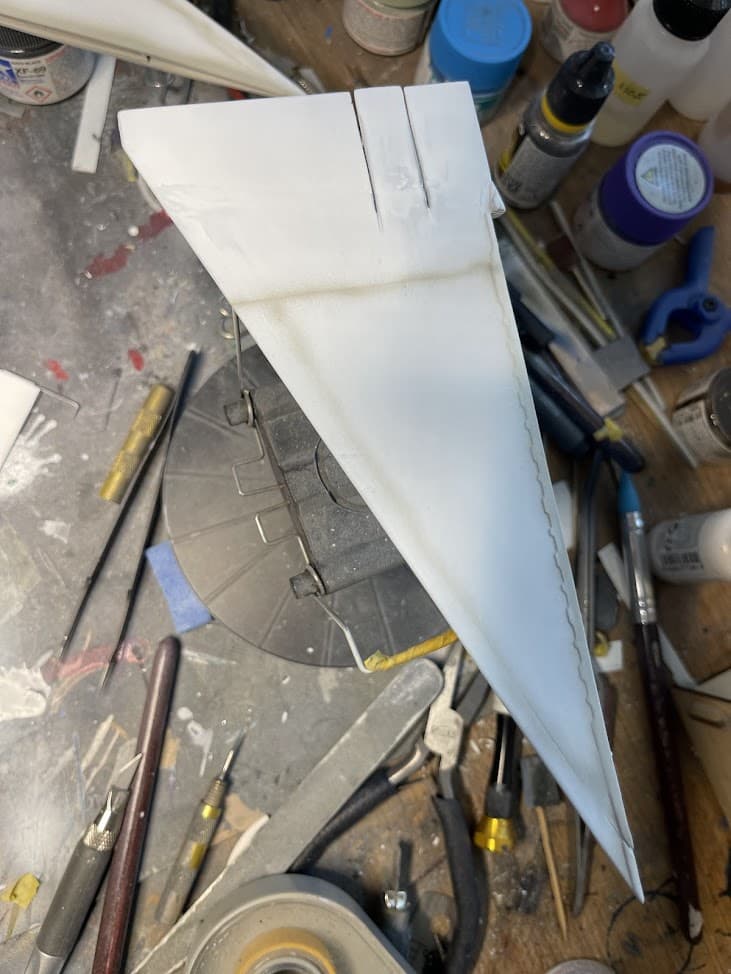
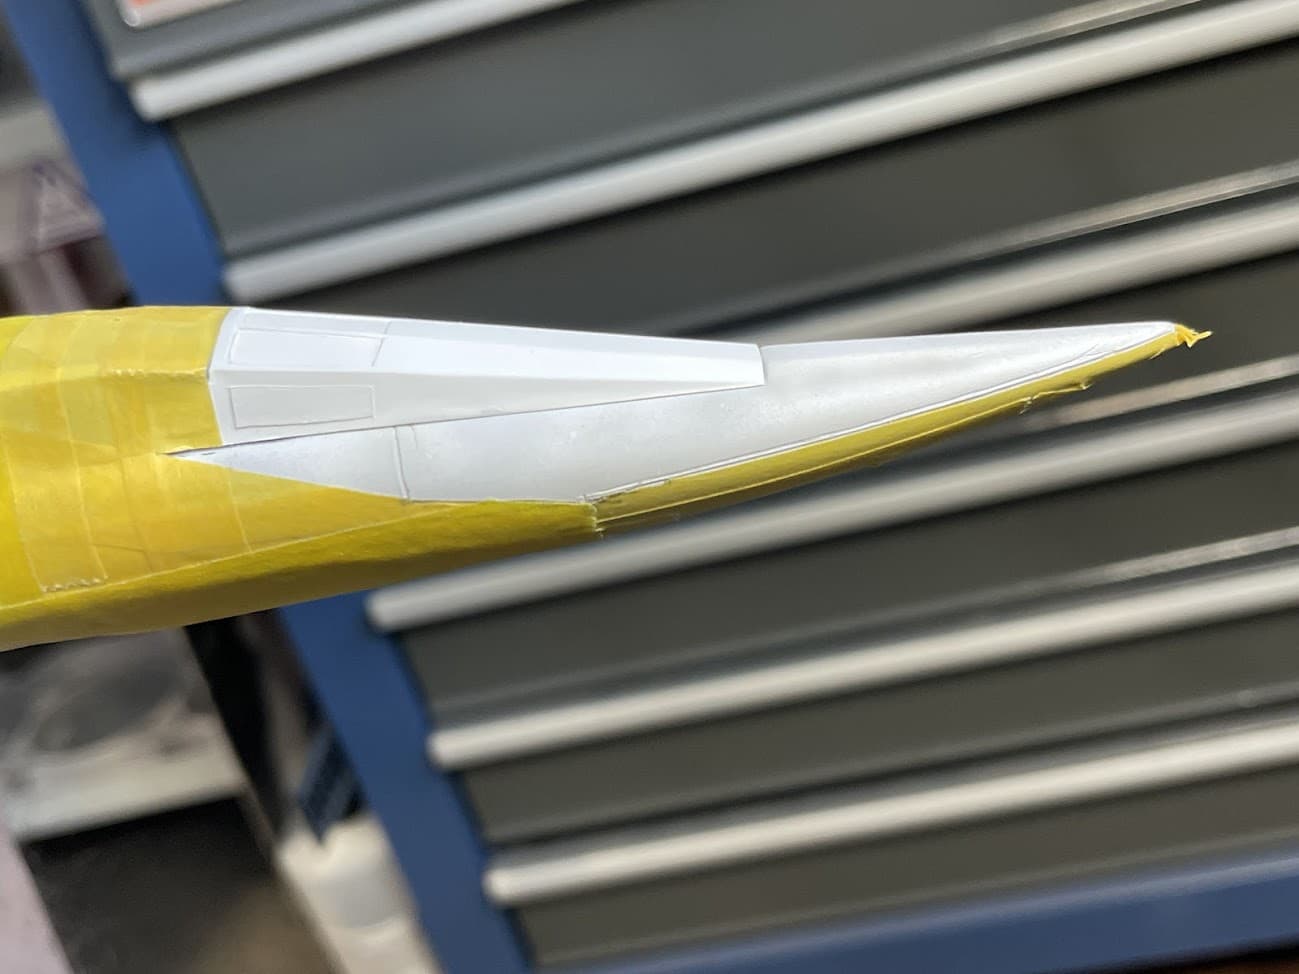
Re-did the panel lines, they were raised, so I thought I would try scribing them, first time doing this, very nerve wracking
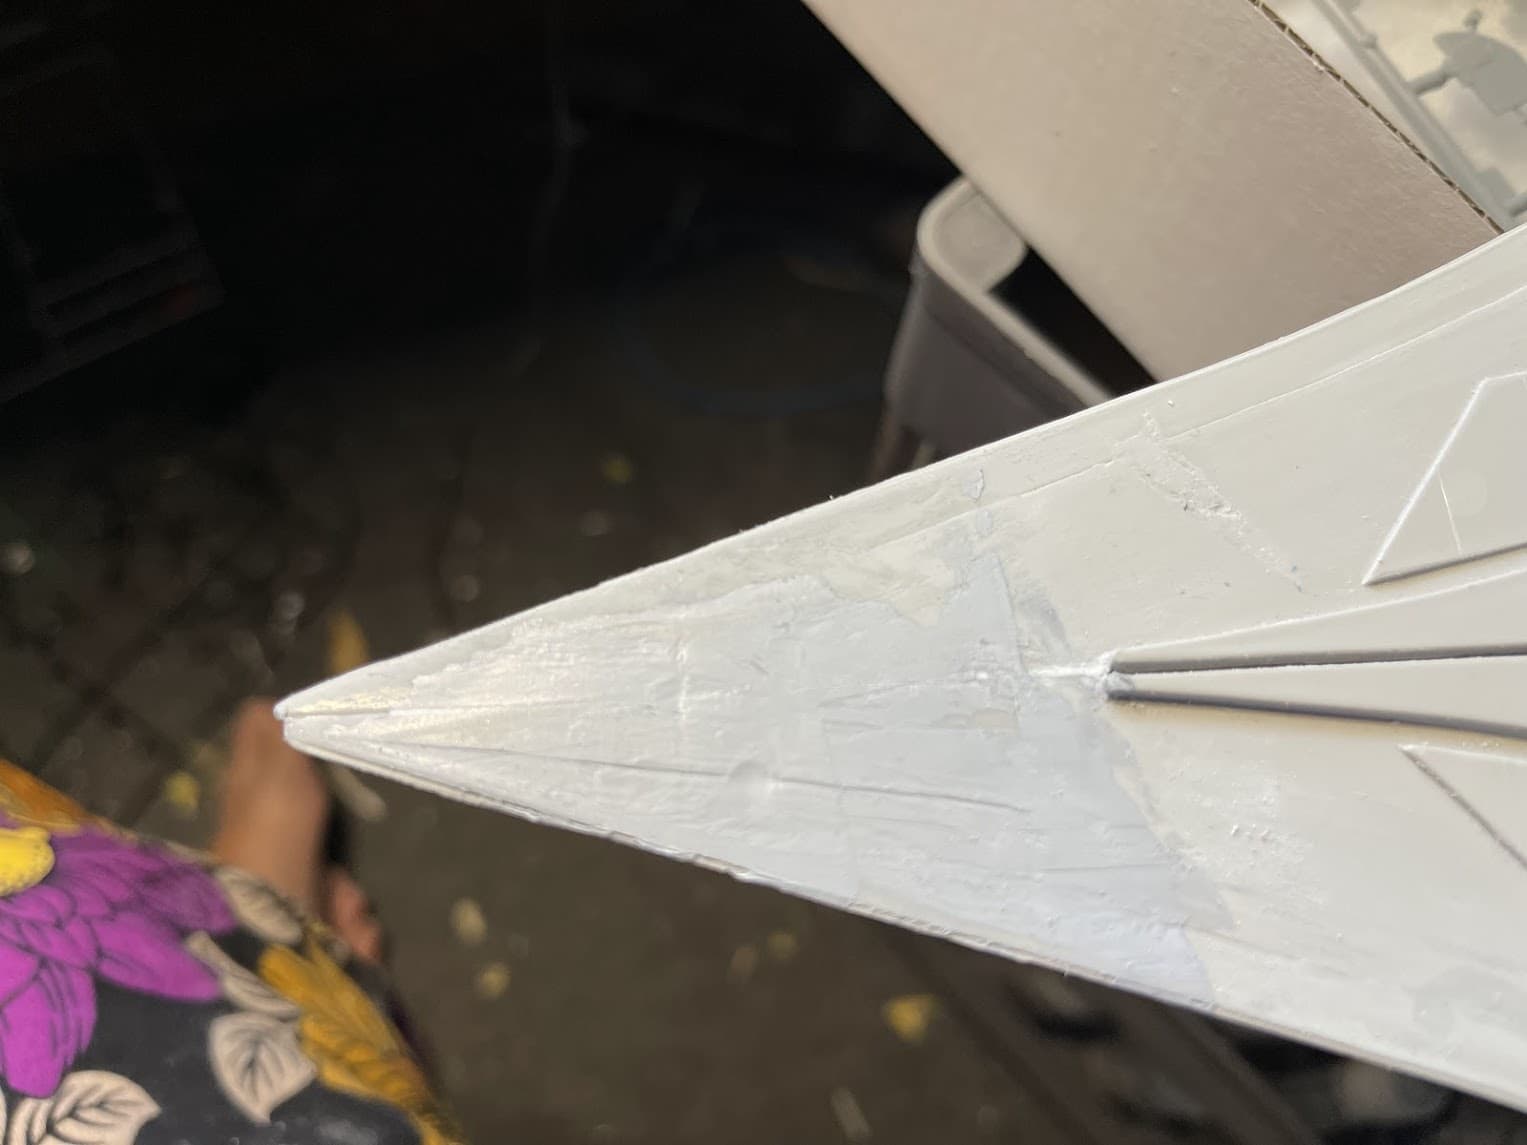
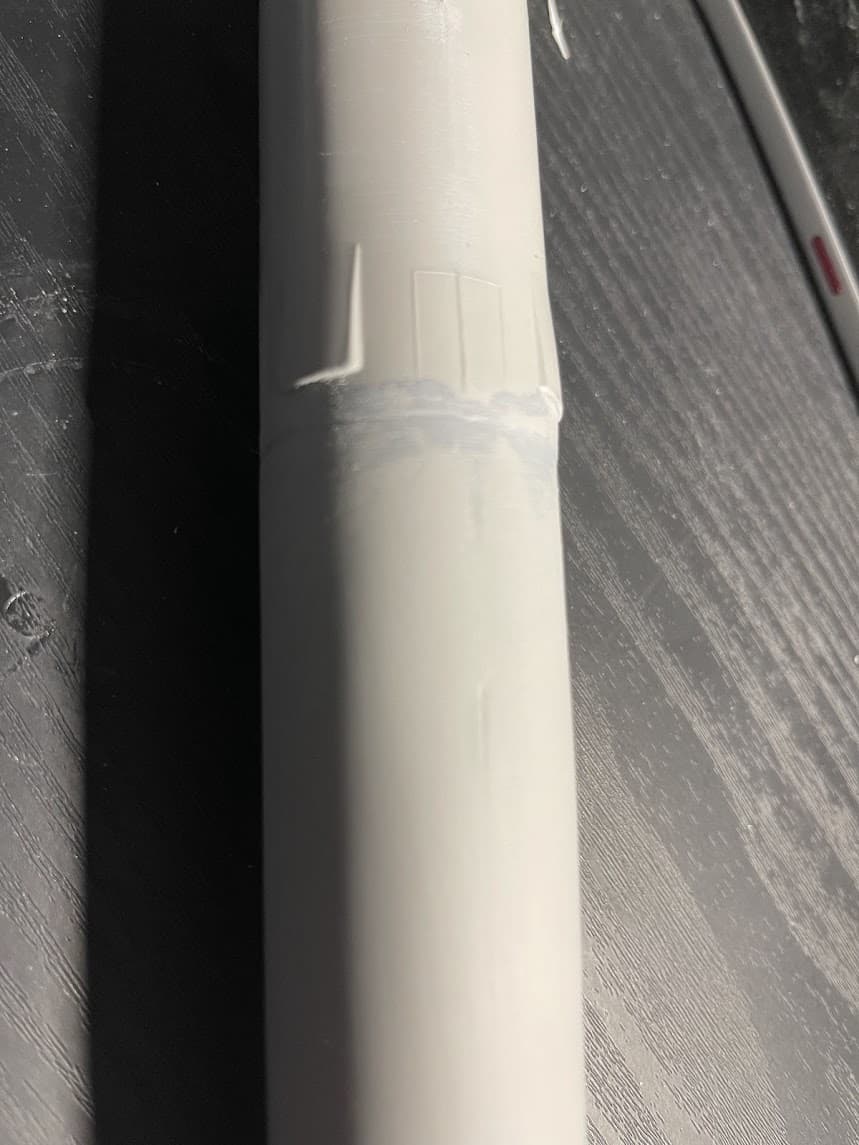
Trying to smooth out all the filled spots
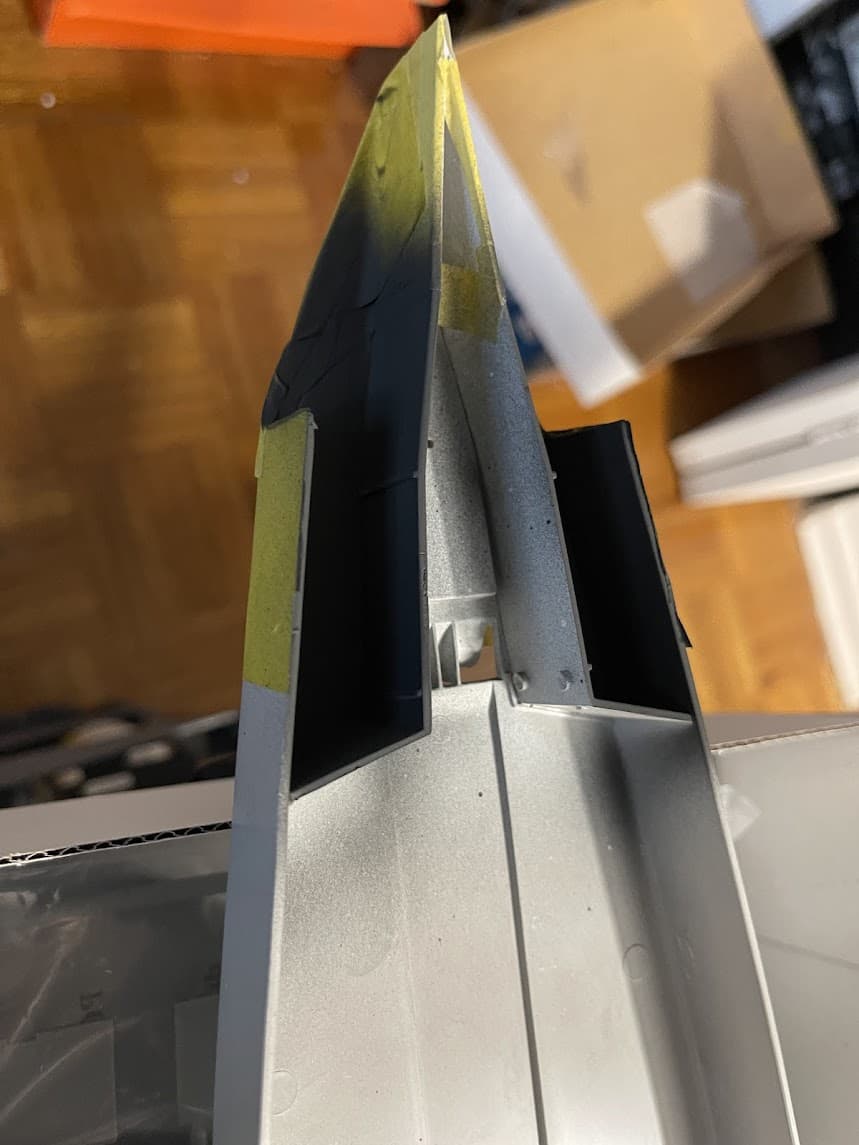
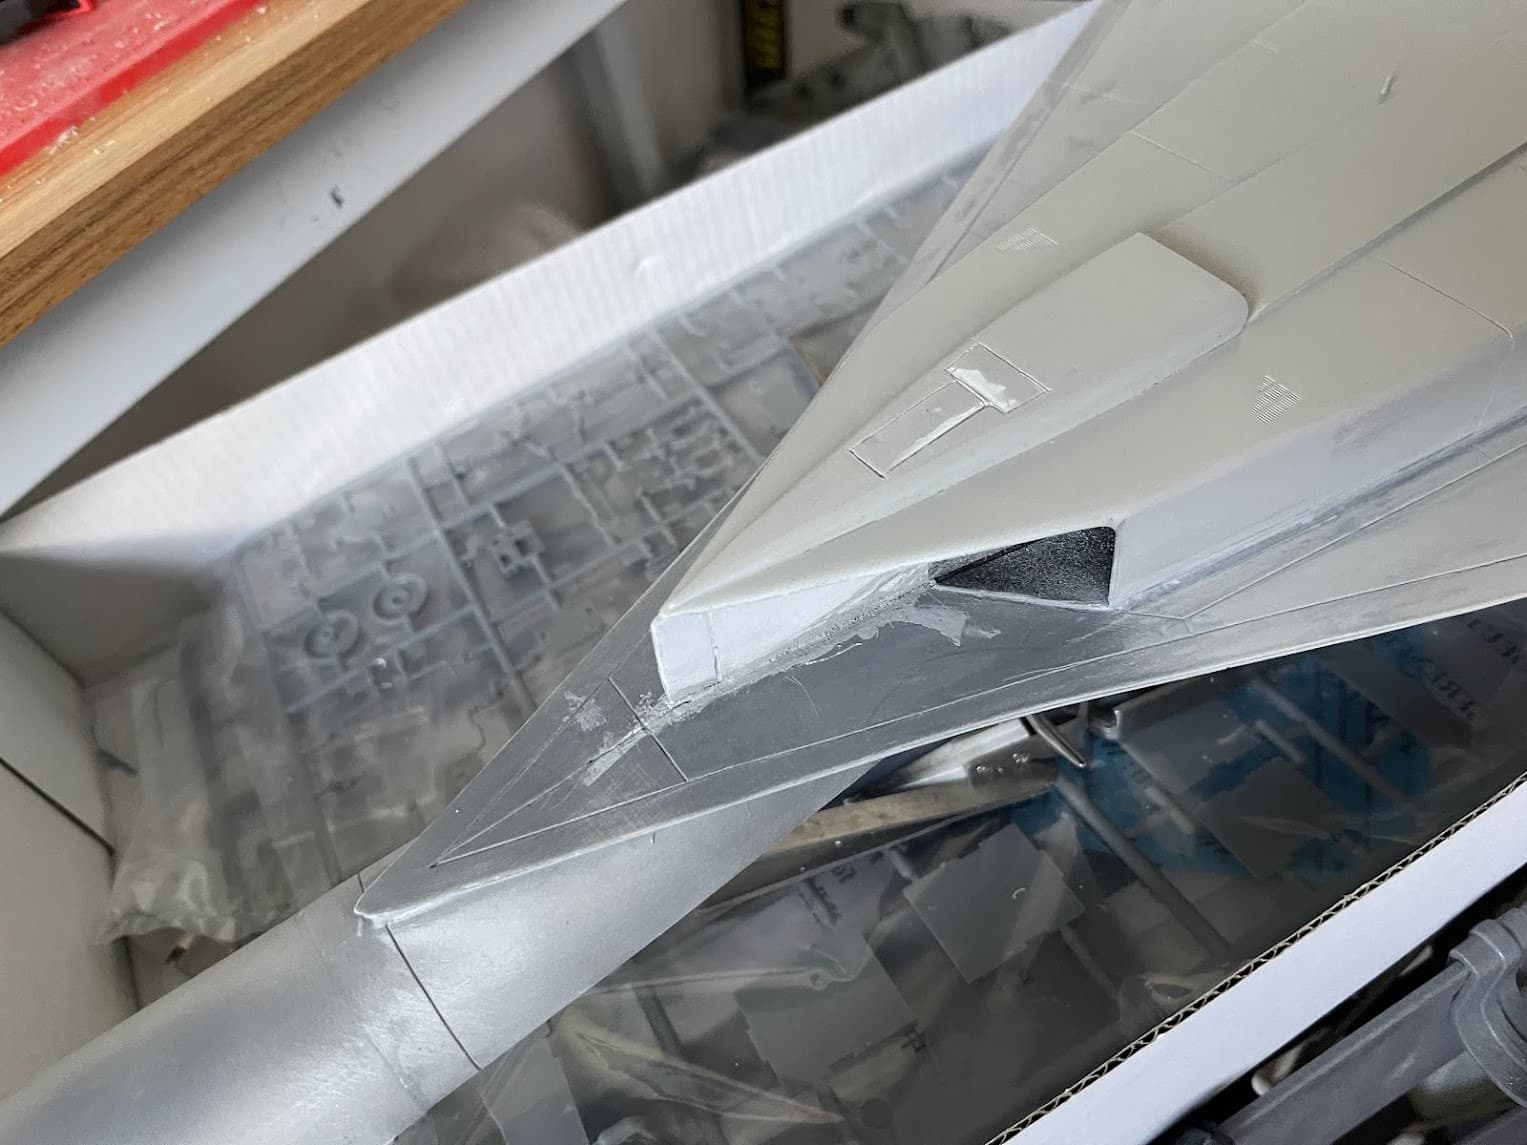
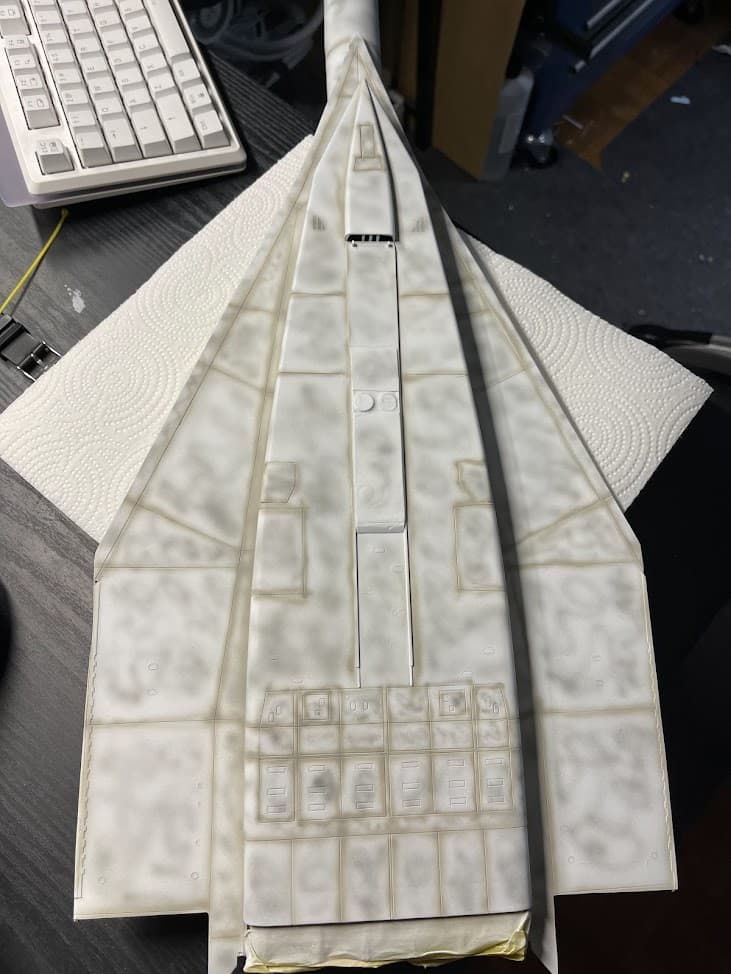
Came across this image when looks at references
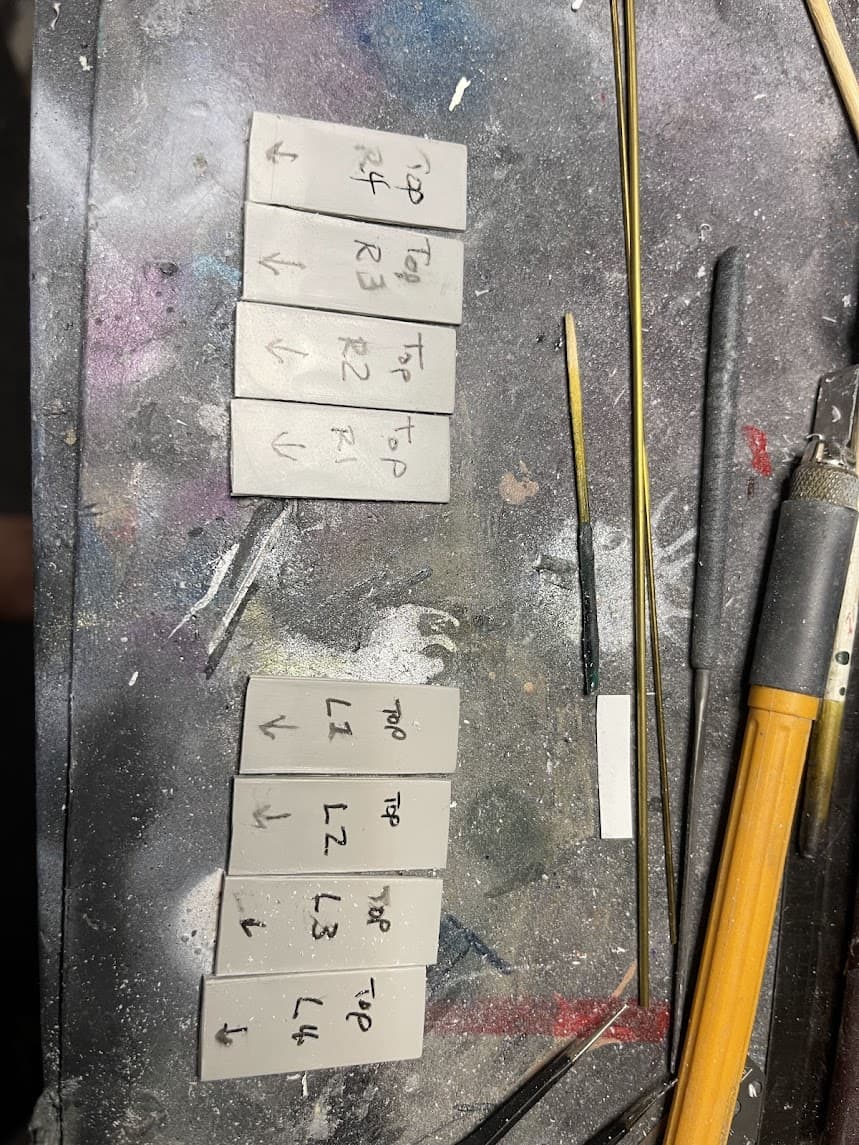
And thought I would try and replicate that and make the rear control surfaces moveable
hinged
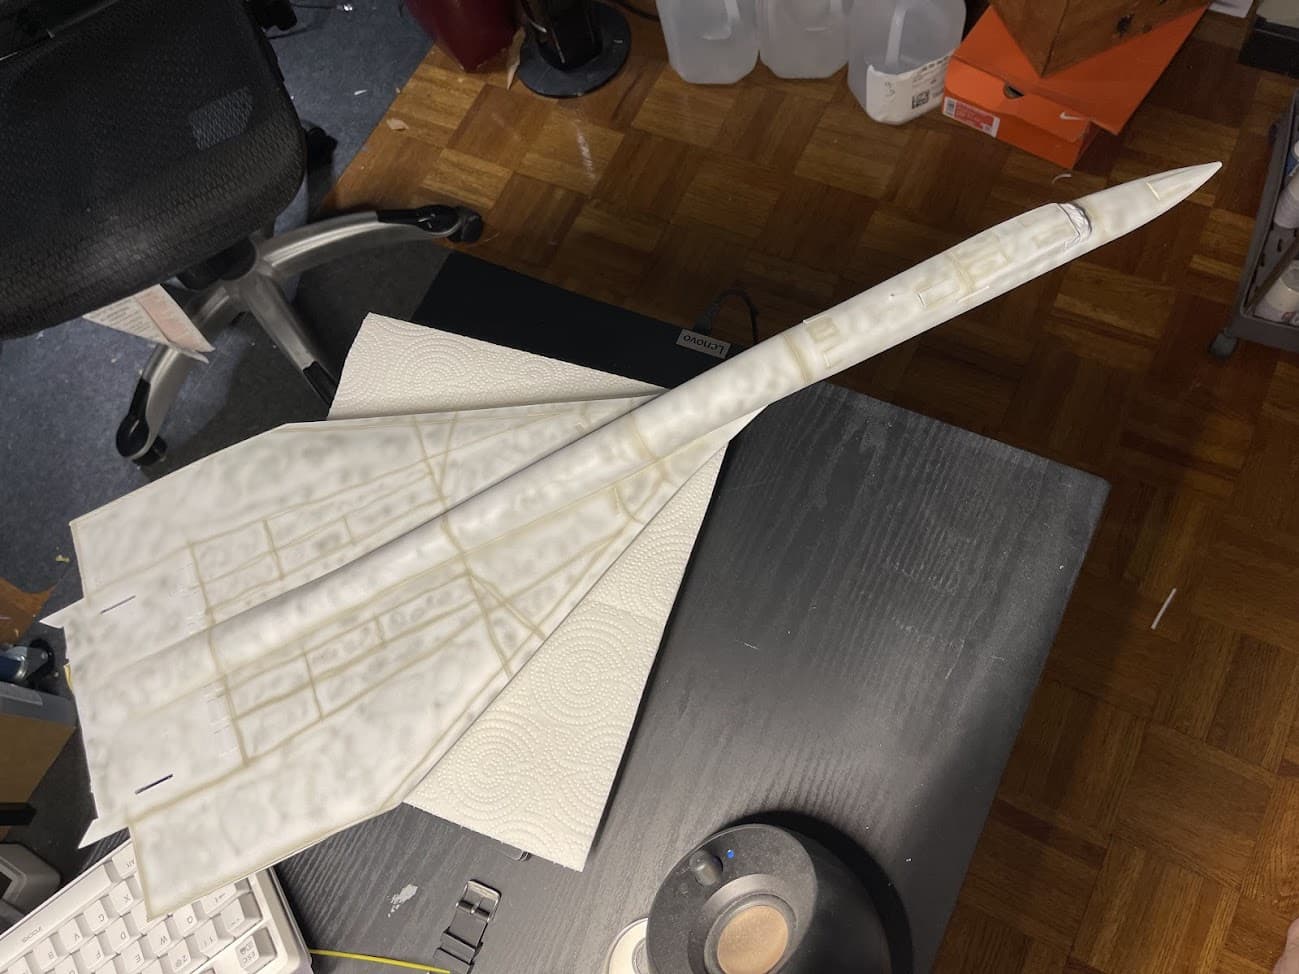
What is that, like 1/48 scale? ![]() That bird is HUGE!
That bird is HUGE!
Nice job on that monster! I am guessing 1/72 Italeri? Like the addition of the pilots.
Yeah it’s crazy. It’s 1/72, I updated the title
Good progress, especially like your remake of the flap-y-finger-feathers
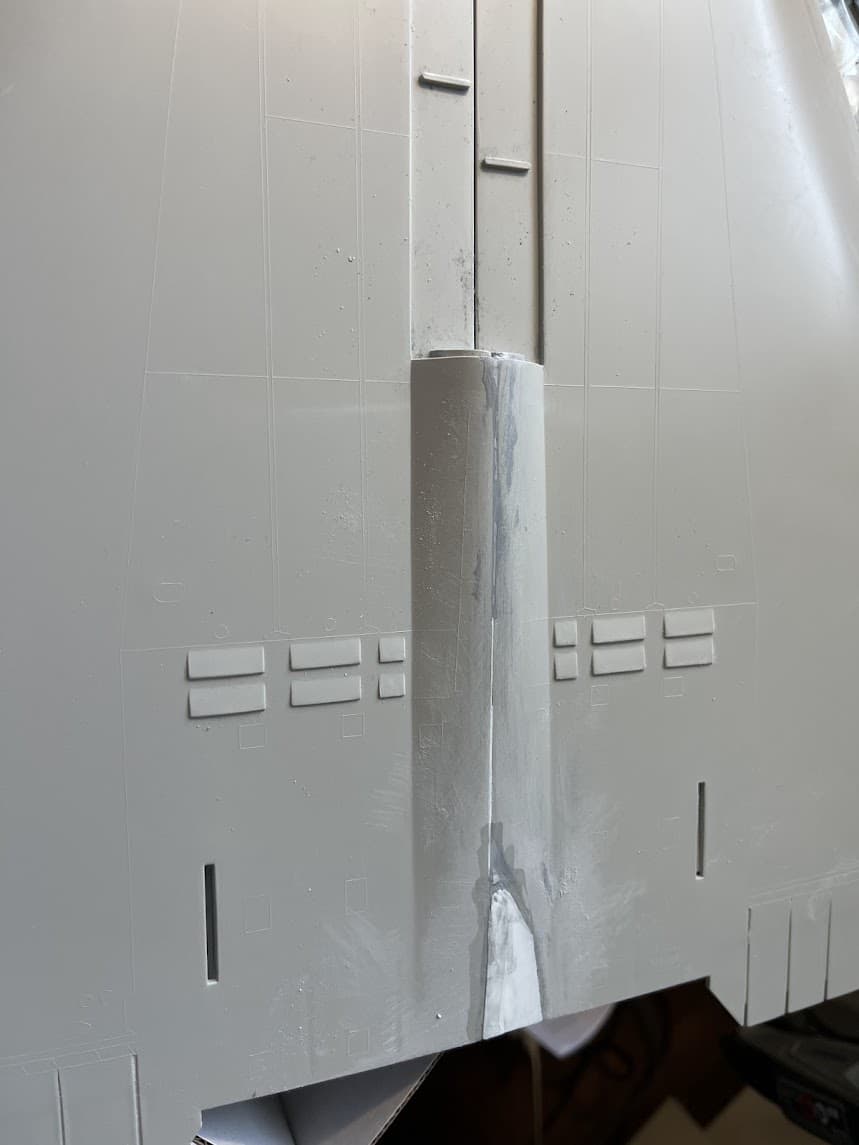
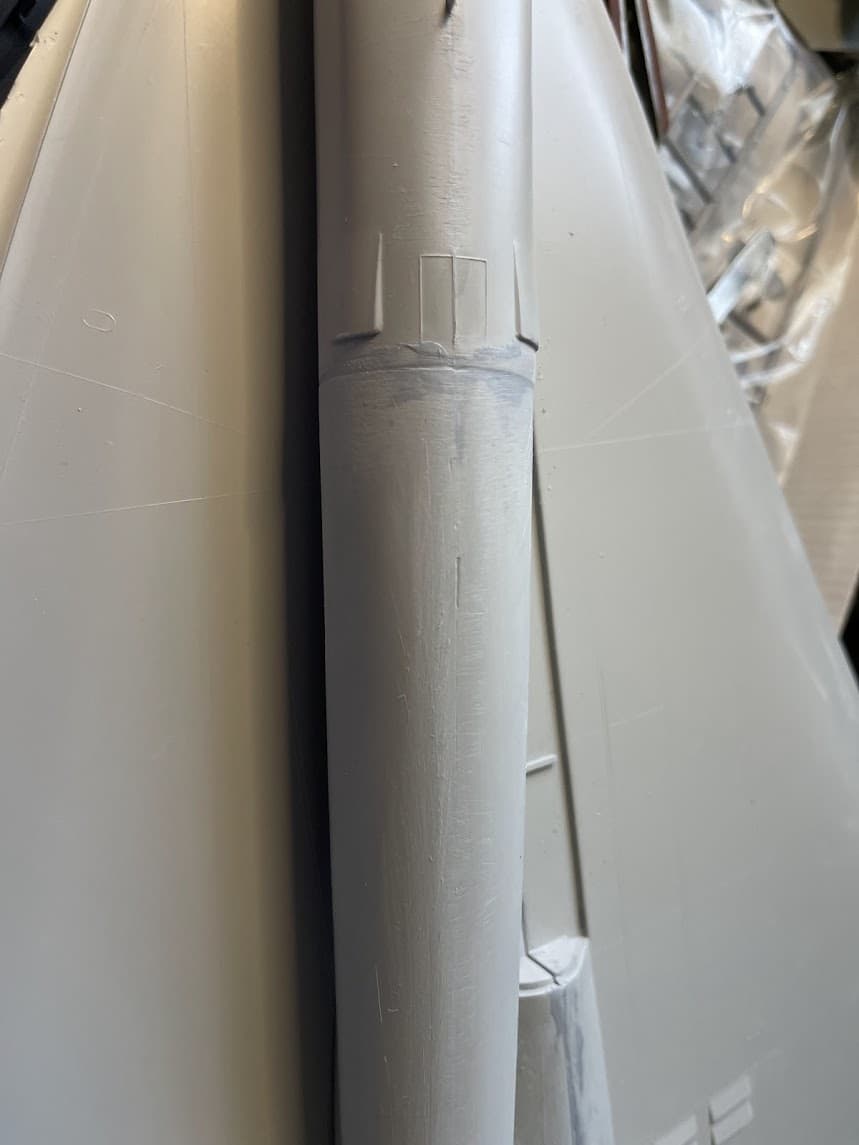
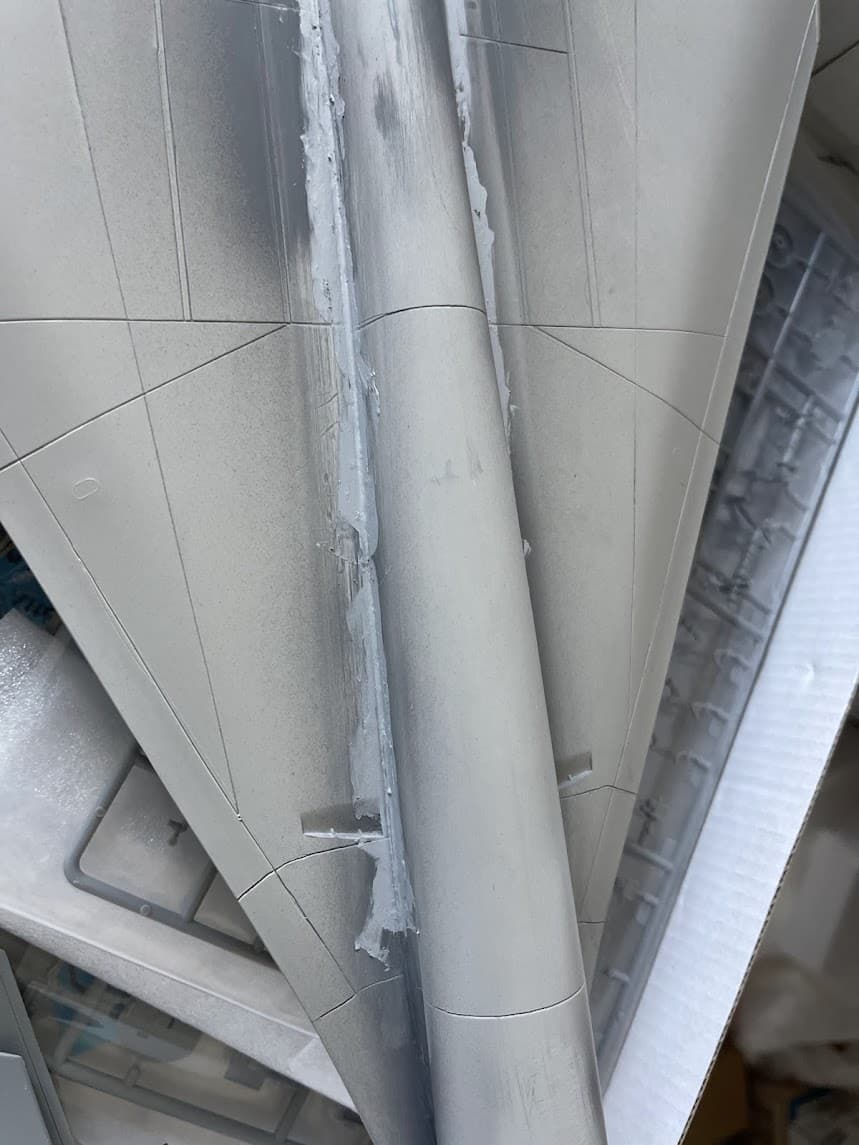
More progress, lots of filling and sanding…
Attached the bottom part of the hull
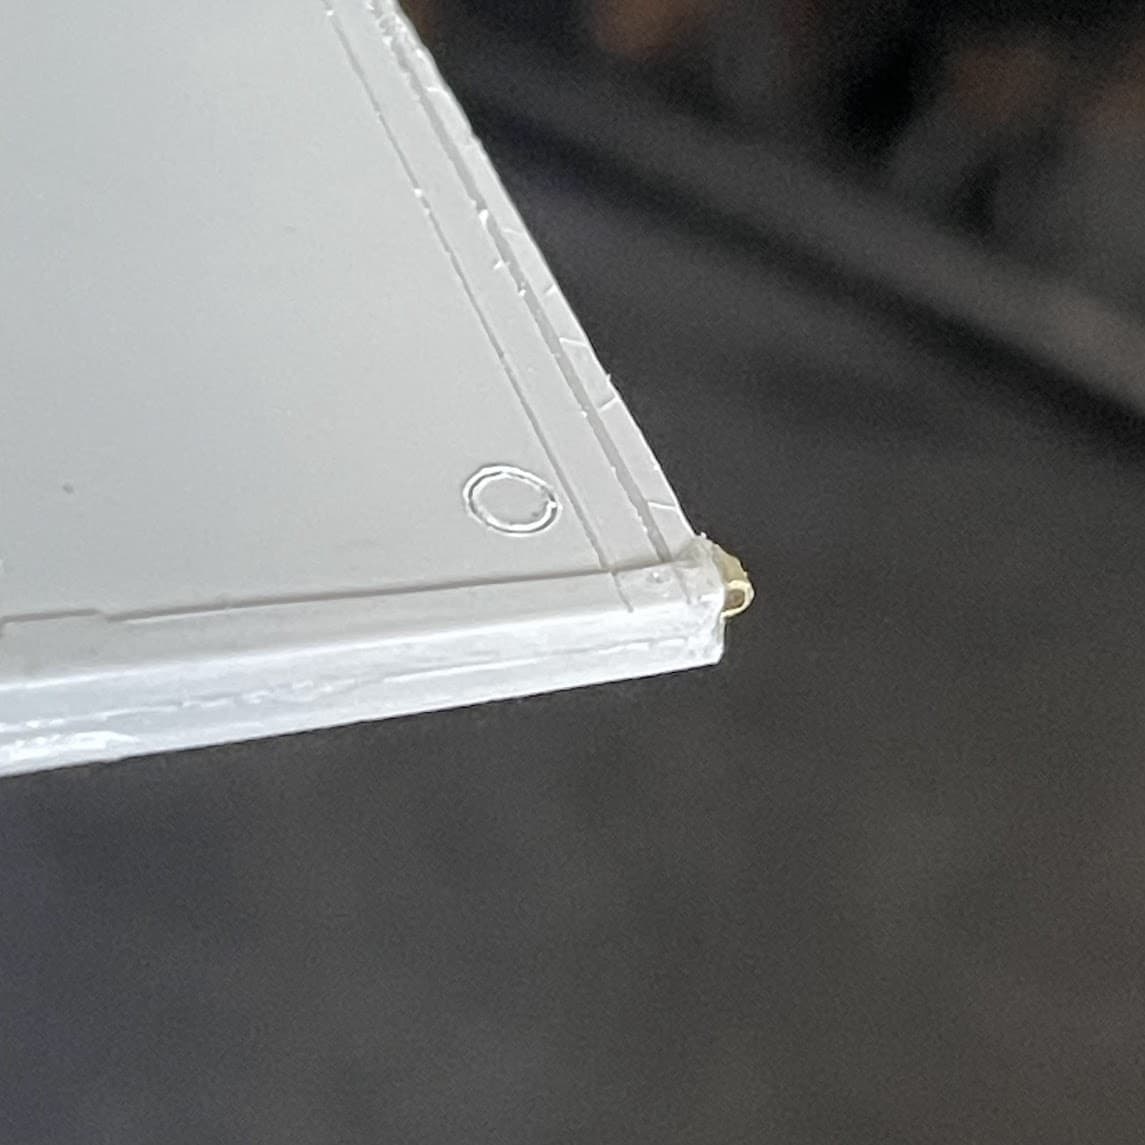
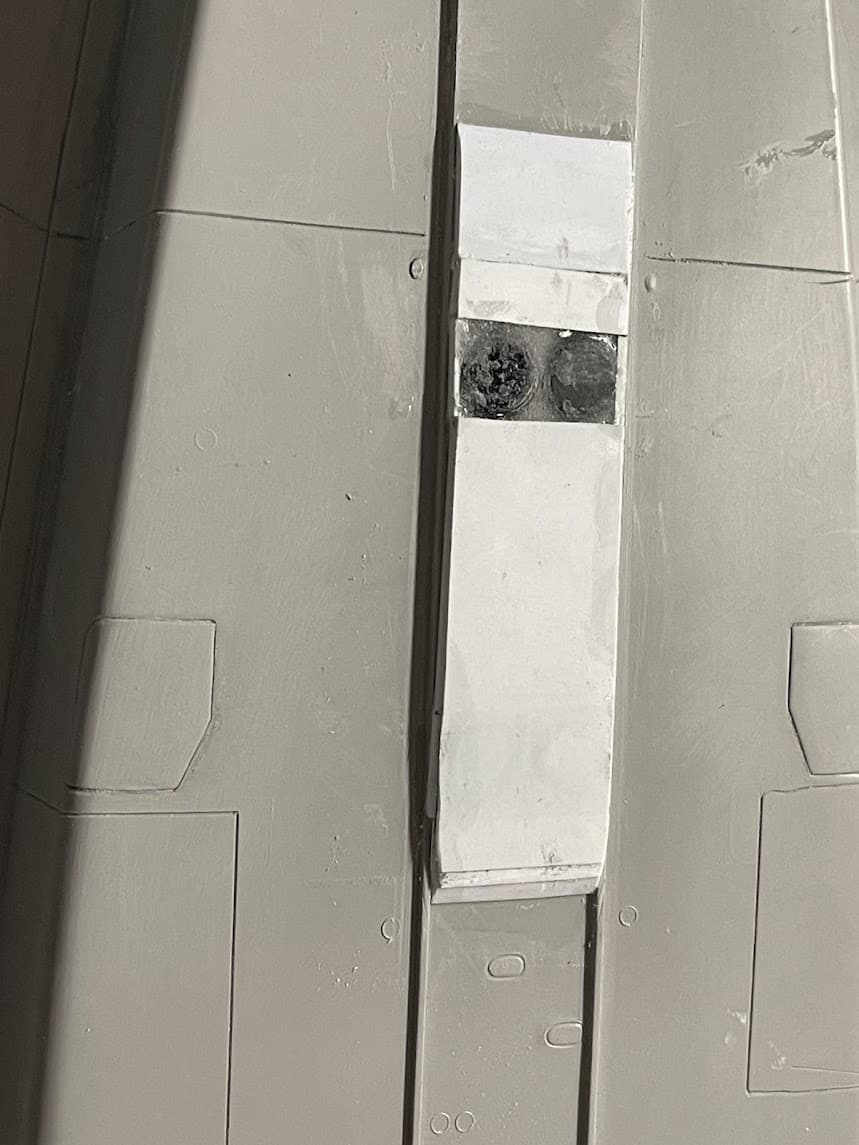
Adding filler to some of the joins
But… like an idiot forgot to add the mounting magnets!!! Argh, too late now, so I’ll need to craft something…
Such an impressive aircraft, in real life and in kit form and yet you really don’t see a lot of them on contest tables.
Watching! I have that kit in my stash, along with some Brengun PE and weighted resin tires. It IS big for that scale. Shame the fit is so poor. Are you sure the pilots will even be visible in that scale?
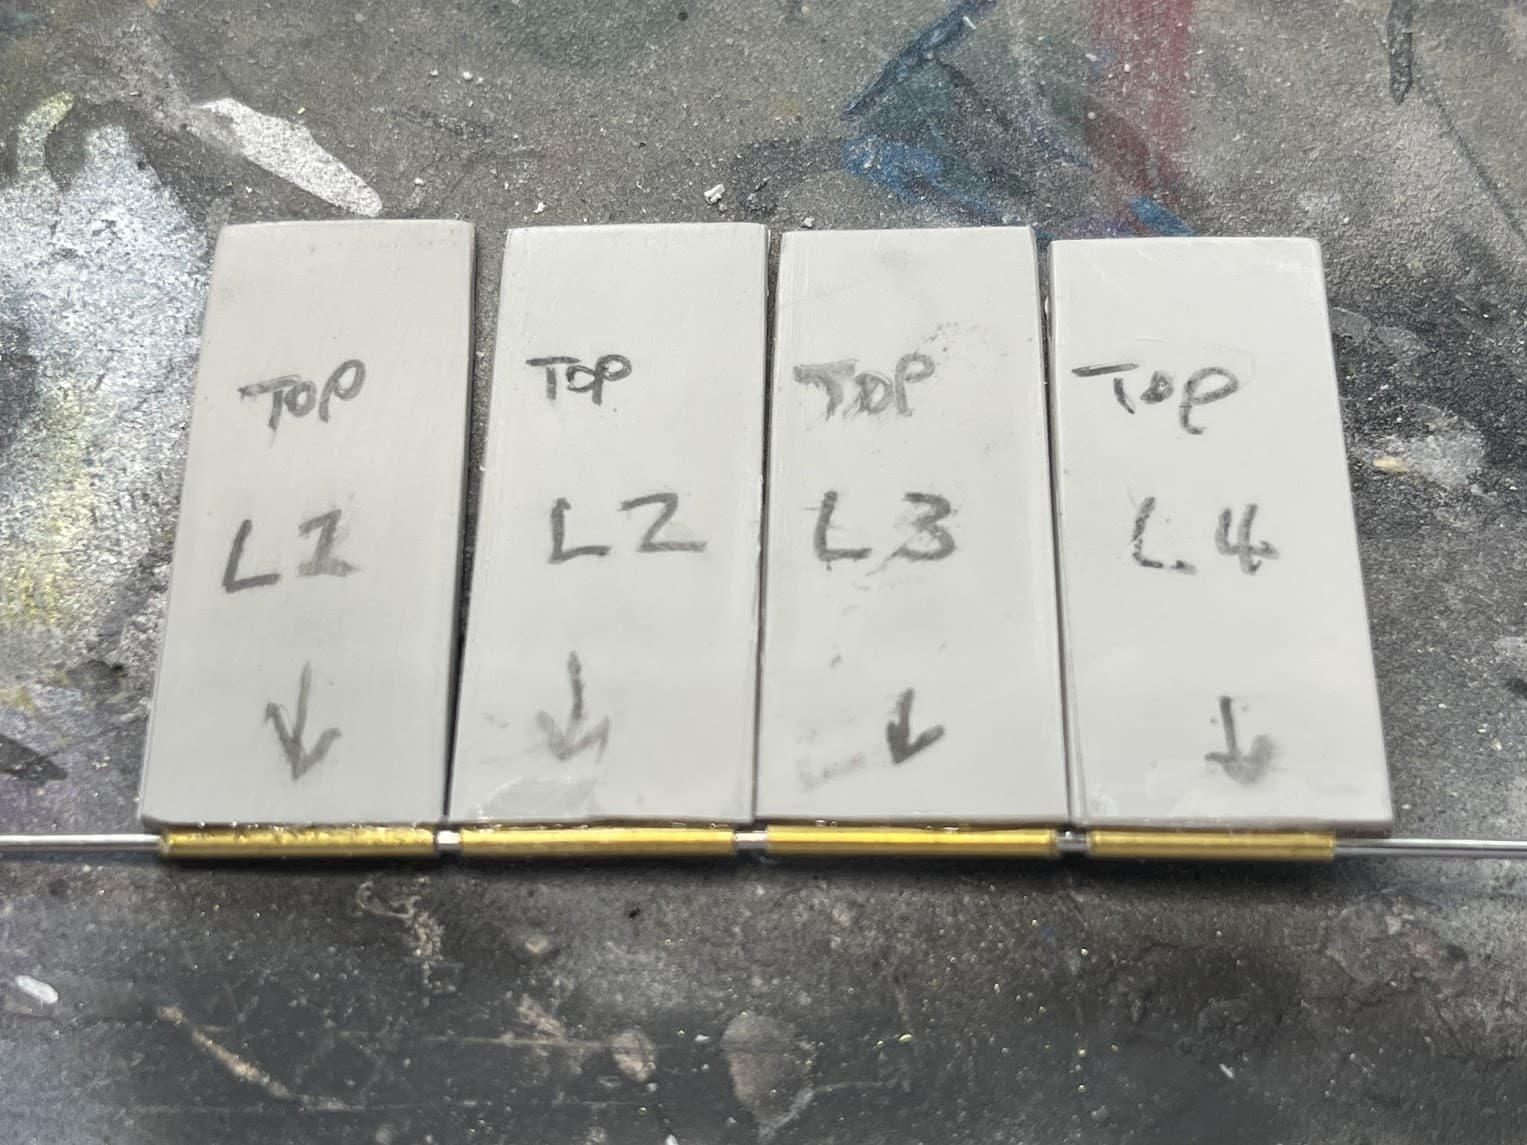
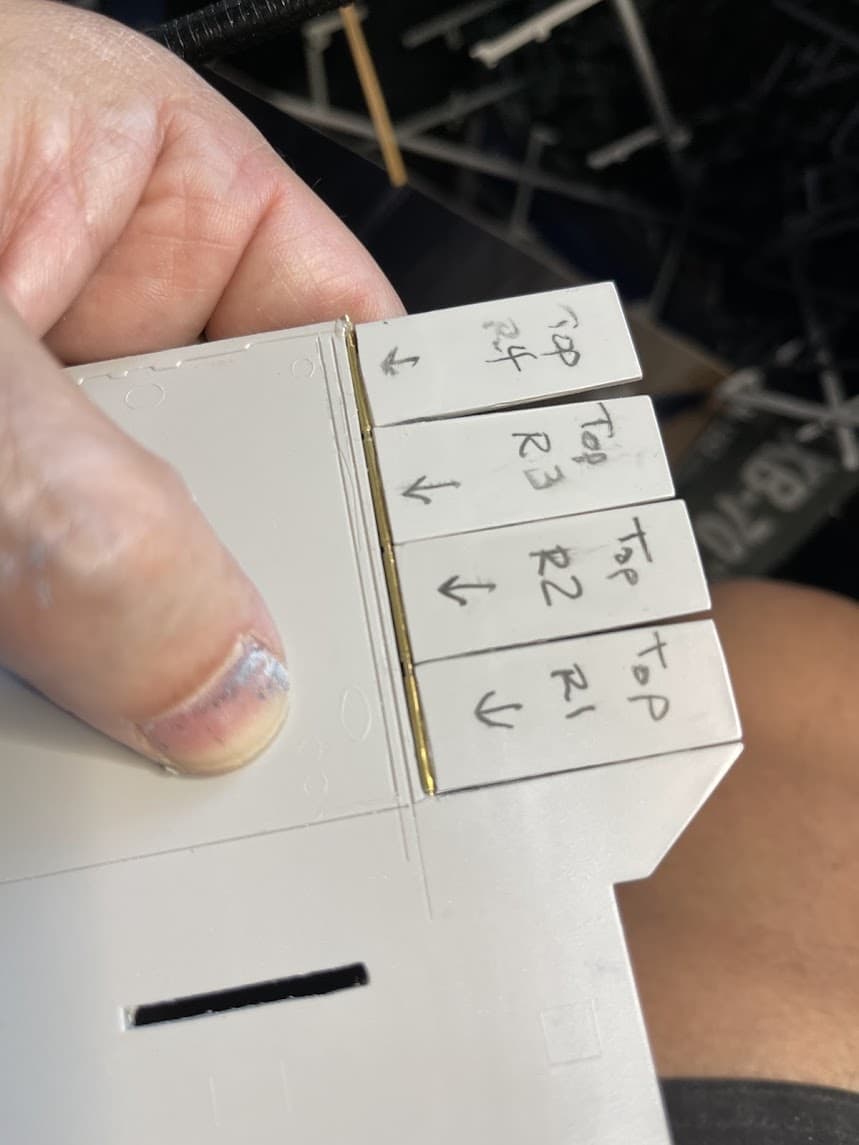
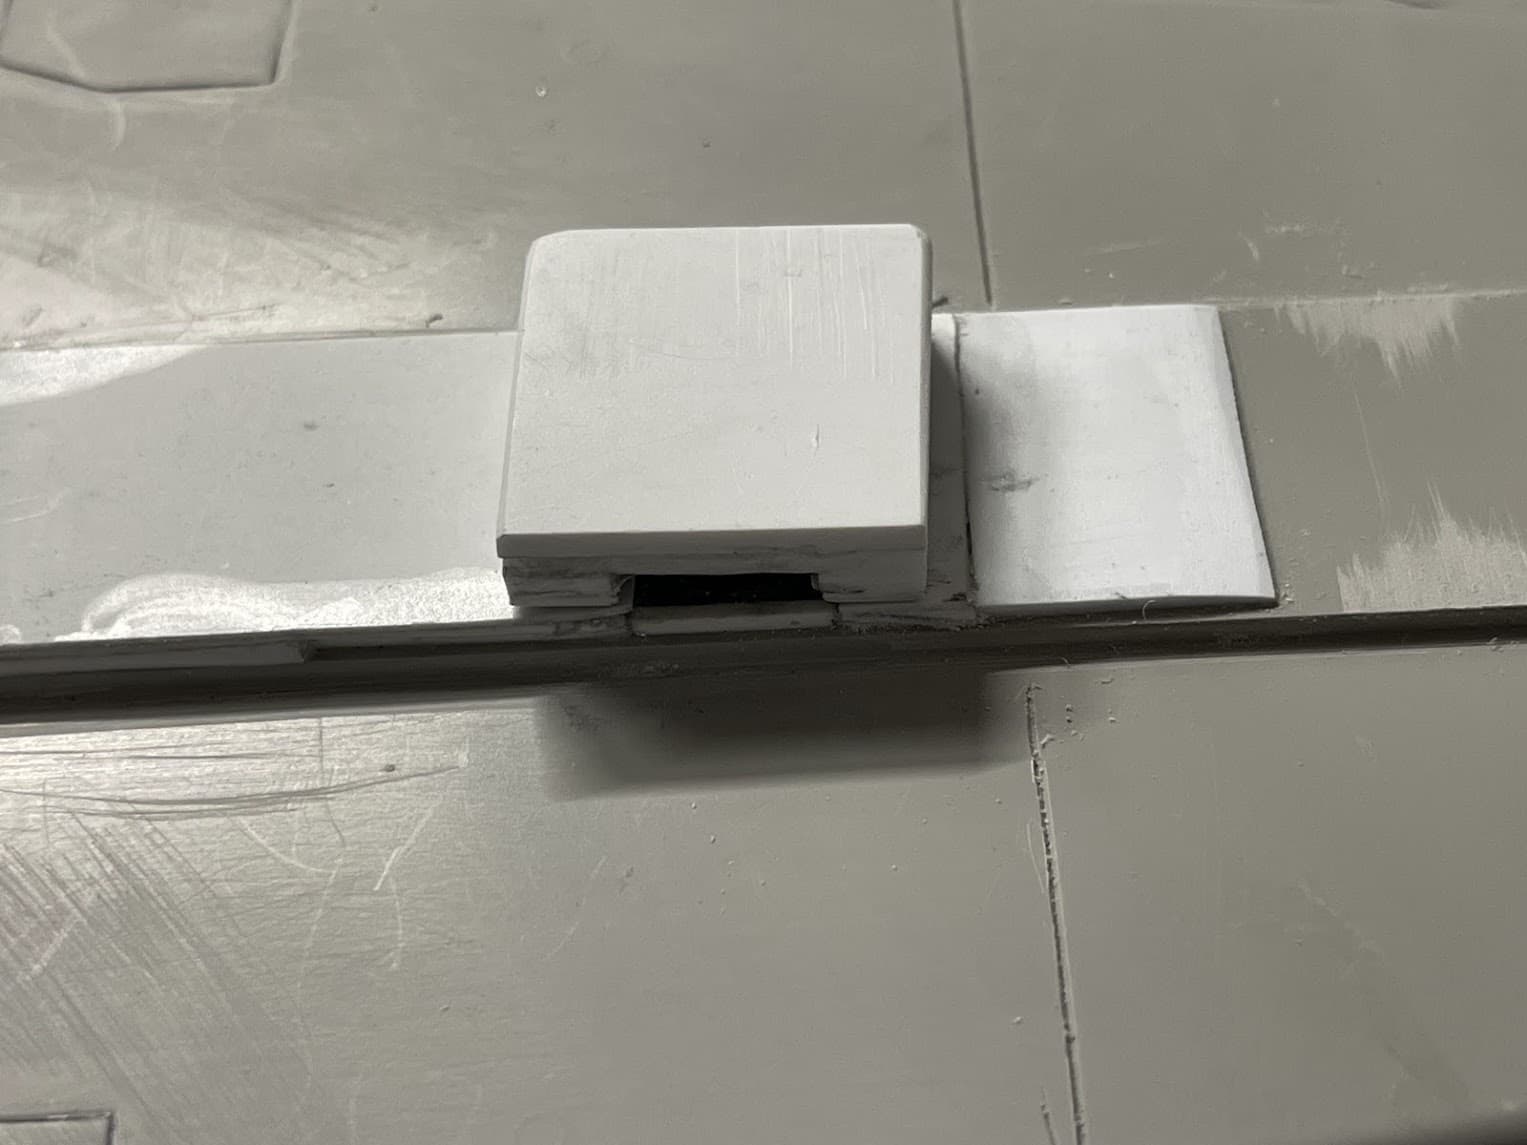
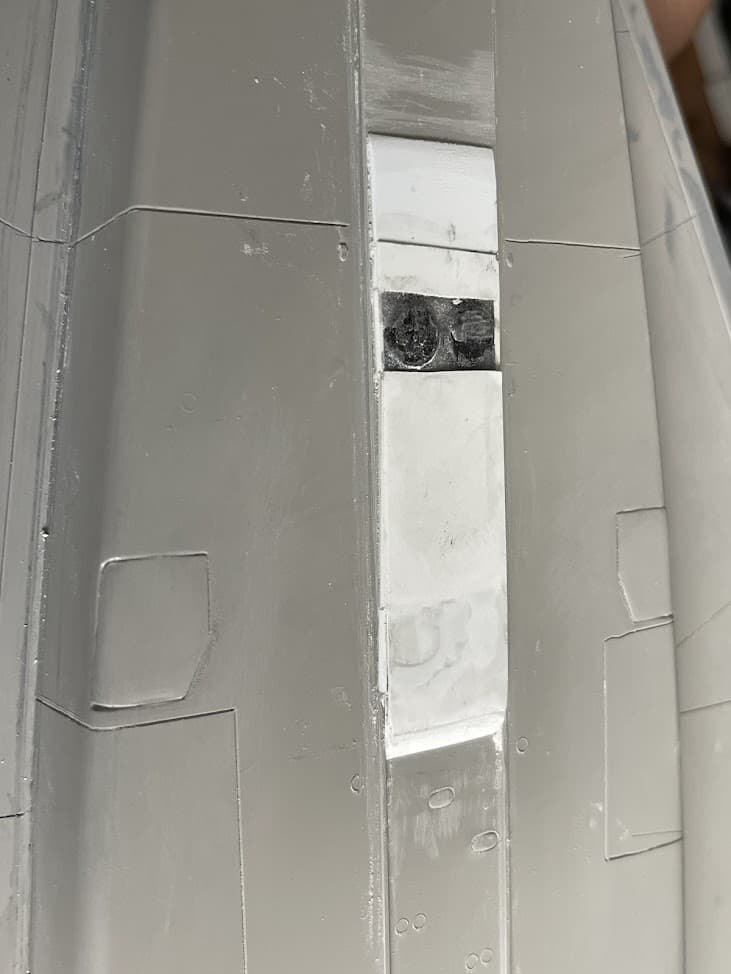
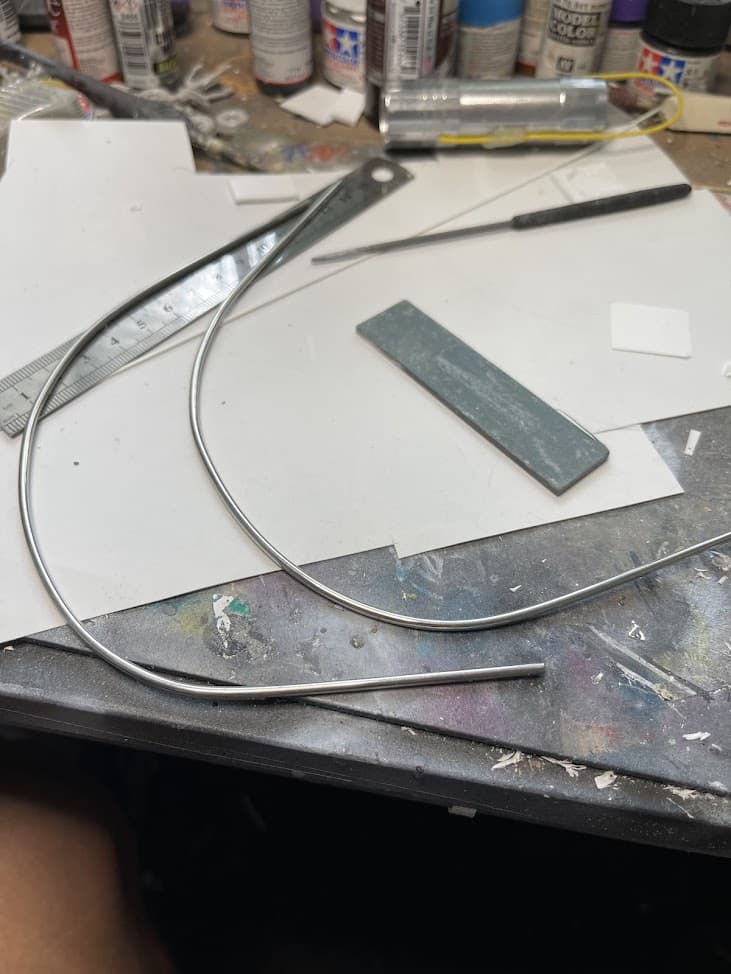
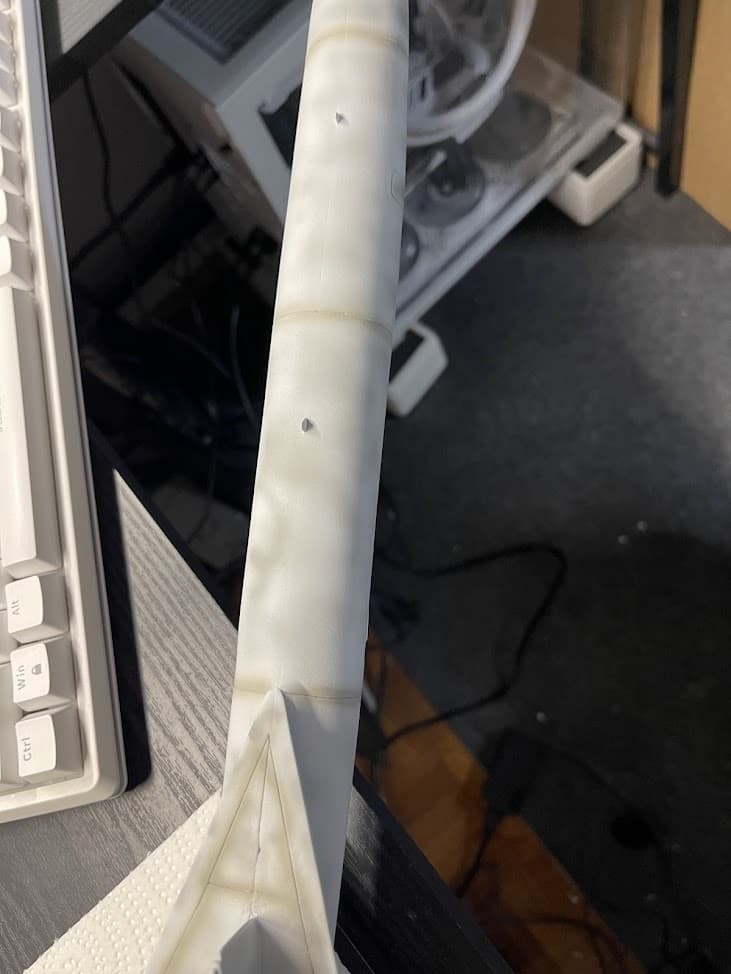
Yeah I think so, it’s a little tight but you can definitely see them. I’ll post a picture later. Trying to figure out how to add some resistance to the hinged flaps before I put them in place permanently. I thought I could just use some really thin (0.25mm) plastic card and put that in place over the top and bottom hinge area, to try and give some resistance so the control surfaces don’t just flap around. Not sure how well that’s gonna work or look ![]() Experimenting with really thin steel rod to see if I can make something there that might work…
Experimenting with really thin steel rod to see if I can make something there that might work…
In terms of adding a bit of friction to the hinge line I have an idea. If you put a little bit of a bend/warp in the hinge pin where it goes through the hinge tube, it will create a little bit of friction to maybe hold the flaps in place. The idea isn’t mine originally, I saw it in a magazine article about hinging model car doors (probably FSM many years ago. I’m not home now, but can maybe look it up later this weekend when home.
I found this video, it basically covers a couple different ideas to create the resistance to keep the hinged part in place.

On the underside of the bird, give the brass tubing a little tap with a small screwdriver to deform it a bit, making it impinge on the steel rod some?
In the crafting world, there’s something called ‘glue dots’, or ‘snot dots’ ( ![]() ) that are used to adhere paper to other bits. It also works well to temporarily hold plastic bits to something, like a toothpick for paint. It doesn’t dry. Perhaps a small sliver of that at the opening of the brass tubing before you shove the rod in there could provide enough resistance to keep them where you put them?
) that are used to adhere paper to other bits. It also works well to temporarily hold plastic bits to something, like a toothpick for paint. It doesn’t dry. Perhaps a small sliver of that at the opening of the brass tubing before you shove the rod in there could provide enough resistance to keep them where you put them?
Thanks guys, interesting ideas. I don’t mind if they move, I just want there to be some resistance so they just flap all over.
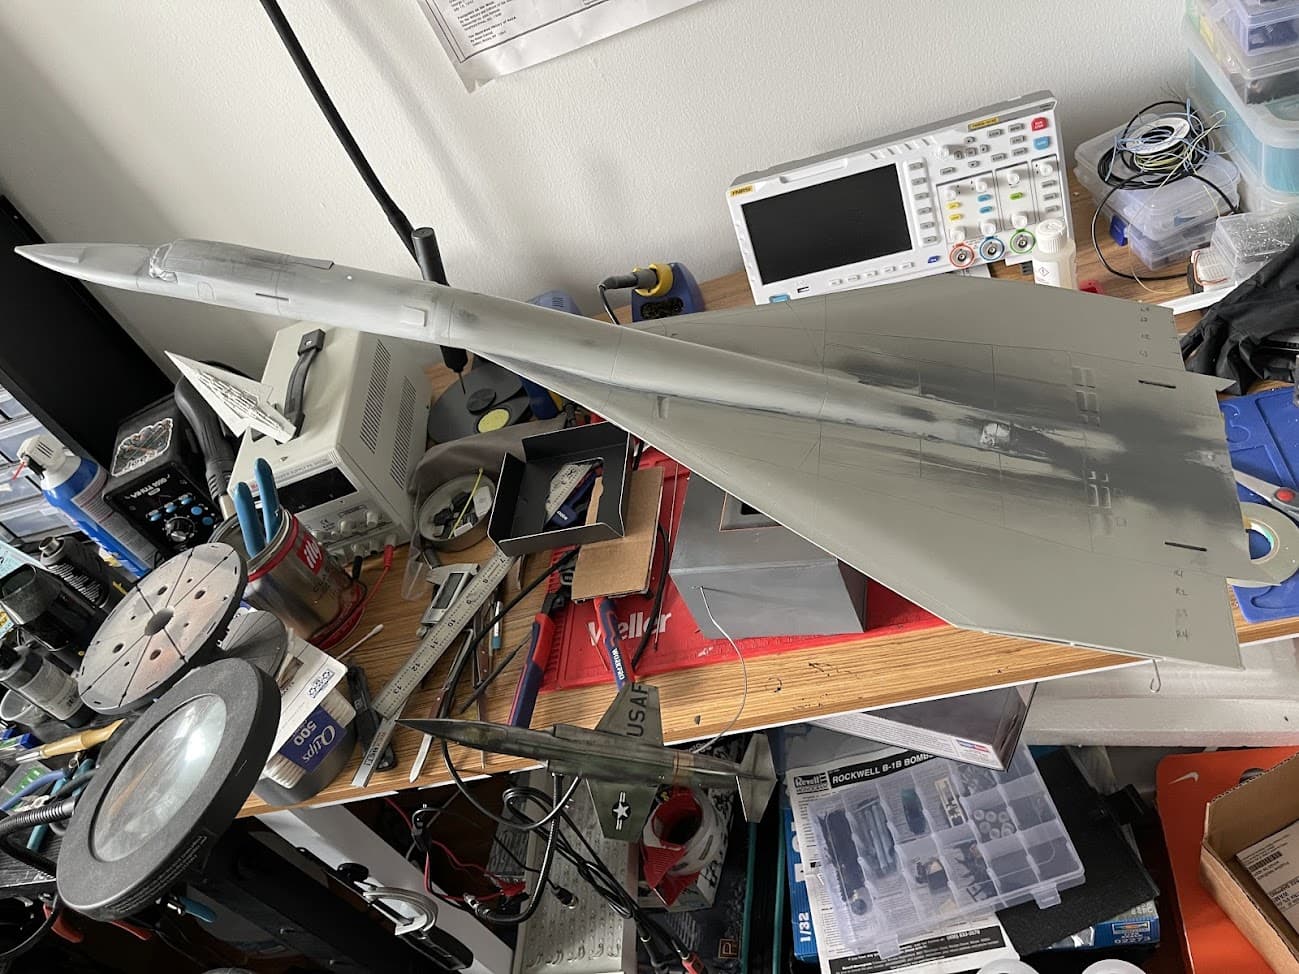
OK some further progress…
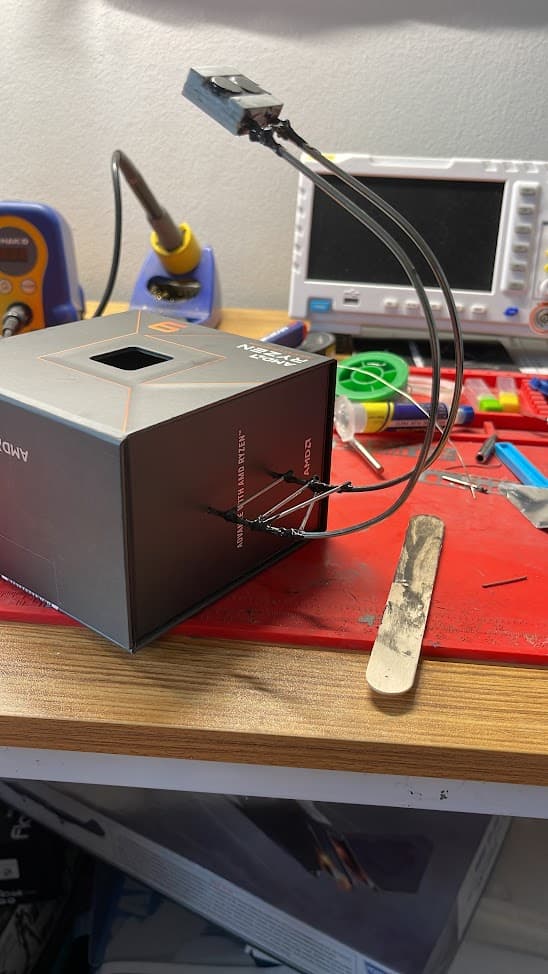
Mounts done on Valkerie
Added some extra supports to make it stiff enough
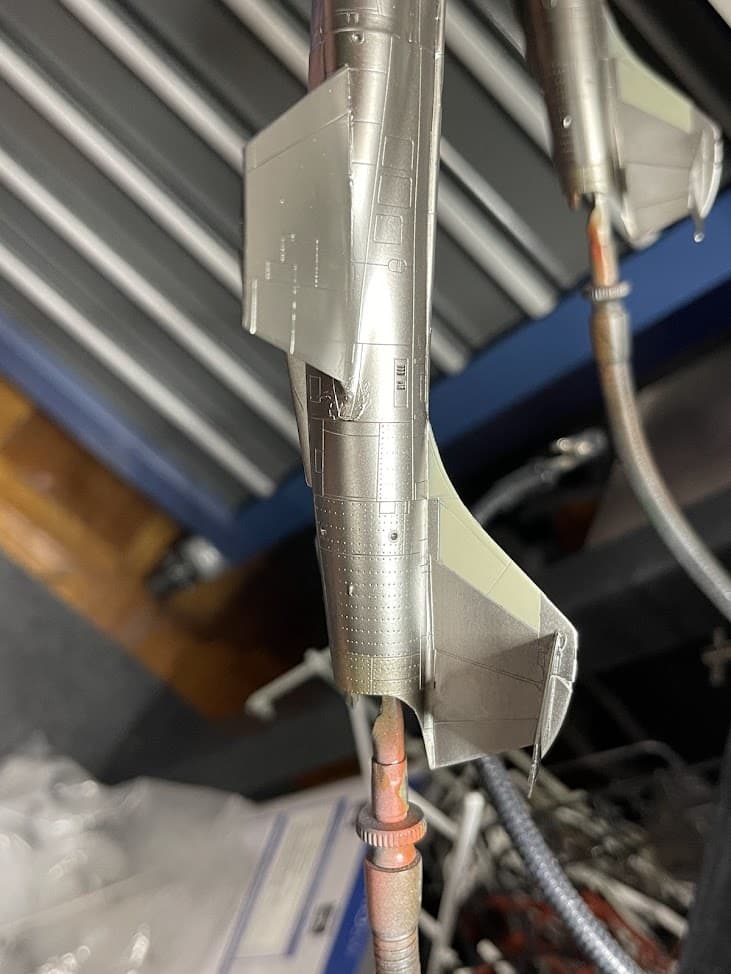
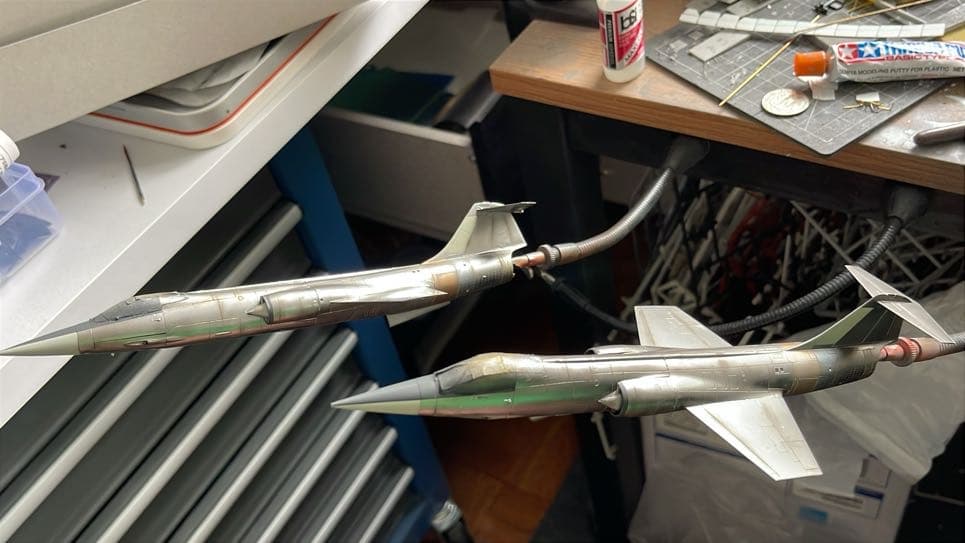
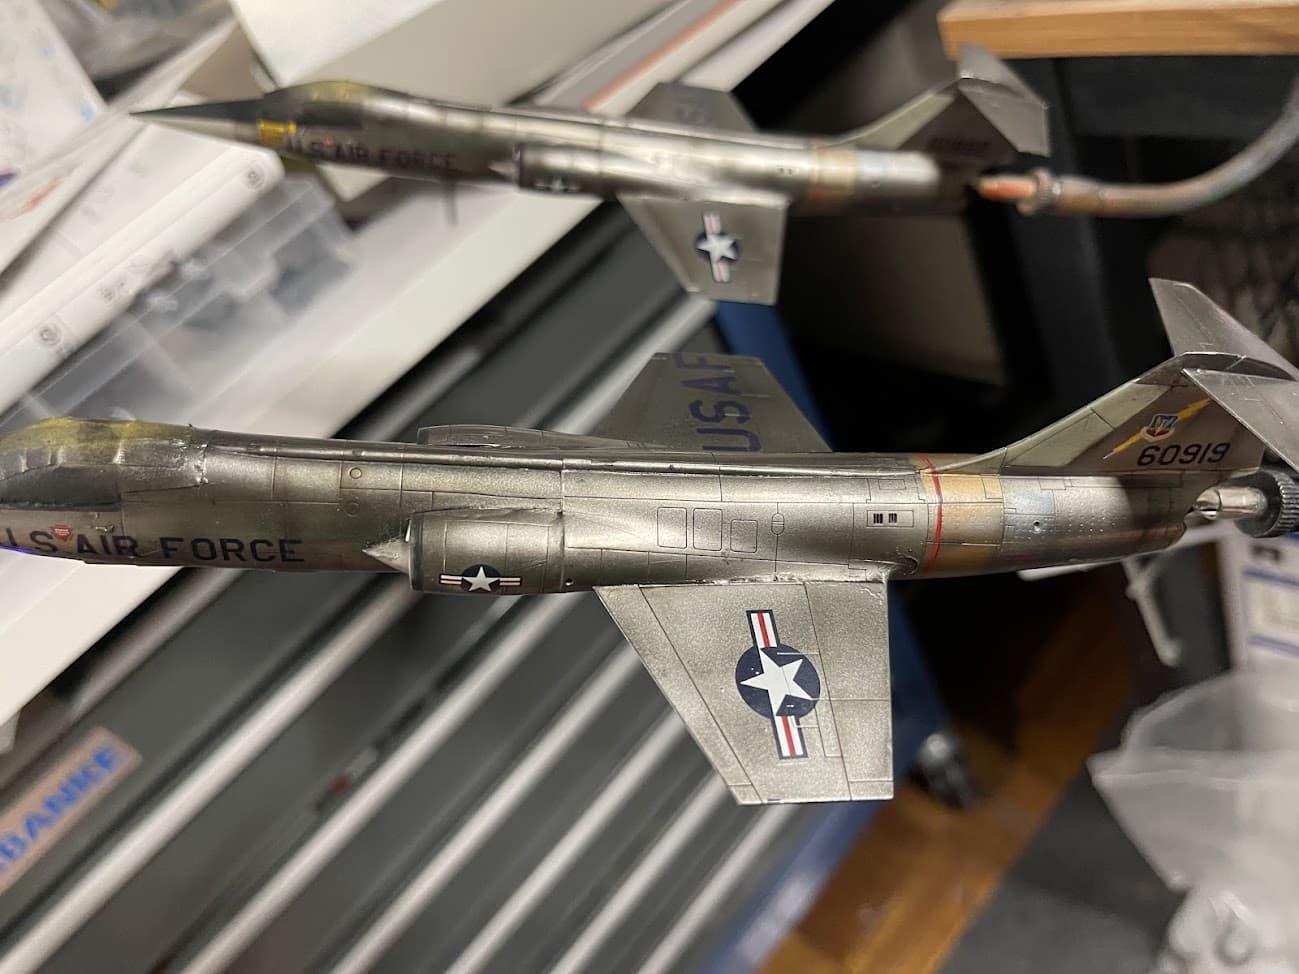
Wanted to add two escorts, so bought 2 1/72 F-104 kits, cockpits…
Painted metallics
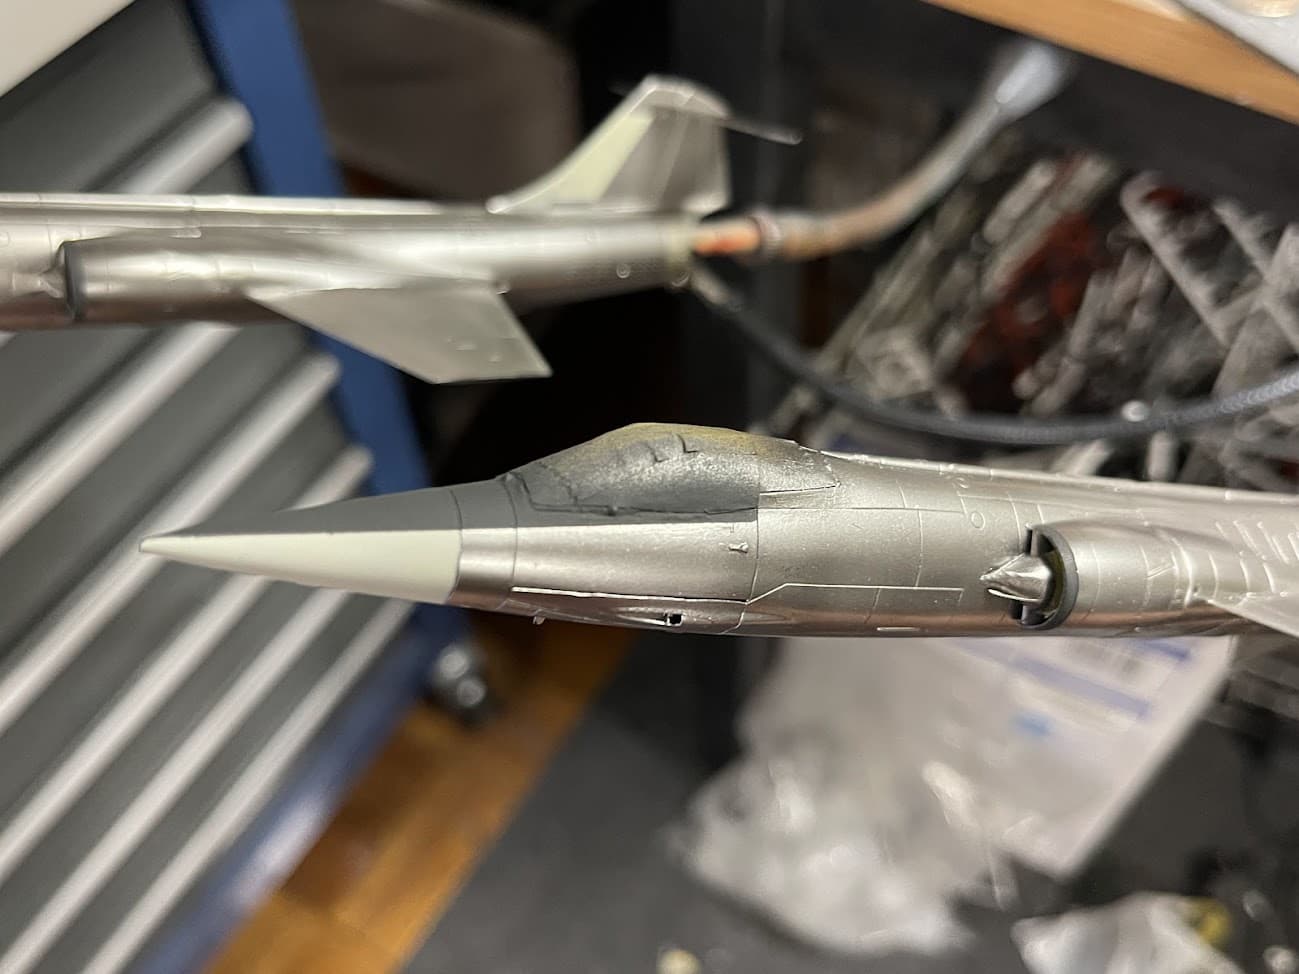
Doing some shading with mascara brush or whatever they are called
I just added a thin clear coat, before applying the decals, and not sure that was the right idea. For the metallic color, I used Green Stuff Chrome Metal Airbrush paint. This went on really nice. But using the Tamiya X-22 clear over it was maybe not the right idea… Oh well these guys are just to add some spice to the overall Valkerie.
Finally some more updates:
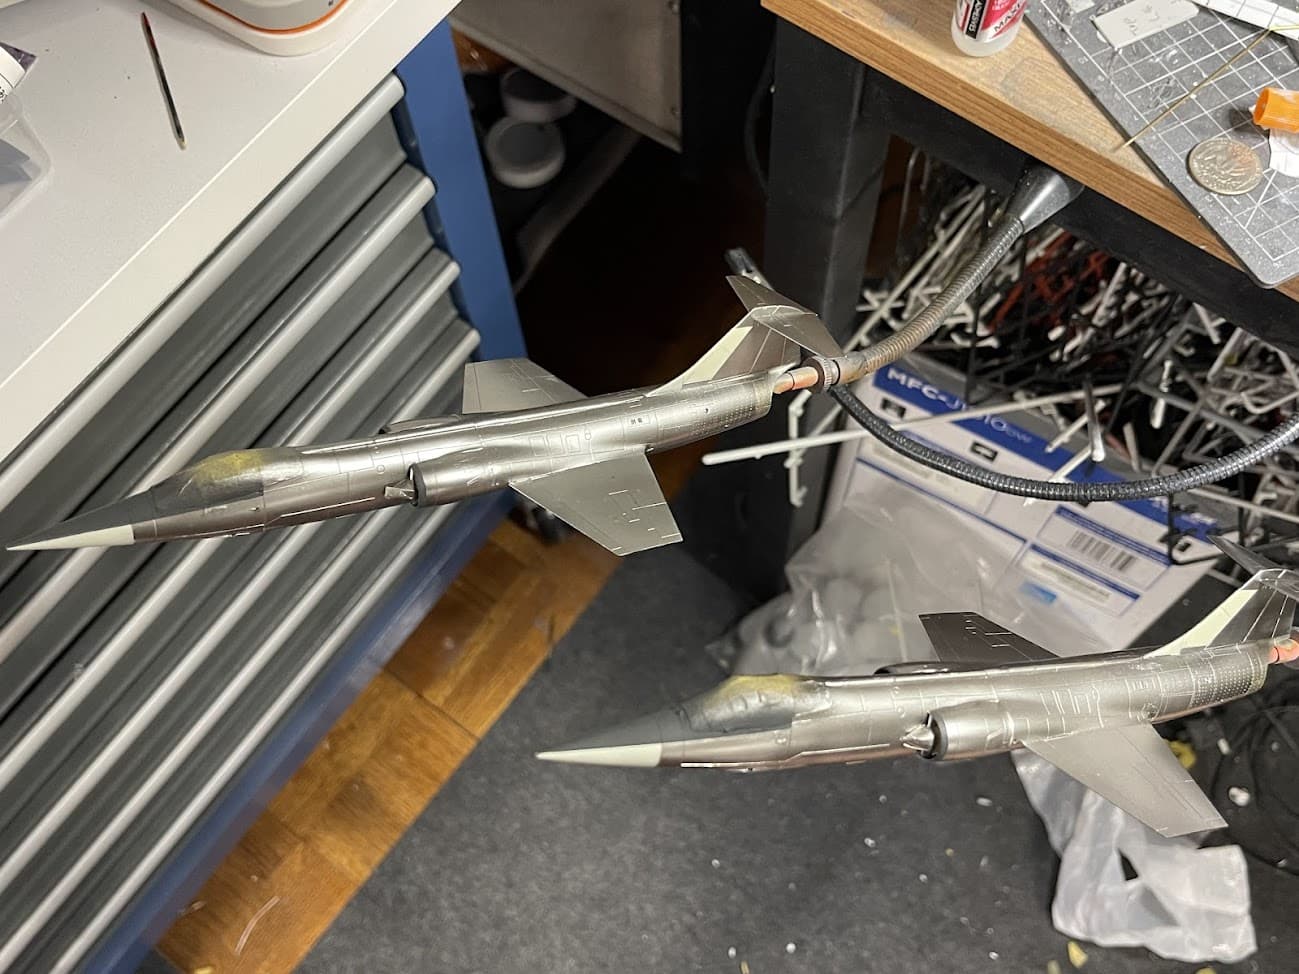
For the escort fighters
What they look like mounted together
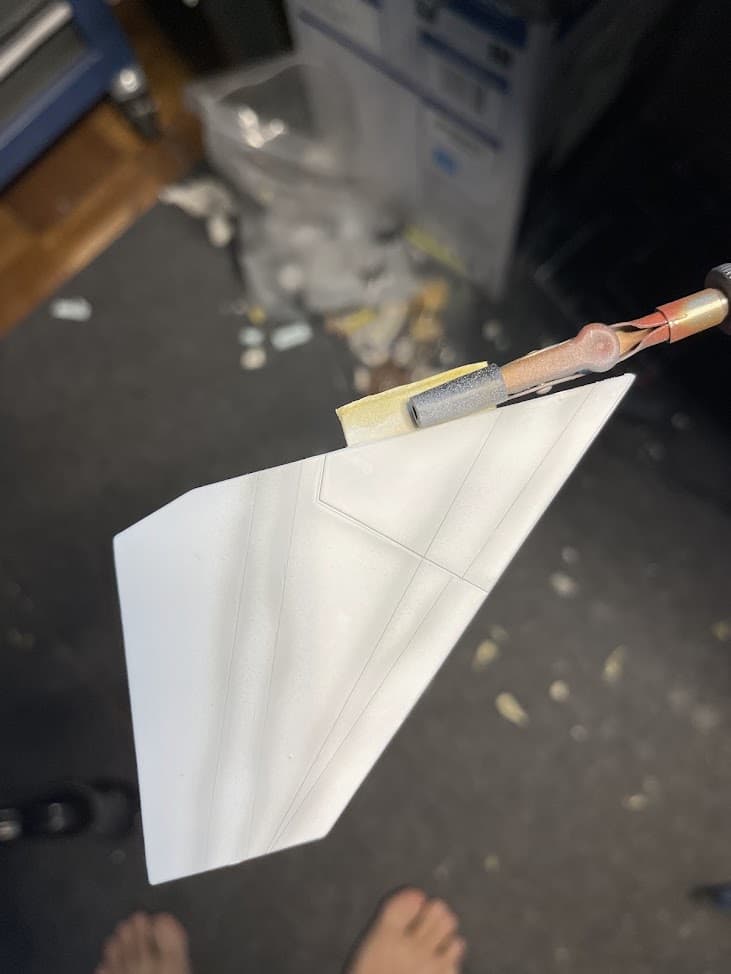
Painting white coat/pre-shading
2 layers of white over this
That’s going to be quite the display once it’s all together. The sanding on the nose looks like it’s small enough that you could probably still fix it. It’s all in the black, not near the paint line.
If you are careful, it would just need some touch up after the re-sand, or maybe it’s not really noticeable after the canopy is on?