Thanks! I believe you’re right. It looks like Amarillo to me as well, though the character spacing in “NAVY” is tighter in the photo below.
Thanks! I believe you’re right. It looks like Amarillo to me as well, though the character spacing in “NAVY” is tighter in the photo below.
Sorry, guess I wasn’t much help. Great to see that with John’s help you’re on the right track now though!
You were indeed being helpful. Thanks!
Here’s what needs to be done to turn the Kitty Hawk kit into prototype #2.
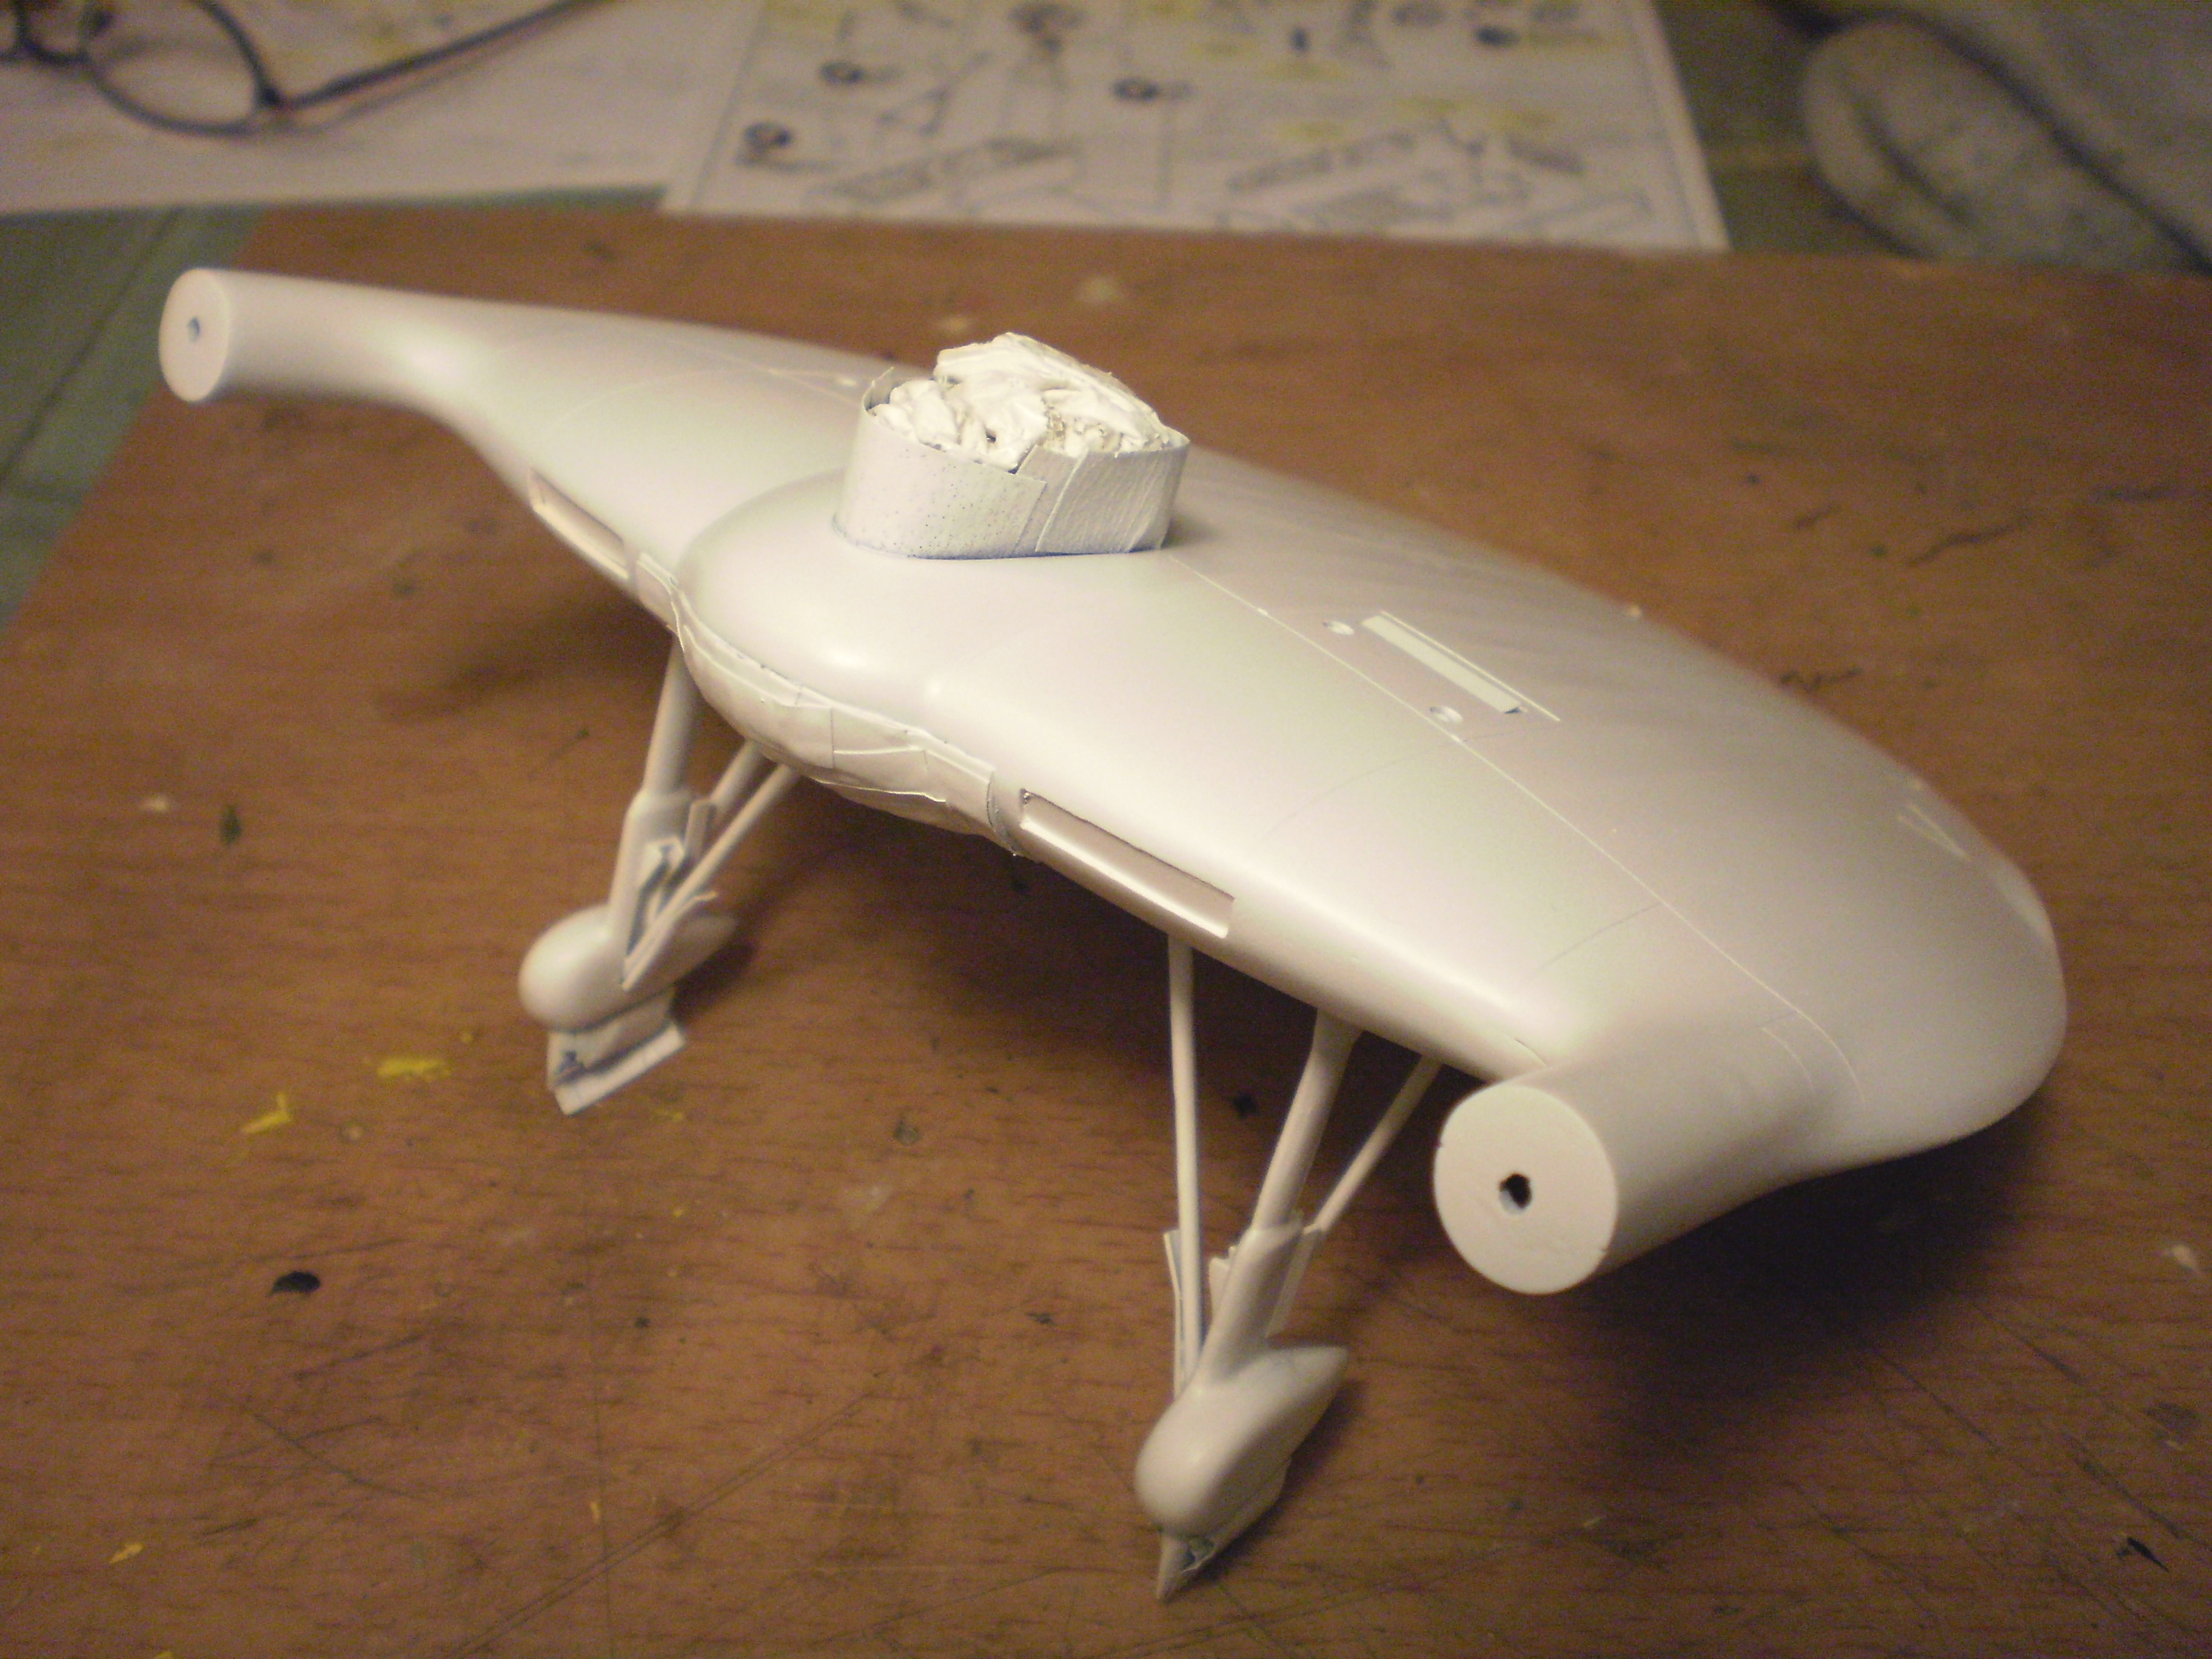
Don’t use the tailhook, bombs, bomb racks, and armor glass provided in the kit.
Fill in the channels for the tailhook mechanism. (I did this with sheet styrene, but if I were to do it again, I’d use epoxy putty - though the added weight might make it necessary to use the metal landing gear set from Scale Aircraft Conversions).
Pose the exhaust flaps for engine cooling air (parts D15, D17, D24, D26) in the open position - the way they’re most often seen in photos.
Replace the kit’s thick, ribbed, landing gear canisters (parts C27) with thinner, plain, styrene rod.
Make a square headrest for the pilot’s seat.
Make wheel bulges for the outer main gear doors.
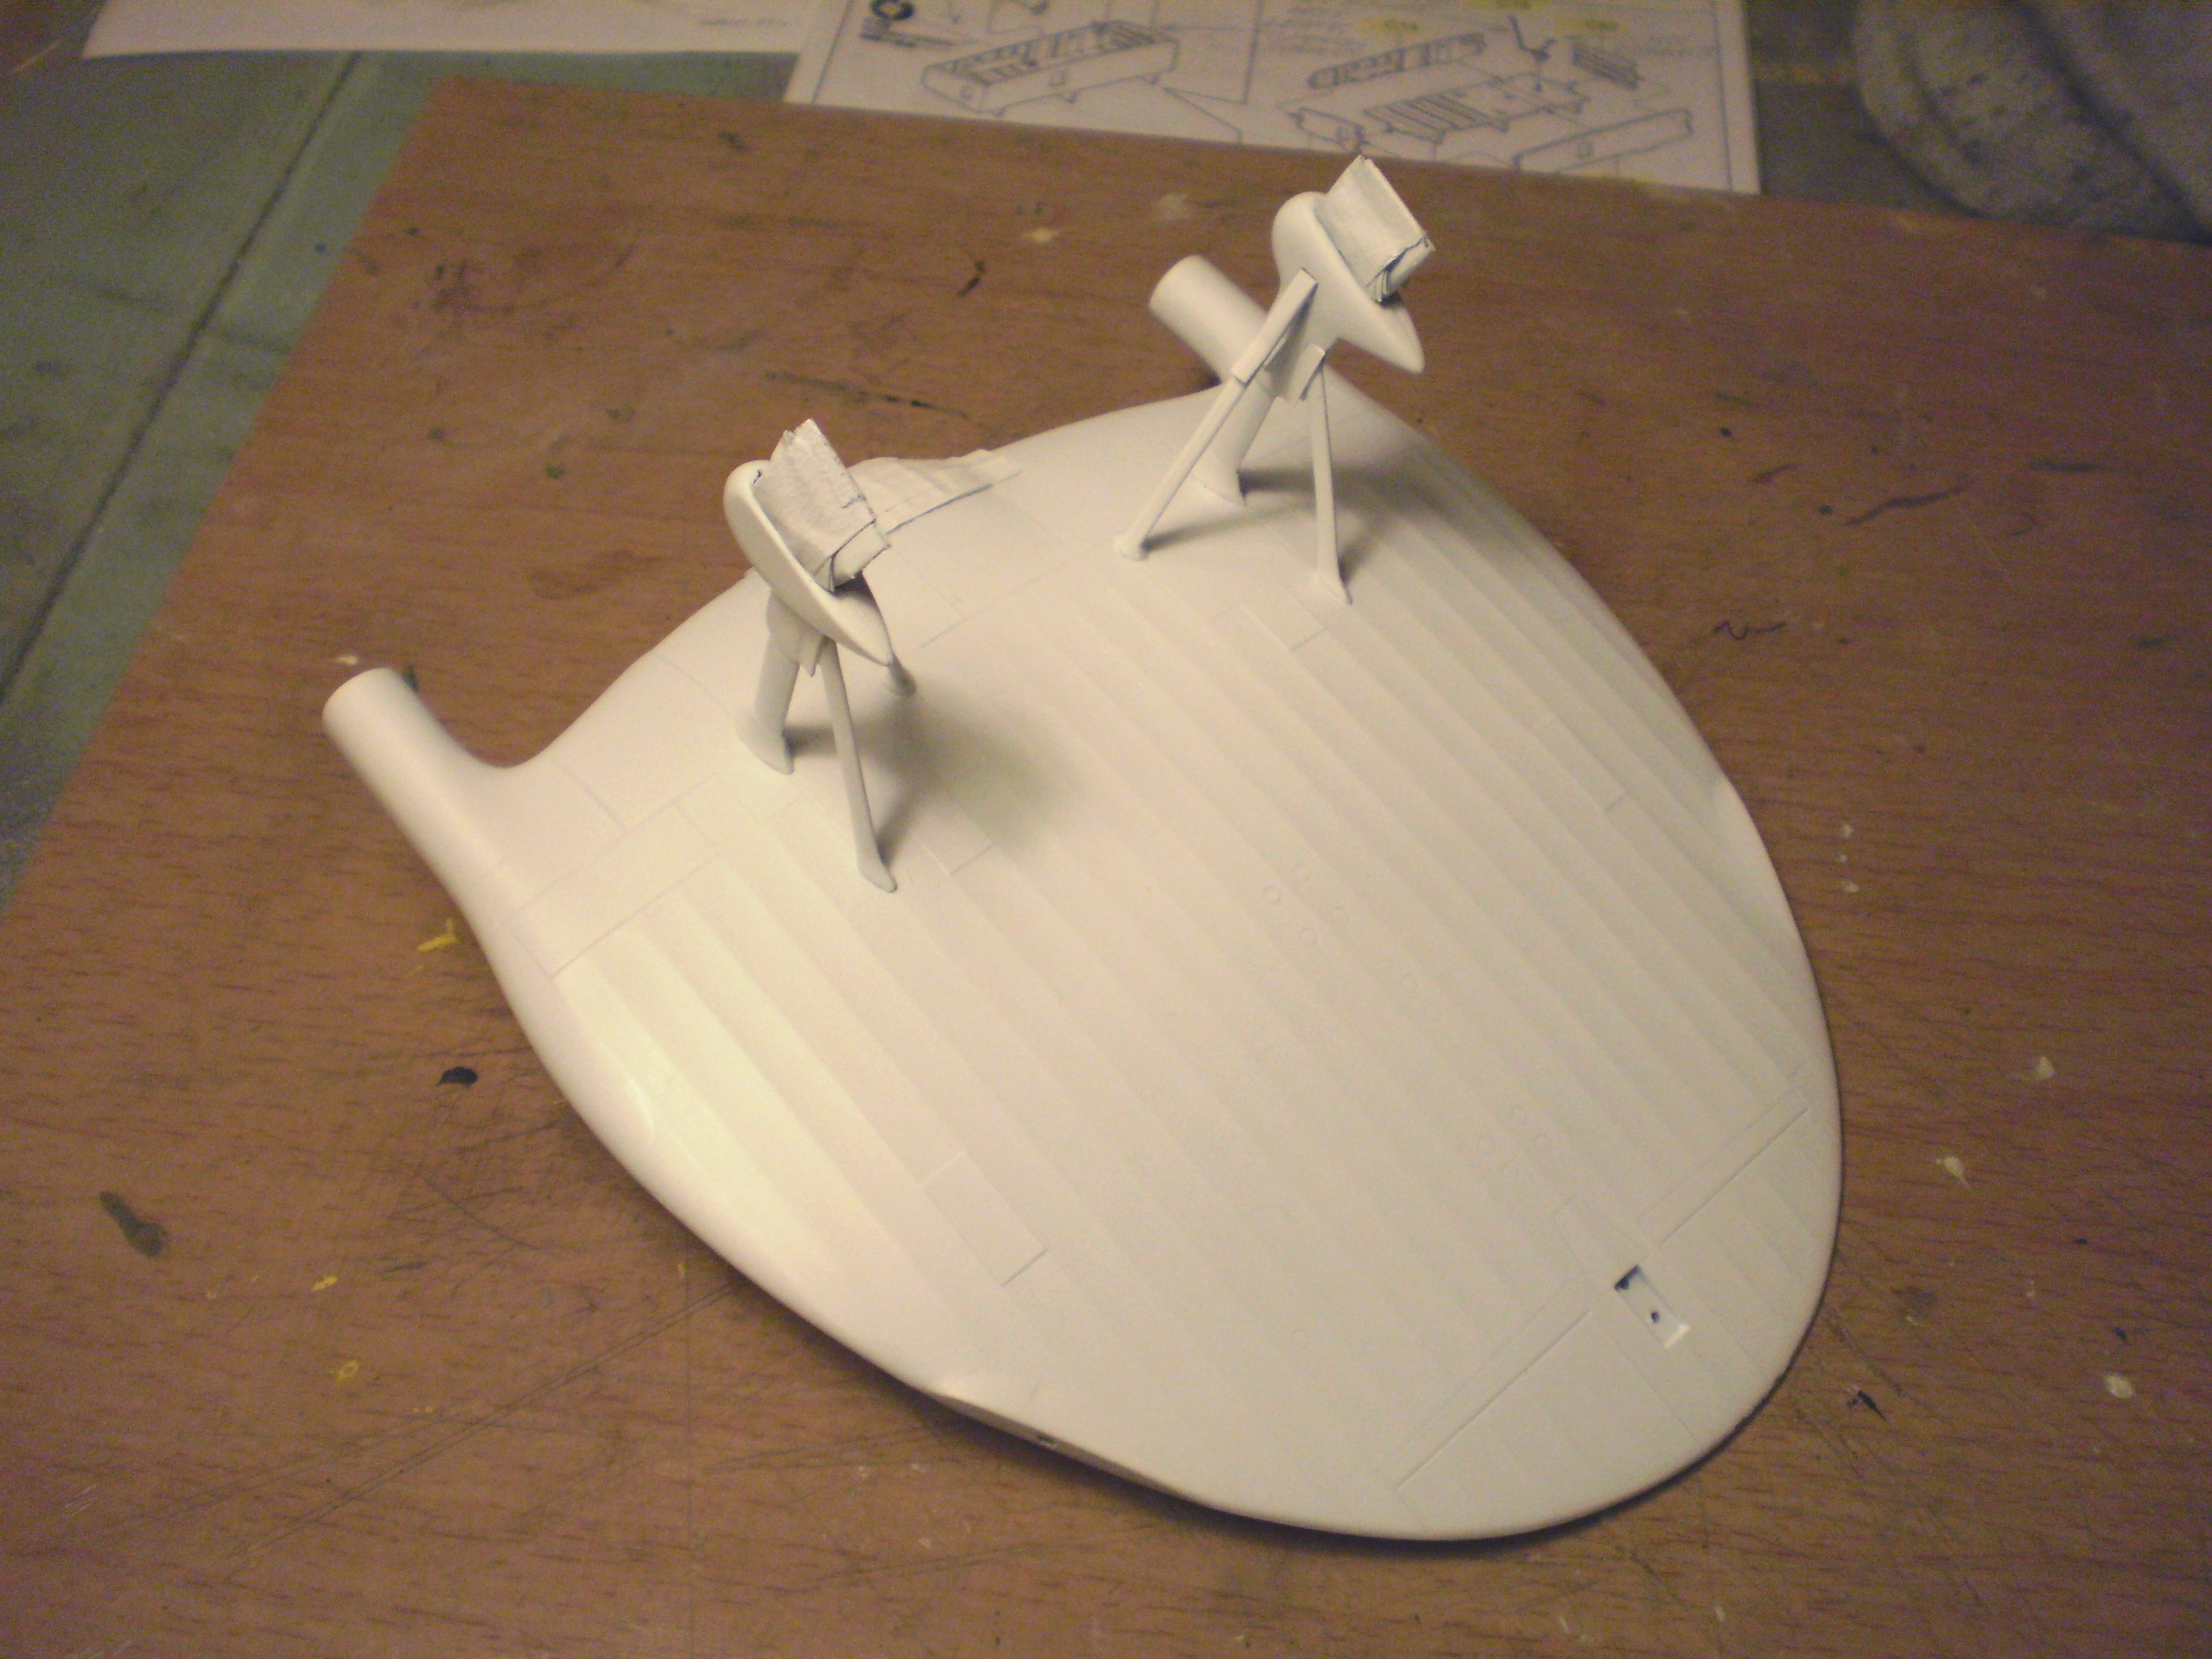
Remove the ribbing on the rudders.
Fill in the six gun ports.
Use just one national insignia decal - on the upper port side.
Place the decals representing taped-on walk/work panels OVER the national insignia. (The kit instructions and box art show the panels UNDER the insignia!)
Place the oval logo decals on the front side of the port propeller, and the back side of the starboard propeller.
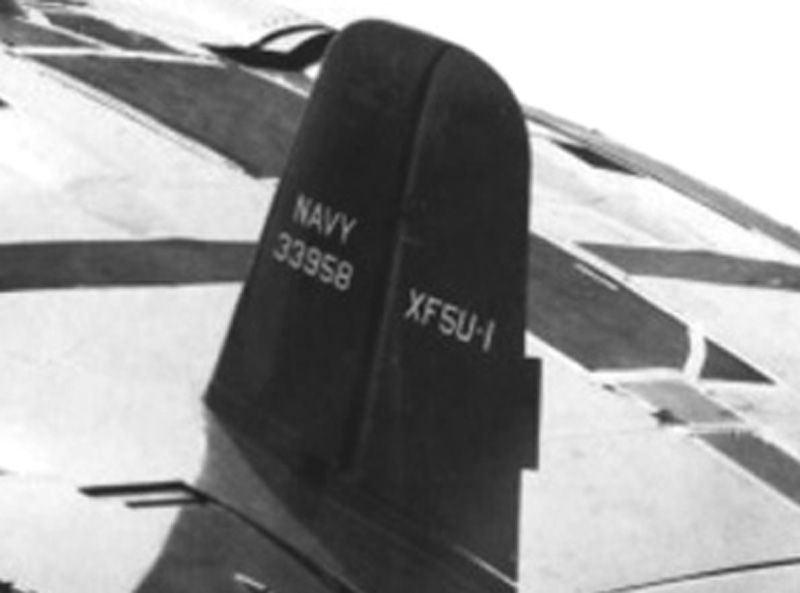
Create custom decals for the vertical fin and rudder markings, as well as the propeller tracking diamonds.
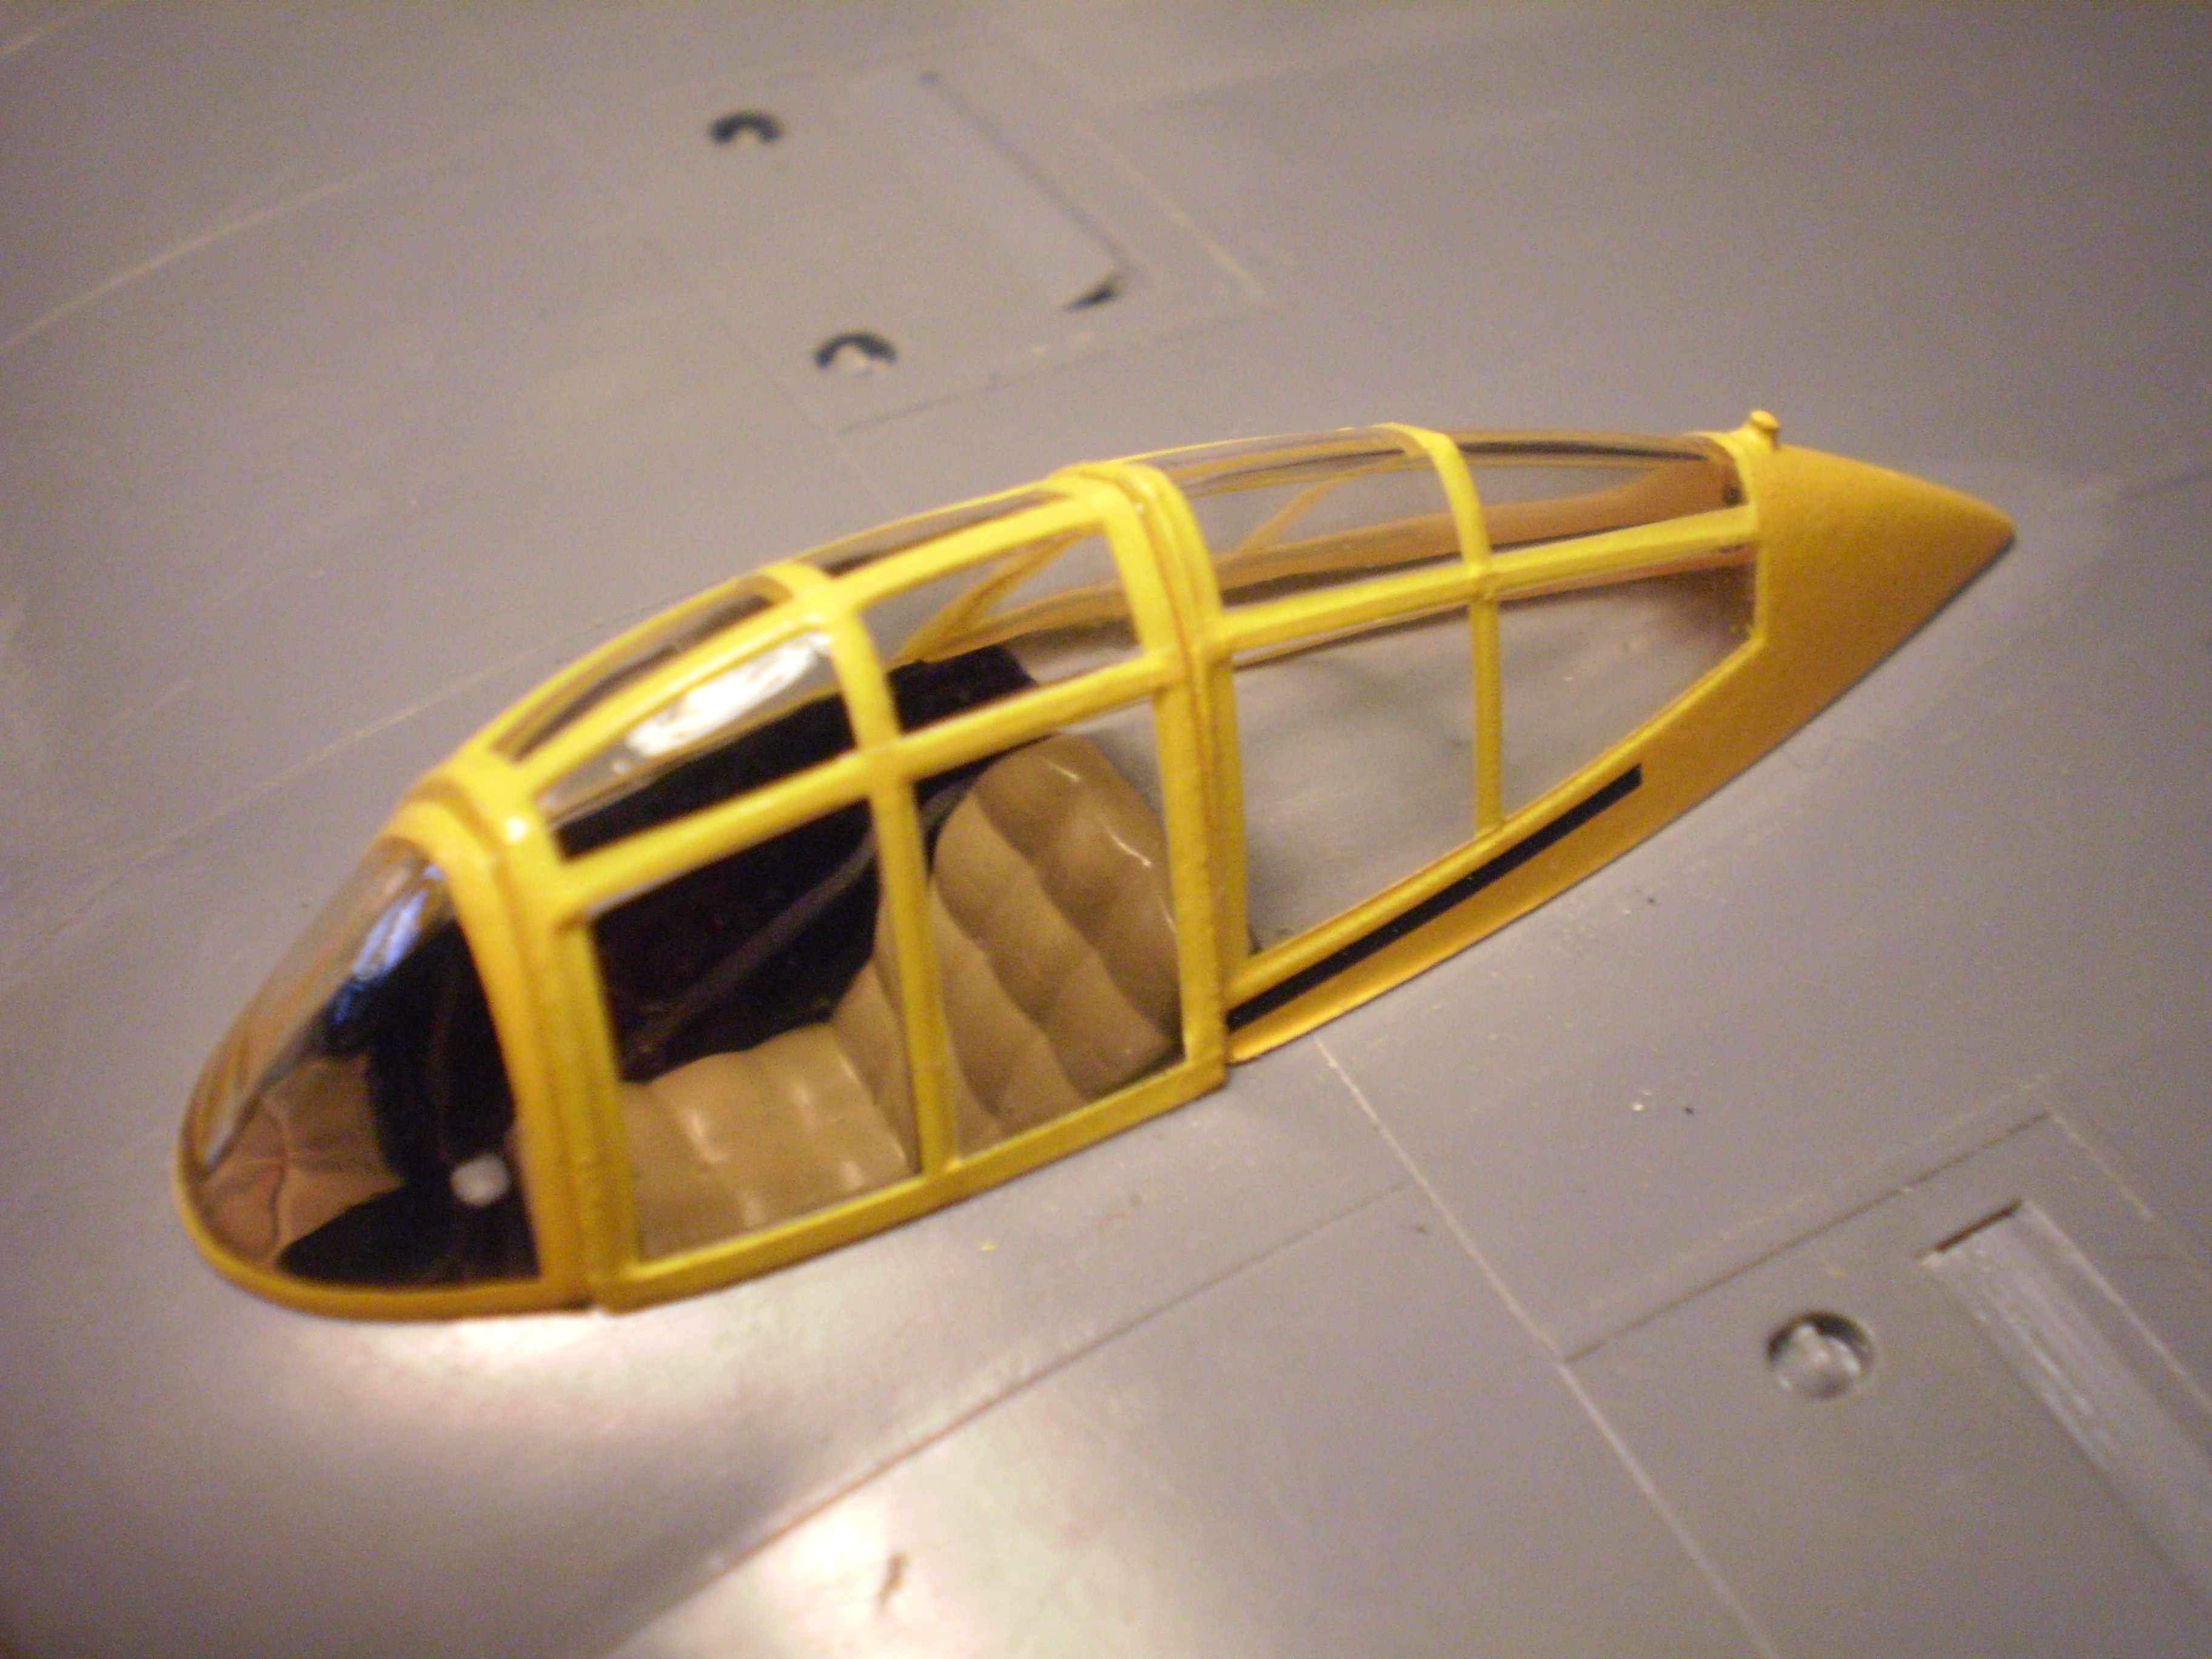
Canopies painted. Three methods were used.
The V-173’s canopy was done with a combination of masking/spraying and decal stripes. Paint is Testors 1214 and 1114 Gloss Yellow. The decal stripes are Print Scale CAMO-035. The yellow of the decals doesn’t quite match the Testors paint, but I’m happy with the overall result.
The XF5U-1’s canopy was hand painted with Model Master FS15042 Dark Sea Blue, and then cleaned up with a sharpened wood toothpick.
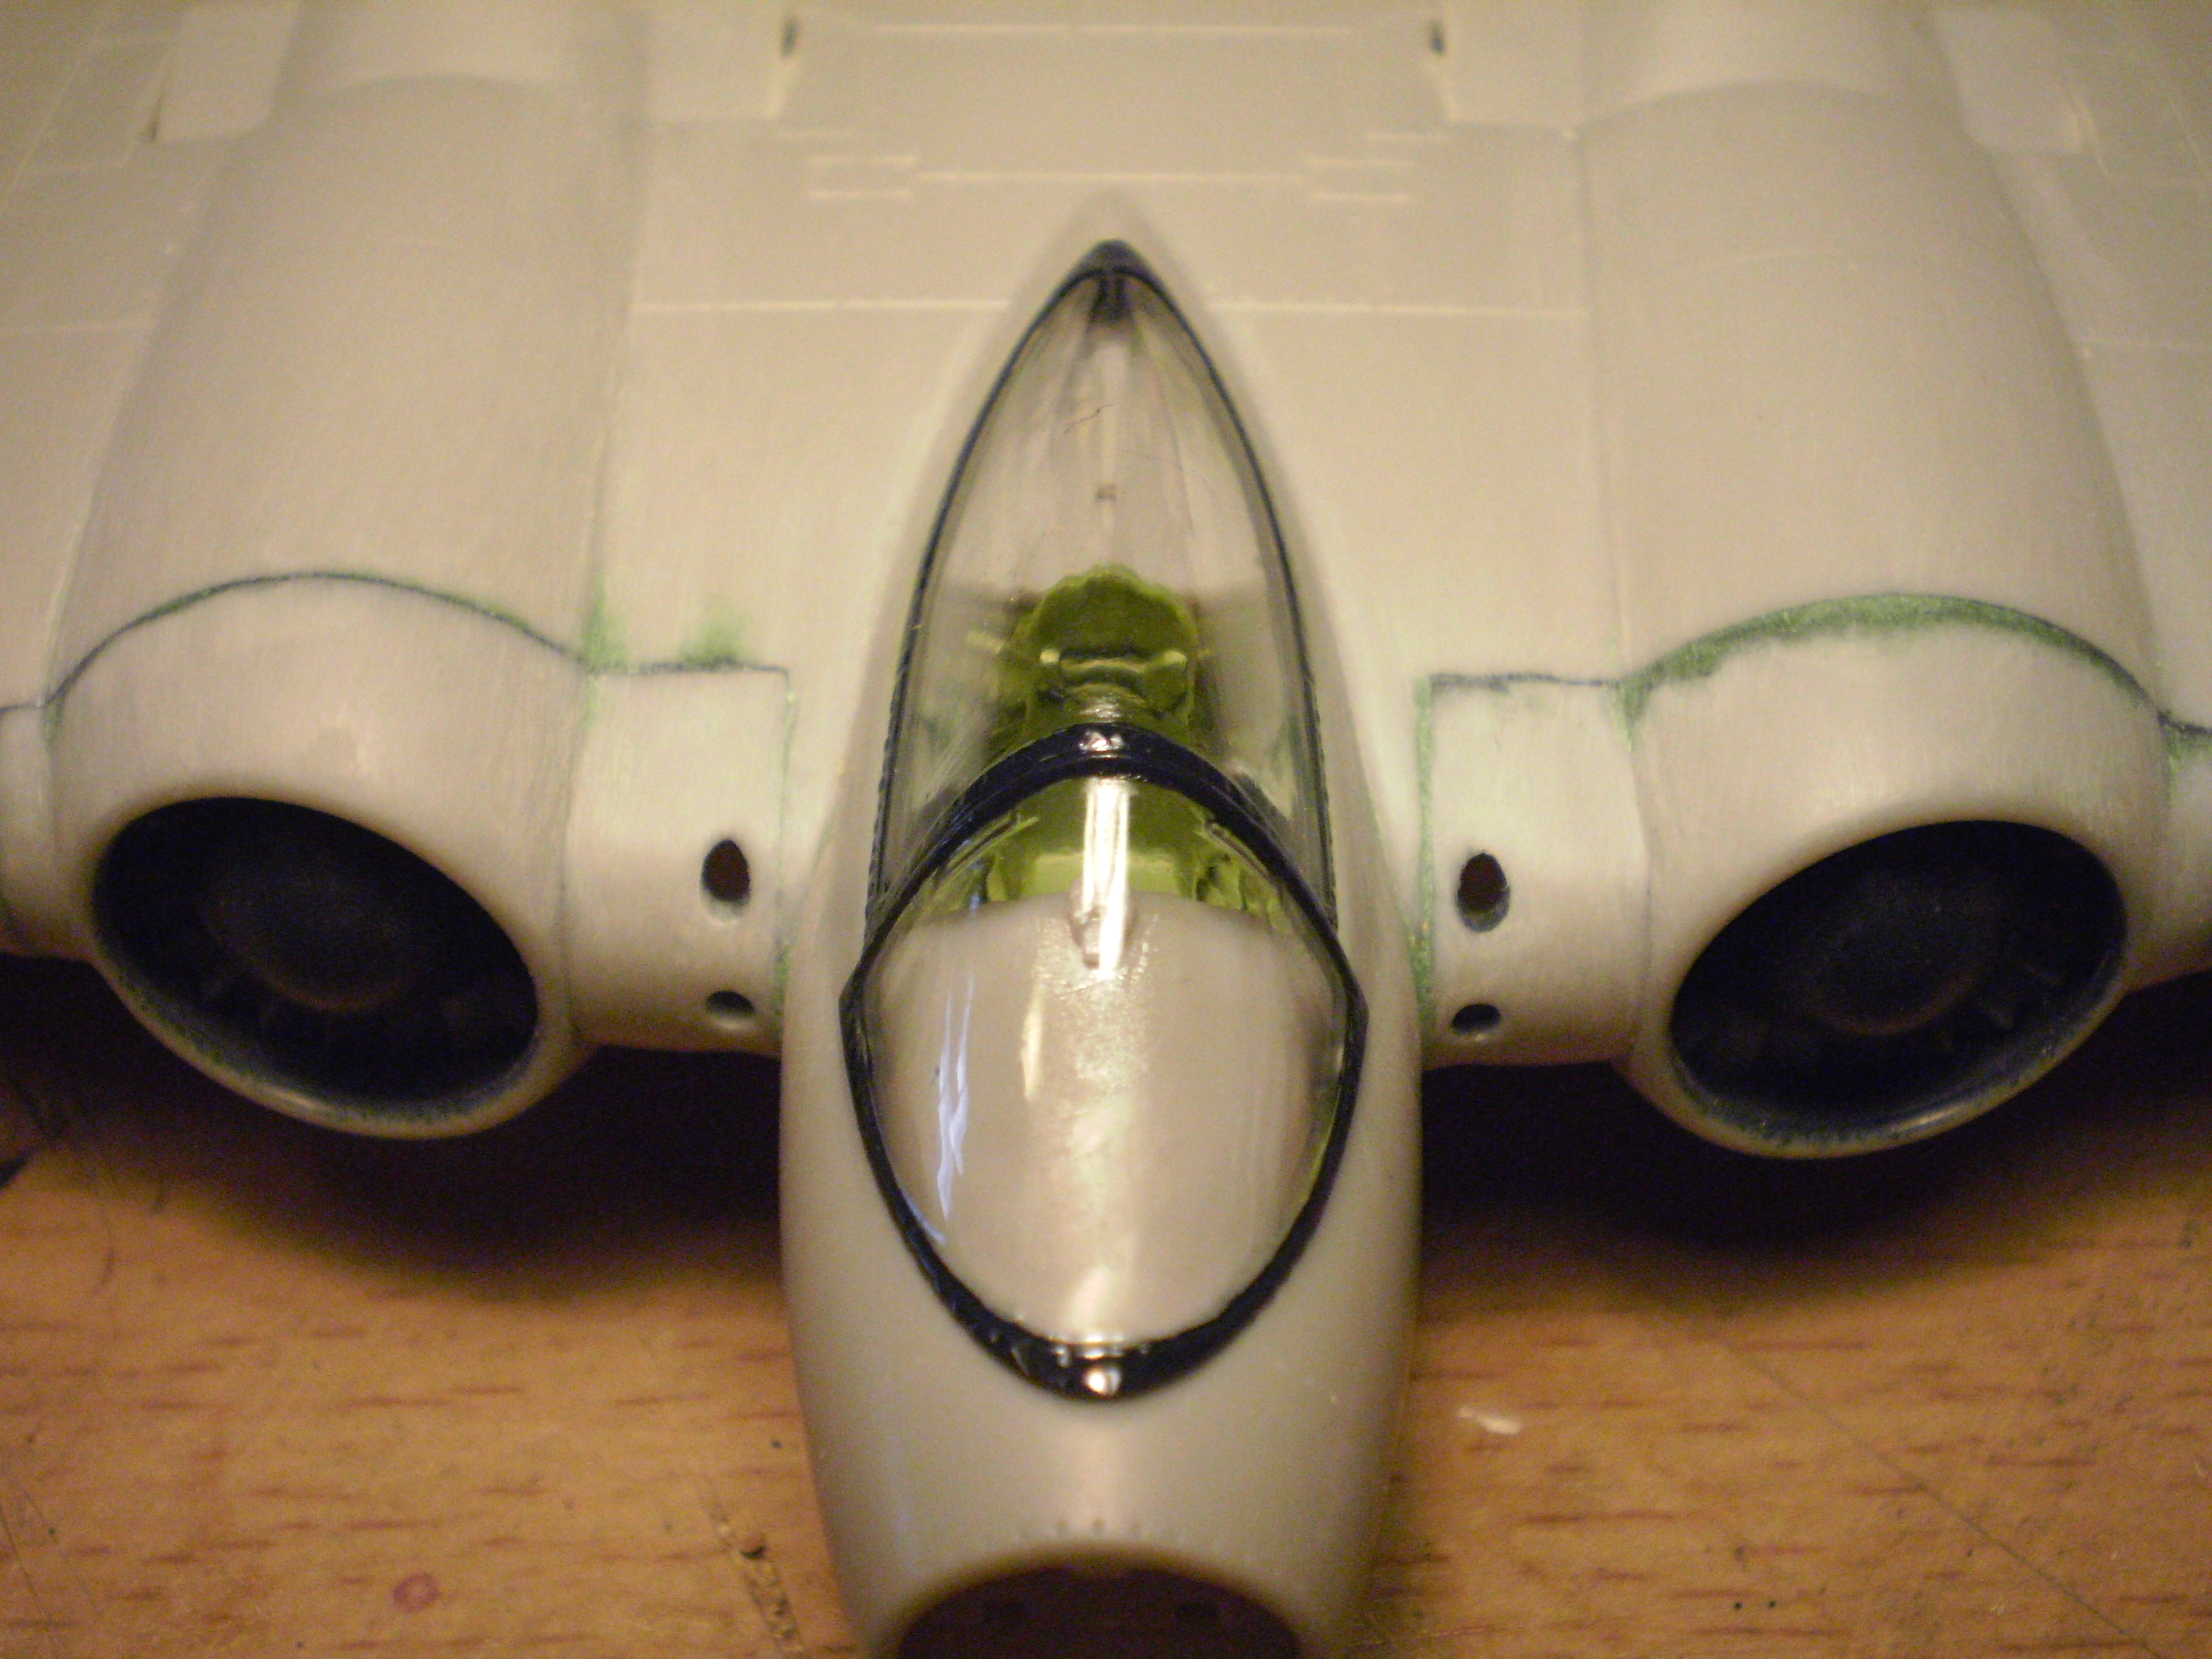
Both canopies were dipped in Future.
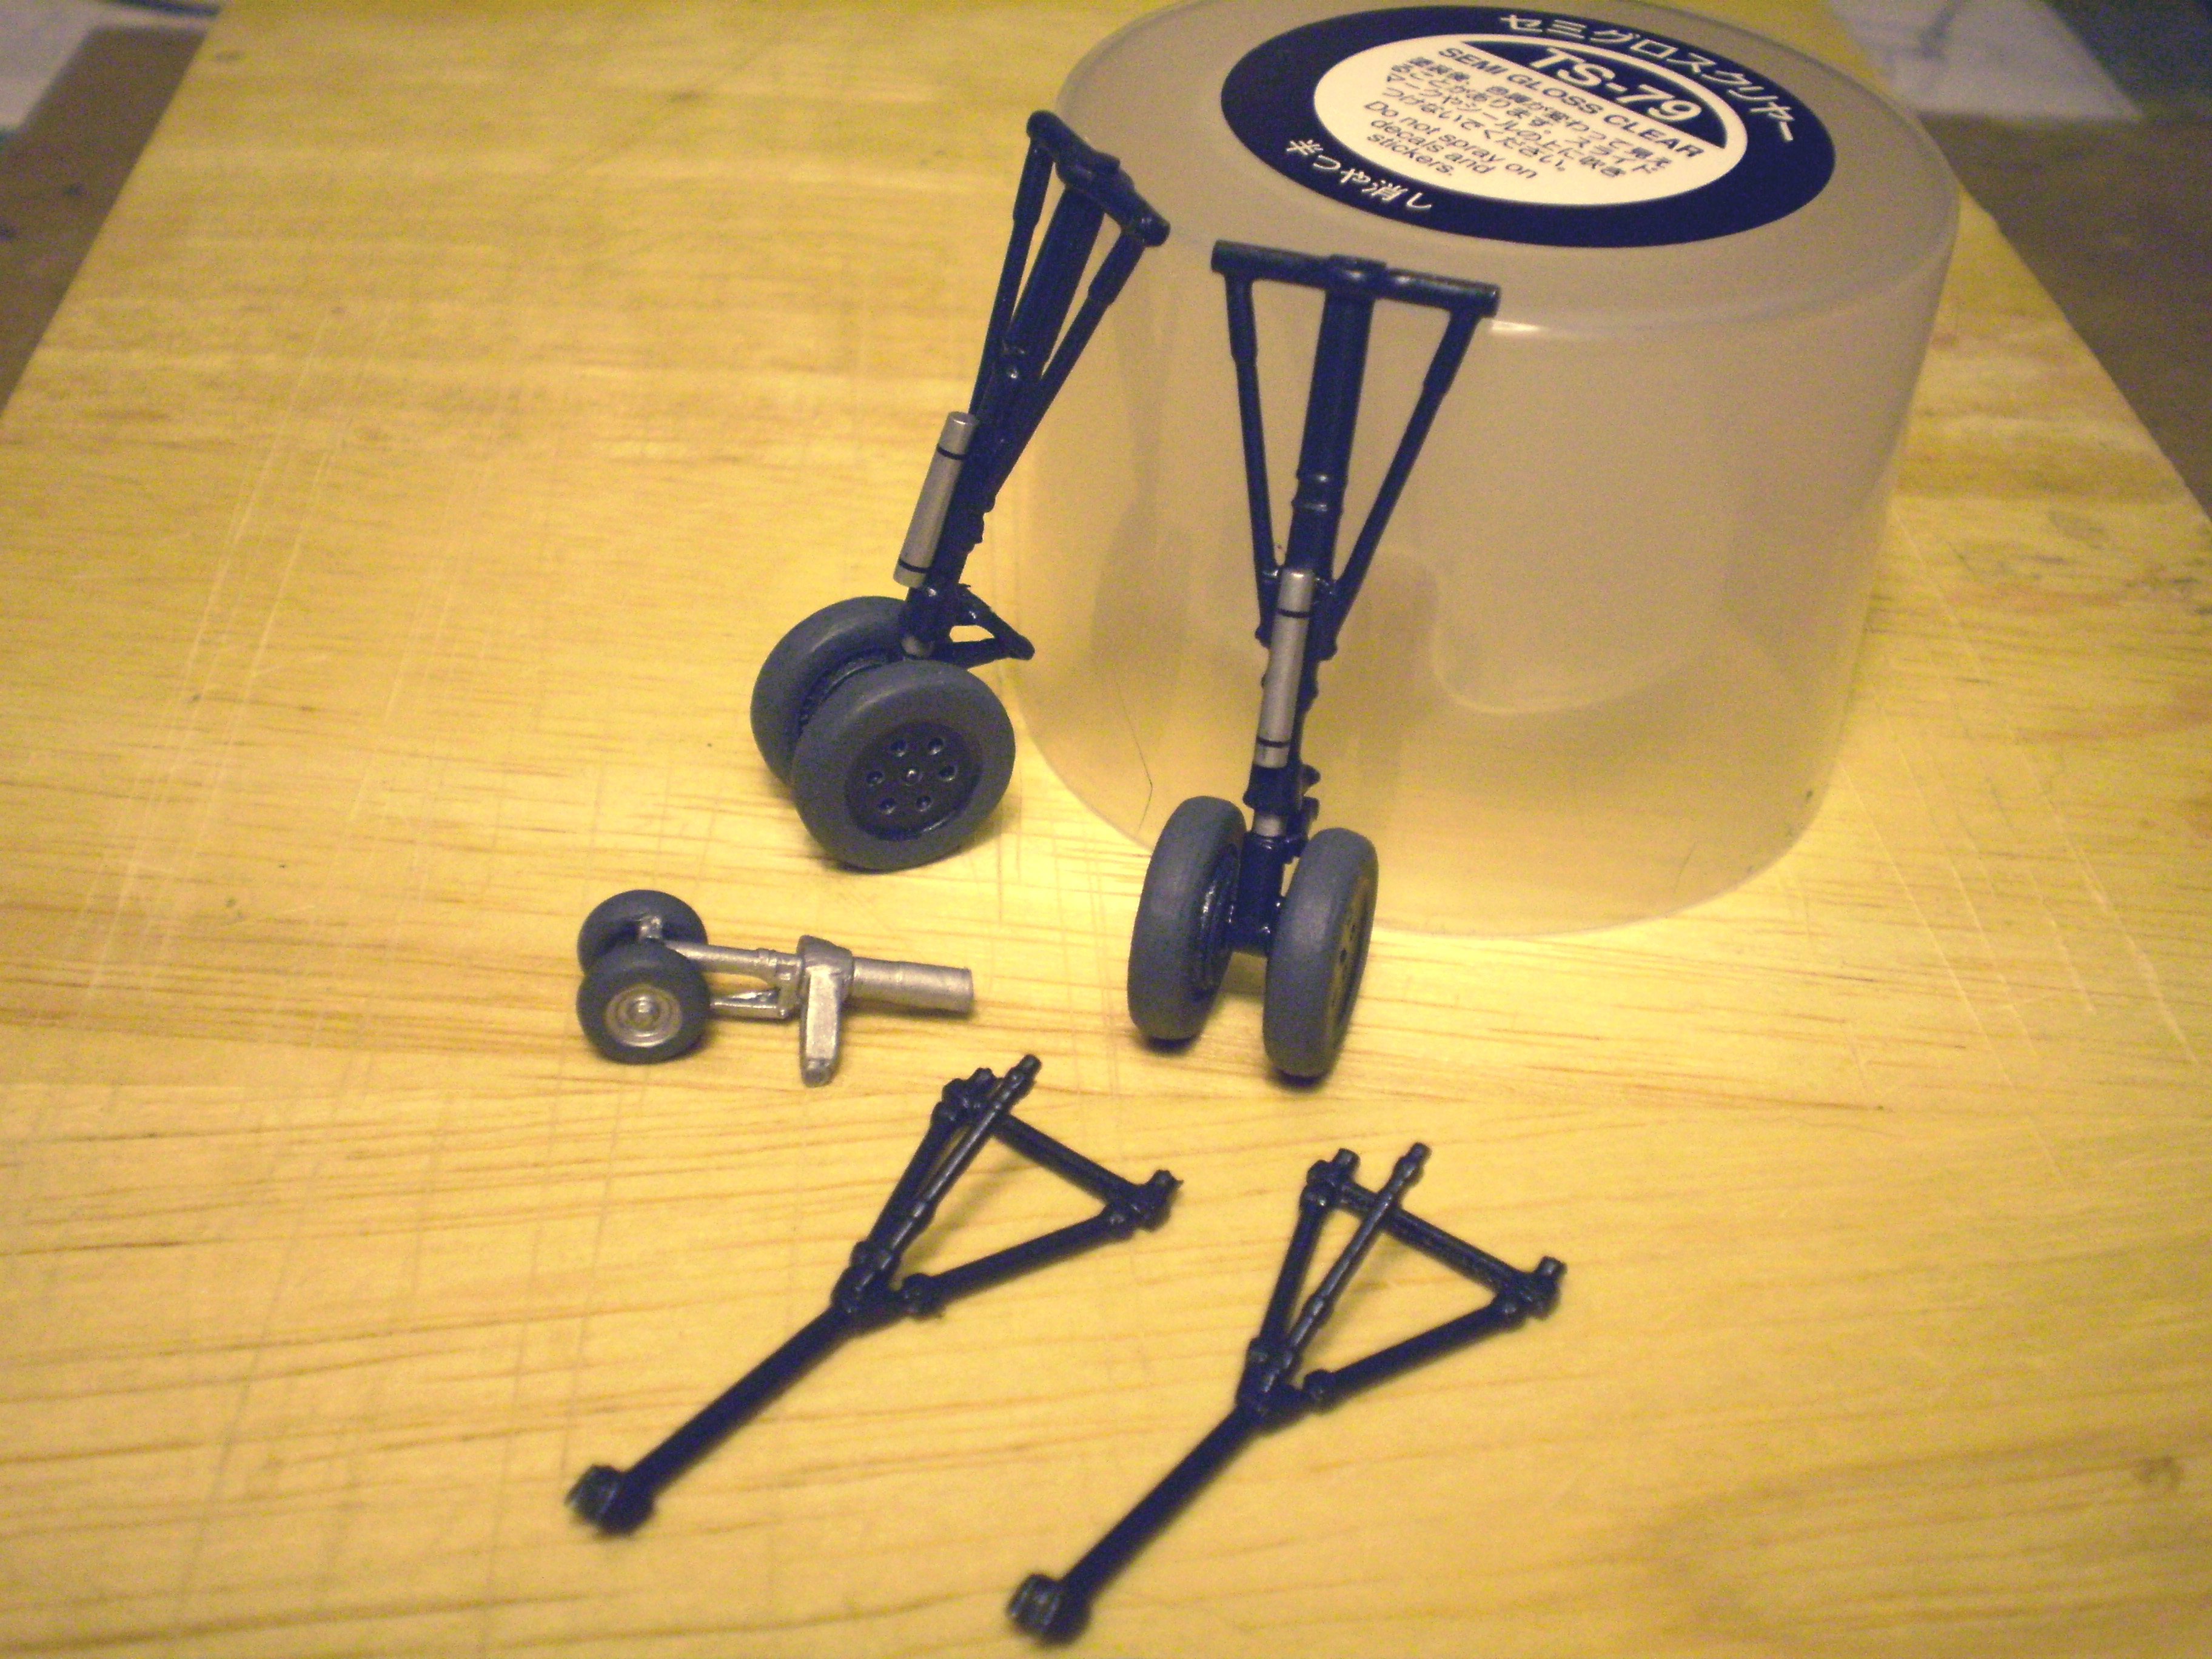
Gear for XF5U-1 prototype #2. The kit’s brake fluid reservoirs have been replaced with styrene rod - detailed with decal stripes.
Headrest added. Onward to the propellers for both planes!
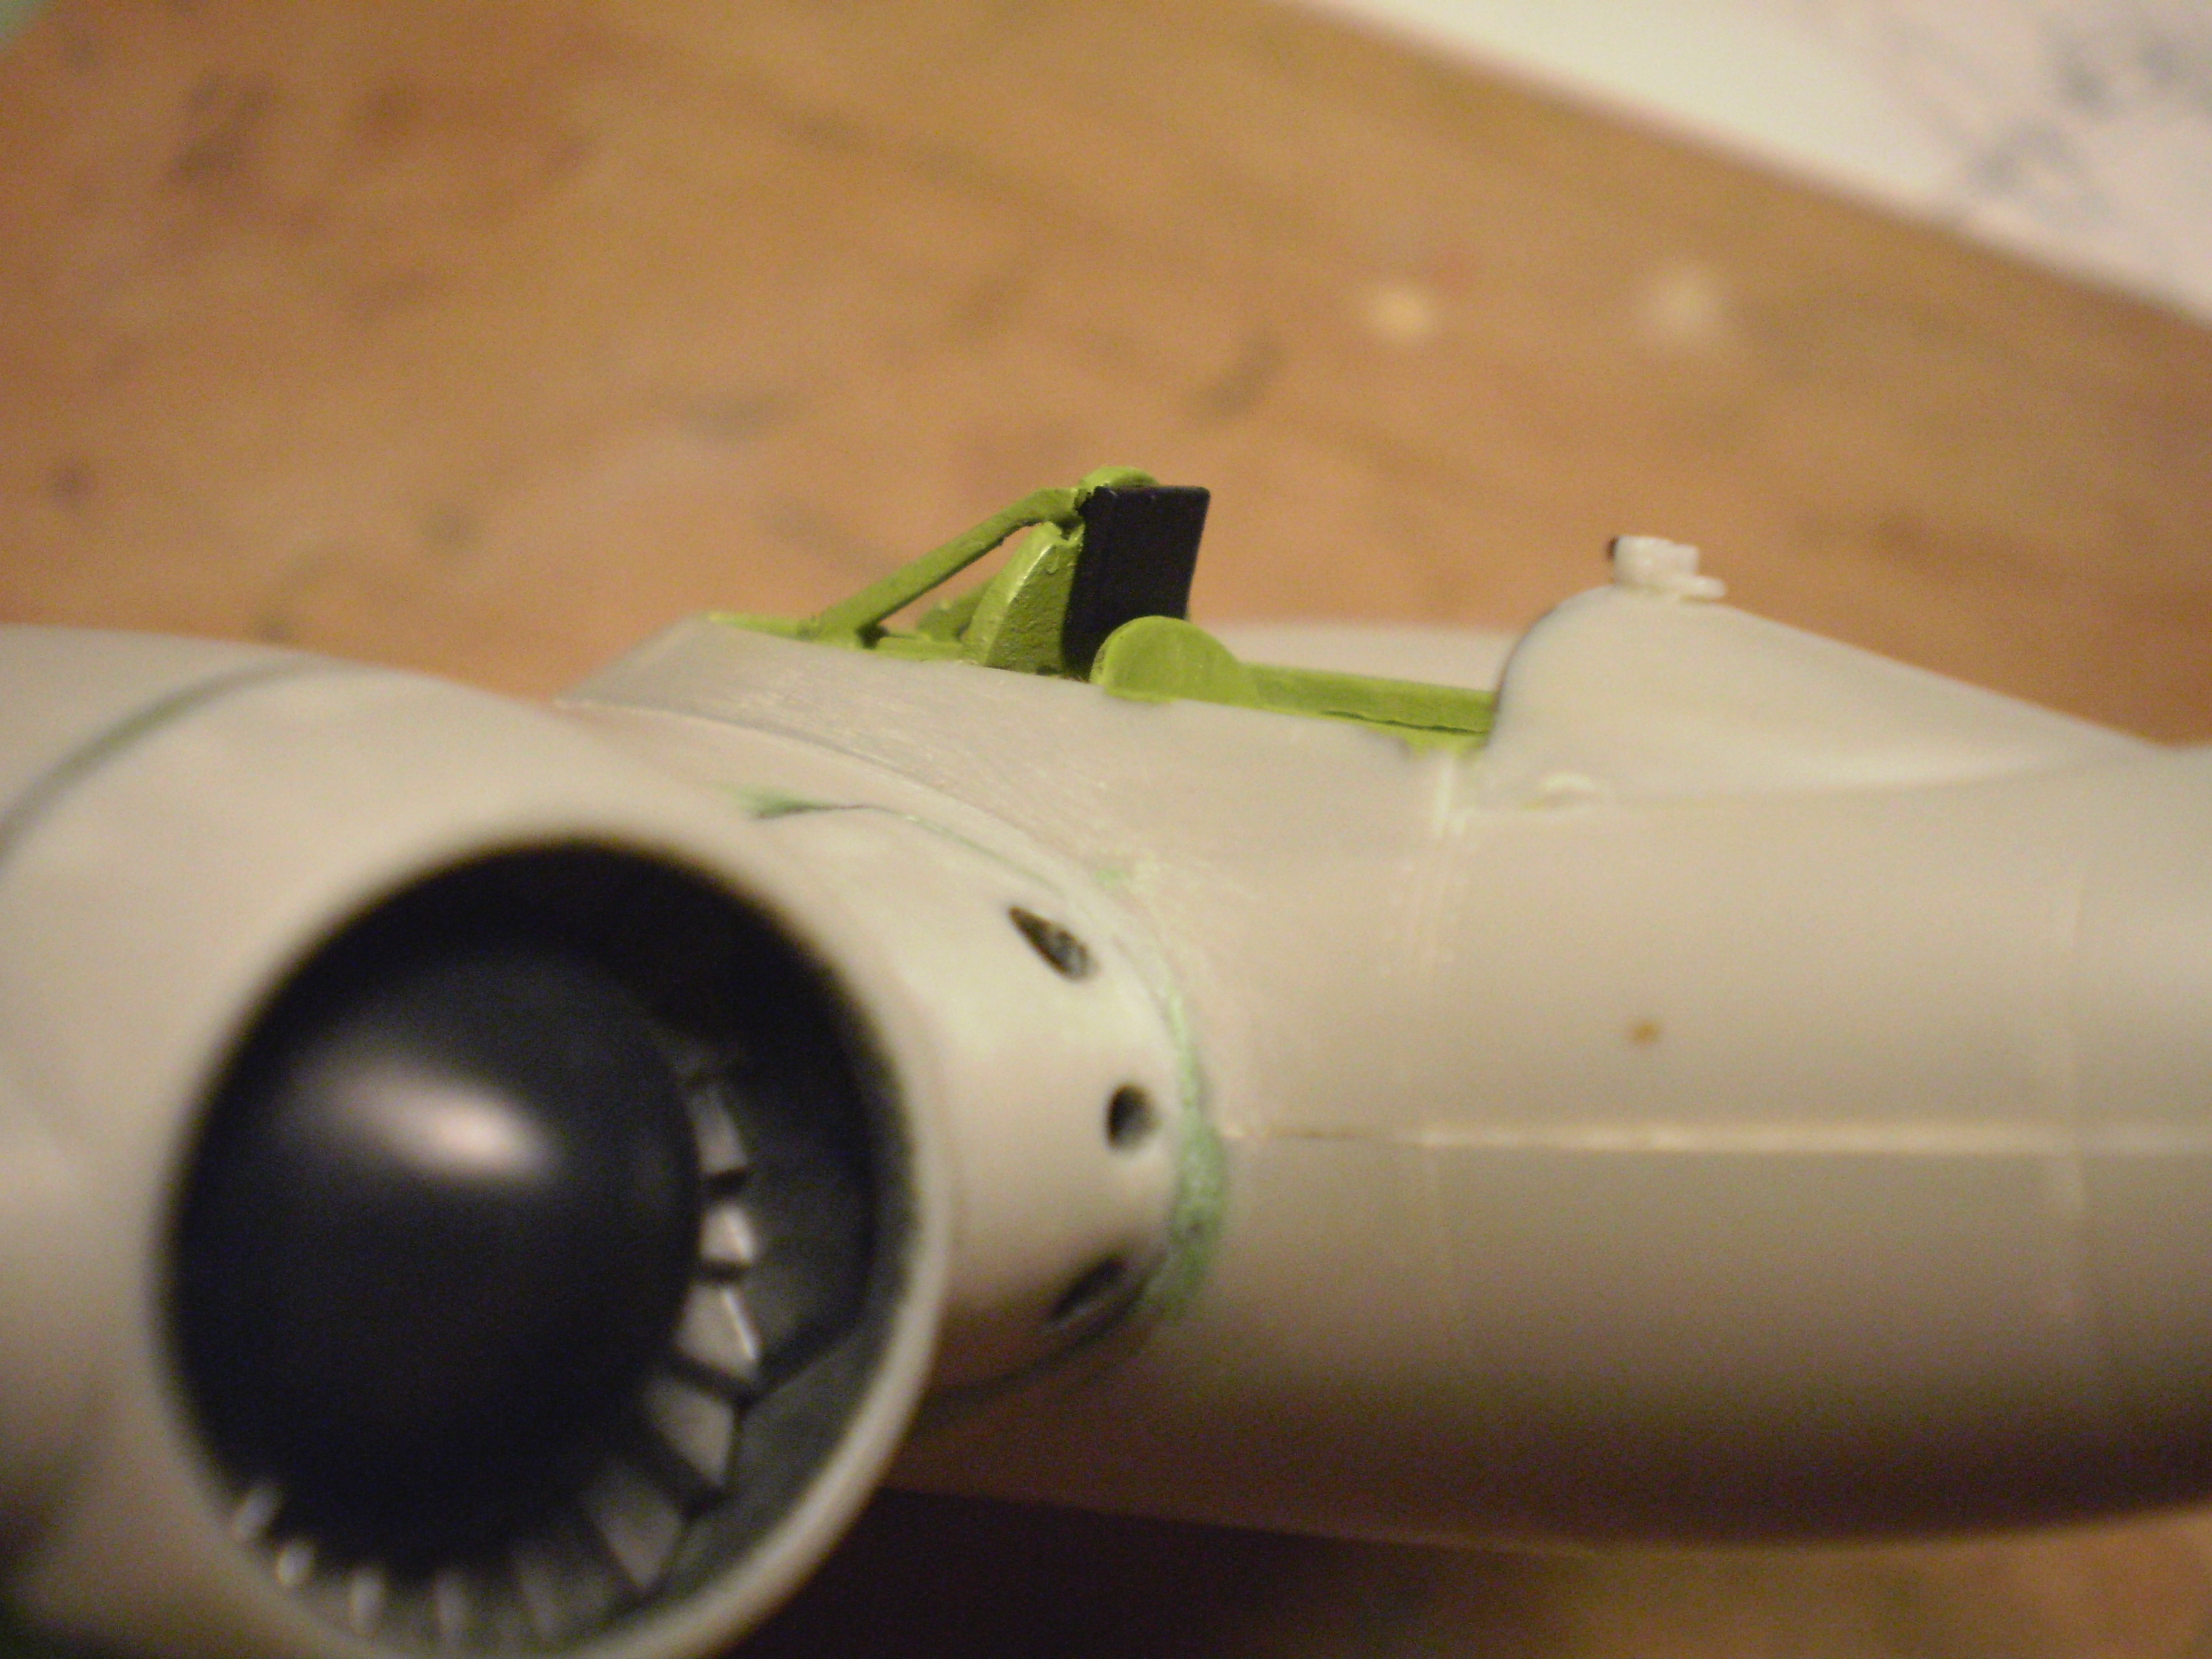
Since I’m building the XF5U-1 as the plane that actually existed, prototype #2 (BuNo 33958), I’m thinking I might include the feature in the photos below (it doesn’t appear in all photos of prototype #2). I haven’t been able to find any information about it, or any clearer photos, but my guess is that it’s a pair of inverted extinguishers, plumbed to the engine compartments for fire supression during tests. Does anyone think this is a possibility? Has anyone seen something similar on other test aircraft of the period?
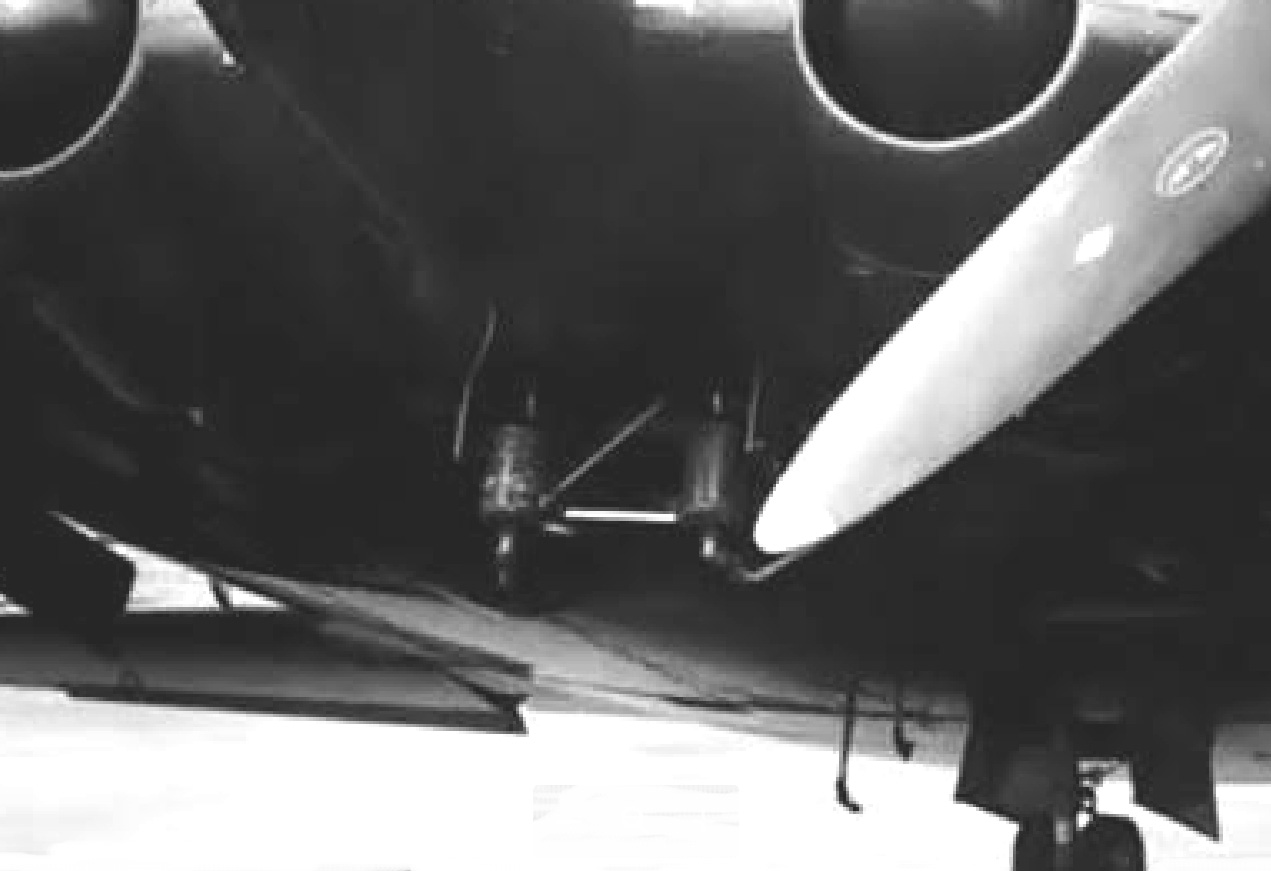
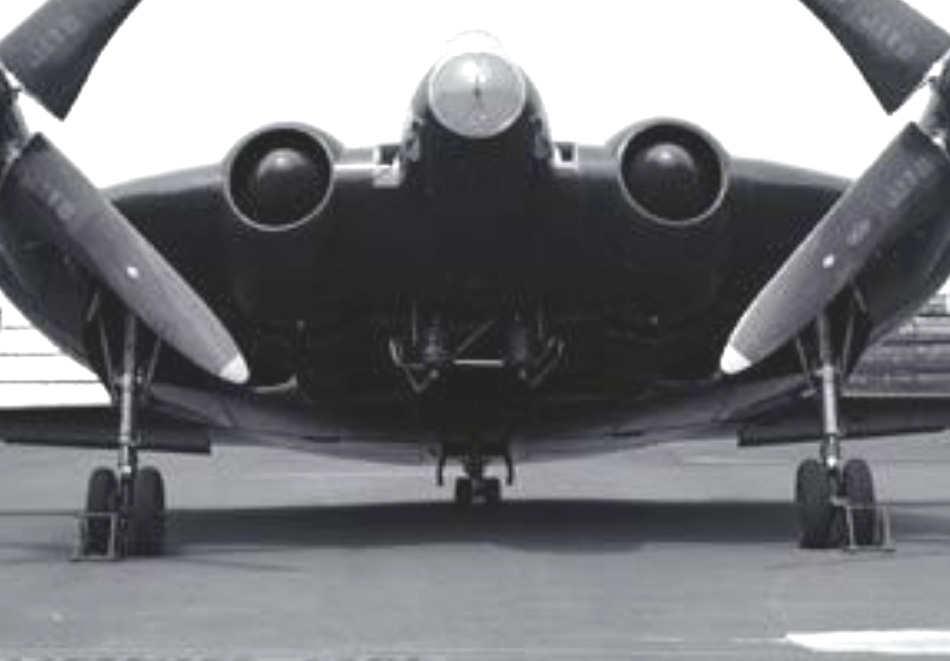
I have no idea what those fixtures might be. As to the cylinders on the landing gear, usually a reservoir for the brake sysytem will be before the pistons that actuate the brakes. I would bet those cylinders are related to the oleo struts instead.
Very nice paintwork on everything.
Nice work on the canopy masking/painting!
Both are very nice, the yellow one is a knockout.
Thanks John! I like your guess about the landing gear cylinders.
Thanks Greg!
Sharp work on the landing gear and those canopies turned out great! Fantastic job on masking and painting them!
Thanks Gamera! Actually, I did very little masking, and only on the yellow one. I’m kind of allergic to masking, but I think I’ll have to get used to it if I’m going to build aircraft models. A skill that must be mastered.
Ah ok, however you did them they look perfect! Wish I could brush paint that well.
Here’s the tutorial I followed to hand paint the Dark Sea Blue canopy. It’s an easy technique that doesn’t require perfect neatness with a brush.
Woodgrained all the prop blades today.
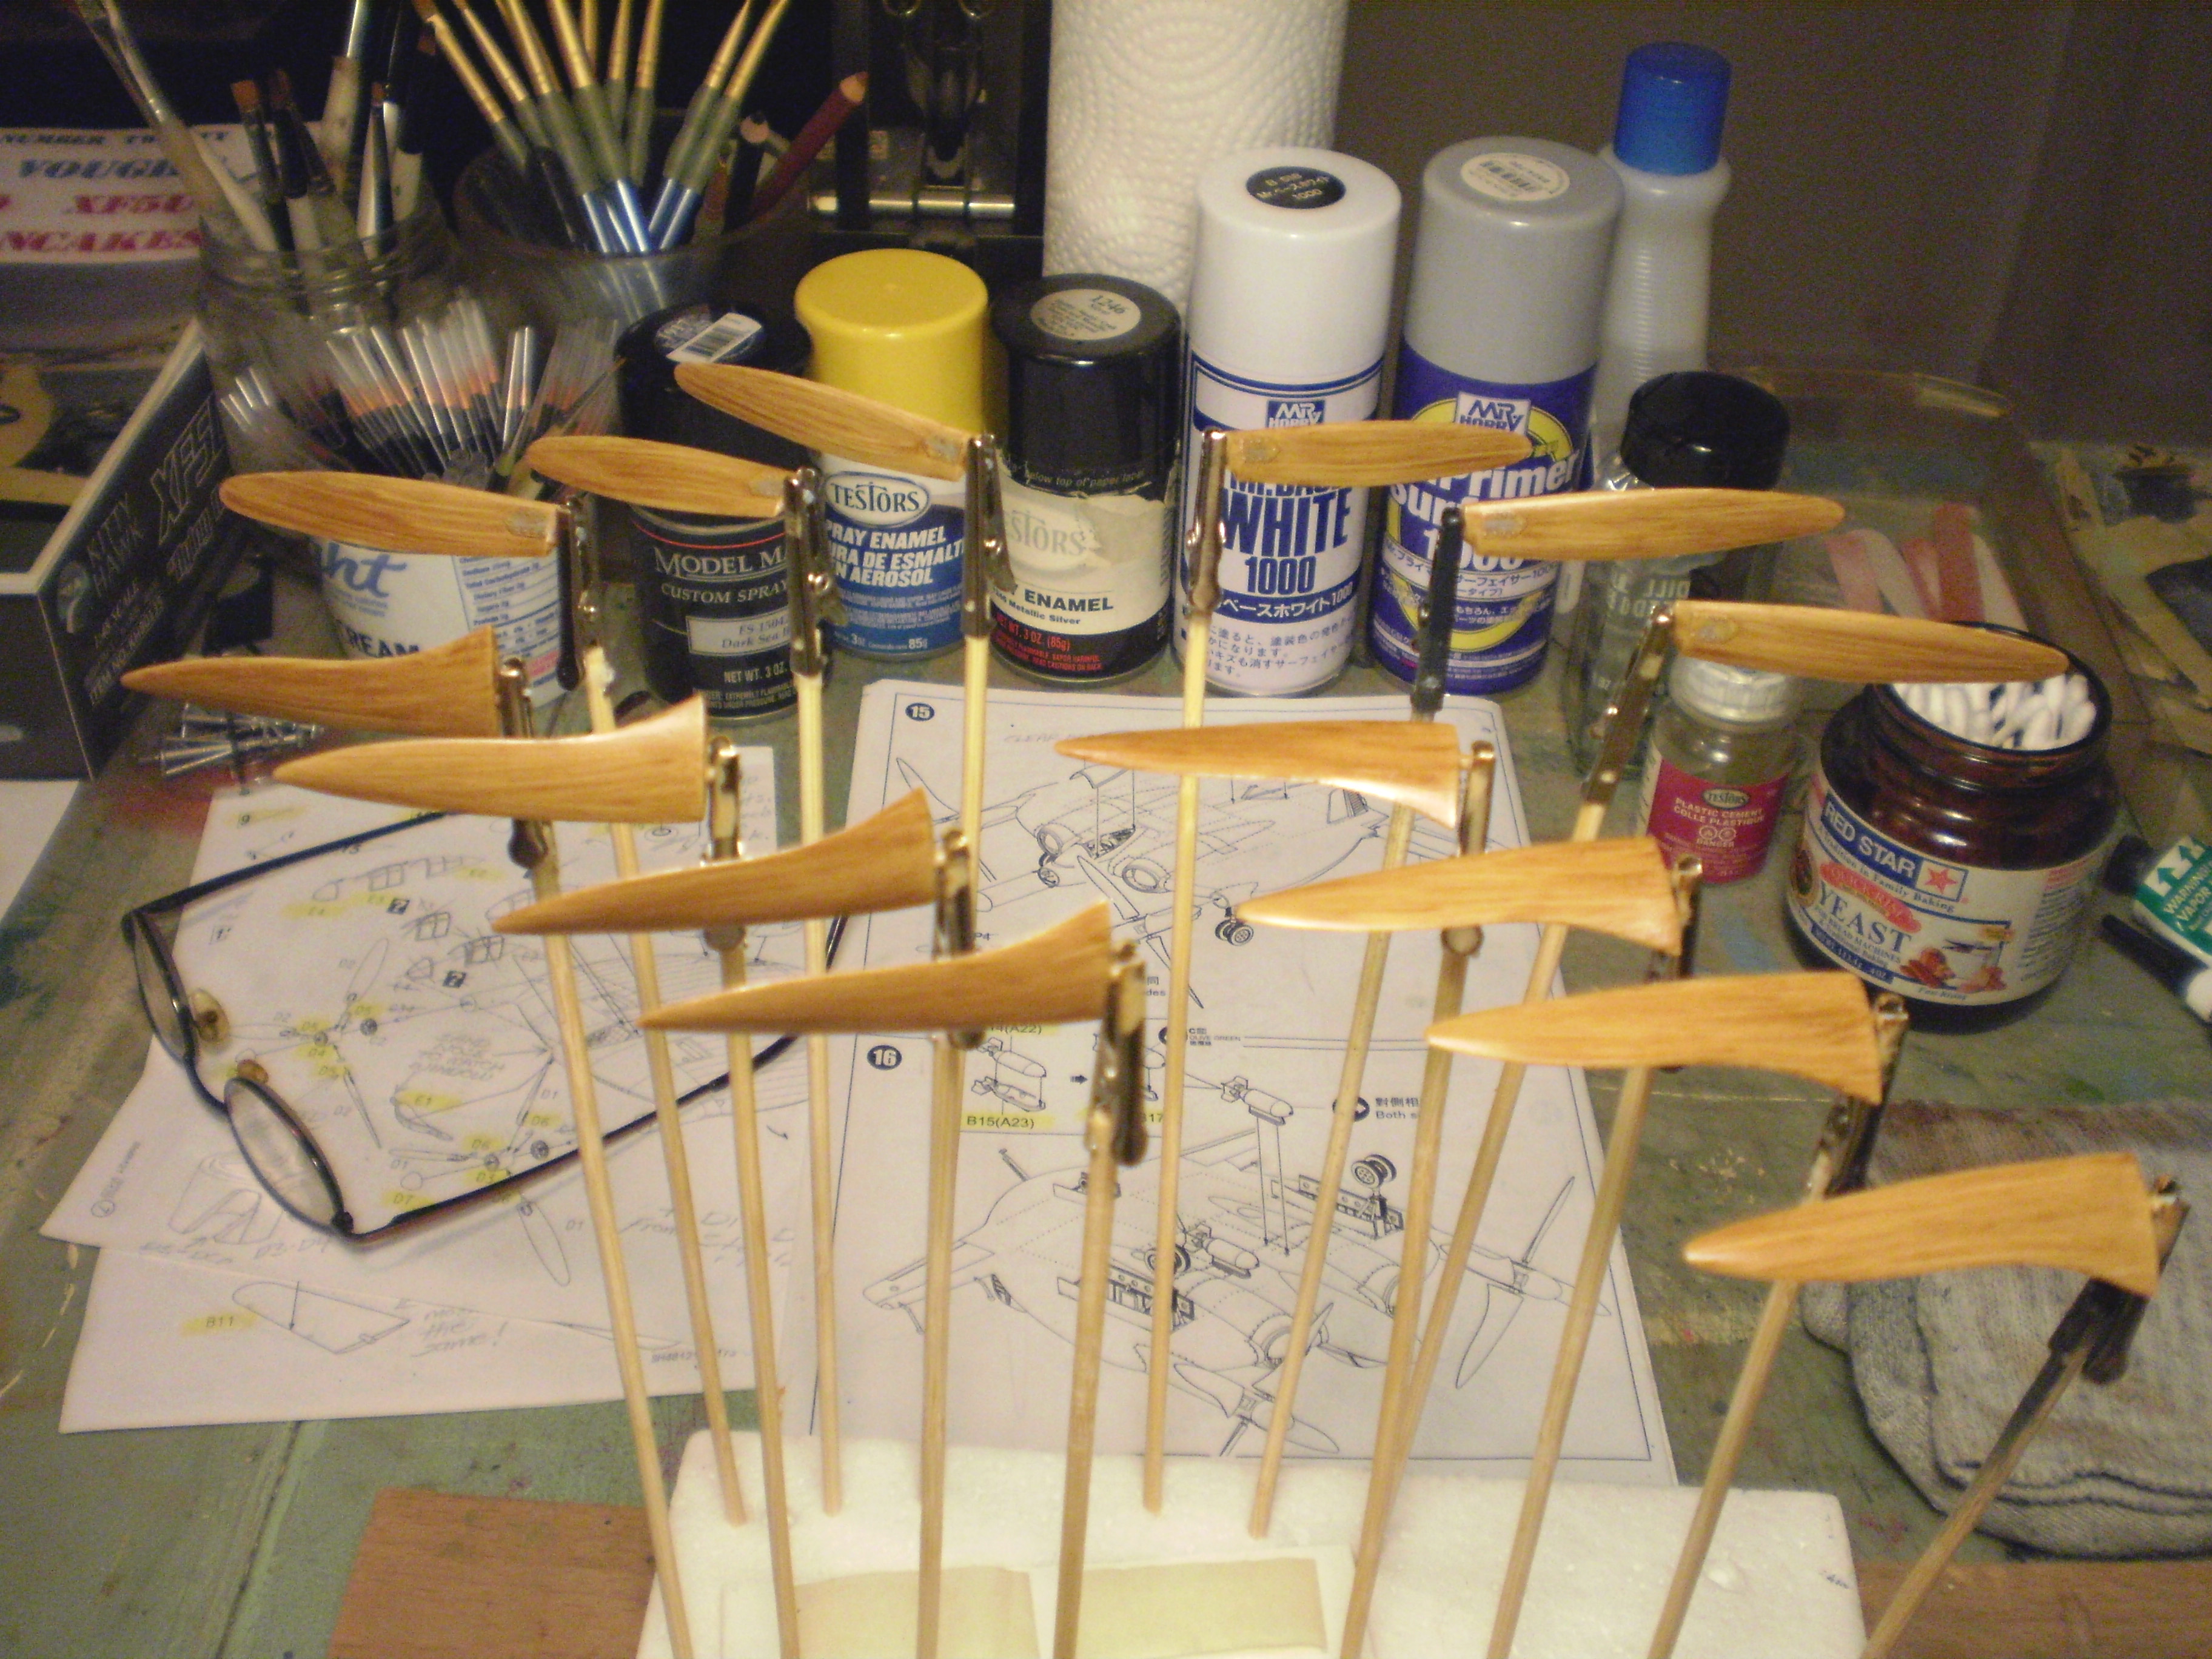
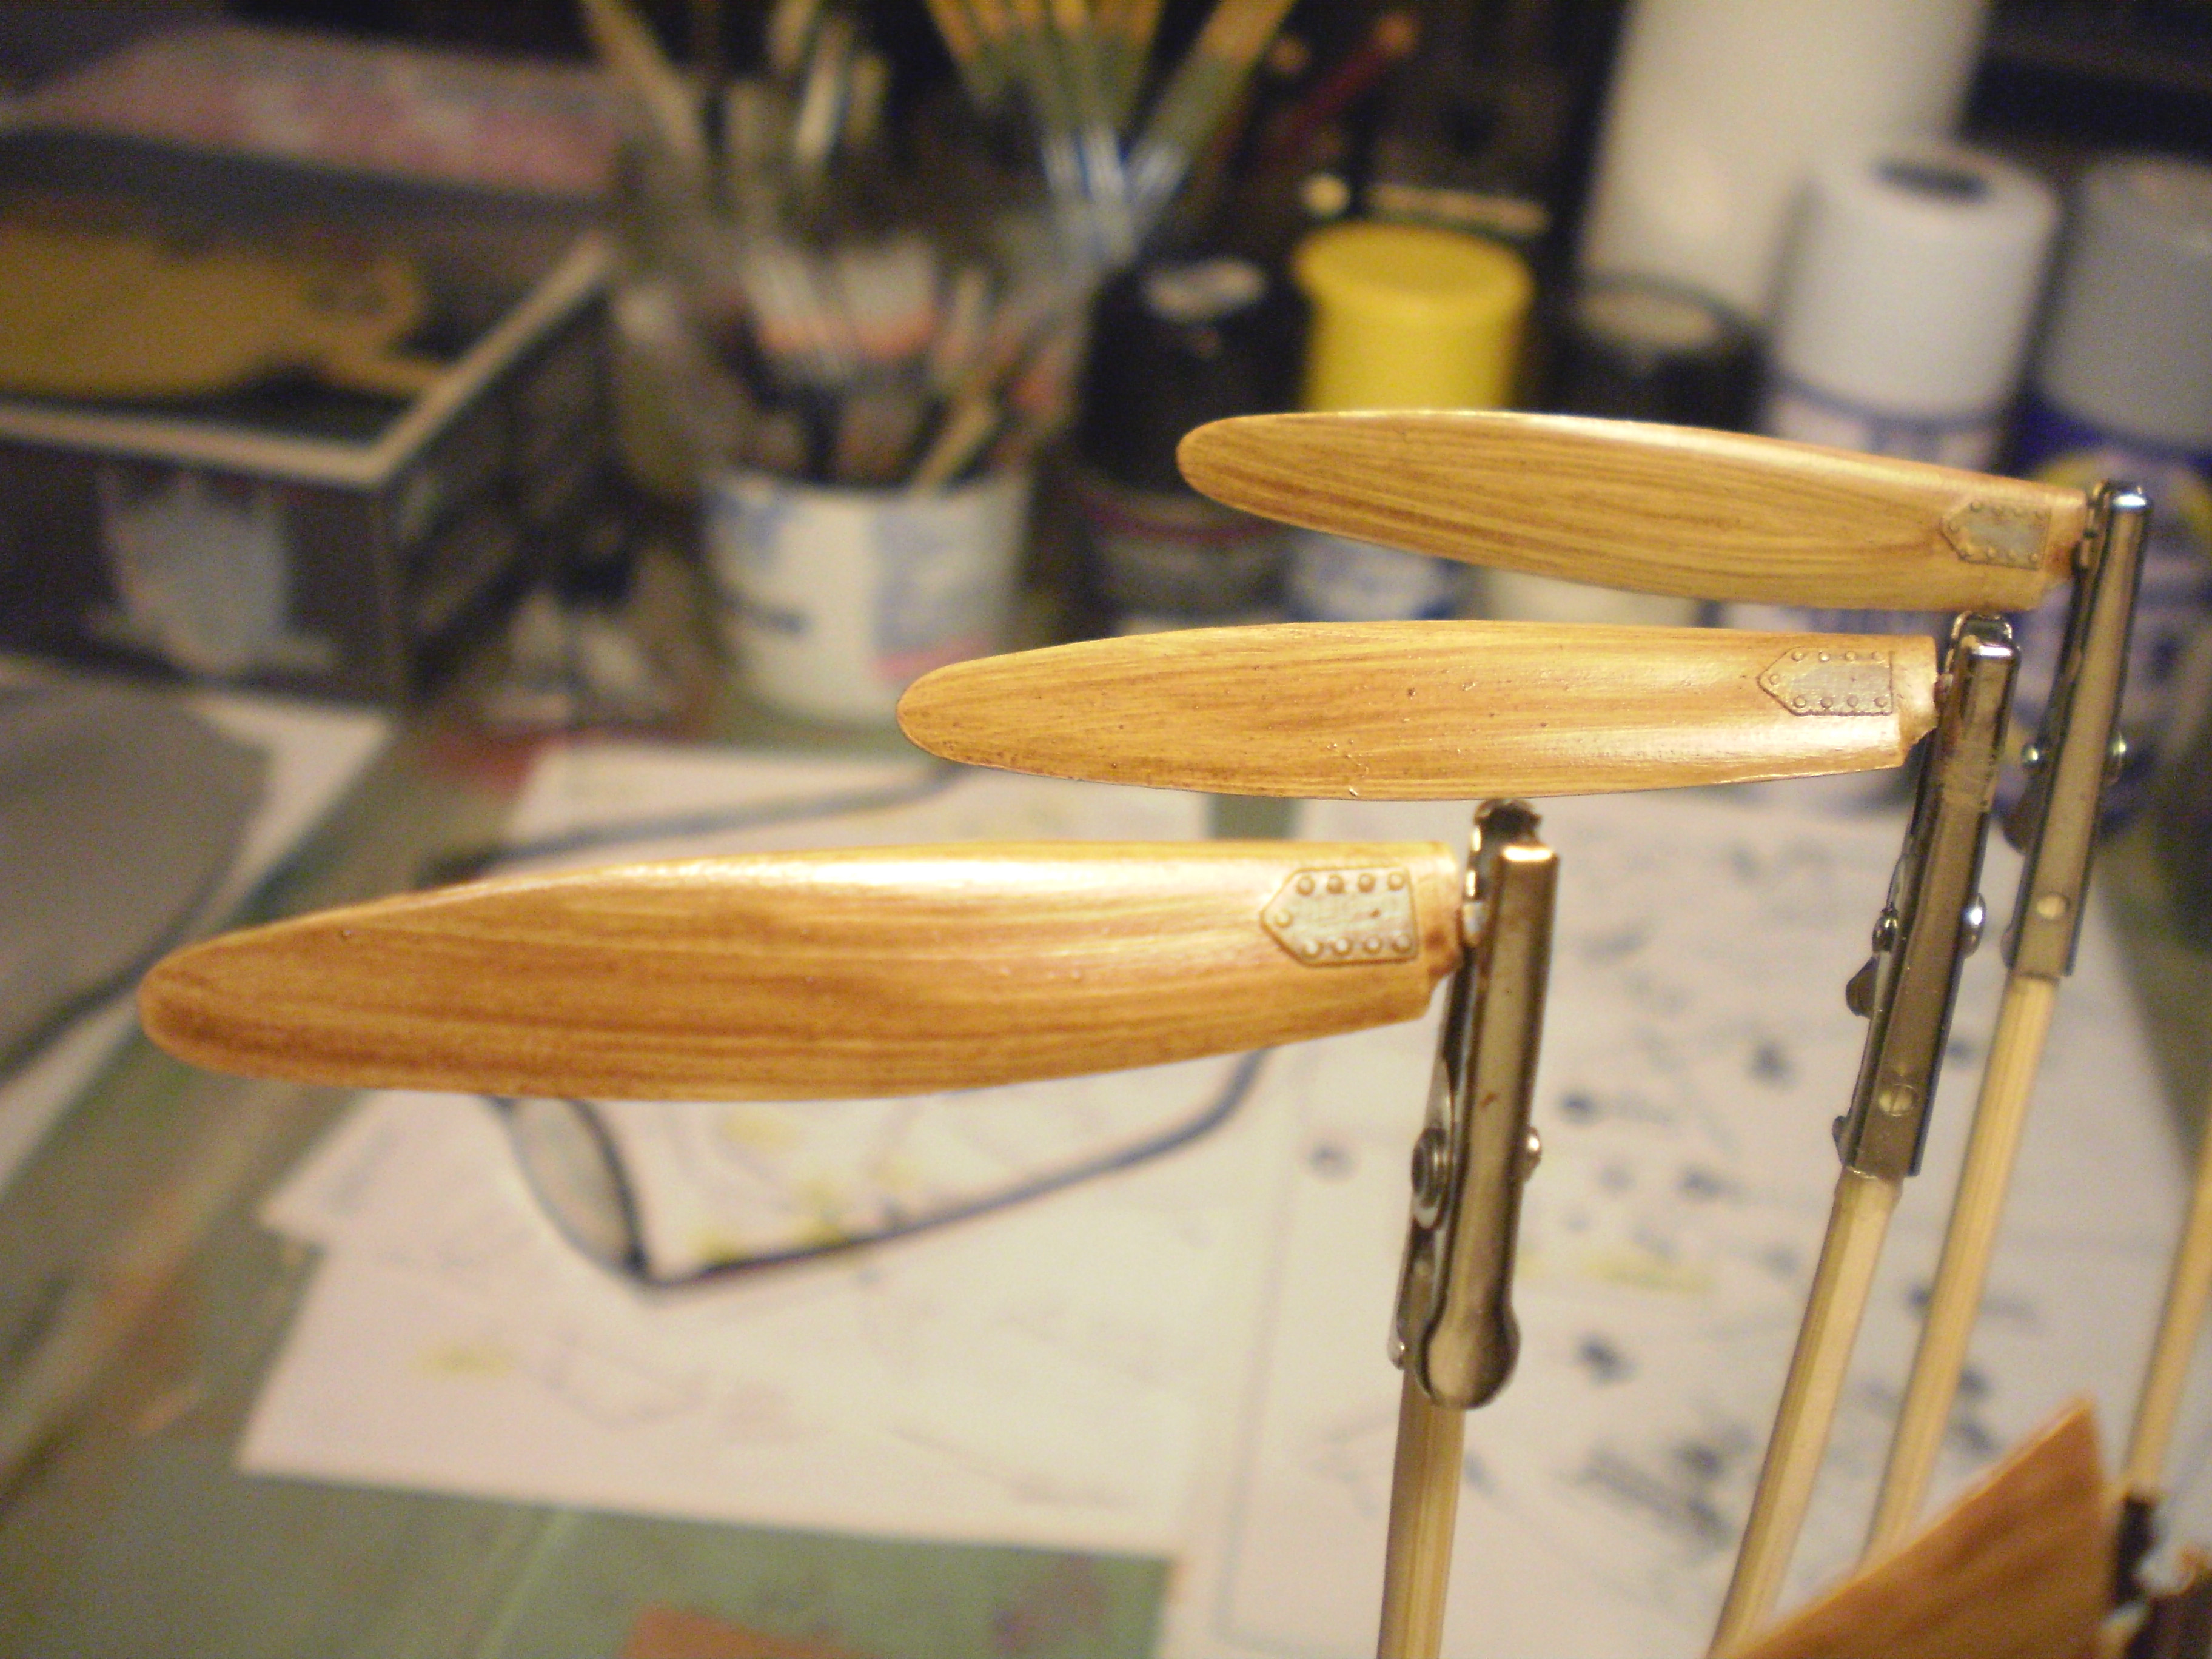
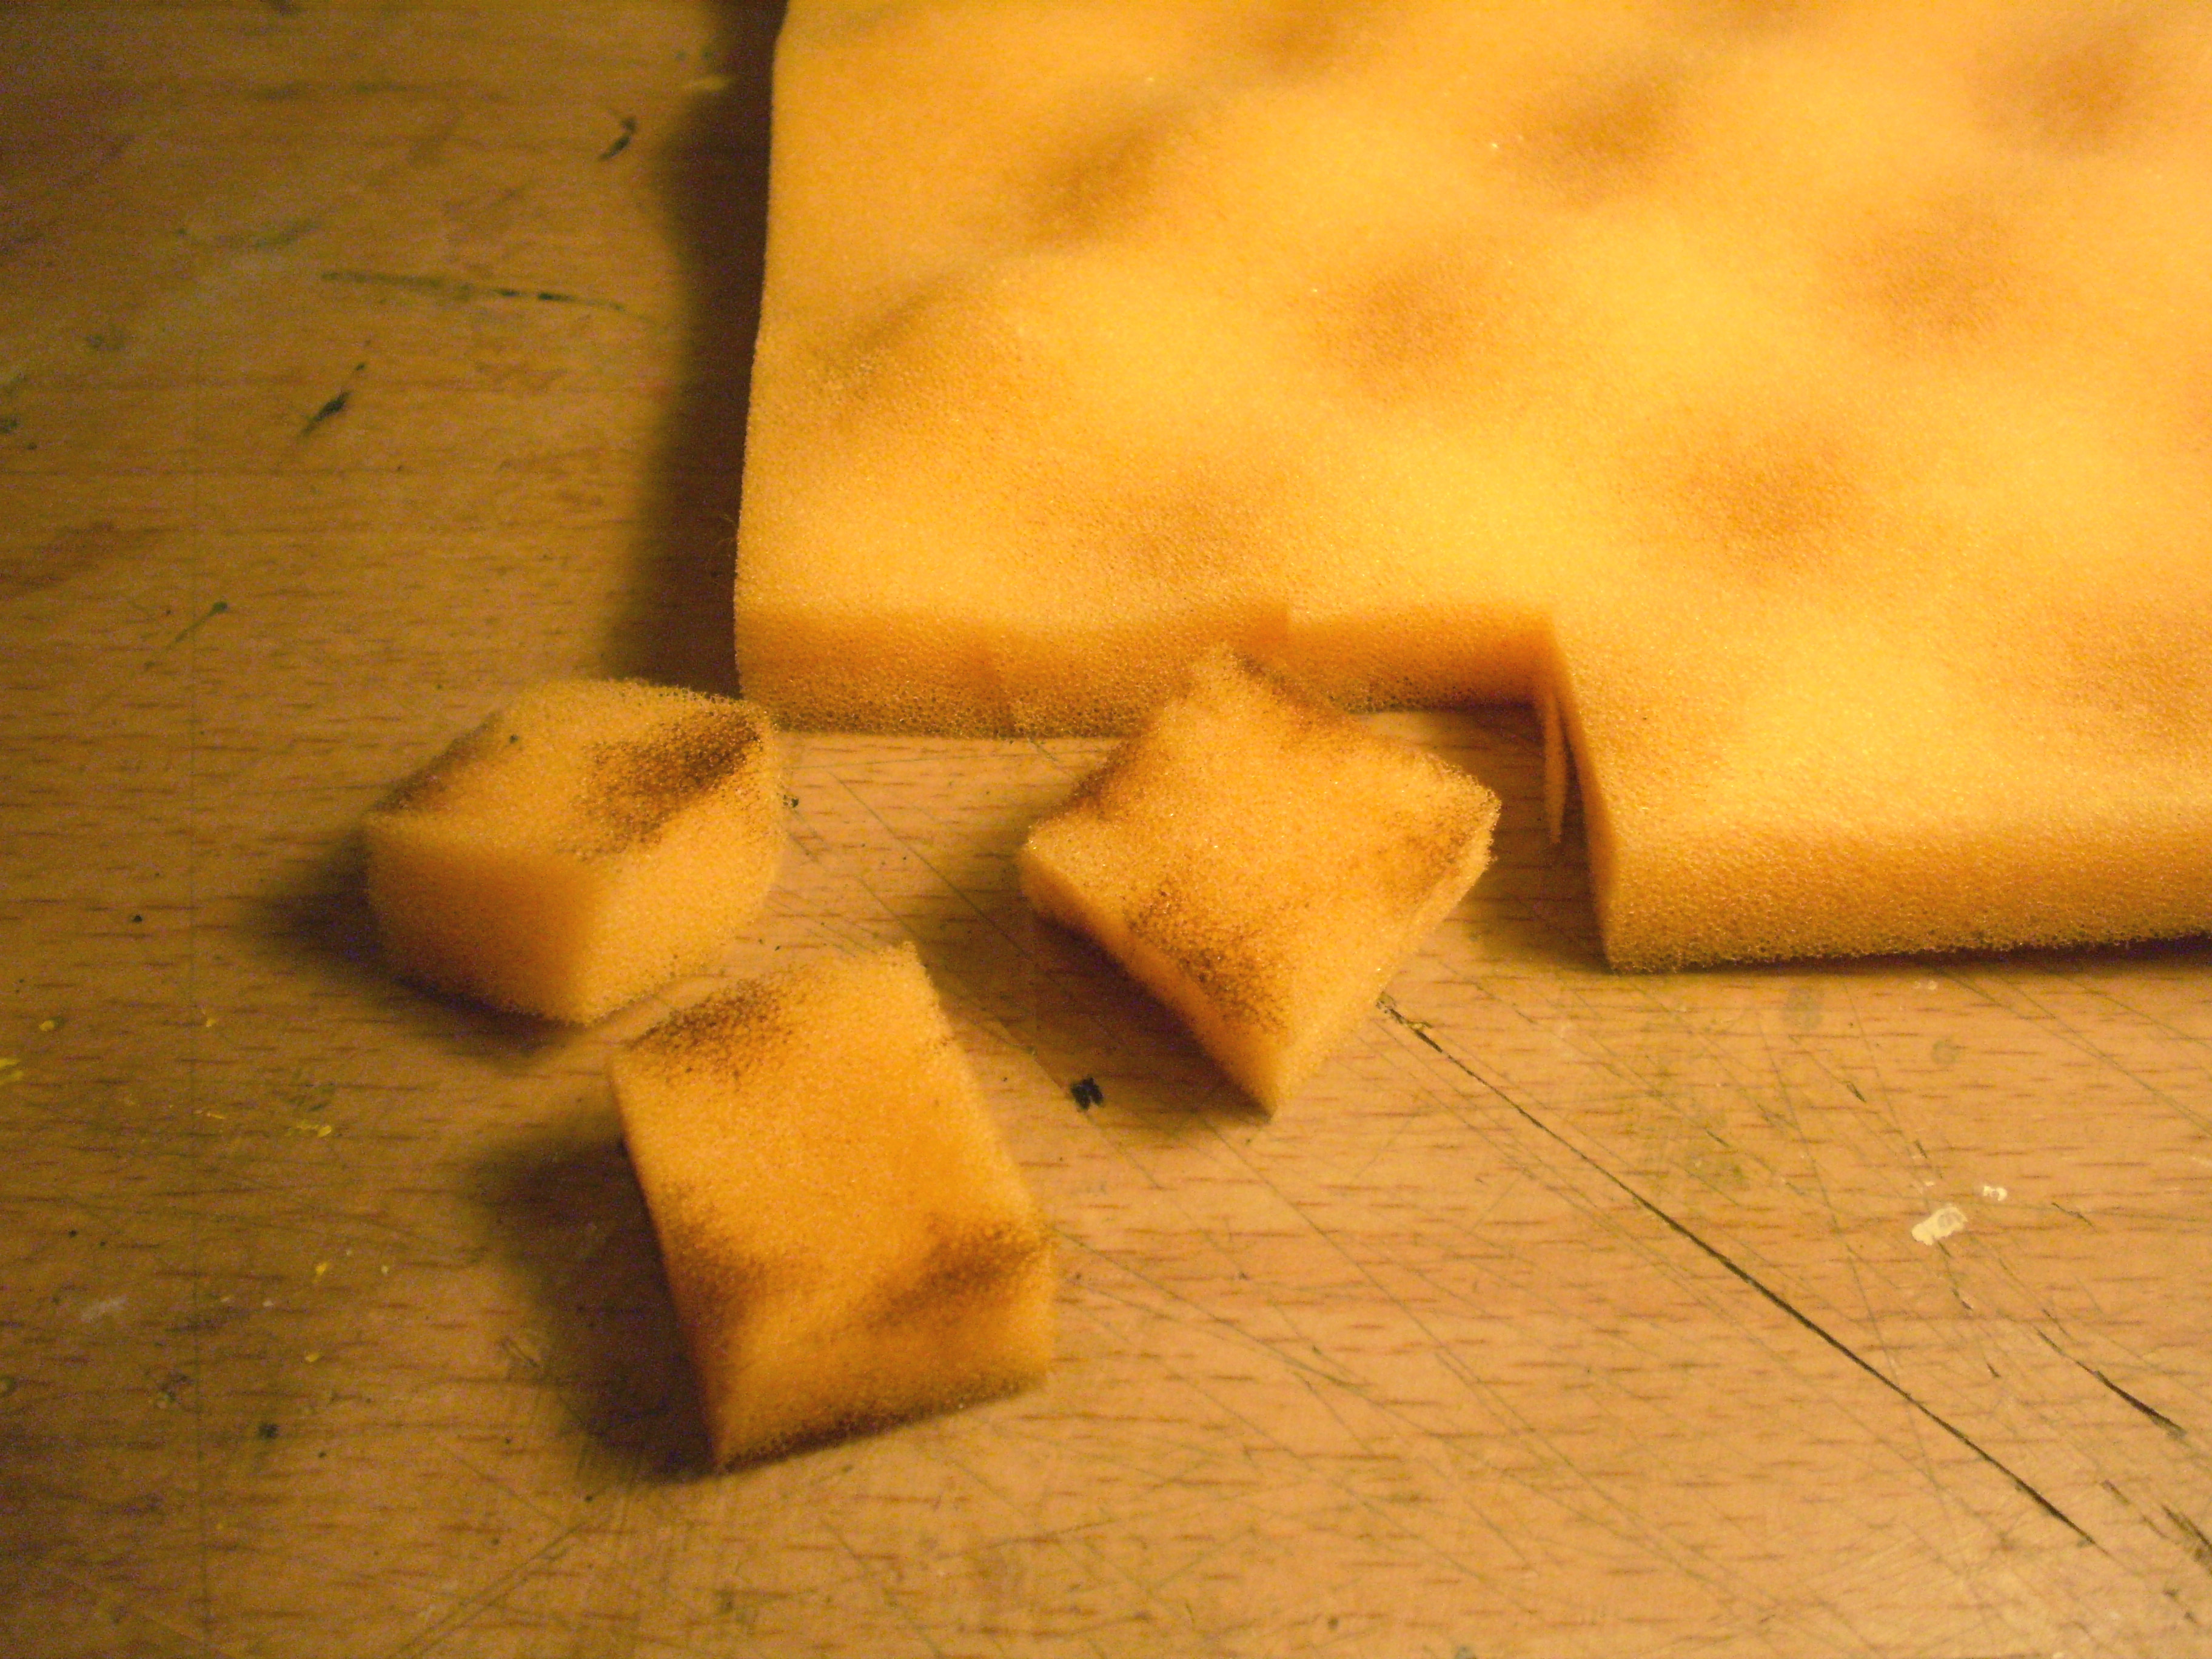
First coat is a dark yellow acrylic. Second coat is a thinned, burnt umber artist’s oil paint - brushed on, then streaked with the cut edge of a sponge (packaging foam). I’ll let these dry for a week, then apply a clear gloss coat, tinted to make the blades a little deeper and redder in color. After that, I’ll paint cuffs, stripes, and tips. Then apply decals.
Looks like beautiful lacquered wood!
Nice!
Thanks Chad!
Thanks John!
Primer is down on the V-173. Gunze Sangyo Mr. White Base 1000. A few minor flaws in seams were revealed, but that’s par for the course.