Text heavy update incoming!
I spent a lot of time brainstorming how I was going to get these tracks bent and fit to the wheels with the wheels installed, but I couldn’t come up with anything. If I’d bought em earlier in the build I could have done it before the fenders were on, but that just wasn’t the case.
Luckily it was one of those ideas that comes to you while you’re doing something totally different – for me I was working in my wood shop, where jigs rule the world. It occurred to me that the critical measurement that I needed to maintain was the distance between the axles.
So I used some lacquer thinner to rub some paint off the inside of the brake drums, stuck the wheels onto the axles, and cemented some bits of sprue with them in position. I used a glass file (dead flat) to hold the wheels in the proper plane while the cement set up.
Left them overnight, and then slid them off the axles. I also marked which one was driver’s side just in case there were any differences.
They slide on and off the hubs smoothly now, and I can fit the tracks to them before installing them onto the car as a complete assembly, after which I’ll just snip the white sprue pieces off.
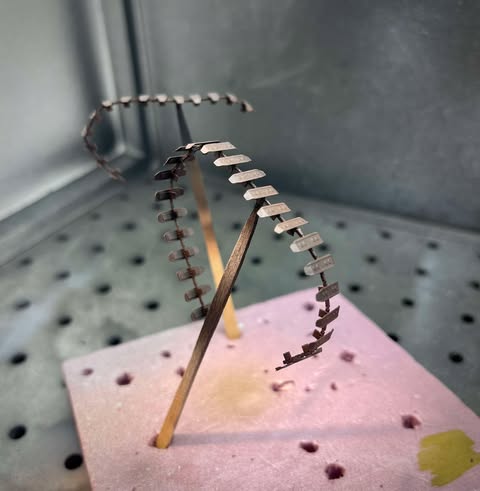
As you can see the tracks fit naturally on the wheelsets, and bend nicely around the curve. I did find that those little joints between the tracks, though, work-harden like crazy. You get one bend and unbend – the second bend breaks them. I probably should have annealed them before beginning assembly I guess? Lots of solder repairs later, I had them mostly bent and ready for primer.
I degreased them with a blast of straight acetone from my airbrush, and then gave them a shot of Tamiya fine surface primer from a rattlecan and let them sit for a full day. That was followed up by a black basecoat, a layer of Vallejo model air “rust.” I was surprised at how … rusty it made the tracks look.
It was so convincing that I next gave it a coat of Vallejo chipping fluid, and then the 4BO green. A little work with a scratch brush had them looking pretty dang rusty and worn, though the effect is subtle and so hard to see at scale that it might have been a waste of time. In any case, some satin varnish locked it all in, and any glaring problems will be covered up by weathering.
After plenty of time for this to cure, I sat down today to attempt to assemble them onto the wheelsets. It worked – but it was about one of the most shakey-hands hope-you-don’t-screw-up jobs I’ve done on a scale model. In the end, the thing that worked was a third-hand alligator clamp set to hold the assembly, a hobby knife point to hold the track in place, water-thin CA glue wicked beneath the tread, and then CA accelerator applied via pipette with a tiny applicator tip.
There’s some shine from the CA glue and the varnish, but it should tame down under the imminent flat coat.
P.S. That pipette/applicator trick is one of those light bulb moments that makes you feel clever for devising it, yet dumb for not having thought of such an obvious solution earlier. I have always struggled with CA accelerator. The stuff I have comes in a small pump-spray bottle which of course is totally inappropriate for this kind of work; I’ve tried using an old 000 brush, but the fibers just gum up with hardened glue instantly; I’ve tried using an old airbrush needle, but the fluid is so thin and without surface tension, so it barely sticks to the needle and doesn’t like to run off once it does. The applicator tip on the pipette allows you to give your join just the right amount of kicker without it running all over the paintwork.


