Three years ago I built a Revell F-86. I tried to duplicate a NMF using Testors’ Metalizer paint. The results were far from what I was striving for. Instead of a NMF, the model looked like it was painted, which it really was. The biggest mistake that I made was that I primed the model prior to painting with the Metalizer paint. That results in a funny looking pebble finish. I have since learned to never prime prior to painting with the metalizer paint.
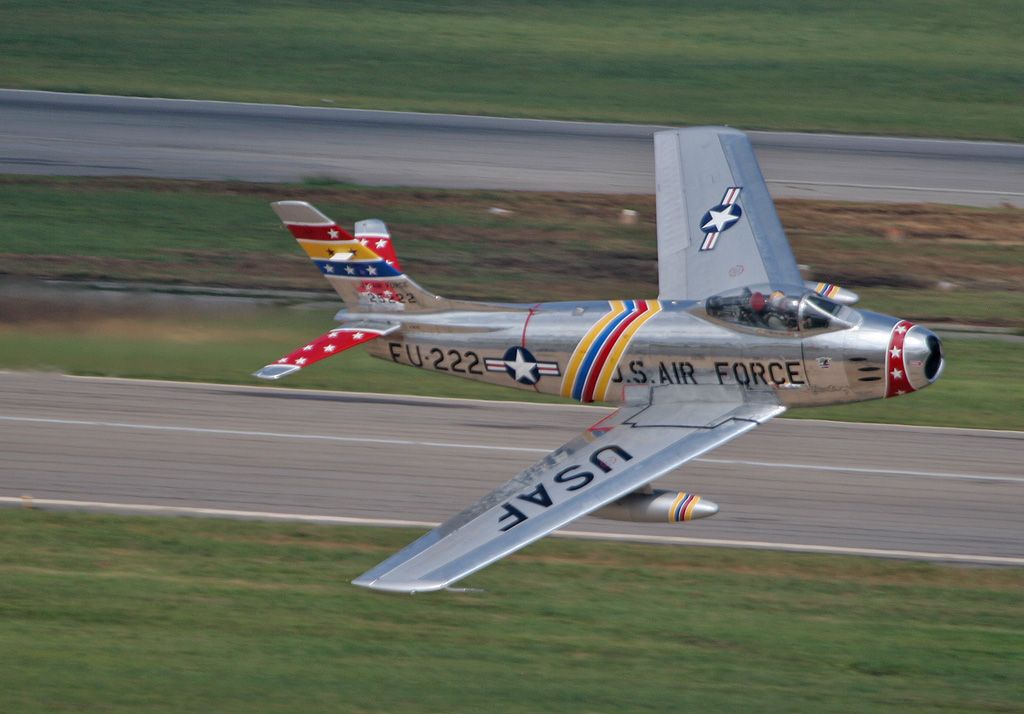
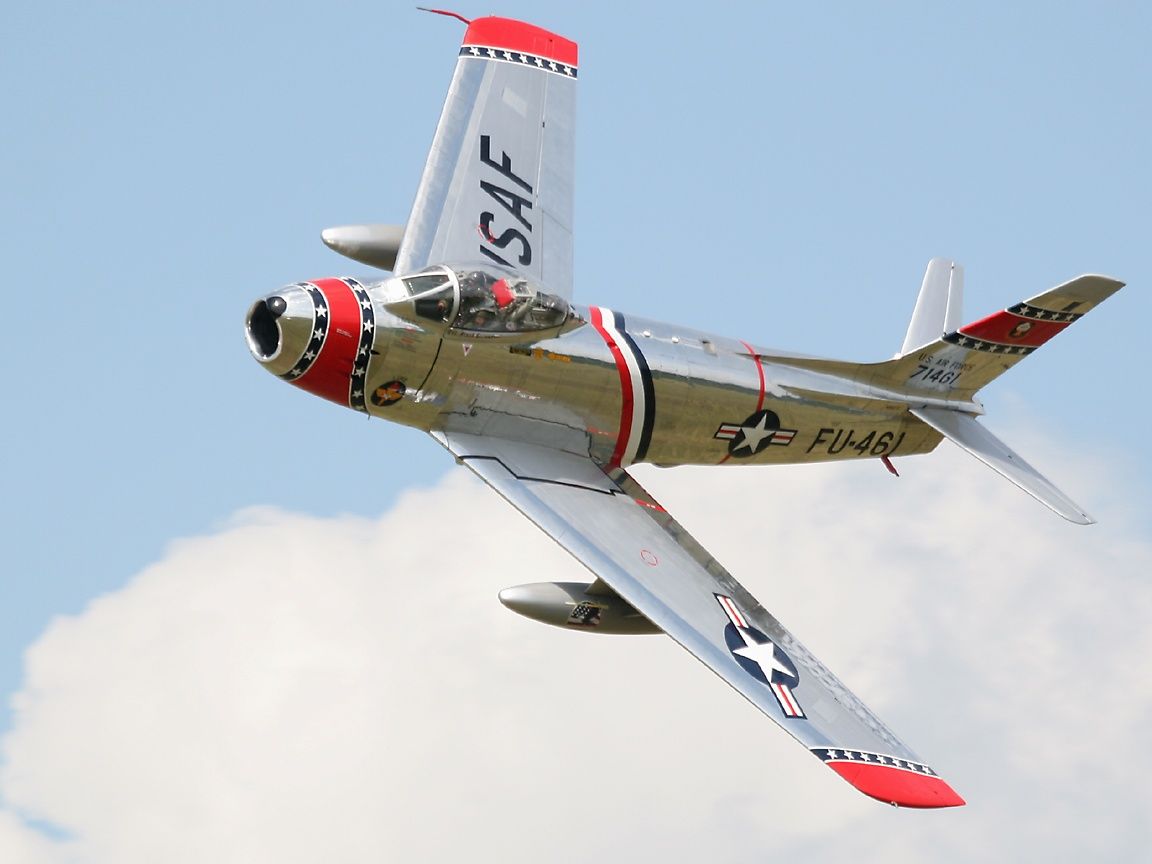
So, my new goal is to build a NMF F-86 that looks similar to one of these planes:
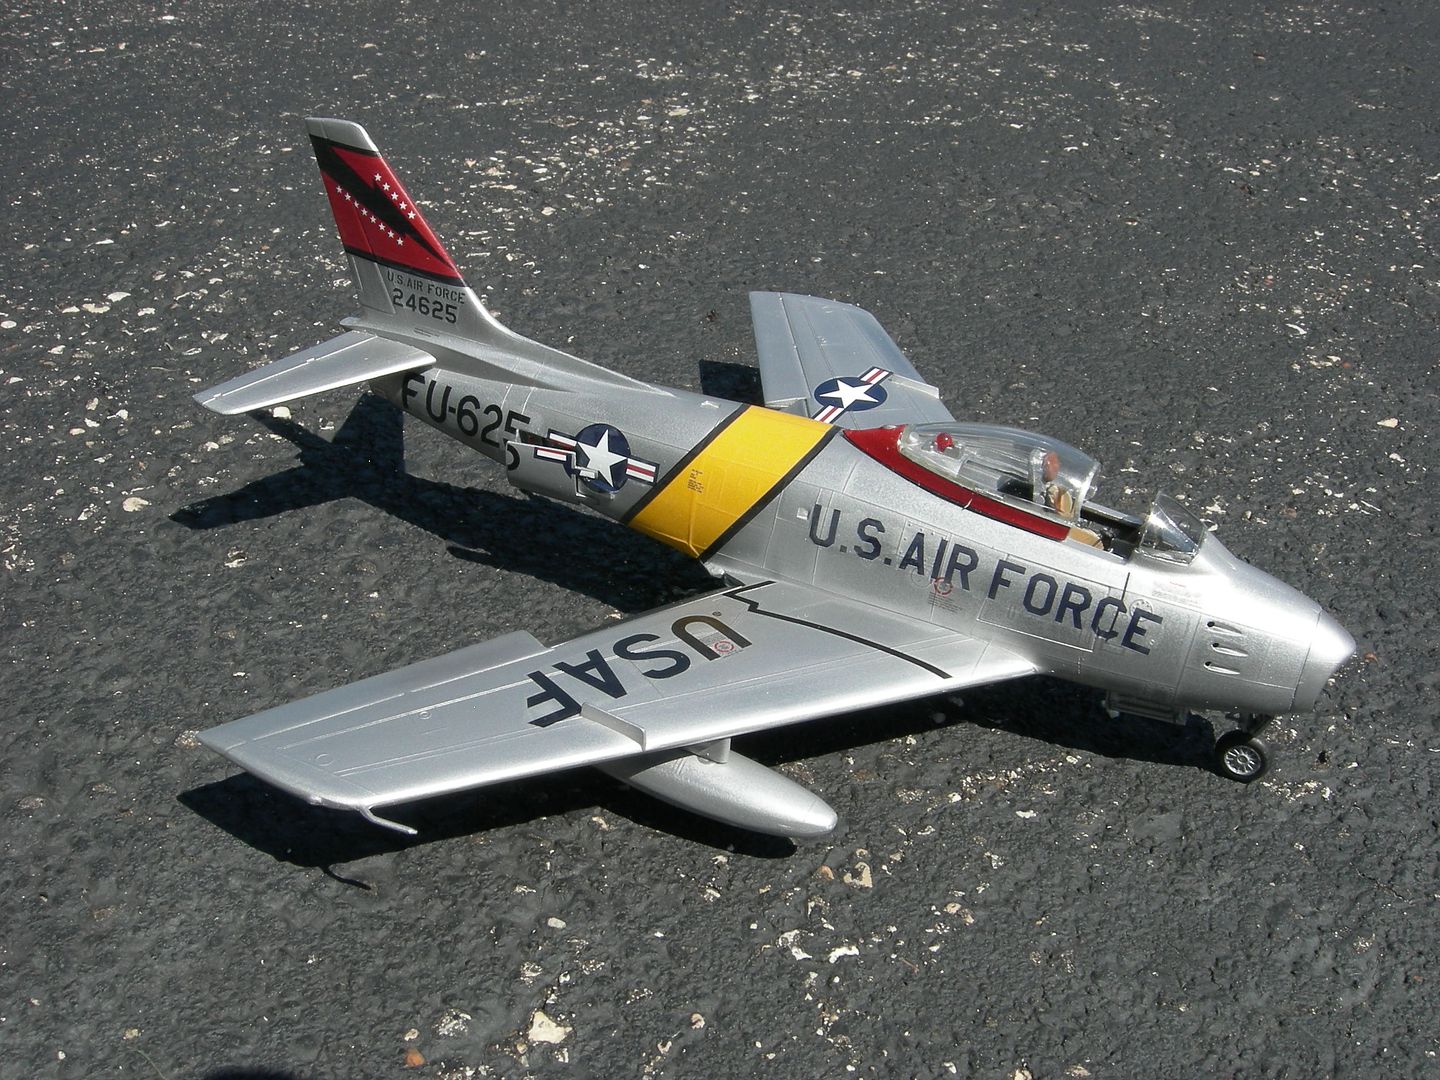
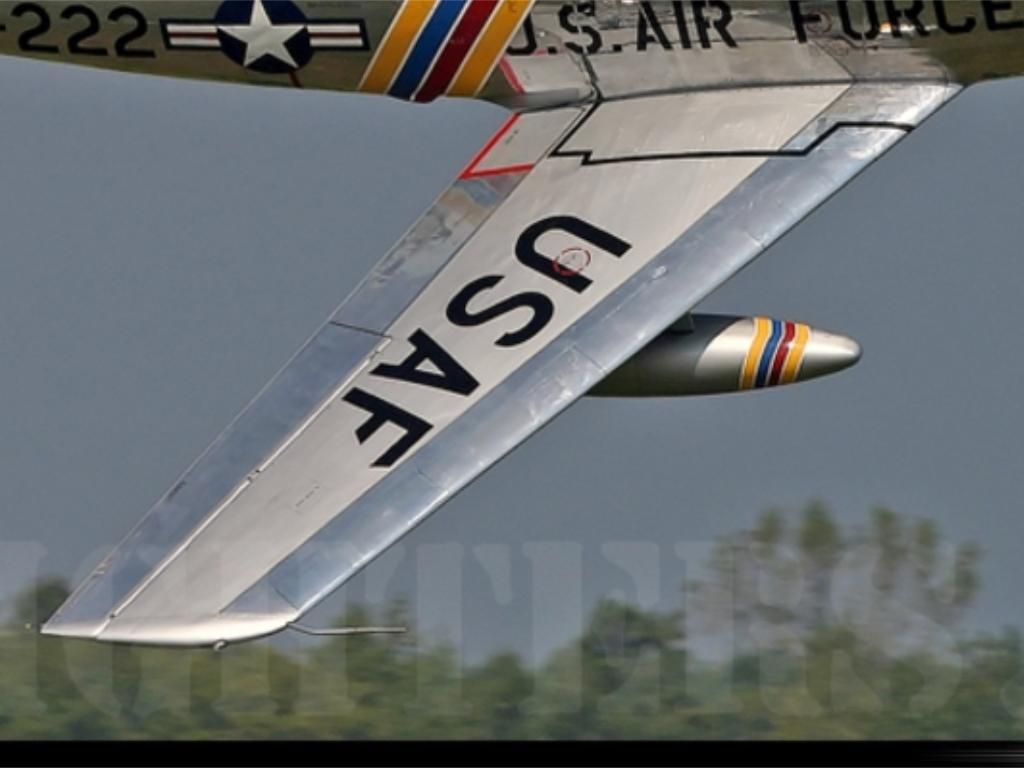
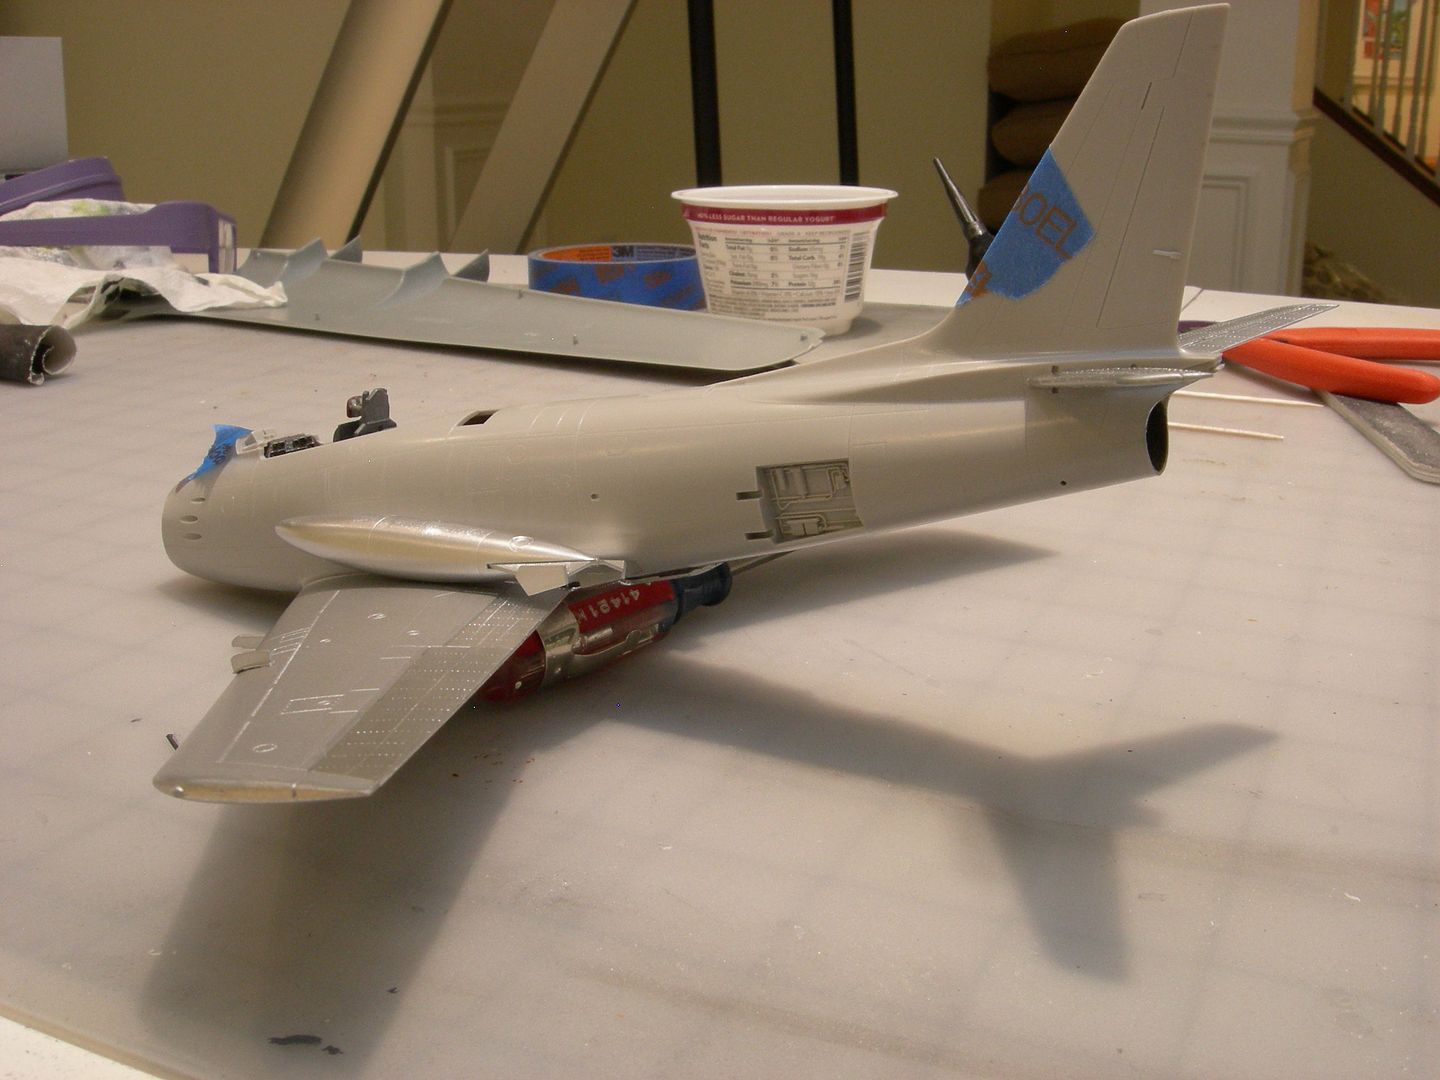
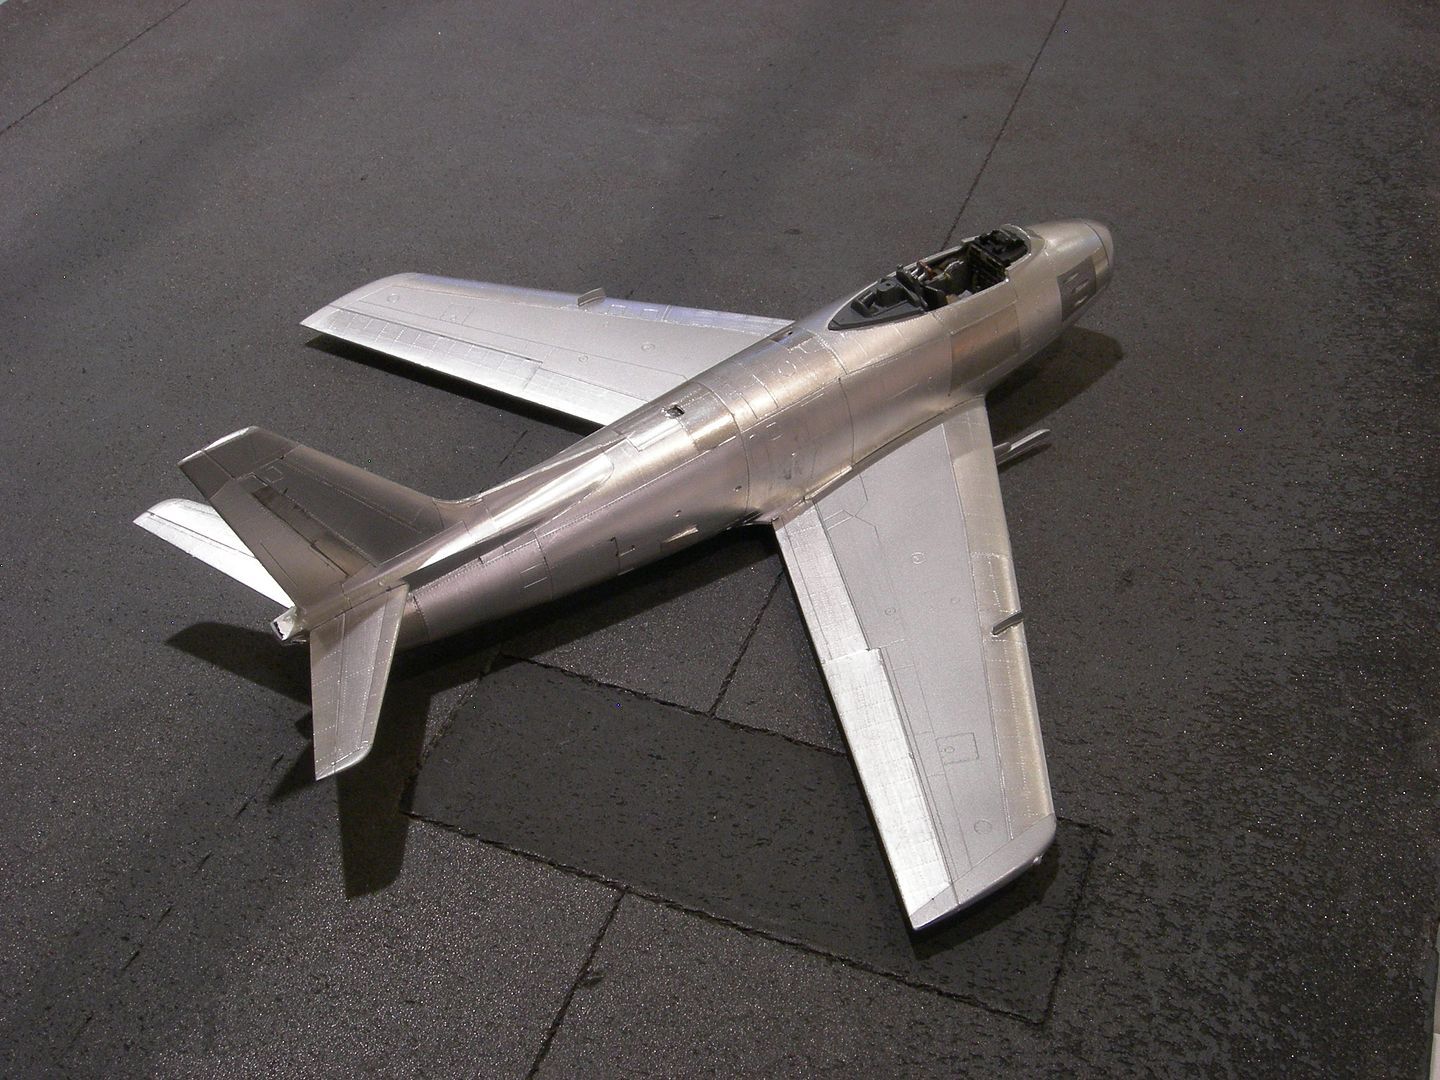
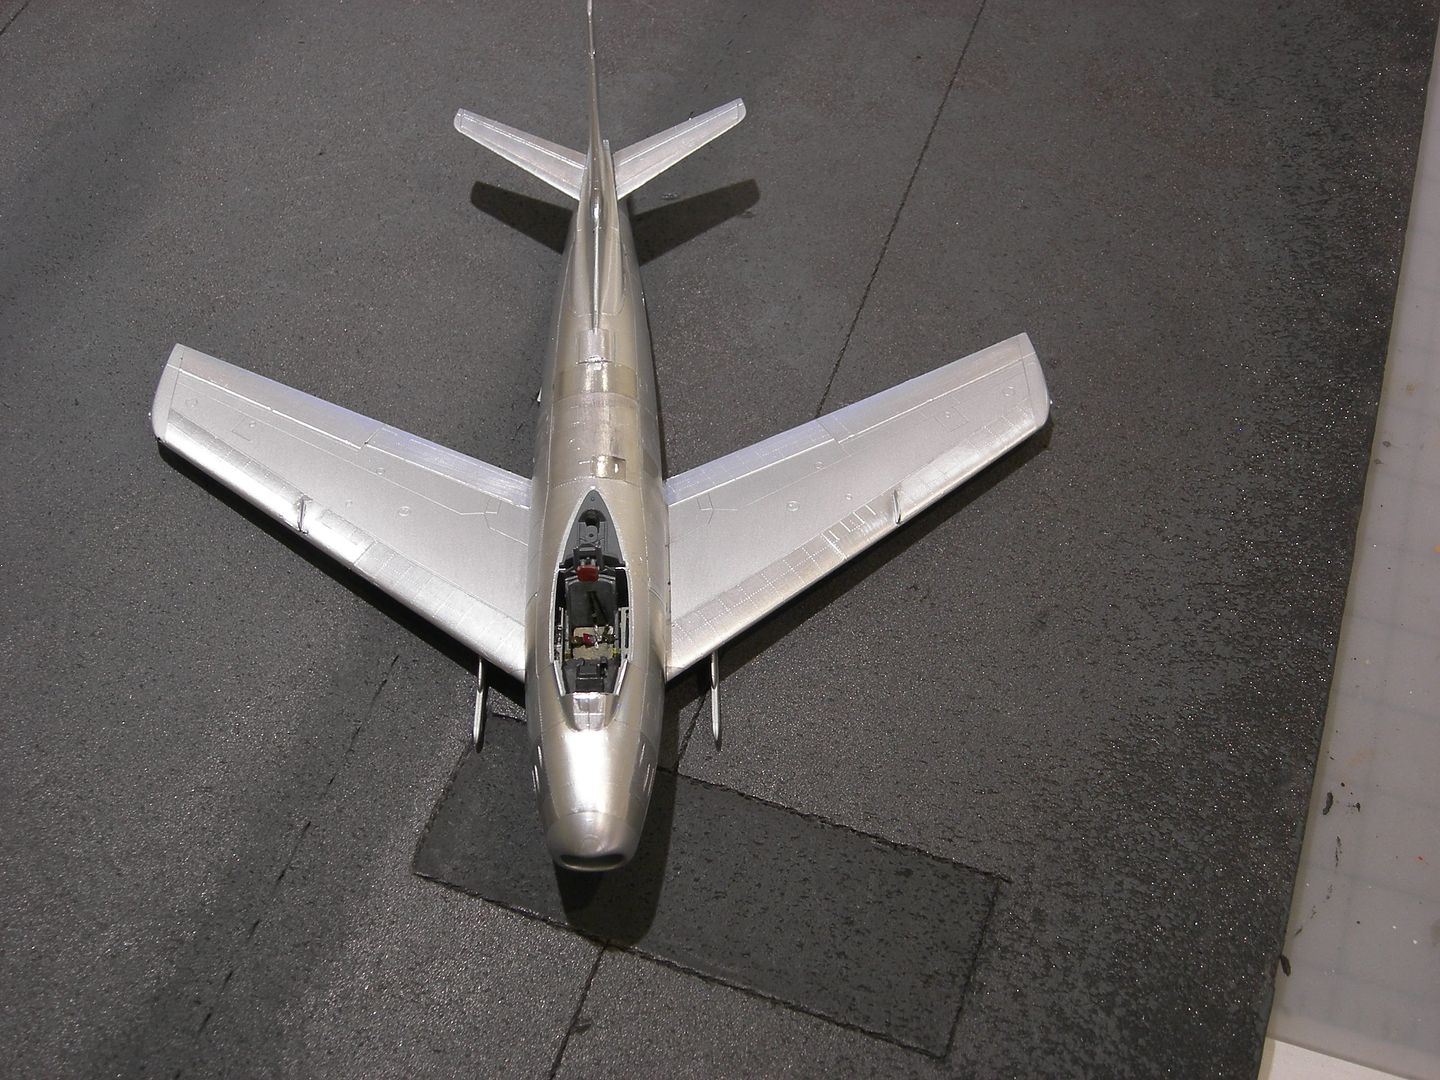
The fusalage and the operable sections of the main wings are natural aluminum. The main portion of the main wings are painted. This is typical for F-86 jets. I have read a couple of reasons why the wings were painted. One is the that material that the wings were made of corroded very fast. So they were painted. The second theory is that the paint made for a very smooth surface which increased the laminar flow of the wings, similar to the wings of the P-51. I din’t know which is correct, but I will build my model with painted wings. I will be using Bare Metal Foil for the NMF.
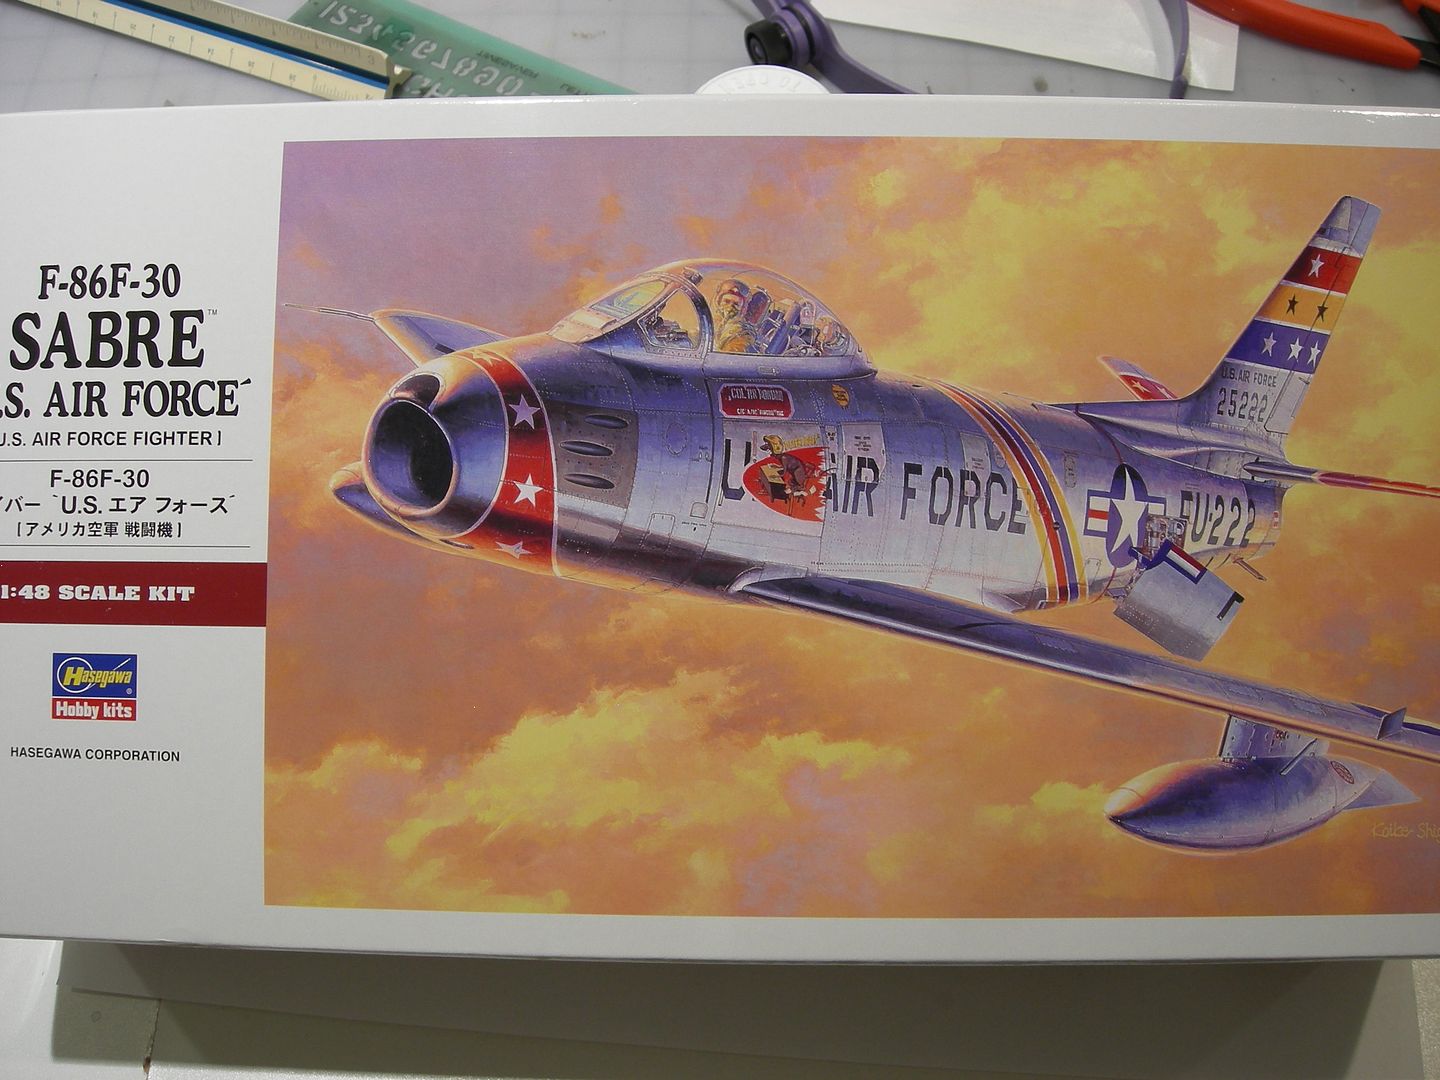
I will be building the Hasegawa kit.
Unlike the Revell kit, the parts in the Hasegawa kit have very little flash that need to be removed. Also, there seems to be more parts than can ever be built into this plane. Don’t be fooled by the box art, there are recessd panel lines on the model but few, if any, rivets on the model. I have a plan to fix the rivet issue. SO, let’s start with the cockpit.
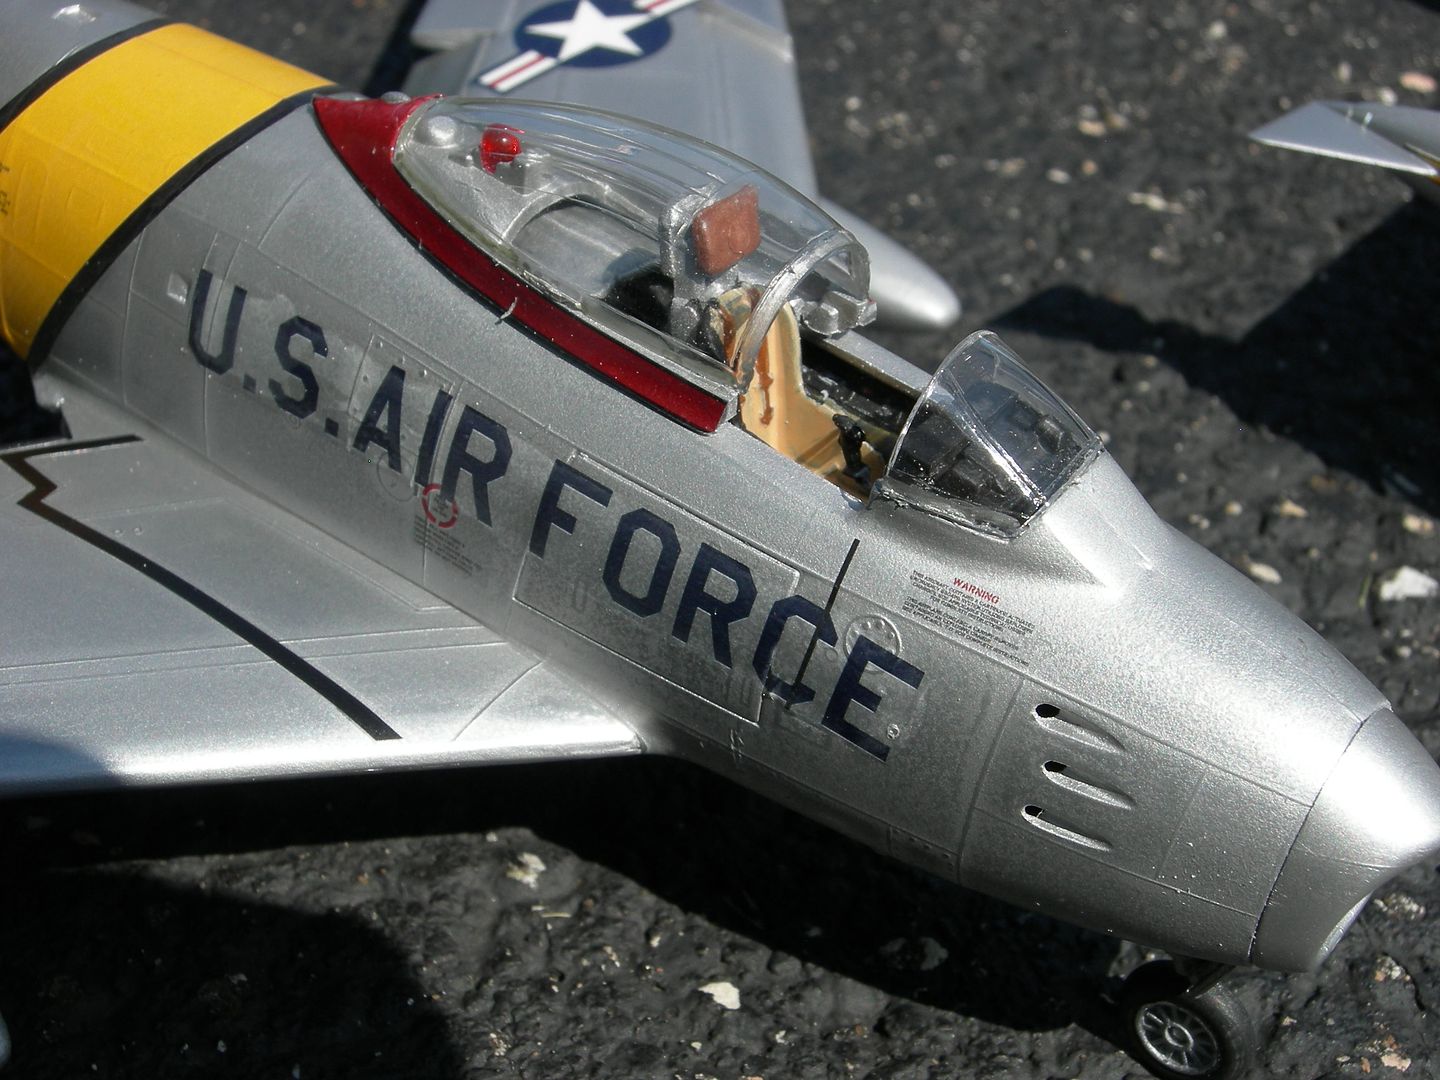
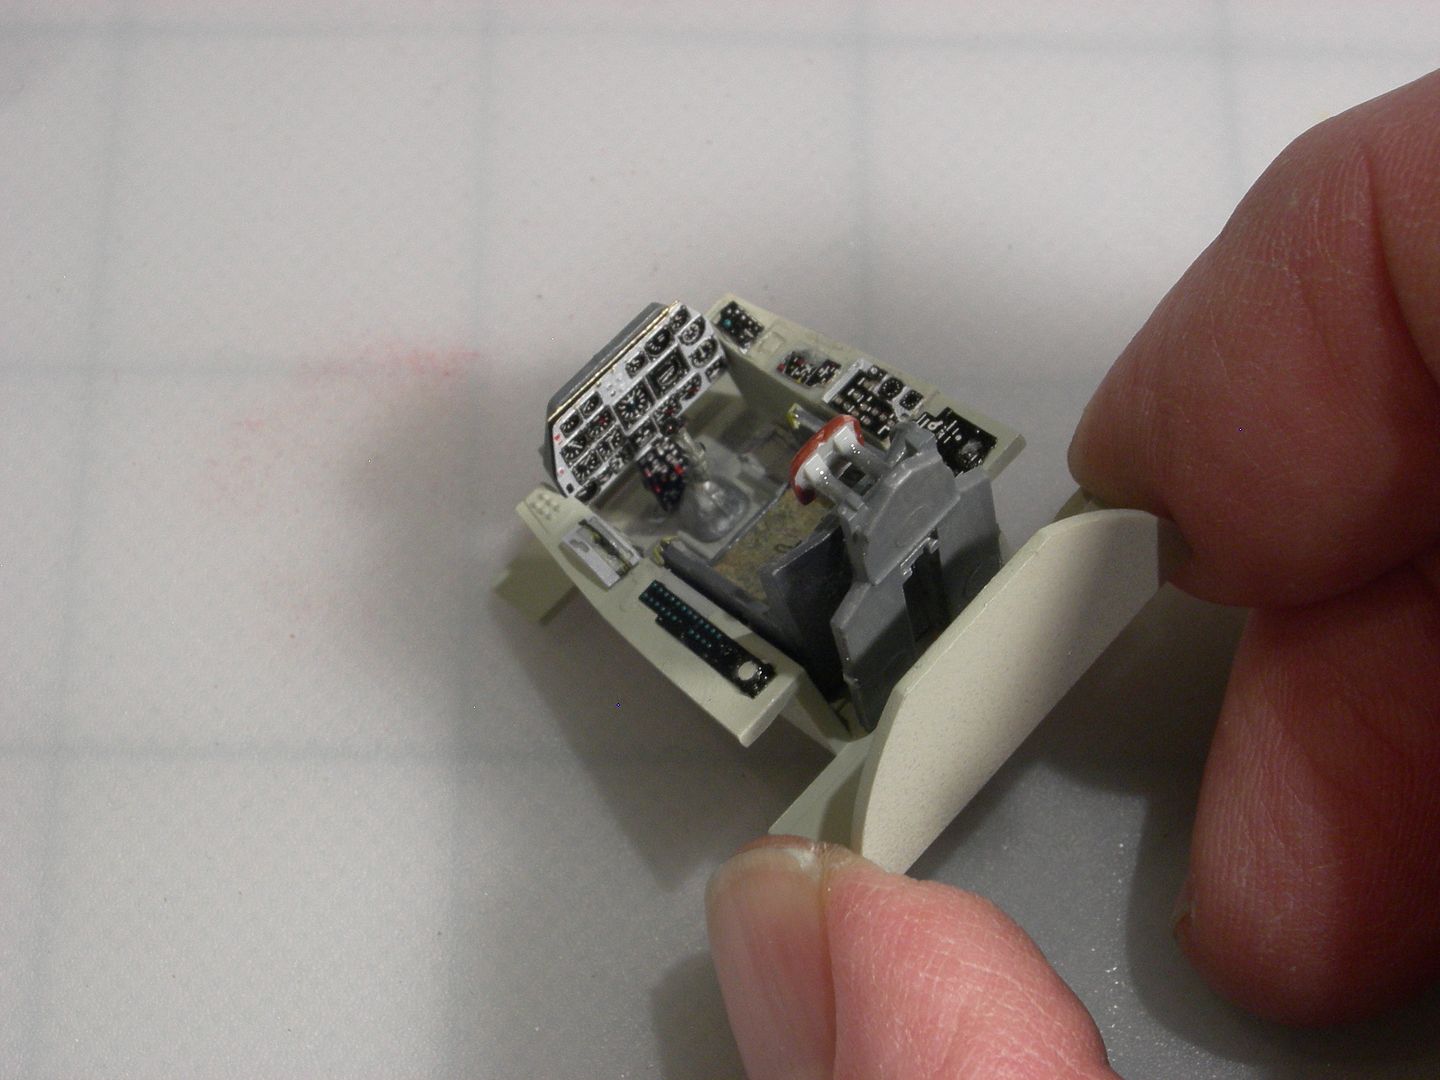
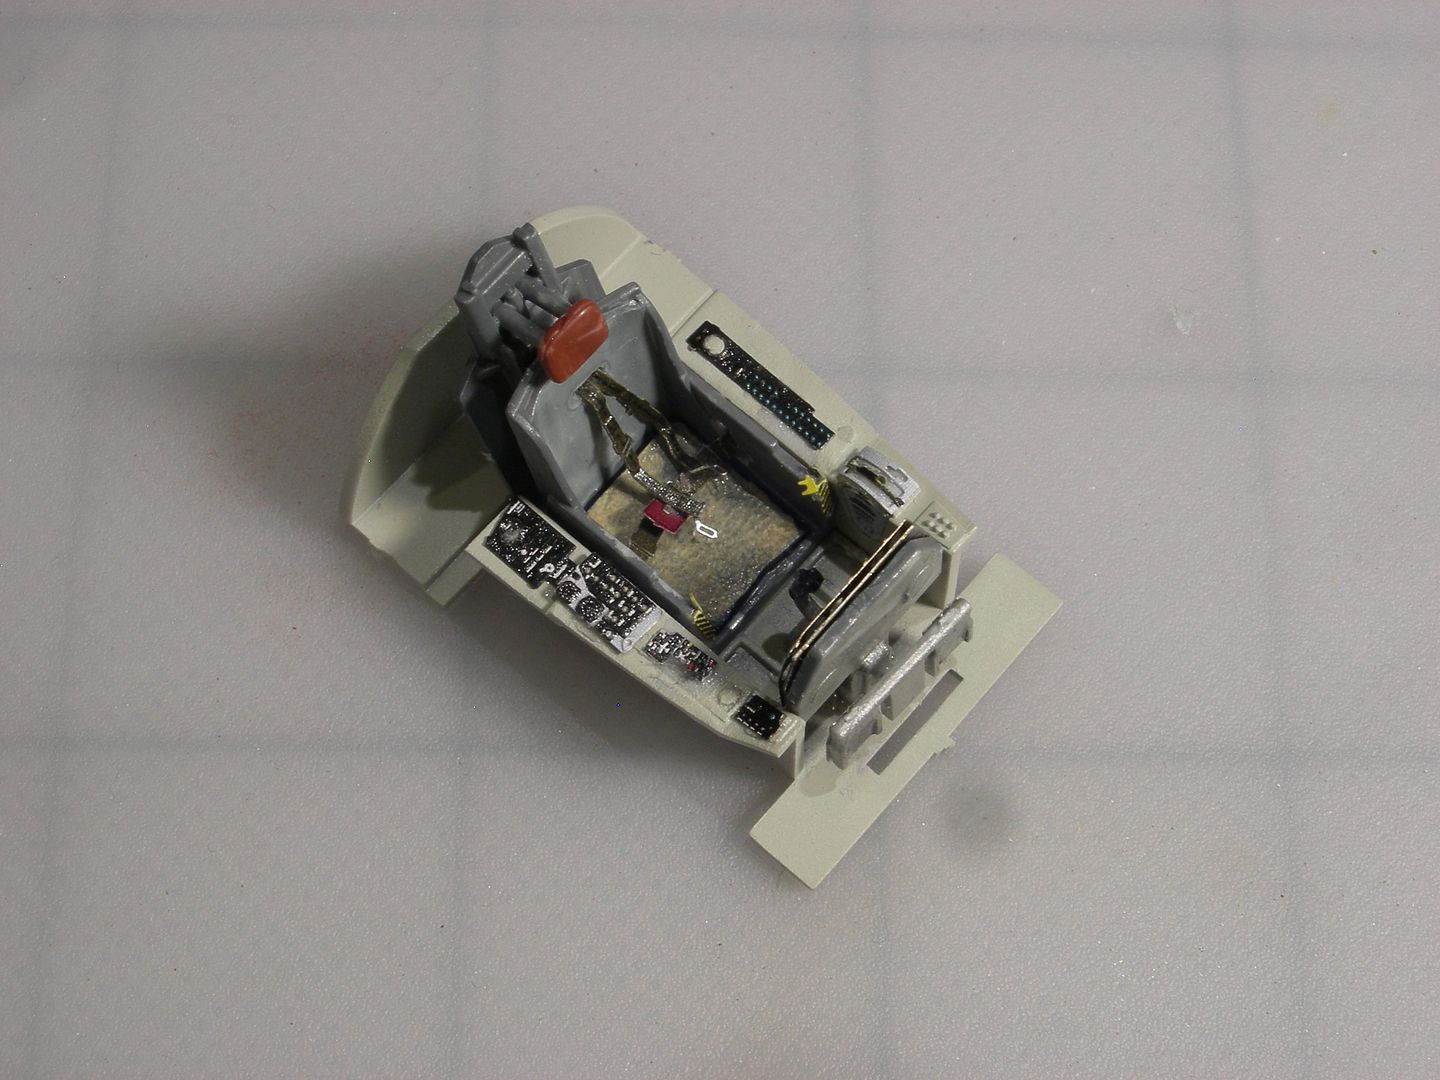
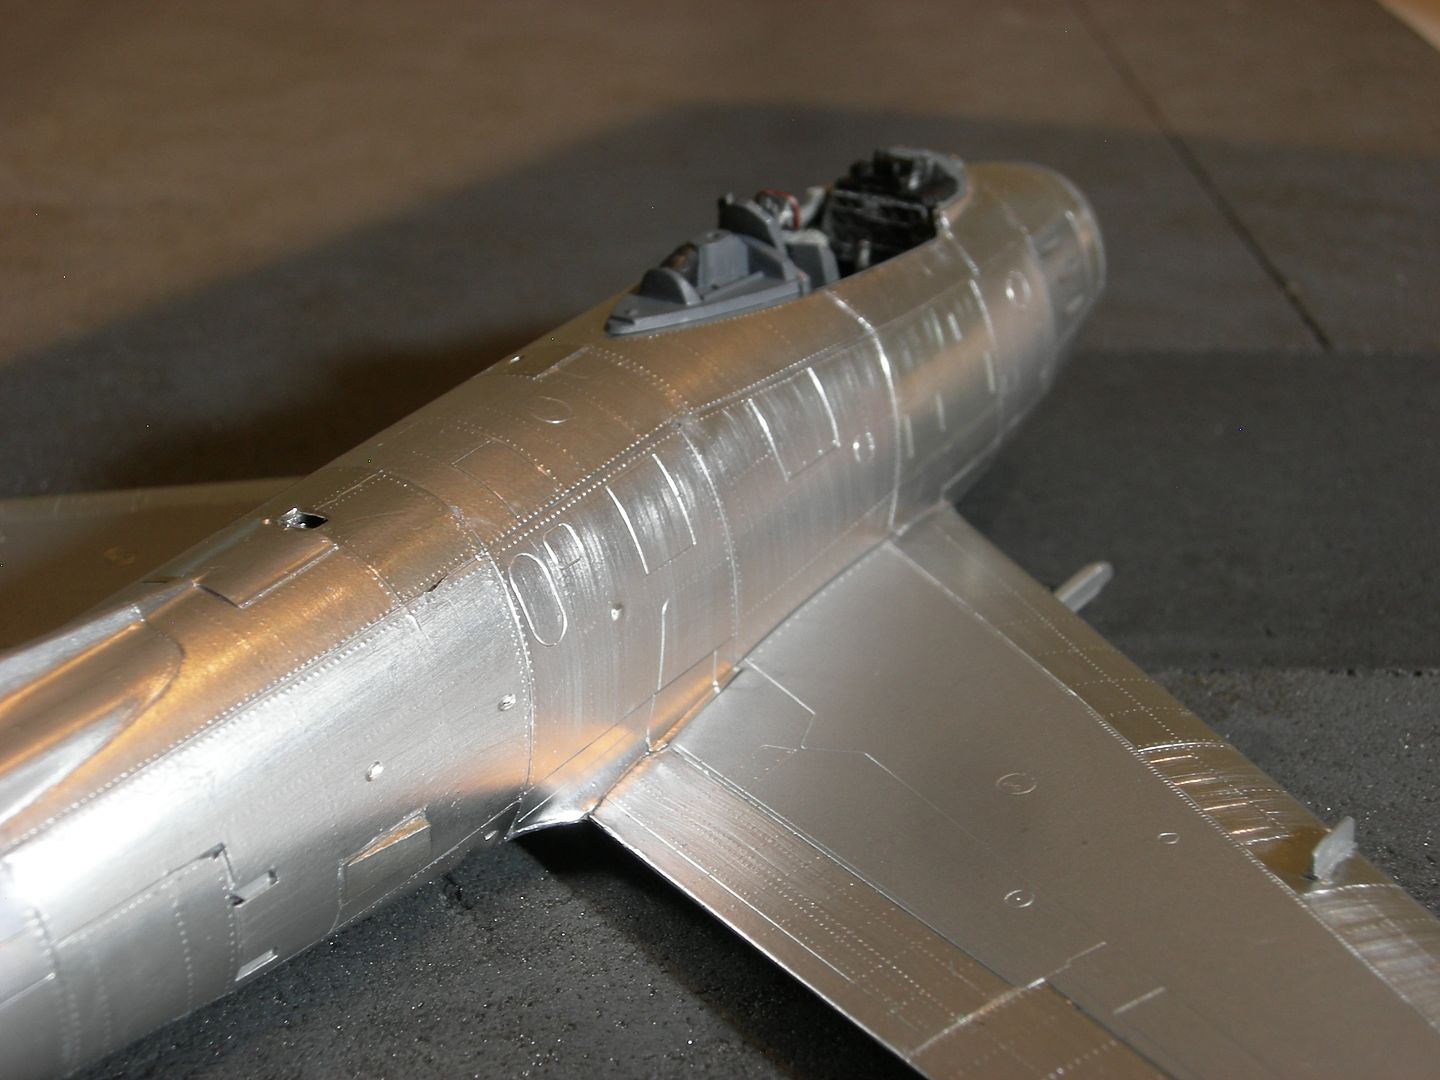
The cockpit lacks detail,and does not have any seatbelts. I purchased an Eduards detal kit. The cockpits of these planes were painted in a number of different colors. I painted mine a light grey.The front part of the cockpit is typical Eduards. It is made up of three parts. The parts do not have any adhesive, so I used super glue. The Eduards kit did not have any detail parts for the top areas of the cockpit sides. Almost all of the detail parts are to be installed on the sides of the cockpit. That’s too bad because they will never be seen. Instead I installed the parts there intended for the sides onto the top of the cockpit. It is not accurate, but I think it looks better. I do not like the looks of the Eduards seatbelts, so they me be removed before the kit is finished and replaced with something else.
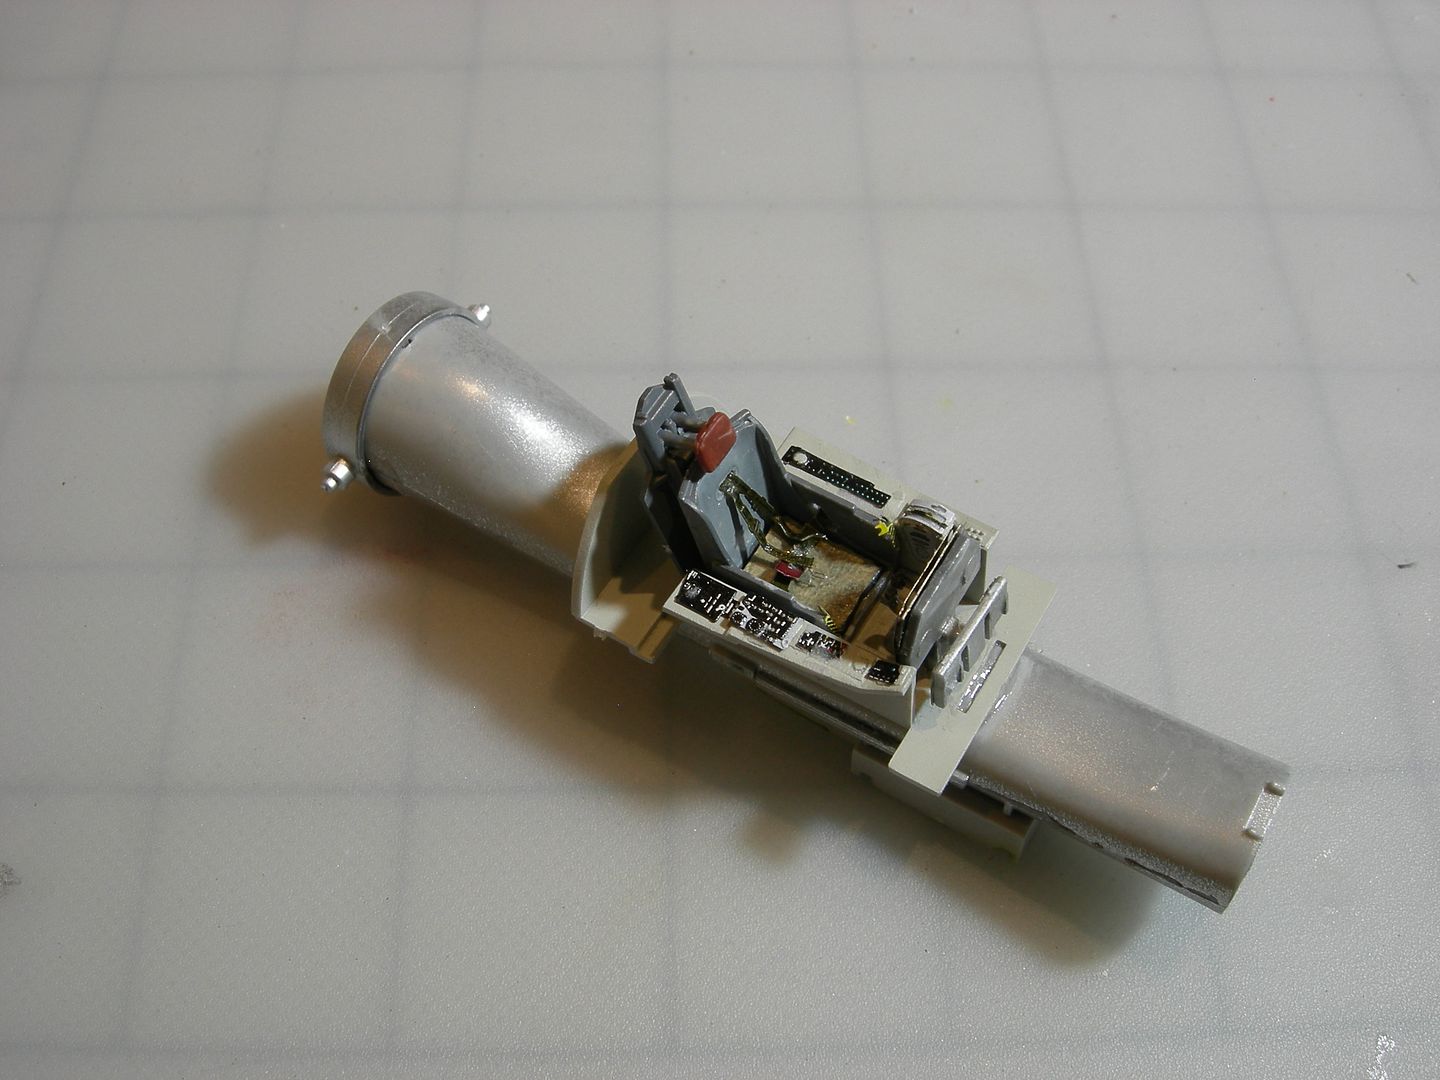
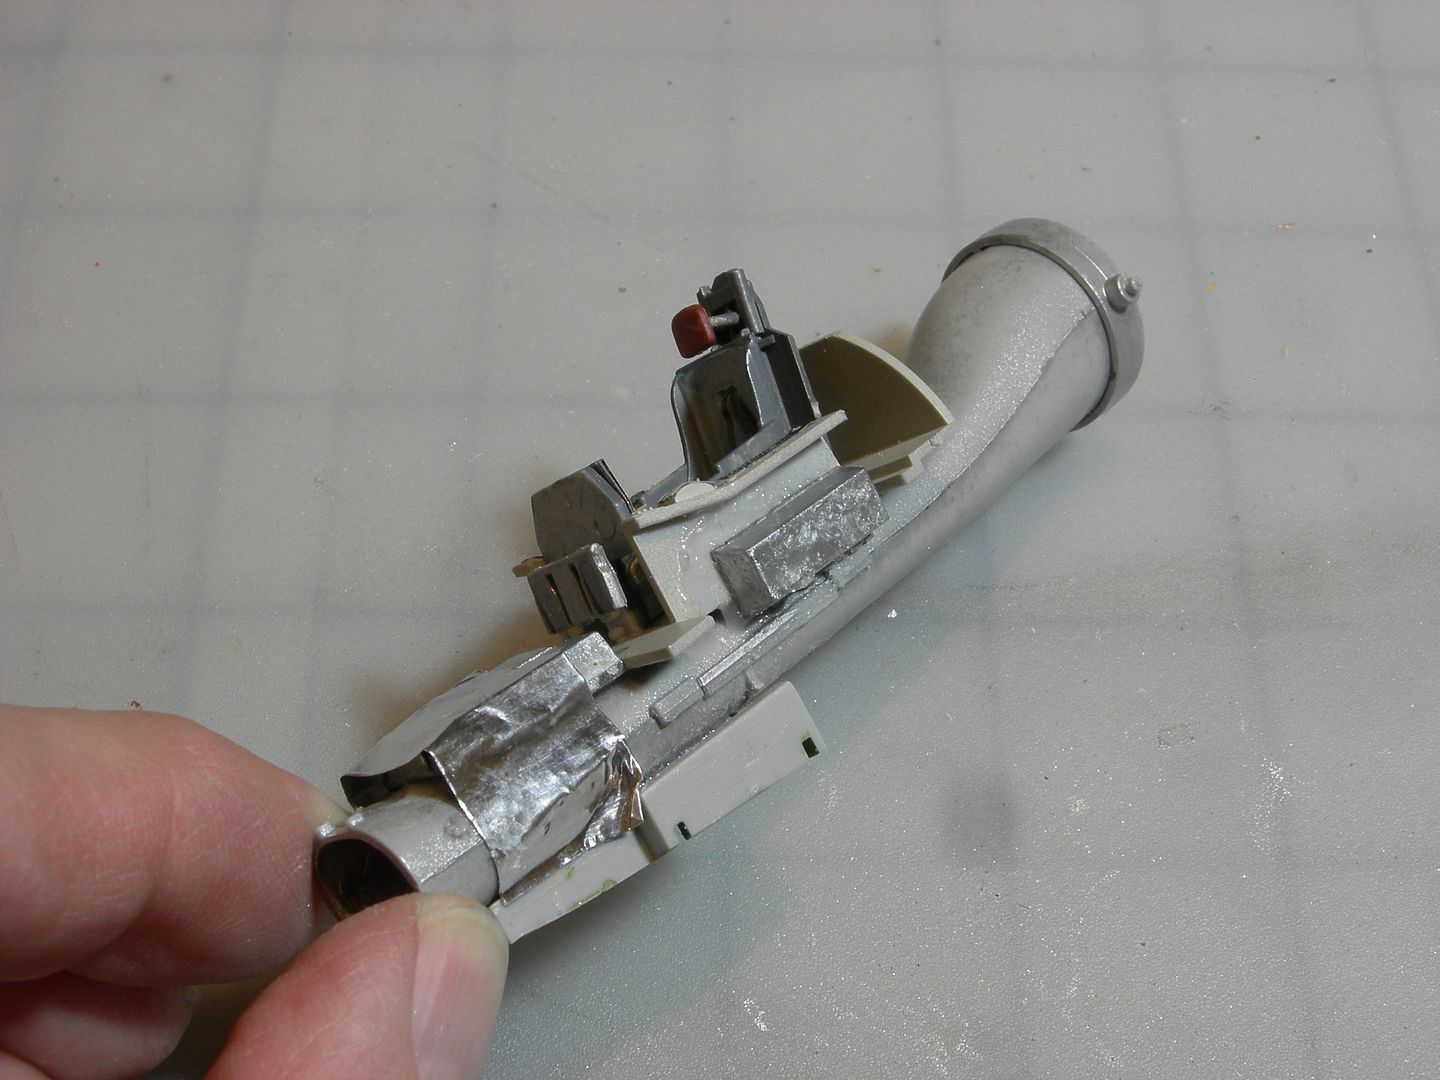
AFter the cockpit is finished, it’s time to glue it to the engine’s intake tube. The tube is in two parts, top and bottom. The seam is not really visible when looking into the front opening of the tube. The silver ring at the rear of the tube is the engine’s compressor. However, it is not visible when looking into the intake tube.
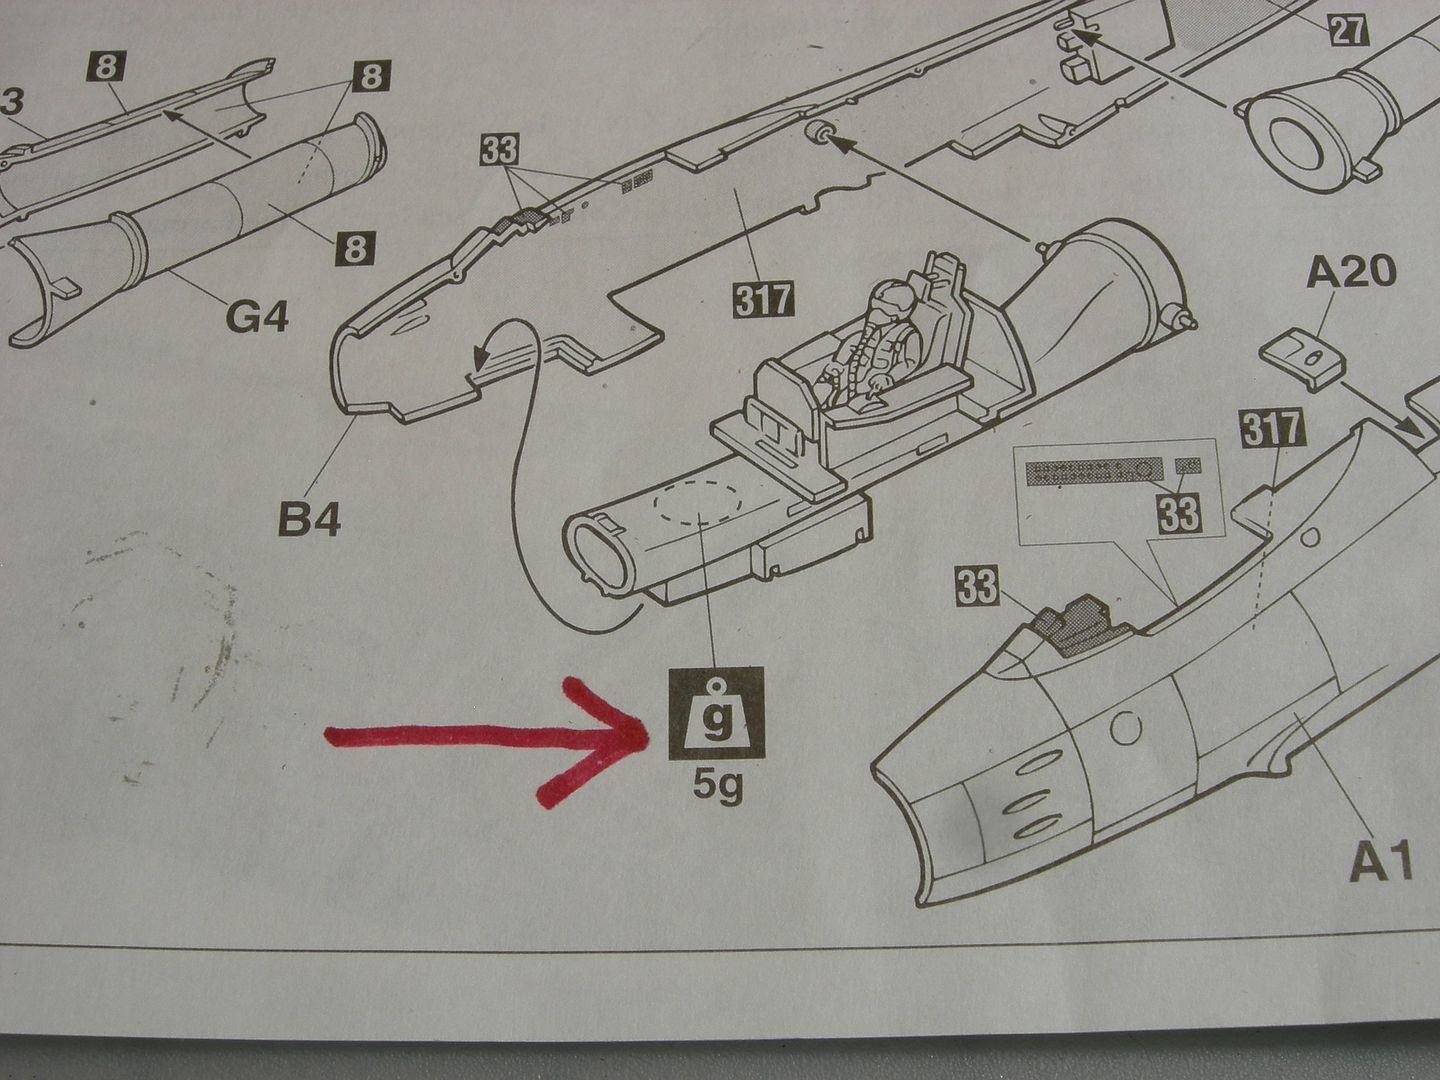
The next step is to add weights to the tube to keep the plane from sitting on it’s tail. The instructioins indicate the amount of weight to be added. I wish all manufacturers did the same.
I used weights that are intended for a pinewood derby car kit. They were glued with epoxy. I used some high temperature duct tape to make sure the main weights would not fall off.
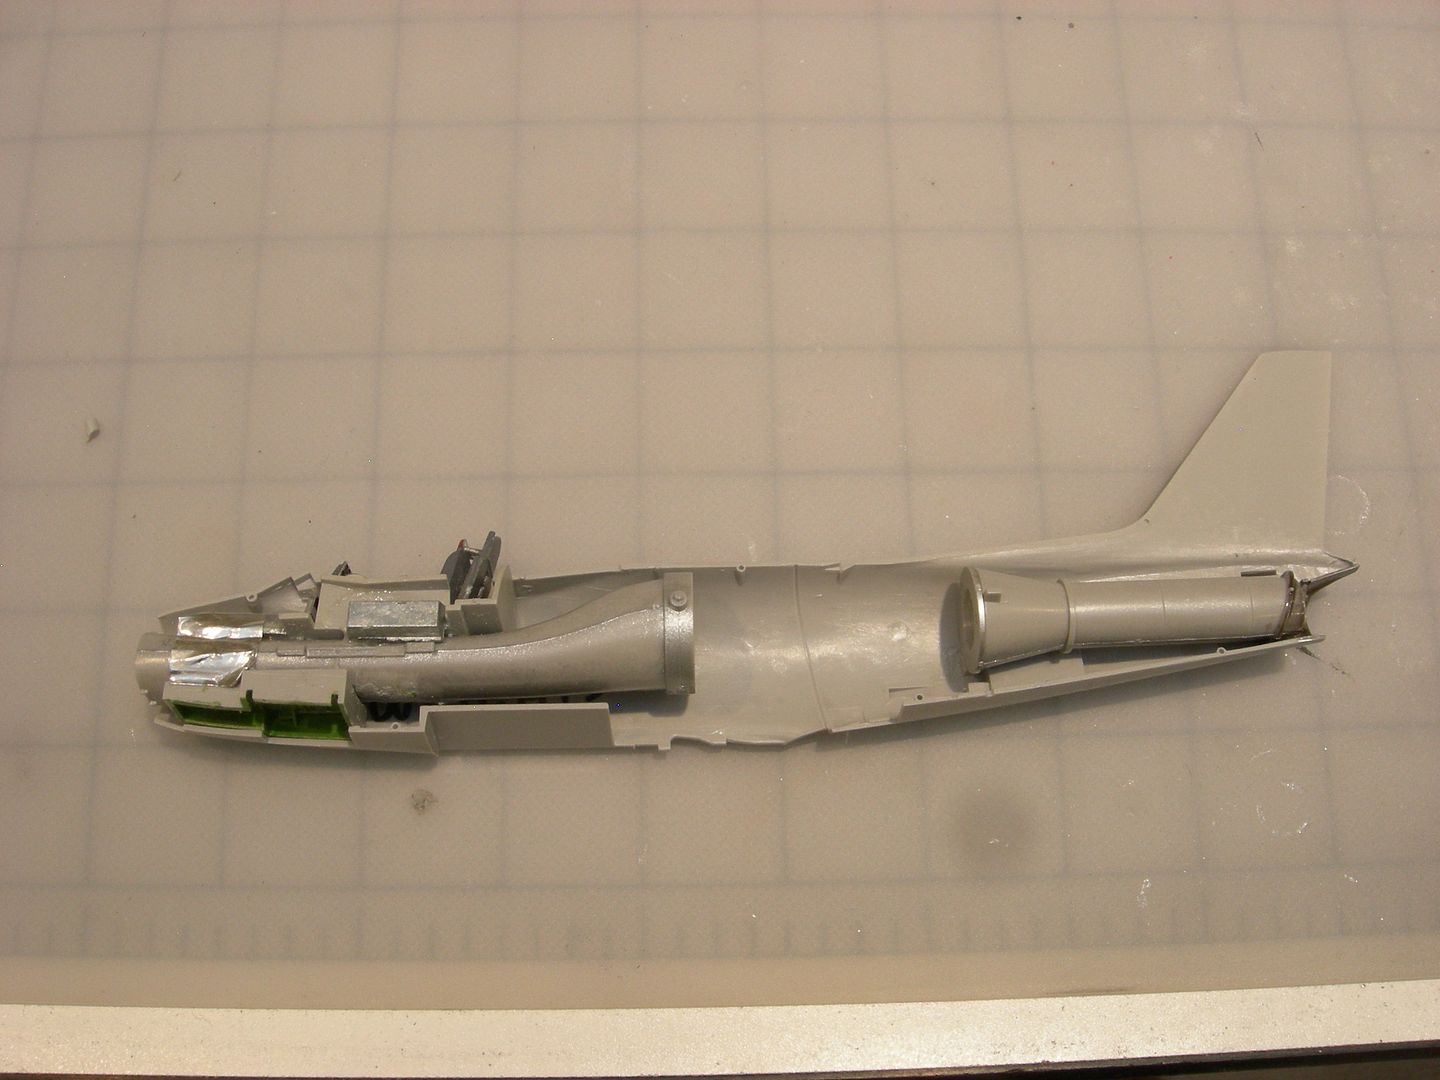
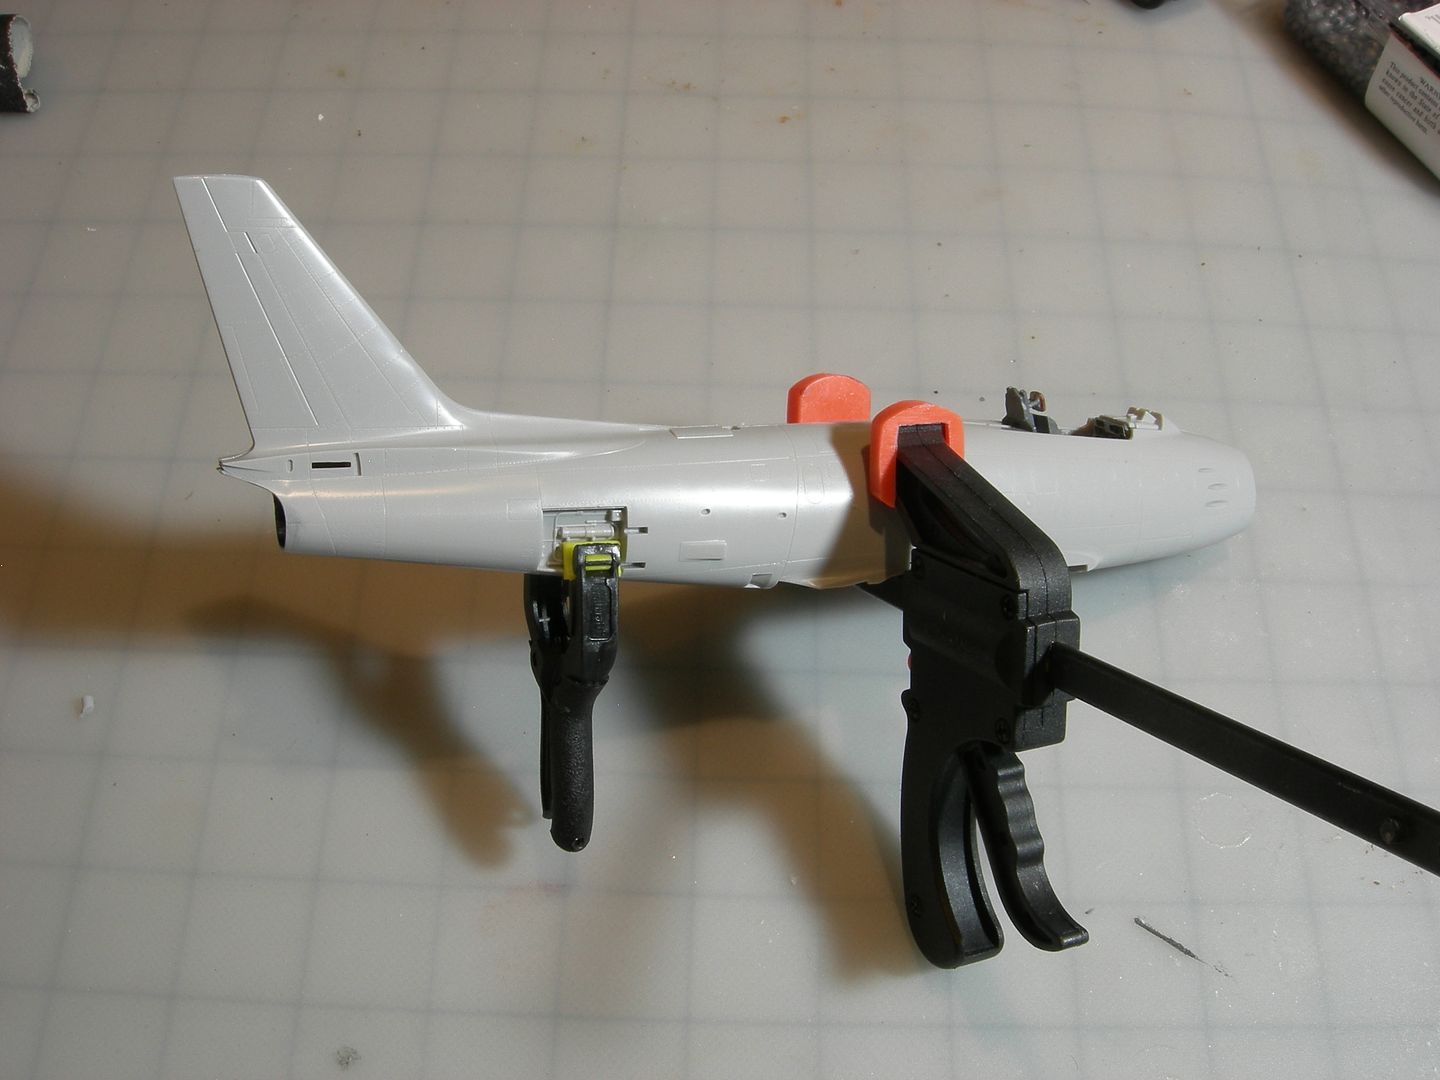
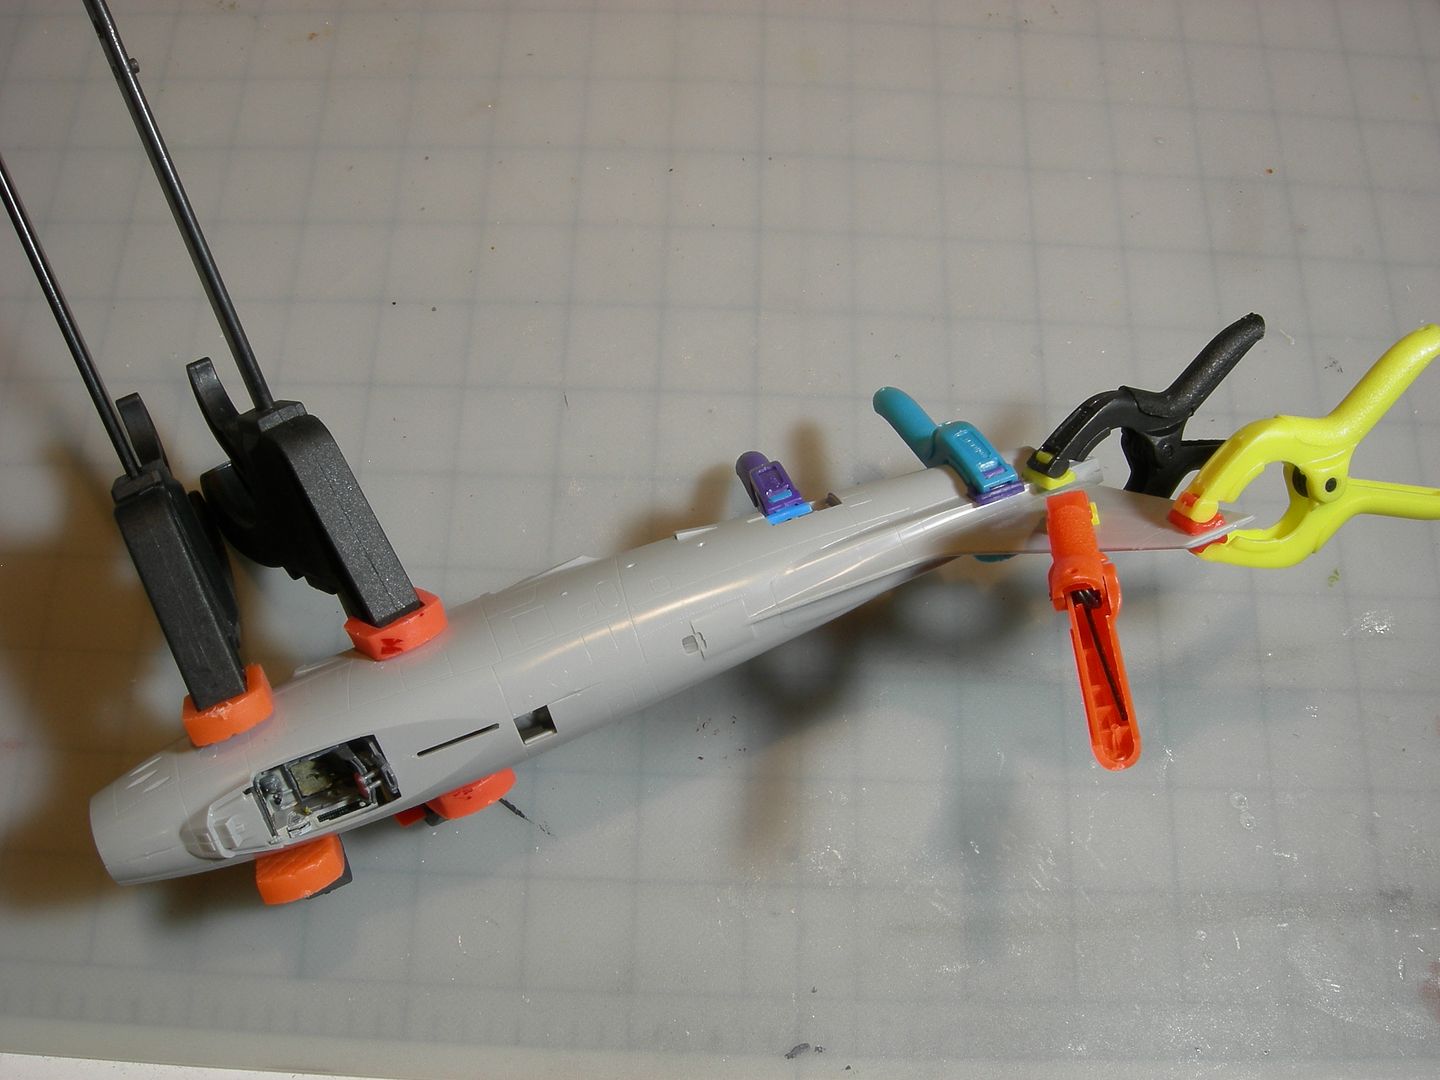
Now, the final step befor closing up the fuselage is to glue the front engine tube/cockpit assembly and the rear exhaust tube to one side of the fuselage. There is no engine in this kit. It doesn’t matter because it won’t be seen.
It’s not possible to glue the front tube, rear tube and both sides of the fuselage together at the same time without three hands, or a prehensile tail.
So I decided to glue both tubes to one side of the fuselage and temporally clamp the fuselage together to allaign the two tubes. After the glue dries I’ll glue both sides of the fuselage together.
Good progress so far. I really enjoy building these Hasegawa Sabres. I’ve put together at least 20 of them.
A couple of tips, if I may? The rectangular, wedge shaped vent in front of the speed brake well in your last photo is unique to Japanese built Sabres. They’re not there on North American, Canadair or CAC built Sabres. Not sure if you want to shave it off and fill the resulting hole or leave it as it is.
Secondly, when attaching the nose ring, glue the small piece that contains the landing lights between the fuselage halves first. The instructions call for gluing the nose ring in place first. By gluing in the landing light piece first, you’ll get a better fit of the nose ring to the fuselage and you won’t need a prehensile tail to spread the fuselage pieces on the bottom to create the correct gap. It will also lessen the amount of filler needed, if any, around the nose ring / fuselage butt joint.
I’m attempting to replicate the wing below. Note that the moveable sections of the wings are unpainted aluminum. I’ll use Bare Metal Foil for those parts of the wings.
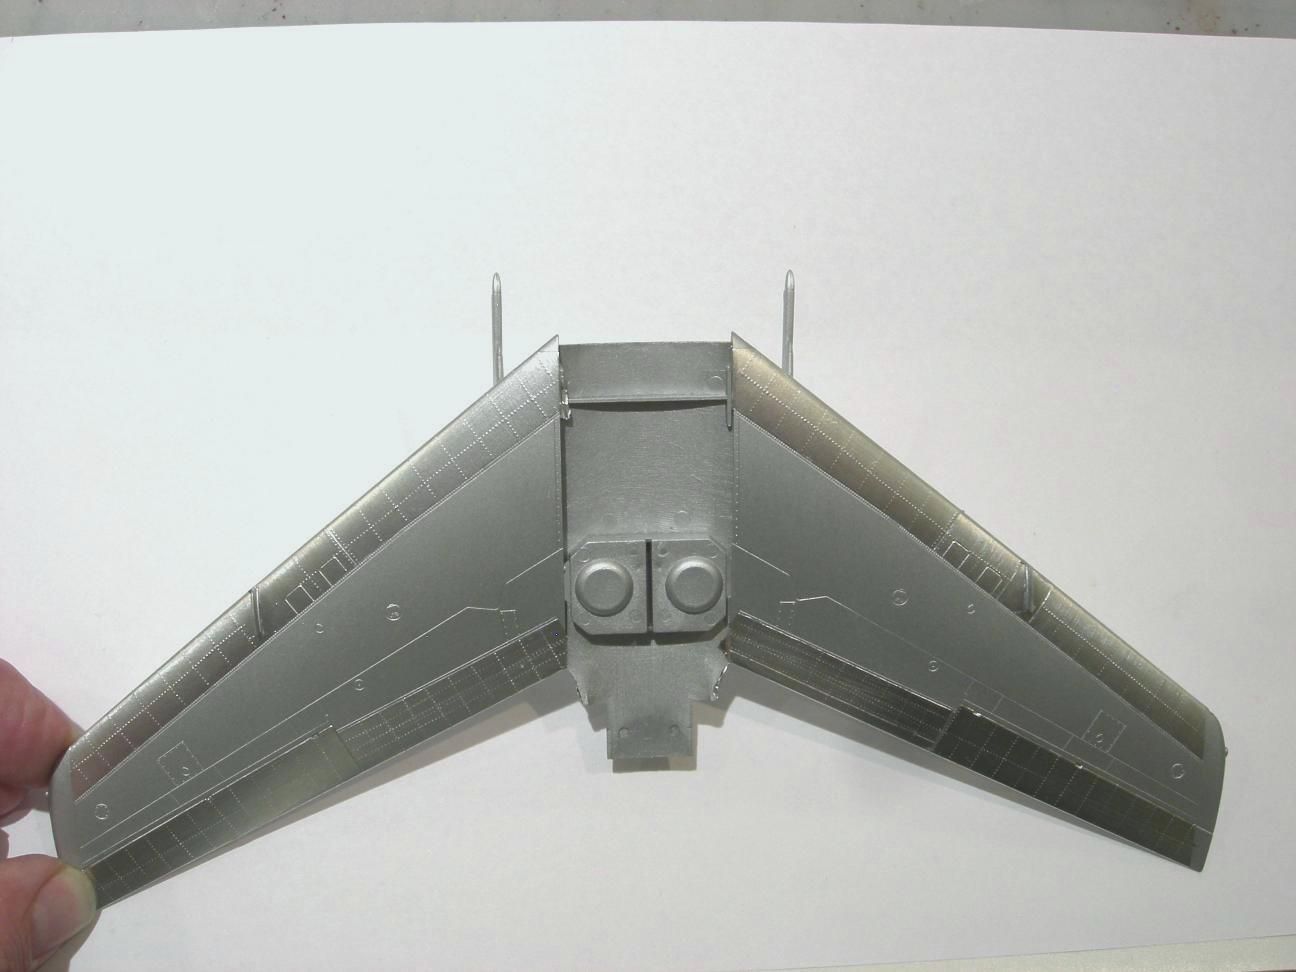
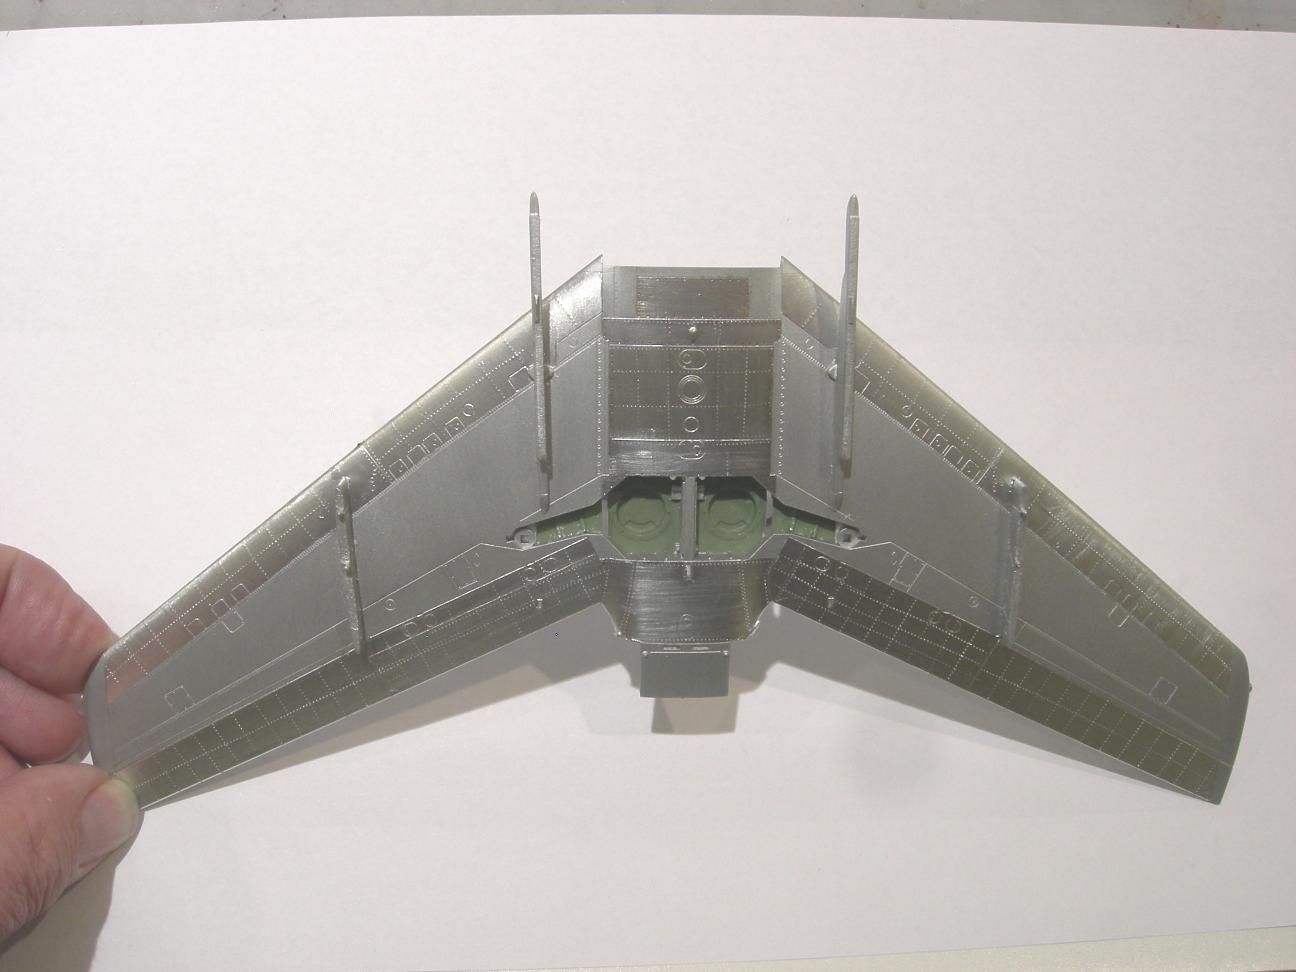
After glueing the upper and lower wing halves together, I painted the wing with Testots’ Metallic Aluminum. After drying I sealed the unbuffed metallic paint with Metallic Paint Sealer. Bare Metal Foil was added to the mobable parts of the wings. I used a rivet making tool to add rivets. I used a light at a low angle to exaggerate the appearance of the rivets. In reality they are more subtle looking.
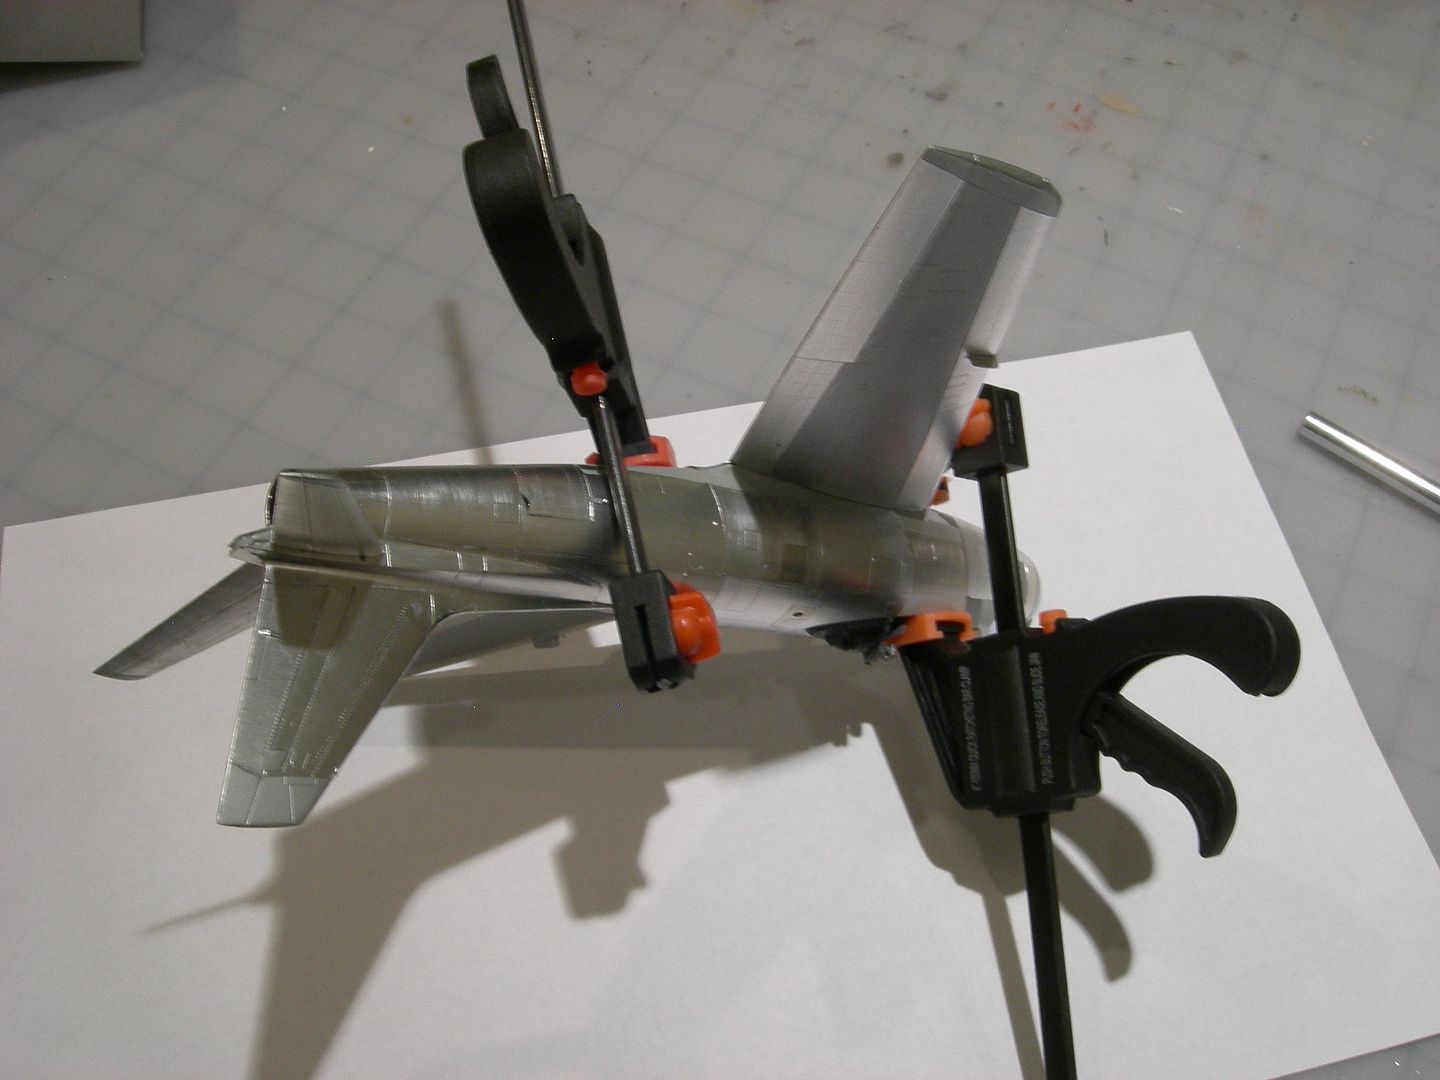
Before I glued the fuselage together, I checked to make sure that I added enough weight. I taped the fusegale together and clipped on the main wing and rear wings. The plane’s nose tipped forward when it was balanced in a small screwdriver. All’s well. The two halves of the fuselage were then glued together.
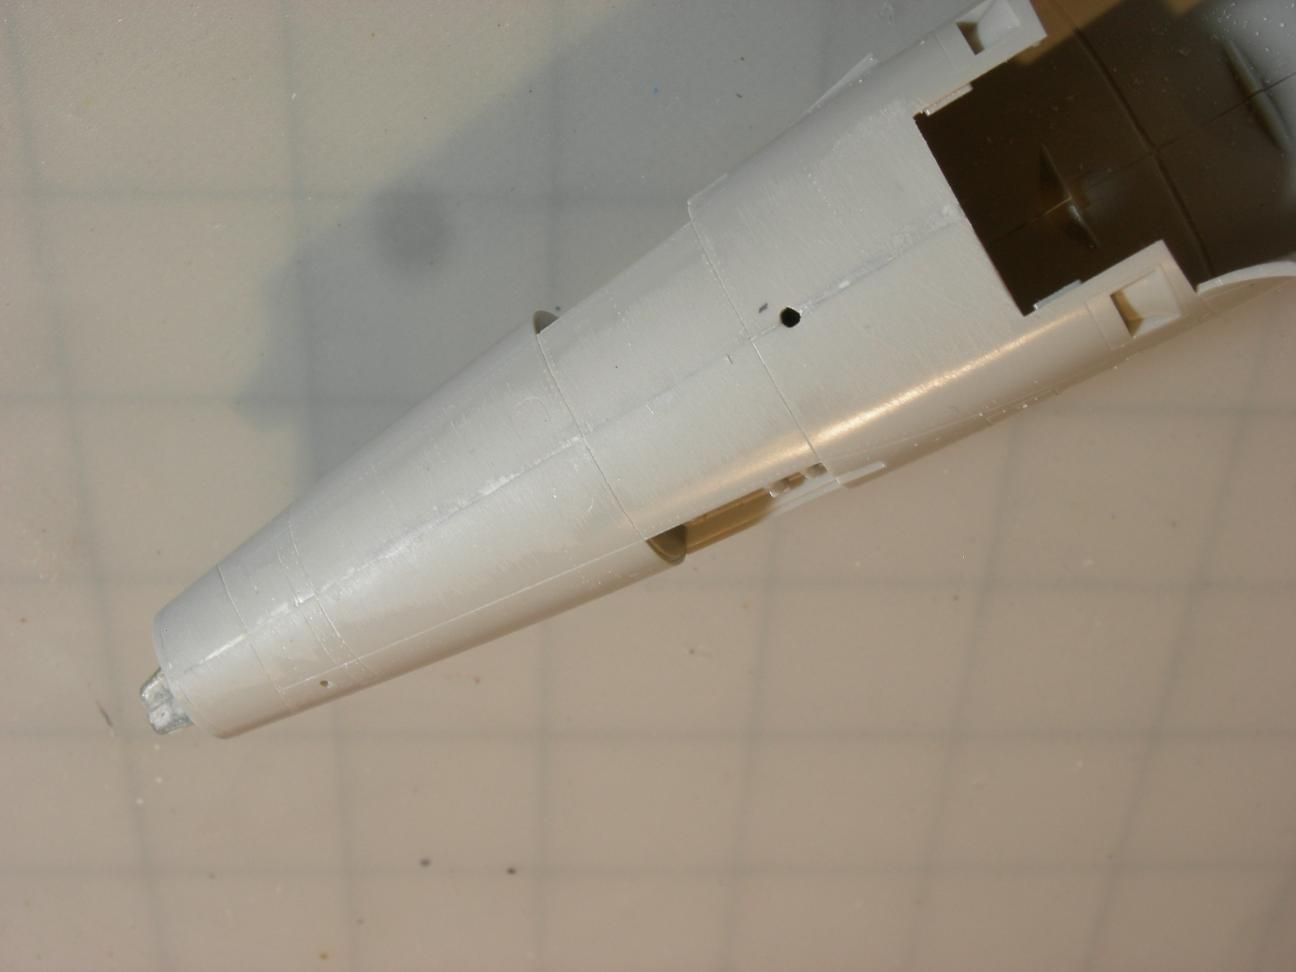
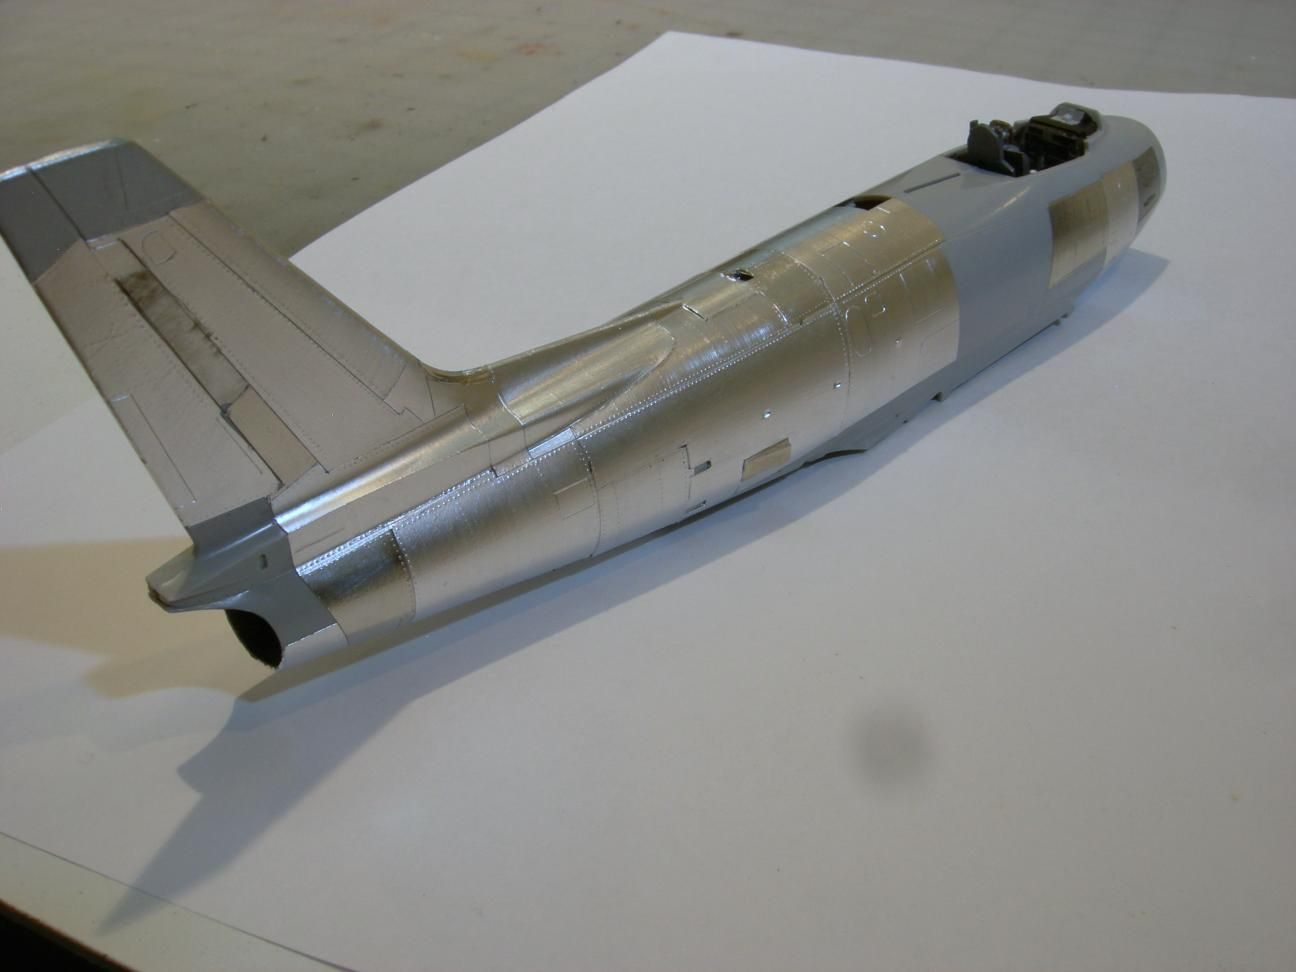
After the glue on the fuselage set, I filled the seams with Tamyia Surface Primer. After sanding, the fuselage is ready for finishing.
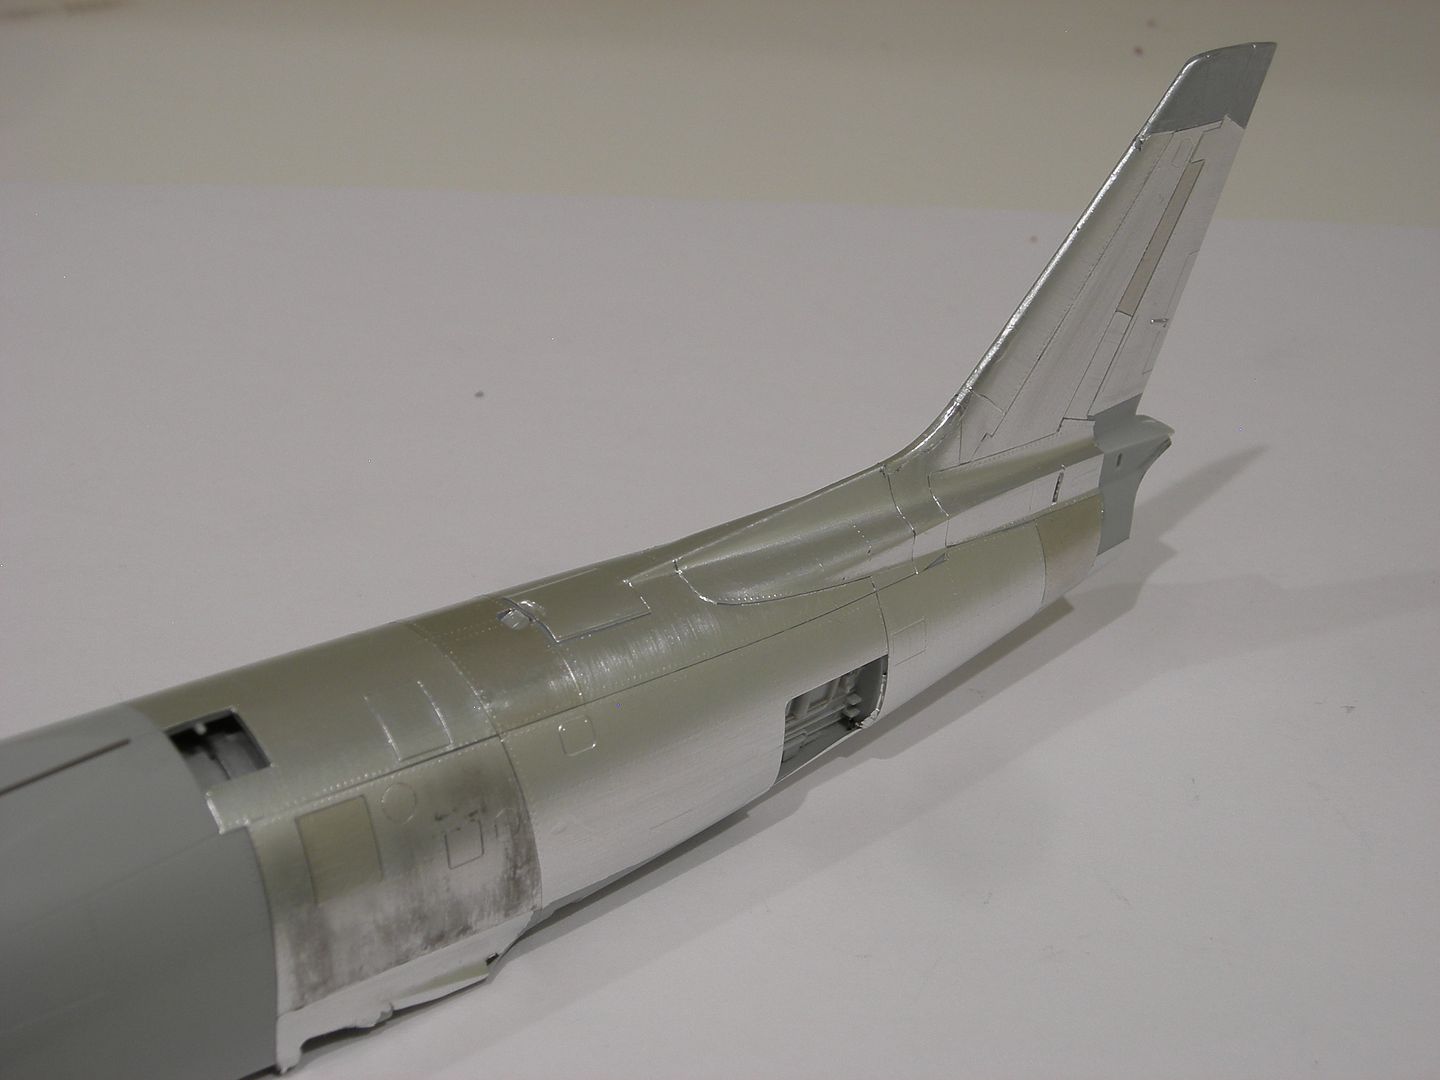
ALl the joints are filled and sanded. Now it’s time to apply the Bare Metal Foil. I tried an aluminum darkening product on the panel that covers the engine. I noticied in photos that this panel somes gets discolered from the heat of the engine. I am not sure that I like the affect. I may replace that panel wit a new piece of BMF.
Nice work so far. I’m still not where I want to be with NMF planes, but I think I am getting closer. I have never tried foil, but I like the look of yours.
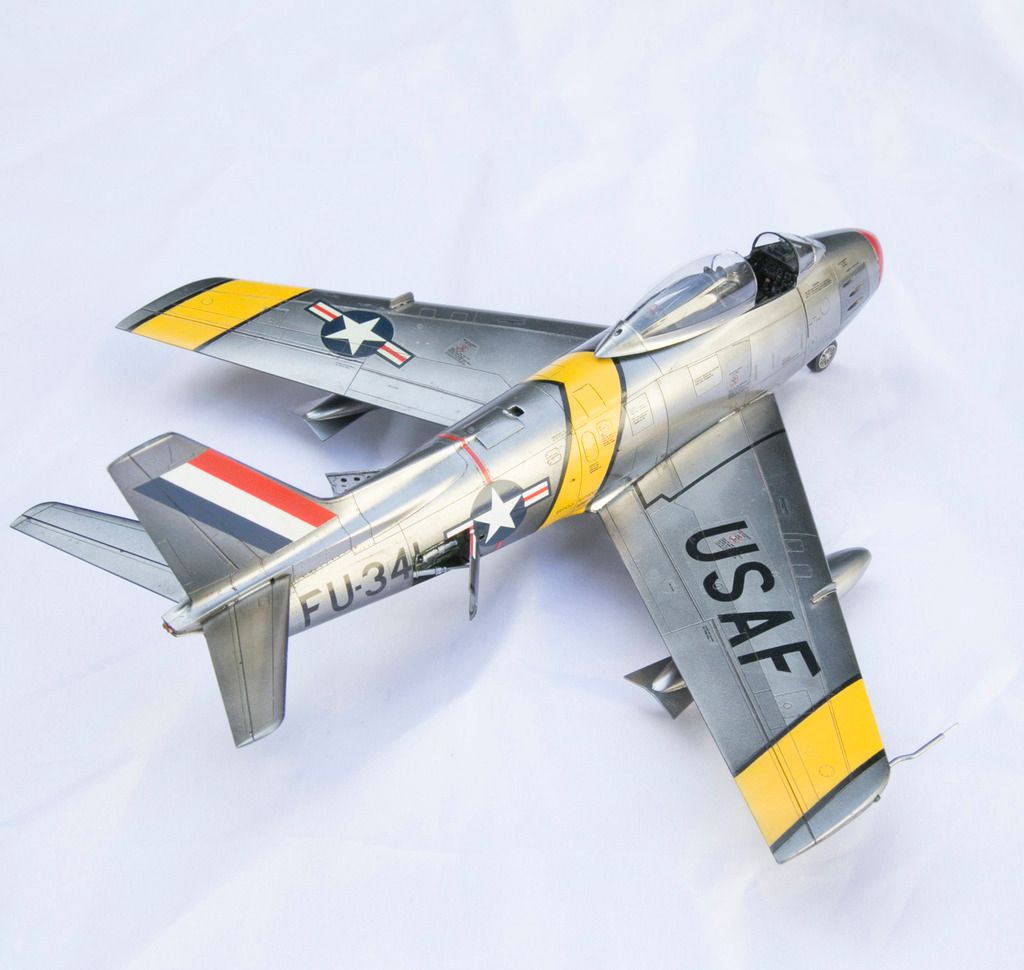
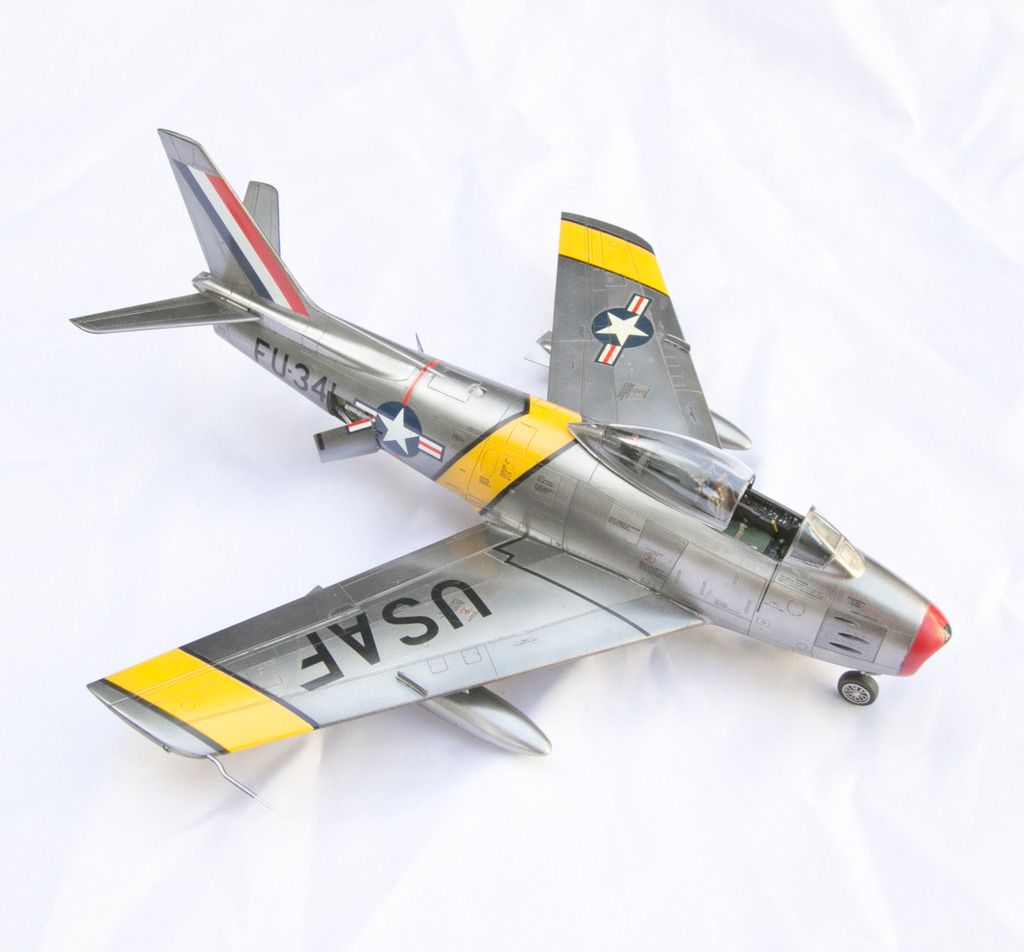
My Hasegawa Sabre was painted with one shade of Alclad: Airframe Aluminum. My first step was Mr. Surfacer 1500. I followed it with Tamiya gloss black. Then came Alclad, followed by Alcad Aqua Gloss acrylic clear coat. Next up was decals, and then another layer of Aqua Gloss.
In the end, I wasn’t happy with the way it looked like metal heavily coated with clear coat. The uncoated Alclad looked much better, but I wanted to protect the decals from the wash that came after, so in that place I’m at a loss.
I’m following your build with interest.
I hope I’m not hijacking your thread if I post a couple pics of mine:
To achieve the different shades of metal, I sprayed more or less Alclad Airframe Aluminum on the plane. So the gun panels got the least spray, and the tops of the wings got the most, since spraing increasing coats tones down the shine and gives more metal color.
Oh, and those decals are Super Scale. They layed down well, but you can still see the film to some extent. I think my next challenge with decals will be cutting them out exactly, so there is no film.
That’s a great looking Saber. I really liked how you were able to make the panels different tones. It adds a lot of visual interest to the model and makes the model look more like a real MNF.
You should try doing the BareMetal Foil finish. I would suggest that you try it on a P-47. That plane has simple shapes.Use a paper blending stick to burnish the foil. Then do a single rub with 0000 steeol wiil to give it some texture.
Looking good so far. Keep going. I recall reading somewhere that the center upper wing section was anodized rather than “painted”. Anyone know for sure? I’ll be interested to see how you get “that look”.
I know that the center upper wing section was not left in a natural metal finish. In most photos it looks like that section was painted in aluminum paint. If it was anodized, it would be in natural aluminum, similar to the aluminum frames of storefronts. The only way I could do that is to finish the sections in BMF and then use a very thin wash of Mineral Spirits and white artist paint.
Anodizing is an electrochemical process that CONVERTS the metal surface into a decorative, durable, corrosion resistant anodic oxide finish. Aluminum is ideally suited to anodizing. Do not misunderstand, I am NOT criticising your work. Your model has the correct “LOOK” for the upper wing center section. I do not recall if the under wing was done as well. I have seen several F-86s up close and the center section of the wing does not look painted. As for the B-29 I do not knowas I have not looked into that aircraft. I have seen the Commemorative Air Force’s B-29 FIFI up close, in fact inside her, but not the upper surface of the wing.
As a matter of fact your model looke great so far. I am a huge fan of the F-86.
I take no offense to your remarks and I welcome all comments [:D]
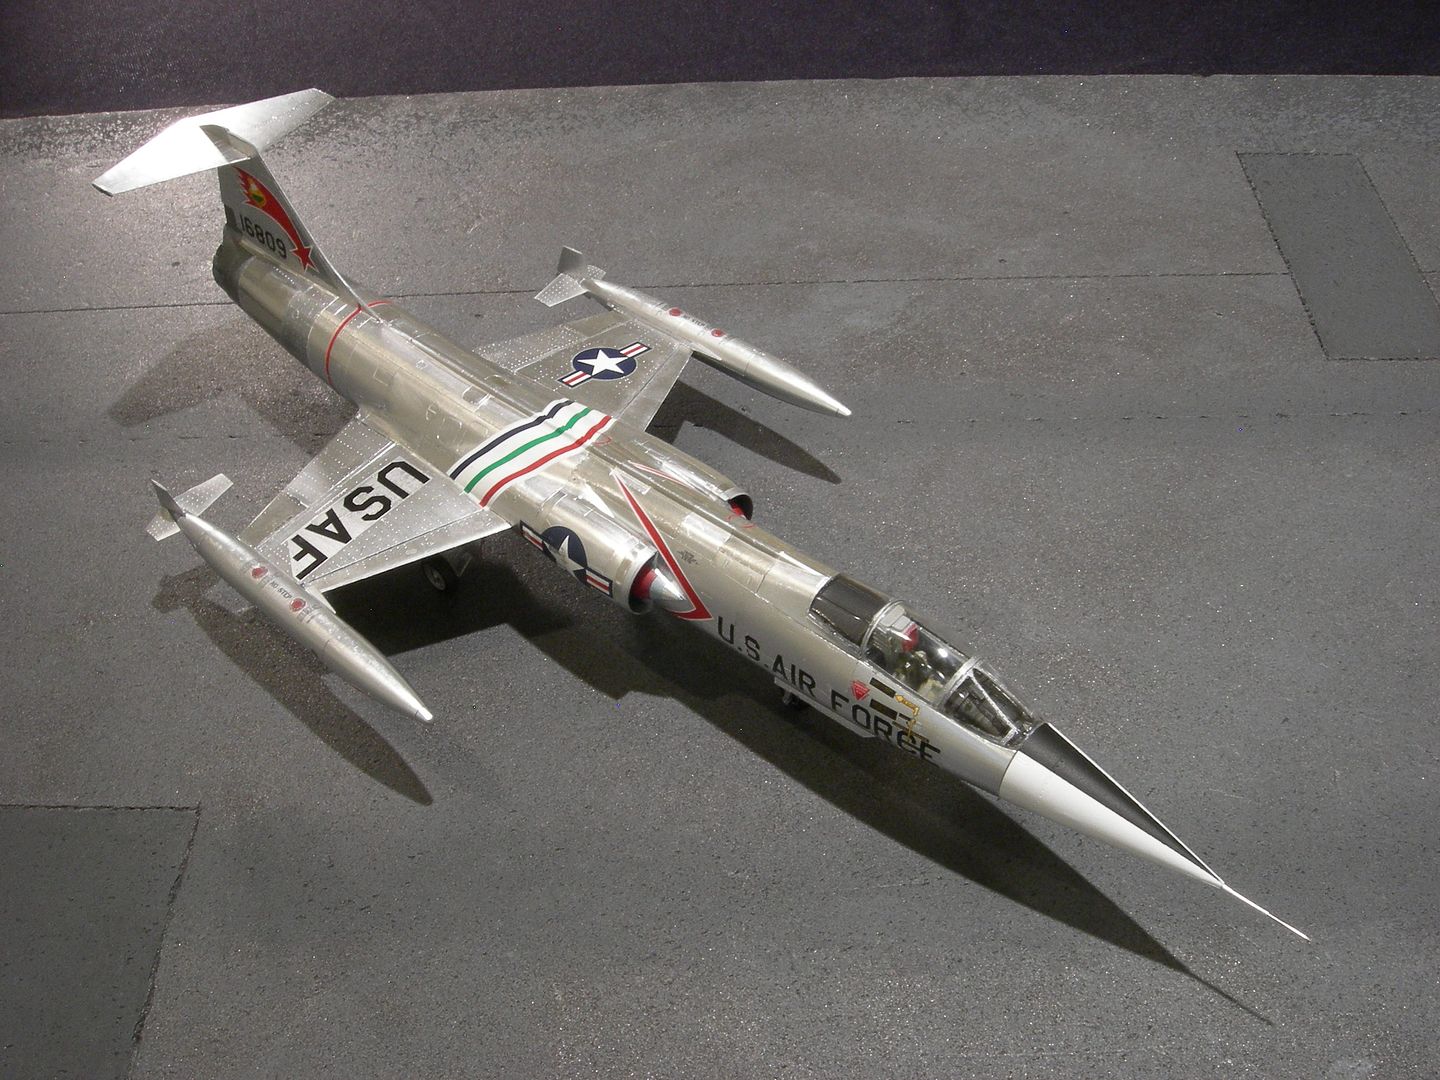
It is difficult to determine from photos of F-86, P-51, F-104 and B-29 airplanes if the center section of the main wings were painted or anodized. I’ve read that the center sections of P-51 wings were painted to improve airflow, the center sections of F-104 wings were painted to prevent corrosion and that the center sections of B-29 wings had a different color because ther were of a different alloy than the remainder of the wing. Who knows for sure.
I think FiFi is 100% painted, so who knows what is going on there?
Regarding the underside of the F-86 wings, I could not find any photos that indicated if the center section was painted or not.
So, I do the best I can. On the F-86, I painted the cener section with unbuffed Model Master Metallic paint. The remainder of the wing is BMF. I think it looks similar to the real thing, so I am happy.
Keep your comments comming. They make me a better modeler.