Many, many thanks guys. It is greatly appreciated. I think you see that build way better than it really is, but I know we are all much more critics with ourselves than others are so.
Just wait before it is finished as I can still goof up. I know there is some parts I scratchbuilt that are not very accurate but most of them will remain unseen or partially hidden so it doesn’t botter me much. I’m really happy with the result of the rusted steel texture though.
I made some good progress lately. I’ve glued both hull halves together, I just hope I didn’t make any mistake cause I can’t reopen it now.
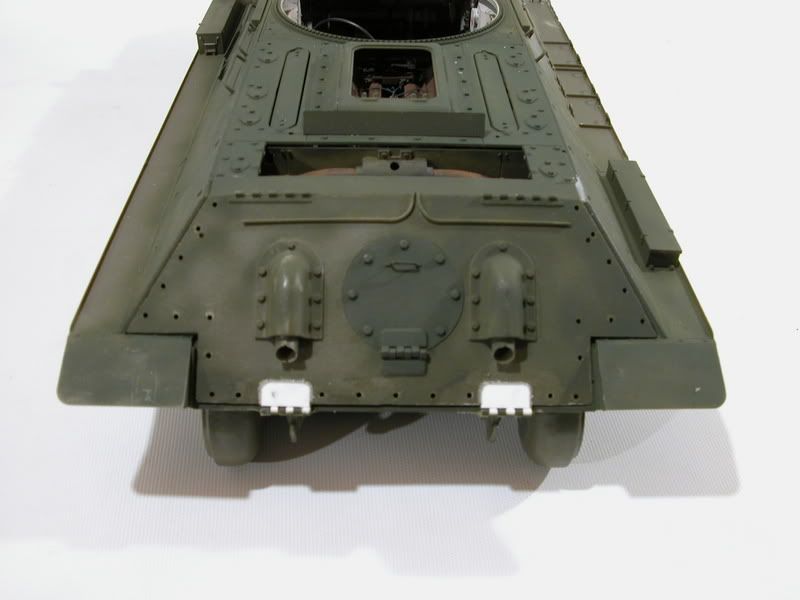
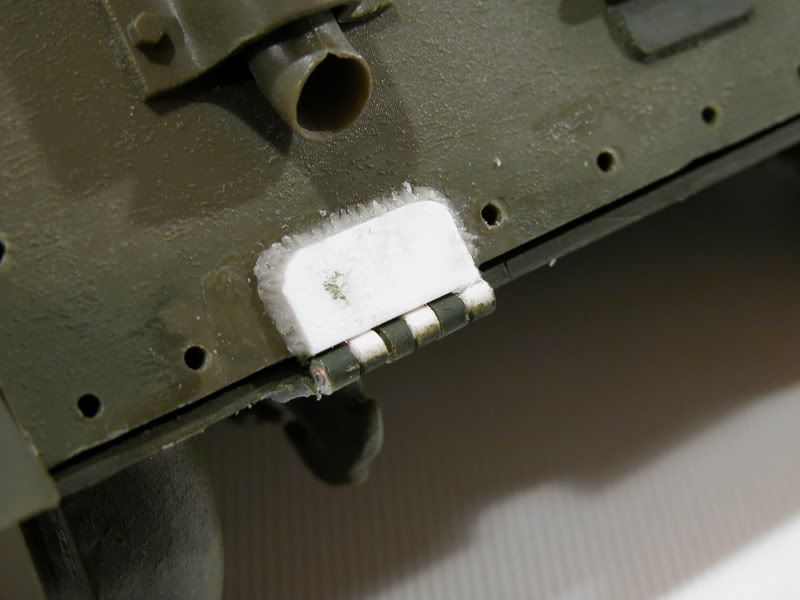
As mentioned earlier, the hinges on the rear plate are for a model factory no. 183 and my model is supposed to be from factory no. 174 which has big wide hinges at the rear. That is a mistake from Trumpeter and I had to change it since it is quite noticeable. The welding is made with Aves Apoxie Scult, thanks to Jeff, it works wuite well.
I still have to do the weathering but that will come later.
I had some time to work the turret also. I have no pics but both gun barrel halves are now glued together and sanded. I’m happy with the result even though it took 3 evening to complete.
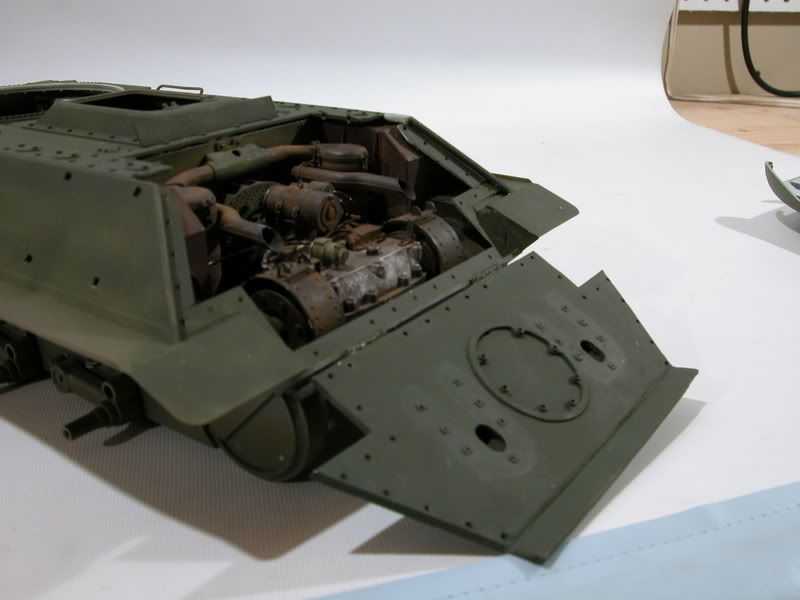
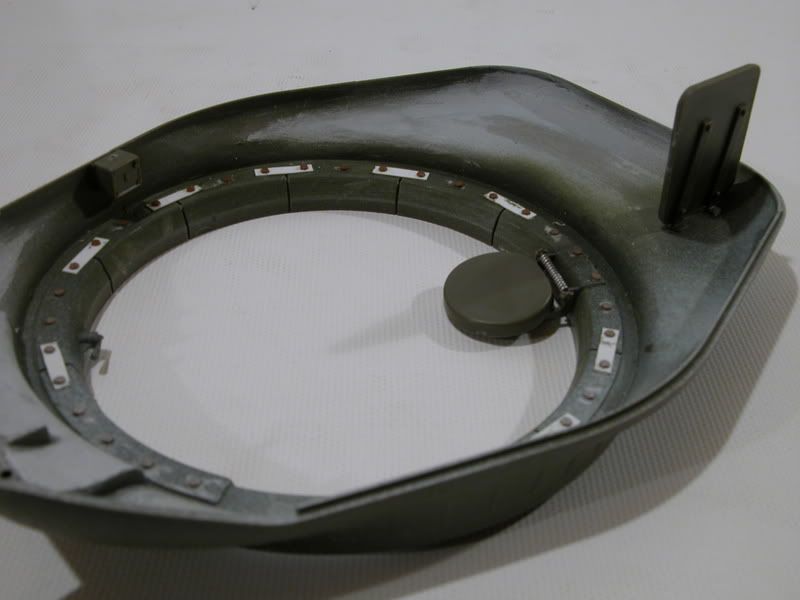
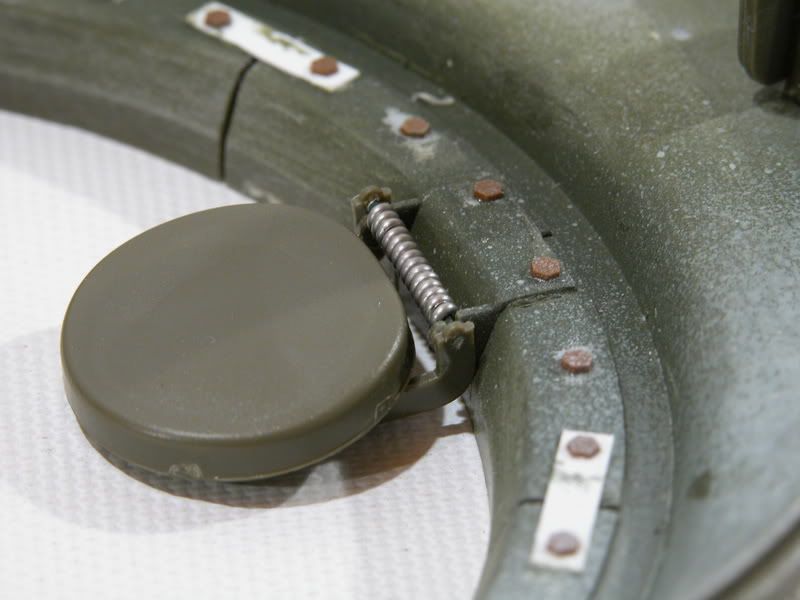
One major disapointment with this kit is the number of ejection mark. It’s insane. Some located in very hard to reach area. On the turret lower ring, there was a EPM between every bolt heads. There was no way I could putty and sand these marks in that area. So I scraped all the bolts and flat bars off the ring and sanded the whole thing. Then I’ve been able to rebuilt the details. Here is the result. I have no “before” photos … sorry.
The gun is almost completed and I’m still working on the interior of the turret.
looking good yann! [tup] can’t wait to see it completed. what paint did you use on the motor? the silverish color, looks great. and isn’t the apoxie-sculpt awesome? i love the stuff
hey yann[:D]-- nice solution to those epm on the lower turret half-- I did mine the ‘old fashioned’ way and it really almost made me want to quit-( but came out quite nice, just would’ve been faster your way- (also when I did the turret lower, I did not have a hex punch set-- I DO NOW !!-- lol–[(-D])–any way dude, I am also working on the turret and I find it much more taxing than the chassis or motor-- did you cut the roof off of your turret? I did on mine – also a pain in the a$s–good luck to you – and tell the truth-- isn’t this model a frustrating pain in the butt!!?— lol[(-D]-- tread[:P]-- p.s. nice fix on the factory 174 style hinges also–
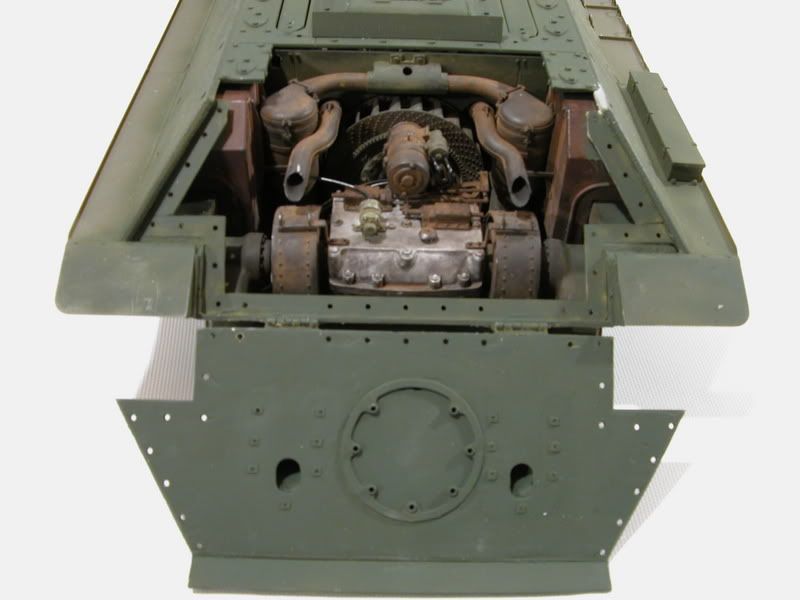
Thanks Chris, yeah apoxie sculpt is a charm to play with. What you see at the rear is the transmission and I used a mix of Tamiya flat Alumnium and flat white (around 80% - 20%)
Thanks Treadwell, you’re right, it is a pain in the @$$. Way to much things to sand.
i’m gonna need a new house.cowabunga thats a fantastic piece of plastic.i would be accussed of loving styrene more than my wife.and you say theres more to come,wholly @$%@,i need a nitro.gotta go.
hey man-- Yann wrote ‘why did you cut the roof?’-- so it could be like my 1/25 and 1/16 tamiya tiger-- lift off roof, expose interior detail[:)]-- but on my 1/16 it meerly gets at the electronics for the r/c-- I will post pics of my t-34 progress in a few days --you will see[:)]-- tread[^]
Bill, thanks for the compliment. I agree that people will look at it but I doubt I win anything, I made too many errors. As per what I saw last fall, the quality of the finishes was very high. Do you remember the MIG?
I can’t remember the last time I was in the Armor section and what pulled me in here today. But went right to this thread and went through every page.
OMG Yann that is just incredible work. Last year I won the T34/76 1942 in a club raffle and have been itching to build it for a long time. I can’t decide if looking at yours is an inspiration… or making me say, “What’s the point…the bar it out of my reach”[;)] Or maybe I can use yours…and others… as a guide[:-^]
I found a site where some modelers have super detailed their 1/16 T34’s but they are all the 85 not the 76. Can this still be used a guide? Are the similarities close enough say in the engine area to wire it the way they did? I know the turrets and guns are different, but what about basic chassis and engine?
Wingnut: If you want to be accurate, there are alot of differences everywhere. There is even some difference between tanks of the same model but from different factories. What you need to do is a complete research on the model and factory number you want to model. My main references were the Airconnection book: T-34 Mythical Weapon and the CD-ROM from Toadsman here: http://www.toadmanstankpictures.com/index.htm
I think these references are a must for anyone who wants to build a T-34 accurately. And both are complementary. There is information and photos in the book that are not on the CD, like the engine and transmission area. And there is much more interior color pics on the CD than in the book. One major problem though is that the color photos are mostly from a Polish T-34-85. That means my T-34 may not be 100% accurate but I don’t care too much.
This is the most complex tank I’ve ever built, there is so much little differences and subtile changes between models that the research is definitely the most important part of the whole process.
I hope you jump in the project, it would be interesting to follow the progress of someone else after I did mine. I’ll be there to help if you decide to do it.
Looking good, the exaust pipe lines up with the outer pipe, and make sure that door still can open, keep up the good work!
And don’t you hate that you make a little mistake inside and when you try to fix it you accedentaly damage the model and intead of making it better, it got worse. Like when I fix my Mark II I accidentaly place the wheels up side down, the glue was drie and…euh… rip the piece right off [#oops] can’t say it fine and just thought to myself “wait a minute!..thinking…thinking…thinking, realise! shi@#$[censored]”. Can’t fix it now, unless, wait no that won’t work, owell the paint job looking horrible anyway look like it was painted by a clown.