Fred - It has been a long 10 months of looking forward to your WIP progress pics. Your B-17 is something to be Really Proud of . I was so dissapointed to have read of the fogging issue, I was glad you were able to fix that. Very Nicely Done - Bravo [bow] [bow]
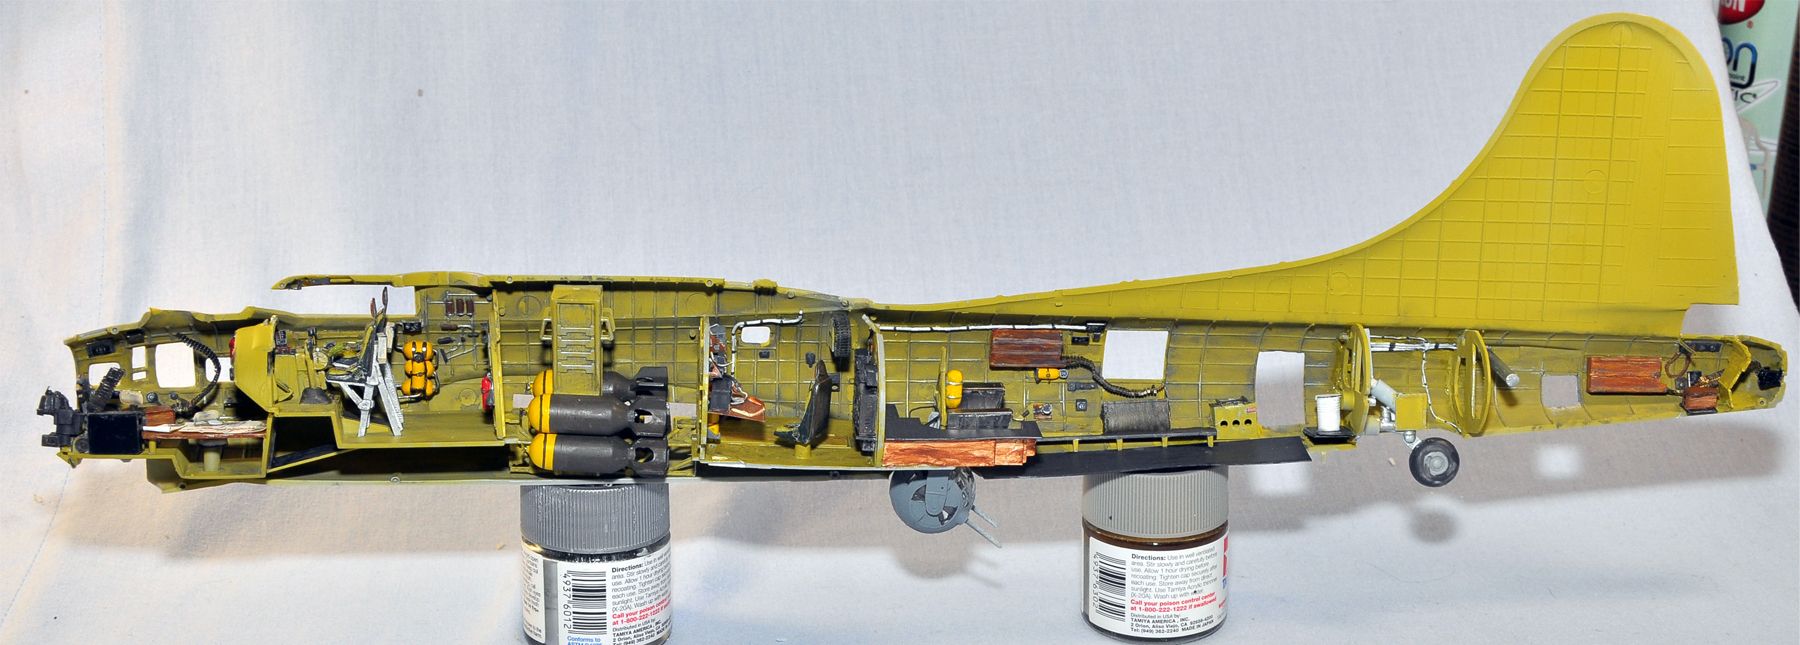
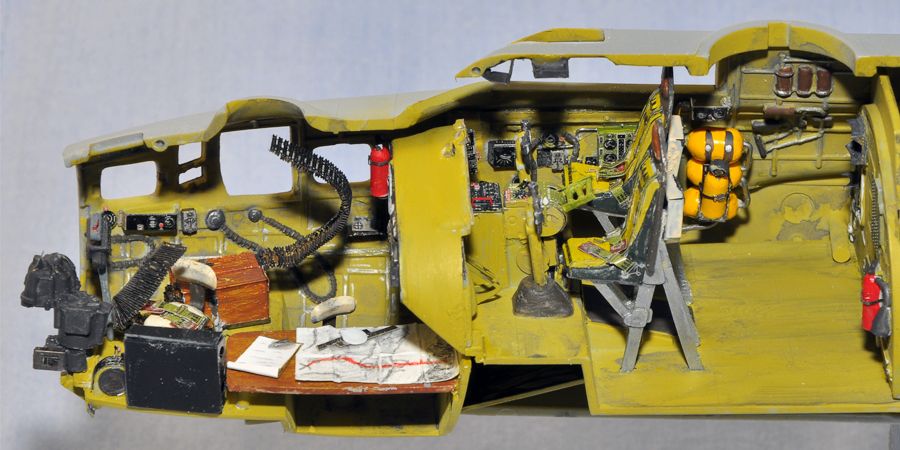
One the one hand, I’m so glad it’s over and on the other, I’m going to kind of miss it - all the intricate building and studying pictures. Of course, after I took the pictures, I realized I knocked off the tail gunner’s access hatch and I never took a picture of the part that took the longest - the PE flaps. The flaps took me almost a month each, to build. I’ve never seen such fiddly pieces in my life
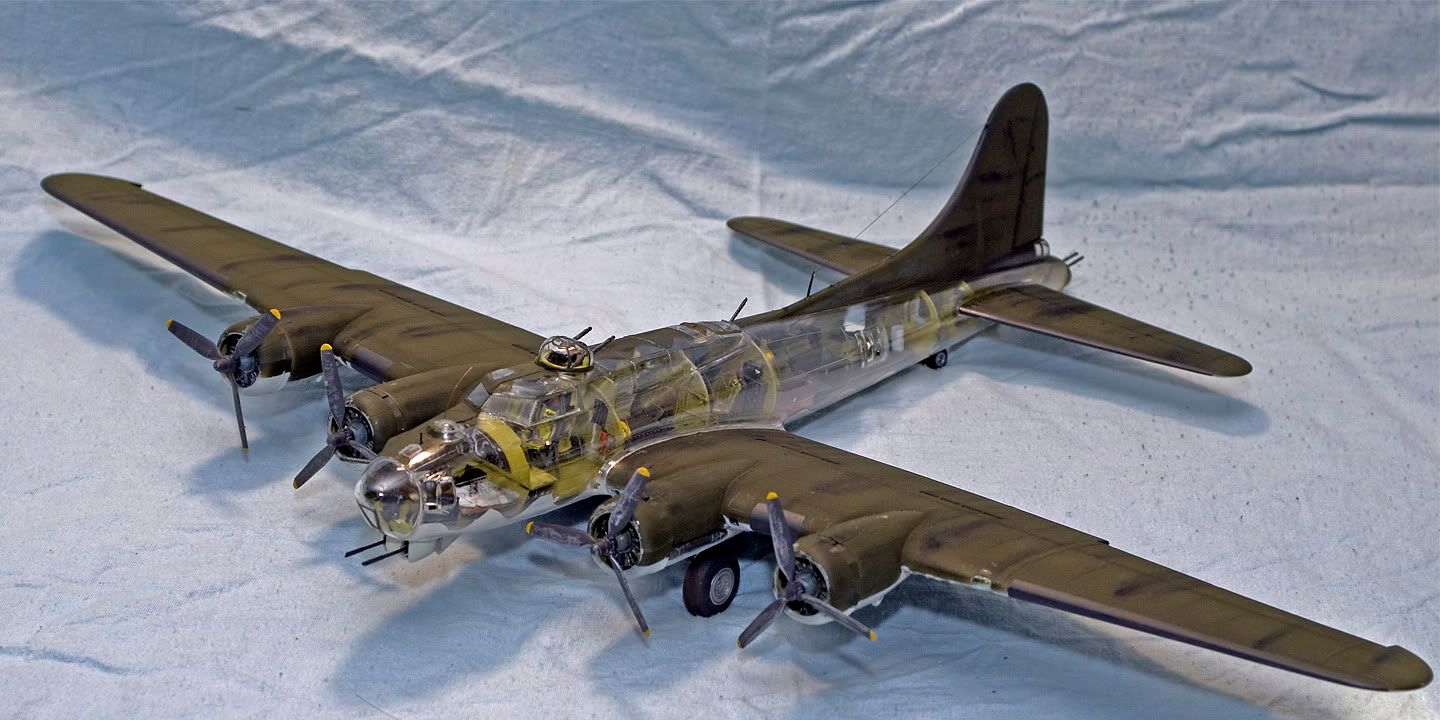
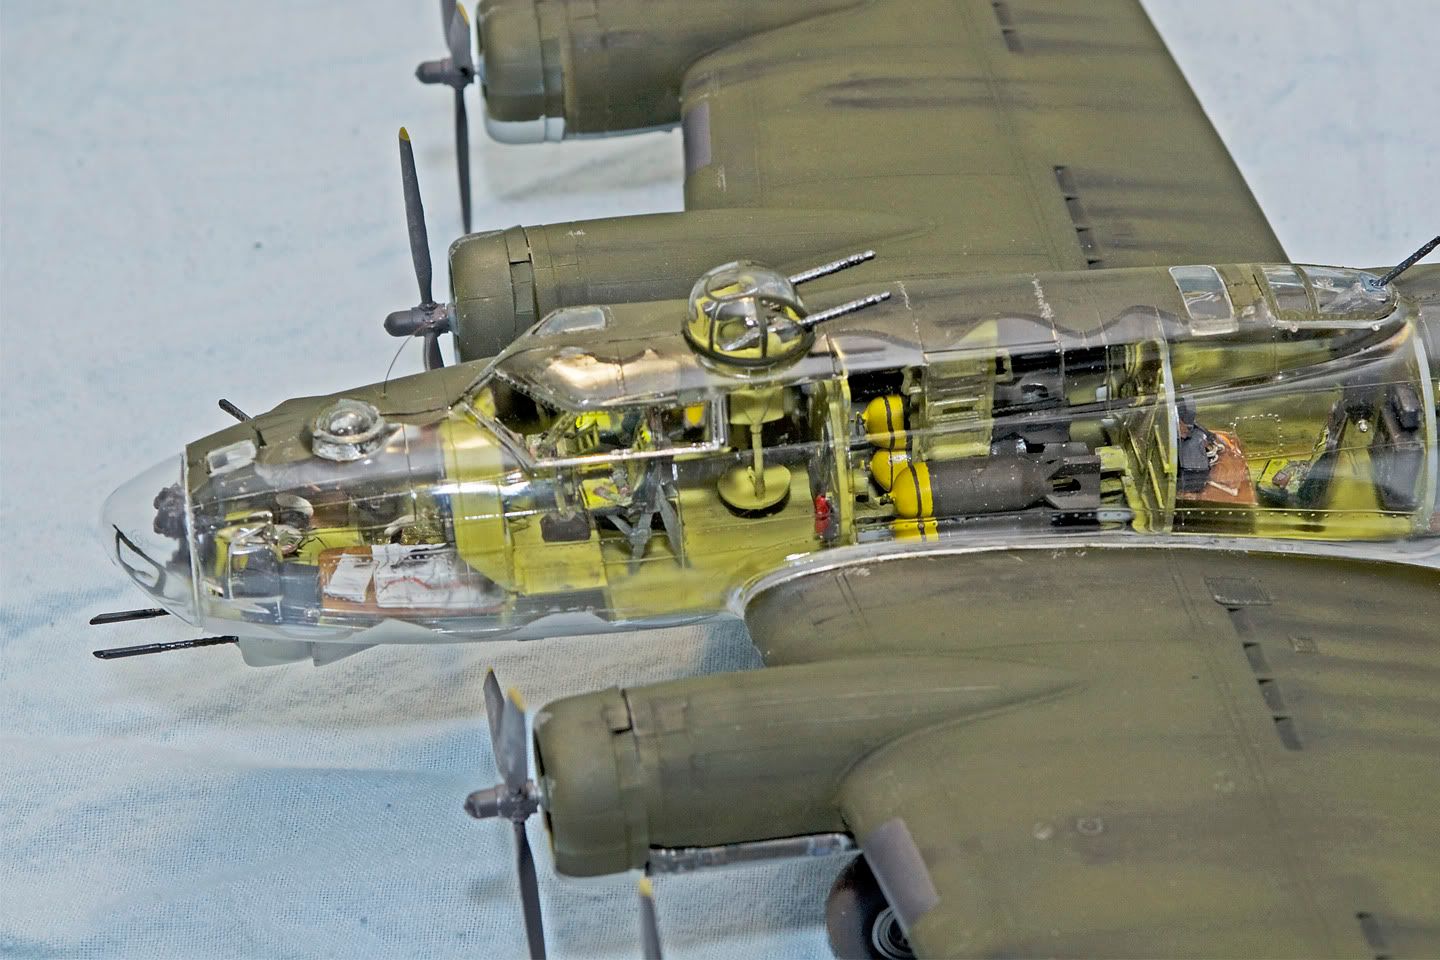
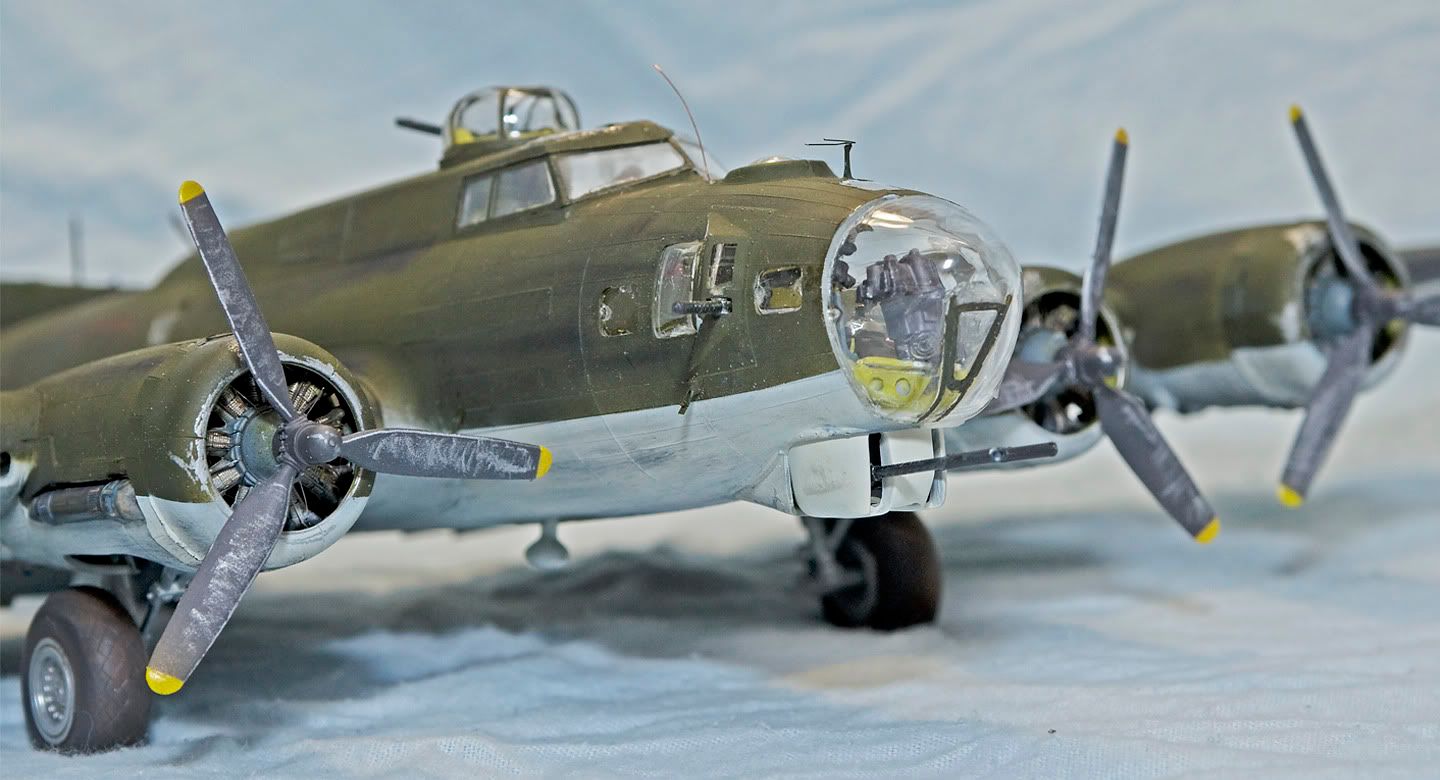
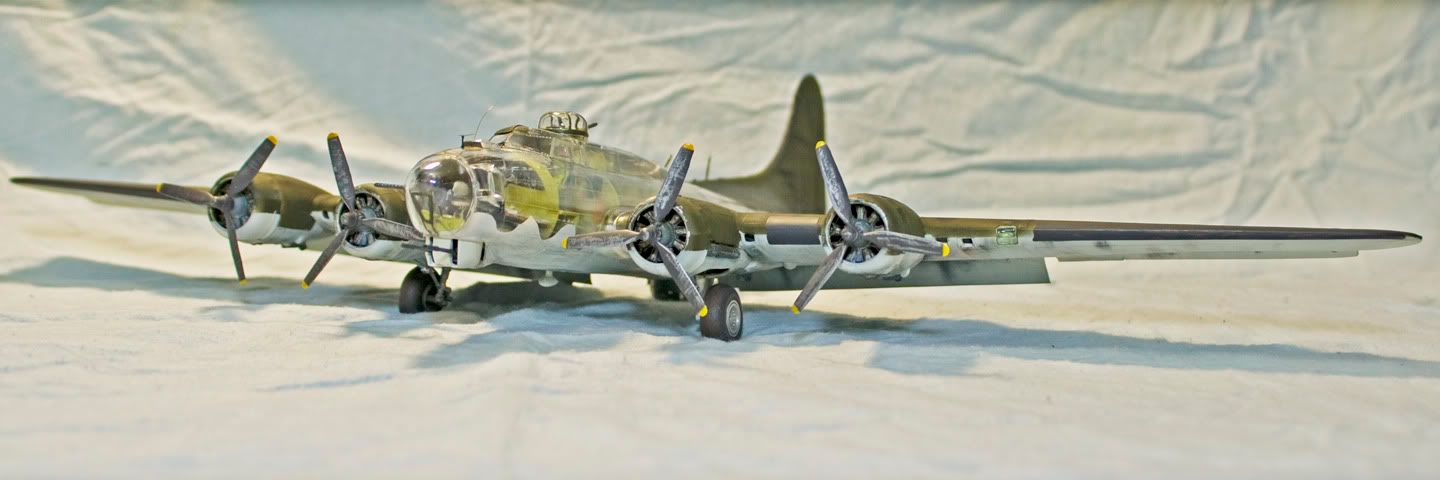
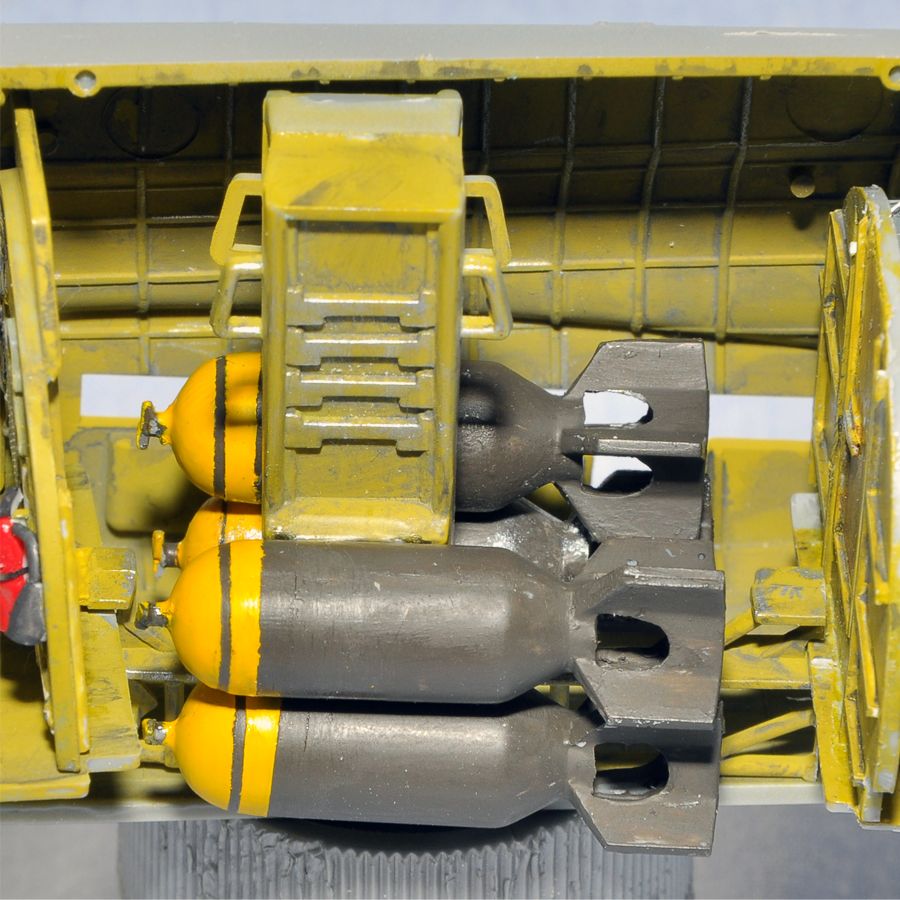
Thanks, Rick. Honestly it was sort of an executive decision. As I was getting closer to the end, I decided I wanted it to be more of a technical representation of a B-17, than a representation of any particular B-17. Imagine if the guy at Boeing who did the visual cutaway was tasked with making a 3D representation of it. I figured there wouldn’t be any group or NI markings as they’re not important to the “what’s where” guide.
Oh man Fred that is one awesome build !!! I have been following it from close to the beginning and was truly worried when you had the fogging troubles near the end of your build. You pulled it out from being a horriable desert let down beautifully. Very will done. Now we might be seeing this build in the Builders Gallery soon ???
Quite the piece of workmanship, Fred. I like the wavy line method of handling the clear solid separation, looks akin to what an illustrator would do. A very interesting model.
Thanks, mac [:)]. I suggest if you get a chance, to give it a try. It really does challenge your building skills - especially if you use the PE. It completely changes the way you have to build.
Thanks, Randy. I guess that would be up to the fine folks at FSM and Kalmbach [;)]. First, I need much better pictures, though. For some reason, these were turning out dark, even with 2 light sources and a flash. The pictures here were heavily tweaked in photoshop to bring out the colors and lighten them up.
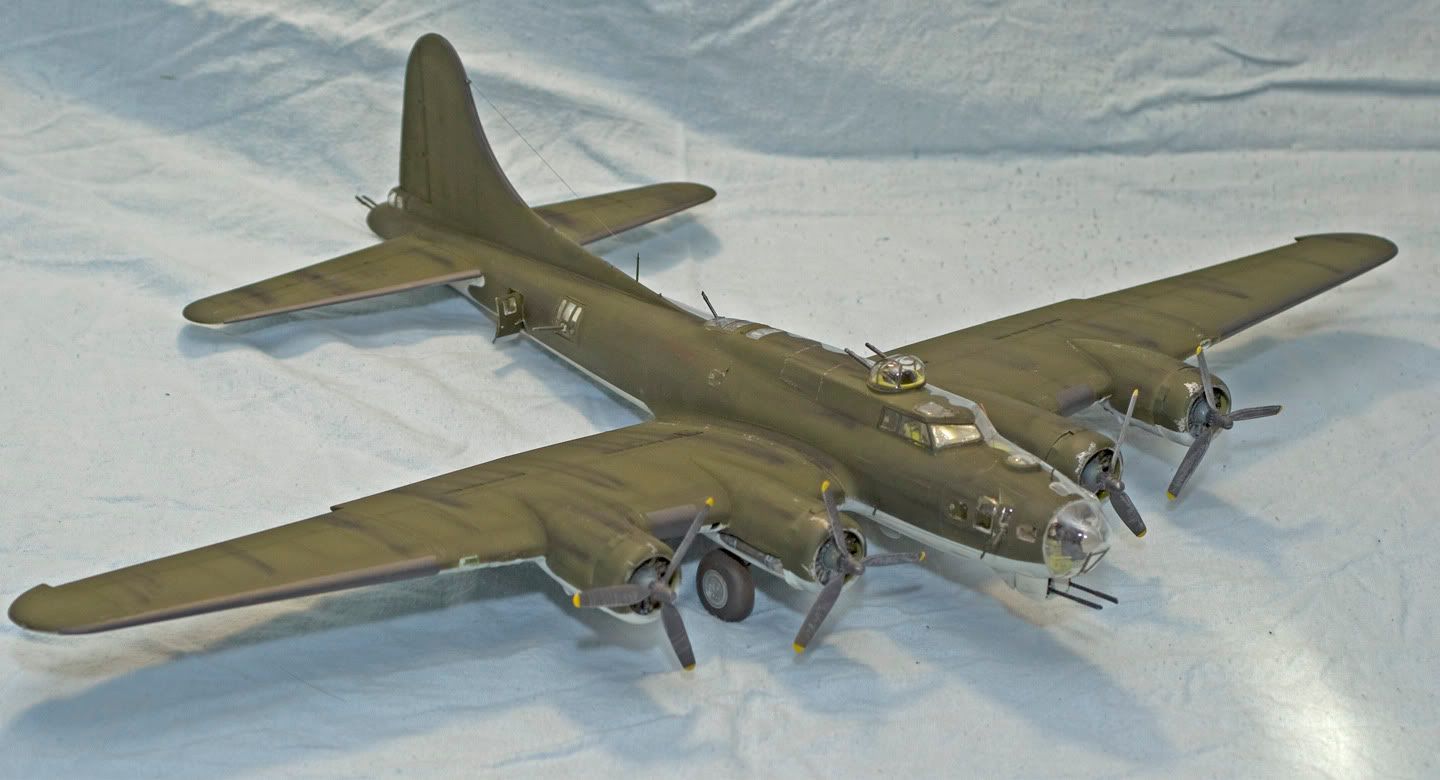
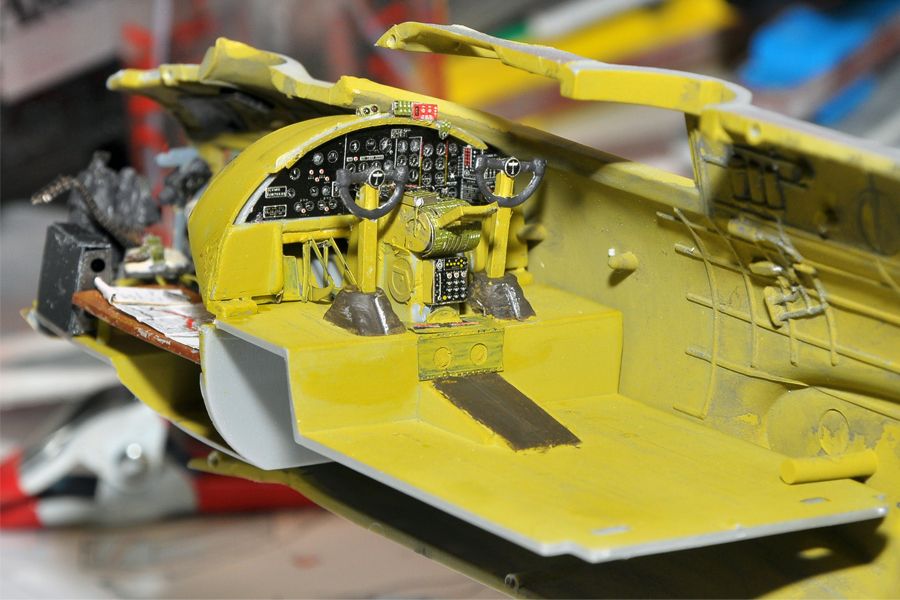
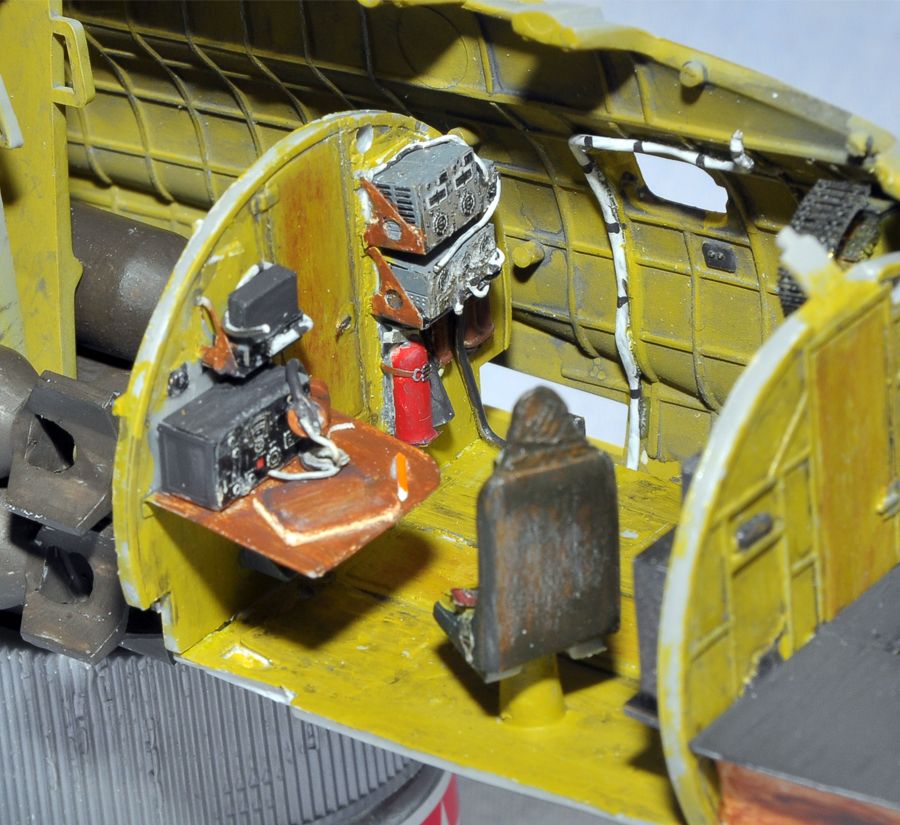
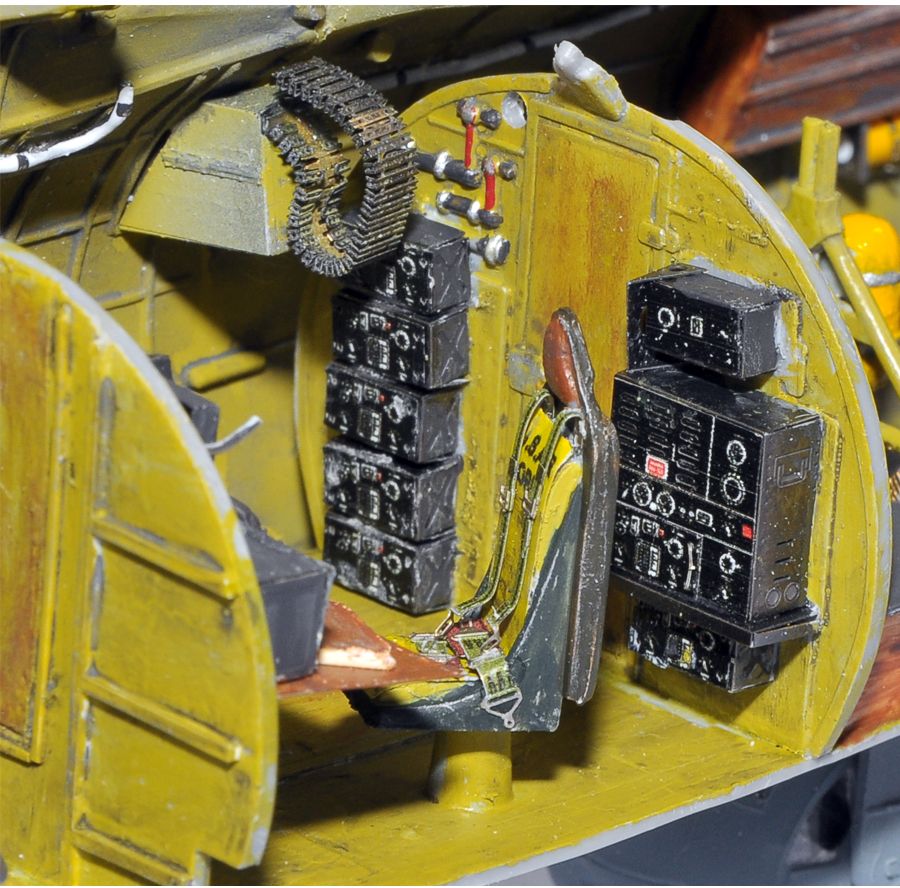
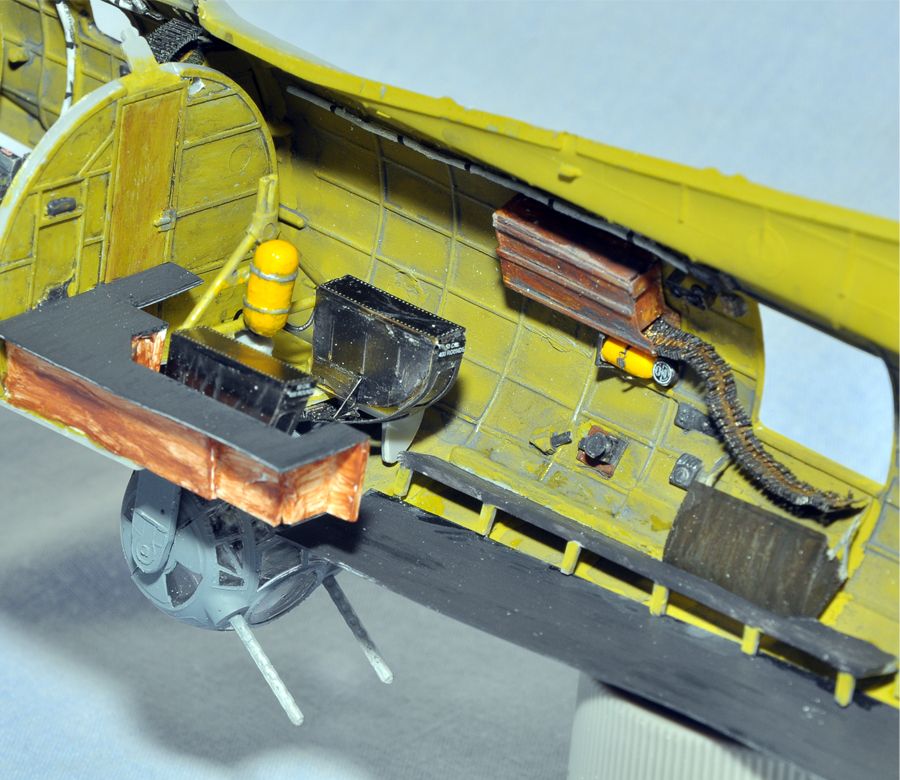
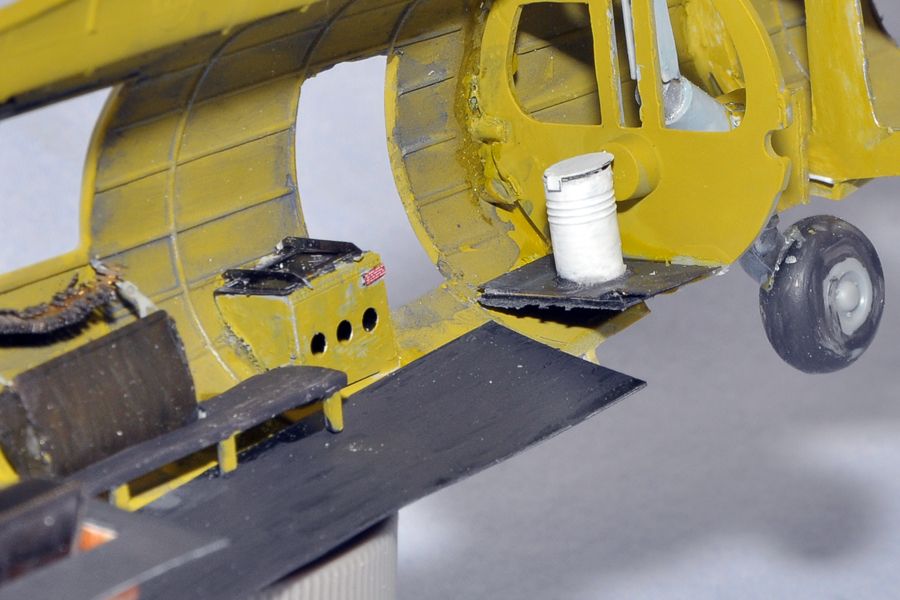
Thanks, Baron. The weathering is a combination of pre and post shading. I used flat black for the pre-shading and Doc O’Brien’s weathering powder (from micro-mark) for post-shading. I used shades of black, grey and rust follwed by lights mists of the base color and then more weathering. It’s a simple layering effect that adds depth. You can also use a damp papertowel to blend the colors (which I did for the exhaust).
Thanks, John. That paint scheme actually turned out to be a last minute decision. I started out planning to leave the side completely clear. But then I realized that I really didn’t like the unfinished seams, so after cleaning them up, I had no choice but to figure out a way to paint them. I’m happy that the solution turned out as well as they did.
Wow - very nice job man. Very nice detail work and weathering. I like the way you did the cutaway part with the paint line - rather than making the line at the center seam. I think takes it look cleaner than it would have - good idea.
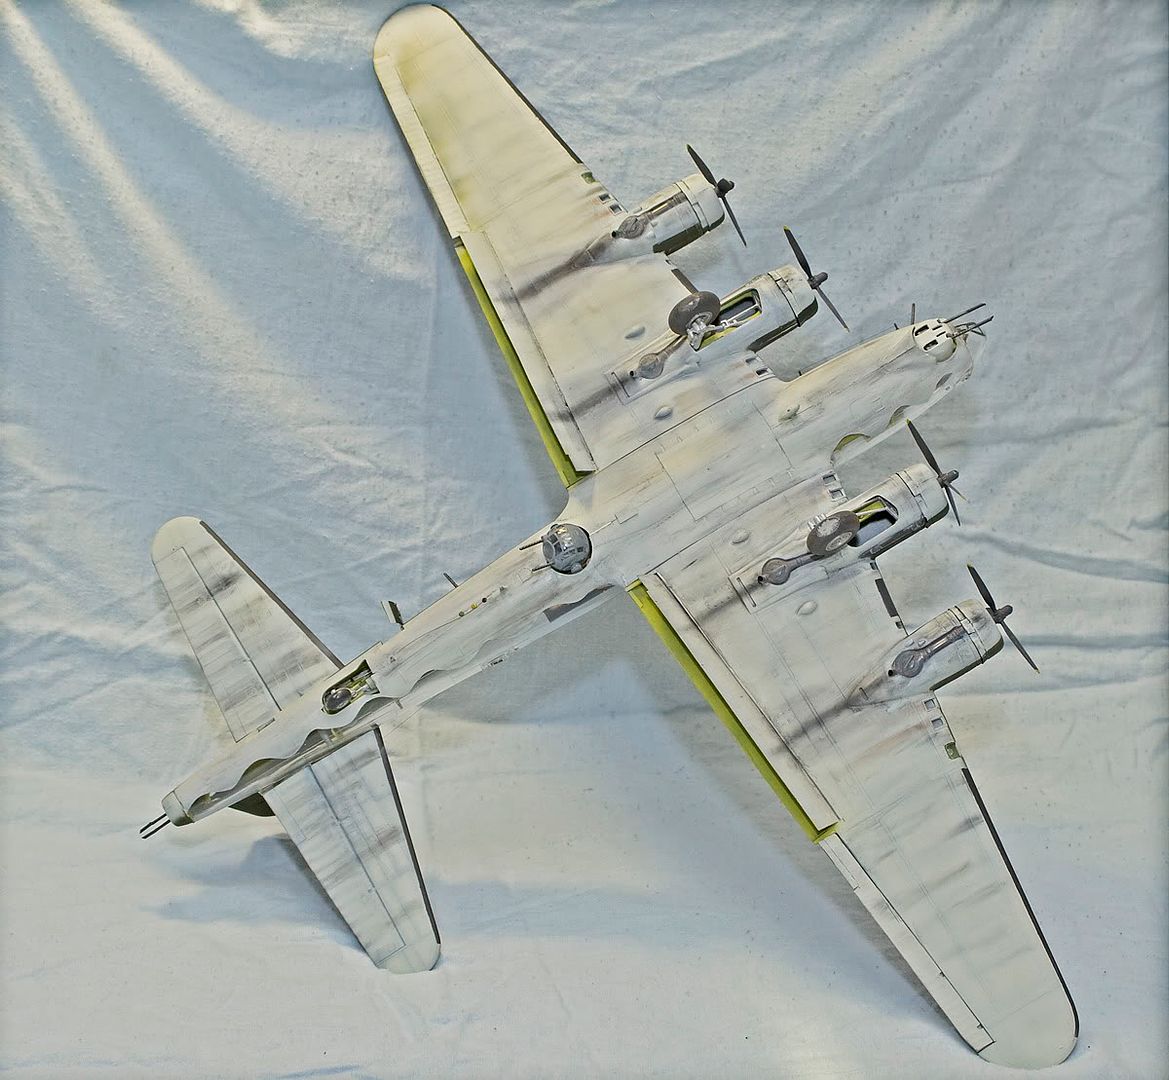
Hey you forgot to paint the left side of the fueslage! With such attention to detail in the interior I am shocked that you could miss this![:-^]
Seriously, great build, I only hope mine turns out as well. I have a couple of clear kits to build, I’ve been afraid of them I think because I think they won’t fit right and I’ll craze the clear parts…
Ross, don’t worry about the clear half. Coat it in Future and you really won’t have to worry about much else.
I find the best way to model is to just do it. Don’t worry about whether or not you think you have the skill. Tell yourself that you can do it and before you know it, you’ll have done it. When I left the hobby some 20 years ago, there was no PE and scrathbuilding was left to the masters. When I got back into it 2 years ago, I went whole hog with PE, resin and scratchbuilding. I had never tried any of it; I just decided I was going to try it and it worked out. The real skill is in the planning. Get an idea of what you want to accomplish and work it into the printed directions. If you want to add a particualr detail, figure out how it would affect the prescribed build and work around it.
 Oh man Fred that is one awesome build !!! I have been following it from close to the beginning and was truly worried when you had the fogging troubles near the end of your build. You pulled it out from being a horriable desert let down beautifully. Very will done. Now we might be seeing this build in the Builders Gallery soon ???