I’m glad I could be of assistance. Techical and historical Accuracy is important, if not moreso than the modelers skill. And your skill is commendable.
Rob
I’m glad I could be of assistance. Techical and historical Accuracy is important, if not moreso than the modelers skill. And your skill is commendable.
Rob
Rob,
Thanks again for the complement. Means a lot to me. [:)] Back to the bench!
Bob
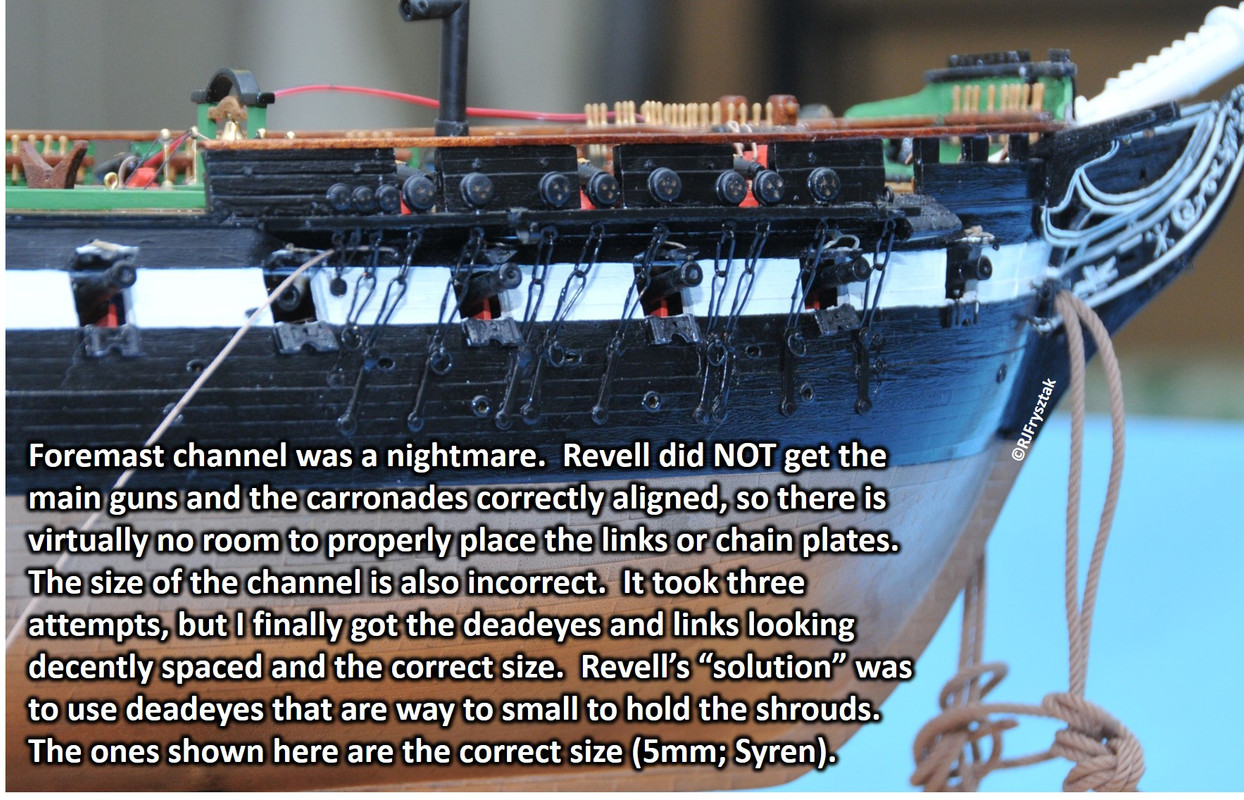
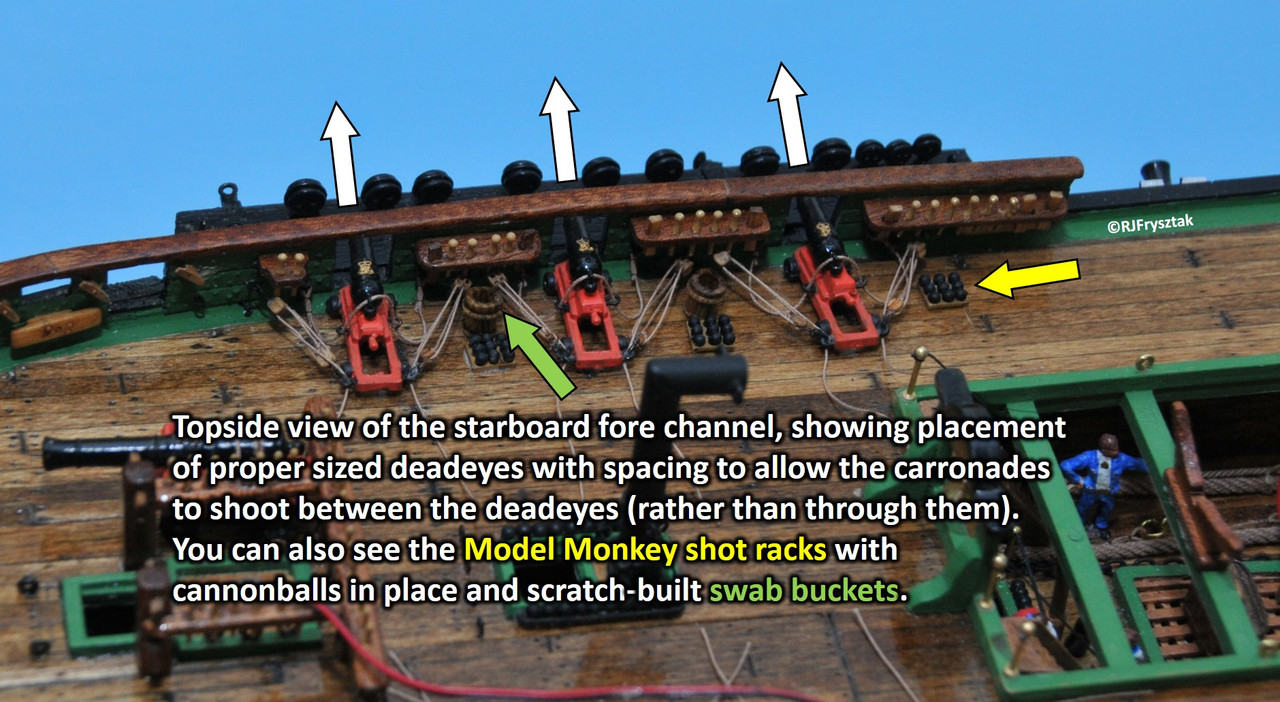
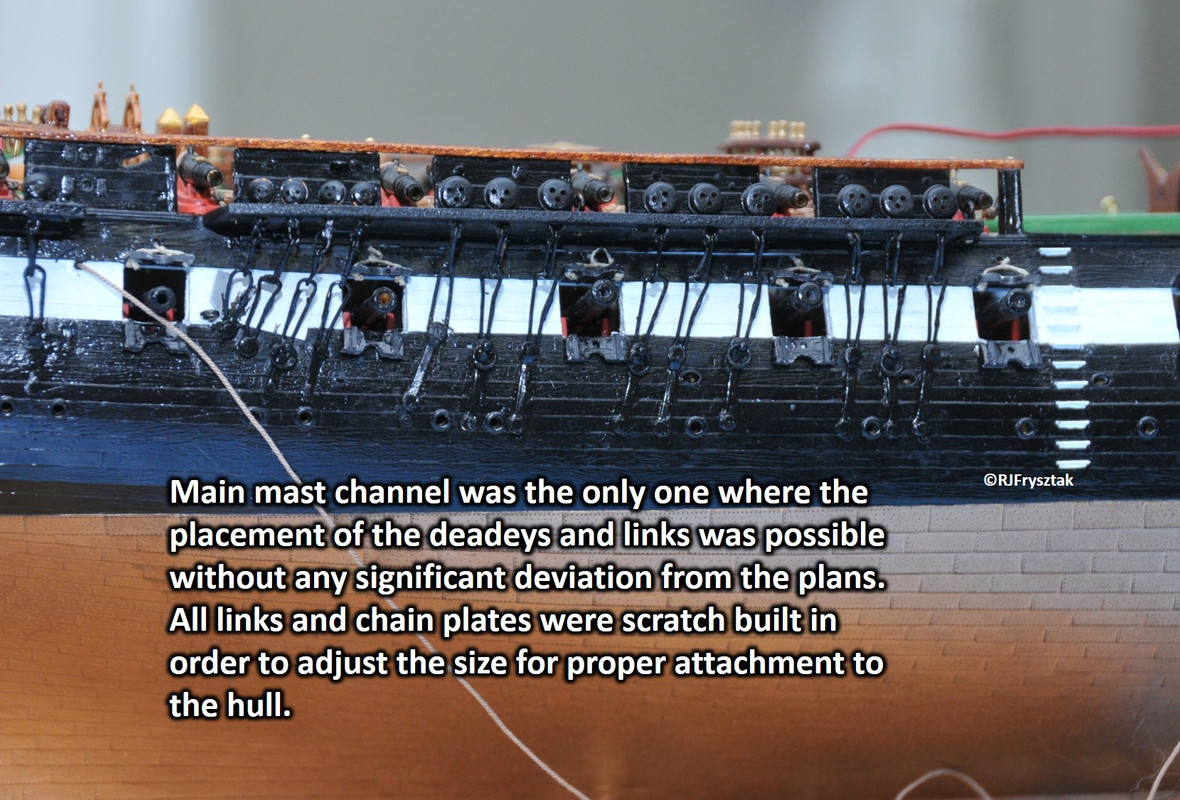
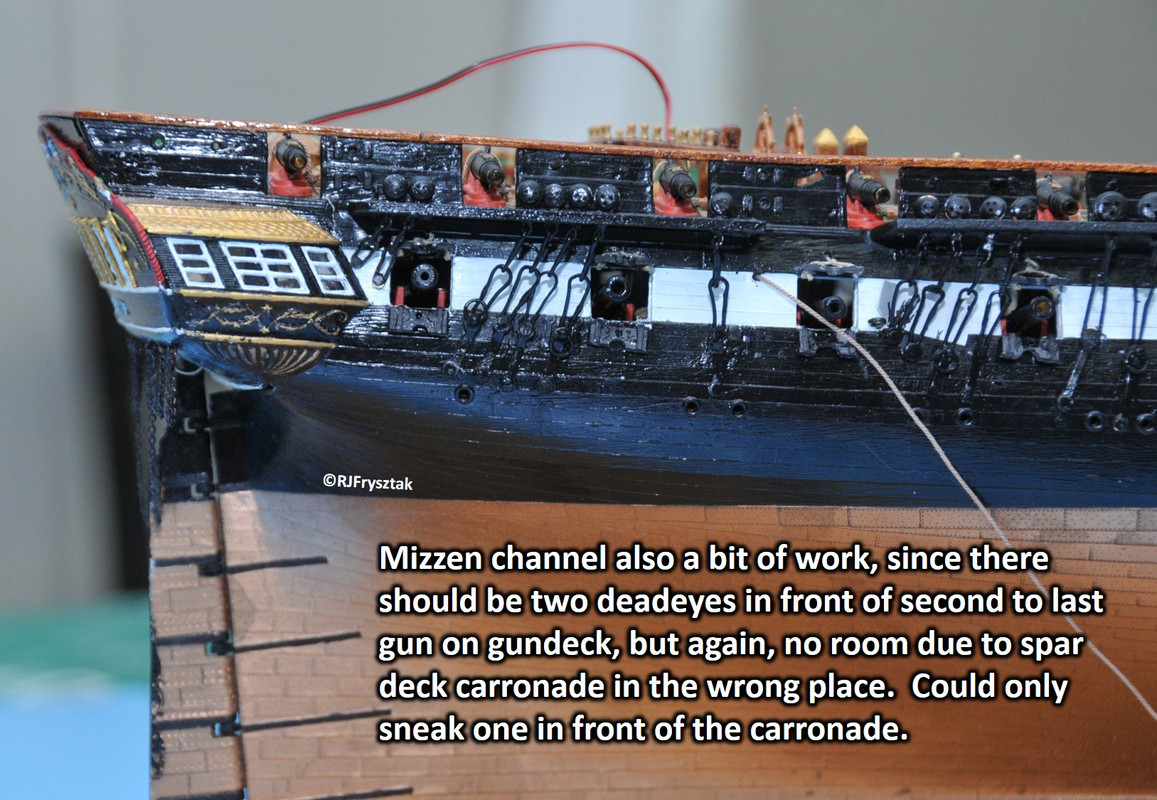
Been busy with the starboard channels, links and chainplates. First, Revell did NOT do a good job placing cannons, since there is virtually no room to put deadeyes and links that don’t interfere with either the spar or gun deck cannons. The worst offender is the foremast, where the cannons form a zig-zag pattern. Main mast was pretty good, then back to a big offset for the mizzen channel. I started with the main mast to get my techniques for making the deadeye strops and links. I used copper wire so I could solder them together (for strength). I used the proper size 5mm deadeyes (Revell’s are woefully undersized) and marked the channels. Since the channels were fitted with pins, I could test fit as often as I wanted to insure proper placement and alignment. Mizzen channel was next (not too bad), and finally the biggest challenge - the foremast. The foremast channel took me 3 builds to get it looking proper, with decent spacing of the deadeyes and room for the carronades to shoot. All were finally painted black after mounting. On to the port side.
Bob
Looks fantastic. In all of your modifications did you account for the accurate angulation and rake of the shrouds from the new location of the adjusted deadeyes? A quick test with the lower mast in place and piece of black thread held along the shroud path from top to deadeye…will give you a good clue as to weather the chain plates align with the shrouds.
Other then that possible issue…the mod and scratch work look good…you’re moving along nicely and soon you will be setting masts and rigging shrouds.
Rob
Rob,
Yes, I did the string thing with the lower masts in; thought I mentioned it in a previous post. With the proper sized deadeyes, it is really not an issue though, except for the mizzen mast. But thanks for the heads up; and the compliments.
Bob
Bob,
I just had time to go through this most excellent WIP. You are doing a great job on this venerable old kit. I’ll be following along now and can’t wait to see what’s next.
Steve
Been awhile. The Covid19 thing is really messing with my mojo. Quite busy doing online lectures and meetings. But I digress. On to the cool stuff.
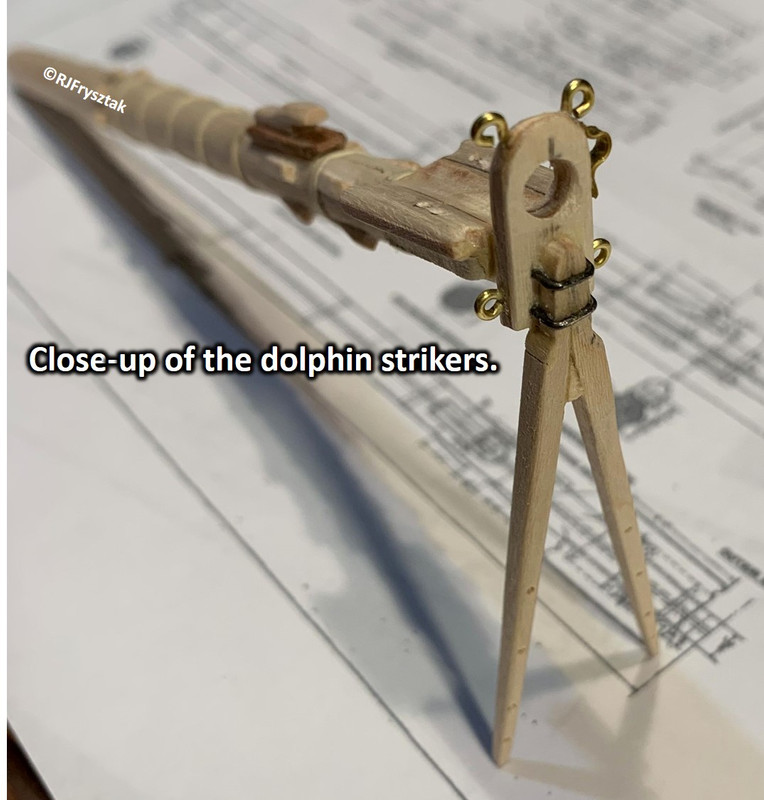
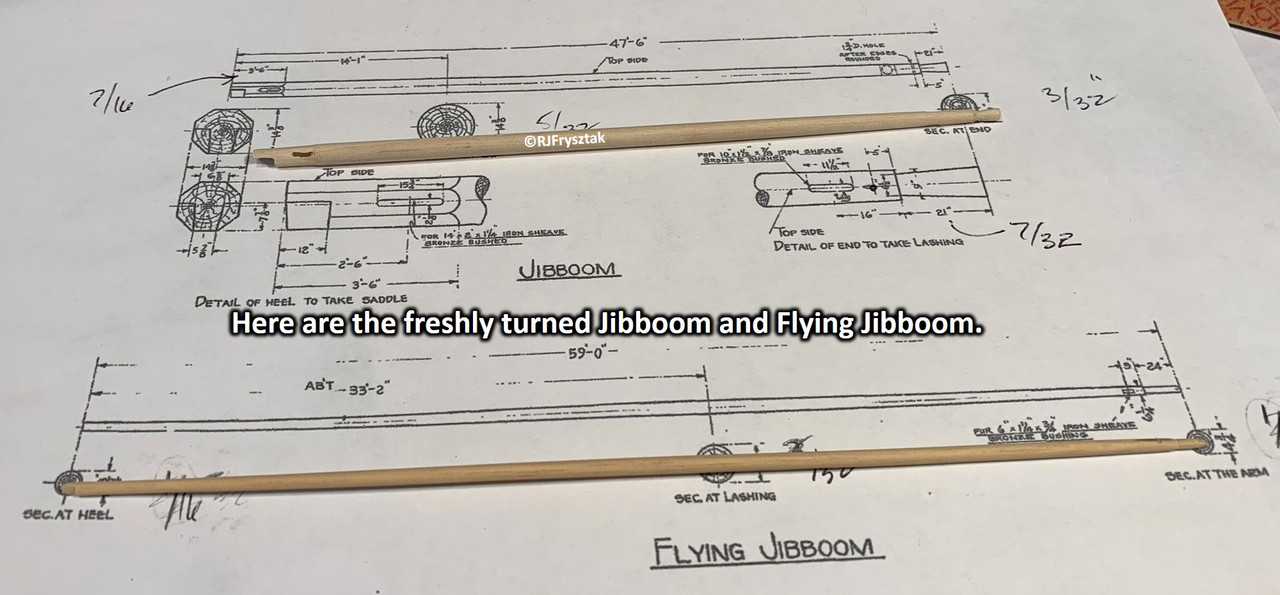
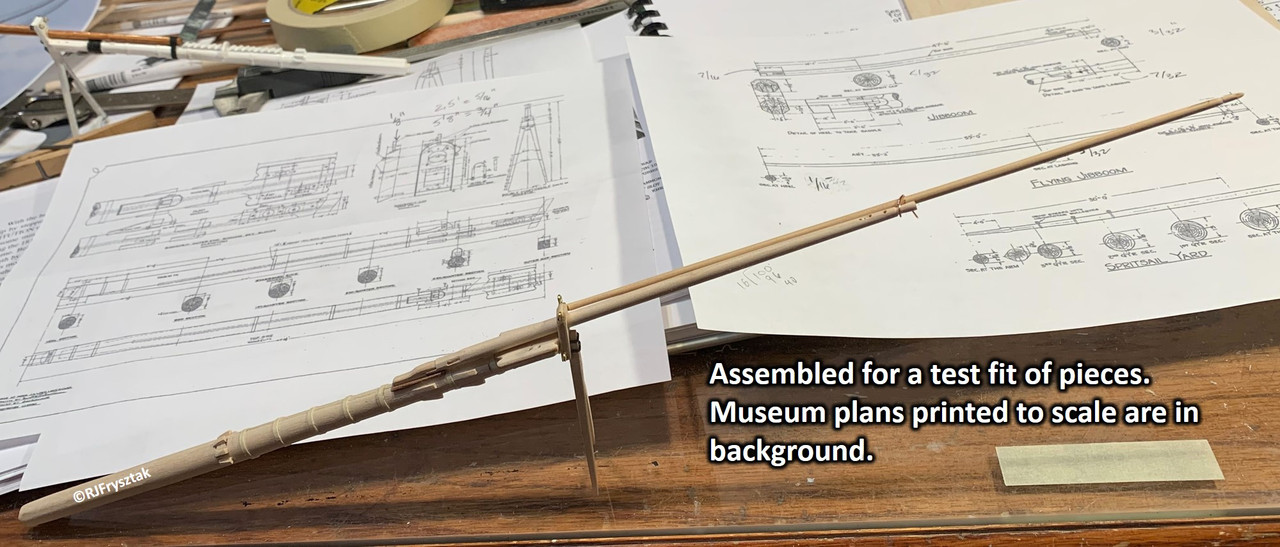
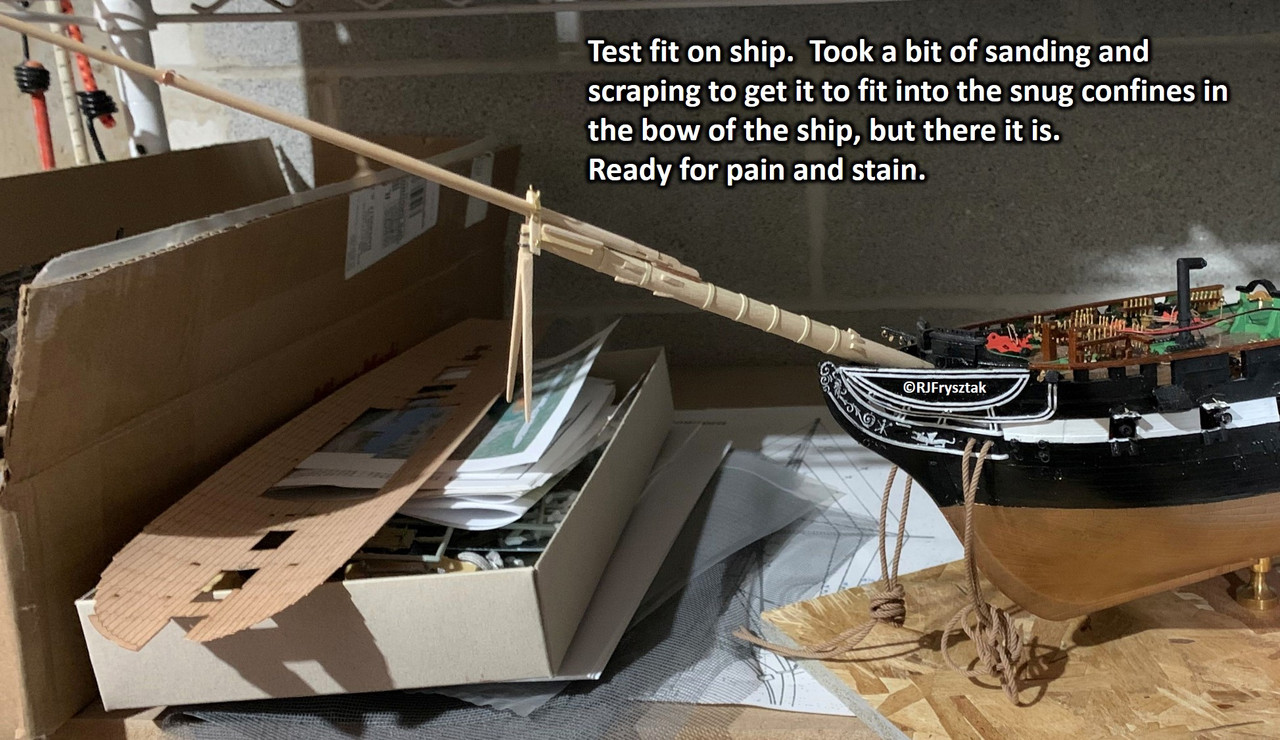
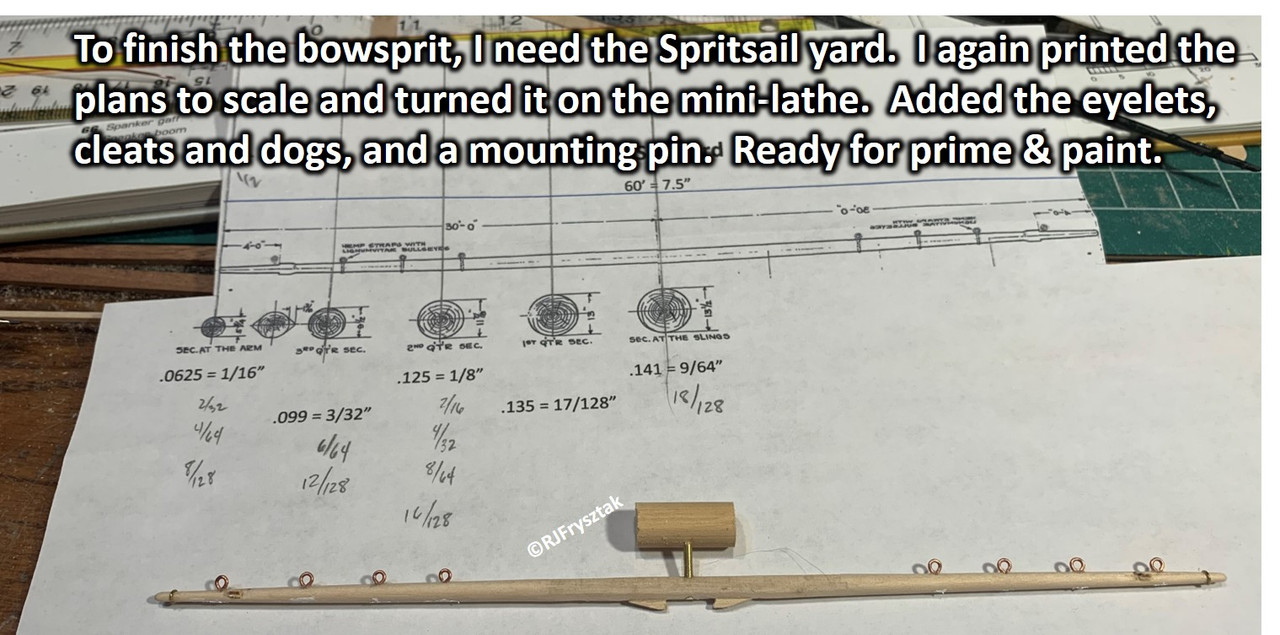
I was very unhappy with the look of the bowsprit. Just didn’t look right when comparing to the real ship. I had to make new booms since the old ones were warped, but even that didn’t help. So I went to the museum plans and printed out the bowsprit and jibbooms to scale. Sure enough, the bowsprit is over an inch too short. Jibboom was correct, but flying jibboom was also short by 1/2". So I went to my stash of dowels and pulled out the lathe. I was going to need to start turning upper masts and spars anyway, so I thought I would “practice” with the bowsprit (since I did have a nice hybrid one already made; you can see it in the background of image 4). Below are the pics of how it turned out.
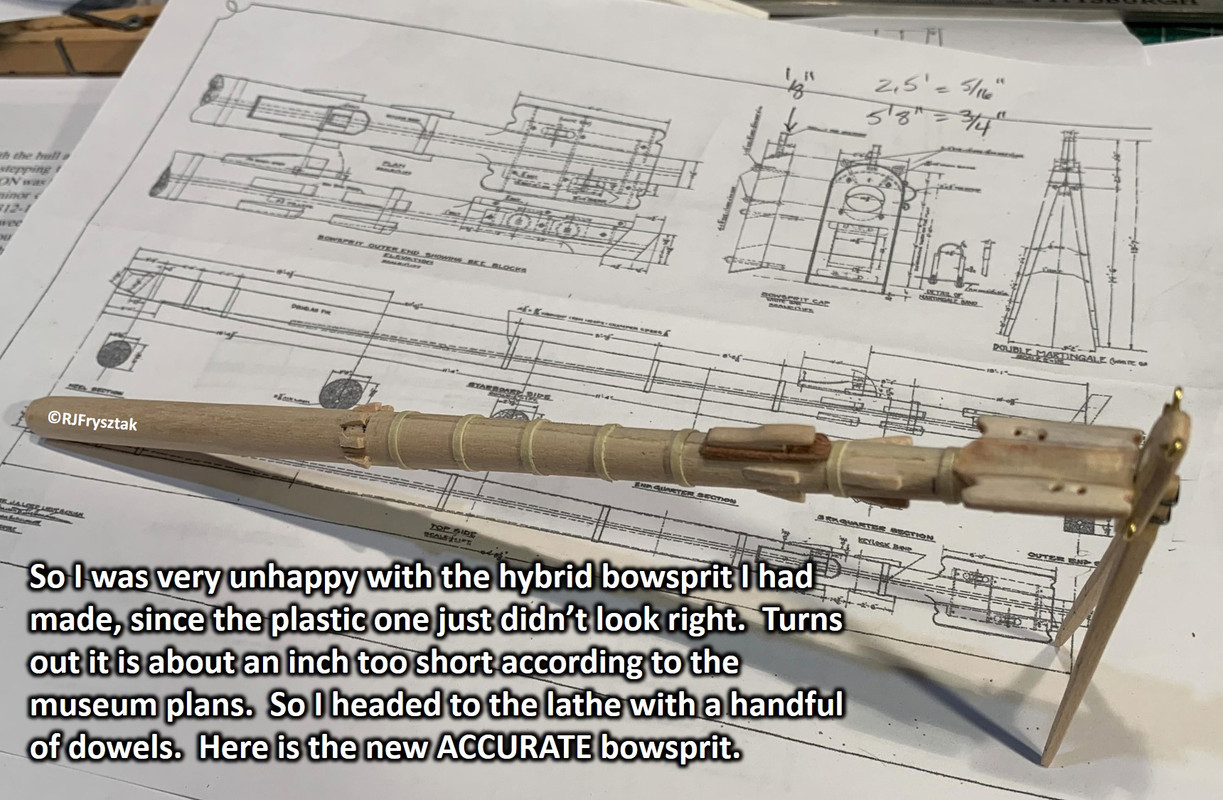
Cheers,
Bob
Here is how the new bowsprit and jibs look painted up and fitted to the bow.

Working on the foremast next.
Bob
Finished turning the spritsail yard and moved on to lower foremast.
On to the lowere mainmast.
Bob
Bob,
Spectacular scratch build work on the bowsprit and foremast! I love your attention to detail. Curious, what shade of white are you painting your masts? And what type of wood are you using?
Jose
Thanks, Jose. Using a neutral white, which has a warm quality to it instead of a bright white.
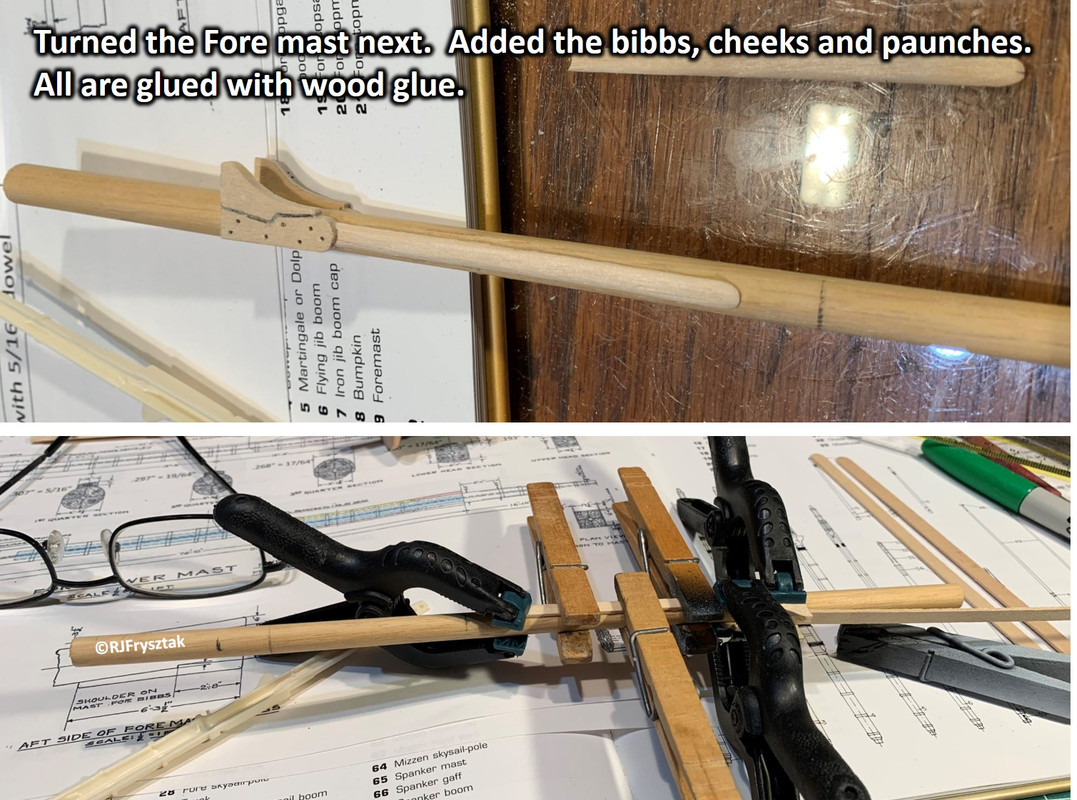
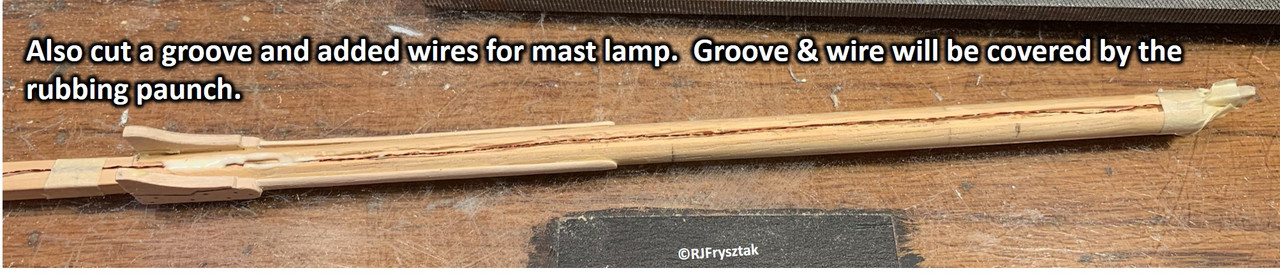
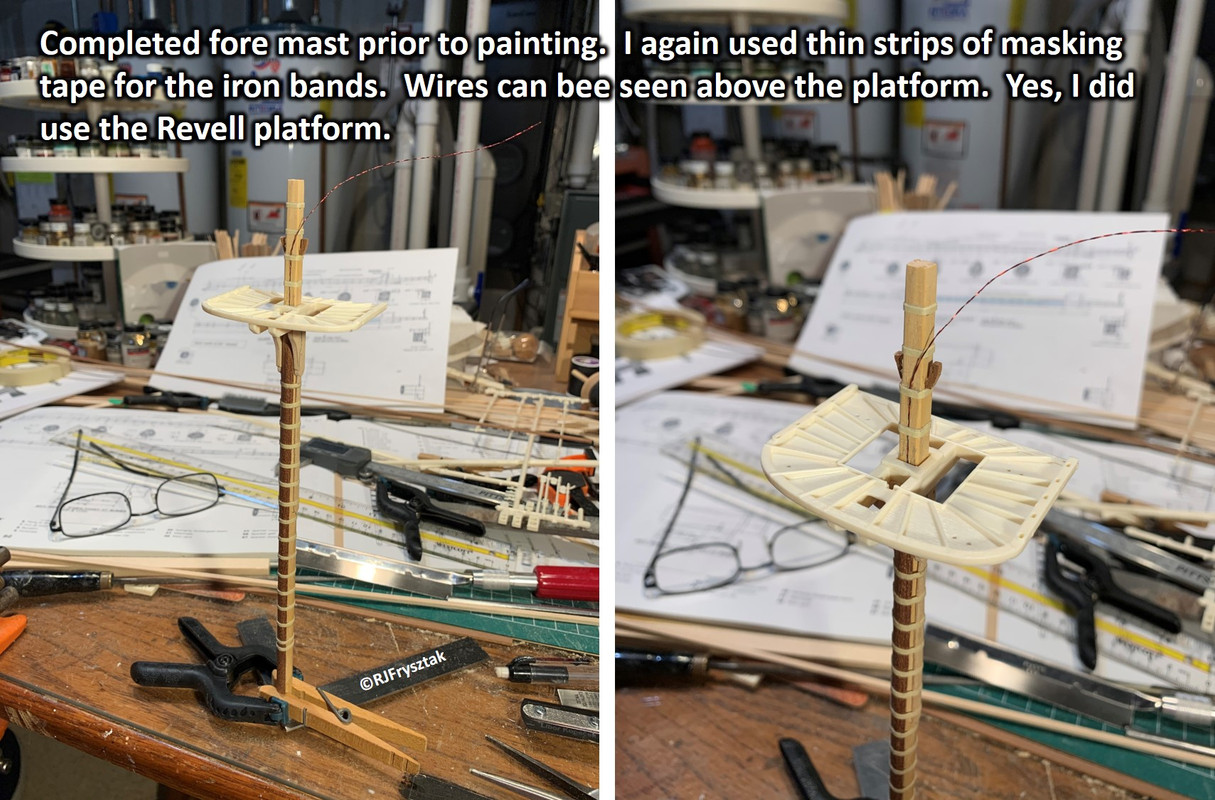
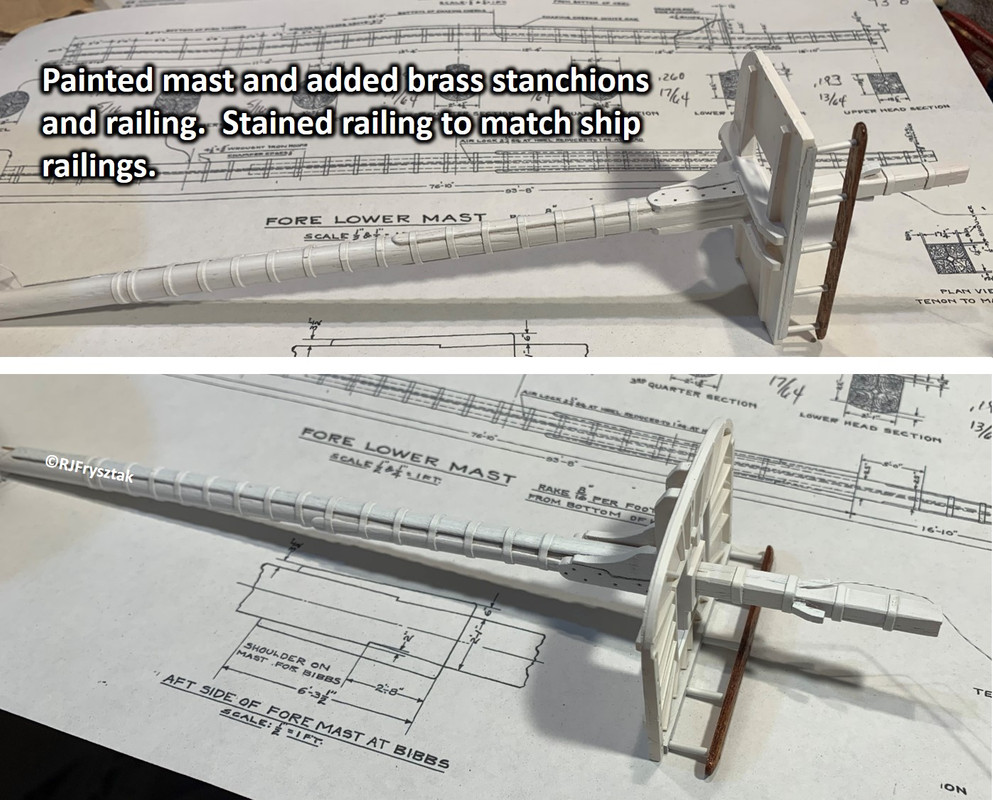
Finished the Foremast. Bit of a pain getting the skysail pole made; kept breaking when I got close to 1/16". Ended up making individual pieces and just sanding down in the lathe when I got close to that.
Bob
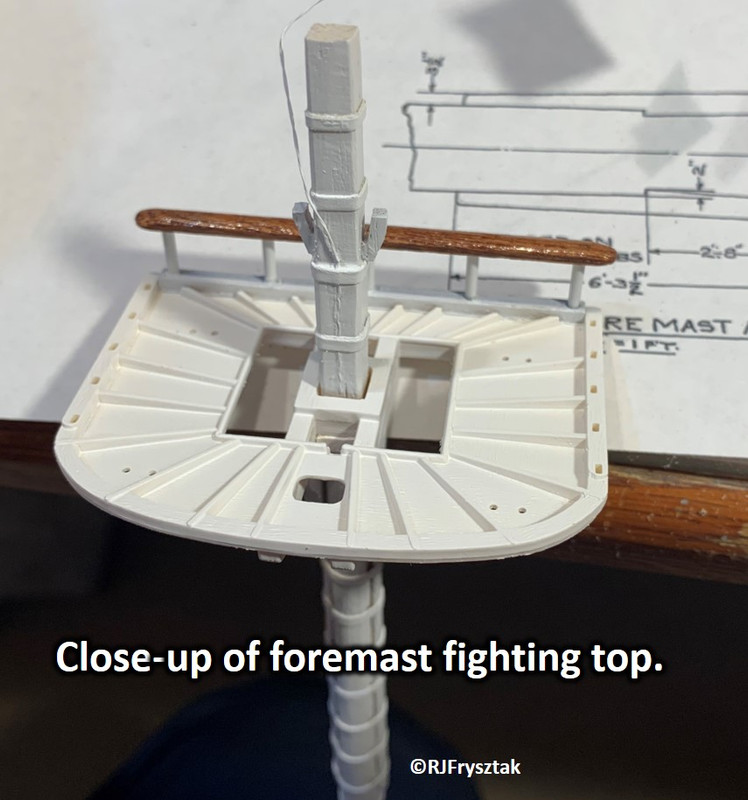
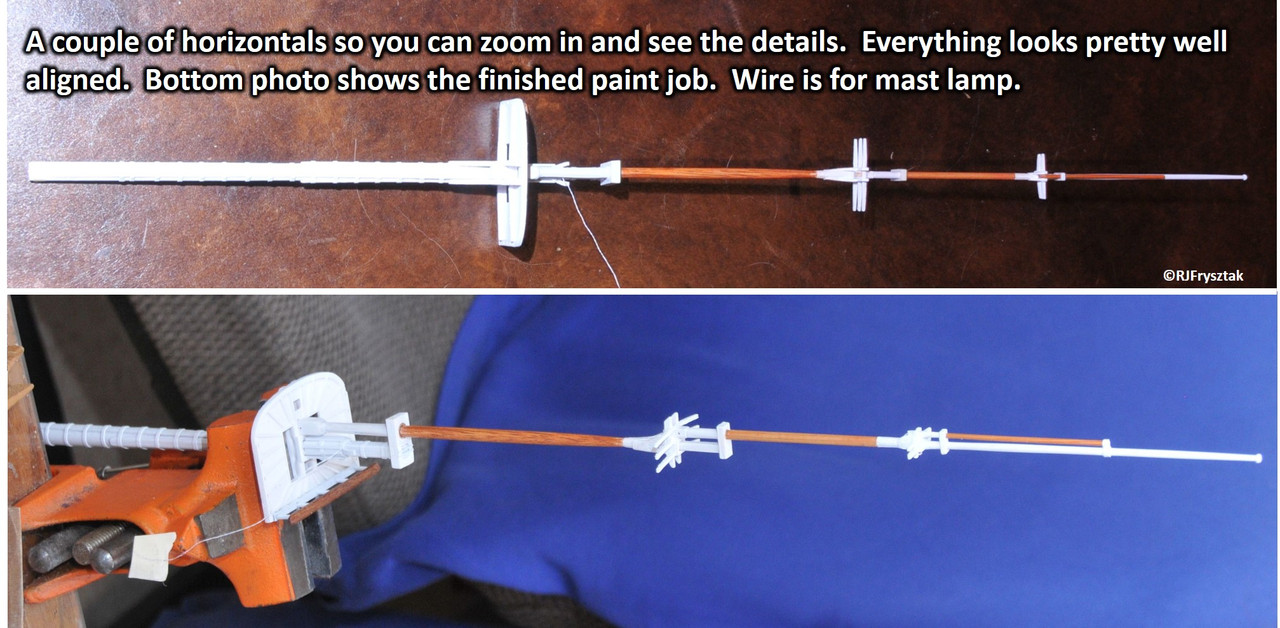
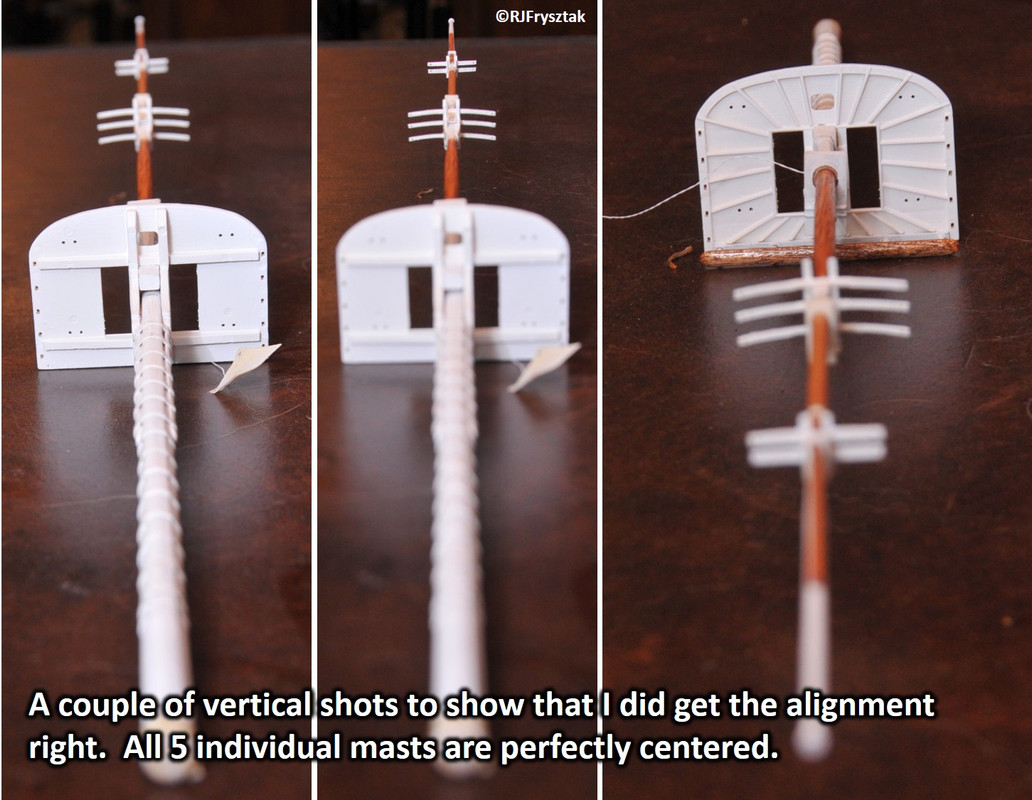
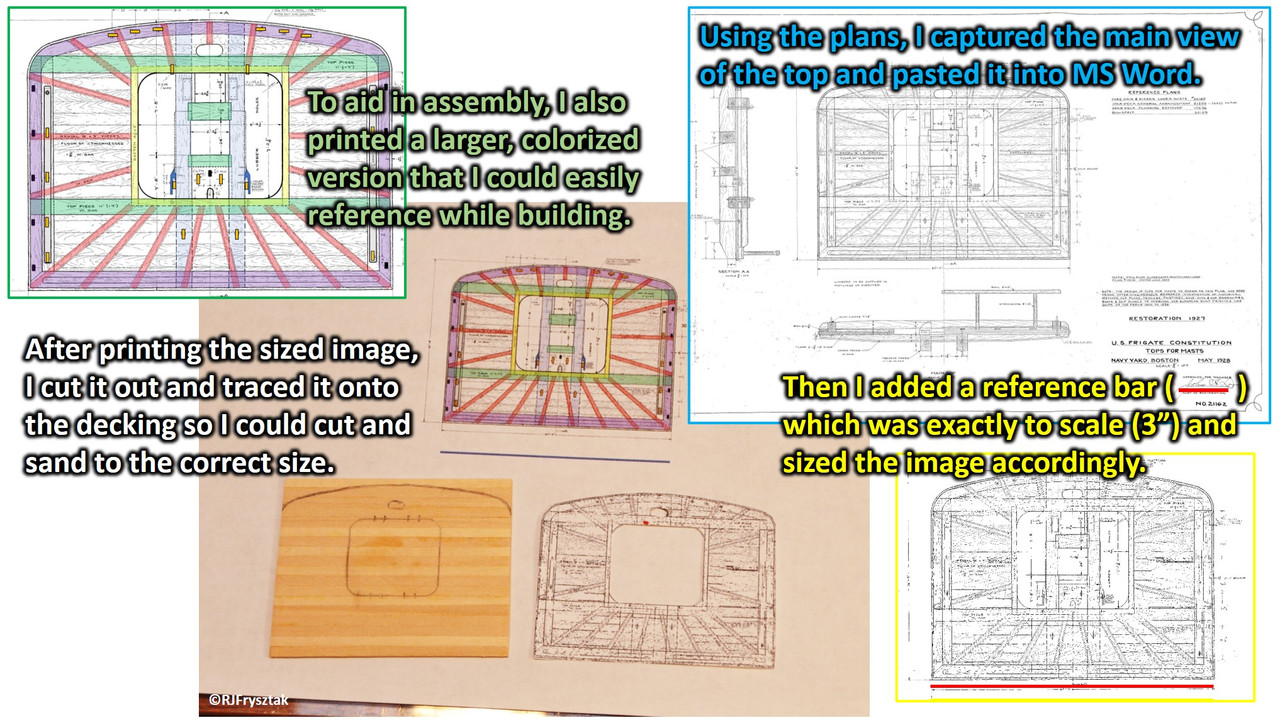
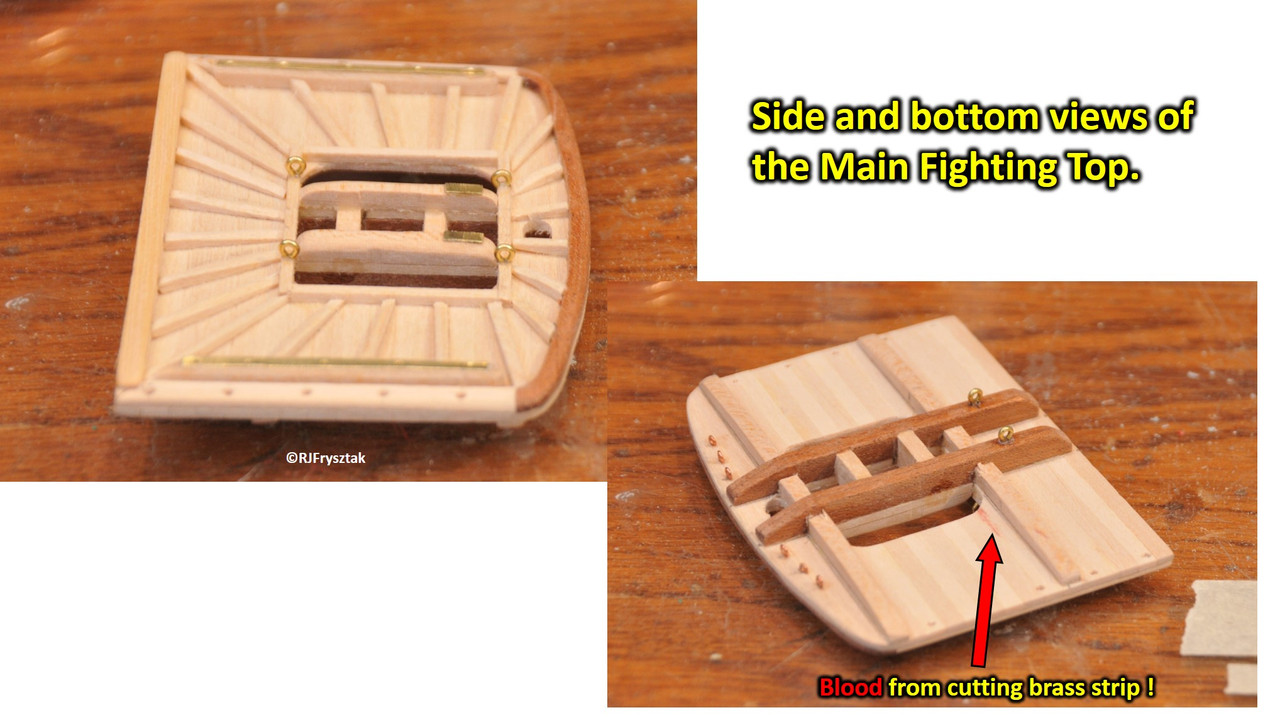
Been working on the masts and yards. Since I have switched to wood, the plastic fighting top looked odd. So I built a wooden one. I have a tutorial which I did at my shipbuilding club tonight, but I will spare you the details and just show the finished product.
I have a few of the yards as well.
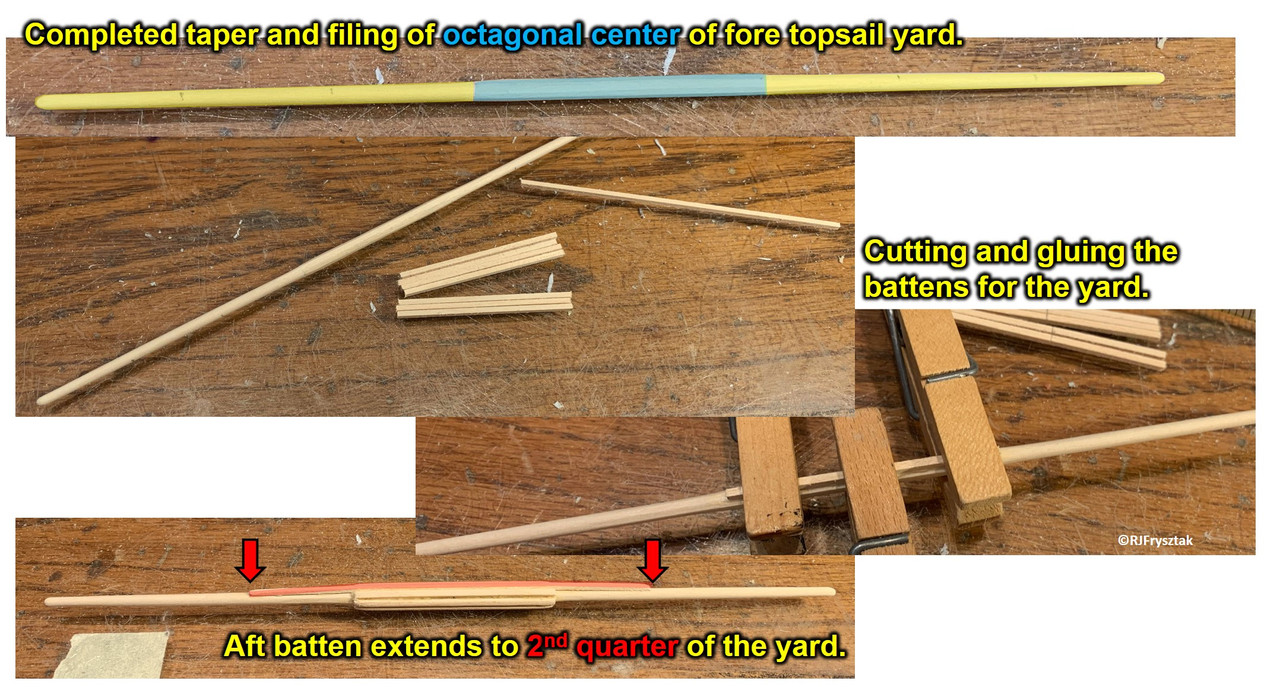
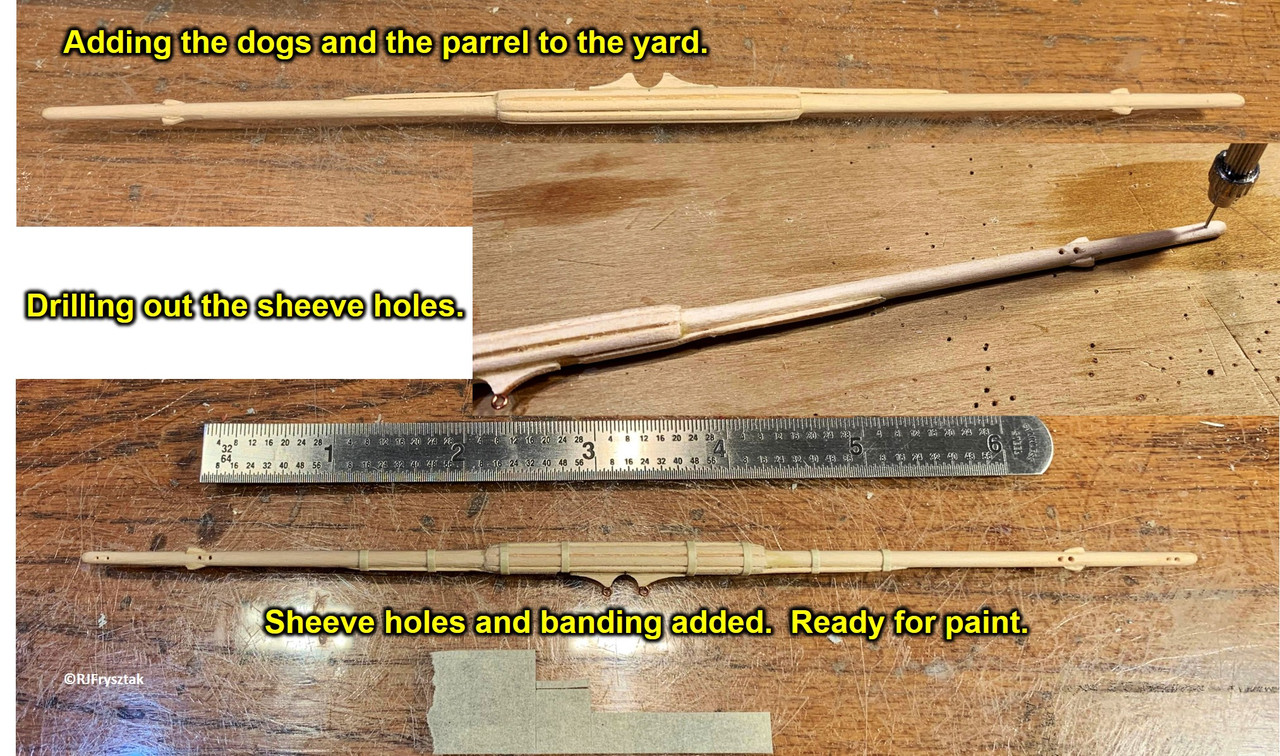
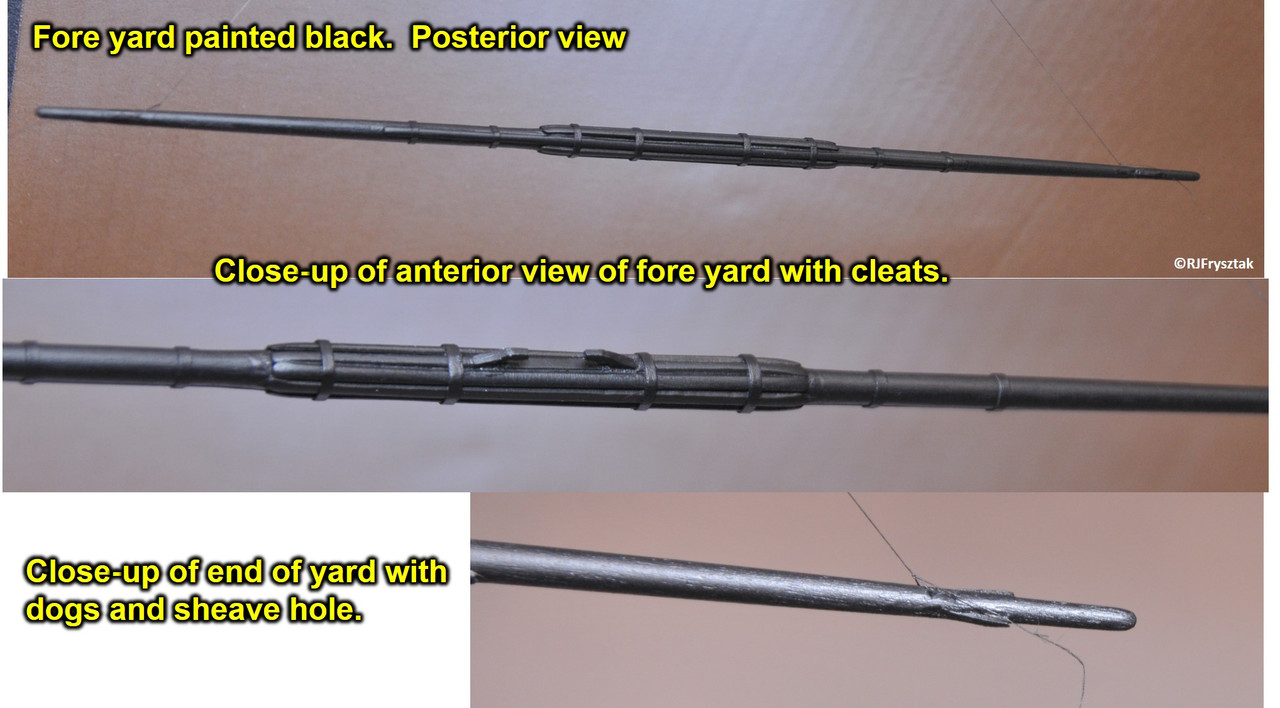
That’s all for now. 2 more masts and a bunch of yards to go.
Bob
Bob, you have certainly taken the Revell USS Constitution to a new level. By the time you are done you will be justified in dropping the name Revell from our build! Thanks for sharing your journey; it is a WOW! BTW, I am still plodding along with my OOB build.
Thanks, Shipwreck.
I already did this ship once in my early 20s, strictly OOB. This time I wanted it to be special. That, and I wanted my wife to let me display it without any sad comments this time (I still think secretly smiled when I had to scuttle the original). She is overly supportive this time because she sees the amount of work I am putting into it, and is actually impressed by my workmanship. Not in any hurry to get it done. Do it right the first time - er, second time - and you won’t have to do it again. Although I don’t show her all the stuff that hits the bin because I screwed something up. She only gets to see the good stuff!
Bob
I’ve been looking at pictures of sailing ships in combat, and noticed that they all showed reduced sails, as I understand it to help prevent damage to the rest of their sails.
Try as I could, I could not tell if the rest of the sails were furled or put below from those paintings.
I was going to model my Constitution with furled sails, but since the kit came with open gunports, usually, as far as I can tell, mostly when prepped for battle, I decided to model her ready for battle with guns run out, ports open, and reduced sails.
I have some silk span on order for sail making, and HiS carriages for the spar deck.
I scratch built a Brodie stove, galley and water barrels for the gun deck, then covered them up when the spar deck went on. That’s when I went back to your build and saw the open decks.
Rick,
Yes, I wanted to be able to see my work on the gun deck, so I cut three large “holes” in the spar deck that can be removed to show the workings below. Plus I lit it all up with LEDs.
Bob
You did an awesome job. That build is a classic!!!
I absolutely agree with Jim, this is one heck of a build Bob!
I’ve added this thread to my favorites so that I can refer to it when I build the 1/96 United States that was given to me for free. Please the pictures and dialogue coming.
Steve
Thanks, Steve.
I can’t really tell if I am giving too much info or not. Or taking too many pictures. But I will keep posting as long as I am still building. I will try not to bore anyone by reposting similar builds, such as the masts and yards. Not a whole lot of differences there in terms of useful build info. But I will definitely get back into posting once the rigging starts. And I am sure I will have plenty of questions once it does! Nice to know that folks are still watching, as this is going on two years now.
Bob
Do not worry Bob, you cannot provide too much information. Keep posting, please!!