Thanks for the condolences. It was a very trying couple of months before the wedding. But all is good now.
Thanks again.
Bob
Thanks for the condolences. It was a very trying couple of months before the wedding. But all is good now.
Thanks again.
Bob
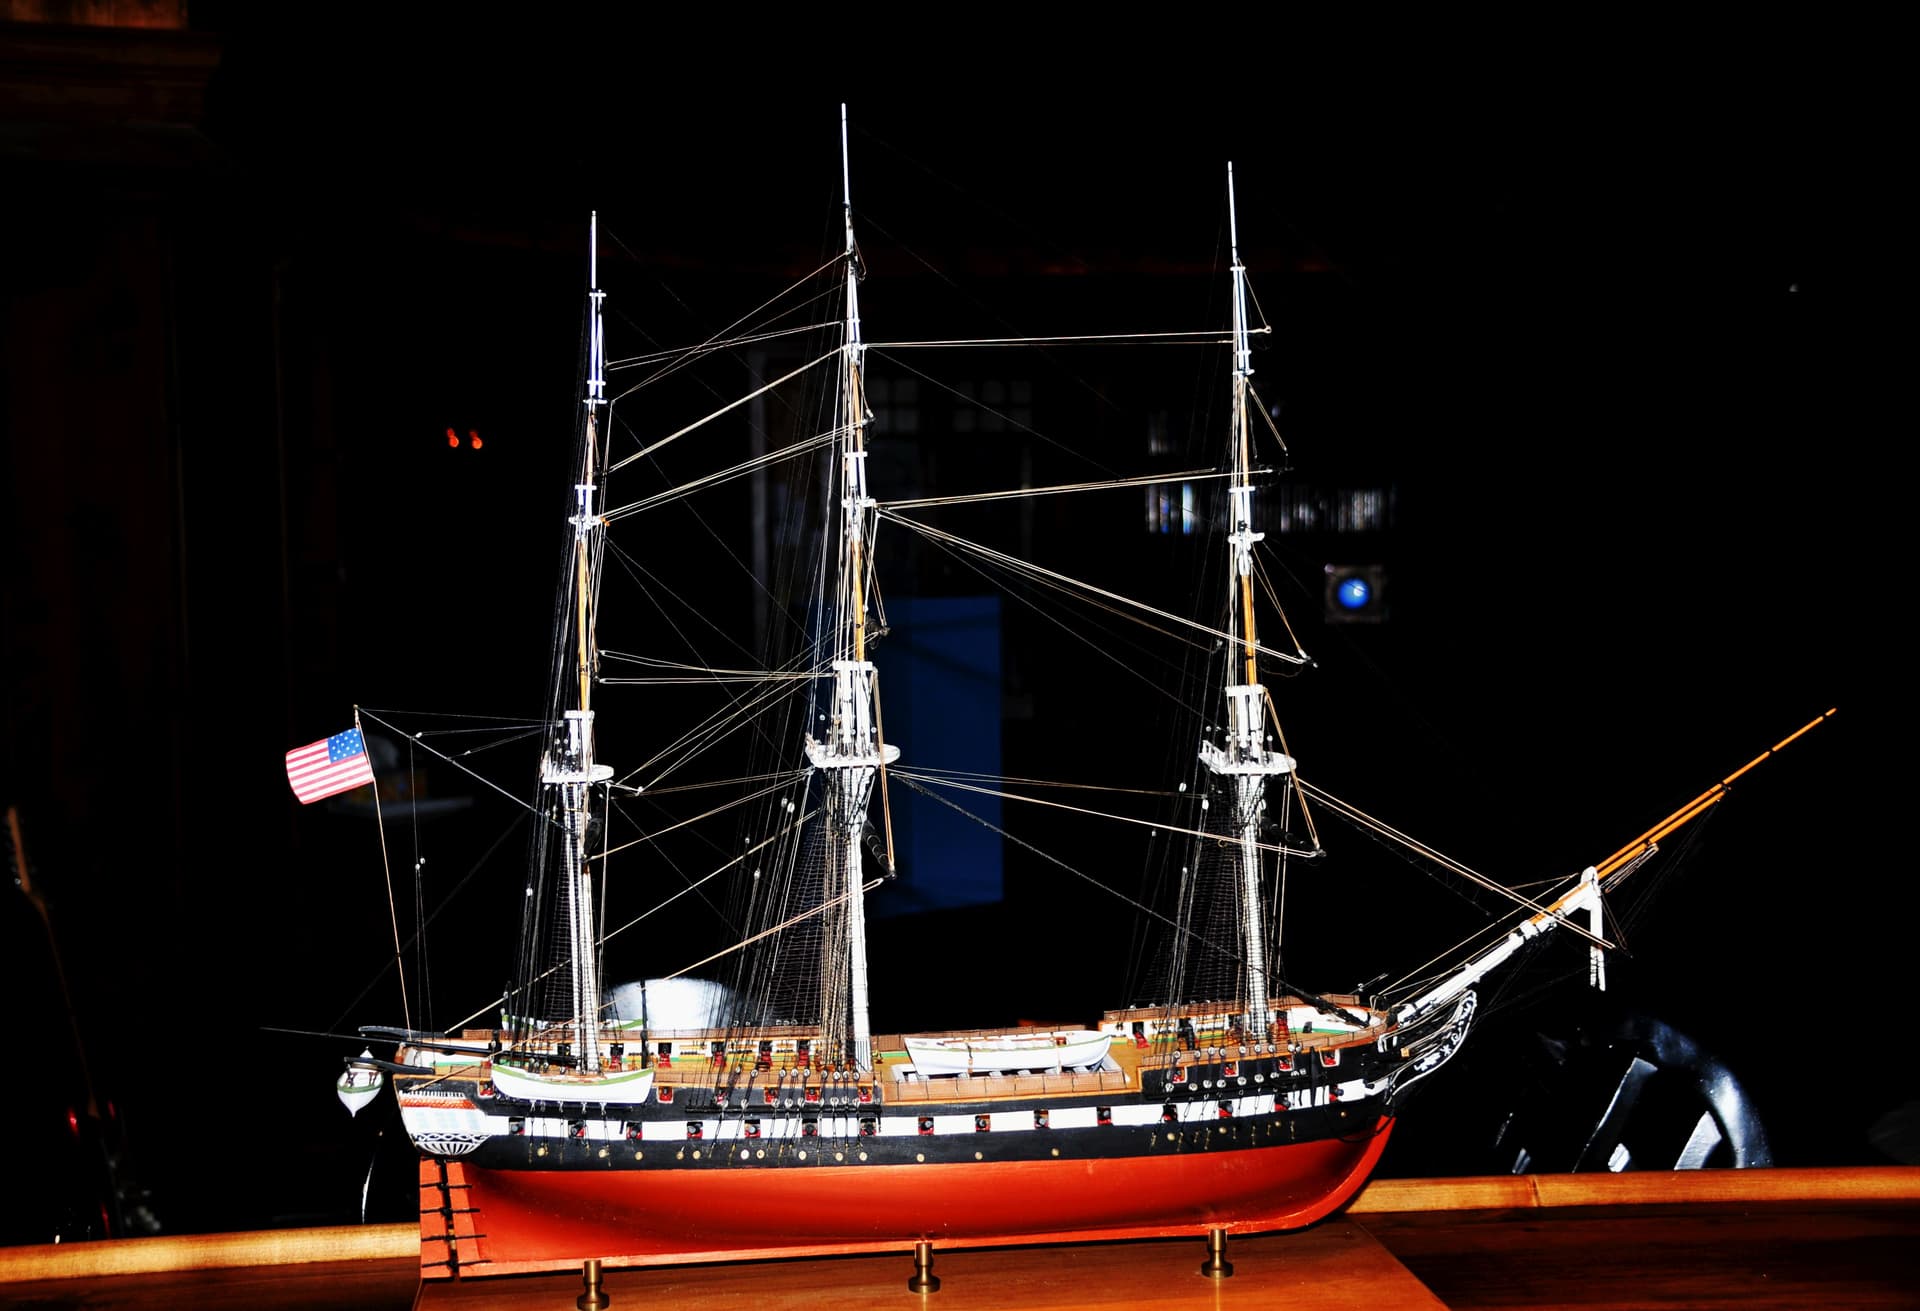
A past member’s daughter contacted me about rebuilding her father’s Constitution, which had seen better days. Broken bowsprit, fore topmast and mizzen topmast. Missing a few cannons, and 30+ years of dust. So I agreed to take on the restoration. Following a cursory cleaning/vacuuming of the dust and loose parts, I ended up completely removing the bowsprit and the broken topmasts. Much of the rigging had also not fared well, and a few lines had frayed to the point of replacing. This kit also had the metal blocks, which had started to seriously degrade as well.
Not wanting to undo all of his original work, I left what I could, replacing only those blocks and parts that could not be salvaged. Taken a few months of on again, off again, but I finally finished all the major repairs and rigging last night. I have a few tiny repairs left (ship’s boats), but now it needs a thorough cleaning. I did the spar deck up to the capstan, but it will take a few passes to get all the dirt off of her. Spars look particularly dirty, except for the ones I removed and/or replaced. Included a few pics of the after (but before a real cleaning). I will post a few more of the before & after photos when I get a chance.
So technically, this makes #3 Constitutions for me.
Bob
Nice of you to do this. I don’t know how you guys contend with all that rigging. I can’t wrap my head around it. I get aggravated with the minimal rigging on ww2 warships and planes, let alone sailing ships!
Compared to my Connie, this was really minimal rigging (IMHO). ![]() No sails; lifts and braces are the only real running rigging. So not a horrible slog like mine has been. For some reason, I thought it would be “fun” to fully rig mine, and make sails, and … The list goes on.
No sails; lifts and braces are the only real running rigging. So not a horrible slog like mine has been. For some reason, I thought it would be “fun” to fully rig mine, and make sails, and … The list goes on.
Feels good to help someone out, since her father passed away a few years ago. Something to remember her dad.
Bob
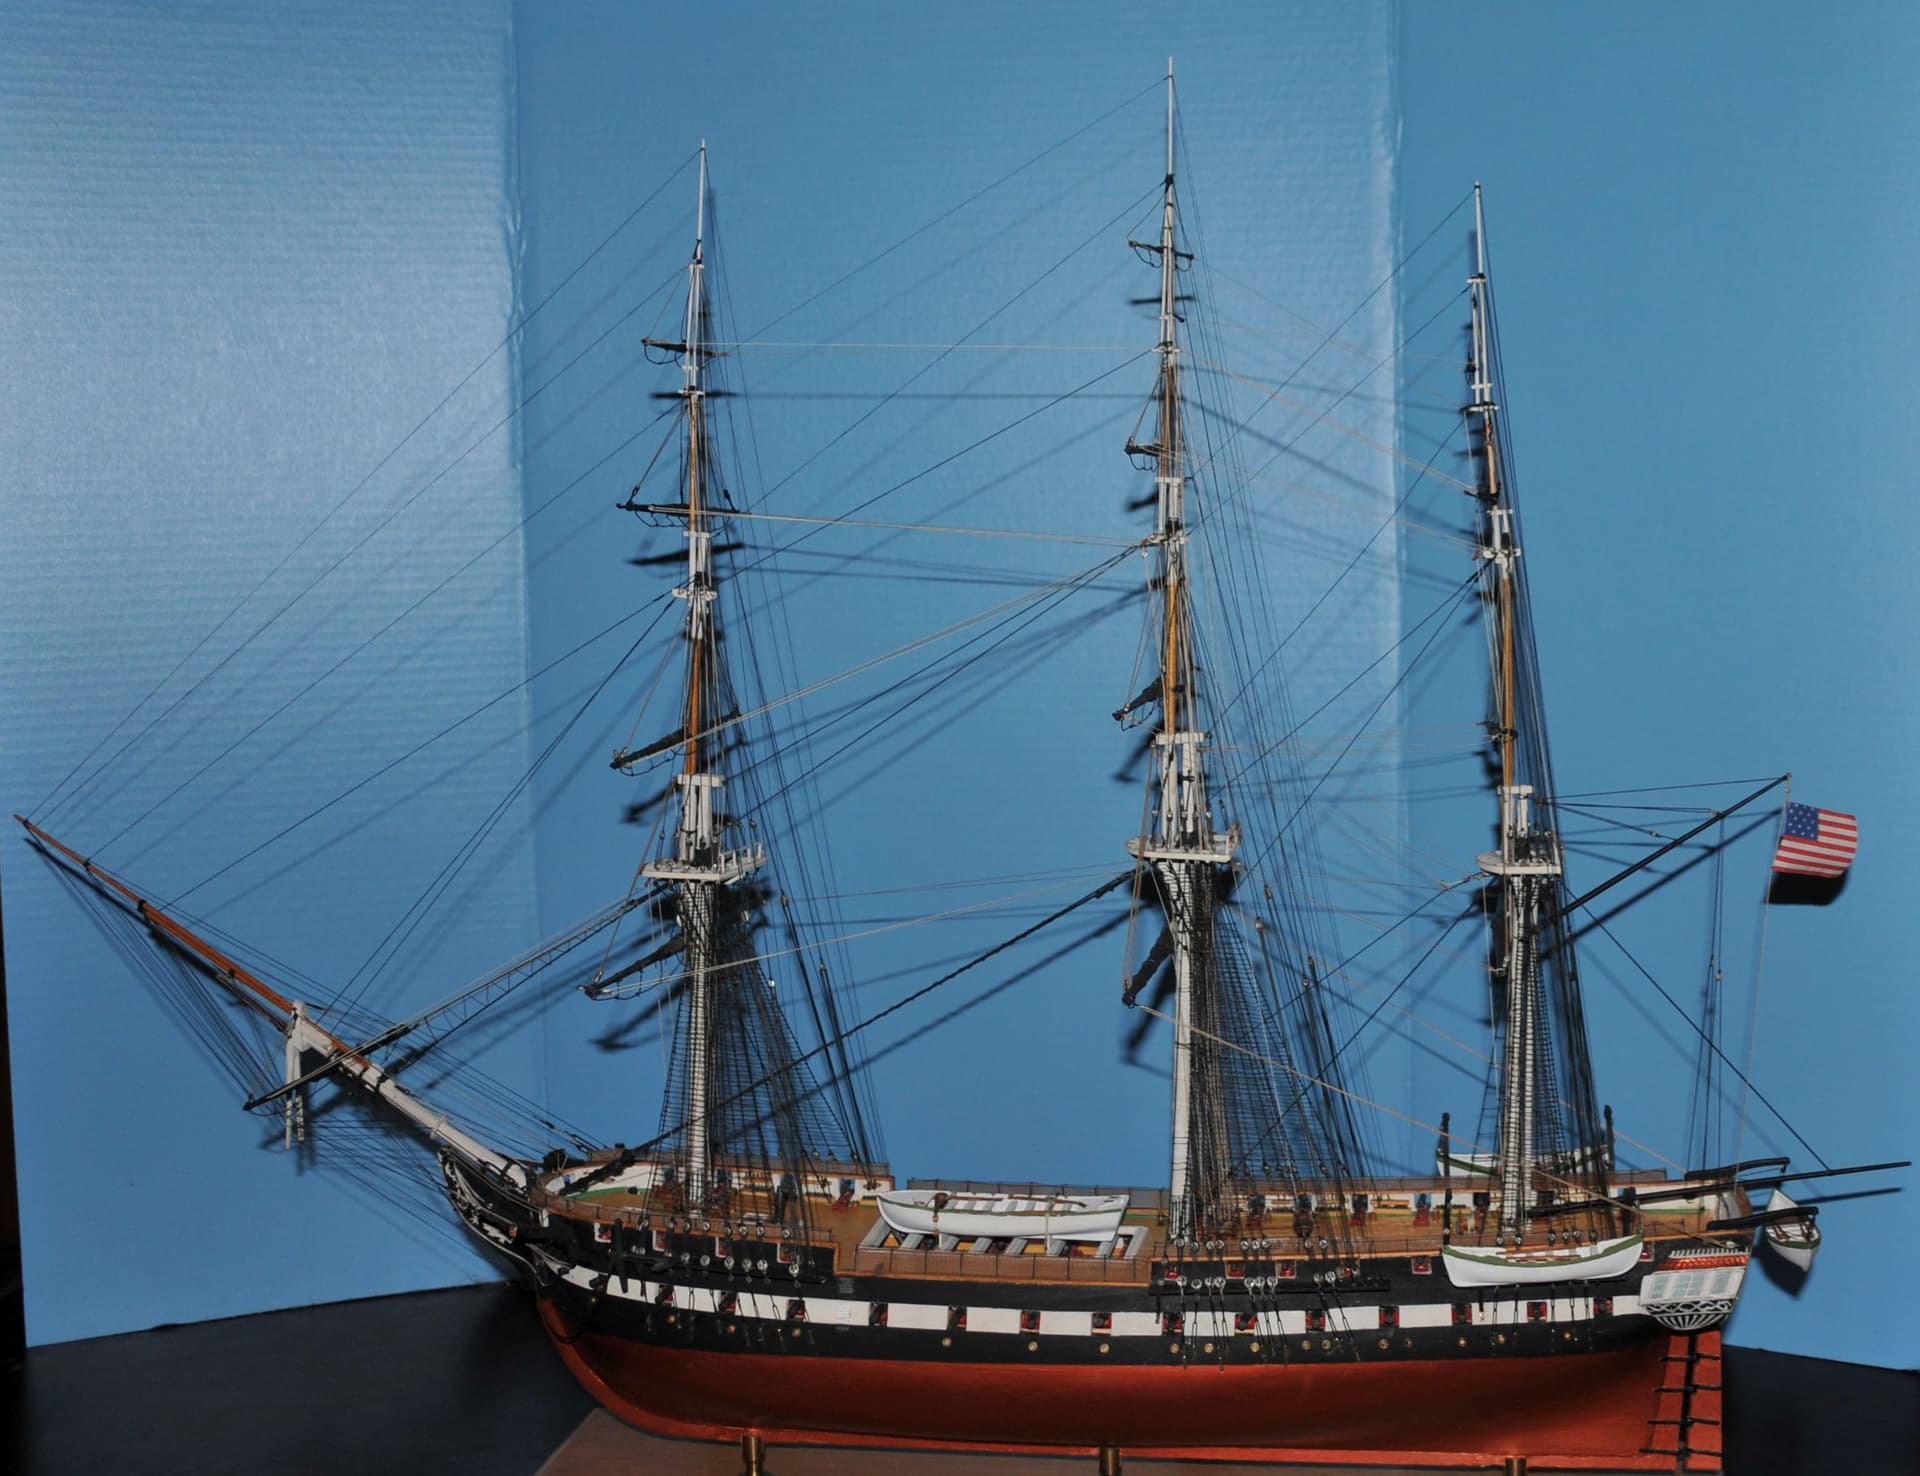
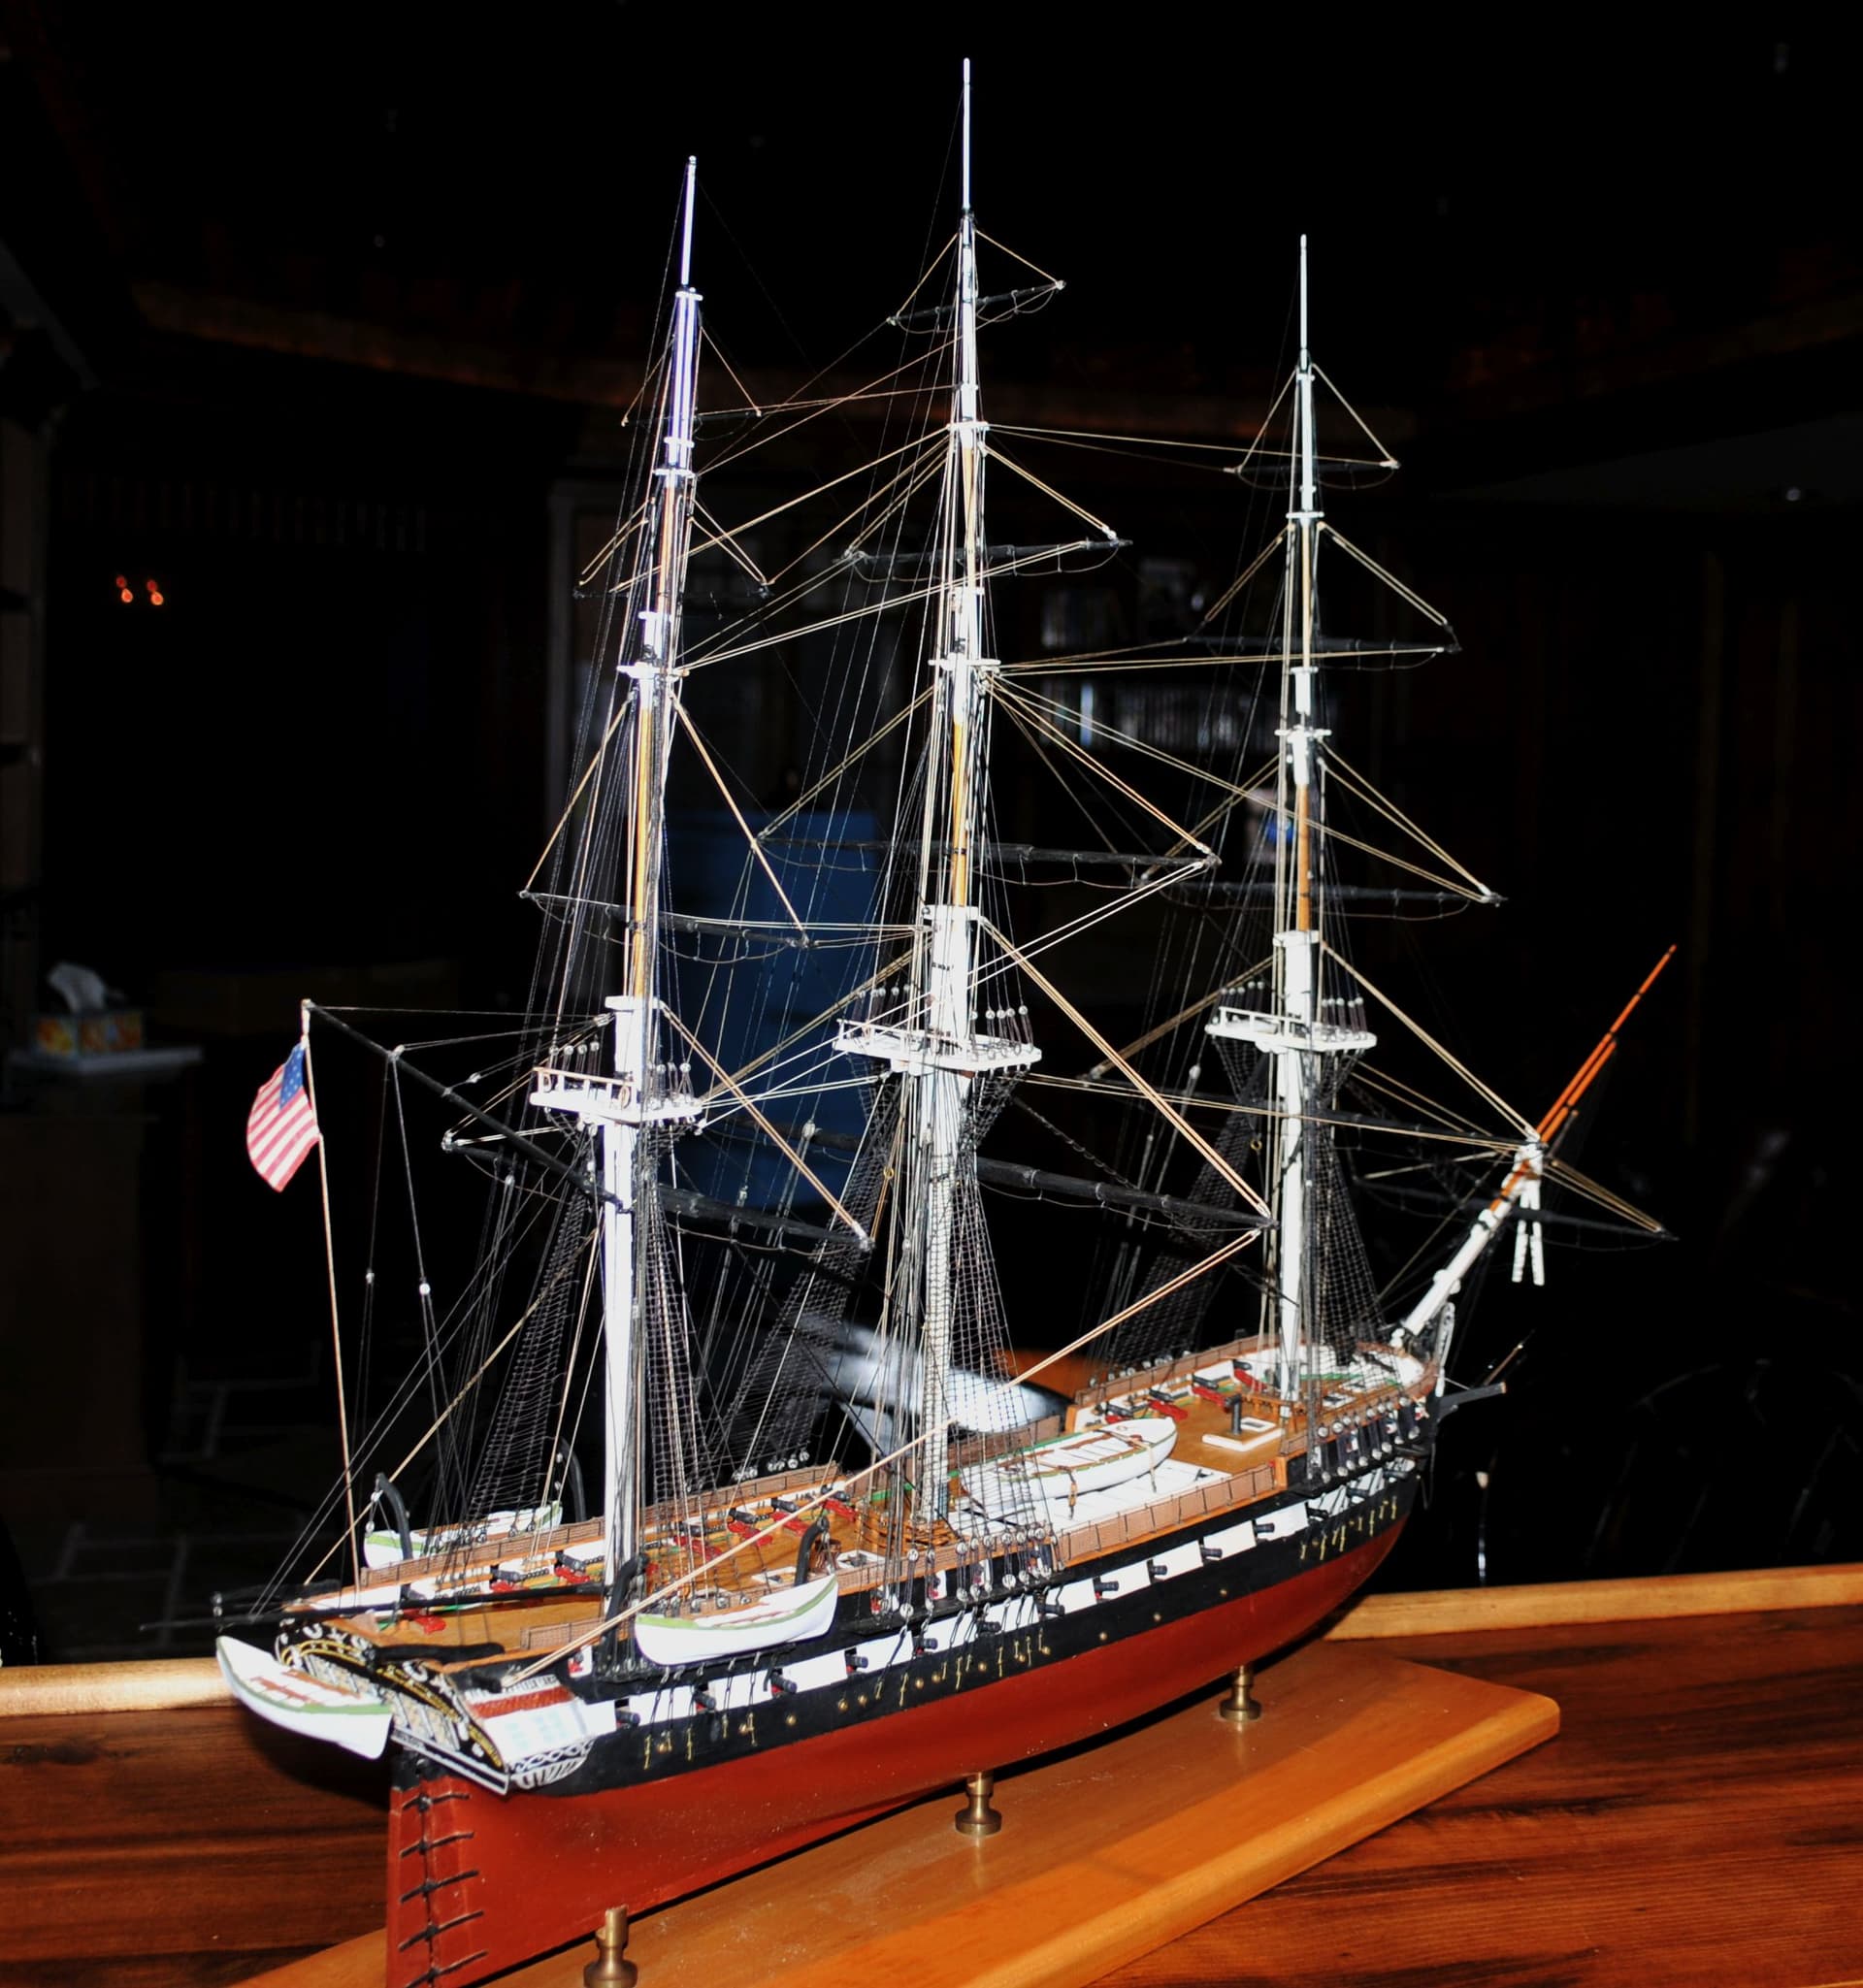
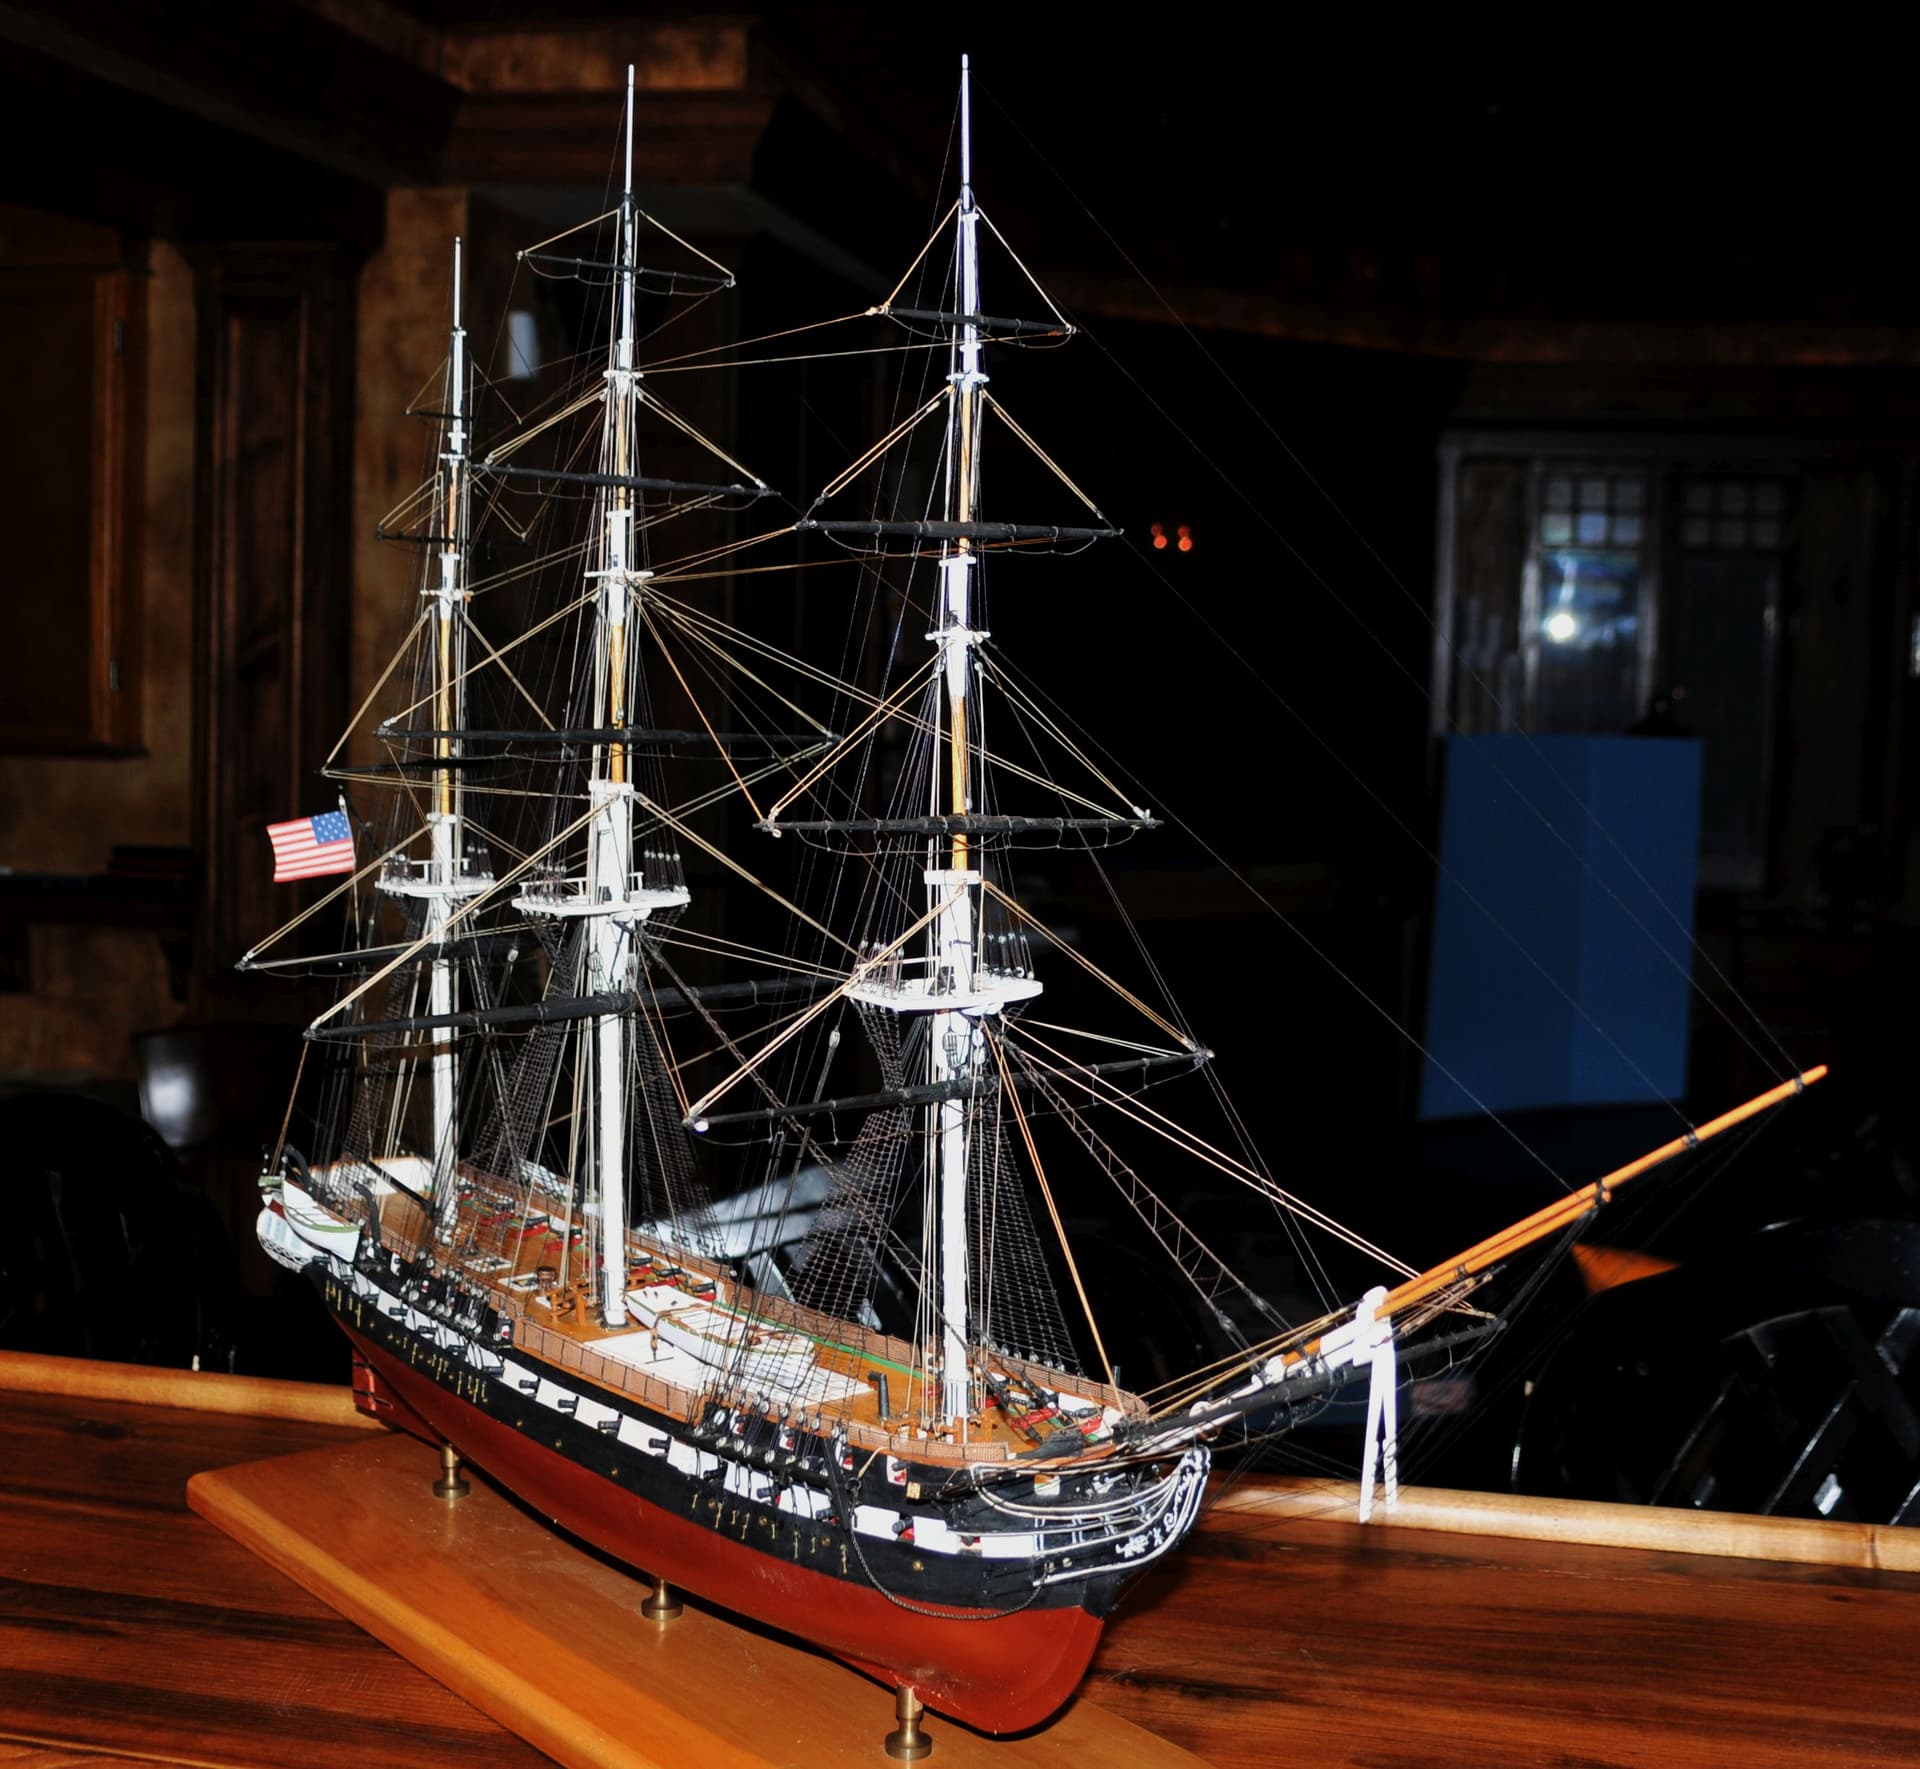
A few more pictures of the completed “refit” of a friends badly damaged Constitution.
All she needs is a nameplate and a trip home.
Bob
Wow! This is absolutely spectacular. It’s the kind of build us novices can only aspire toward someday. Thank you for sharing it!
Beautiful! And good on you restoring for a good cause. Man… I kinda want one now
Well done sir! Beautiful.
Beautiful restoration job and a super nice project for you to undertake for that member’s daughter.
Thanks all.
A special “Christmas present” will be on it’s way back home on Tuesday.
Bob
lovely work bob .can’t wit to see more of your work .
Stunnning work Bob. Very kind of you to do this.
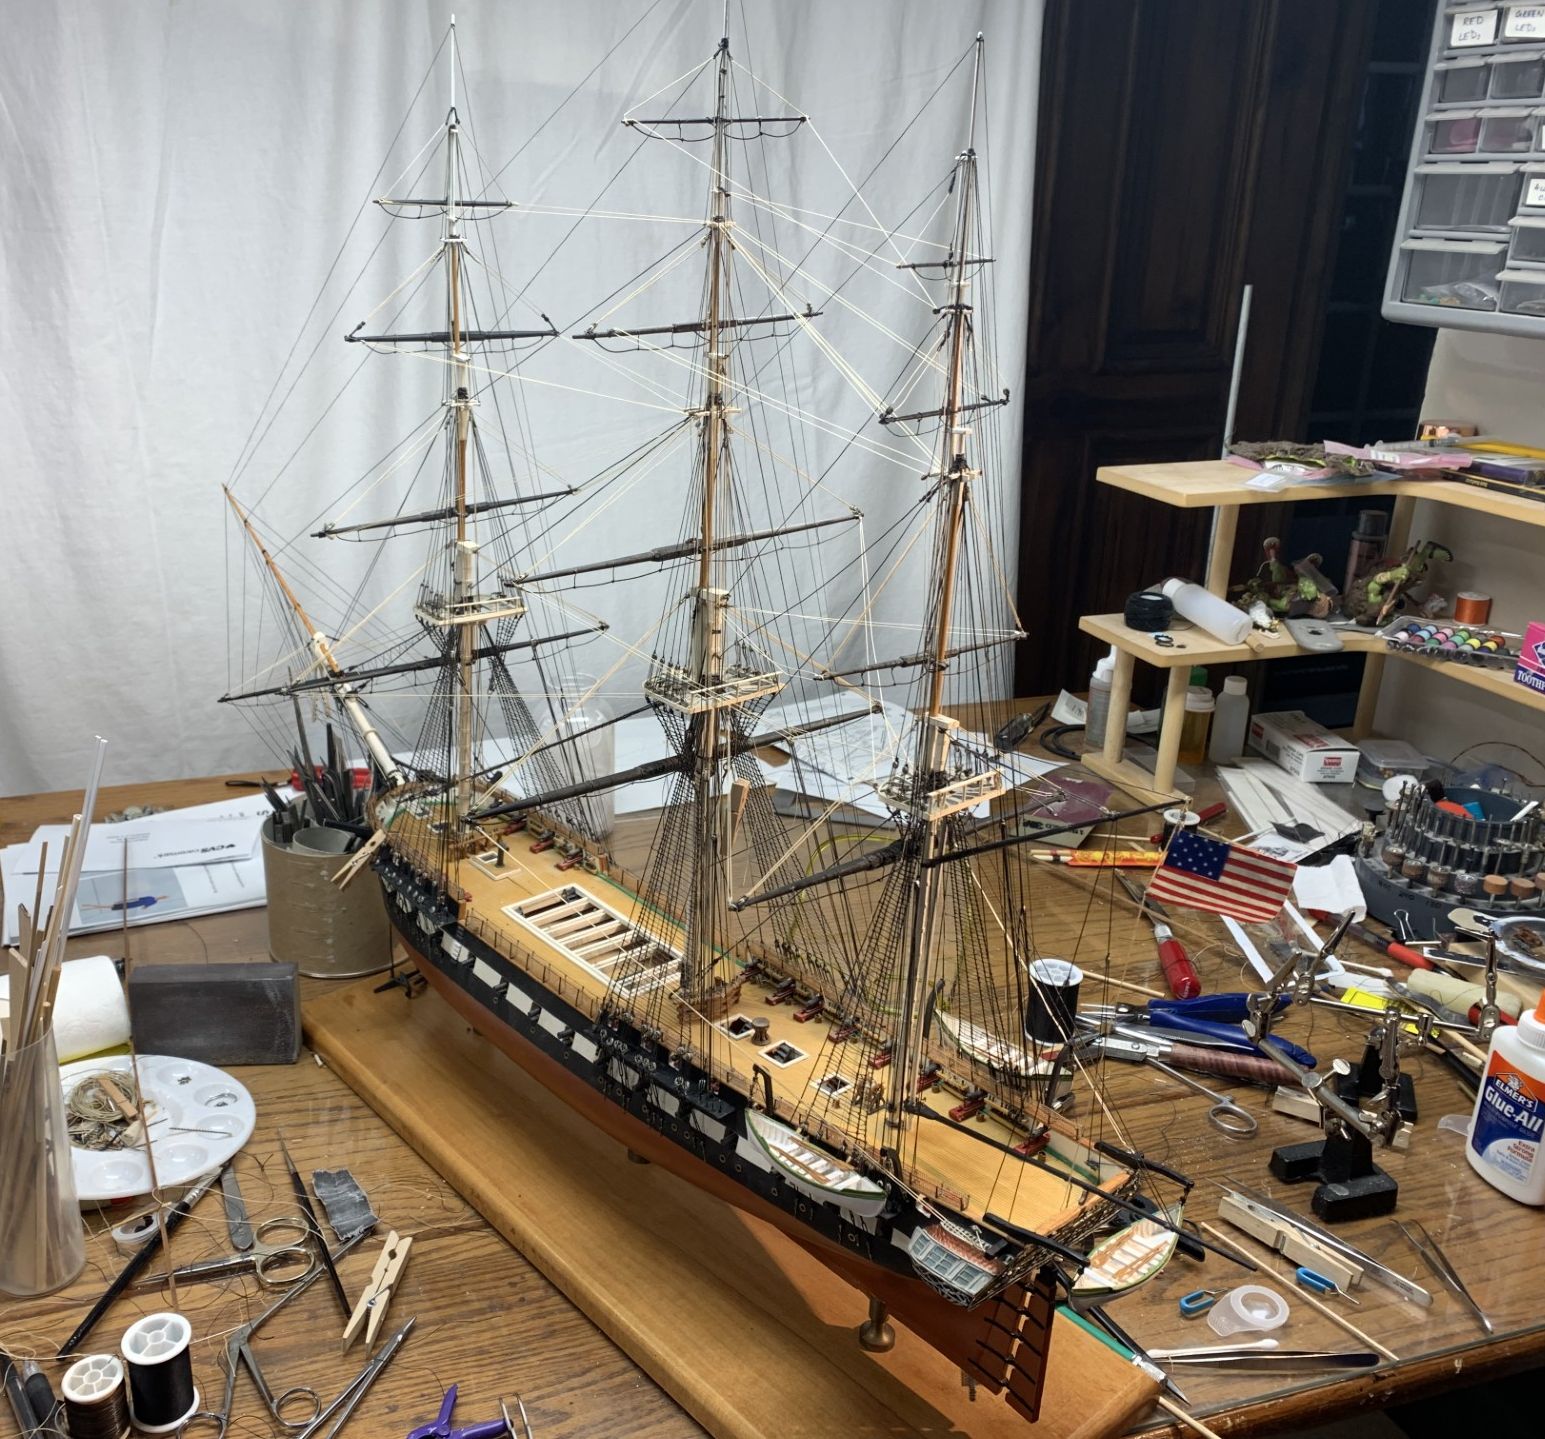
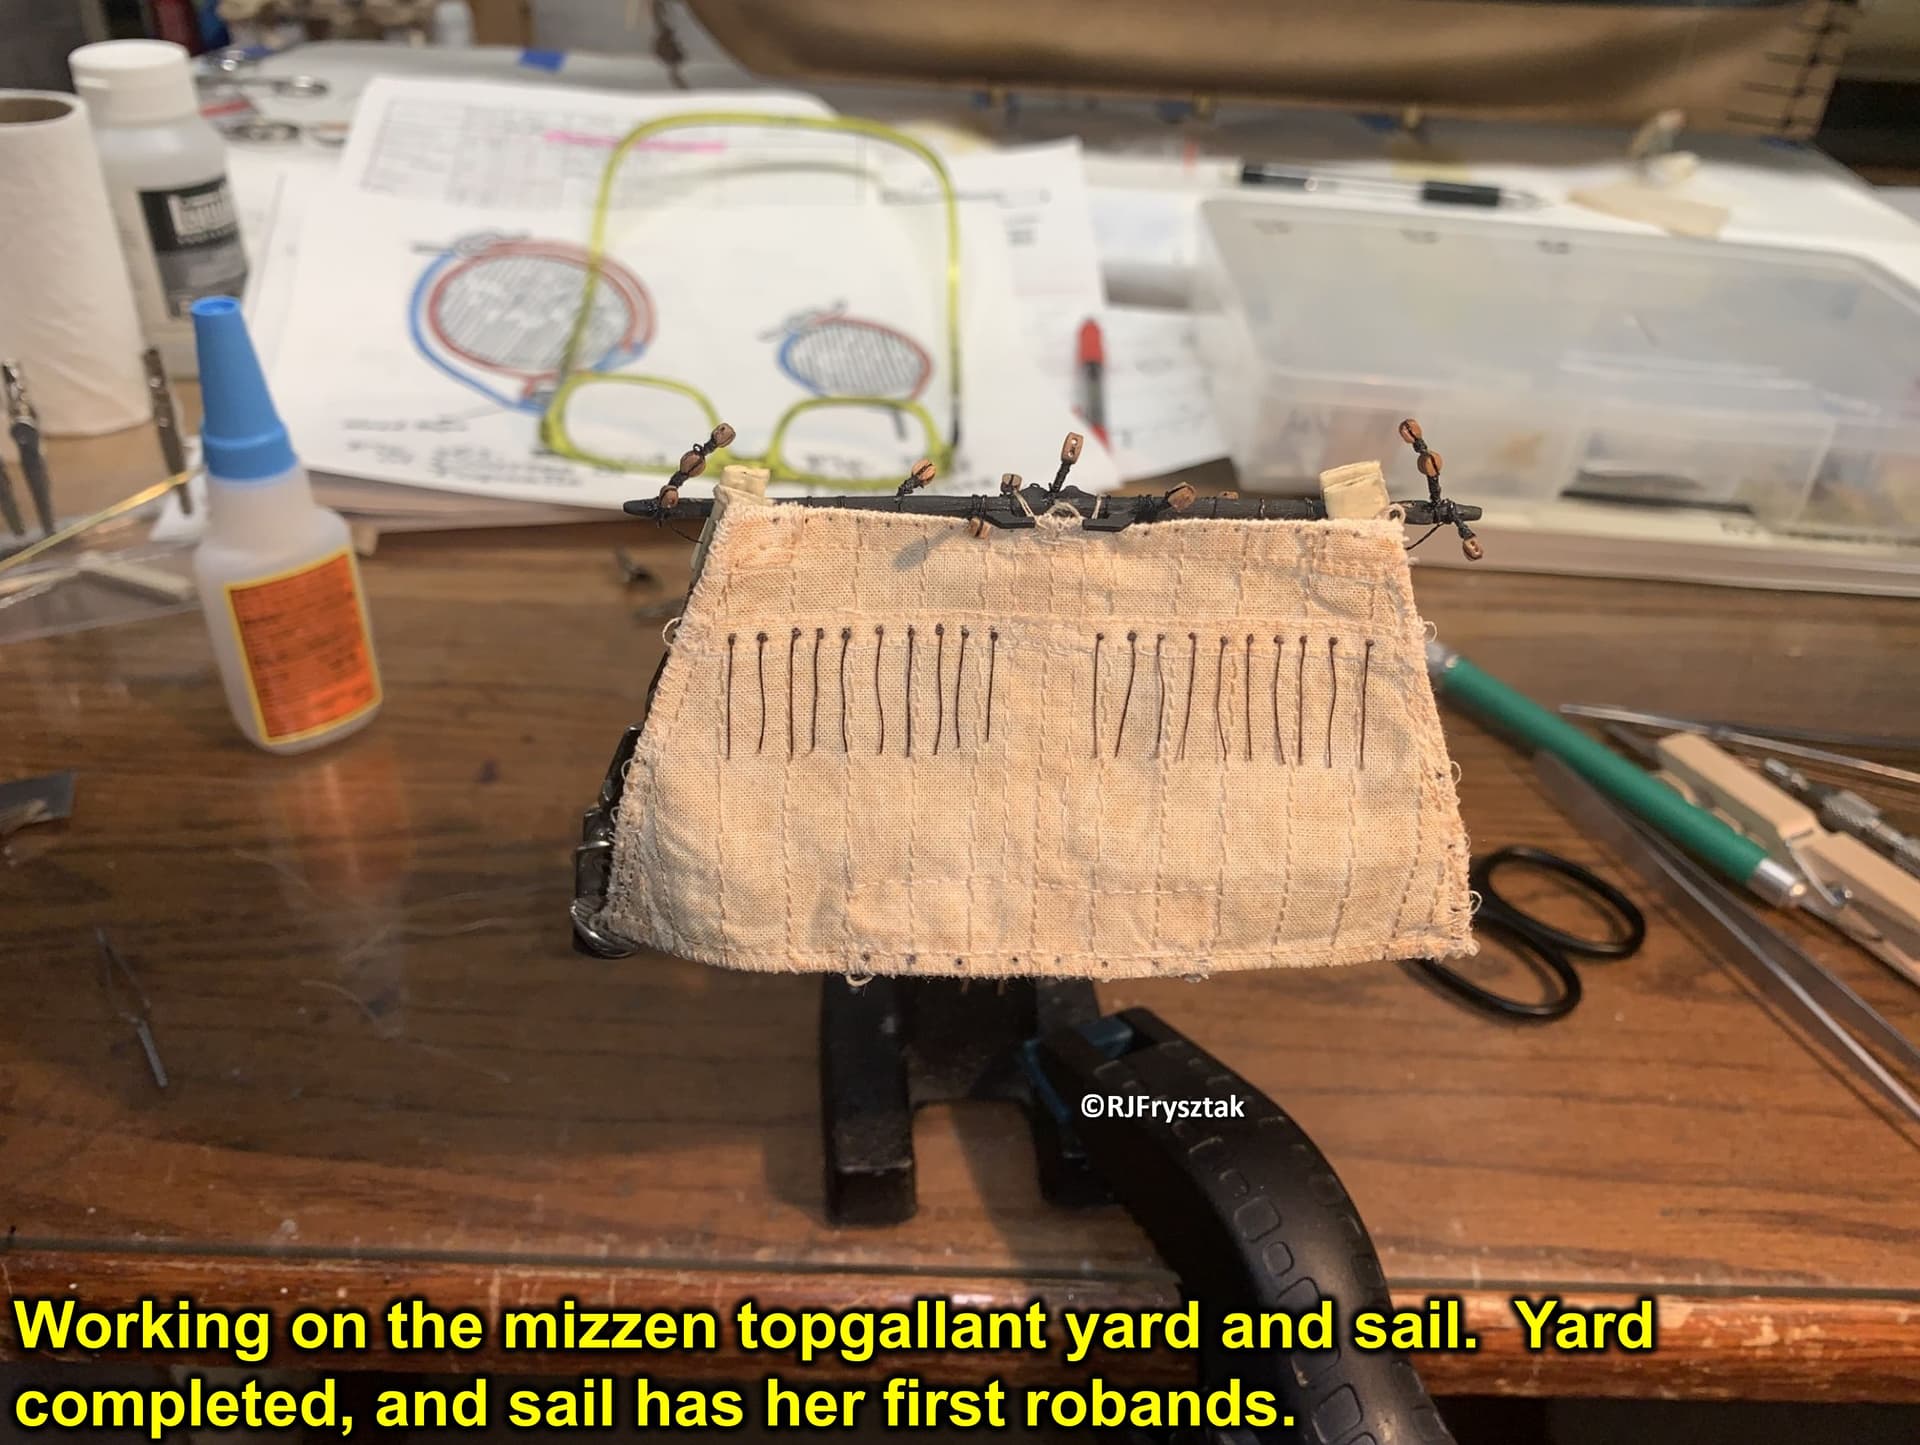
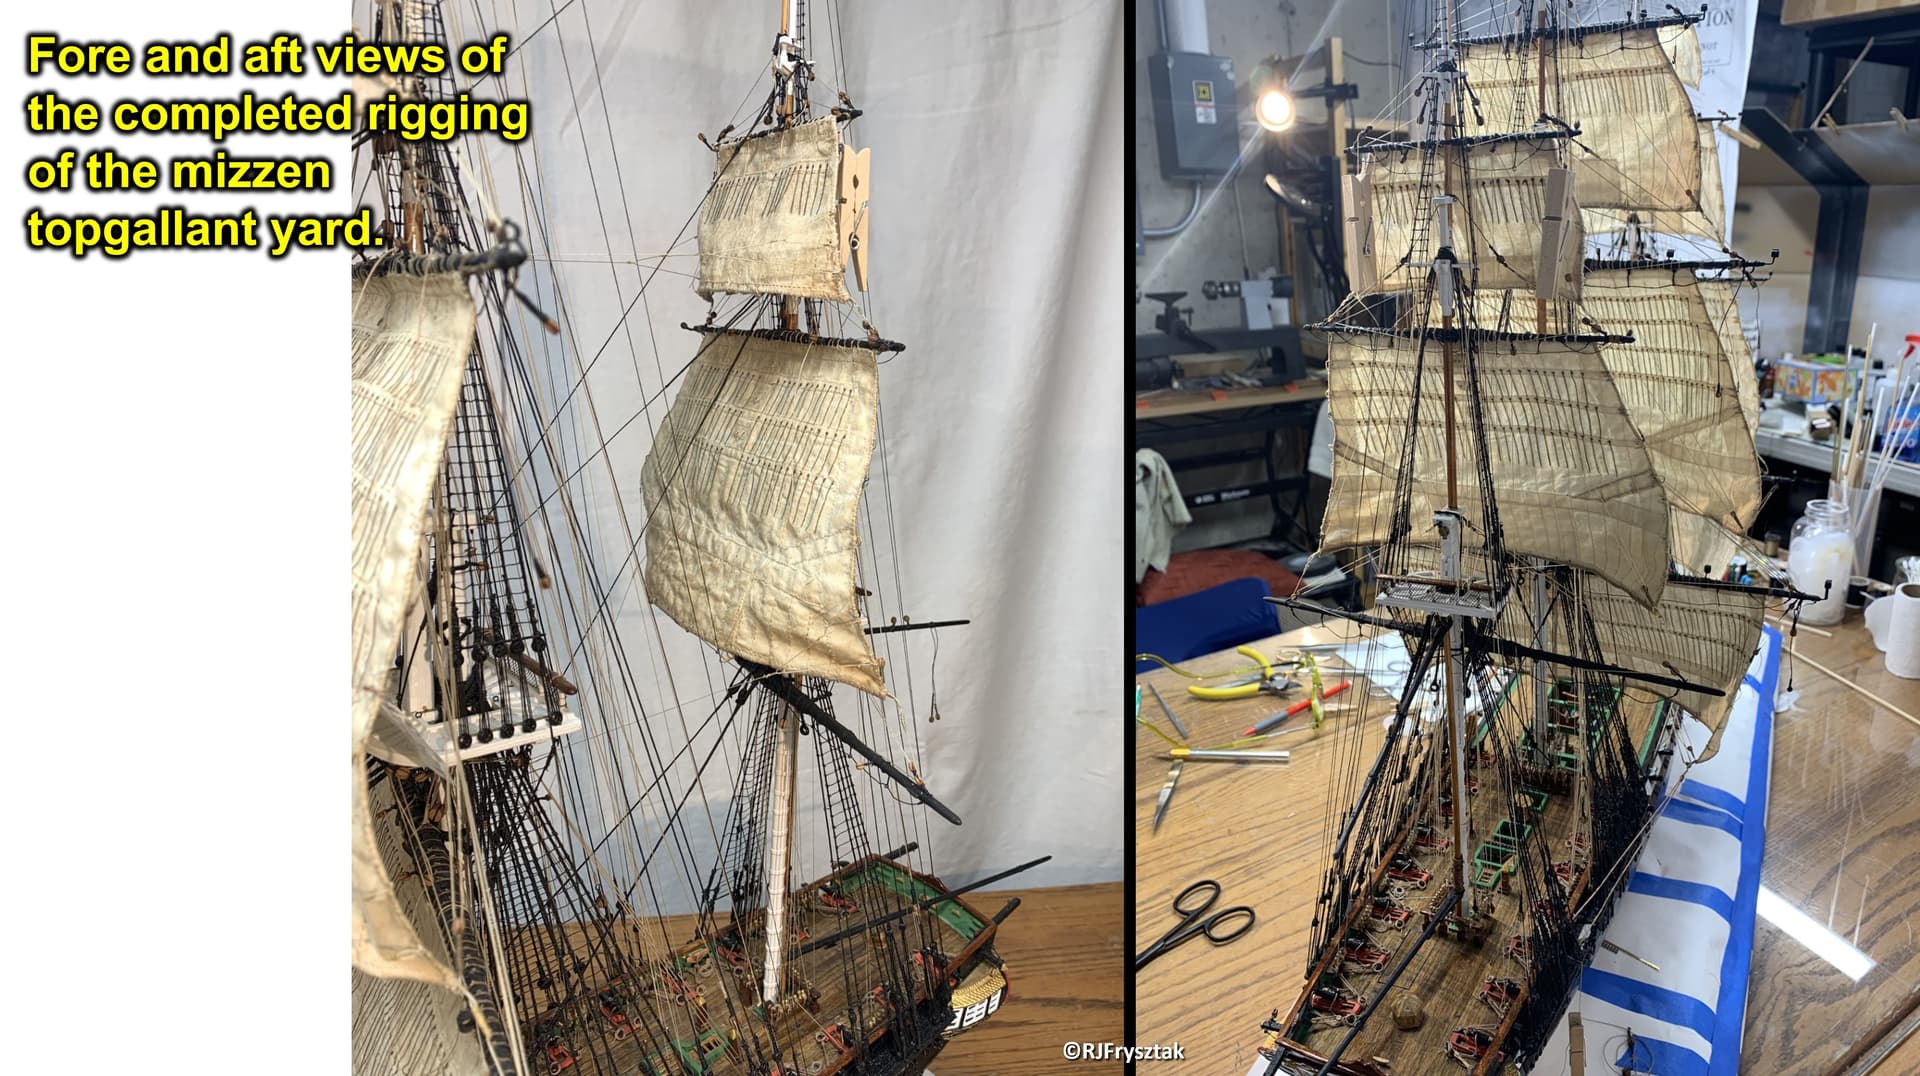
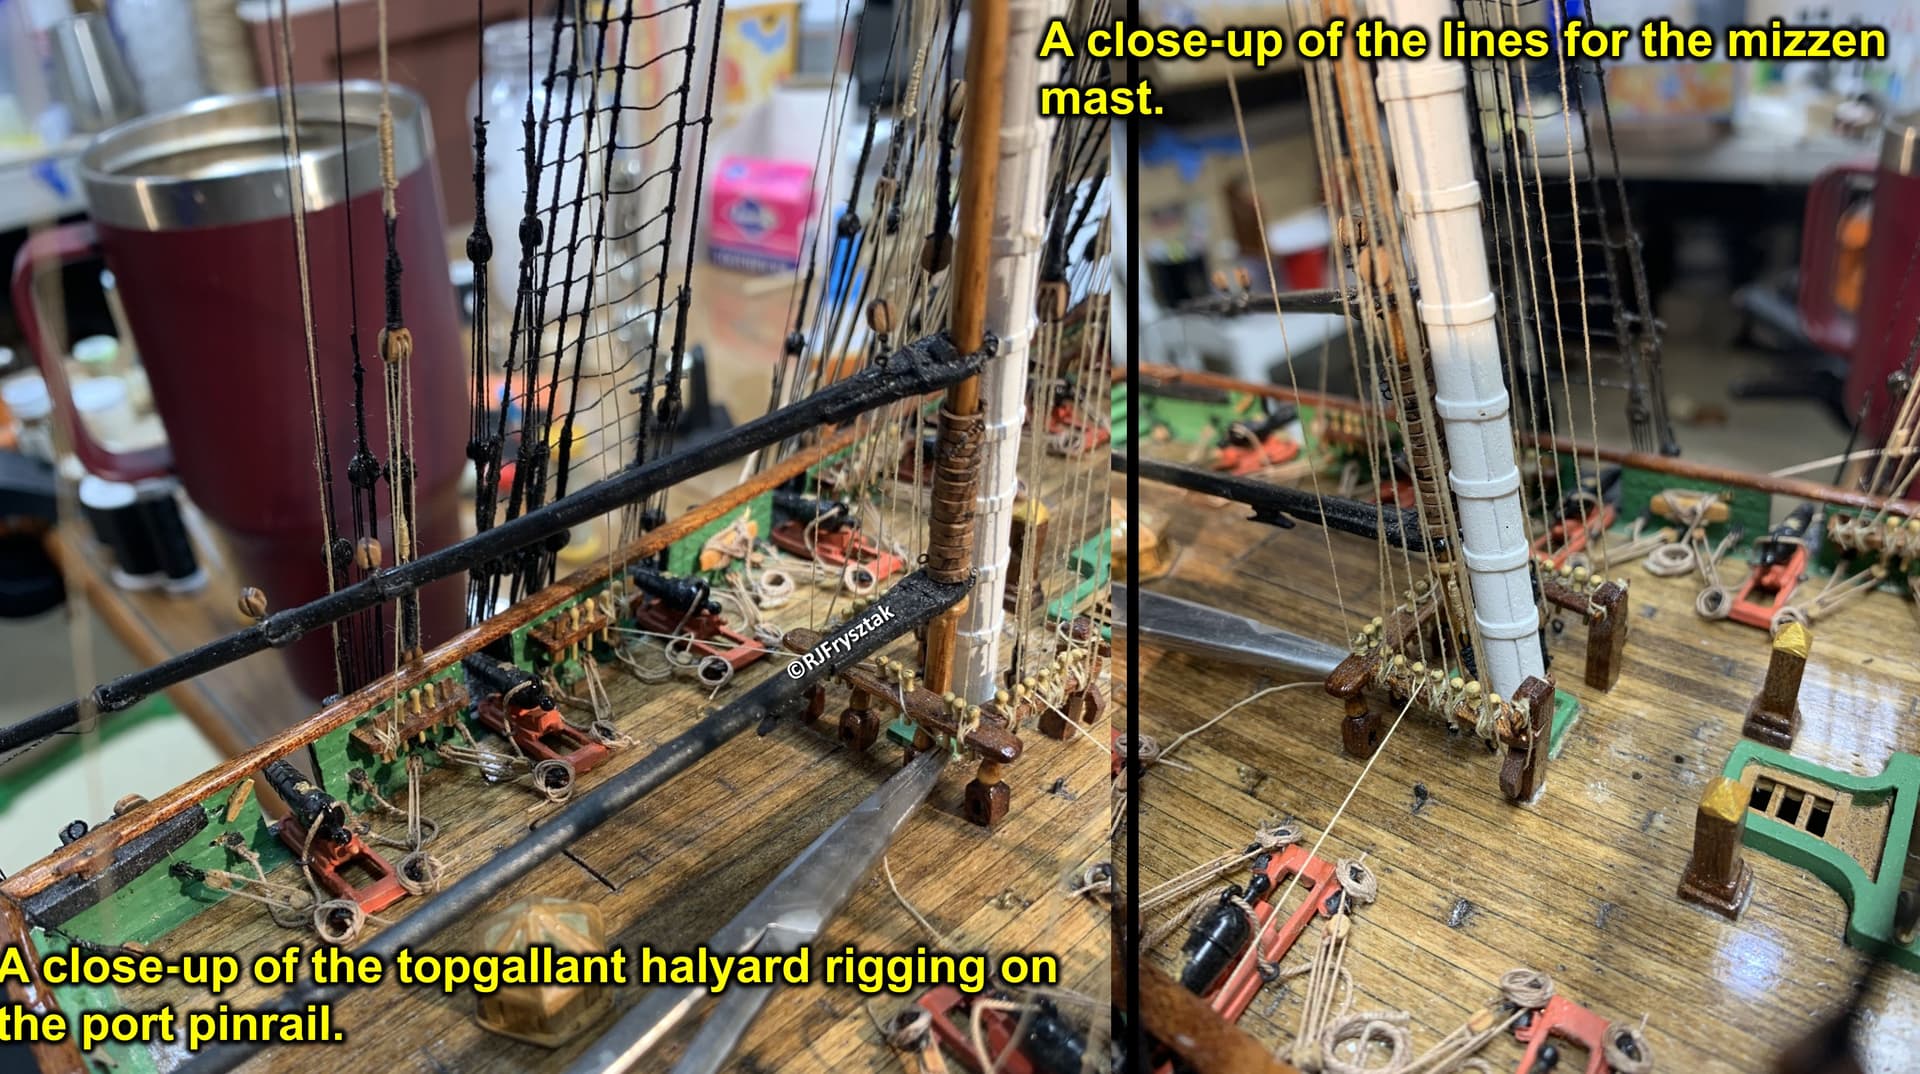
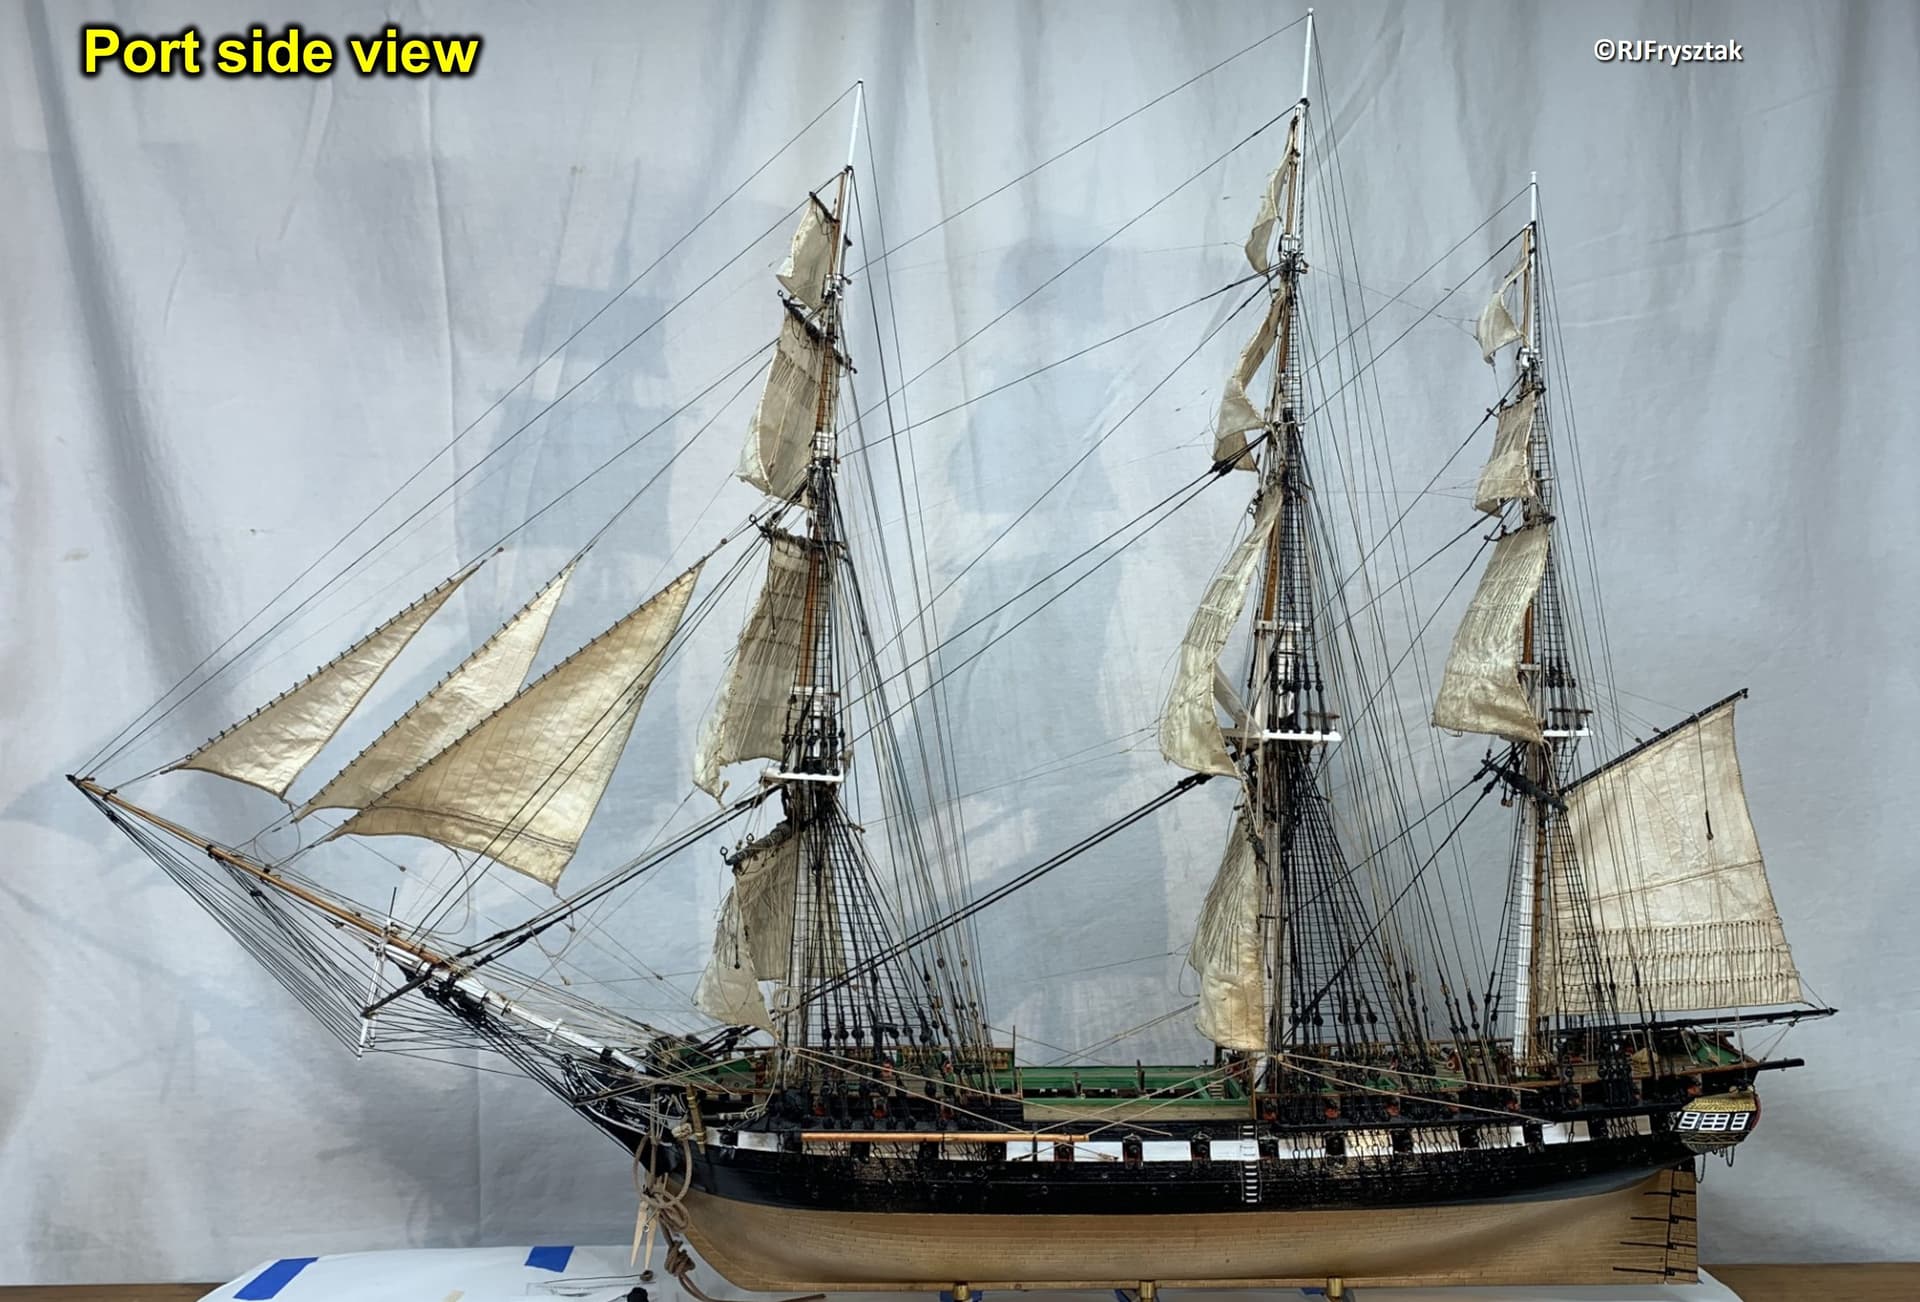
So finally back to the bench working on MY Constitution. Fabricated the mizzen topgallant yard, added all the blocks, stitched up and finished the sail, and bent it to the yard using robands.
Yard and sail then bent to the mast using single parrals, and all rigging completed to their respective pins, including halyard, lifts, sheets, bowlines, clew, bunt and leech lines. Also ran the sheet lines for the royal sail.
On to the royal sail & yard !
Happy New Year !
Bob
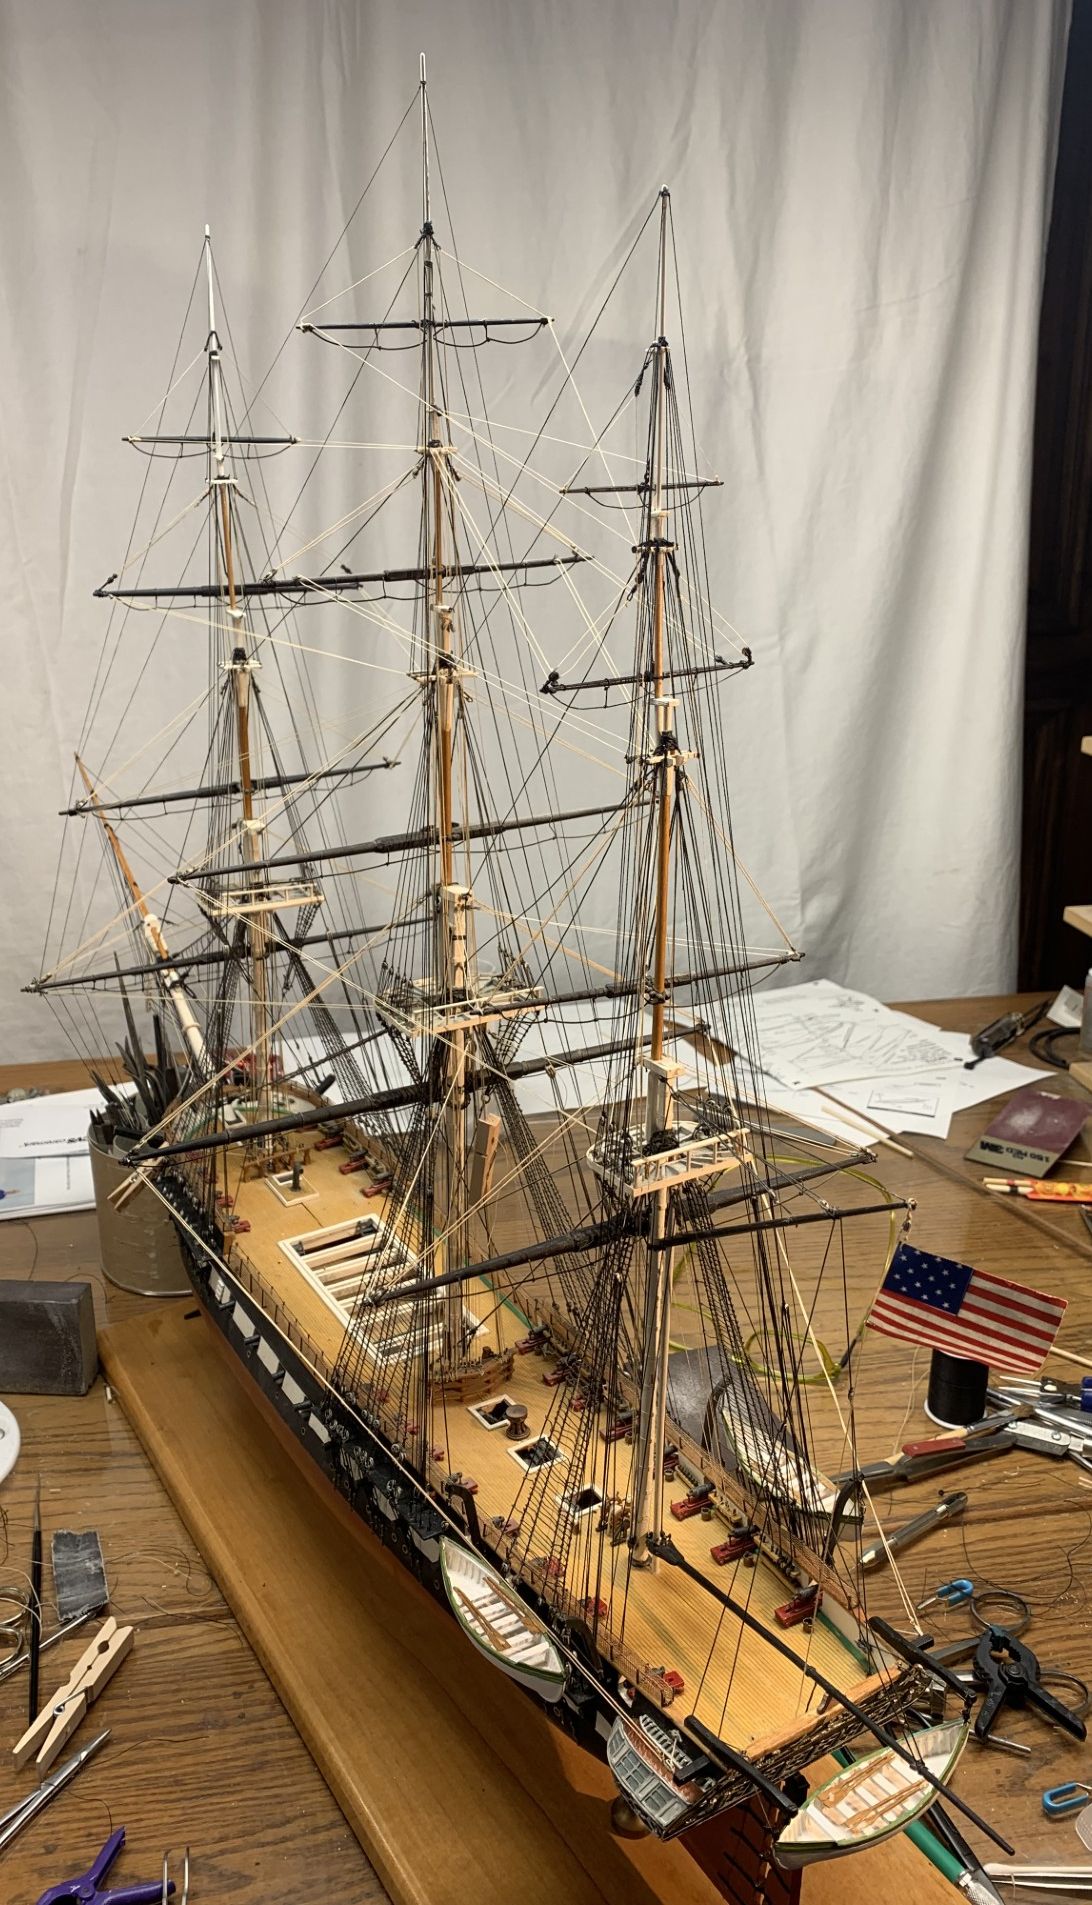
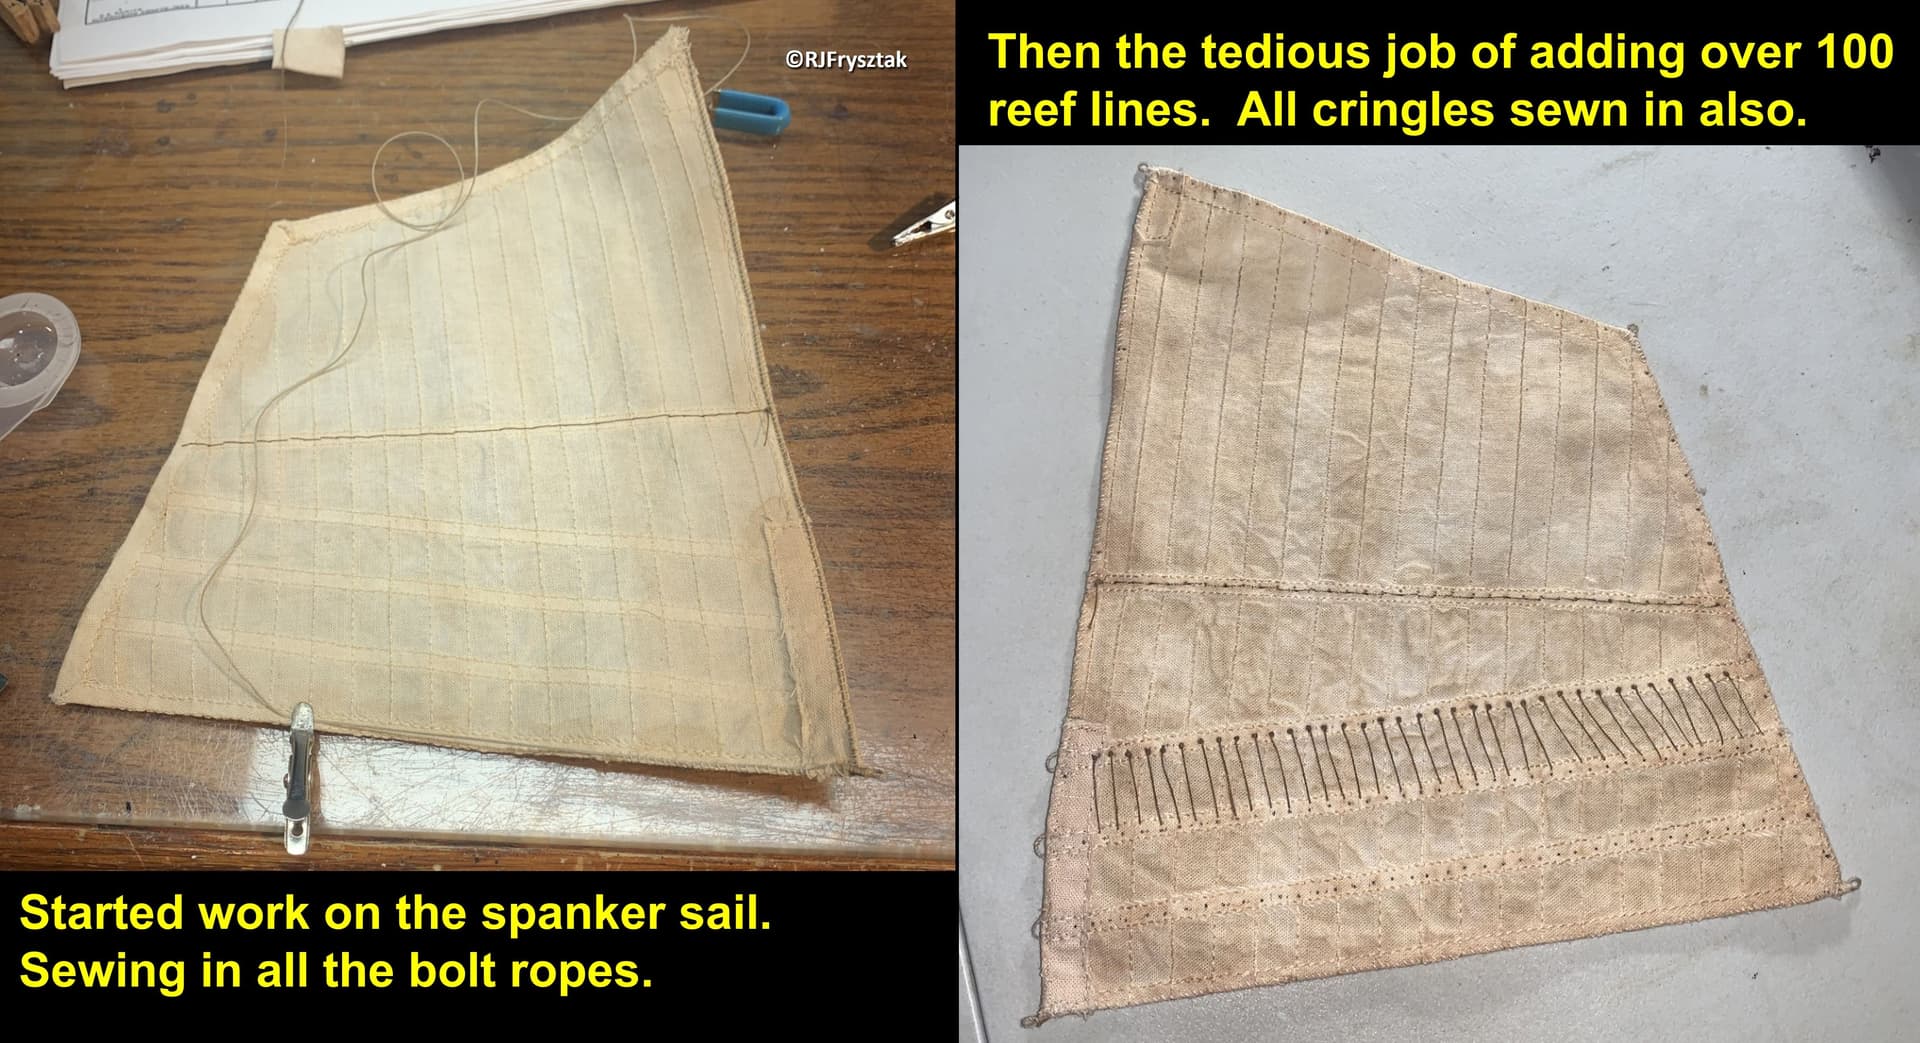
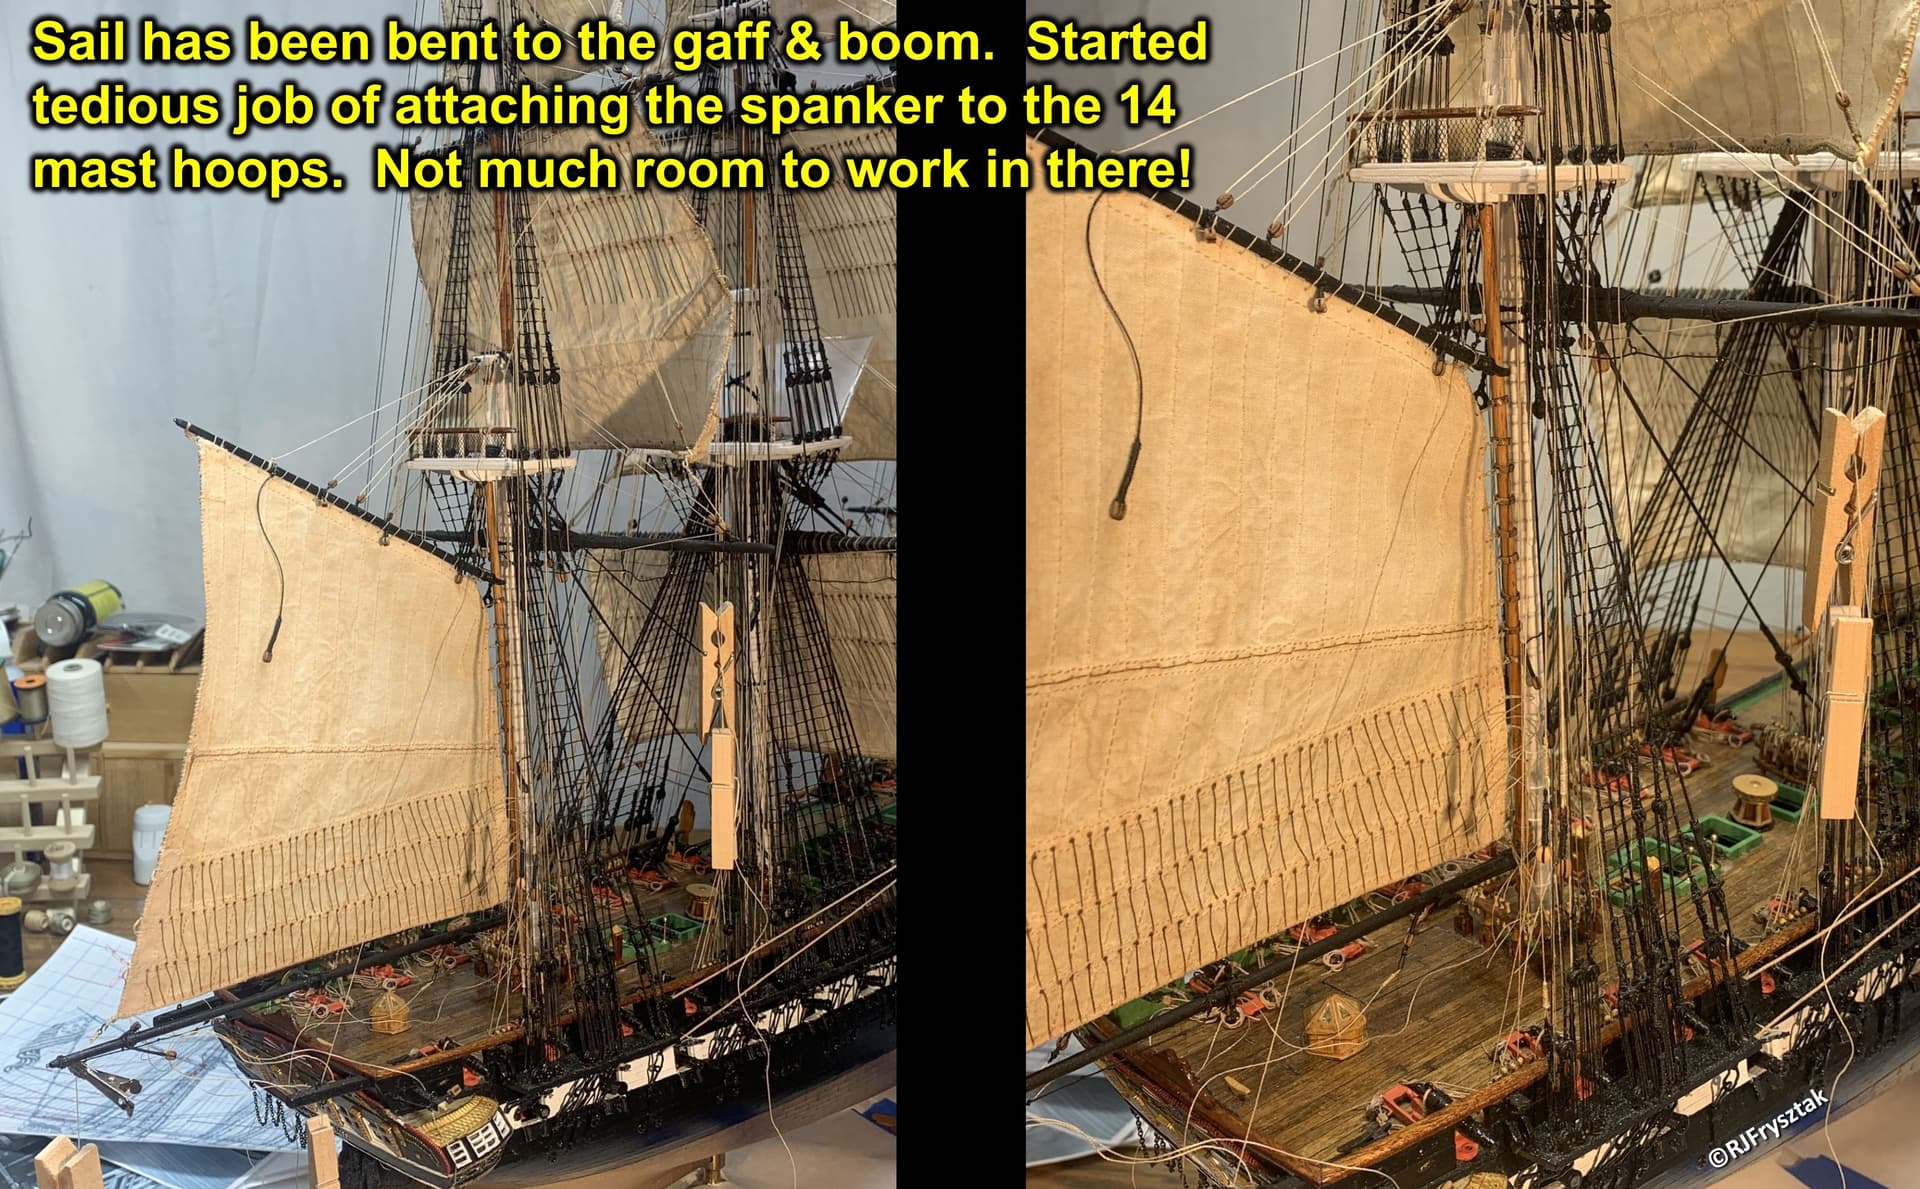
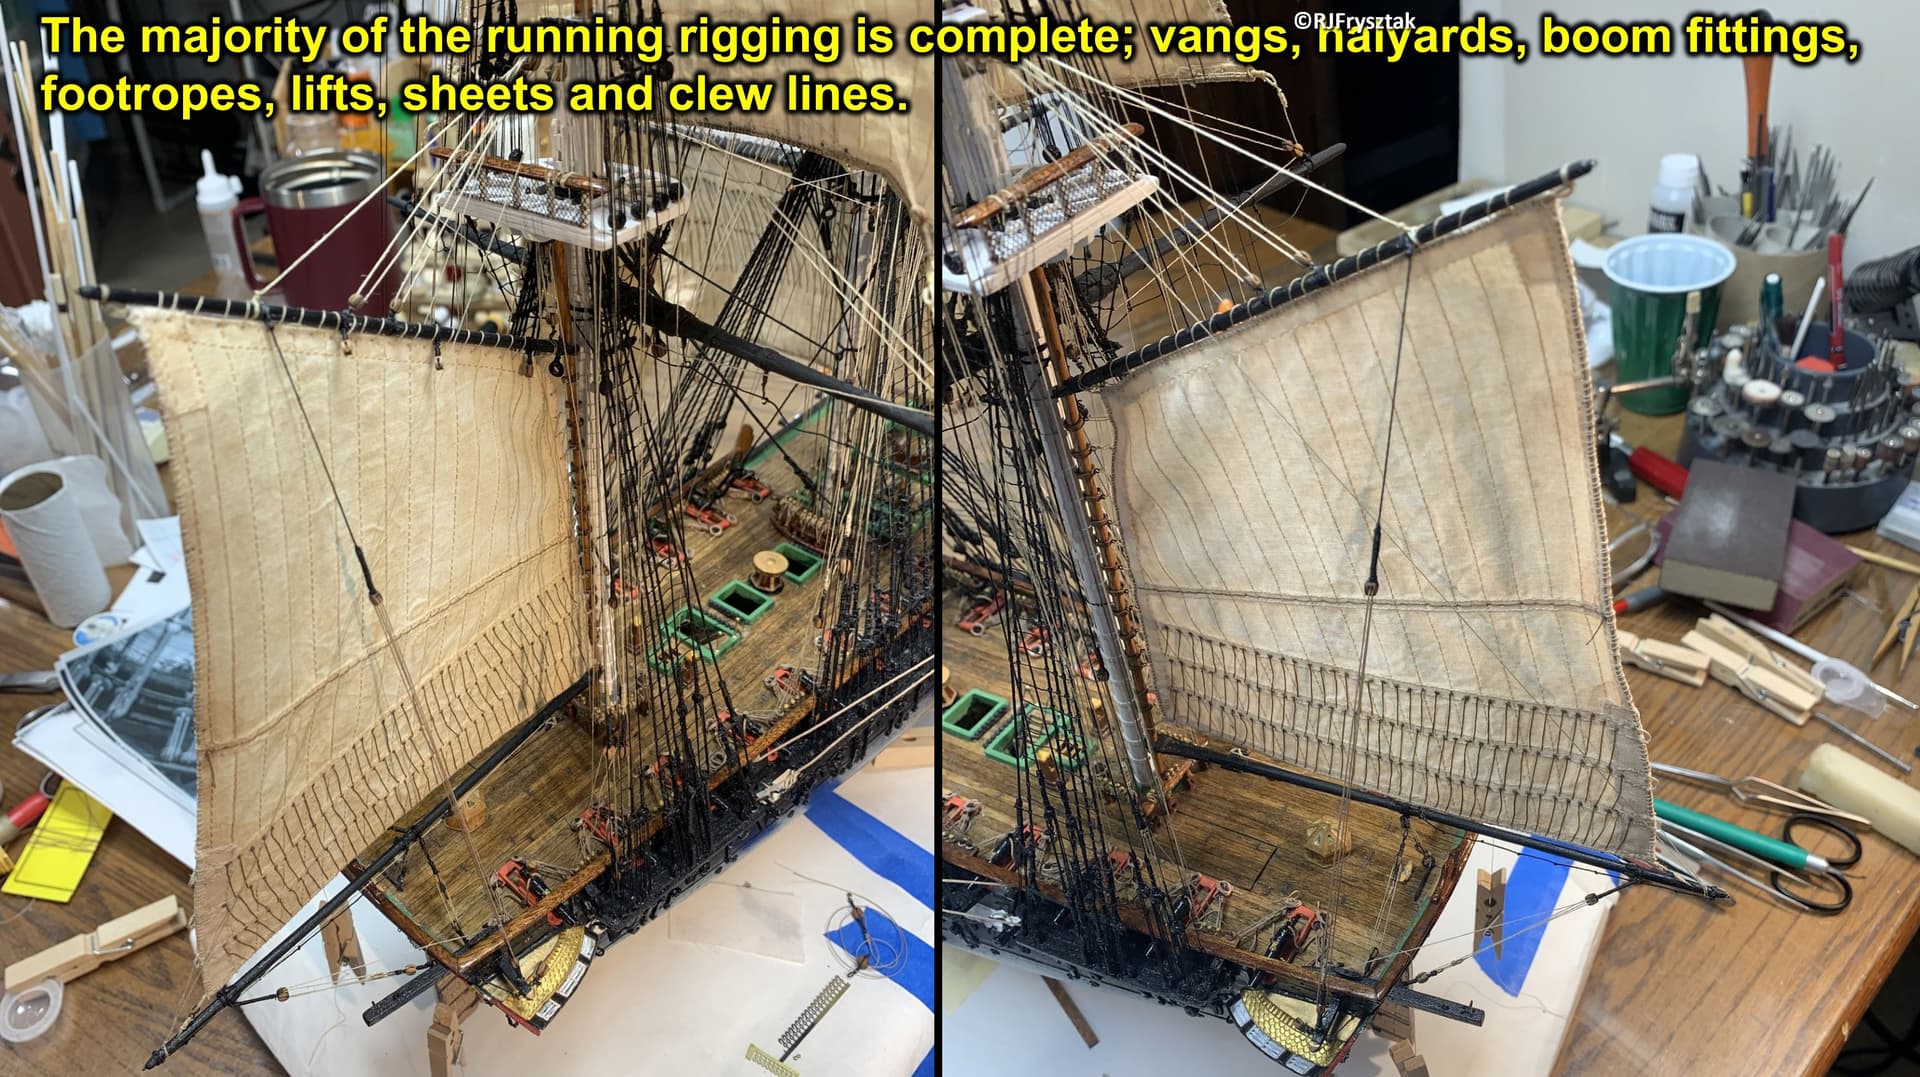
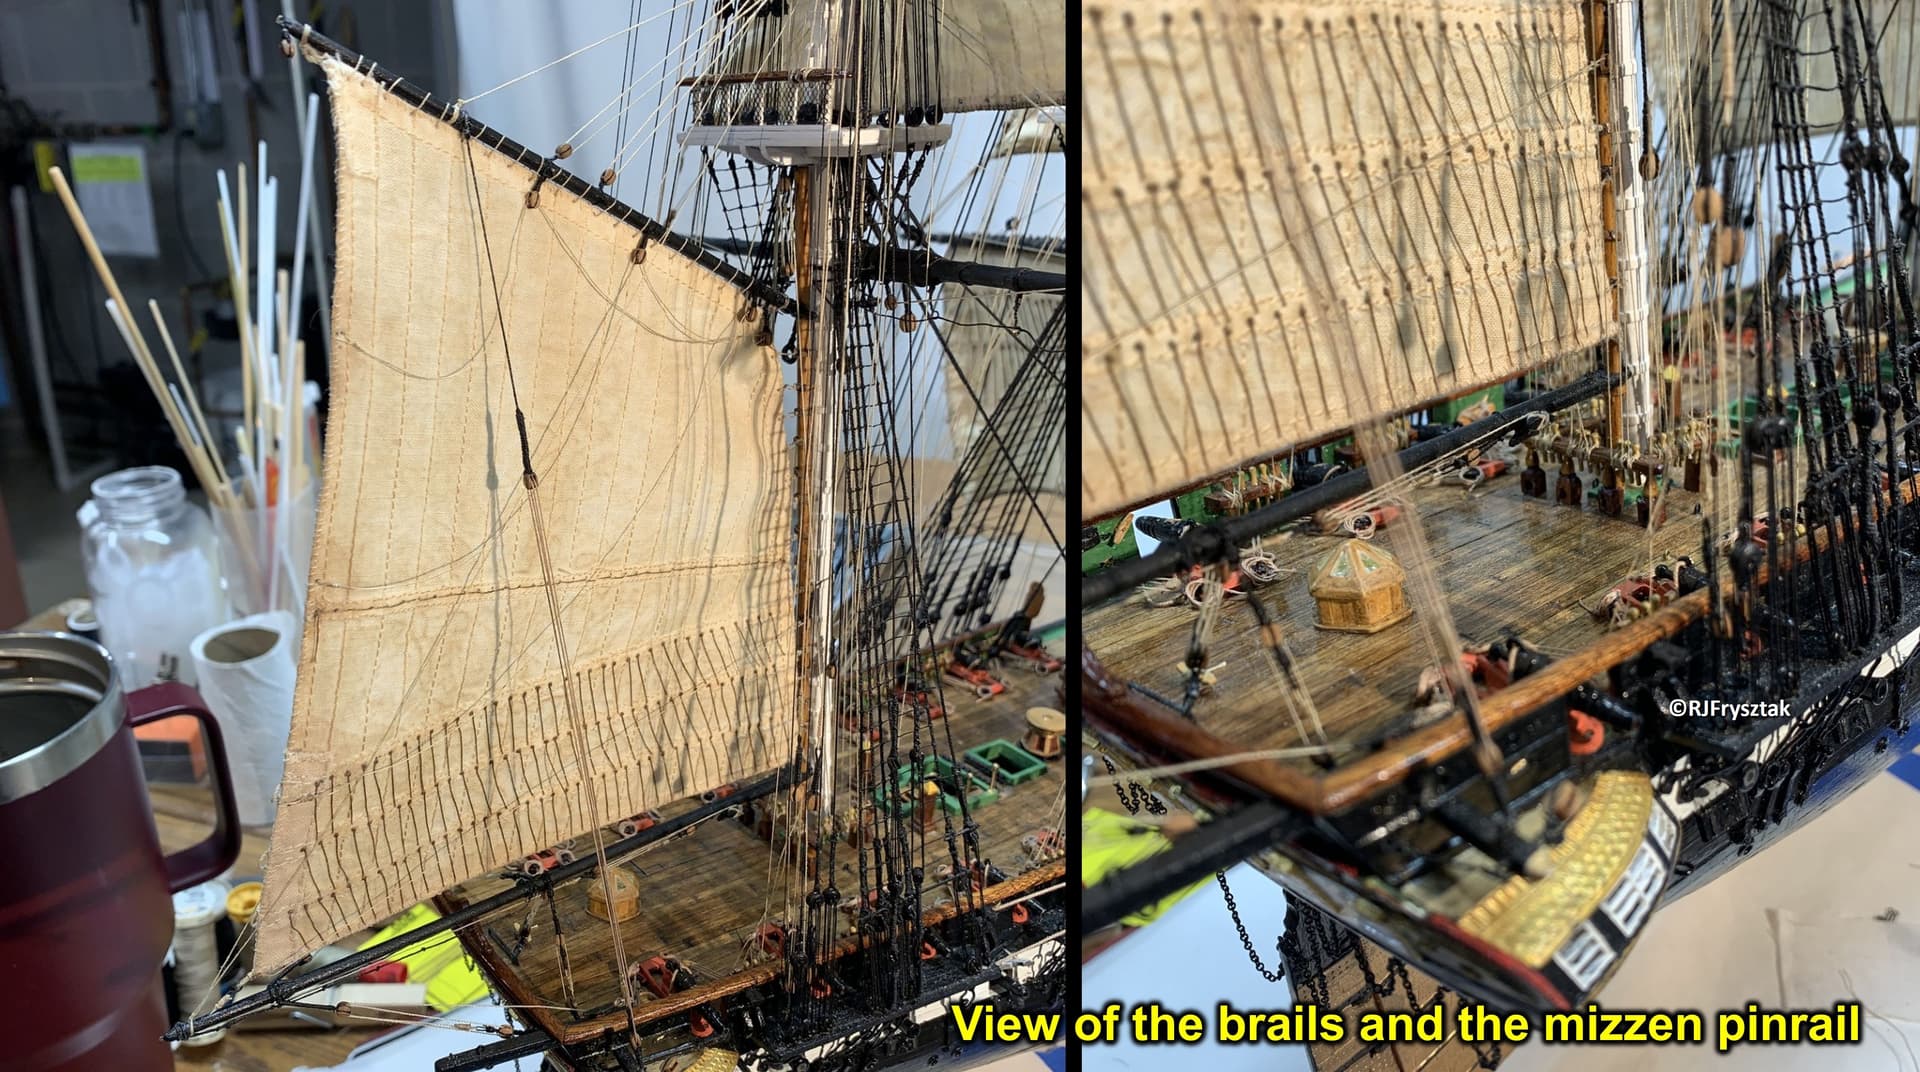
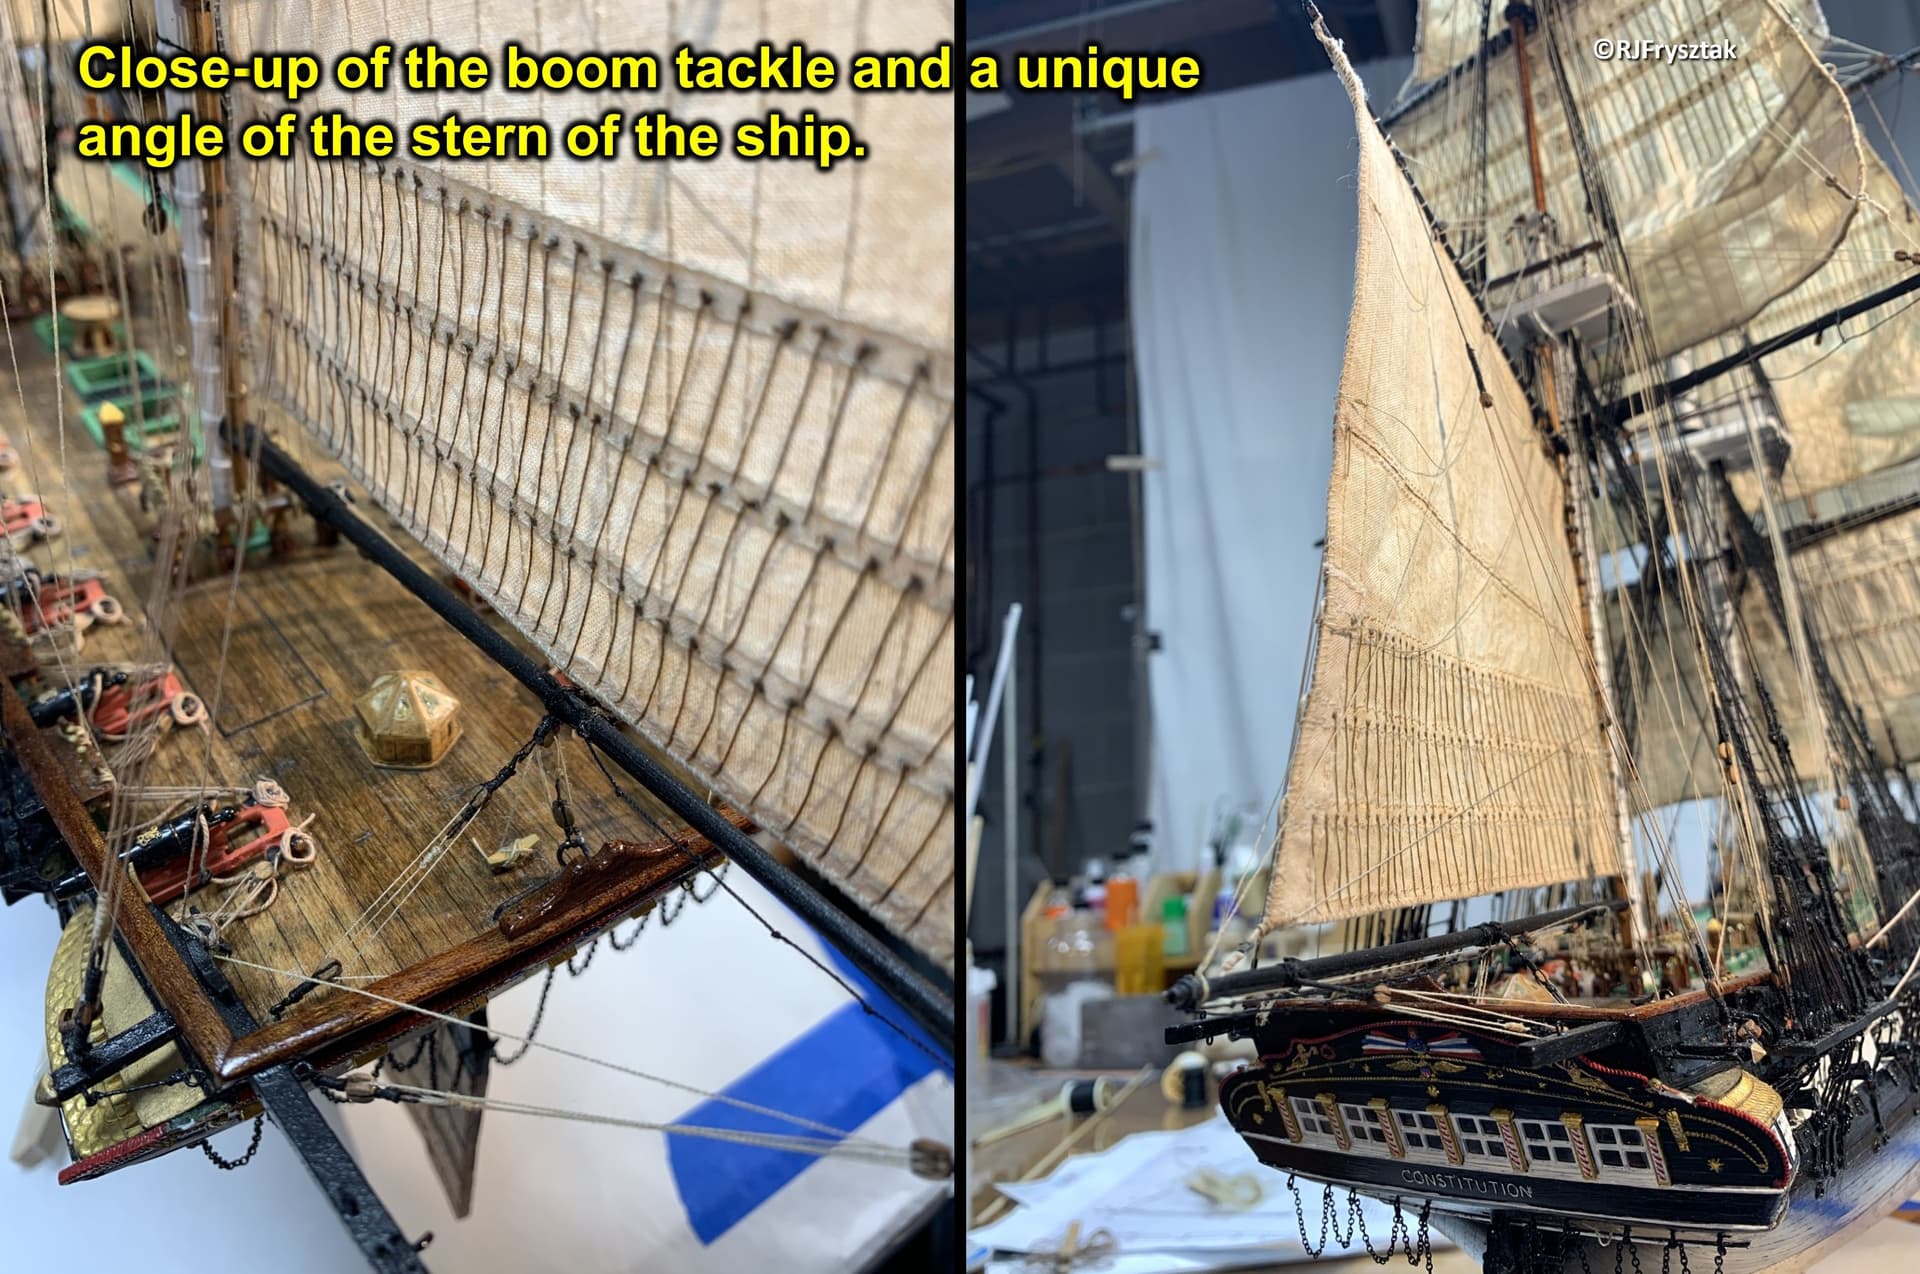
Well, I finally had a few solid days off work, and I made it pay off. Finished the mizzen topgallant and royal sails, then started on the spanker. Very unique rigging back there, unlike most of the typical yard sails. Lots of temporary bracing to get the sail mounted and then get the gaff and boom set correctly. I rigged it with the boom set slightly to starboard as if she is running in a slight cross breeze to match the 5-7 degrees of pitch on the sails.
Bob
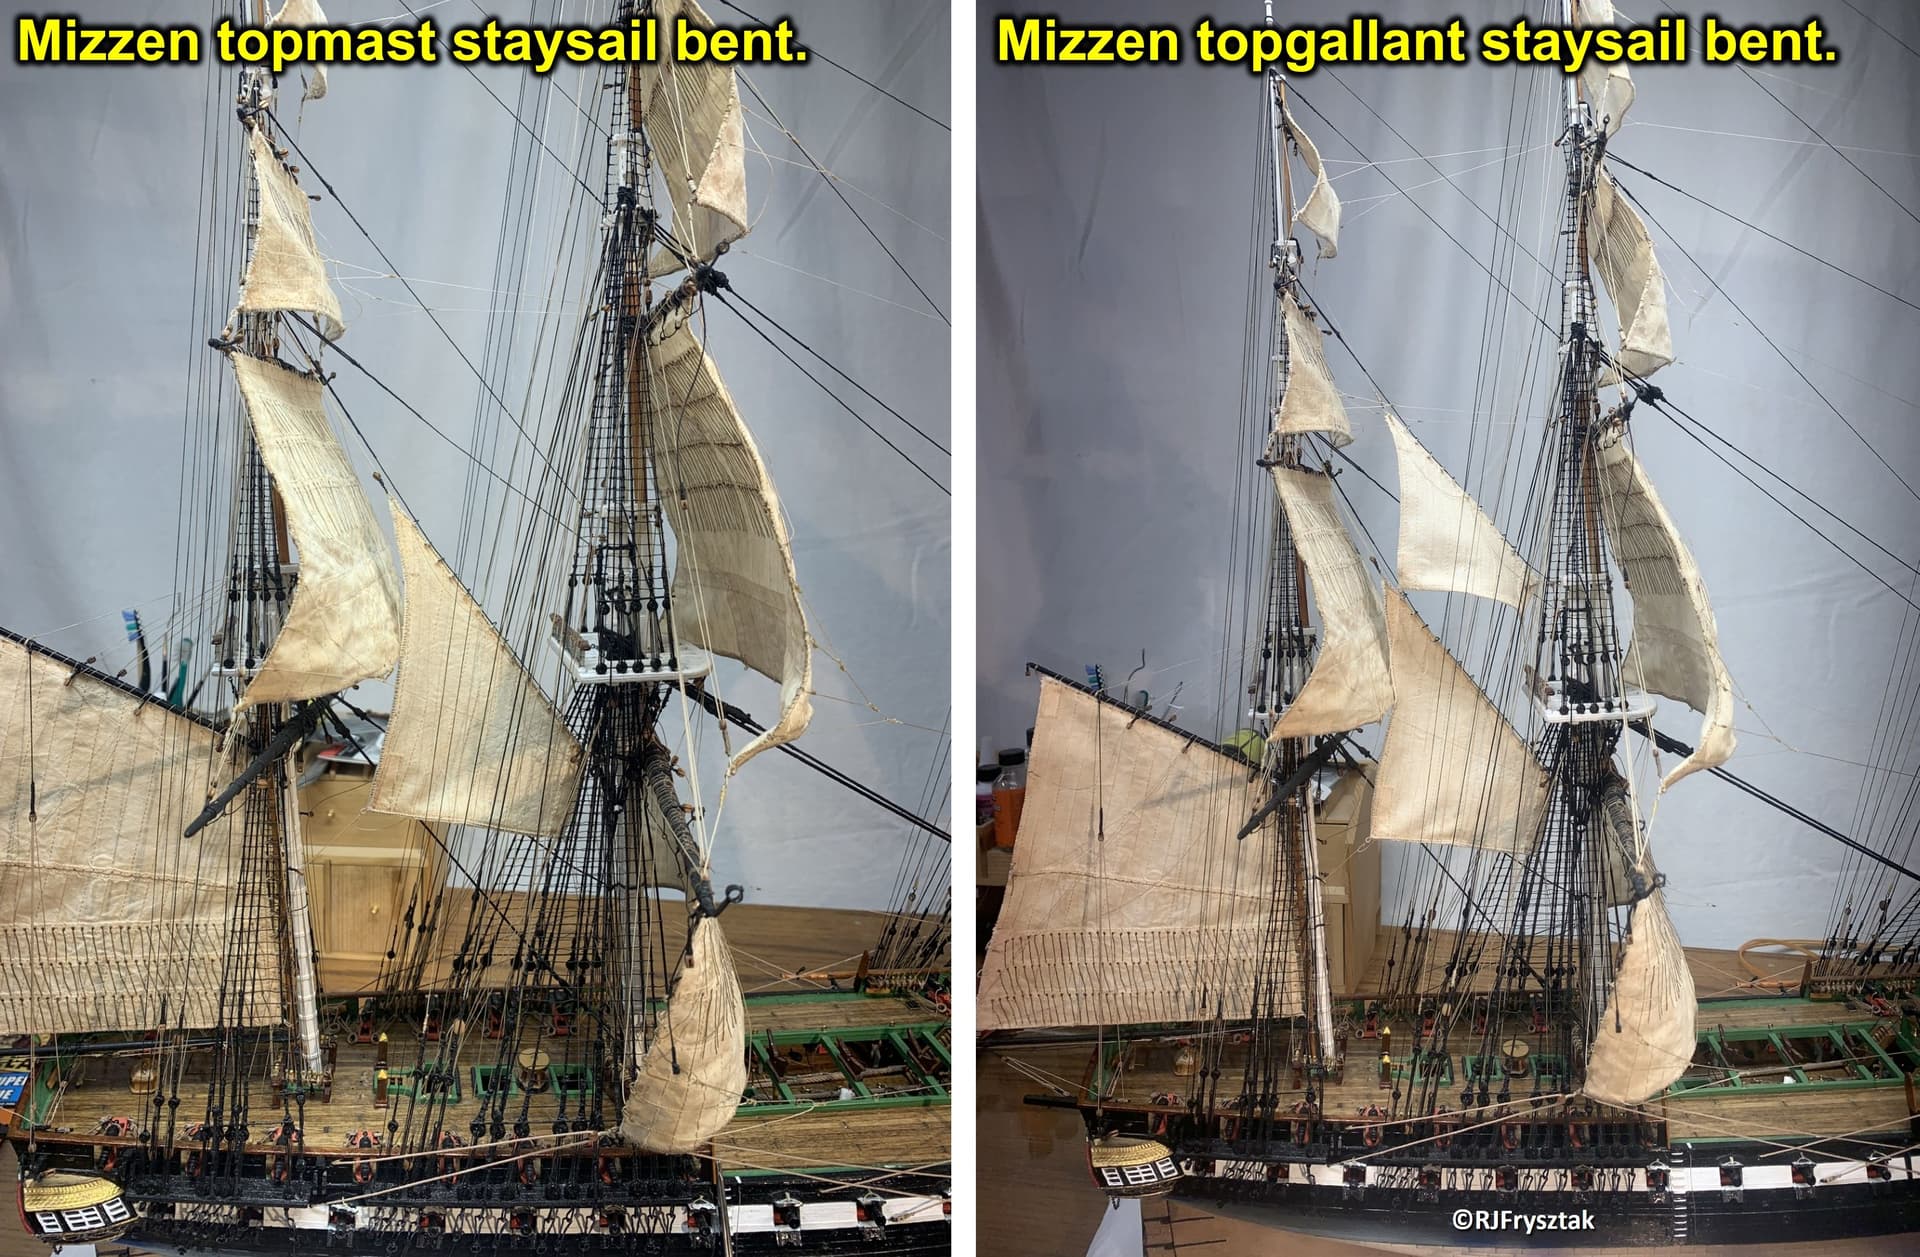
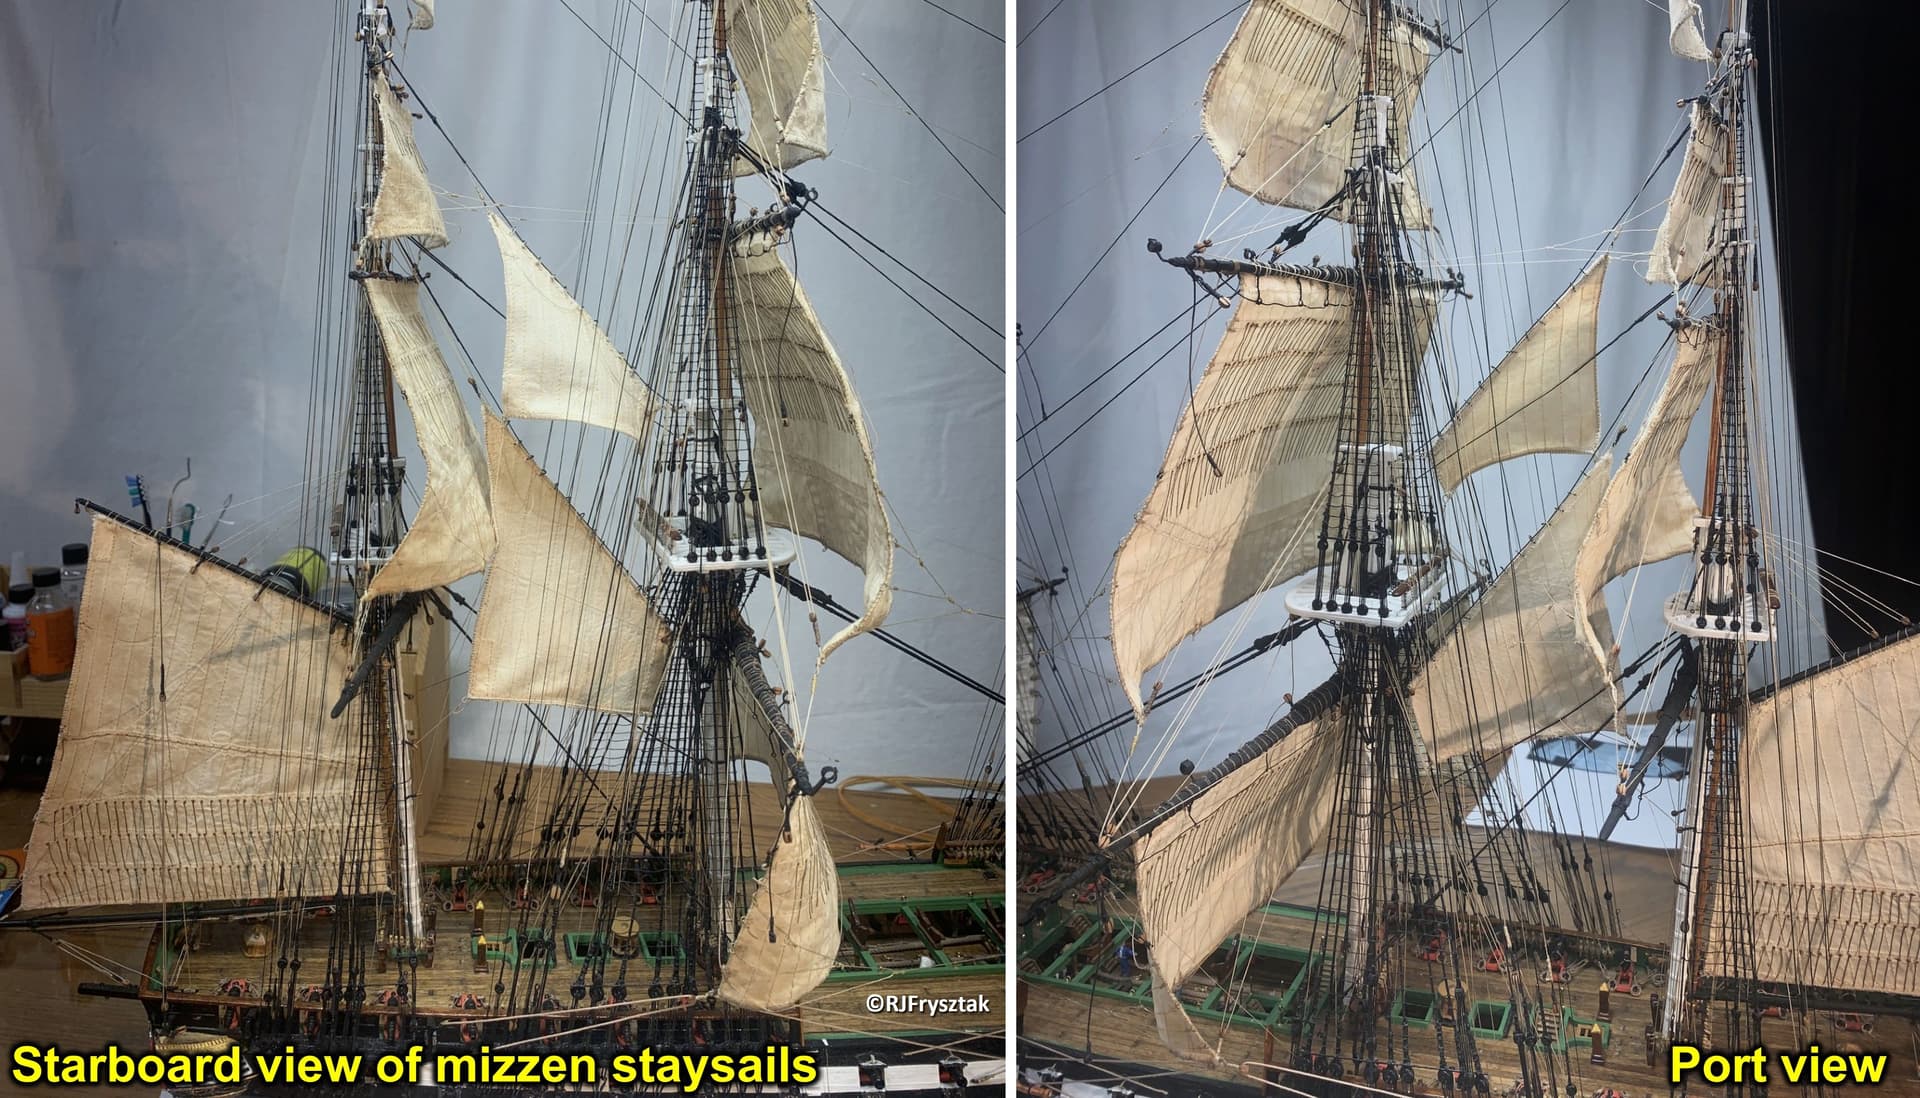
Started aft with mounting the staysails.
Have the mizzen topmast and topgallant staysails bent to the stays with hanks. All halyards, tacks and sheets are done and tied off at the rails. One more to go.
Take care. Stay warm.
Bob
that is some really beautiful work bob .
Thanks Steve. Been a long time coming, but I can see the finish line.
Hoping to take it to Nats this year (but I have said that before !).
Bob
Bob I’ve been following your posts on your USS Constitution build for quite a while, and just today registered on this site so I can comment. I’m shaking my head in amazement as I write this over your research and fabrication skills. I will definitely keep following because I can’t wait to see how you put your crew members in place.
I’m about a year behind you in my own Constitution build and I’m committed to building her as she looked at the height of her engagement with the Guerriere including the crew and marines. I won’t have as many sails as you to deal with (fighting sail only) but have to make them look realistically furled. I plan to embed the ship in “ocean water” too- we’ll see if I can manage that. Your careful and well documented rigging photos and notes are a big help to me. Thanks!
Thanks, SaltyDoug. It’s been a journey for sure. I am definitely a Type-A person, with an unhealthy attention to detail! But it certainly has paid off in the long run. The hardest parts are here near the end, where you need to pass lines through all the other lines without criss-crossing or looping around other lines. And not bumping the yards out of alignment. And…
The list goes on. But the light is certainly burning bright at the end of the tunnel.
Bob
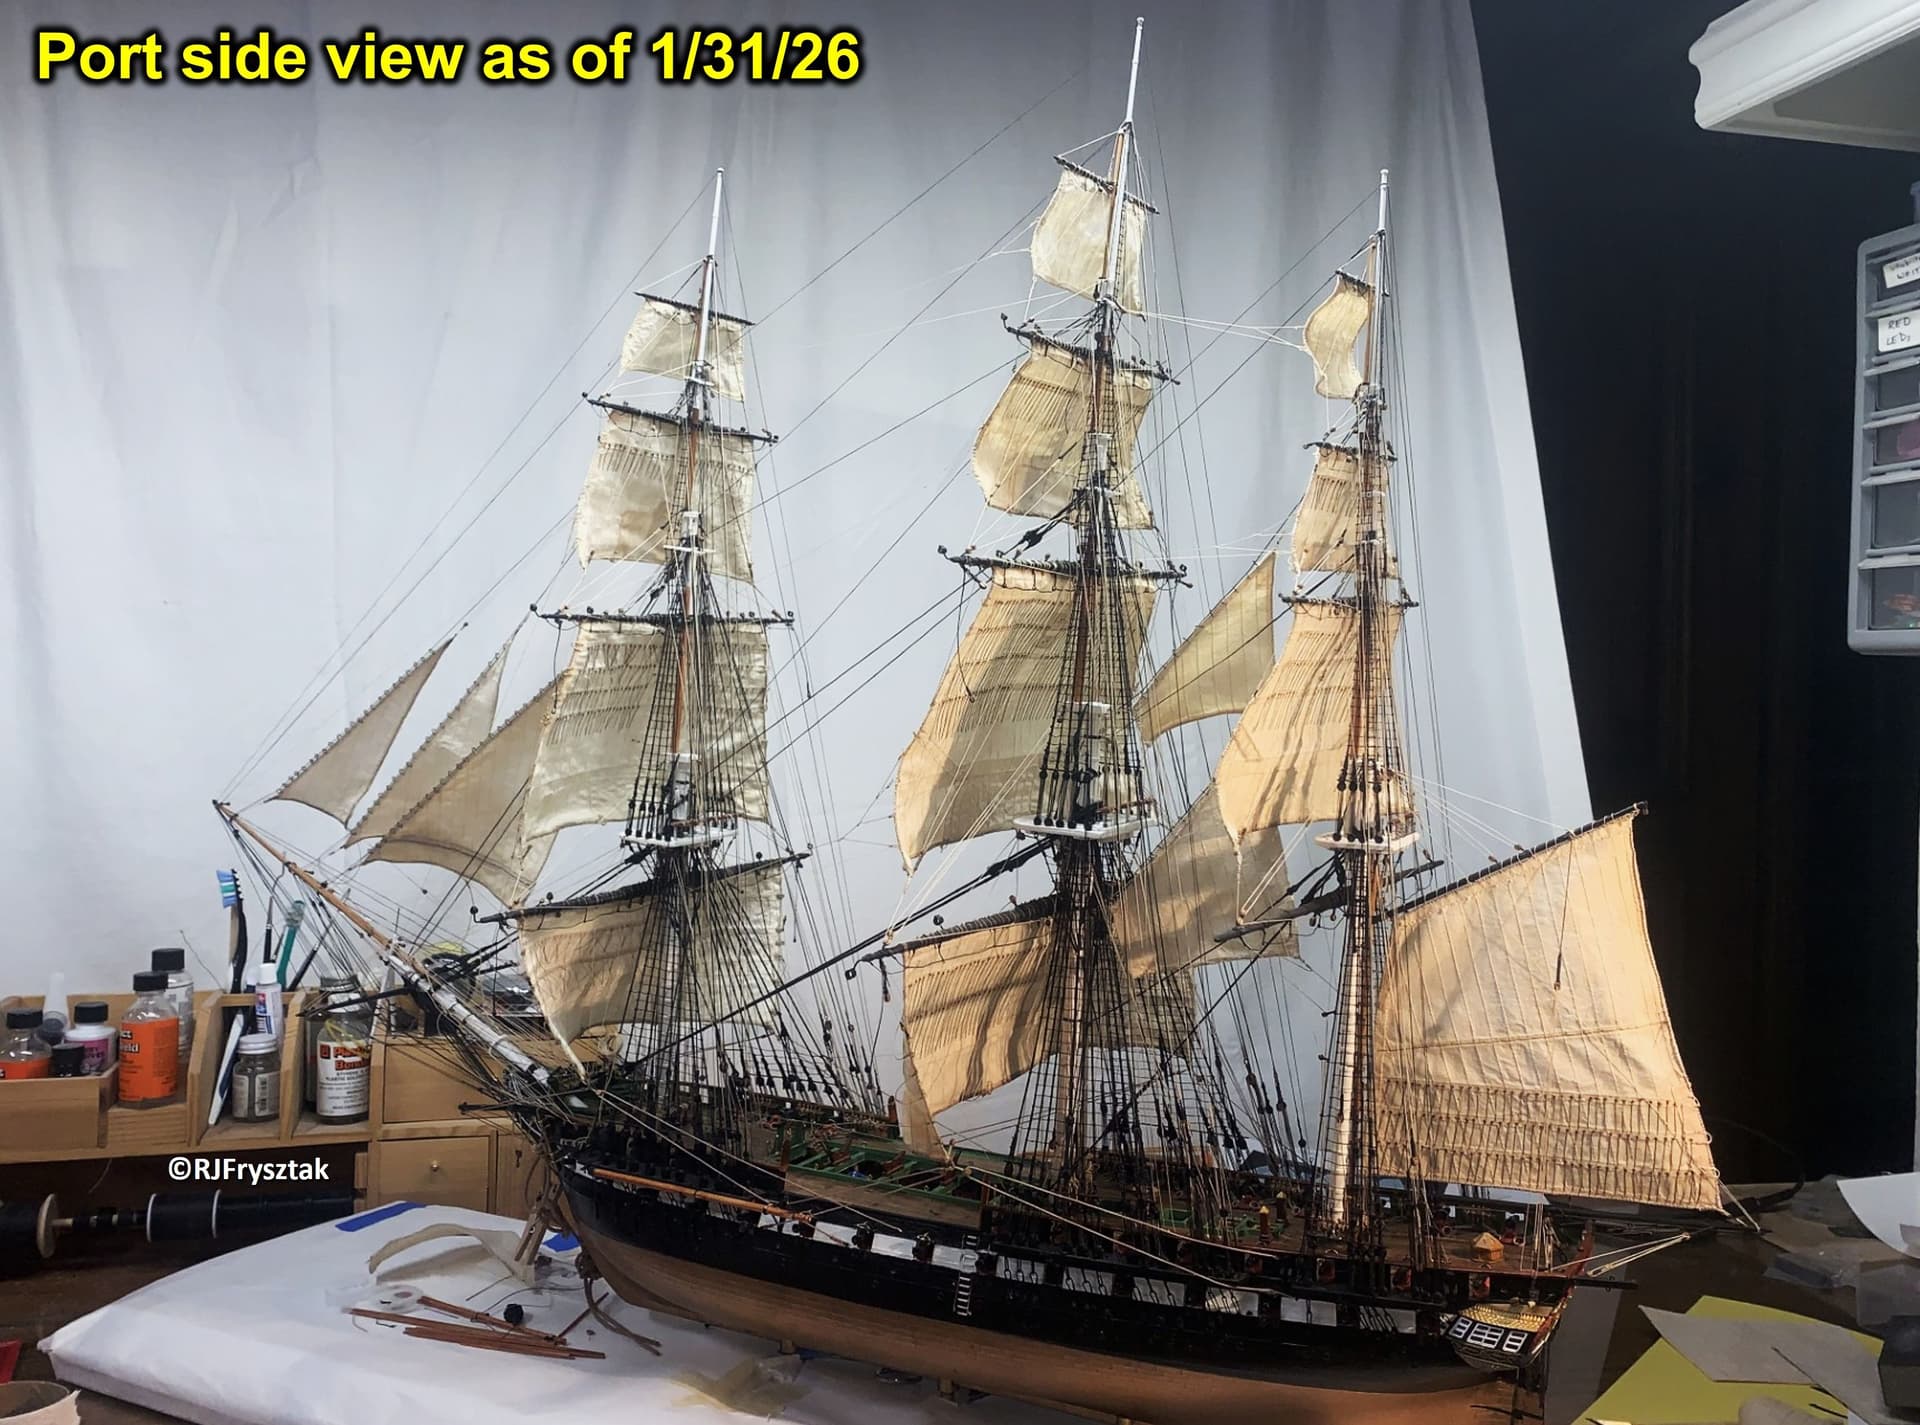
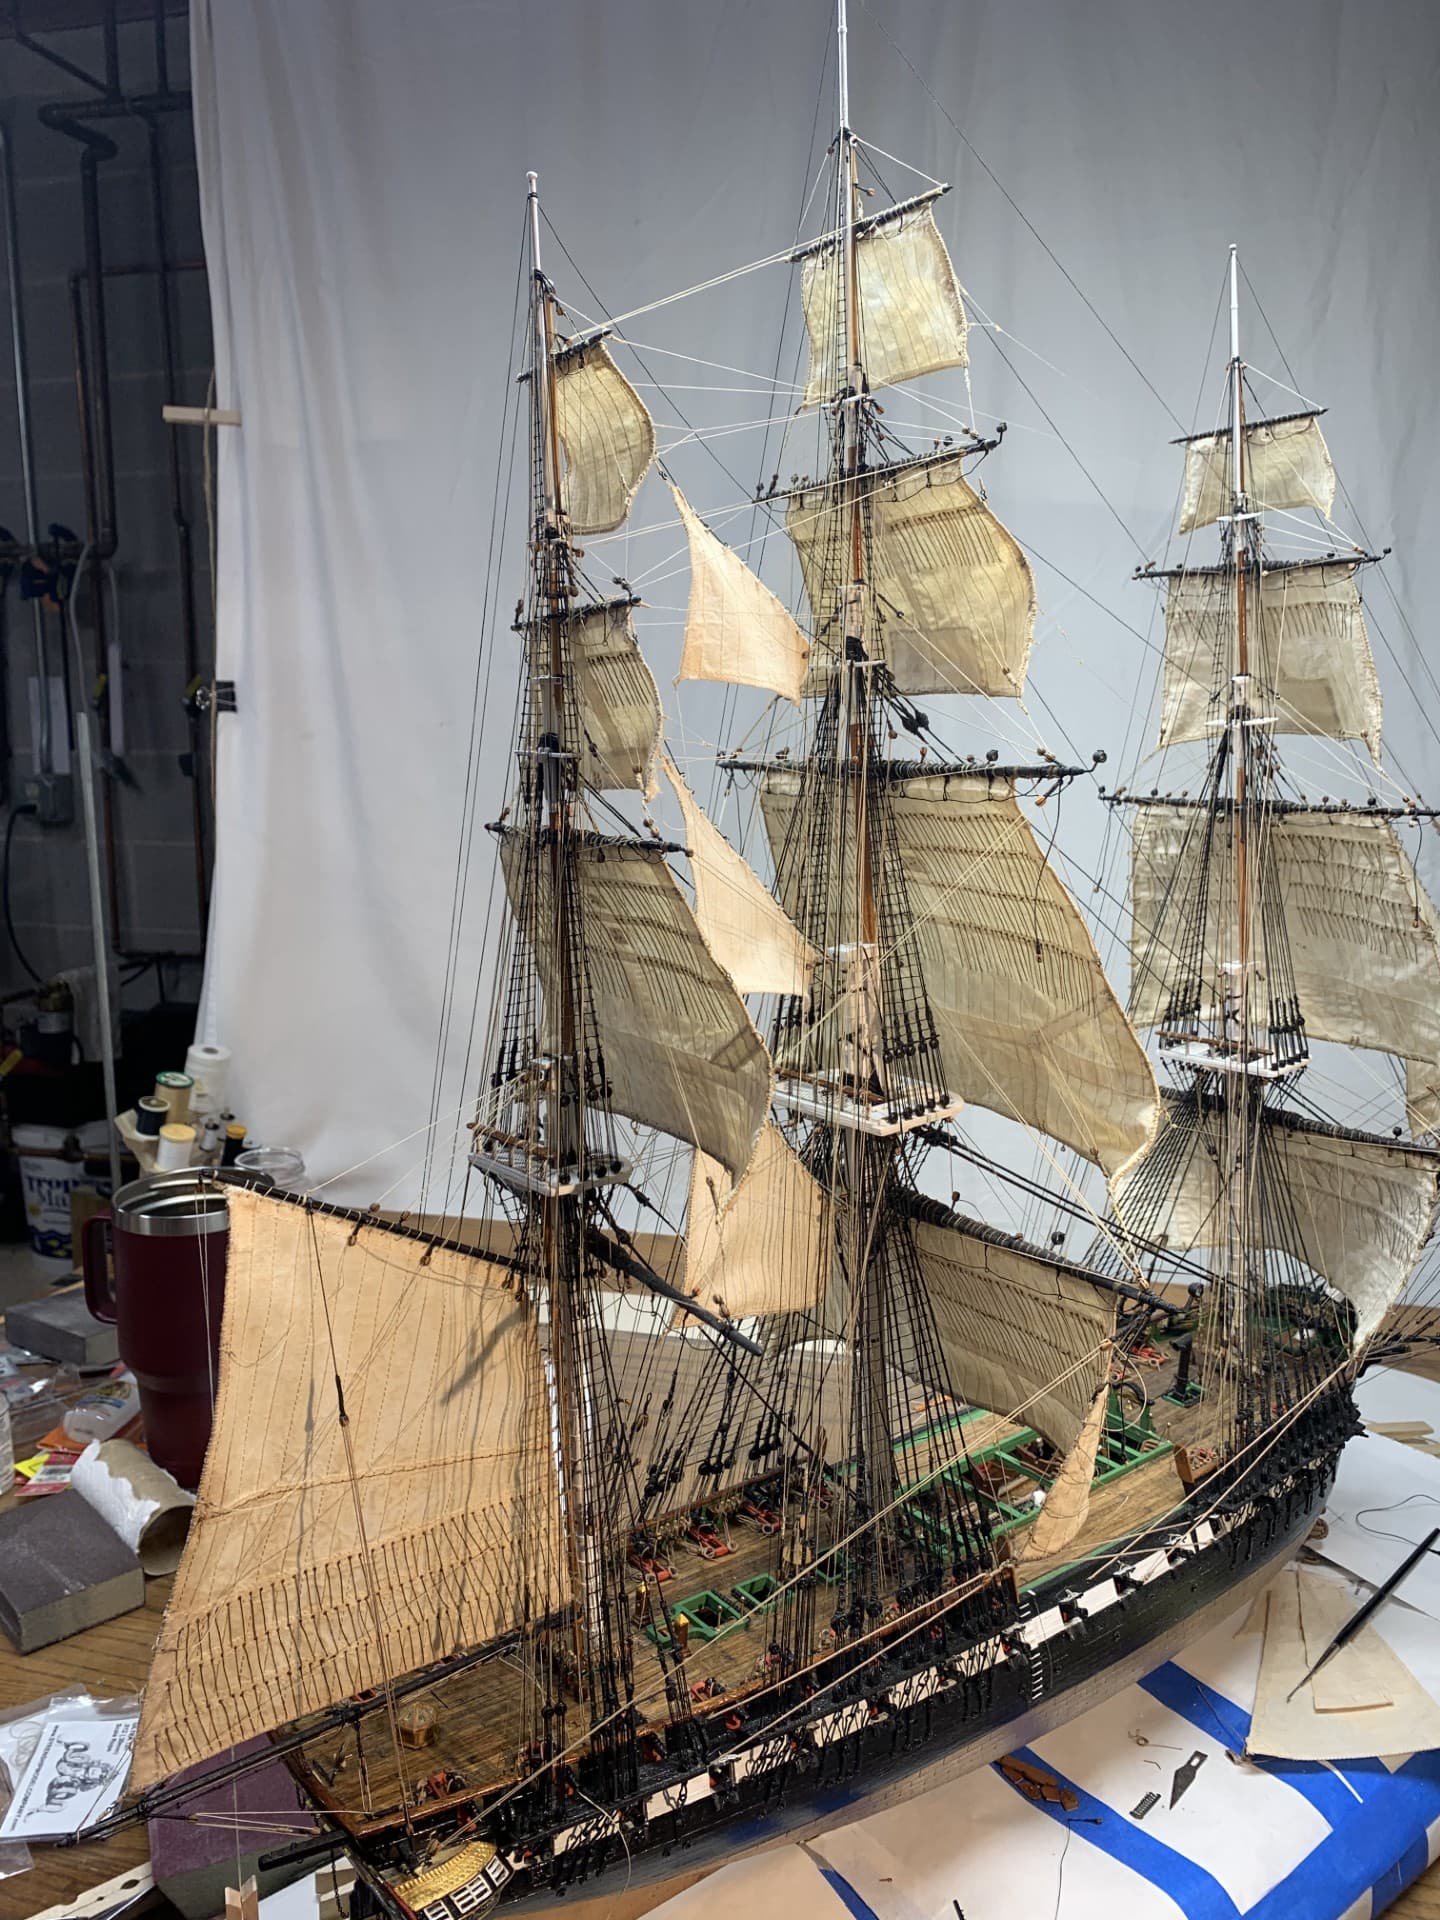
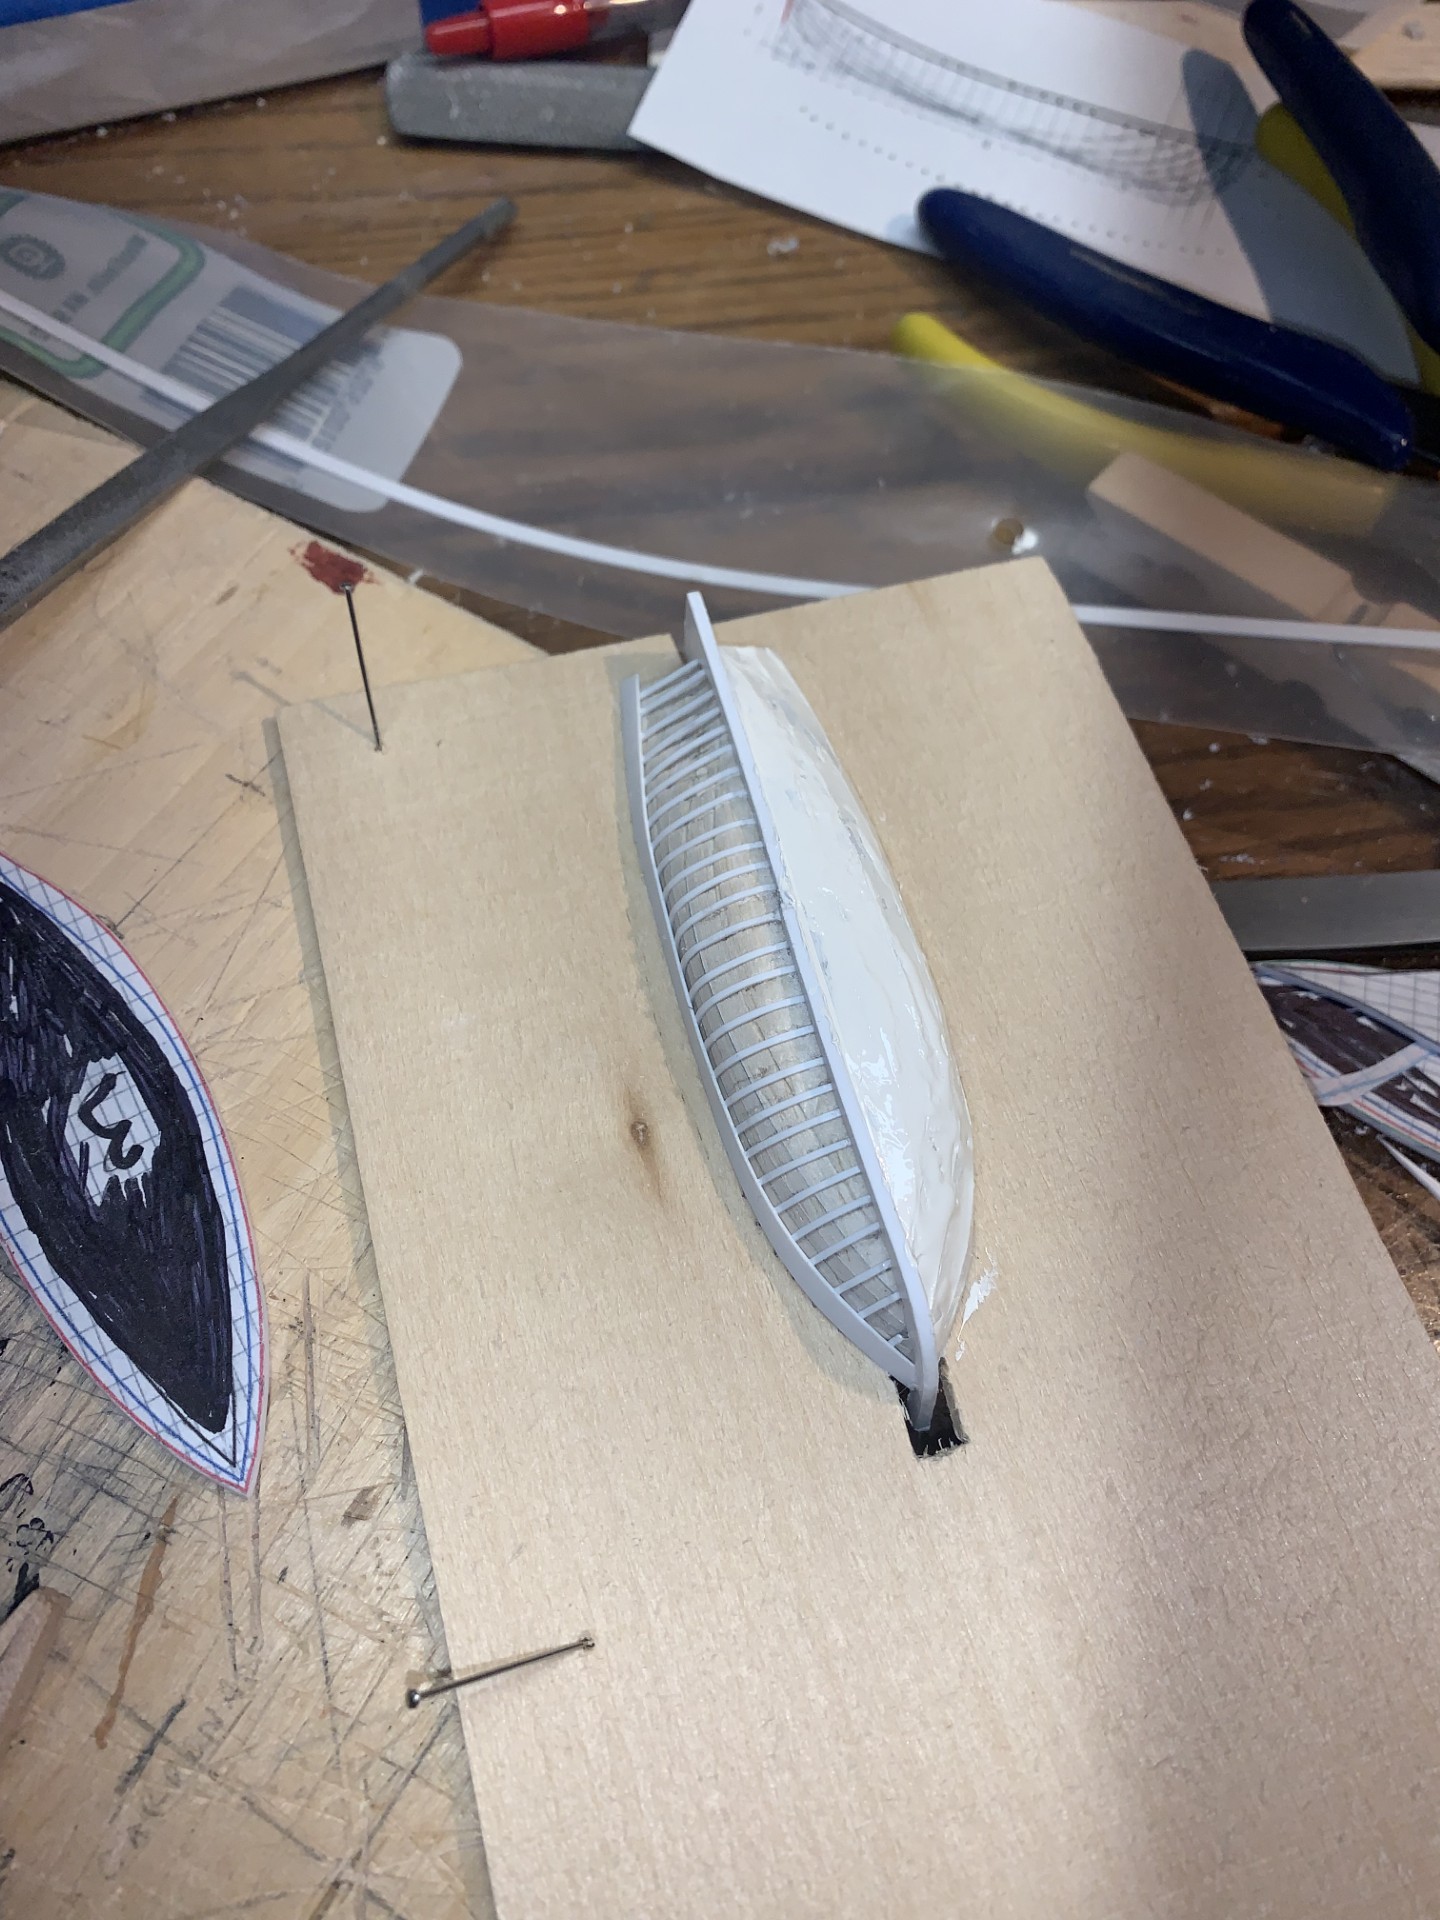
So finished up the mizzen staysails. Then went back and put in both the mizzen and the main braces. Also added all the blocks for the main staysails and foremast braces. Also started fabricating the 28’ cutters for the port & starboard davits. Since whaleboats weren’t delivered until very late in 1812, I decided to go with the cutters. Will also build a 25’ captains gig for the aft davits. Created a solid boat using the line & mold lines (old “bread & butter” method) out of balsa so I could easily shape it. Then glued it lightly to a board and drilled holes for the 27 frames. Used very fine styrene for the frames and then added the keel. Planking over with .015 styrene strips and used a bit of putty to cover the small gaps. Will probably put a second planking over that using thinner styrene strips and sand it down. More as I get further along.
Take care,
Bob