Hey Pawel, nice work on the tracks. I like the subject you’ve chosen. I see that the suspension is like the USA M113 APC. In the photo of the front, it resembled the Marine Corps LVTP-7 Amtrac. Anyway I’ll be keeping tabs on this build. It looks good so far. Good luck.
It is an M113 suspension. The M548 is a modified M113 with the hull cut away and reconfigured in the front to be a cargo vehicle as opposed to an APC. The engine, running gear, and lower hull are all the same as an M113.
Wow, I had clean forgotten that the tracks were a link different from each other–memory wants to put that down to the “stagger” in the torsion bars, that one on one side is ahead of the other.
That’s funny about the missing links there but great job fixing the issue!
Hello everybody!
I sure did hope I could post an update here sooner… But, like they say - better late than never! The thing is the interior of the AFV Club kit is pretty barren, and without the windshield and roof it will be very visible… Eduard set 35906 helps a little, but I also had to design my own decals, then get them printed - but finally I can show you my results.
So here are some details and first decals on:
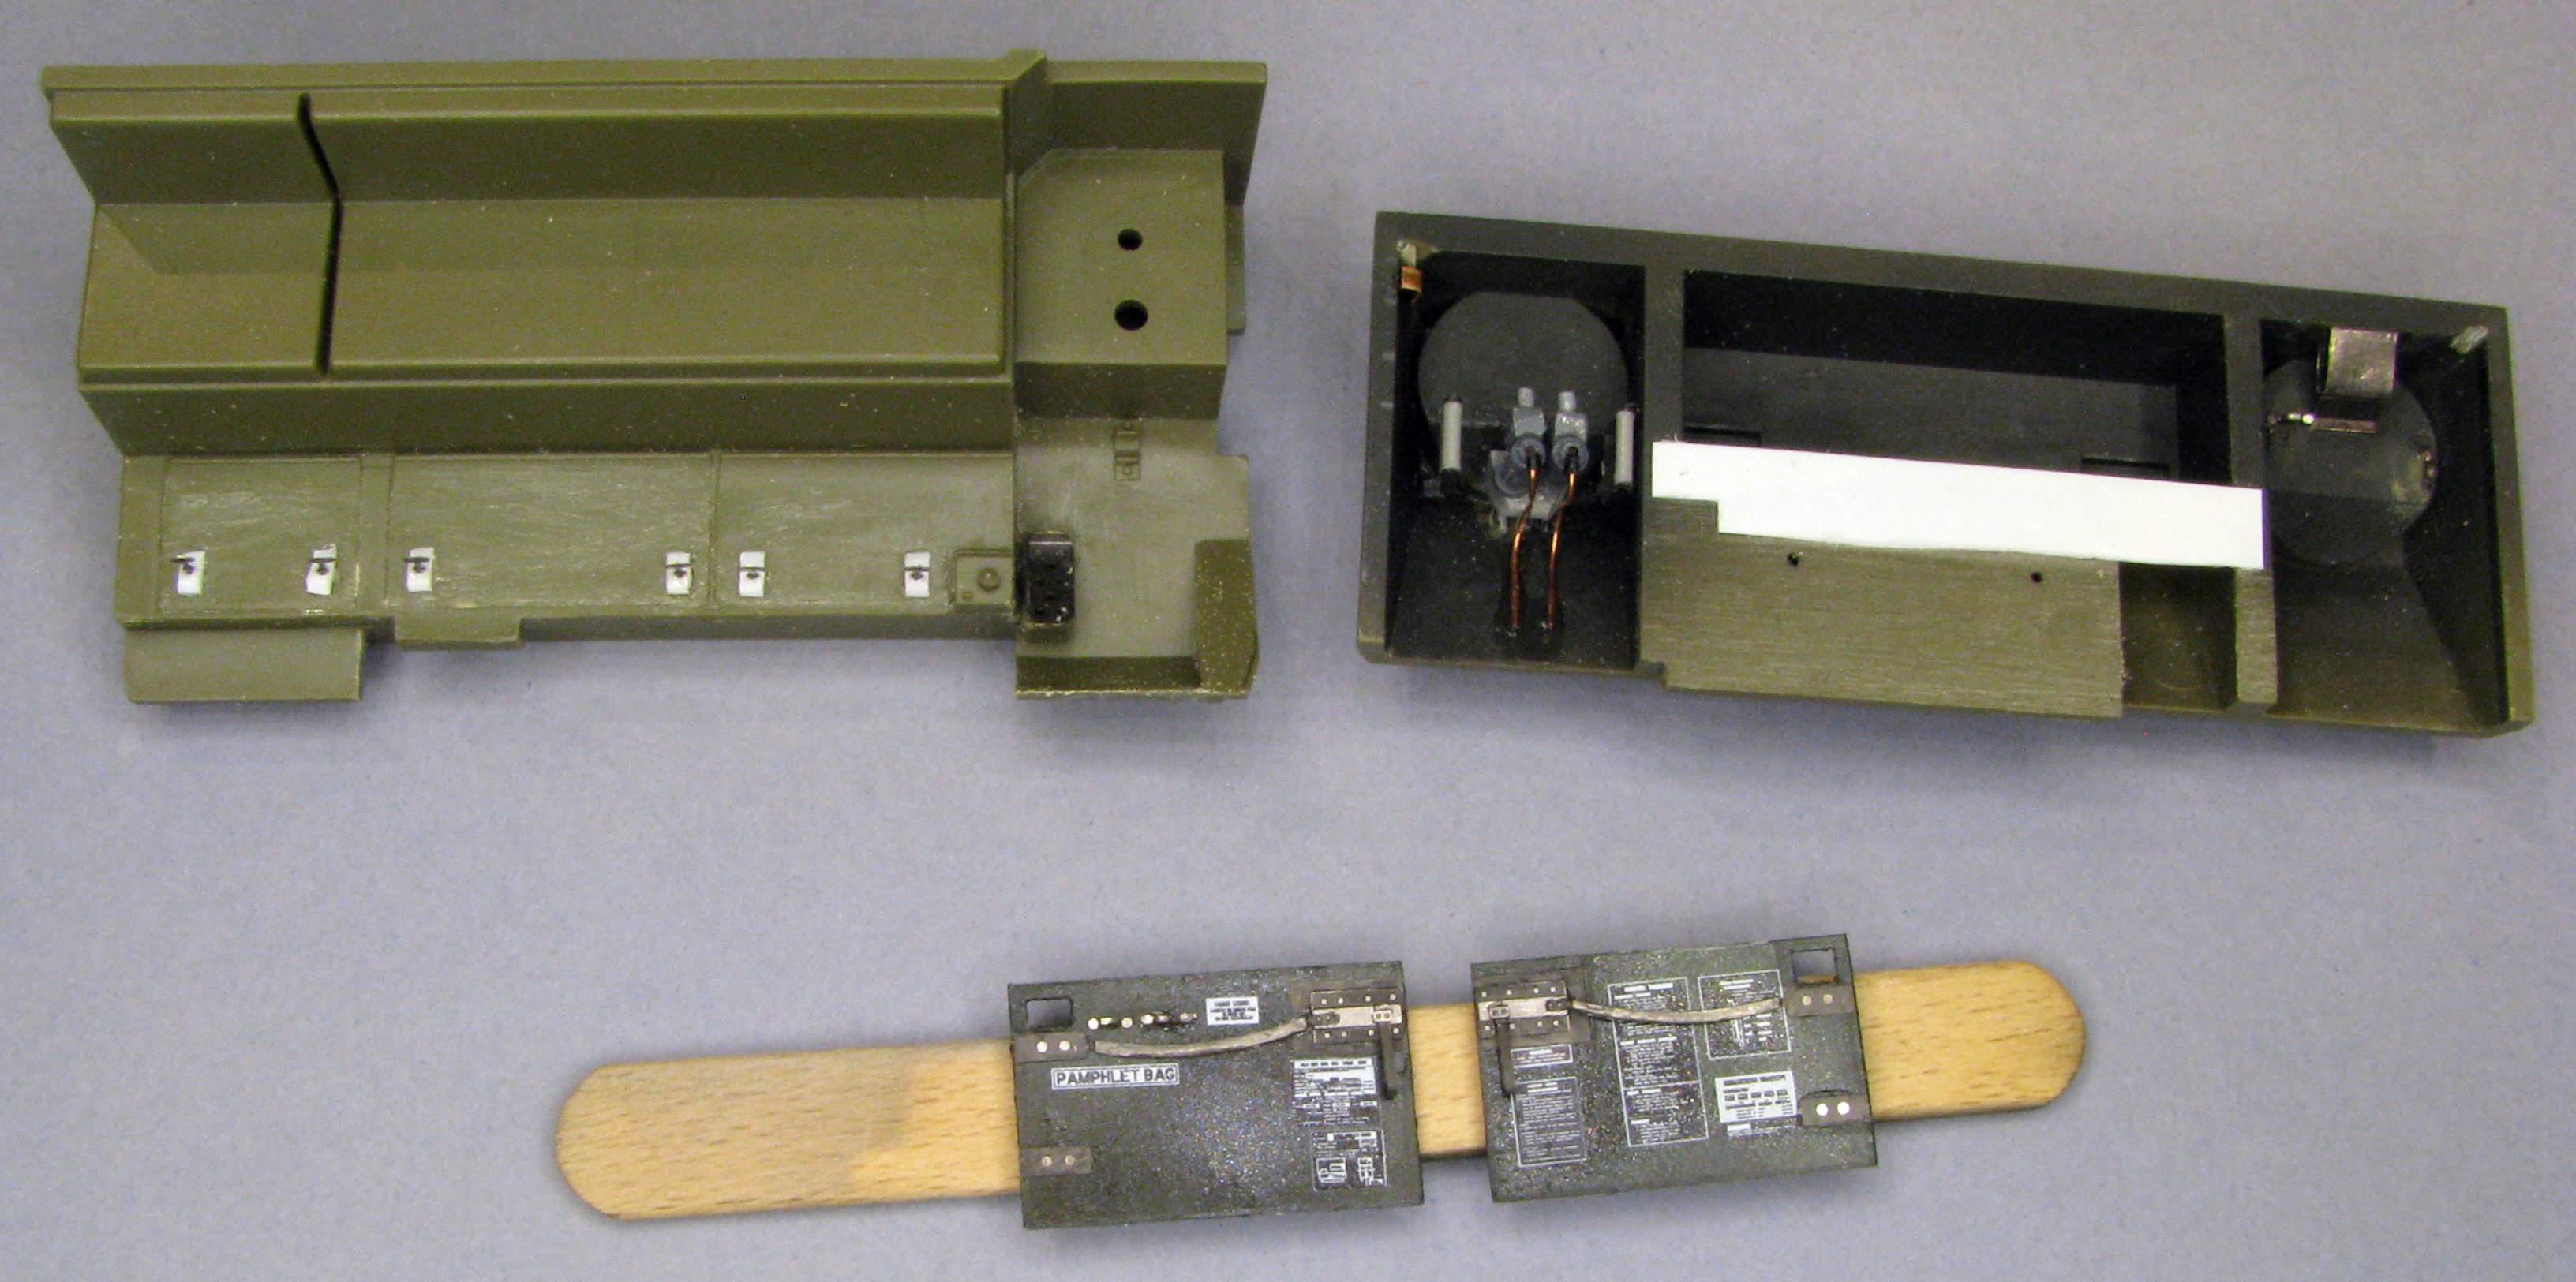
And here are the interior parts painted up and more decals… I have also made the fire extinguisher. There will also be a 3D printed flashlight, and I think I have to 3D print the fire extinguishers, too, for future projects.

Here’s a link to the 3D prints in case somebody could use them:
https://www.shapeways.com/shops/nam-models?section=1%3A35&s=0
So, how do you like my data plates?
Thanks for lookin’ and have a nice day
Paweł
Hello!
So here’s another update on this one…
I have built a first aid kit and a flashlight (it’s 3D printed), here’s what they look like in big magnification:
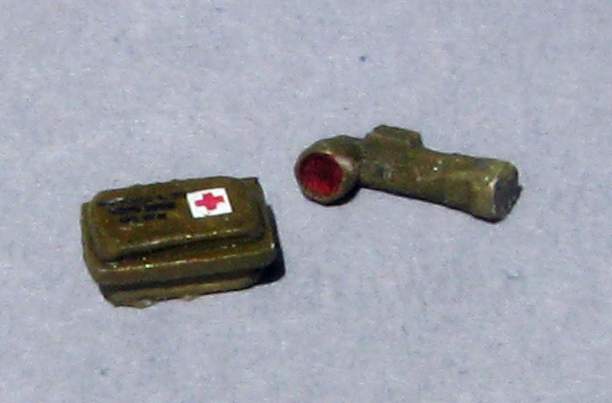
In case anybody needs a flashligh like this it can be had here:
https://www.shapeways.com/product/8QYFT3D3D/1-35-mx-991-u-flashlight-16x
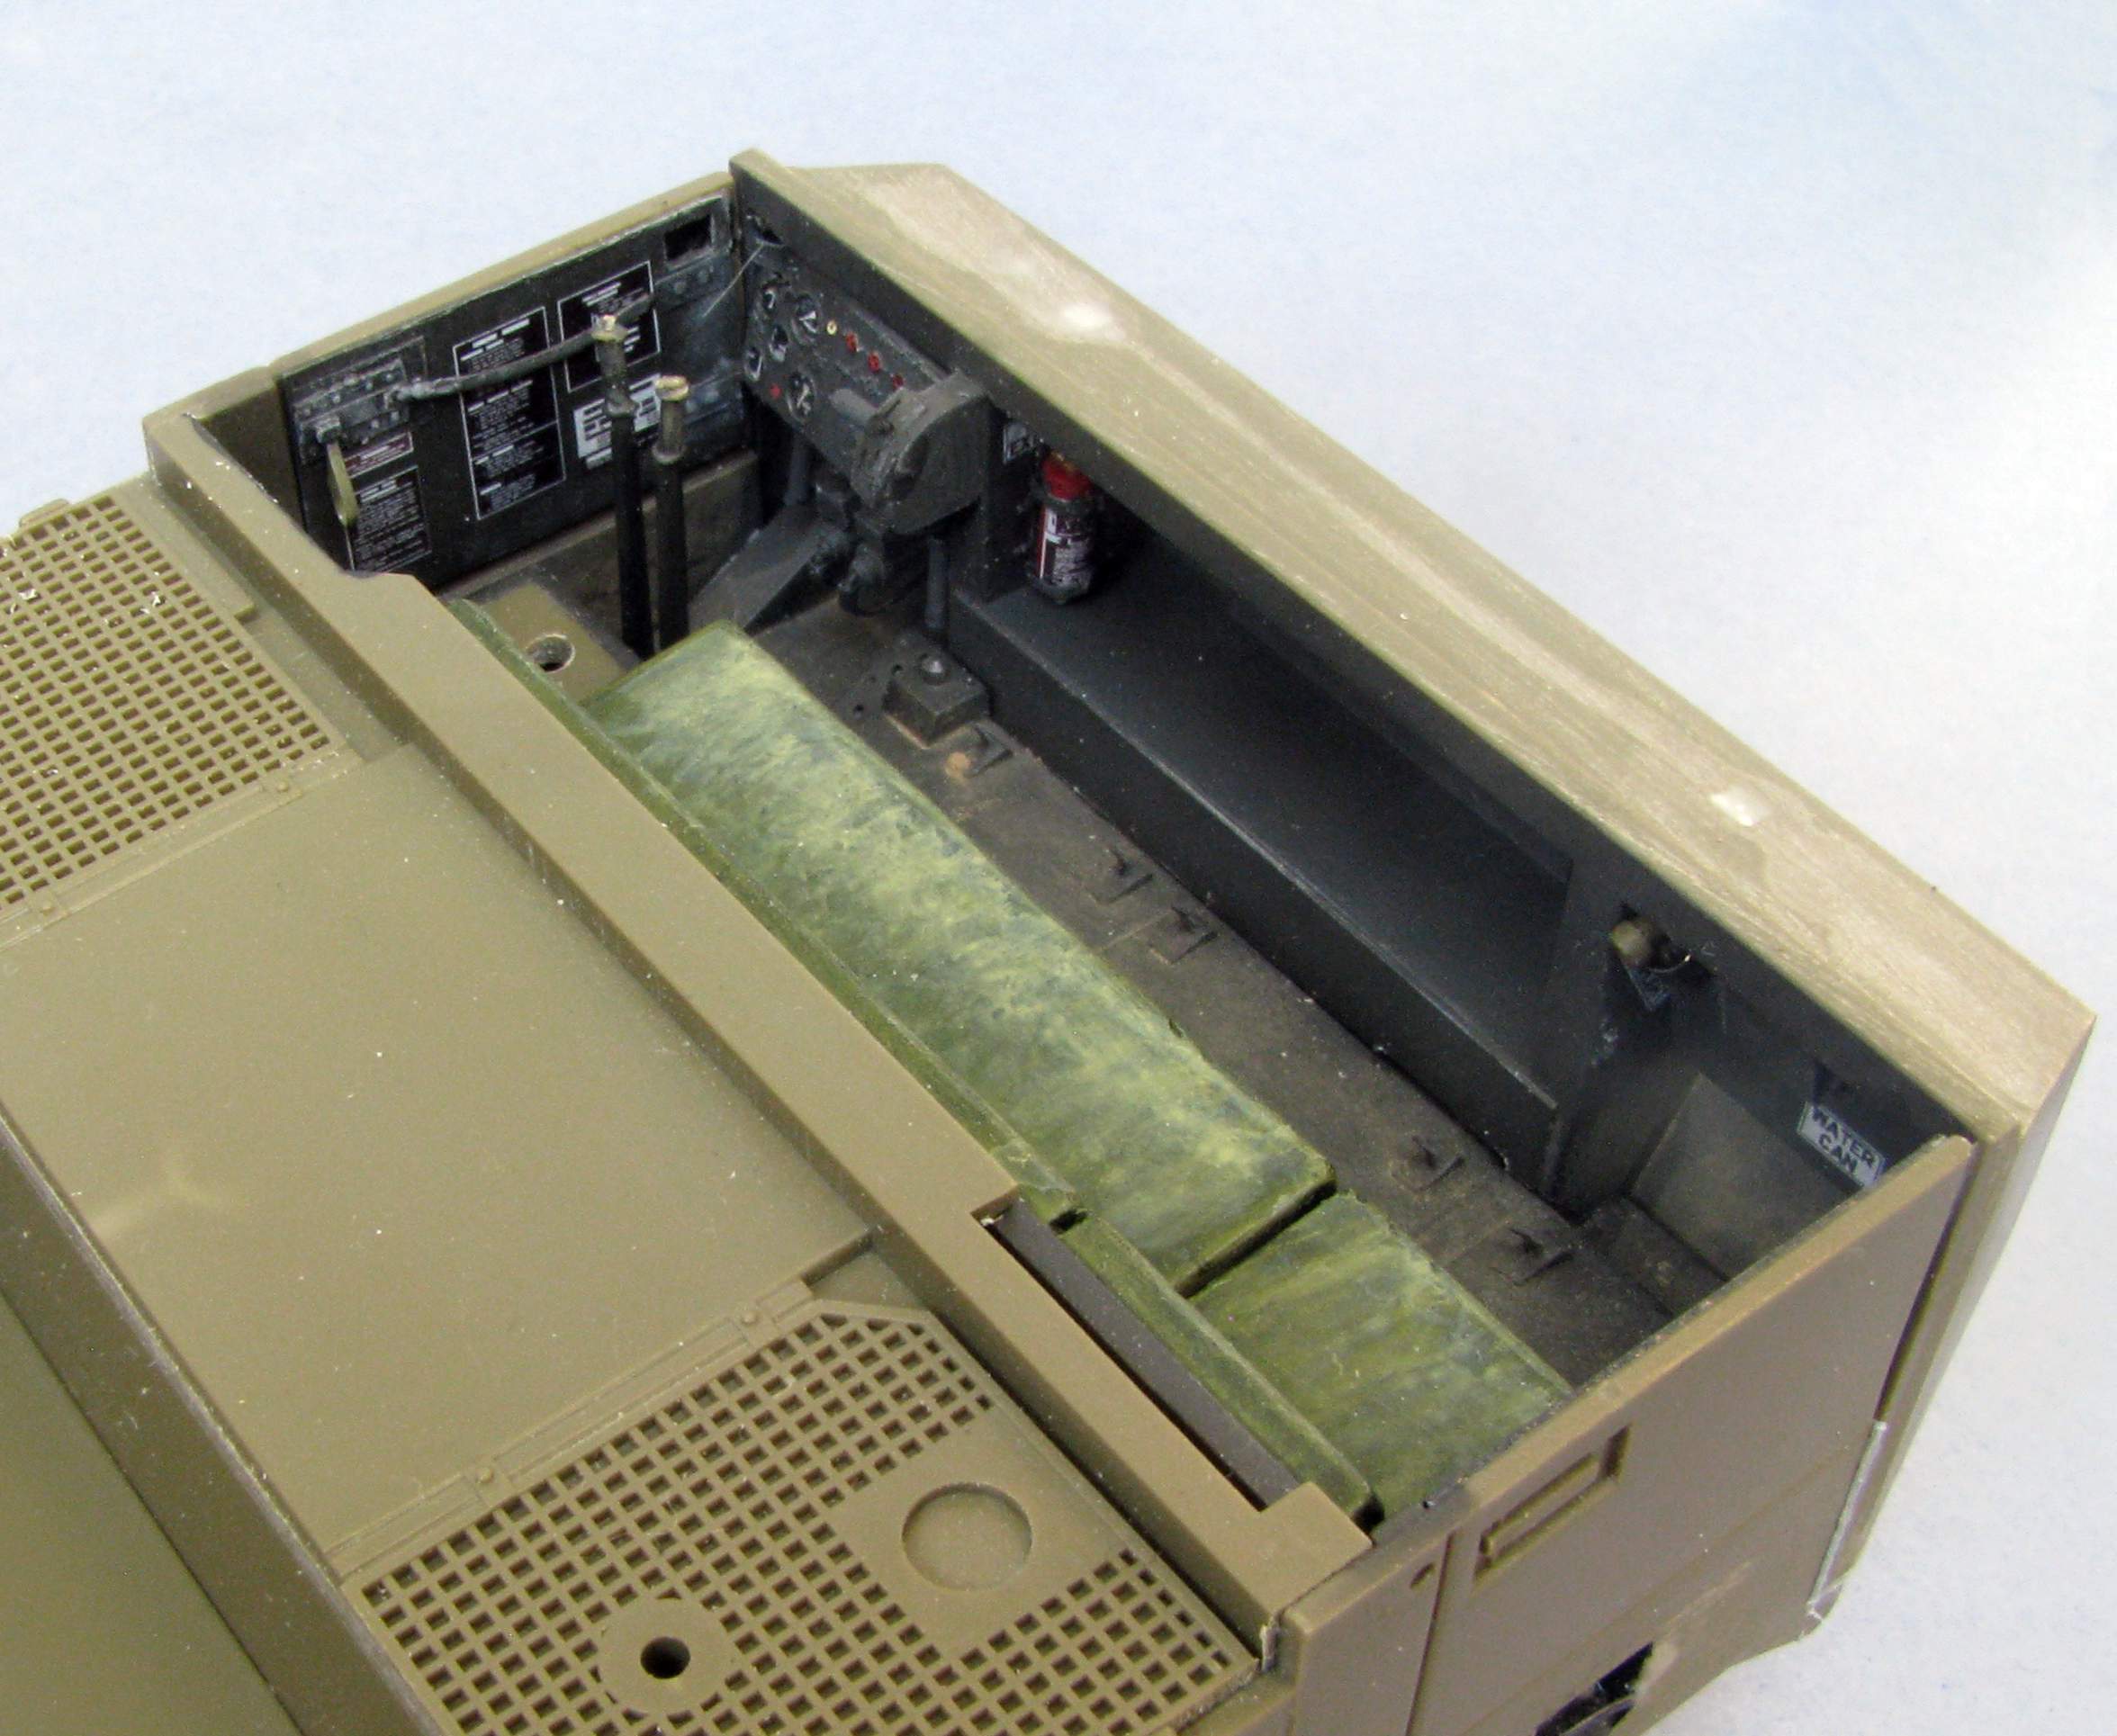
And the cockpit looks like this so far:
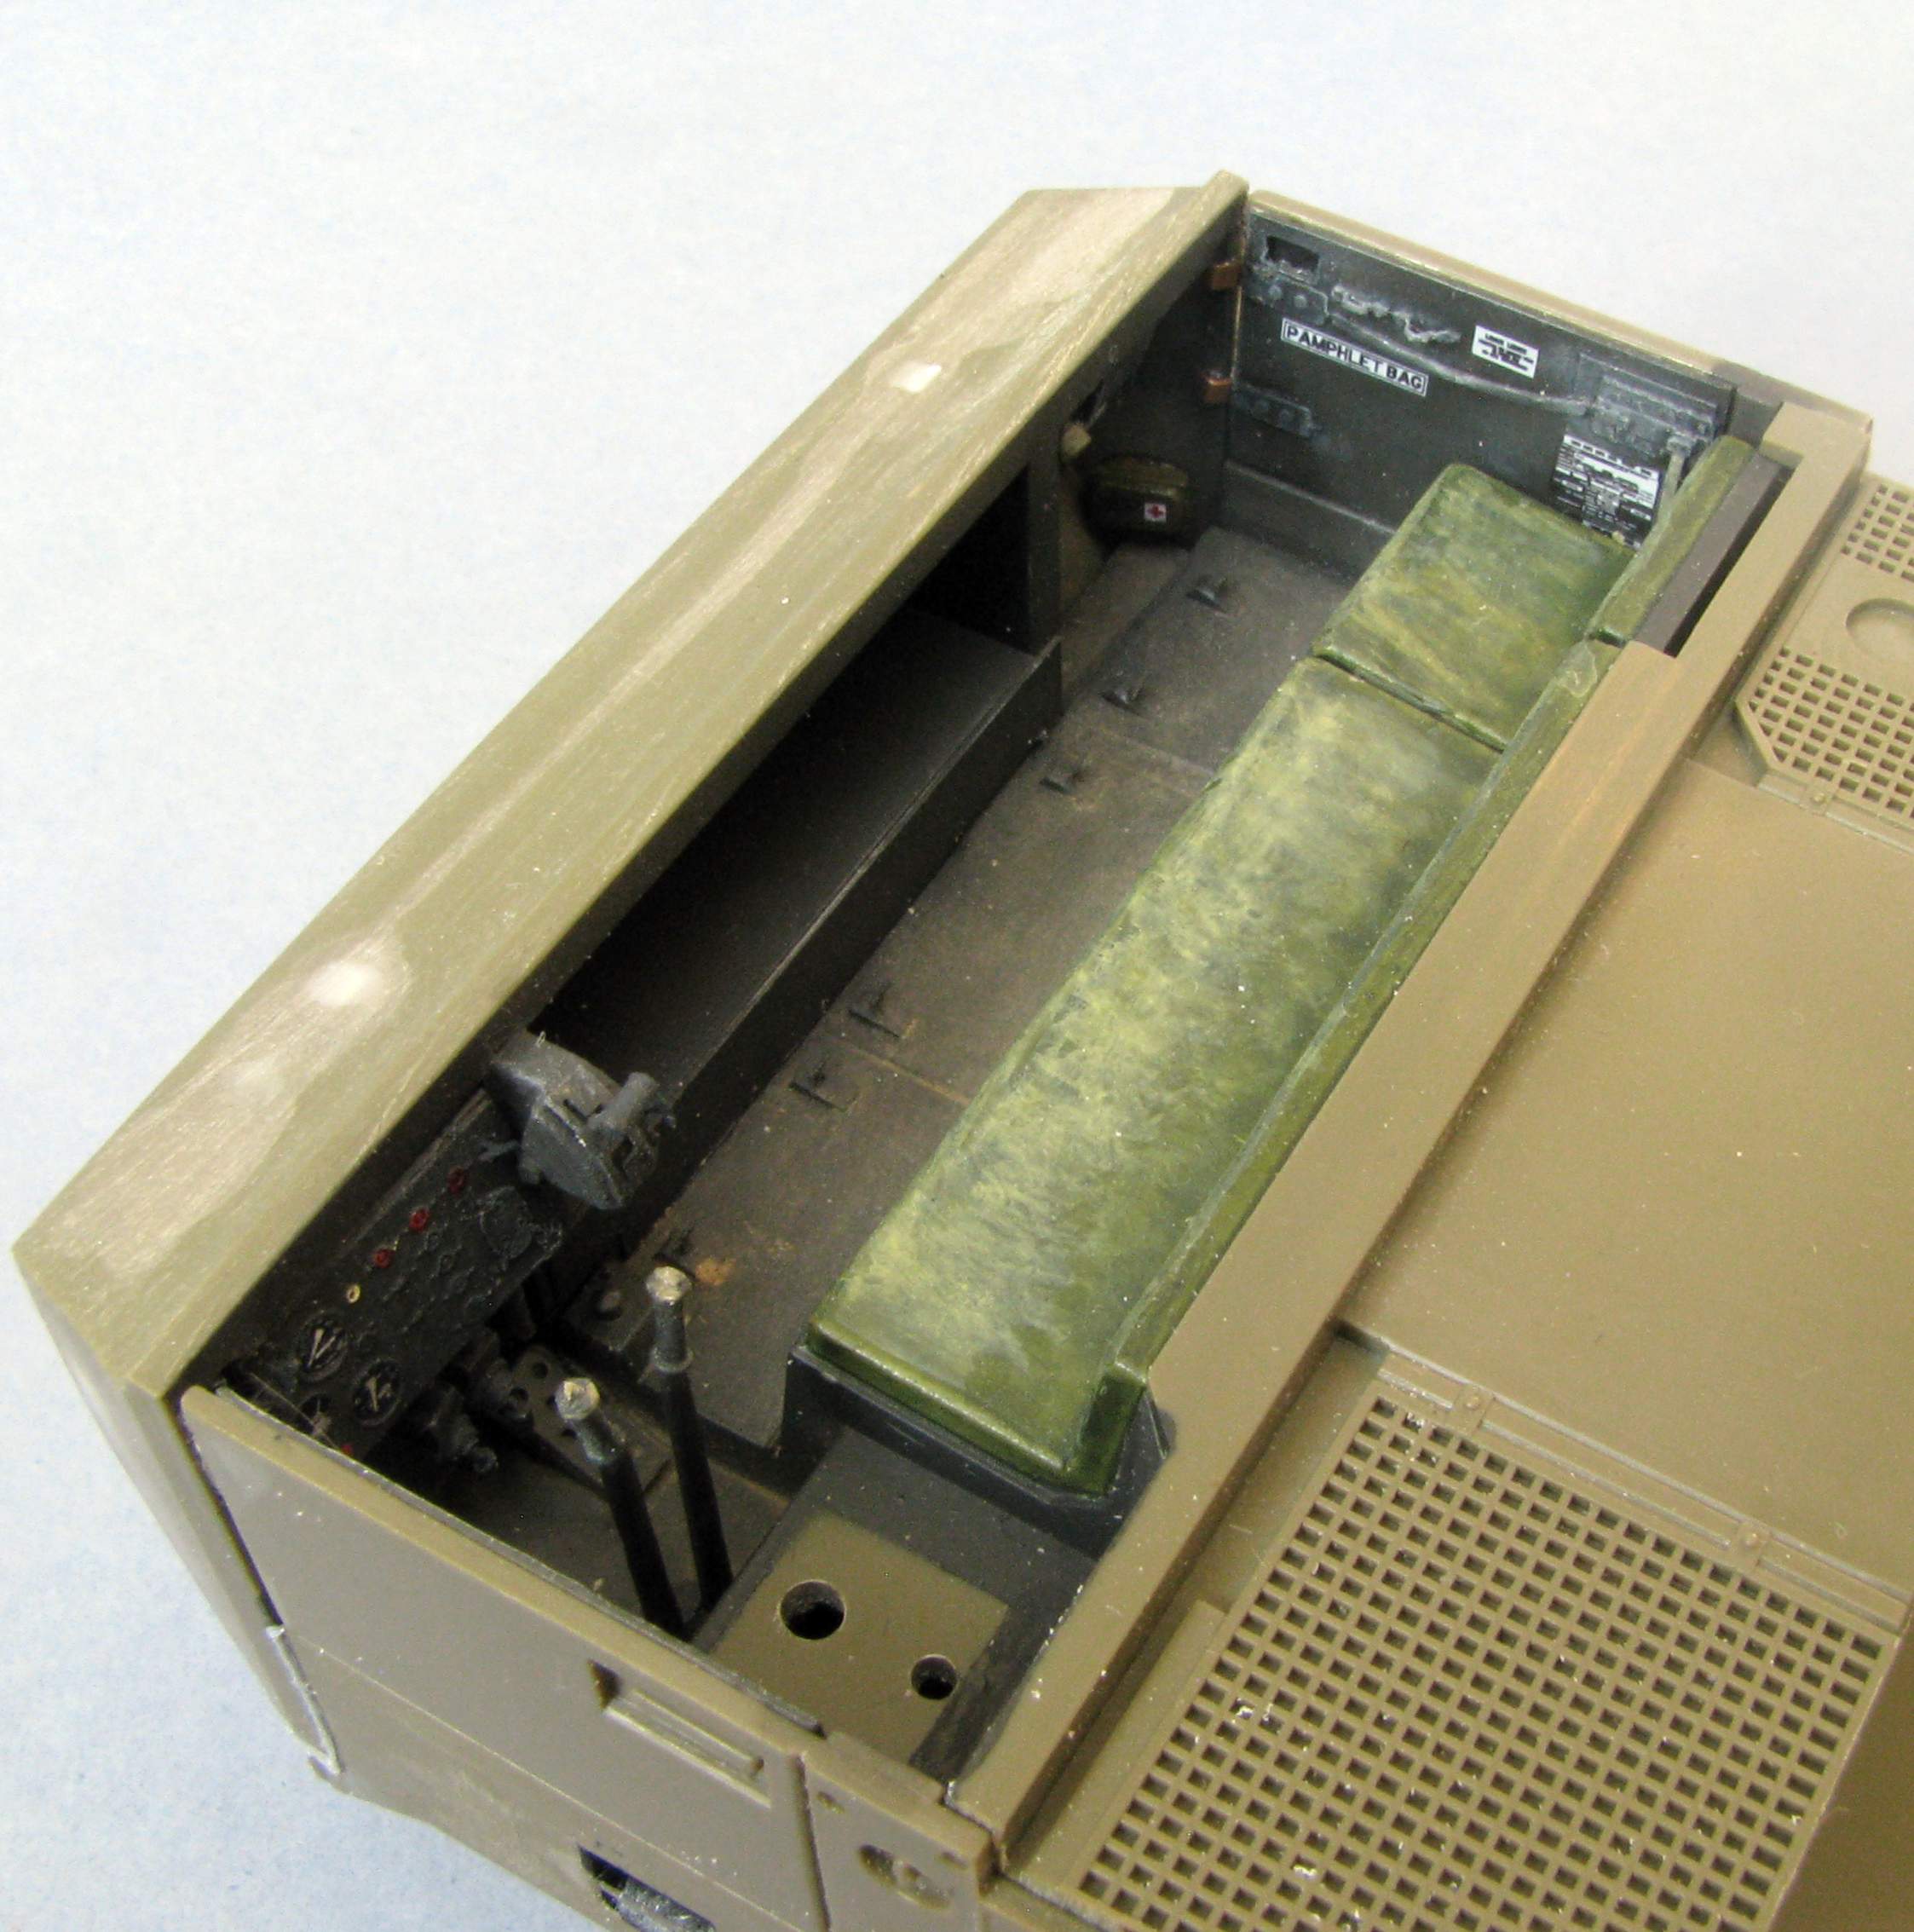
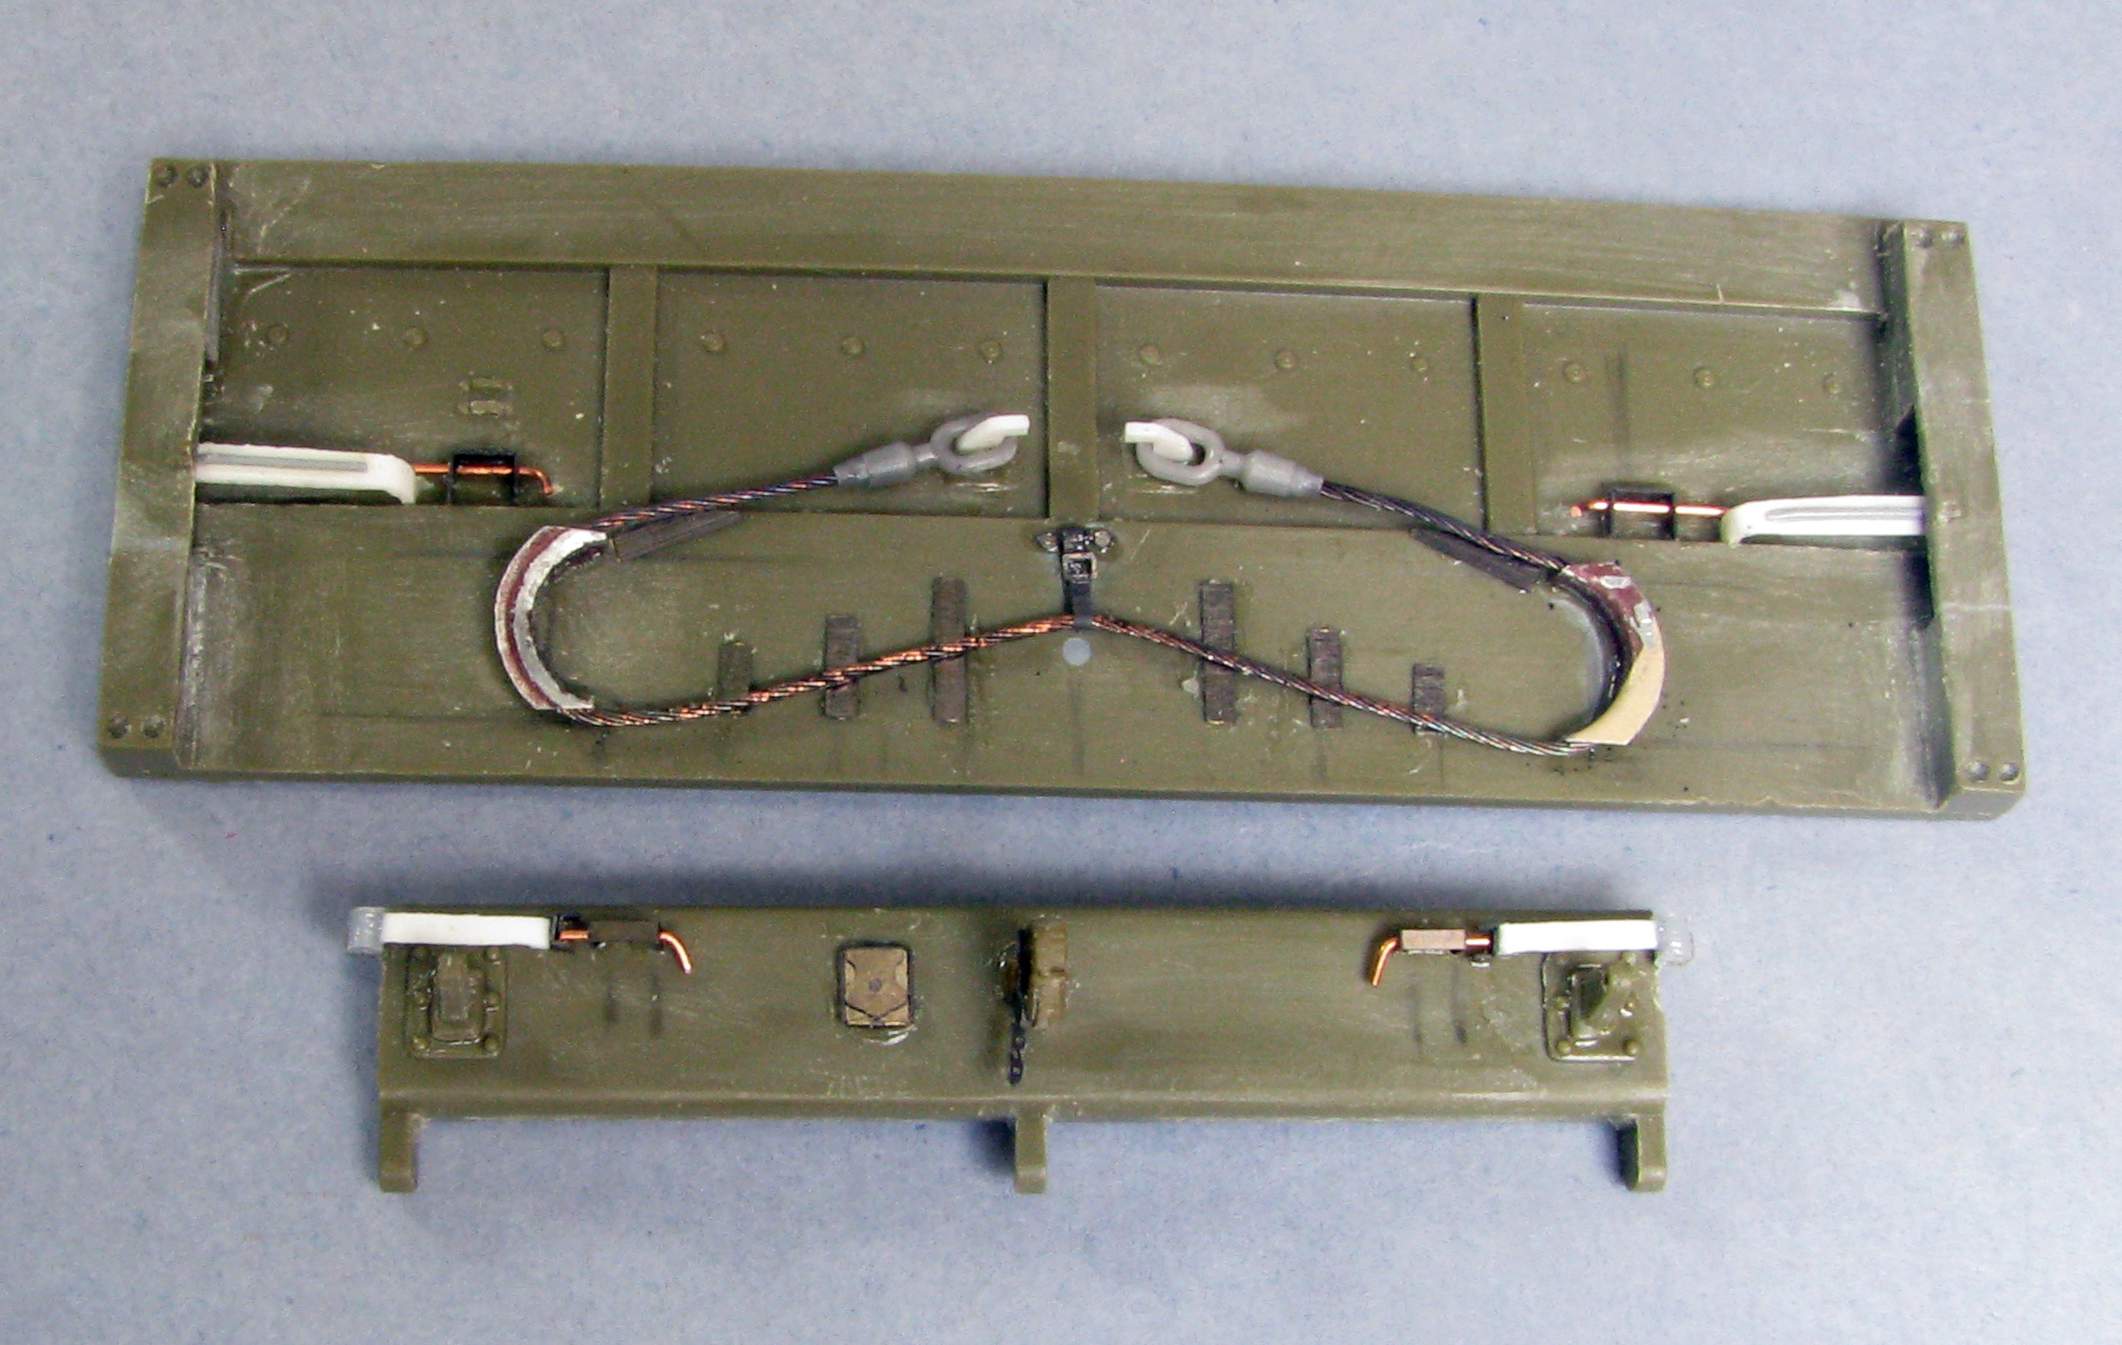
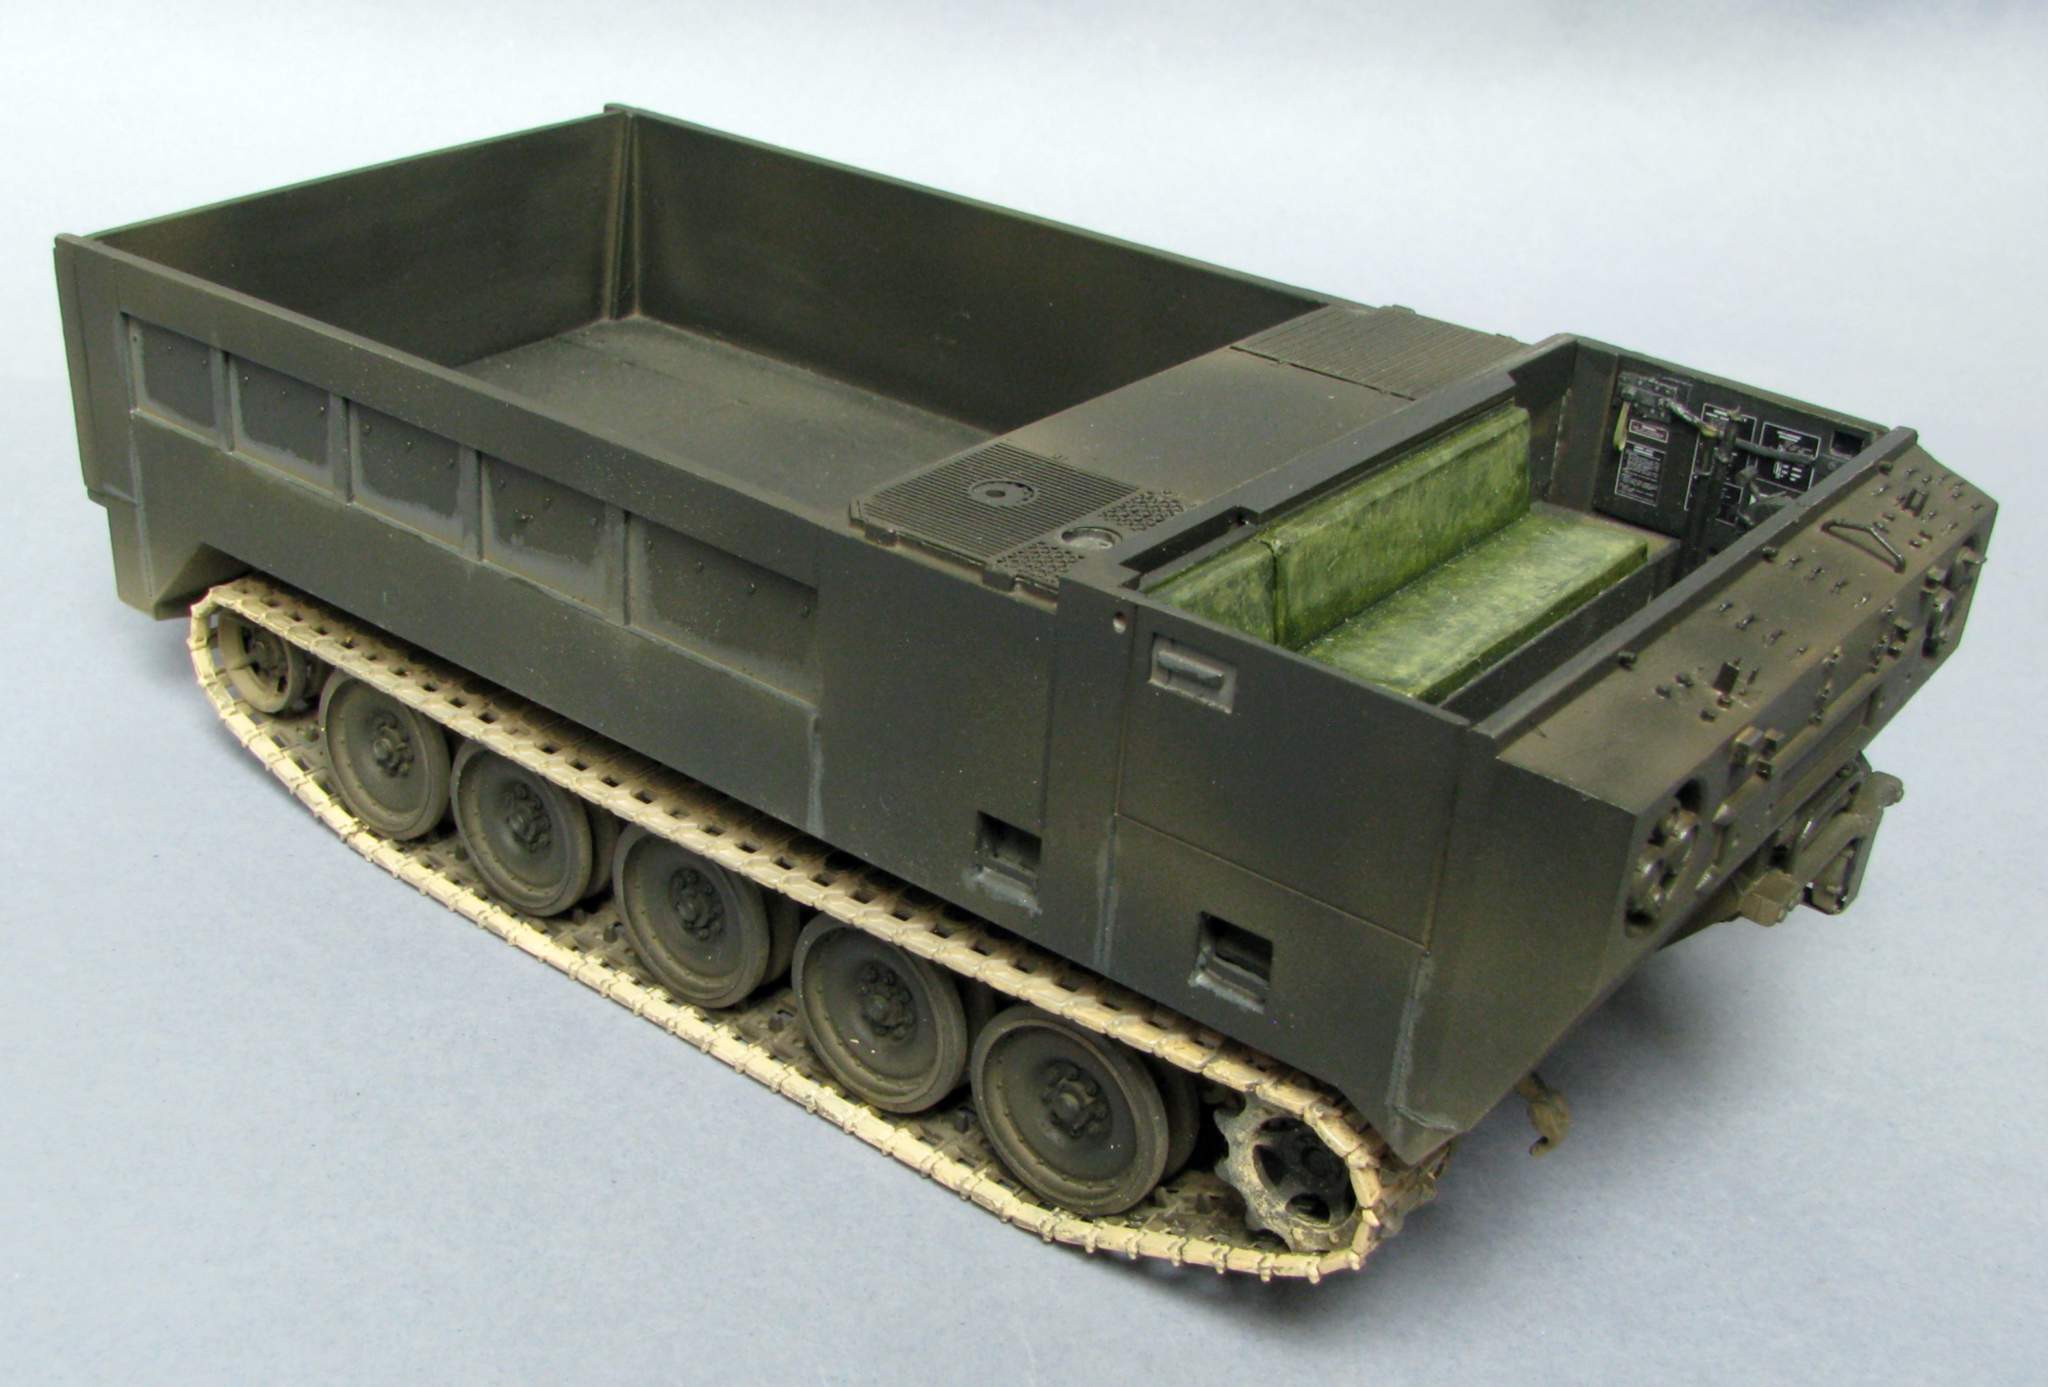
I have also dry fitted the tailgate and the cargo door:
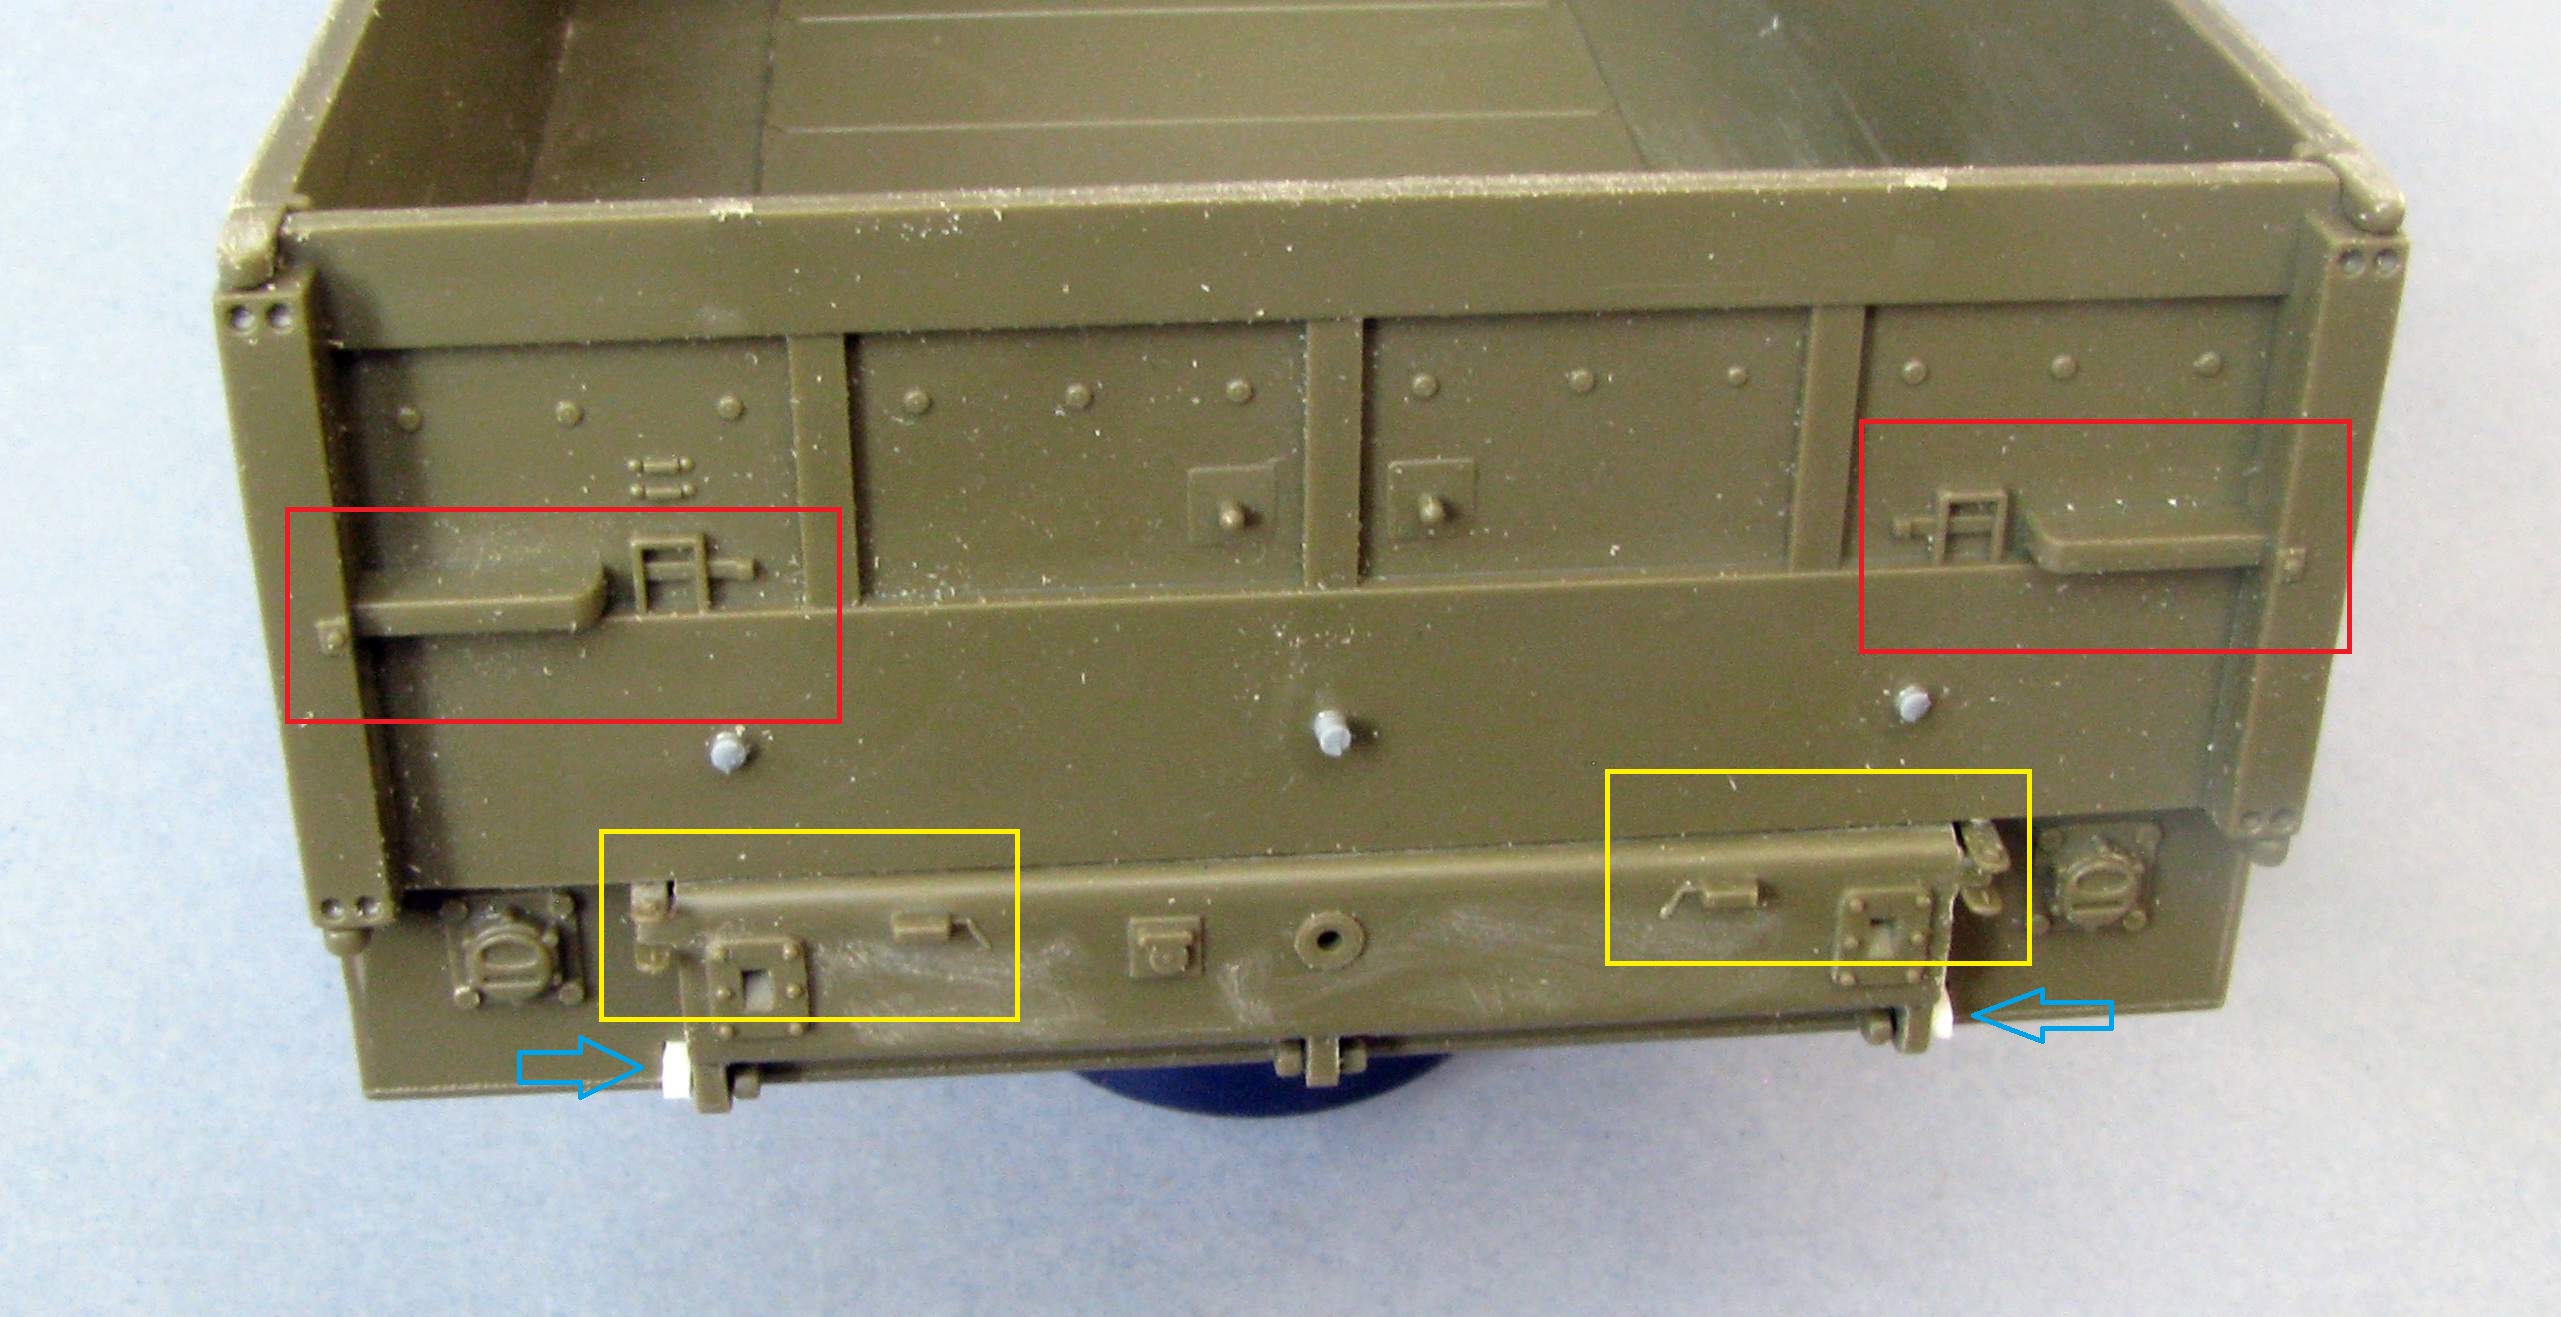
The blue arrows point to the hinges I made to replace the kit hinges that would allow to make the tailgate “operational” (what for?), but they were decidedly oversize… The yellow areas mark the tailgate latches missing altogether, and the red areas mark the cargo door latches that would have to be removed and re-done… So that’s what I’m working on right now.
Thanks for looking and have a nice day
Paweł
Its coming along nicely. Excellent on the small details.
She’s coming along great Pawel, love all those little details!
Gino, Gamera - thanks for sticking with me on this one! I’m glad you like the details, in this case I’ll add some more! ![]()
I’ll try to post some update soon - have a nice day!
Paweł
If I remember, that tailgate could fold down like a traditional truck tailgate or could open to the right or to the left like an actual door. These things used to be loaded with so much stuff it was unreal.
Hello Rob!
Thanks a lot for your comment!
From what I’ve seen in the photos and the TMs, the M548 got the small lower part that’s called a tailgate, and it moves down when opened. And the larger, upper part is called cargo door by the TM and opens to the left or to the right - depending on which lock you open and folds along the side. Both look very heavy…
After scratchbuilding the tailgate latches I discovered they are included as kit parts - too bad instructions doesn’t mention them in any way (they are shown in the instructions for the cargo carrier variant of this kit).
Have a nice day!
Paweł
Hello!
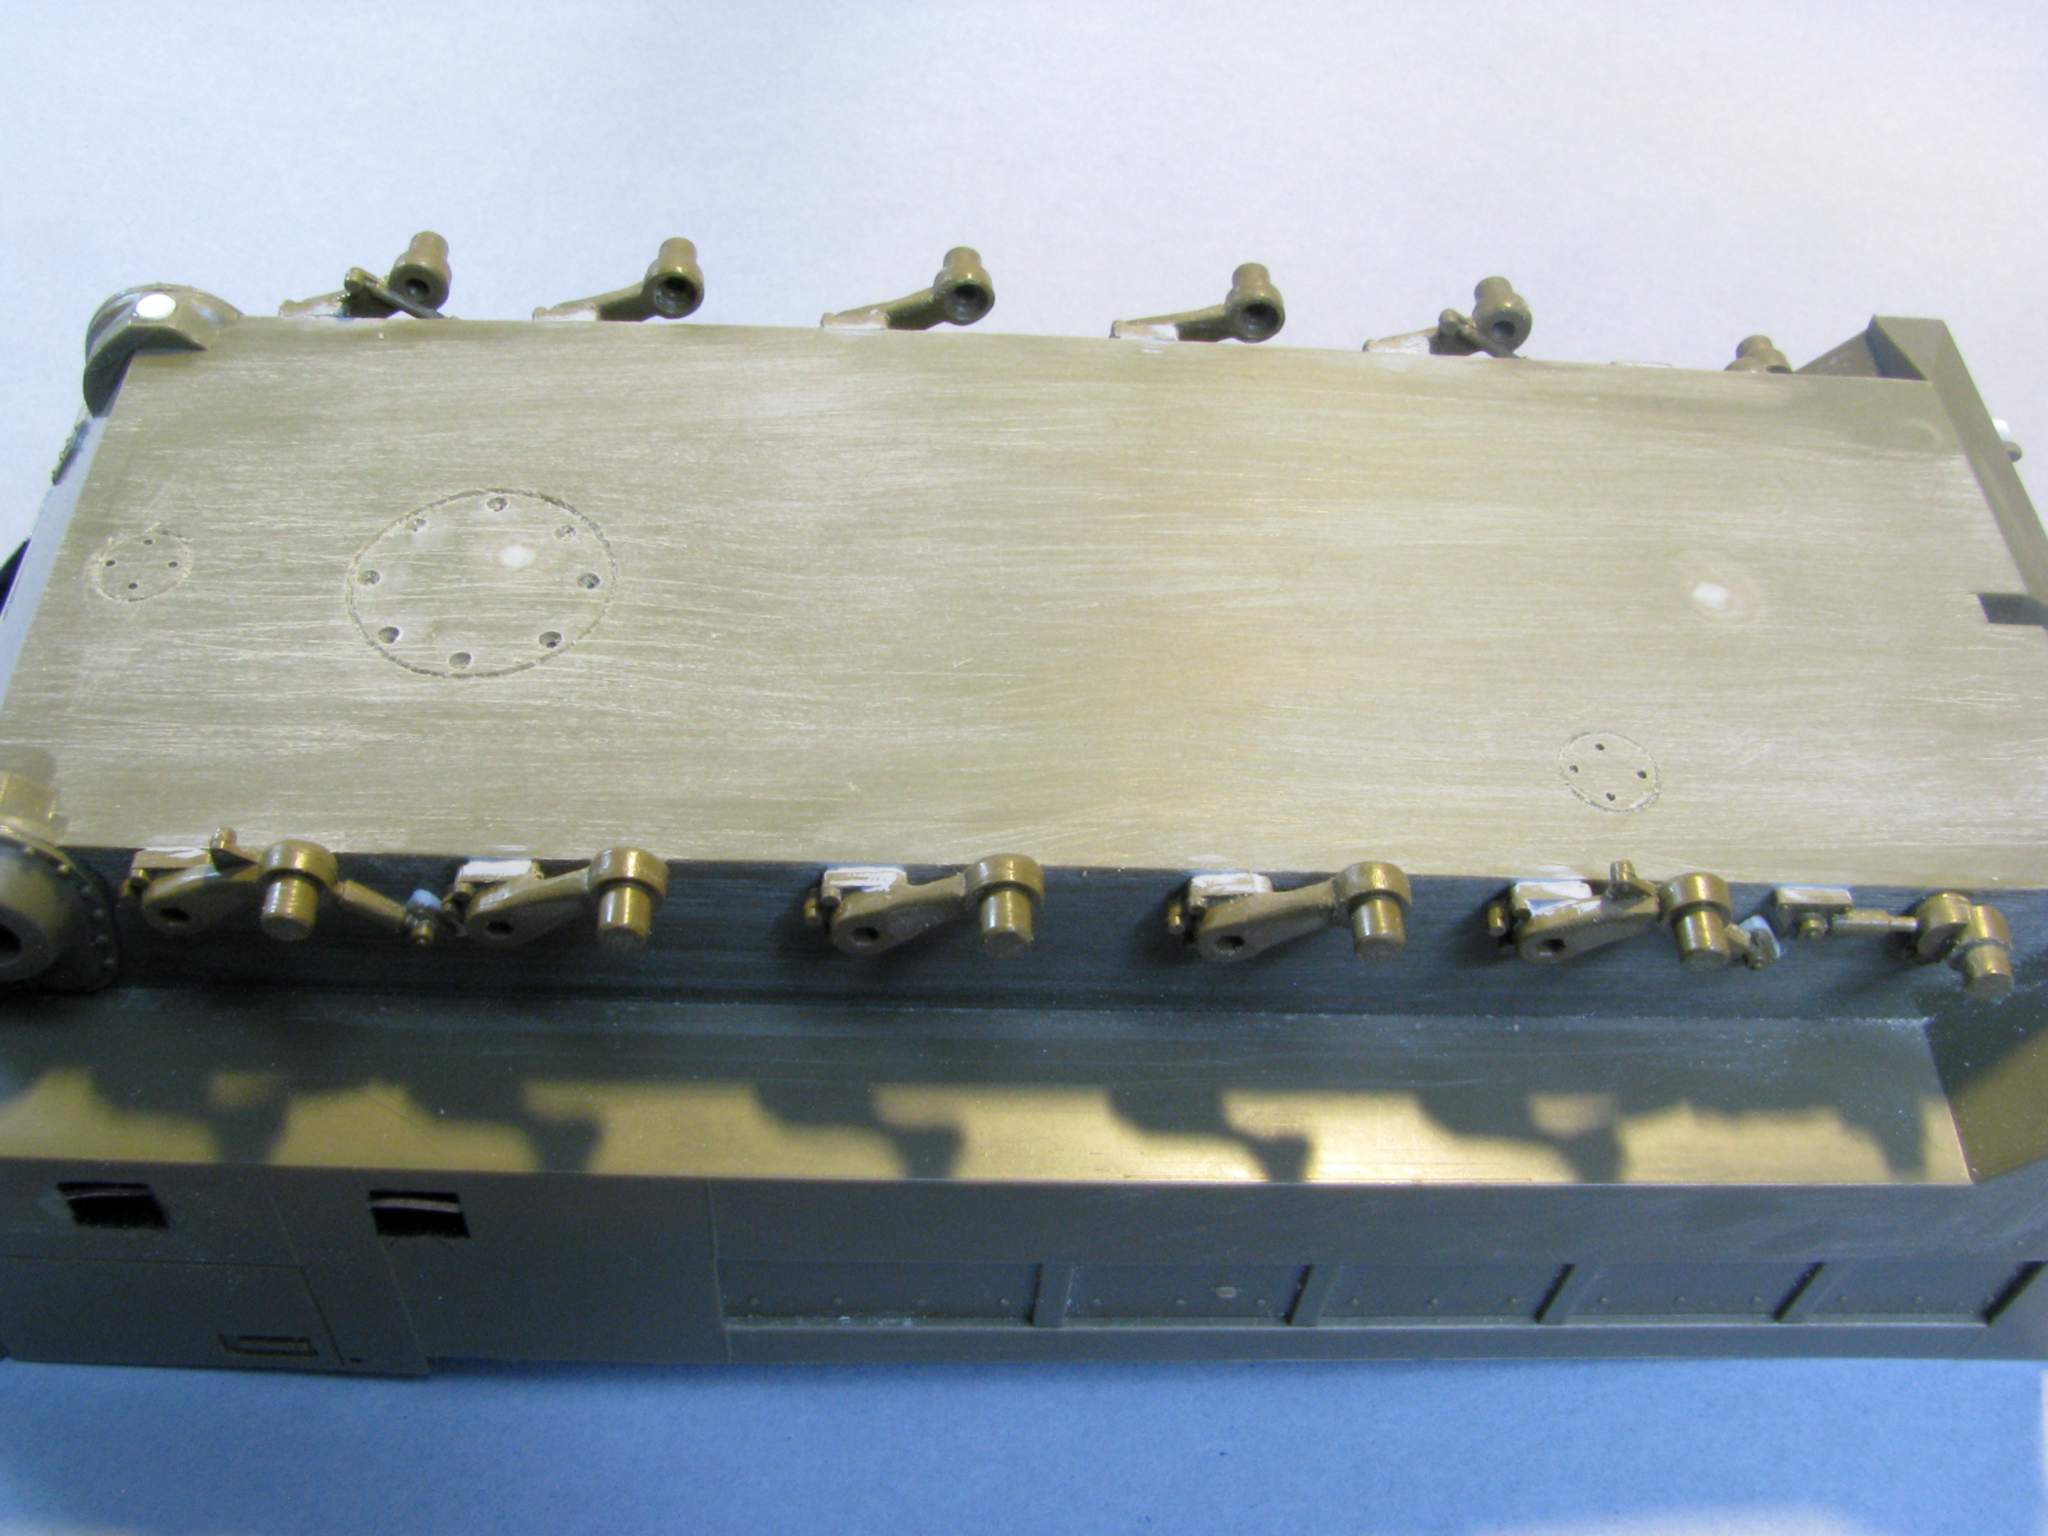
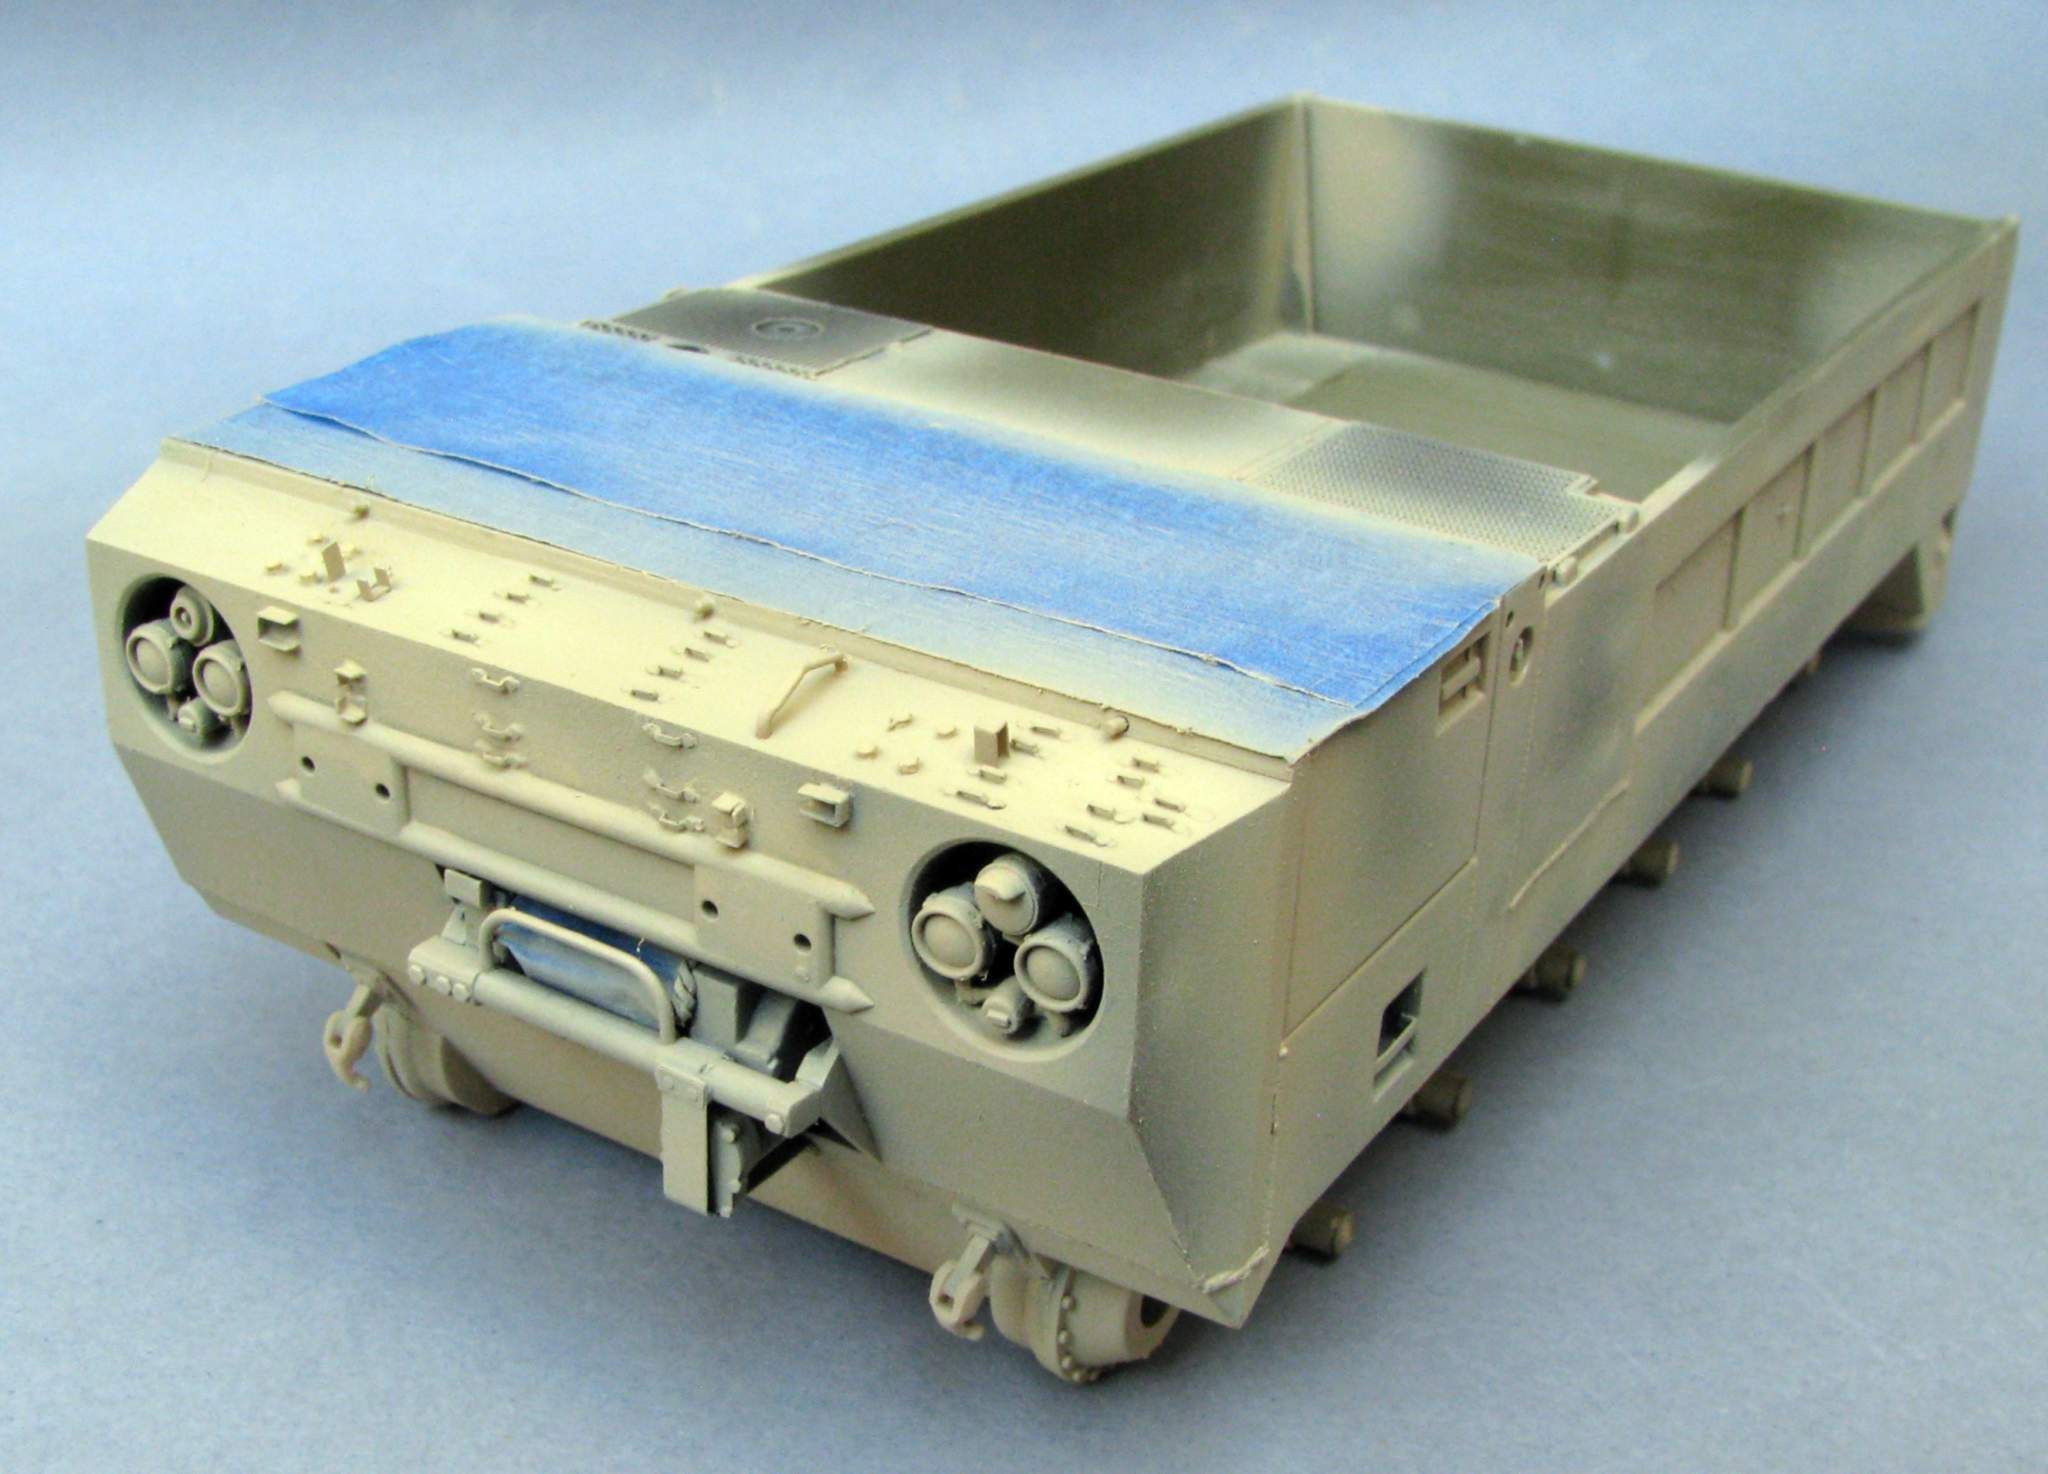
Another small update! I’m still working on the cargo door and while the putty is drying I made some drain plugs and access panels on the underside of the carrier:
I’ll try to show you the detailed front and back of the carrier soon! Thanks for looking and have a nice day
Paweł
Looks good Pawel!
I’m horrible, I don’t detail anything that generally won’t be seen.
Thanks a lot, Gamera!
I hear you, the thing is I’ve got glass shelves in my display case ![]()
Plus I like to handle my models from time to time and look at them from the underside, too.
And in the meantime I managed to do some work. I tried to recreate the dented sheet metal seen on the 1:1 photo:

I’ve also made some welds - I basically stretched some sprue, melted it a little with some lacquer thinner and then shaped them with a tip of my surgical blade:
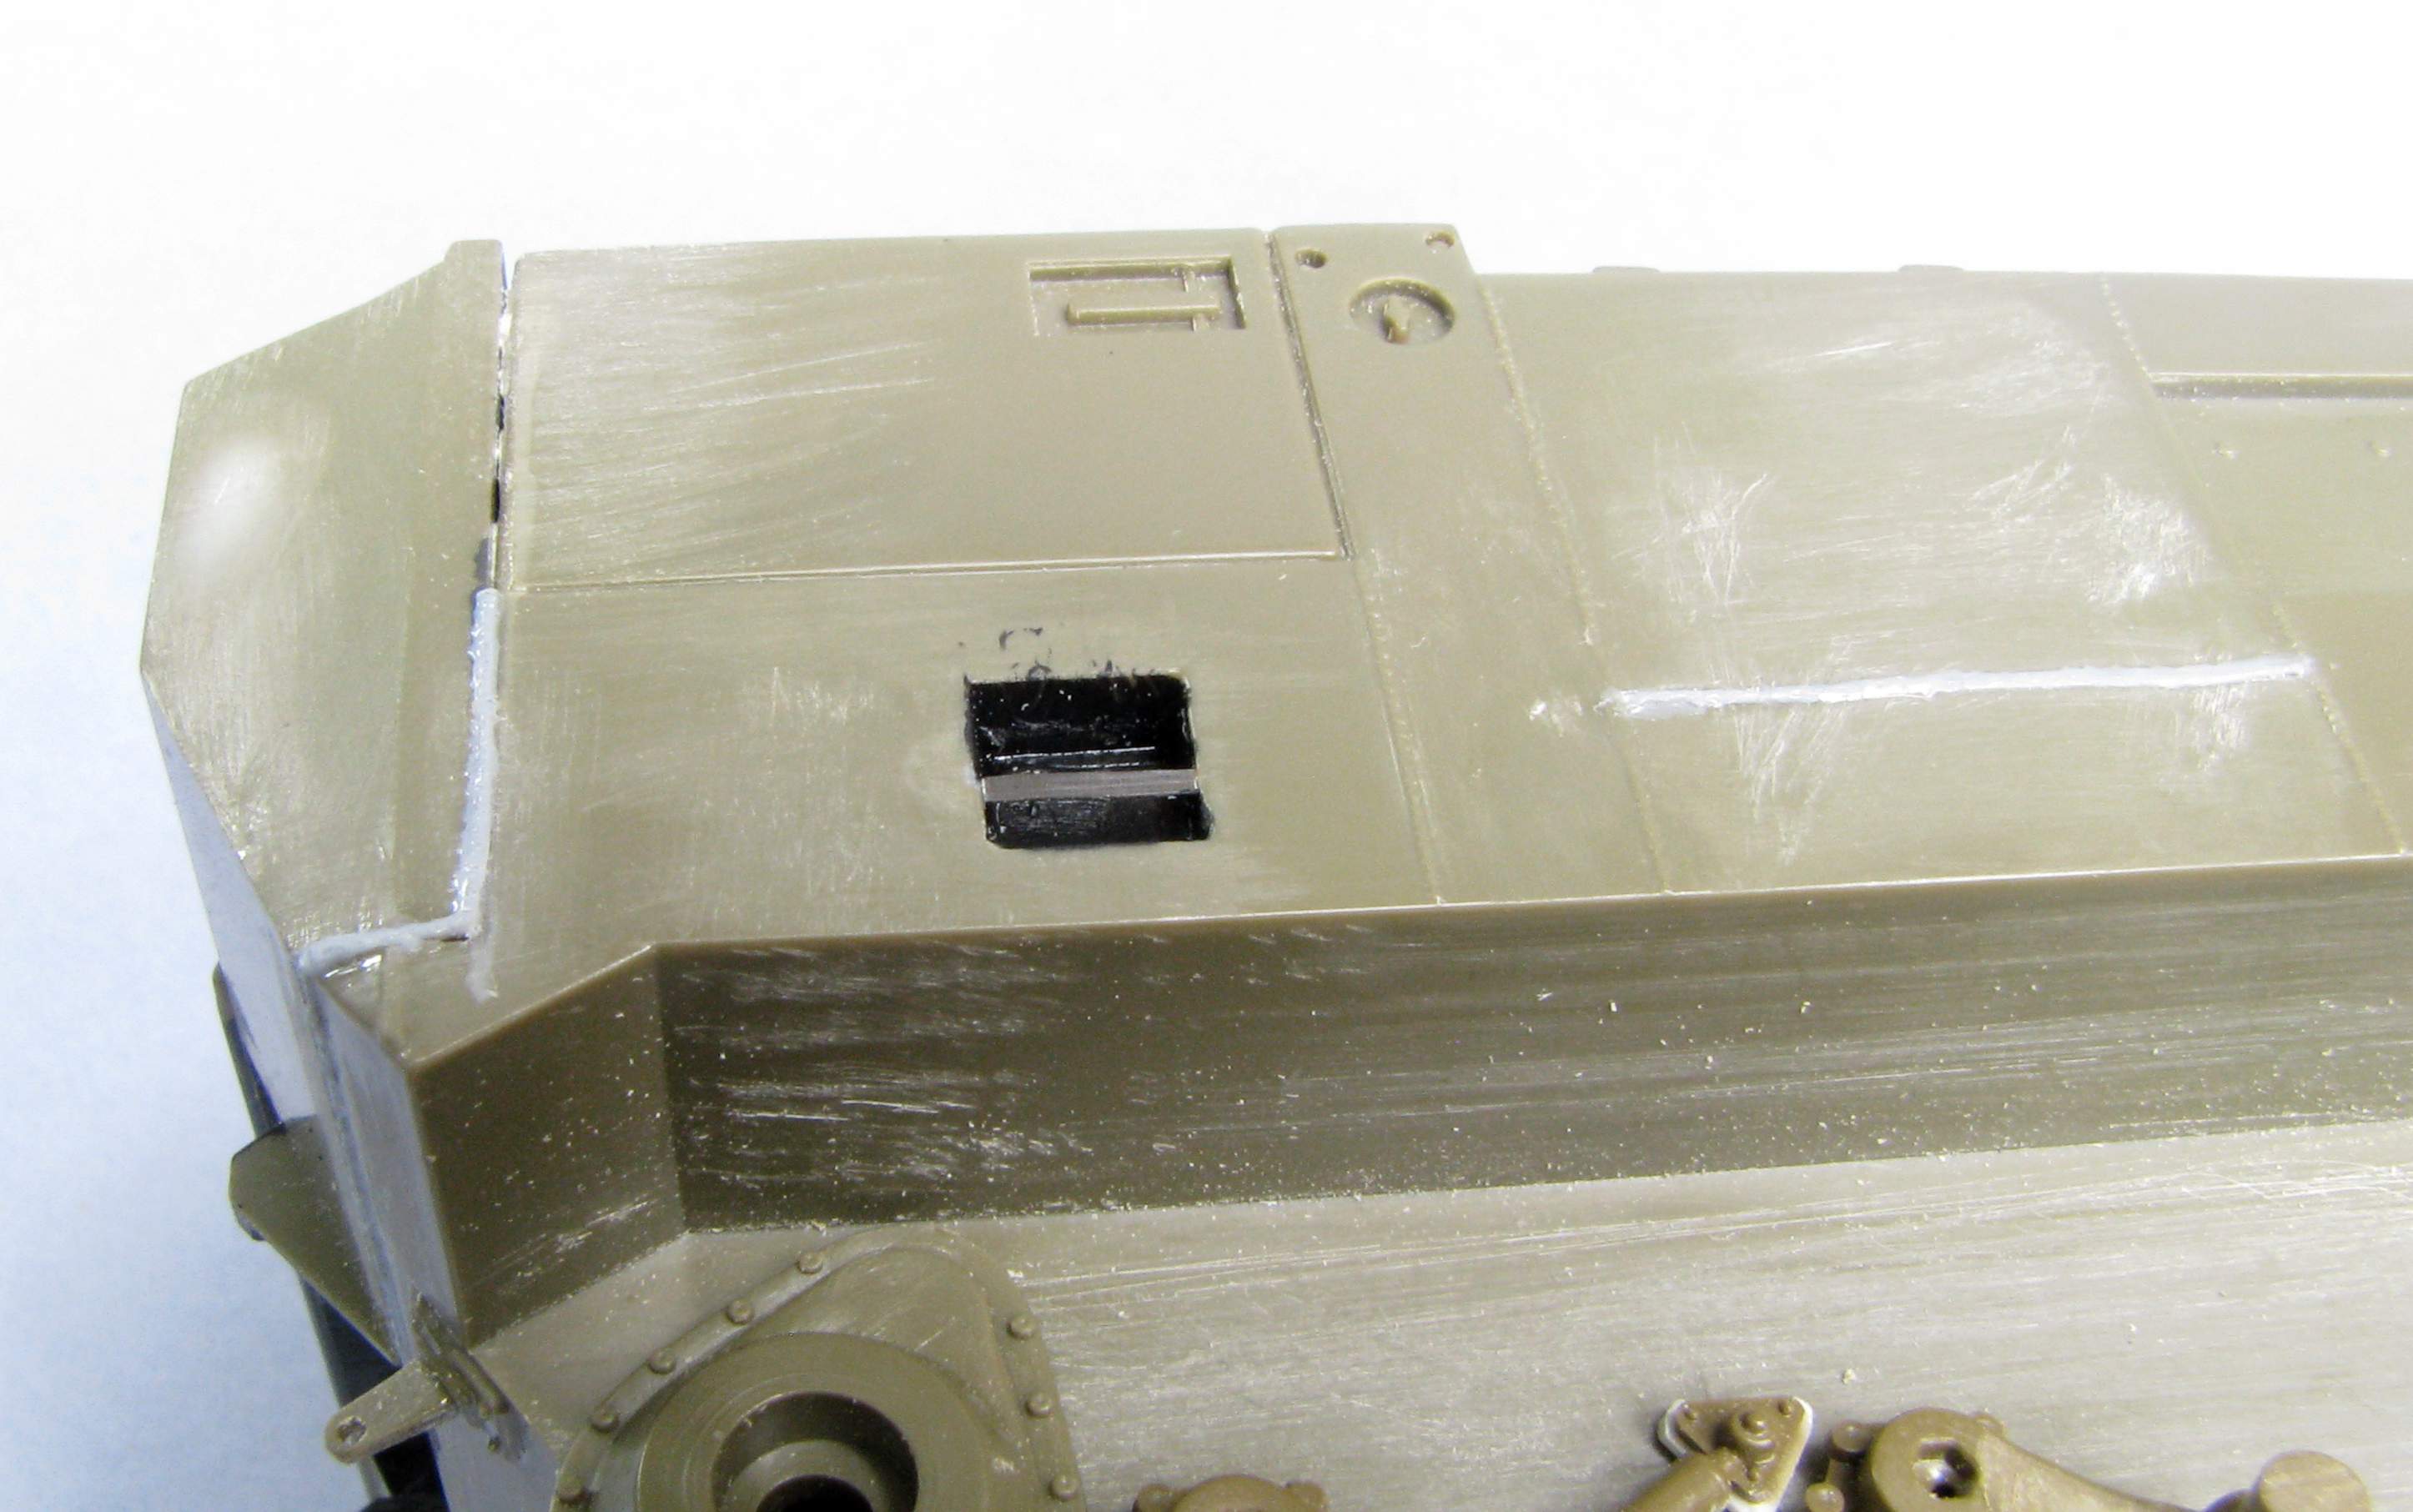
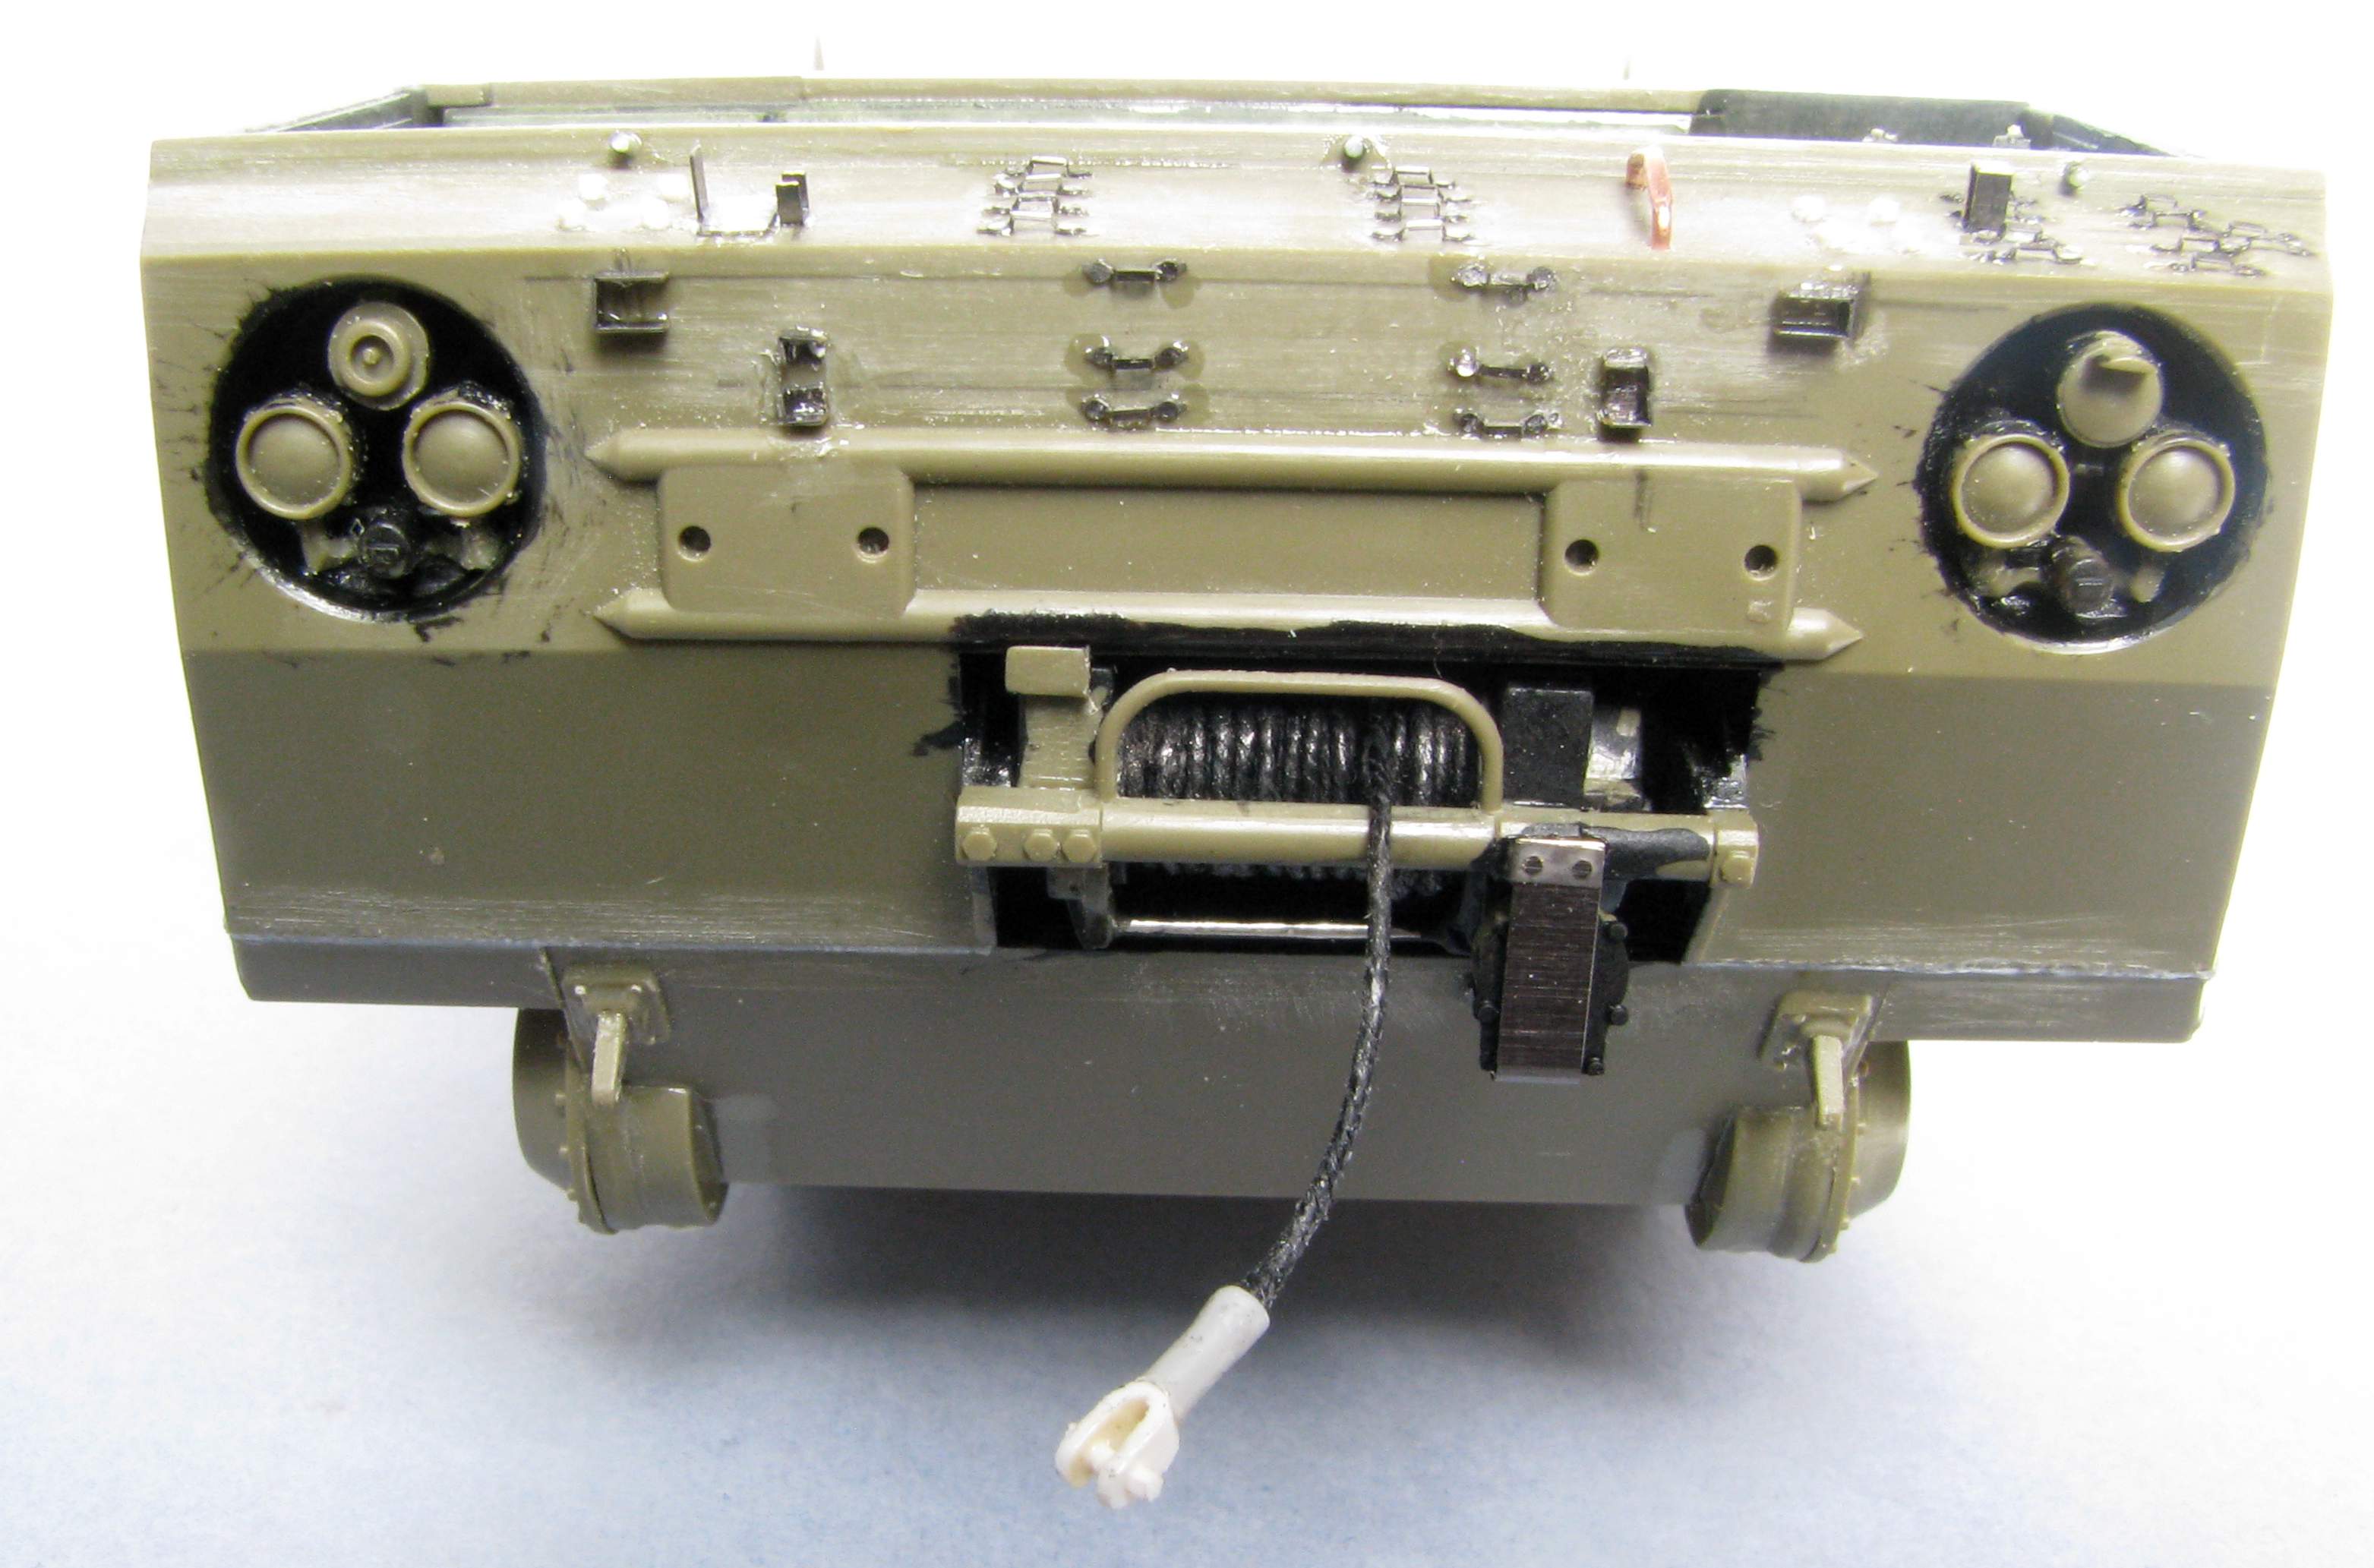
I’ve also populated the light clusters. The hull cavities are painted with black Gunze paint to help with painting later:
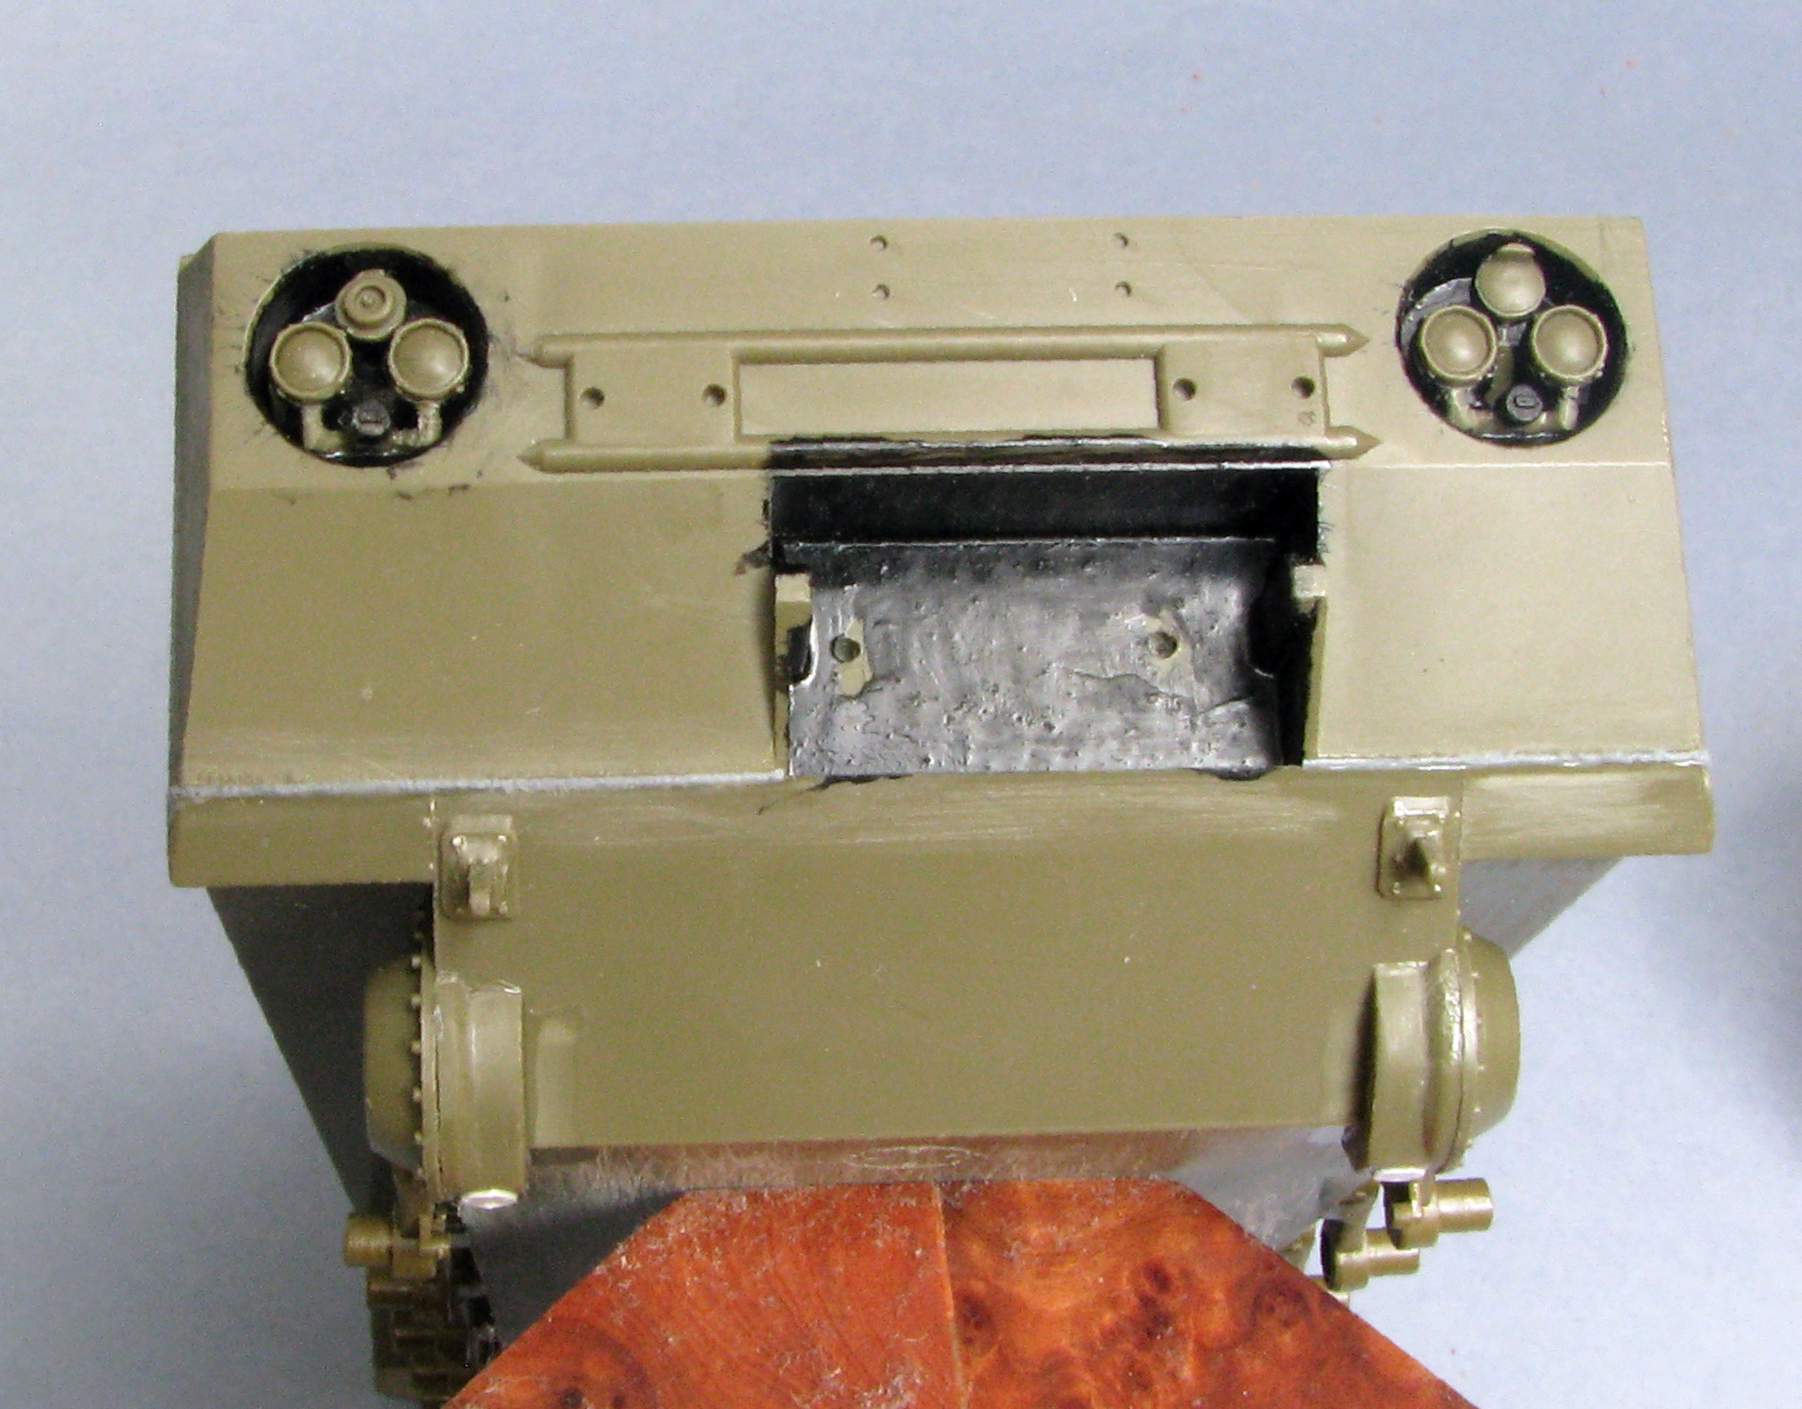
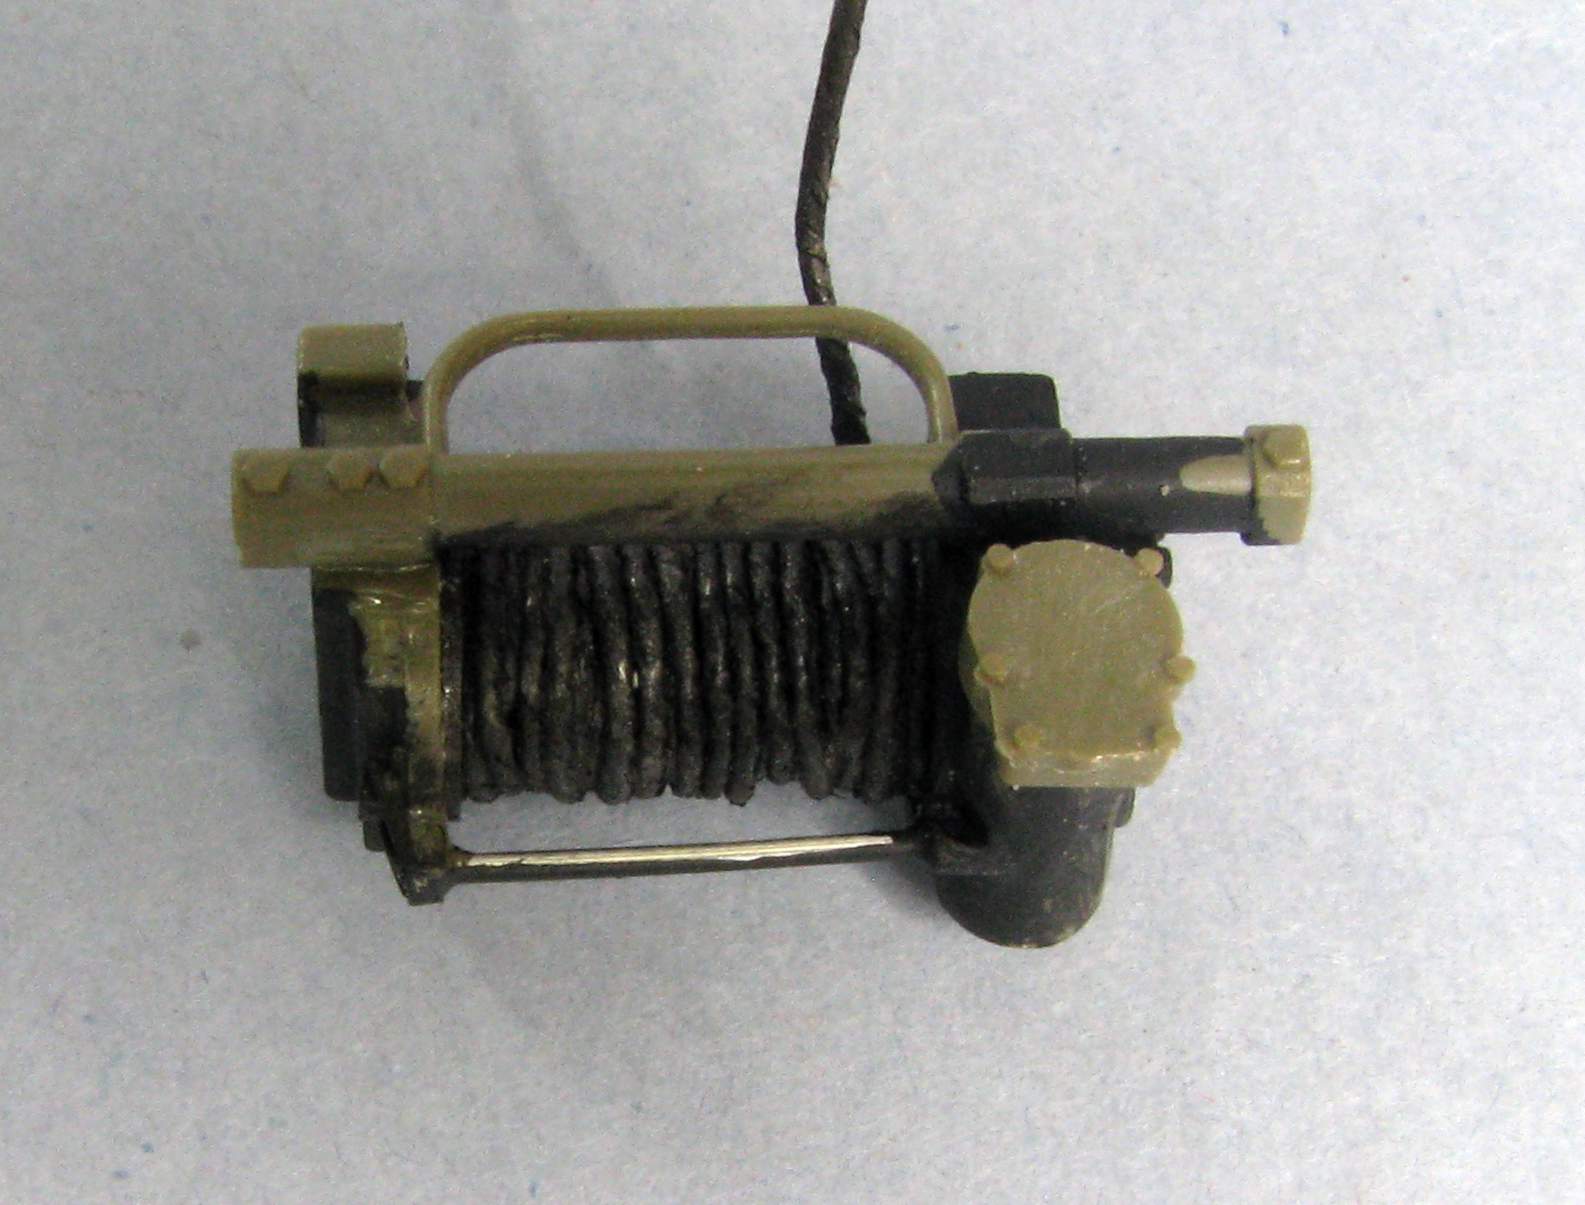
The large opening is for the winch. I worked on the winch itself, too. The winch drum comes in two halves with fake line - instead of cleaning that up I decided to scratchbuild a new drum and wrap some fitting line around it - I think I got something good looking in a comparable time this way:
I’m also done detailing the tail gate and cargo door. Lots of goodies here:
Now I got some more detailing in the front to do - mainly the tool clamps - and the engine grills, then I can think about painting the machine and moving over to it’s deadly cargo.
Thanks for looking and have a nice day!
Paweł
She looks great Pawel!
I can never get line on winches and stuff like that to look right either. Wrapping some cord around it looks way better as well as being easier to work with.
Thanks Gamera!
Sometimes it really pays off to scratchbuild a part instead of trying to save the kit part. It can be a win-win - easier to do and looks better, too.
And I managed to install the winch and detail the front to show empty tool racks. Lots of tiny PE involved, and macro ruthlessly shows all minor problems. I got so close the lens distortion is even visible (the top edges got bent on the photo). The ending of the winch line is scratchbuilt:
Thanks for looking and have a nice day
Paweł
Oh wow that looks good to me Pawel.
The camera always shows more than my tired old eyes can pick up…
Pawel, I really enjoy your builds, great work!
Gamera, Russ - thanks a lot for your comments and please excuse me for taking so long to reply - this build is taking a lot longer than I thought… Thanks a lot for your kind words, your encouragement is important to me.
But I do have an update this time - I started painting the carrier.
First I put on some sand coloured preshading. It’s Humbrol 121:

On top of that I put on some OD - Humbrol 66 mixed with some gloss clear:

I put some pigment on the tracks and on the hull sides.
I started applying the decals, but noticed some of the registration numbers and bumper codes are too big, so I had to redesign them and order them printed again…
I still have some weathering to do to match my photos better…
Thanks for looking and have a nice day
Paweł
She’s coming along nicely! [Y]