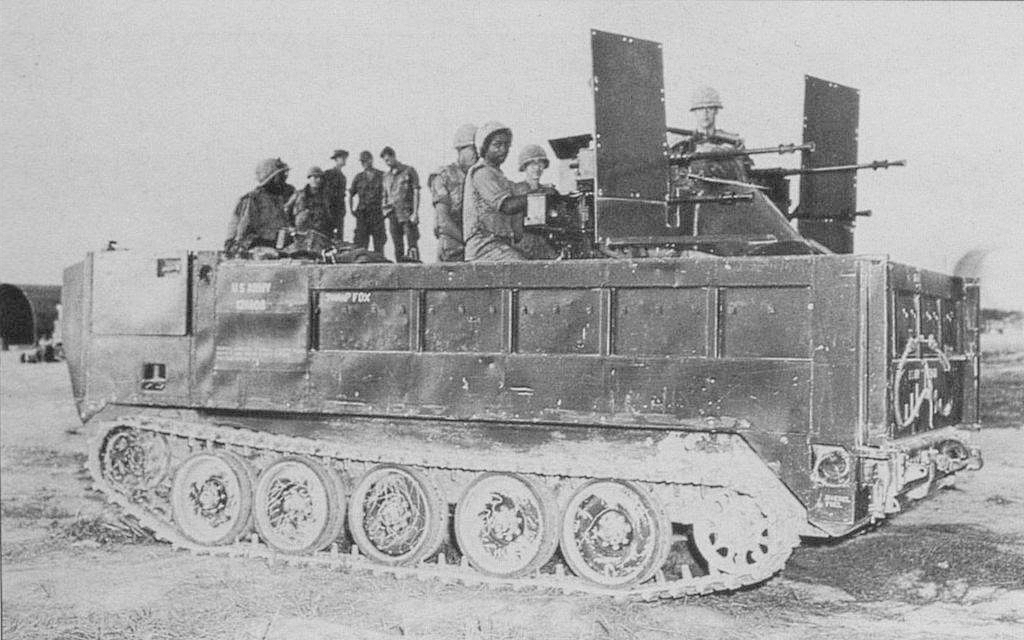
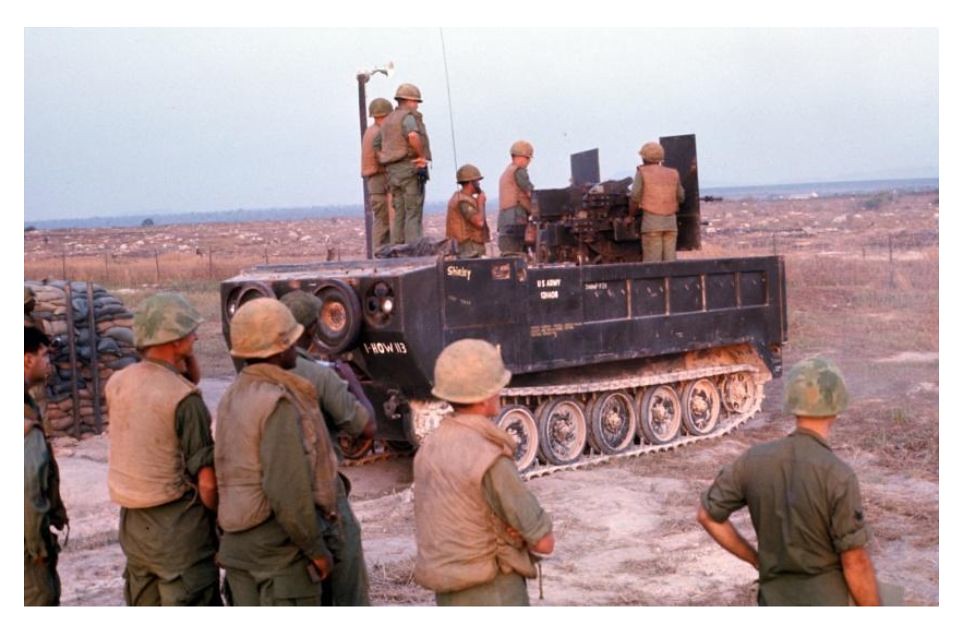
When I bought it there was just one photo of it availalble:
It’s from the Concord’s “Armor of the Vietnam War (1) Allied Forces” book.
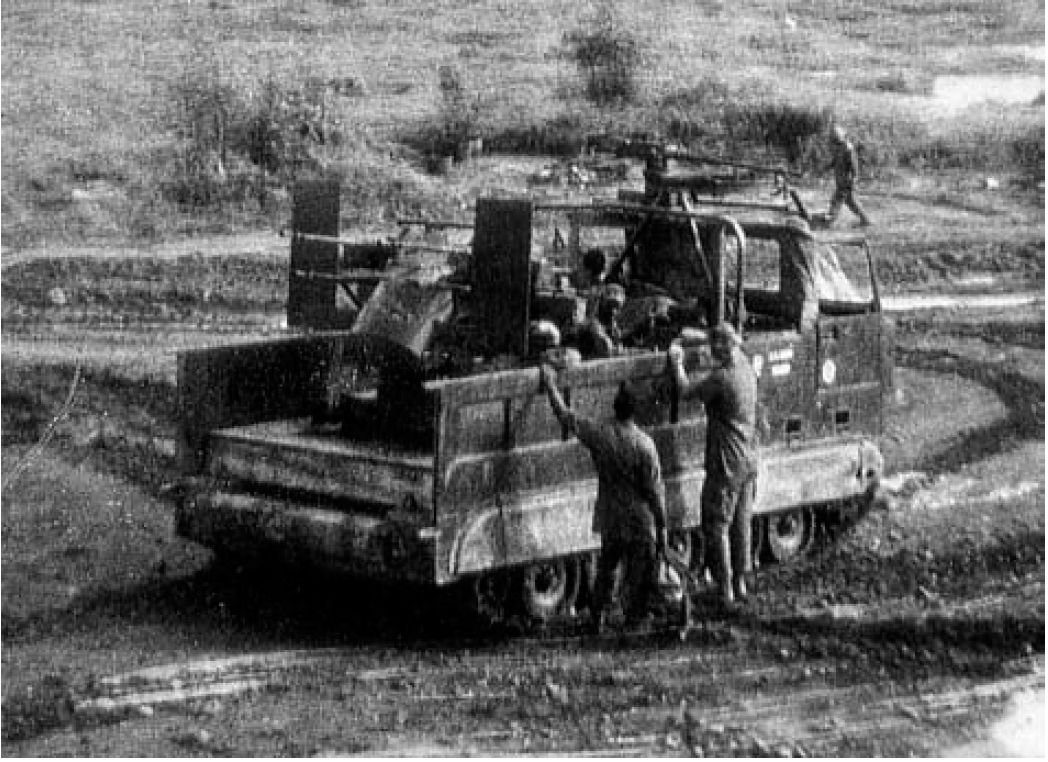
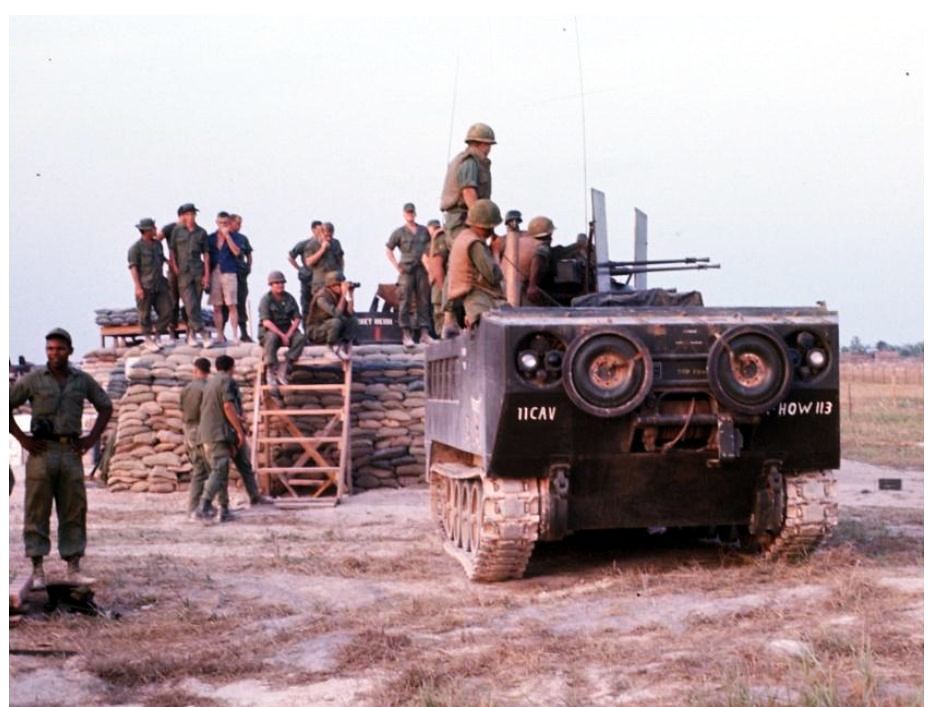
Later veterans from the National Duster, Quad and Searchlight Association (NDQSA) came up with a photo of a similar but different vehicle:
Finally I have found (and this forum helped me with it) two more photos:
And that did it - I thought: It’s not going to get any better than that and I started working. Of course if you have any more cool photos, please post them in this thread. Also, if you have an idea what the “fine print” above the second road wheel in the photo above says - I would love to know it, too.
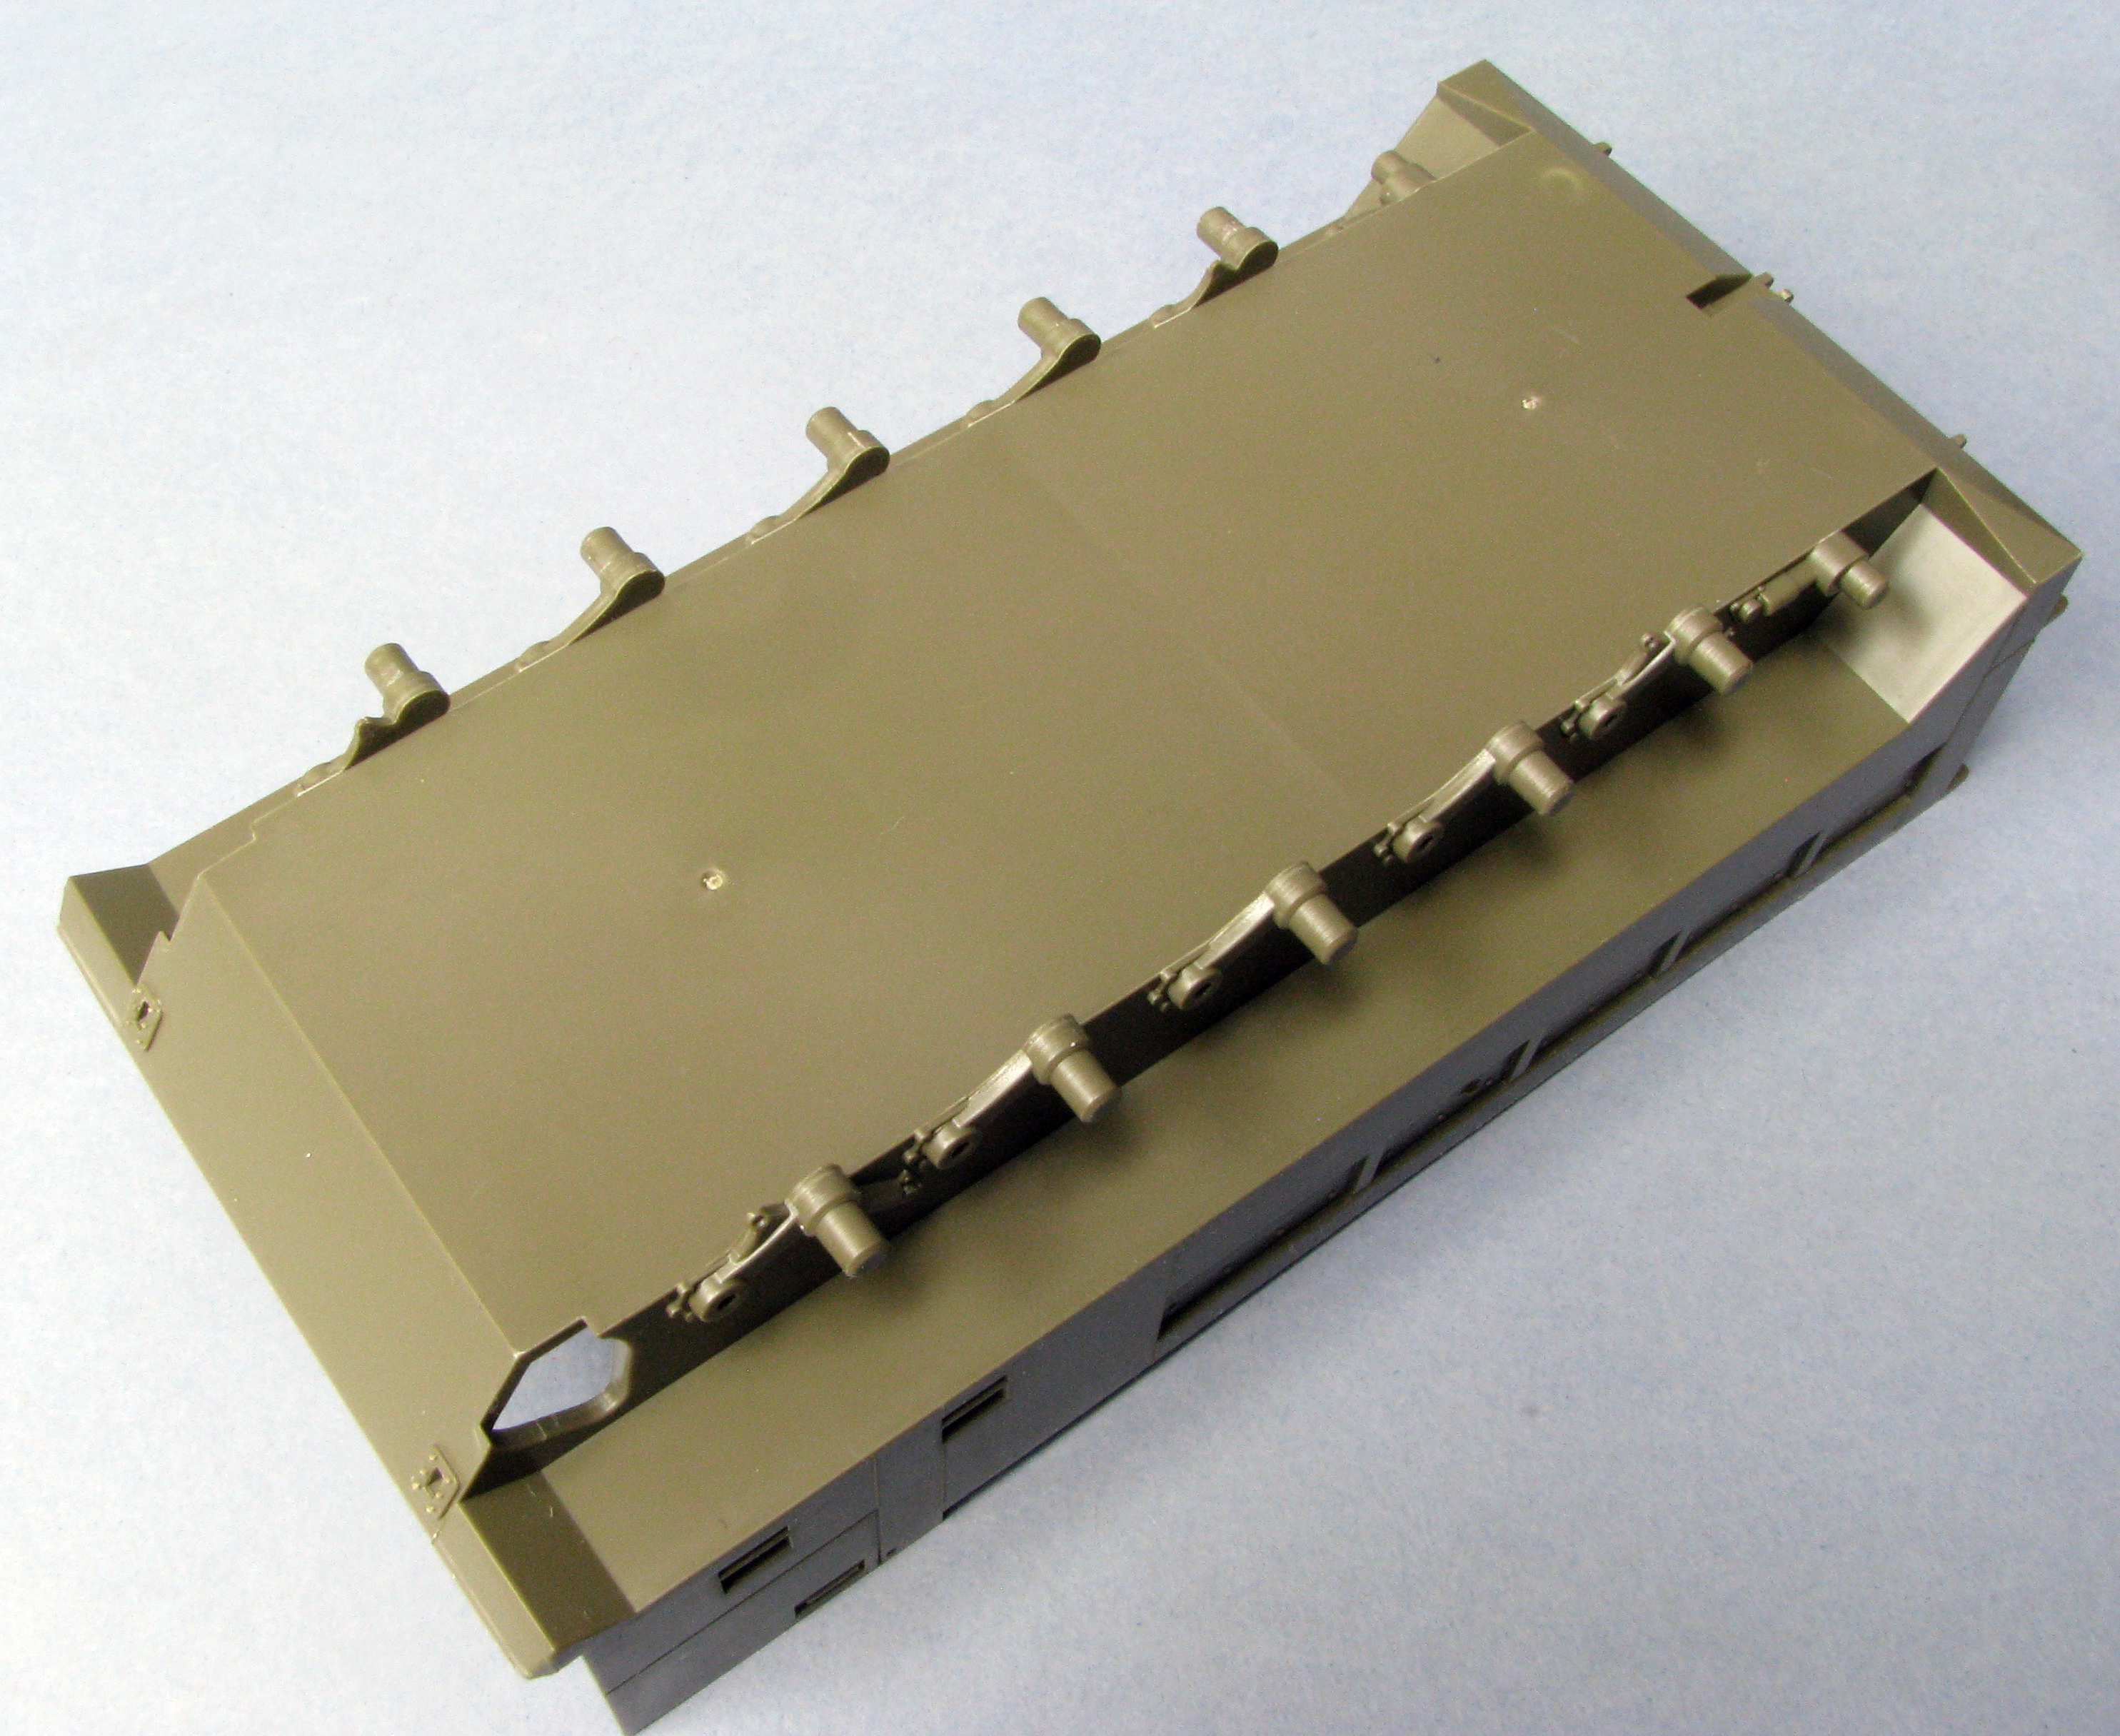
And I took the hull bottom out of the box:
And I decided to improve the wheel suspension - so that’s what I’m working on now. Thanks for looking and have a nice day
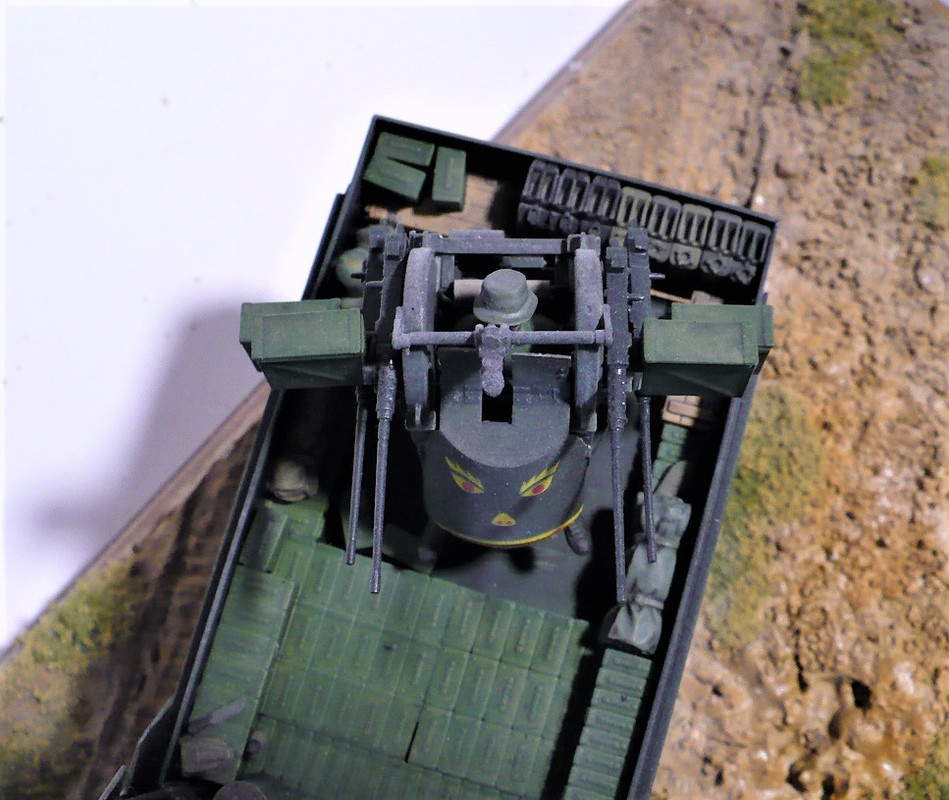
I hope the quad 50 assembly is better than the AFC club gun truck I’ve had sitting for a year part built. I bought what I think are better 50’s but the thing that’s driving me nuts Pawel and has caused the pause is the gun mouting on both outside 50’s. The inner mounts line up front and back but the outer mounts will cock the gun muzzle inward.
It suddenly dawned on me as I was typing this that that may be intentional to get the point of aim in the same direction. I had only seen one in the flesh from a distance. Pawel, you have built other quads, am I assuming correct? If so I still have to wonder why the outer mounting pads are not cocked slightly as well…
LOL I see by the three *** the four letter word I used for ‘angle’ was mistaken for an anatomical feature.
I see that and you’re correct… Yours is a different kit. On mine the front mounts on the outboard guns is probably 3/16 further inside than the back ones.
Like Tcoat wrote, the barrels would have to be practically parallel. Now that AFV Club quad is somewhat old and has a lot of misunderstandings, but is still a step up from the gun truck “Nancy”, because you get a resin trailer chassis that is correct for all quad 50s in Vietnam. Some parts in the kit, however come from the half track M16 version - you have to watch for those when building this kit. The power charger (small gas engine/generator) would have to be replaced with something newer here.
Rob - That’s interesting! So what do you reckon, how many hours do you have in one of these babies? Like I wrote above, this kit has a substantial commonality with “Nancy” gun truck, but improves on it.
Tcoat - maybe I’ll get to building a gun truck on wheels some day too…
John - a plain M548 seems to be a pretty common vehicle, but it has some wild variants, too, and those can be rare.
Thanks a lot for your comments and have a nice day!
Pawel I just looked at your quad build again and posted a question you have already solved somehow. How did you make the bends on those ammo belts? They turned out fantastic and no doubt you’ll be doing it again.
The M548 was just basically an armored pickup truck. We had ring mounts on some of them, but I don’t recall ever seeing an M2 mounted. The cab cover was always in place.
We learned to drive on M113s and the M548 drove the same way. Easy to drive, at most I probably was on one for a couple of days worth of training.
Glenn - I already wrote you something in the thread you started! Thanks a lot for your kind words!
Rob - you make it sound like fun!
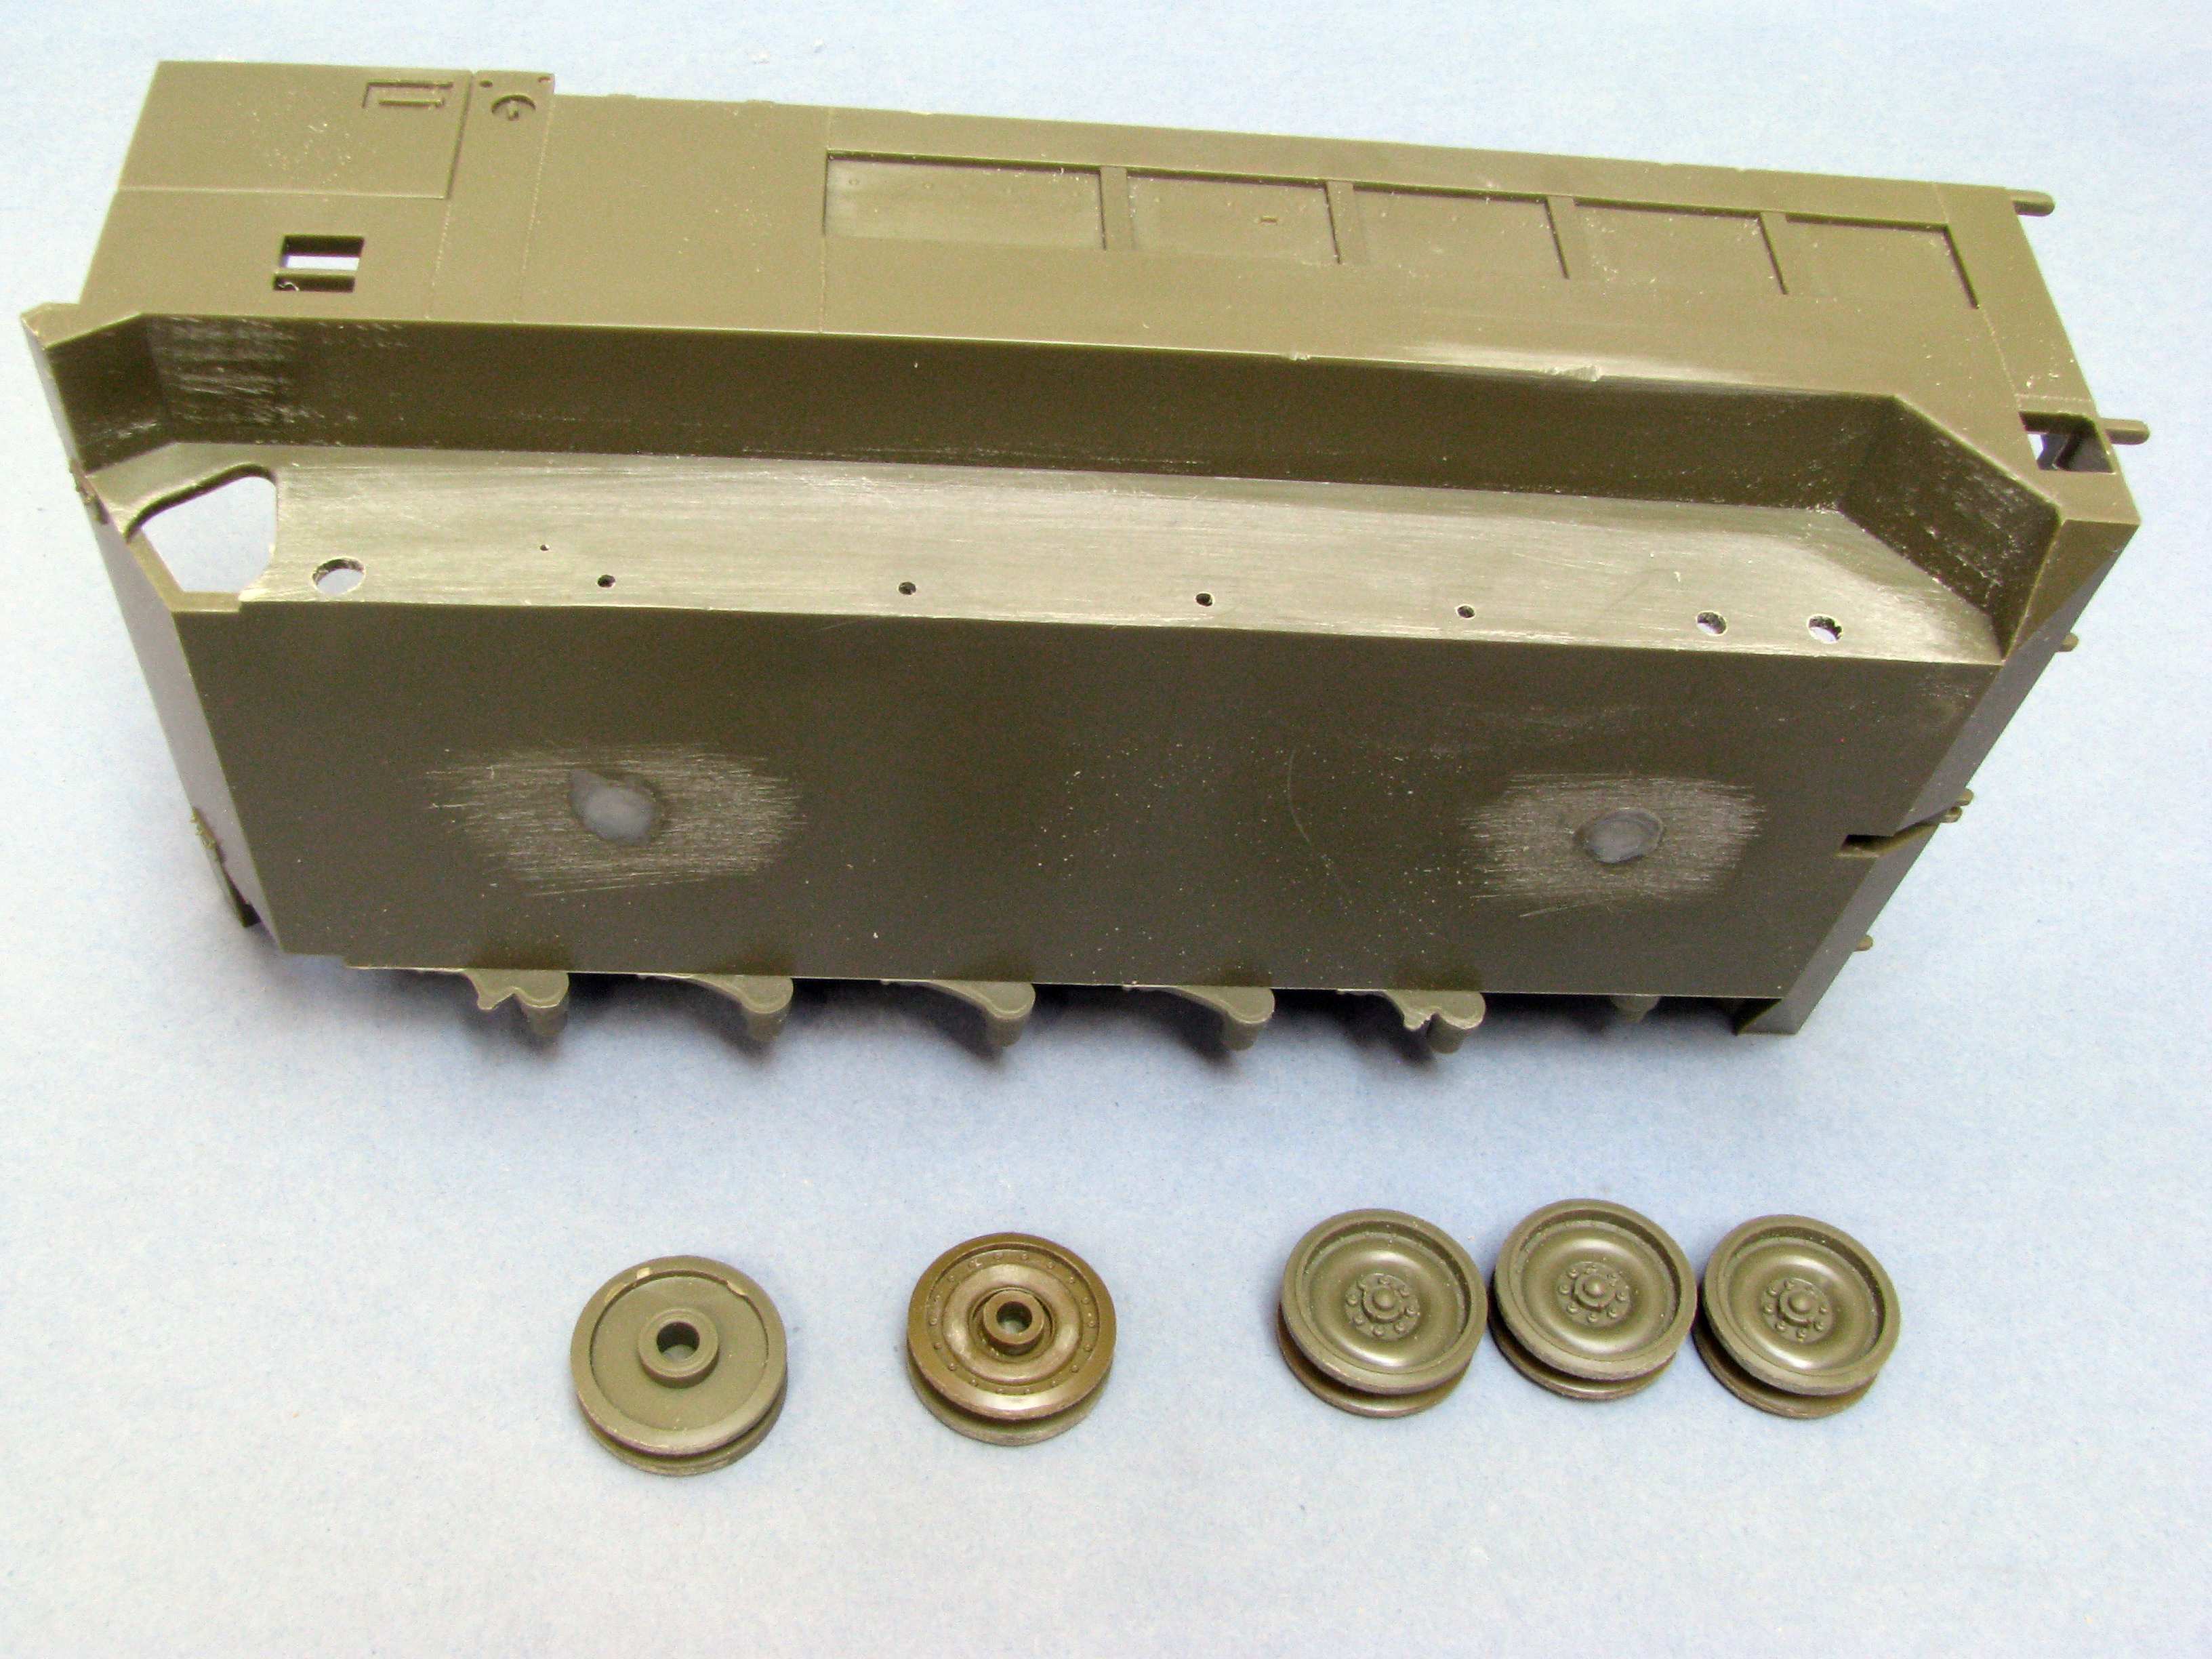
And in the meantime I got an Italeri M113 variant to use it as a donor for a chassis parts transplantation. I started with lots of dry fitting and measuring. Then I drilled a hole in each road wheel pivot point to mark their positions. At last I took a saw and levelled the playing field, so to say:
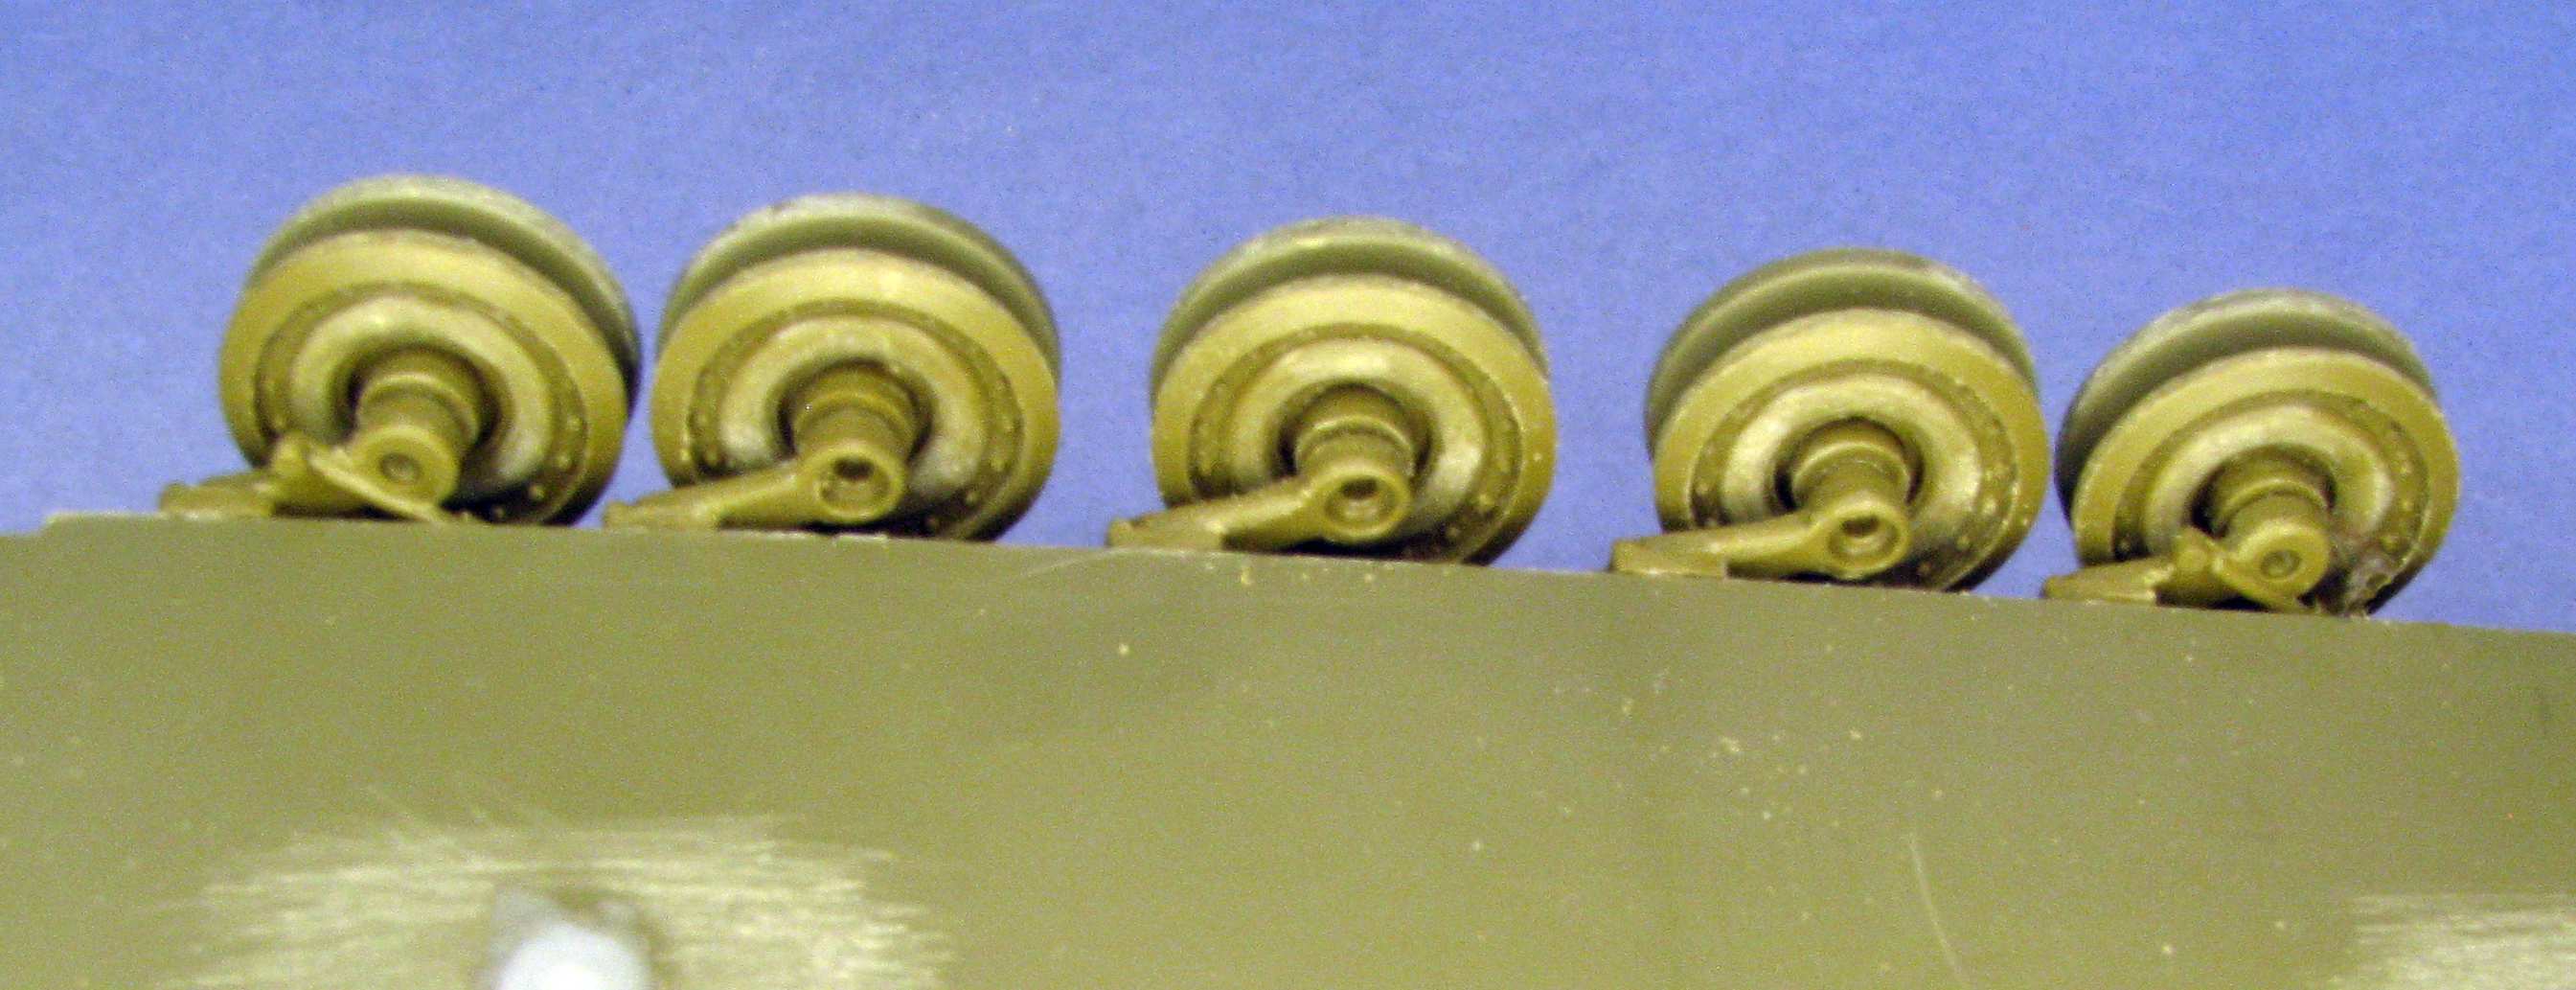
As you can see I have already made some road wheels. The leftmost wheel shows the AFV Club part - as you can see no detail on the inside, whatsoever. That’s why I decided to take the italeri part for the inside of the road wheel (second from the left), but also use the AFV Club part for the outside (it’s quite nice).
As I’m writing this I already glued the road wheel arms in place and now I want everything to dry throughly to get a nice stable alignment. Then I’ll take next photo for you and start working the other side.
Gino, Gamera - thanks a lot for your comments, I’m glad to have you on my thread here!
Gamera - you bet I put a lot of time and effort to select the right ones! [:P]
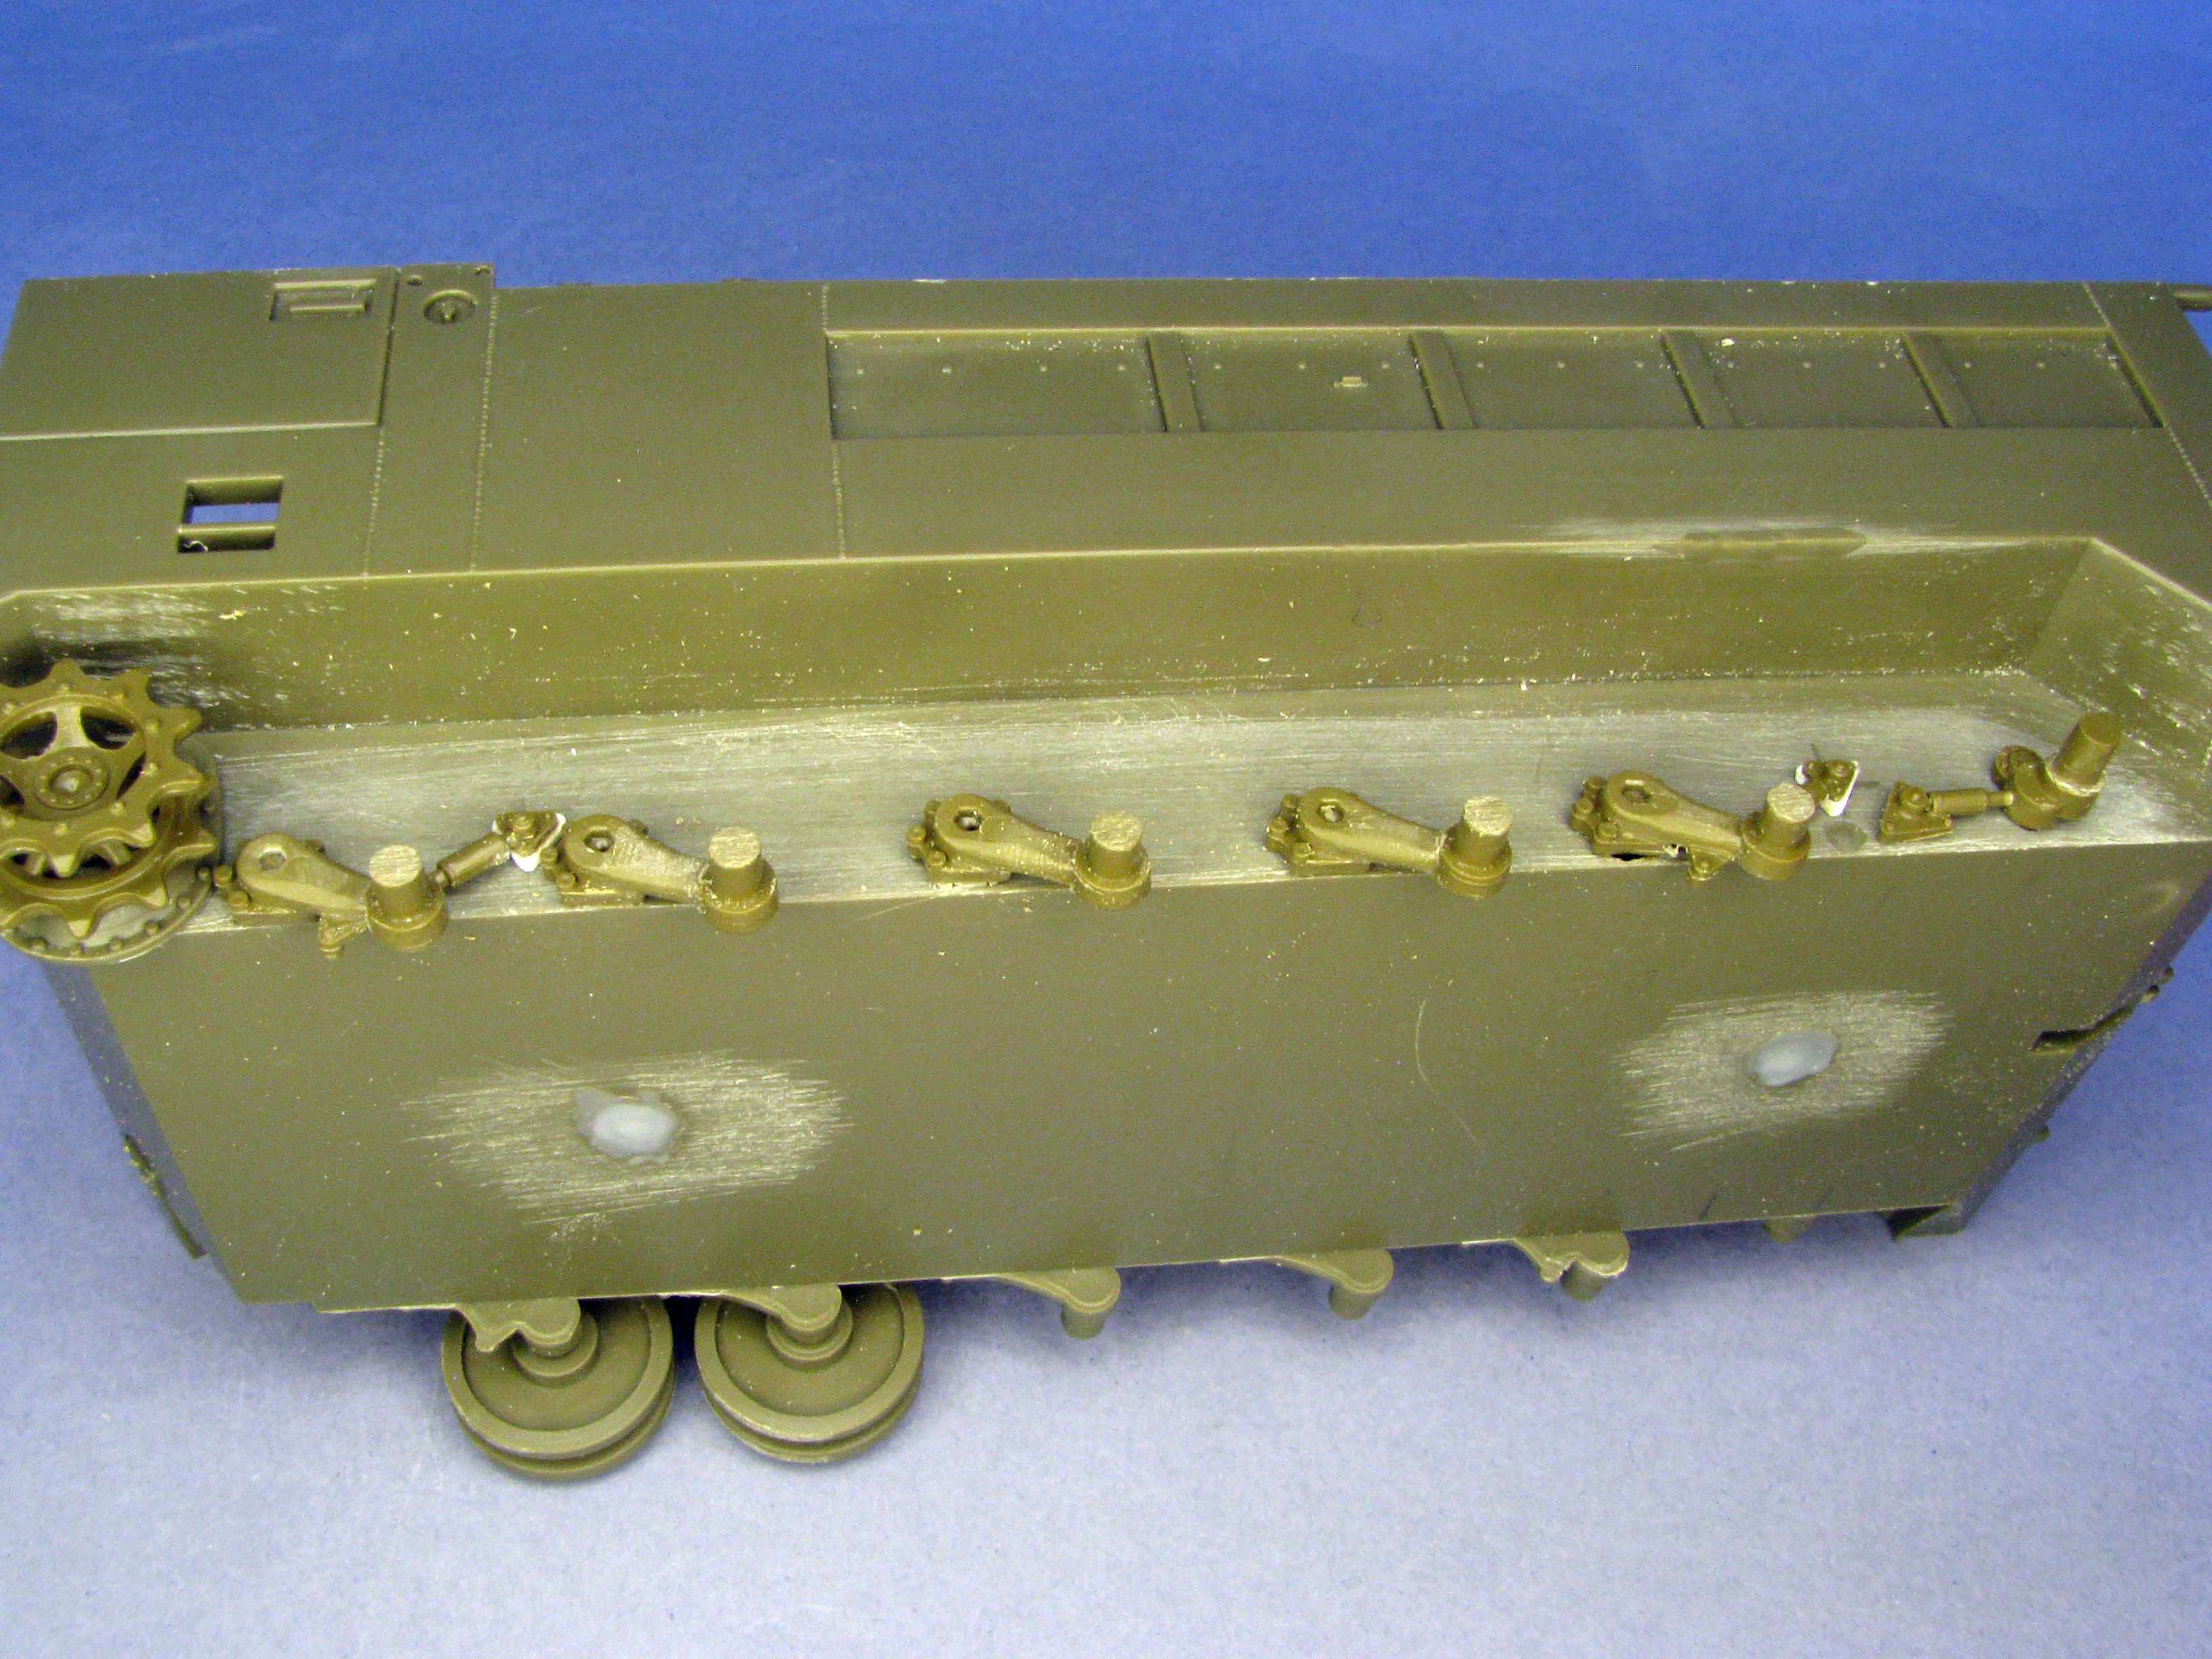
And I also wanted to let you know how the “transplant” is doing. Here’s how the new suspension looks from the inside:
And here’s a photo showing the wheels off, a the same time comparison to stock suspension on the other side:
And it’s that other side that I’m working on right now… I could use some “The Doors” right now… “…break on through to the other side, break on through to the other side, yeah…”
Thats looking fanrastic. Like Gamera said earlier, You always pick great subjects. I always enjoy your work, And you always do fantastic work. Thank you.
lurch - thanks a lot for your kind words, they mean a lot to me!
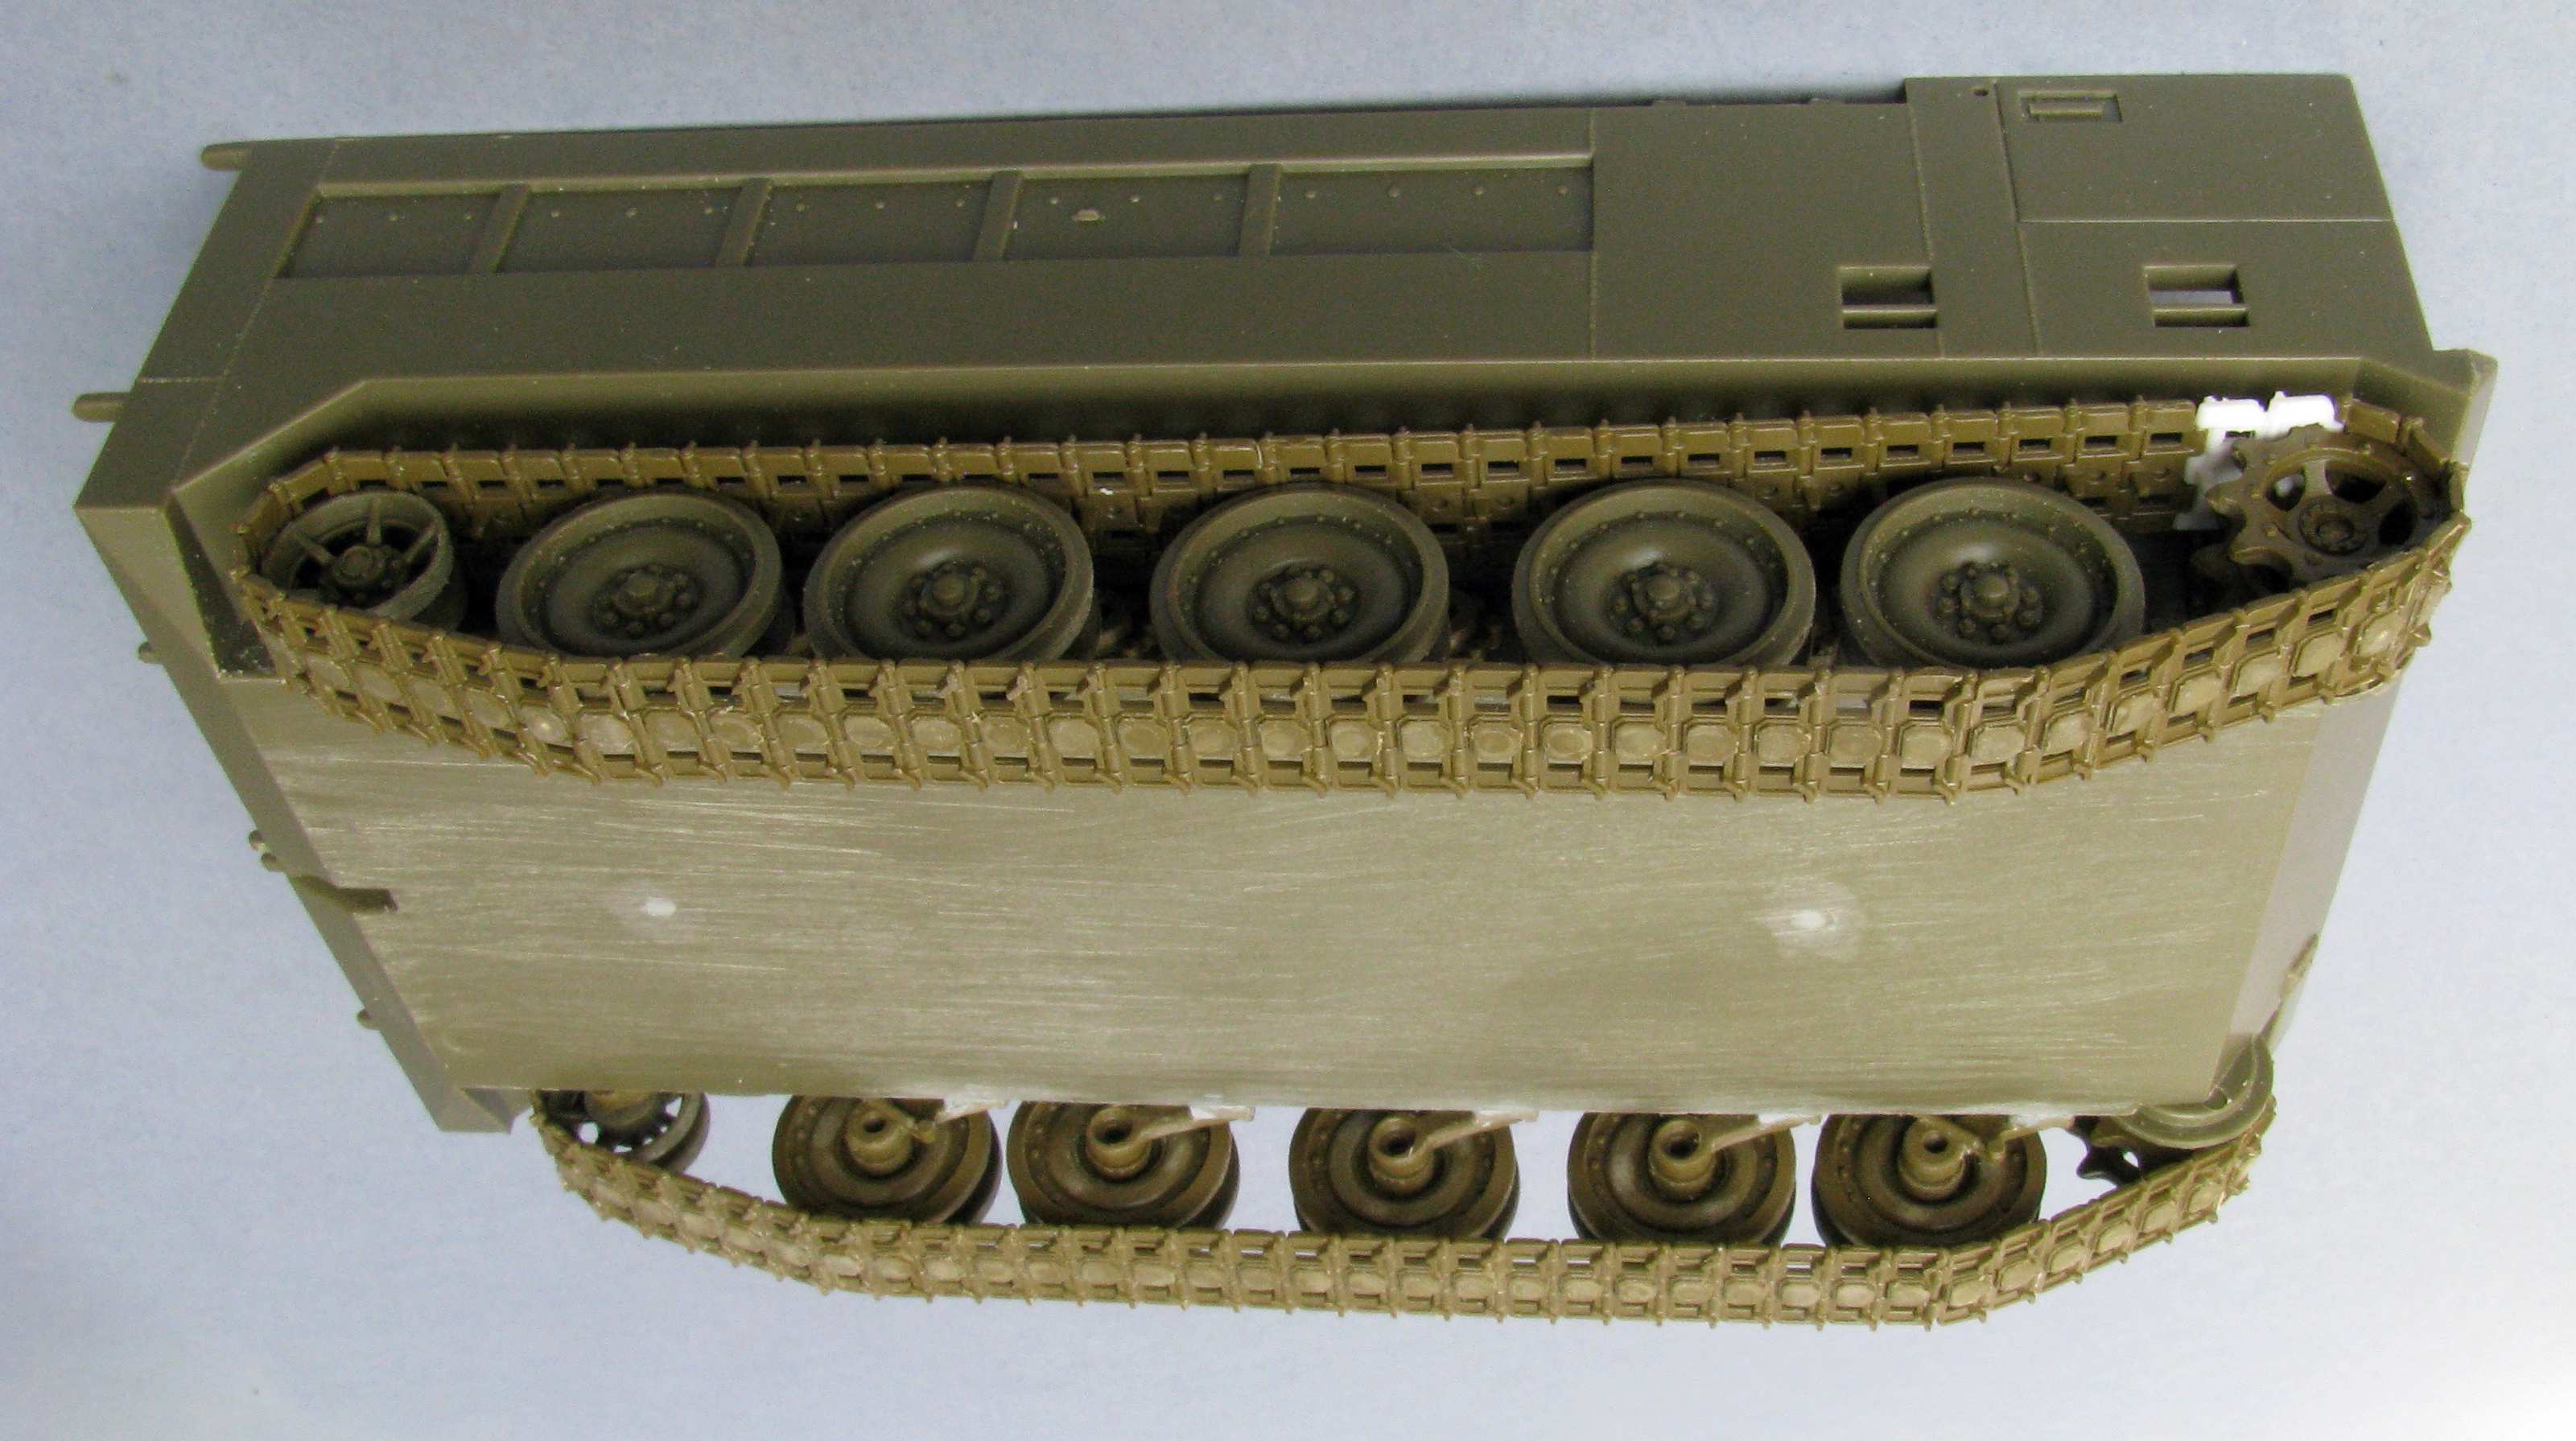
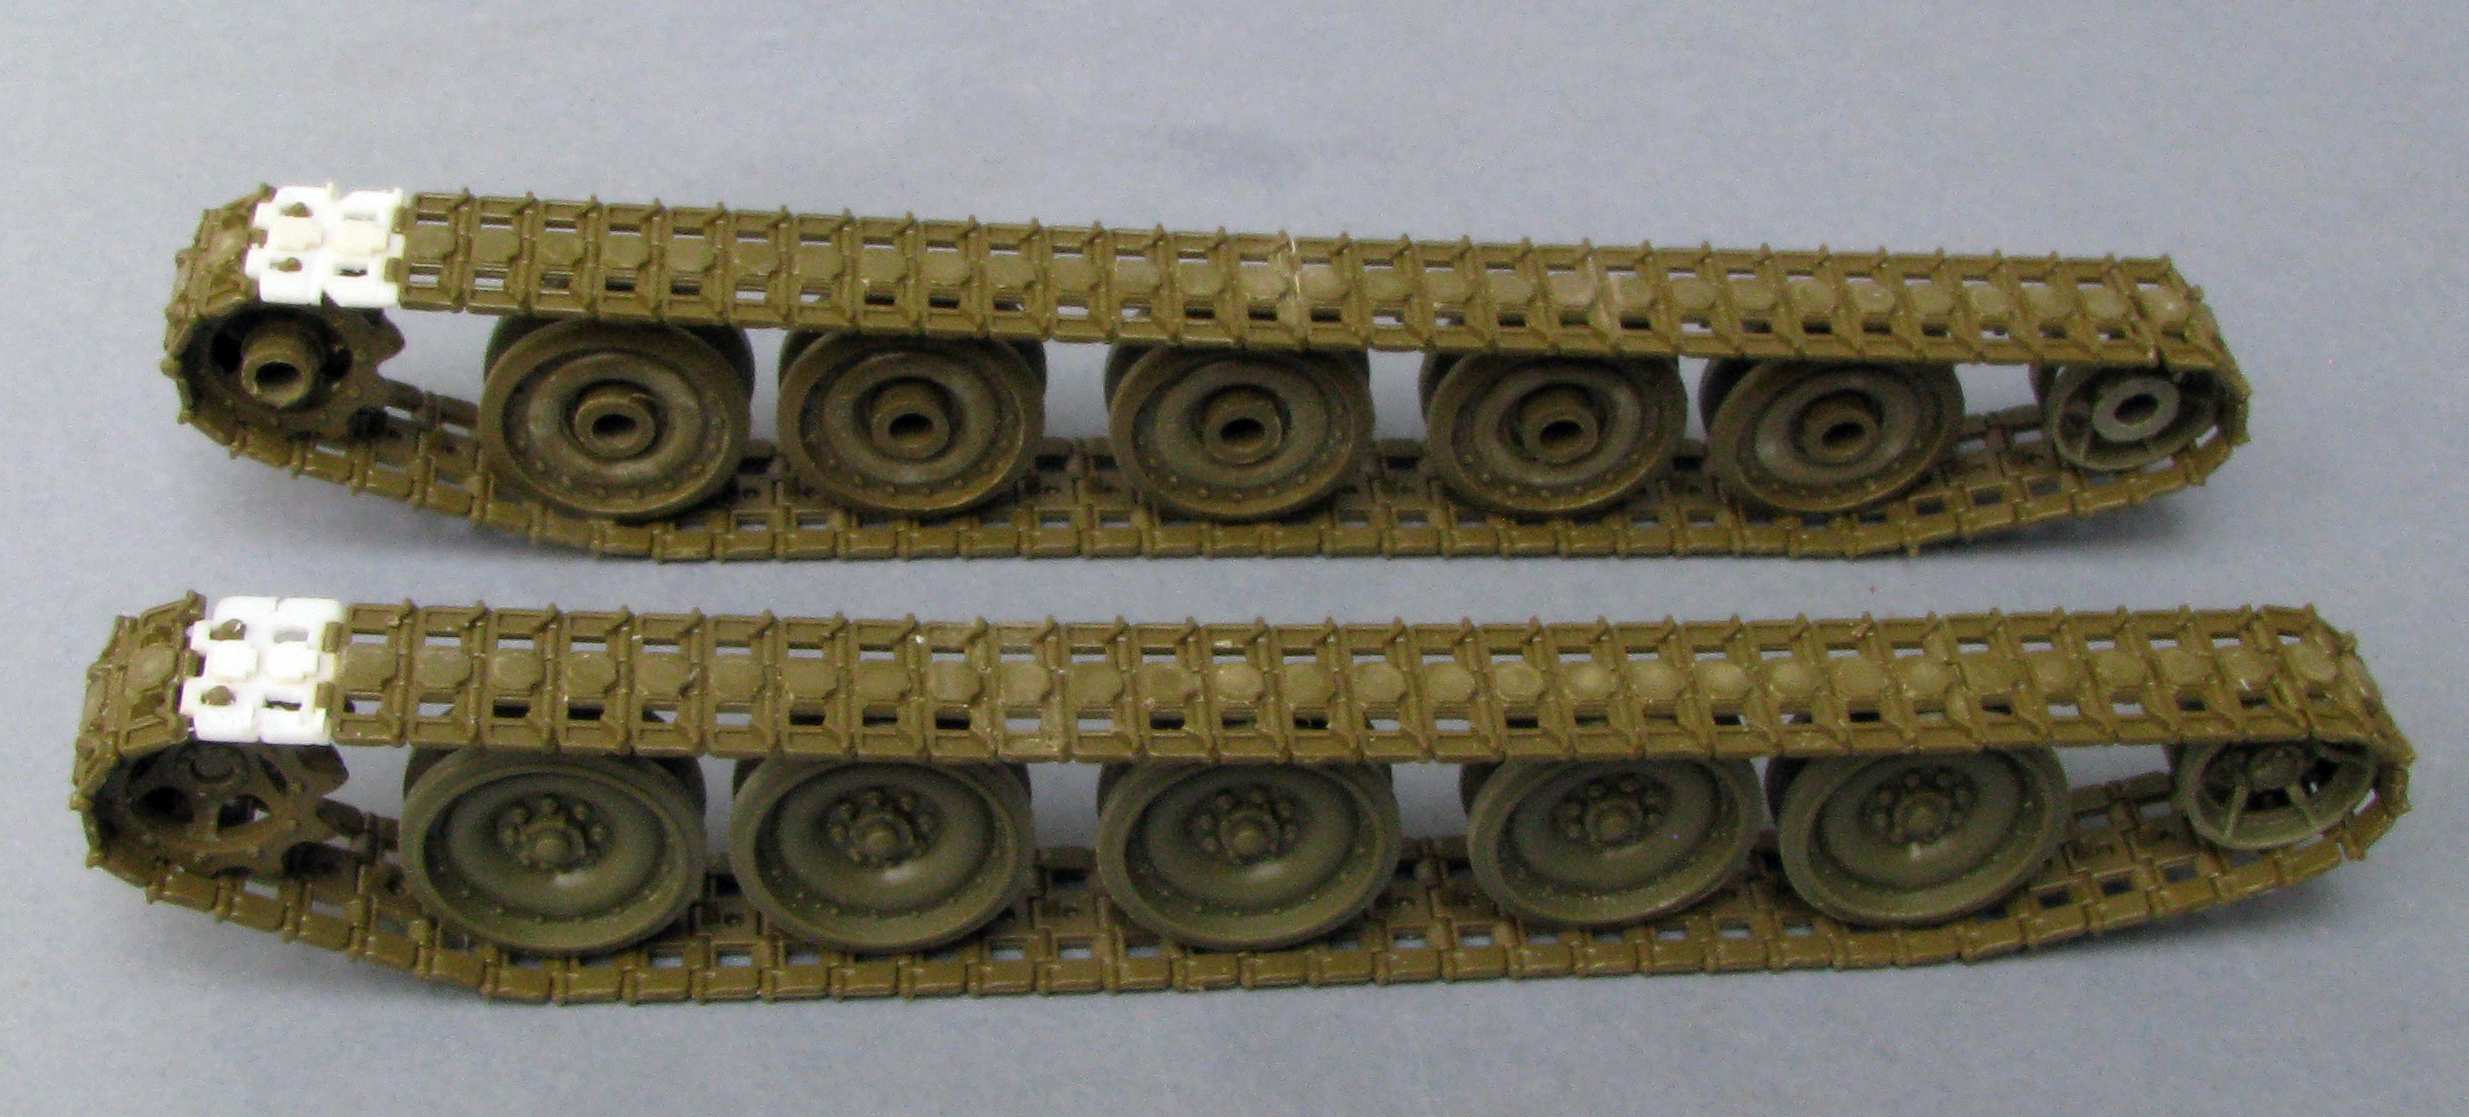
And I managed to finish the transplant! As it turns out, Italeri gives you 69 track links per side, which looks like a lot, but the tracks are still two links too short - so I decided to scratchbuild those missing two links per side and put thm where they will not be too visible. And so the tracks are finished:
As I still want to paint them, I just made the track sets removable for now - that should help with said painting:
Now I’m starting working on the hull - I have to distress the sheet metal some, to match the 1:1 photos.
Is it me, or amybe photo distortion that makes the drive & idler looks just a smidge too far forward & back?
Like, maybe the donor kist locations were a tad long?
Would that be worth taking calipers to other 113 kits to measure the center-to-center, maybe?
This, as it’s all too common to take measurements off unloaded museum/display vehicles, which is like to make the resulting track length too long, rather than too short. Just spitballing here, but also remembering one too many high-riding M-60 kits.
Many display tanks and APCs have tracks that have worn rubber bushings that make the tracks seem much more loose than they would be on a vehicle in service. Walking track is a weekly and sometimes daily task done by crews, so any track links with worn bushings would be replaced more frequently.
In a tank battalion, just about every tank had track changed out annually, not as a scheduled event, but as it was needed due to wear and tear after major exercises.
I don’t know exactly why it turned out this way, but I think there’s some problem with the Italeri track to begin with - there are 69 links per side in the box, AFV Database says there should be 63 on the left and 64 on the right - that’s one thing. Then I agree with Cap’n - it would be enough that the distance between the sprocket and the idler is 4mm bigger than in the M113 kit and there you have your 2 links.
I have no way of knowing for sure, but for me the photos of the real thing show the track in pretty good condition and not too loose - but a bit on the loose side, as it seems to touch the rear road wheels. I remember reading that the correctly tensioned track should hang a bit above one of the road wheels - but I don’t remember how much and above which wheel it should be.
I also managed to decipher the inscription behind the driver’s doors - it seems to read: “REMOVE SCREEN, INSTALL DRAIN PLUGS,
ACCESS COVER PLATE AND GASKETS,
BEFORE VEHICLE OPERATION”
Now I wonder what could be meant with “screen”?
So now I’m startin to work on custom decals, as I need some data placards for the interior.