Harv - are you still needing a drop tank ? I also have some leftover “office furniture” after using the PE set on mine…
Thanks. it’s a 1/48 Tamiya F4U-1D. It came with the moto tug which I did up nice too but don’t have a pic yet. With that said, I think I have most of the decal sheet unused except for the stencils if anyone needs any markings.
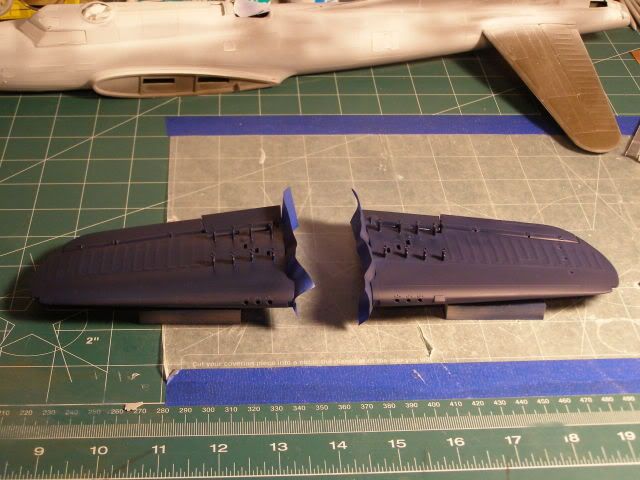
Ok Frank I just did this for you. Since you called me on using the wings to tame a set of treads [:-^] [(-D] Here they are fresh out of the paint~booth. Maybe tomorrow morning I will be brave enough to mount them on the plane [X-)]
[(-D] [(-D] [(-D] [censored] [censored] [censored] [censored] [soapbox] [banghead] [censored]
Trumpeter - …
The Rumors are true, I guess this is why I have seen these only in “Fixed” positions only
[tdn] [tdn] [tdn]
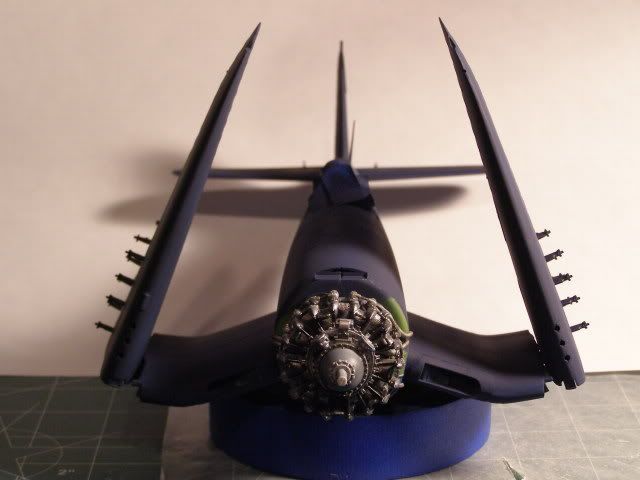
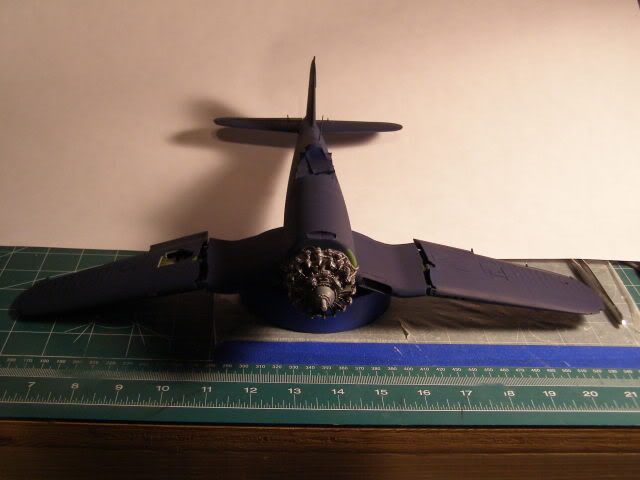 Dumbos ears have more form… I believe they would sag even further down if it was not for the bench top. I Swear …This Bird needs a Victoria Secret’s “Push ~Up” Bra !
KG4 – Stunner! I can hardly belive that’s brush-painted, you have a very deft touch. I’ve wanted an FAA Corsair for a long time, and this convinces me to add one to the collection. The open canopy – the Tamiya part posed, or an AM? A wonderful piece of work, I’ll be very happy if mine comes out looking so good.
Padakr – It sounds like the old Hasegawa kit, on a 2007 rebox copyright. It’s a pretty good kit, if not for the raised panel lines it would still be holding its own with newer examples. Still, midnight blue aircraft have virtually invisible panel lines from six feet back, at least in photographs, so that may be less of an issue that for other types. Thanks for your thoughts on the gear and bay colors, it makes sense. These planes (El Salvador’s) were reconditioned in the US in the early 60s, I believe, so may well have been given full Interior Green corrosion proofing. I’ve done the gear struts and prop hub in gloss white – evidence below.
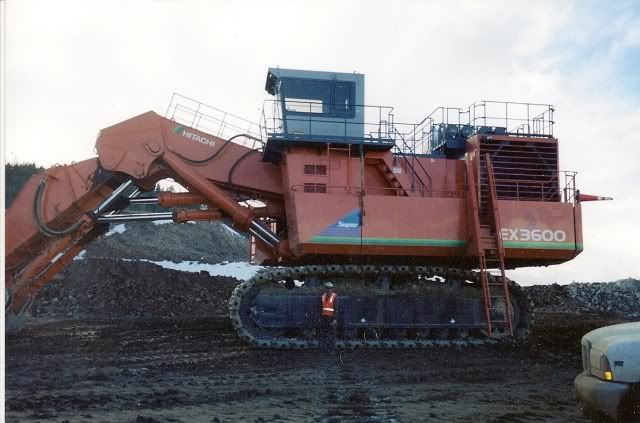
Summit – Oooooooohhhh, my… This looks like a kit with overthought engineering. As Scotty said, “The more they overthink the plumbing, the easier it is to stop up the drains.” Trumpeter haven’t quite got it right yet, have they? Reminds me of their treads on the beast I started building for The Hunters GB earlier this year. Half an inch short, and the best stretching I had the patience for was a quarter. It went back in the box until I have the patience to wrestle with it again. Tamiya should take them on at the big-scale game, if the subjects were carefully selected they’d win the engineering hands down.
Here’s the Salvadorean bird’s detail bits. I’ve also sprayed the exhaust manifold and back of the open cooling flaps Nato Black, and will heat-stain/rust the former. Hopefully I’ll spray the engine tomorrow, then I can get the nose end of this beast put together.
I’ve ordered some True Details 1000-pounders and will scavenge rockets from a Mustang, to explain the fully collapsed landing gear. I also ordered Express Masks, so when they arrive I should be well along toward completing this animal.
I’ll progress as I can, there are sooo many other committments. I’ve foolishly taken on three more GBs in the last fortnight, not to mention real life!
Cheers,
Mike/TB379
Sean, I guess you`ll be doing folded wings, right?? Or you can take the time to glue bracing in and just glue the whole works…naw, do it wings up. I wish I could have done atleast one wing up like I wanted to…
TB, good start. Cant wait to see the color and markings…Harv
Sean- What the [censored]? If I didn’t know better, I would have thought you glued the wing on upside down! [:O] Quite the boo-boo on Trumpeter’s part. Too bad, I really like them with wings down and locked.
Thanks, Harv –
Bit more progress tonight, I’ve applied pigments to rust’n’dirt the exhaust stacks revealed by the open cooling vanes, and dressed some joints. I wet-sanded the fuselage seams and puttied the wingroots. I must have got the centre section of the wing a tad off-true as there were some fine mis-matches. The underside rear join needed adzing back and might call for a spot of filler, while the rest displayed fine gaps. I did the top wing joints with Squadron white, highly thinned with liquid cement and applied with a fine brush. They’ll be sanded tomorrow.
Remaining jobs include assembling the flaps, mounting the outer wing panels, painting, detailing and installing everything forward of the firewall, and painting the bay door insides. I need to drill the locators and mount the heavy duty pylons for the bomb load, and finish installing the rocket racks, but with that lot done she’ll be ready for the paint shop, and that’s dependent on the canopy masks coming in.
I might need to take a break from the Corsair, to do some on the Mustang and defnitely get my two deadlined article scratchbuilds done, plus finally get my Tiger finished before Big Cats expires at New Year. (And start some more… Whimper!)
Cheers,
Mike
NICE work to all!!! LOve the progress and finishes!!! Greta work guys!!!
That Revell kit is new boxing on the ‘OLD’ Monogram kit. It dates pre-70s!!! Someone else here built the same kit i think? If I remember the copyright inside the fuse sides read 64!
[tup] [(-D]
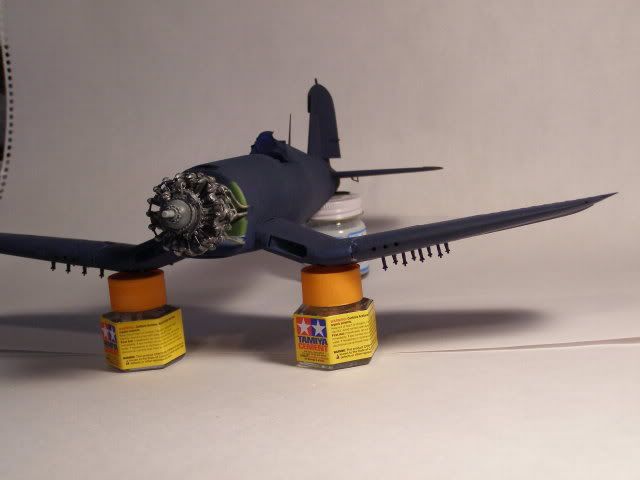
The problem lays within, the outer wing is heavy, I can only imagine what it will be like with the rockets attached.
To solve the problem I will snip the hinge so not to damage anything trying to release the catches. Take a sanging stick and clean the edges, followed by some Tamiya Orange Cap Cement. (in the flight position) Clean up the seam with a piece of scotchbrite and respray. I have come too far to turn my back now, [oX)] Ha ha ha ha hah… you piece of [censored]
Sorry Sean. I missed this post. No, I`m good. But if anyone needs a 1/32 pit set, I have a Lonestar set. Lets just say its a diamond in the ruff and leave it at that. Thats why I went with I believe Velindon cockpit…Harv
Is it better then the sparse Revell “Black Sheep Corsair Pit Details” you think ? I have that kit buried away somewhere in the pile…
Well, yes. Lots of detail. But there are pin holes to fill and I found that in some pieces there was molding material stuck in lots of crevaces. Here is one pic.I thought I had more. If you like I can take more…Harv

I was worried about how my wings were going to look. But they seem to be okay. Kind of surprising as this is a lower cost/quality model compared to some of the others being built.
The underside of the wing has alternating pins to keep the wing halves lined up, and it is a very simple hinge inside:
Don’t know how it will do after I get the rockets on, and I am worried that I might break something simply by opening and closing them. I try to be extra careful.
Hello all,
The builds so far are looking great. Thought I’d share my progess so far.
I joined this GB just a few weeks ago now. I was building the Revell 1/32 kit from an OLD 1970 boxing. I think this was my first mistake. The kit plastic is strange, very brittle and hard and has a tendency to shatter.
Assembling the engine was fun as all the smaller fragile parts broke into several pieces during my attempt to remove from the sprue. I then spent an evening gluing these back together. The left hand fuselage had a nice partial crack starting at the coaming, this was superglued.
The sparse engine and cockpit were painted along with the tail wheel assembly and installed. Before joining the fuselage the partially cracked fuselage decided it wanted to crack so I now had a three piece fuselage!
The wing fit was atrocious. The outer wing sections are separate and must be attached via tiny tabs. The left hand wing went on OK but the right wouldn’t stay in position as there was simply not enough plastic to grip. Corsair was shipped to my father who built up a substantial plastic fillet to fix the wing in place which worked well. However, he then proceeded to superglue the horizontal stabilisers on at the wrong angle (up instead of slightly down). So the tail just looks bizarre. He will be reprimanded.
The cowling had lost several fins so these had to be rebuilt and the already weak undercarriage was broken in the box. To top it off the tail wheel assembly sheared clean off the mounting pins and must be reattached. I feel the U/C is extremely fragile and now that has been broken it won’t support the weight of the model.
I primed the model but I think I’m just going to dump it in the bin. Too many things have gone wrong with this and the stabiliser issue is frustrating, it just looks wrong. Any attempt to remove them would destroy the model especially considering how brittle the plastic is.
This one has been a comedy of errors from the beginning. One last point, I paid AUD $30 for the kit, AUD $37 for the EagleCal VF-17 decals (thanks to the fickle exchange rate and then finding out I could get them locally for $15…) an another $10 in paint for the beast. What a waste of money…
Once this monstrosity has been carted off I will start again with a 1/48 Tamiya Corsair…
Stuff like this really saps my enthusiasm for modelling and makes me want to exit the hobby.
Steven
Steven - Sorry to hear about your troubles with an old classic. I have heard this same story ever so often. Myself, I prefer old kits over the new… I think alot of the issues with some of the old ones are improper storage. Extreme heat or Extreme cold or both. I have kits from the 1960’s I have built and other then yellowed instructions and decals no issues with the plastic. Some of the old Matchbox kits have a “Harder” plactic that will break instead of cutting with a sprue nipper - I use a razor saw and file the remaining nub off.
In my stash I have over 600 kits which none of them were manufactured after 1982, but I have kept them climate controlled ever since I have had them. Stash back dates 20 yrs or more.I have a great time fishing one out and building it without incident.
You talk about a waste of money - That is how I feel about the Trumpeter Kit I have been making. It will be my last as the rest of them are destined for ebay. I am mostly a OOB builder anyway, so a 100 part engine assembly really does not impress me, since it is covered up by a cowling. I have had a lot of setbacks and agravation with this kit but Dang’it I vow to finish it. Dont give up completly on the classics, one bad egg smells up the whole dozen.
Dont get me wrong Iwould still like to take a shovel to this kit [}:)]
Removed self from build.
[(-D] ROTFLMAO
Looking good Sean! You seem to be making good headway. My guess is that you intimidated that poor lil’ defenseless kit into submission. You’re on the home-stretch now! [:D]
Holy Cow , Joe I had given you up for the Ghost my friend. I cant tell you how Happy it has made me that you stopped in and Posted. I hope everything for you has taken a Turn for the Better. Have a Wonderful Thanksgiving and Please come back more often.
Removed self from build.
