Well!
I have to give it to you. I NEVER would have gone to this amount of trouble. I would’ve gone to ACE hardware in the next town and Bought something I could use.
Well!
I have to give it to you. I NEVER would have gone to this amount of trouble. I would’ve gone to ACE hardware in the next town and Bought something I could use.
Hey TB–I want what I want-- and what I want won’t be found in a hardware store, not even close. If it were, I surely would have gone there. Truly, if I wanted to settle on this, I could have used the big ugly greenies that I ordered. I don’t like settling, and I came out of this journey a much better modeler. That is always my goal. Maybe you are a more advanced modeler, I am still learning.
The imagination that’s going into this build is mind blowing and I like all the gadgets and techniques that you’re using along the way.
Thank you, Joe.
I was like TB , then l thought of all the new techniques Steve has learnt , well do e mate , as l said in an earlier post , your a tenacious son of a gun mate . [:D]
Thanks Steve O.
Yeah it’s a matter of learning new techniques. Thanks for writing this up Bakster- I’m learning with each post!!!
You are welcome, Cliff!
Well Bako old mate, I too have learnt something from this. Don’t mess around with making molds, it’s way too complex for a simple bloke like me. You however are a star! Well done mate, I love your determination and I have no doubt that your skills have increased significantly! So now when I want something molded, I’ll just hop on the PM and “Bako, old mate, I was wondering if you could give me a hand…” Just joking. Top result fella.
Hey, if you do need something, please let me know. If it seems feasable to me, I am happy to help. I mean that.
And thanks for the kind words.
Btw. Though I finished one casting project, I am experimenting with another. If it works, it will be a cool thing. More on that in the weeks to come.
For now, I am working on attaching the wheels to the frame. I should probably paint the wheels first, but after all this time of researching, I am dying to assemble something. I am throwing caution and reason to the wind so I can scratch that itch. I may live to regret it but sometimes you just have to scratch. [:P]
Two wheels are on and I used 5 minute epoxy to secure them. I am happy with the look.
Circling back to before the wheel saga, I had decided to shorten, narrow, and align the wheelbase. That has been done, accomplished by some cutting here and some cutting there. The kit, as it comes, has the wheels in an odd configuration, no doubt to create a coolness factor appealing to kids. For my project, not so much.
In the photo, the rear axile is not yet secured, and it is just for reference. I guess the next thing on the list is to start dealing with that assembly. I will be lighting the rear lanterns, so I need to run wiring before closing up the huge voids that the manufacturer left for us to lament over.
That is it for today.

Oh so cool. This is going to look awesome.
Those look fantastic. But you’re right about painting them attached, going to be a little bit of a challenge.
But you’ll get it done.
Thanks GH!
Yeah some careful masking should carry me through on the paint.
It sure feels good to be assembling again.
Thanks Dodgy. It’s starting to get fun again.
great work steve , looking forward to seeing more progress . that’s what modeling should be , fun .
Axle void got me to thinking about underbody lighting along the axle.
Which then shifted to just under-body lighting. And just fillign the axle in.
The tape strip LED color emit based on voltage, as memory serves–so a person might be able to give a nice radio-isotope glow to the rig, were a person of a mind to do so.
Or not.
I probably ought not spend so much time fiddling with its of LED tap and watch batteries and coppor foil tape (other than they are just sitting on my desk askign to be fiddled with). So many distraction, so little time . . .
Not a bad idea. I will give it some thought.
Thanks Steve. And yes, modeling SHOULD be fun.
Today I have the rear wheels mounted as well and I began work on the rear lanterns. I should have some pics in the next few days.
All the wheels are attached. Last night I started aligning the engine and rear wheel assembly. I must have spent an hour trying to find the best angles to work with. You can see in the image that the engine and driveshaft go at an angle. This is how the kit was designed, but their design is ca-ca. Angling the differential/drive shaft causes the lantern mounts to dip. This then will make the lanterns angle downward. I will need to fix that.
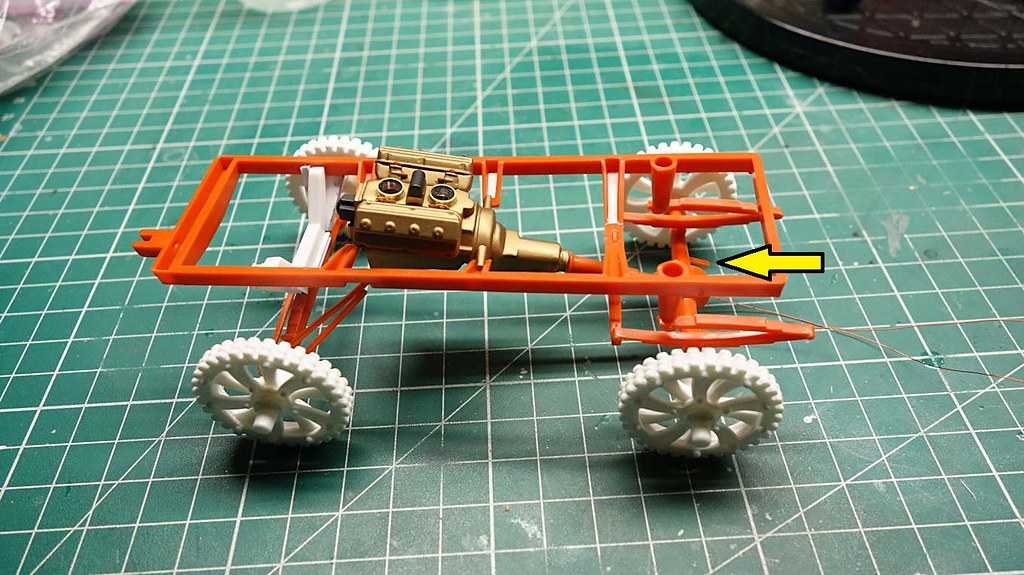
Speaking of lanterns.
I drilled a hole through the face of the lantern making a path for light to shine through. I also countersunk the opening. On the face of the lantern, I will mount a colored lens. More on that later.
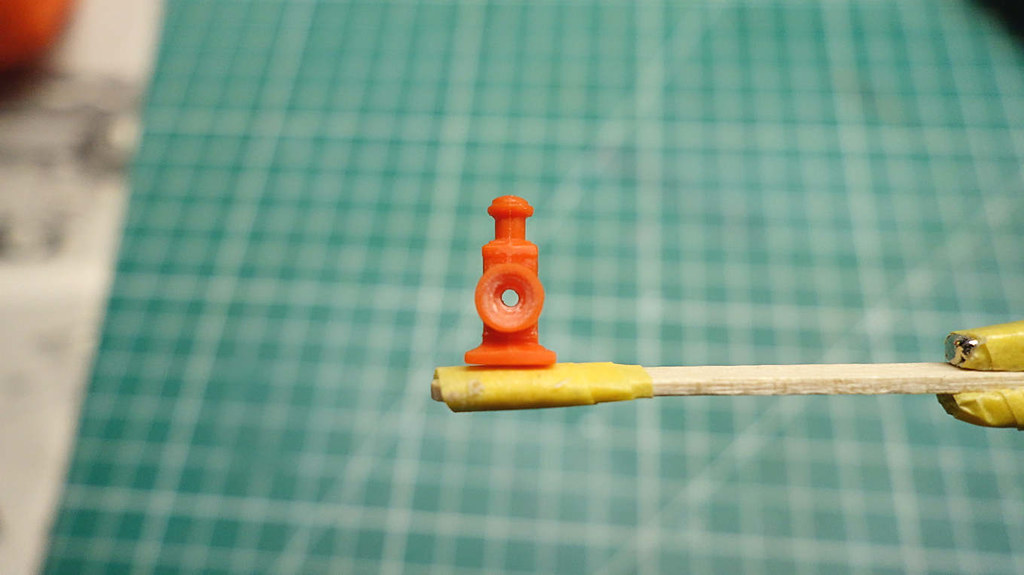
On the backside an opening was made for the LED, the light facing towards the face of the lantern. I’ll be using a chip LED.
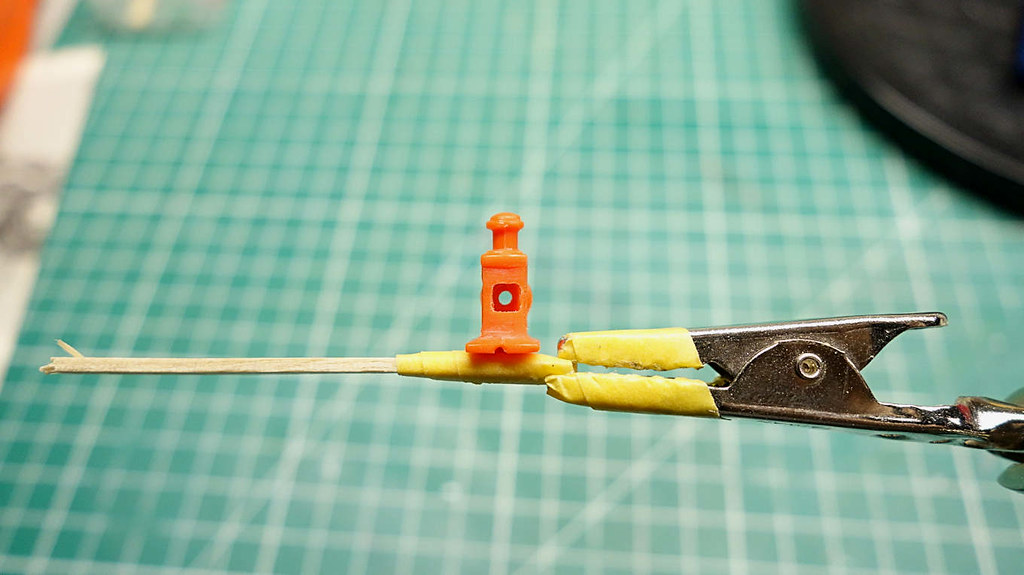
On the bottom I cut a trench for wiring, and from that trench a hole is drilled upwards to where the LED will rest.

Using rhinestones that I purchased from Michaels, I fashion the lenses. I don’t want them faceted though. These come with a sticky back but it is not strong enough to hold them as I work. I used a small amount of CA to secure the stone, and when done, I can detach it. Because of the foil backing, there is no damage to the backside of the stone.
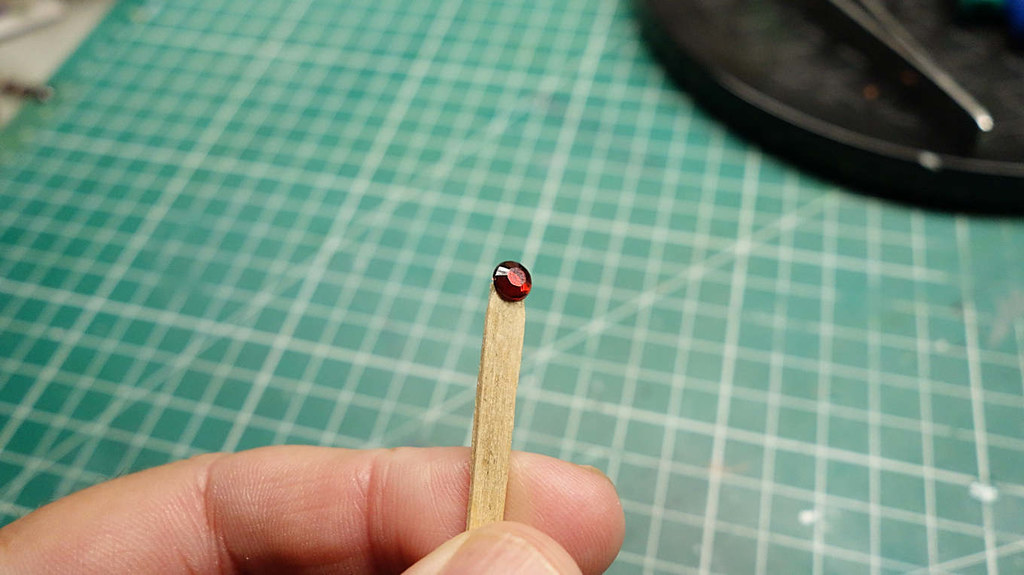
I round the facets with a sanding stick, turning the piece into a dome. I then follow up with a polishing stick, ending the process by brushing Future to smooth and bring out a high gloss.
I was initially leaning towards using green but because my plans are to use a lot of green on this build, I thought red will give it some contrast and pop. In terms of tail lights, this carriage is before the advent of cars and brake lights, so that does not play into it all. I could do clear, but again, red will pop. Kind of waffling. I suppose one could look at it as Nemo is setting the standard for future vehicles and everything that comes later follows his design. [;)]

That is all for today.