Right on brother! It works for me!
Glad you found all this useful. It’s a win win! [Y]
Right on brother! It works for me!
Glad you found all this useful. It’s a win win! [Y]
Thanks Greg!
Laughing. I doubt it, but thanks for the thought! And thanks for the kudos, Gil.
Amen brother. Out from the cave and into the light. All just in time for the clocks to roll back this weekend putting me in the dark again. Son of a …
Thanks Gam!
“Baxter’s Bit’s” will be a featured display at…
Little Timmy’s House Of Miniature’s.
( it’s an imaginary hobby shop/ model museum that I hope to actually open someday … if I can get my wife to leave me alone…)
nice job on the PP. I may have to build one of those myself.
BTW, we don’t have to turn back our clocks in Arizona …
Simply awesome mate. I take great strength from your determination, (I’ll explain more about this later, but your determination has helped me put new life into an old project). I will also be googleing “Bakster’s Bits” and “Little Timmy’s Warehouse of Minatures”.[:D[[:D[[:D[
Hey Tim. Maybe I should collect the meriod of bad casts and send them to you. You can make a display and maybe label it, Baksters Long Long Road.
Thanks and sounds good. It is very easy to convert. The items needed are relatively easy to find and all you need beyond that is an adjustable wrench, teflon tape, and probably a channel lock wrench. That is as long as you don’t need to make a new gasket. Some folks don’t have the issue I did. This is a budget tank, so quality control is not all that good. I would recommend making a new one either way because even if there isn’t an issue, you really need to torque those hold downs when using the supplied gasket. With the new gasket I made, I need far less torque.
I like that. Keep an eye out for a home that I can buy. I like Adobe style. [;)]
Thanks Mate!
I can’t wait to hear more about this project. Don’t forget to Do Tell.
In Nihongo romanji “baka” ( バカ ) is “bah KAH” although sometimes used as a BAh KAh, with equal emphasis on the leading part of both syllables.
There is a reflex with native English speakers to render it as BAHK ah, and that is not quite right, a bit like rendering “thorough” as “thor ohw” instead of “thur oh.”
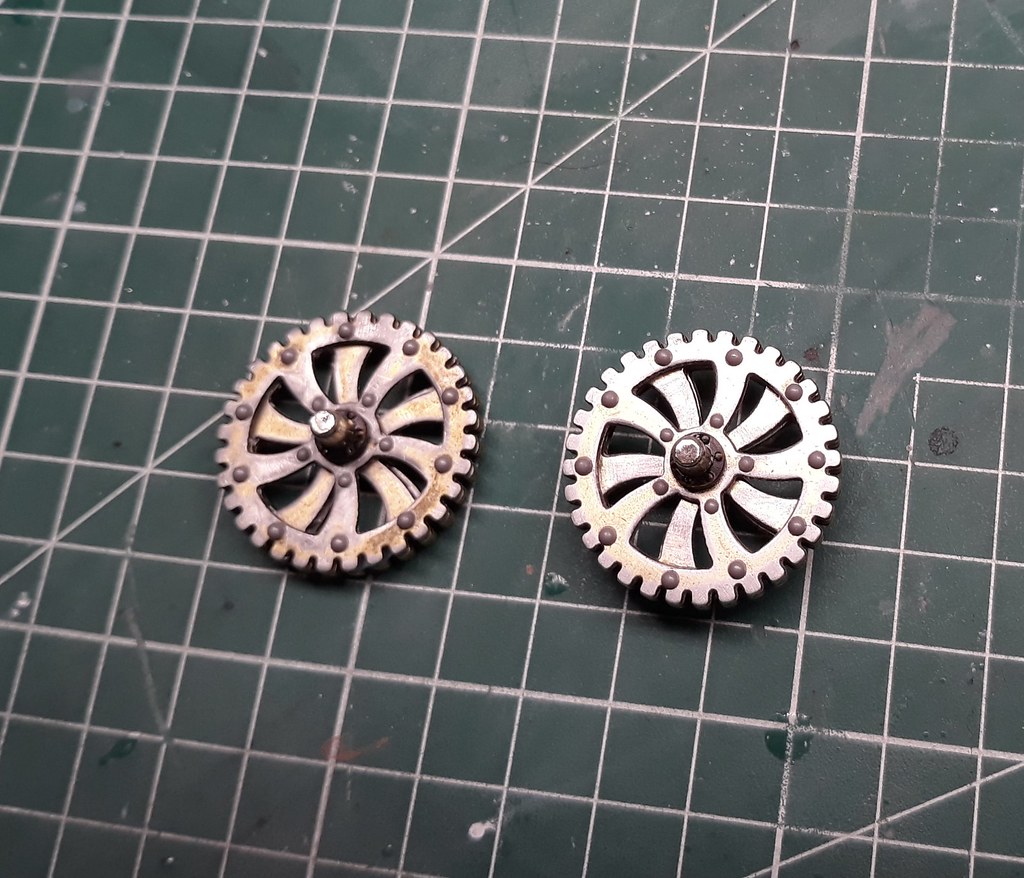
Wheel on the right is the opposite orientation. Next up is to make a mold for it. Not today though.
Powering along Steve.
I like it… directional wheels. Here’s hoping the tread teeth are directional too.[:$][:D]
Oh no. Pretty sure the teeth are all weather, no direction…[;)]
I
I am on a mission to get past this wheel business. Nemo is threatening to particle beam me if I dont get moving on this.
That doesn’t sound pleasant , better get a move on [:D]
Thanks Captain! I took a few courses in Japanese but I kinda sucked at it… [:(DD]
Bakster: Please get a move on - I don’t want to see you vaporized!!! I like the wheels, looks like she’s coming along well for me.
I’m shakin the tree boss. I’m shakin it. [;)]
Progress goes fast when you know what to do. The mold is in process. The first half of the mold was poured last night. Sadly, it looks like I need to order more silicone. I used up too much with all the redos!
Update. Oh and making the pressure pot gasket didn’t help. That sucked up a bunch.
Keep shakin mate cos we’re a watchin… No pressure mind you[:D][:D][whstl]
Speaking of wheels, I think it was Capn that mentioned 3d printing. There are a few videos out there on making 3D wheels, but I happened to watch this one. It shows the potential of this technology. It could have made quick work of wheels, if I had the equipment, and the knowledge to make it happen. Maybe someday and it when it gets easier.
I should have an update this week on the other casts.
Part 2, The Extended Version, Casting My Wheels
Well, hopefully, after this post you won’t have to see more from me regarding casting.
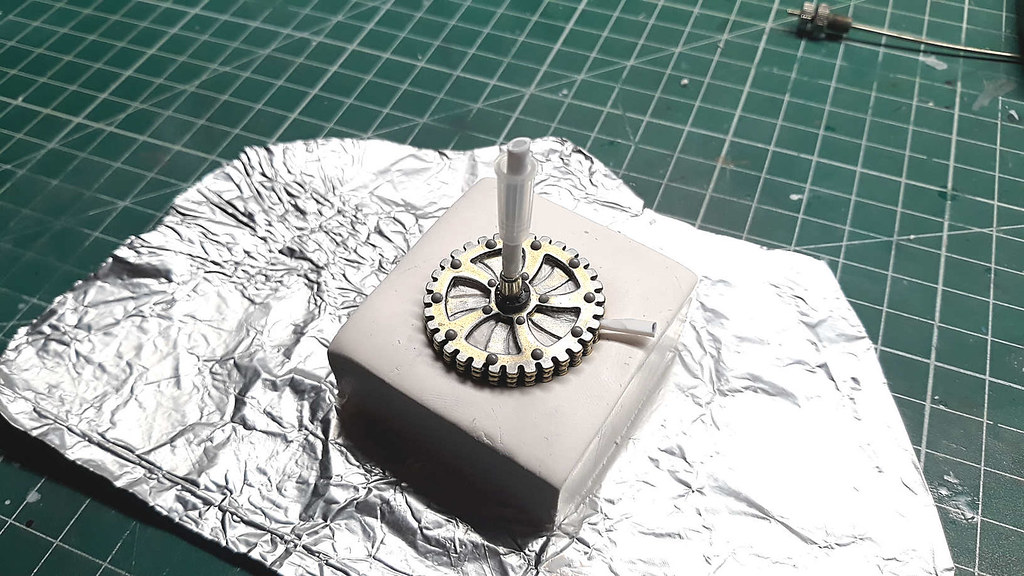
Below: The master is set onto Sculpey Clay, the pour spout and vent mounted, undercuts filled prior. The worst part of the whole process is:
Kneading the clay to a soft and pliable state. The stuff stiffens as it sits. It’s a major workout making my hands strong. Now, I can crush rocks with a simple squeeze. [;)]
Making these undercuts are a PITA. It is time consuming business.
I should mention that I used hot glue to mount the vent and the pour spout. Previously, I used CA, and I found that the silicone remained tacky in the areas where I used CA. I suspect the CA hindered the cure. The hot glue worked perfectly.
Below: The walls are made from foam board. A trick I learned from YouTube is to not score the foam all the way through. It works great to score the paper on the outer side, then bend the foam to make the corner. The advantage of this is that the inner paper layer remains intact, and this keeps silicone from leaking out. In short, you don’t have to hot glue those corners. In the end, you need to seal only one corner.
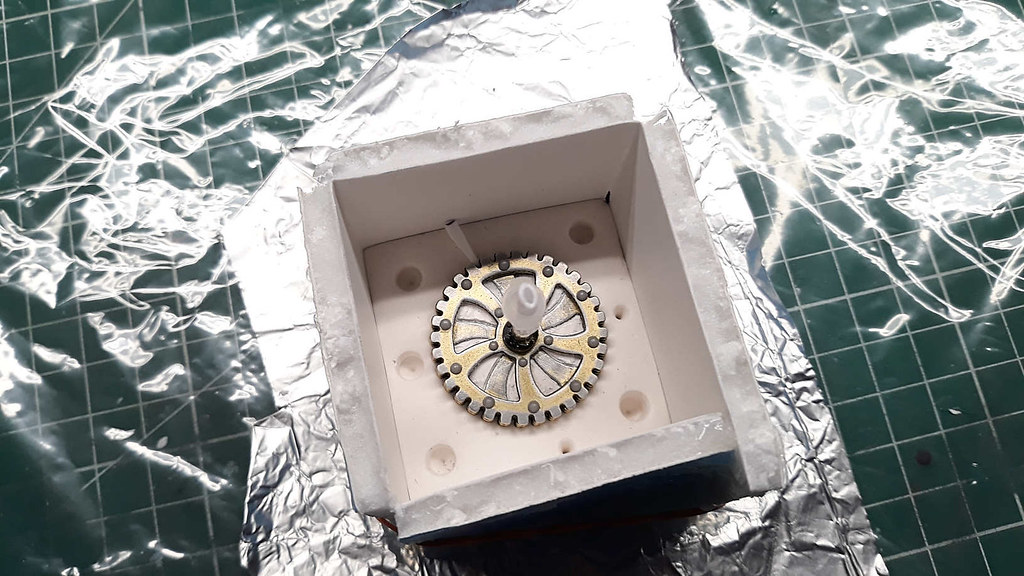
Below: Side 1 of the mold is poured.

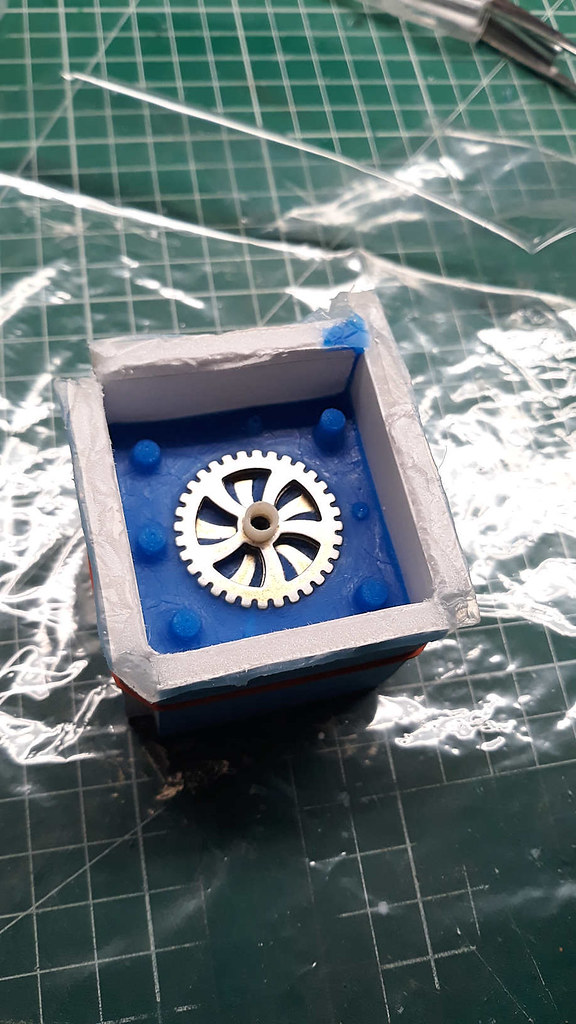
Below: The mold is flipped, the clay base is removed, and including removal of the undercuts. This step is a pita too because the clay is crumbly, and it takes time to clean it all out. Then a thin layer of vaseline is applied to all areas silicone.
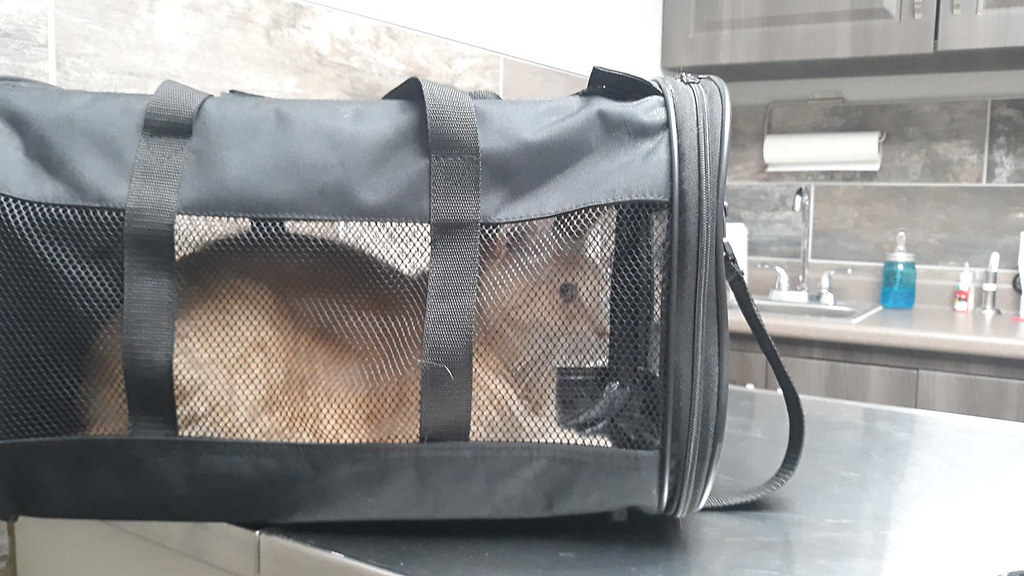
Below: Sammie CAT at the Vet for checkup. Turns out he has thyroid issues. Nothing too serious, YET.
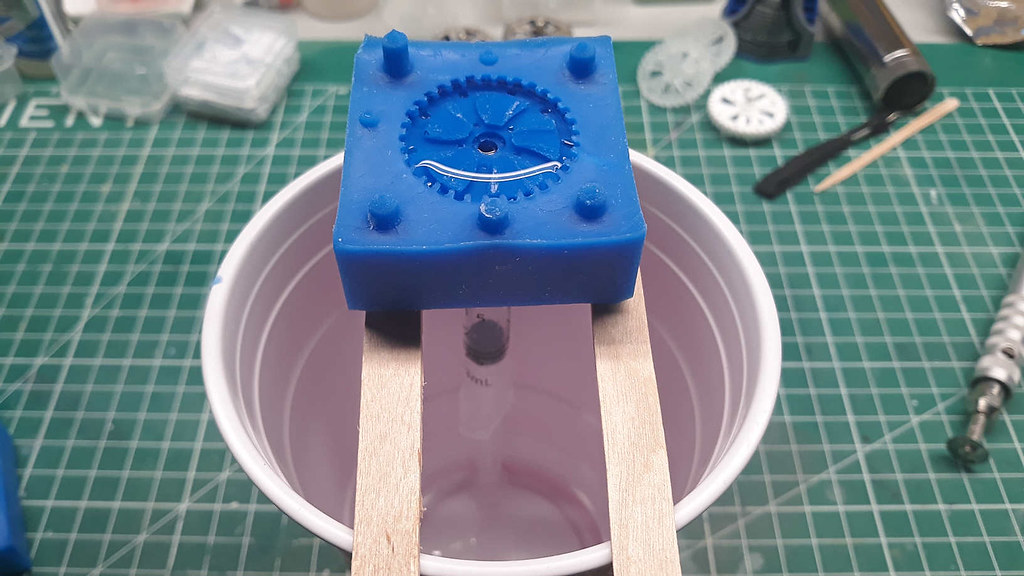
I learned some things with regarding the PBJ method, and using the low viscosity resin:
Then you band the mold, and I inject more resin into the mold until the resin comes out of the vent. Then it’s ready for the PP. I have three minutes to do all this, from mixing all the way to clamping and pressurizing the pot. It’s quite the race, and there is no room for error.
Below: The mold is split open.
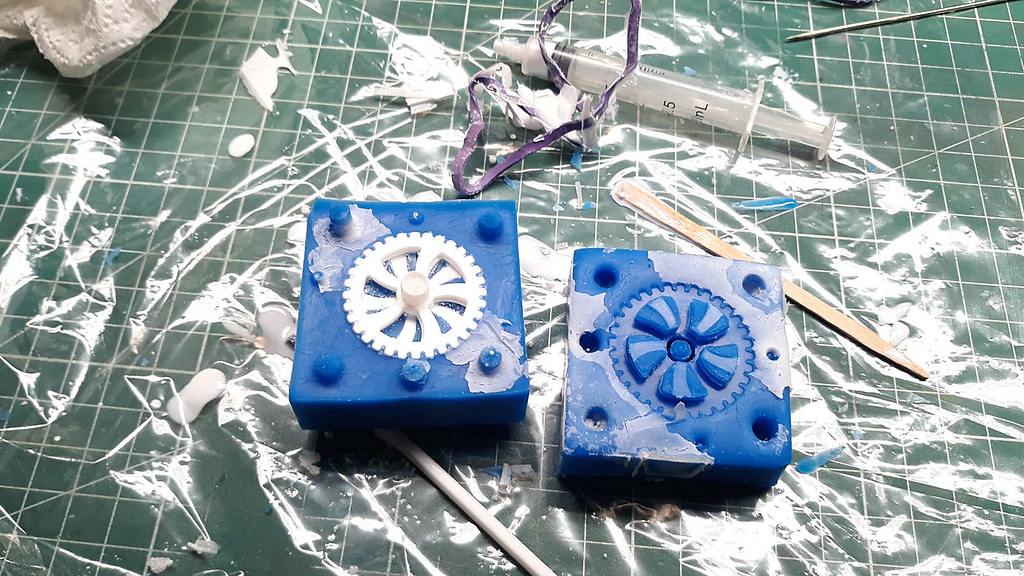

Below: And done.

Finally–I can move on! Jeez.