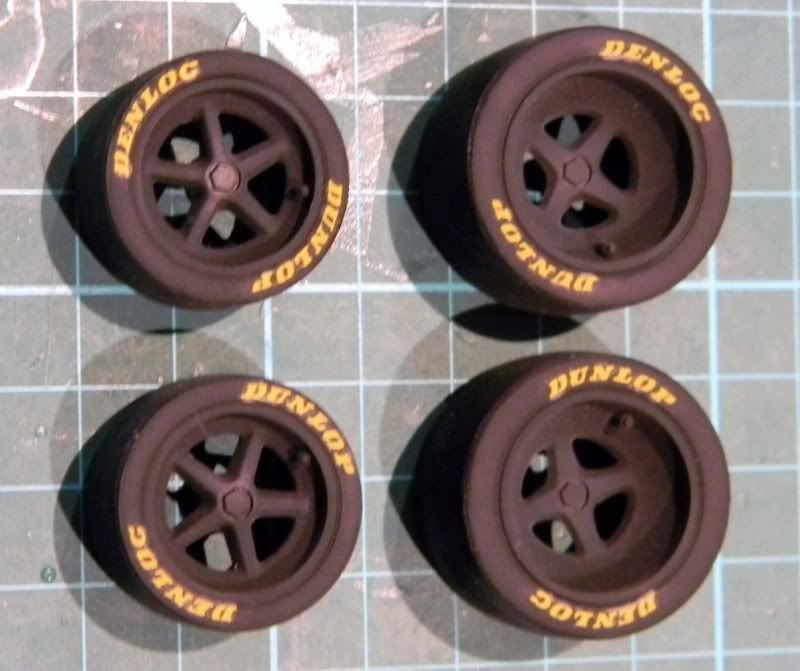
I’ve used the stencil decals on the tyres. These are different to normal decals, you apply the decal to the tyre and then add water to removed the film, which is actually on the front of the decals. They’ve had a subsequent coat of Future, but some tidy up and then a flat coat is warranted. I like to add a droplet of black to the flat coat, it just toans the lettering down a bit.
Tony nice job on those decals,used them before and they can be tricky. I used Valspar rattle can for the sg black,its a full size can and is half the price of tamiya.
Greg thanks
Dogfish thats some great scratch work going on there,nice fix!
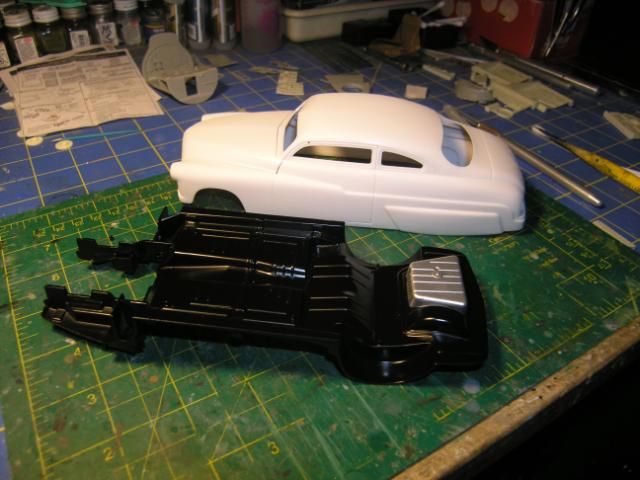
Waiting on paint to dry so not much to report in on the Merc
I was having some problems with MS Paint tonight. I corrected what I wanted to. So, if some one has PhotoShop or another program, please feel free to take this pic make any changes you like to it.
There’s some great builds going on, y’all! Taxtp, I haven’t tried the Future top coat yet, I couldn’t find a floor buffer small enough to get into the corners[:D]
Here are part of the exhaust. This kit came with these pipes that break out about midway of the doors. It also comes with a stock exhaust system. I’m going to modify them so the pipes break out in front of the rear tires. Also drilled them out so they don’t look like a lump-o-plastic hehehehe.
Here’s the beginning of the engine and transmission.
Intake was stripped of chrome, cleaned up and painted aluminum the way nature intended it to be. Looking at the photo, I think I may a little gap to correct.
same with the valve covers, stripped the chrome and painted aluminum.
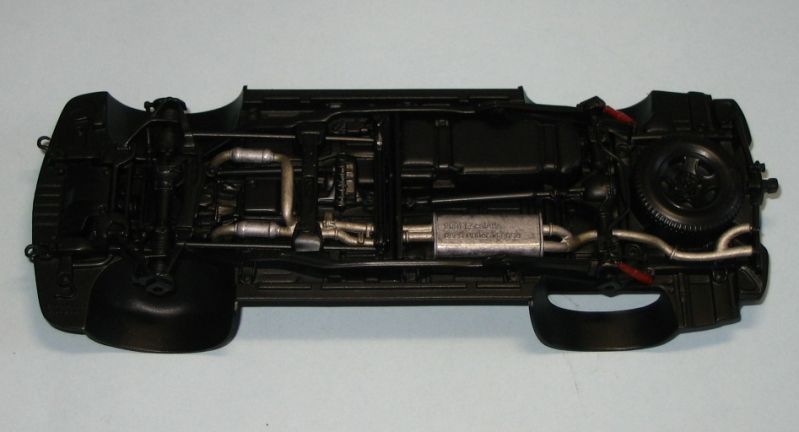
And got the undercarriage painted. I have to look at it tomorrow though as it was cold and I have my fingers crossed that it’s ok.
it’s now been two days since I touched any of my builds. I’ll get back into it this evening.
I’ve been thinking of doing a 67 camaro to make a 45 year matched set. Don’t put me down for it, I have quite a few others to do before that happens lol
Greentracker - thanks for the further work on the logo. Would it be possible to make the writing in bold font for better visibility ?
I might also try to have a go at one tomorrow. Give people a choice of two or three to suit their tastes.
I’ve finally got the time to give my update for the day, after a super busy one playing cricket and chasing after the kids.
This is the progress on the Monogram 1/32 1966 Mustang.
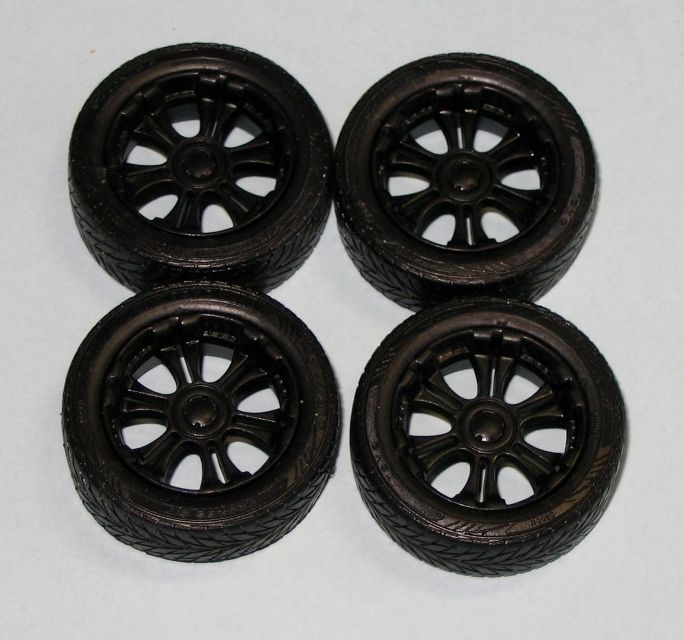
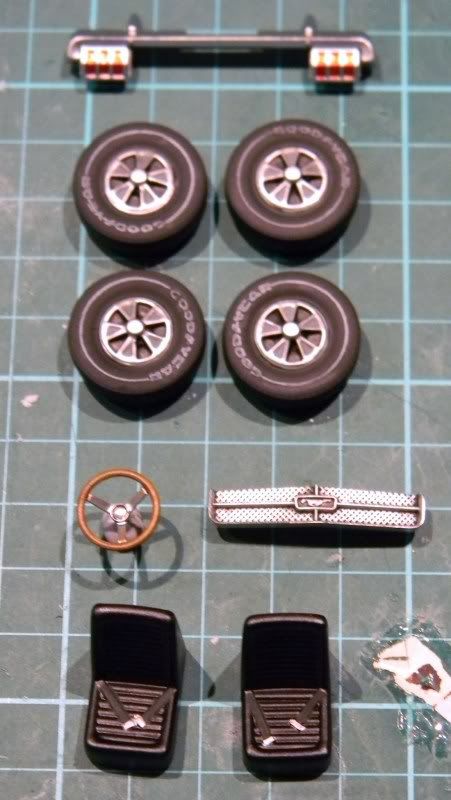
I’ve coloured the tail light lenses, completed the rim and tyre assembly, finished the grille, also the seats and completed the woodgrain steering wheel.
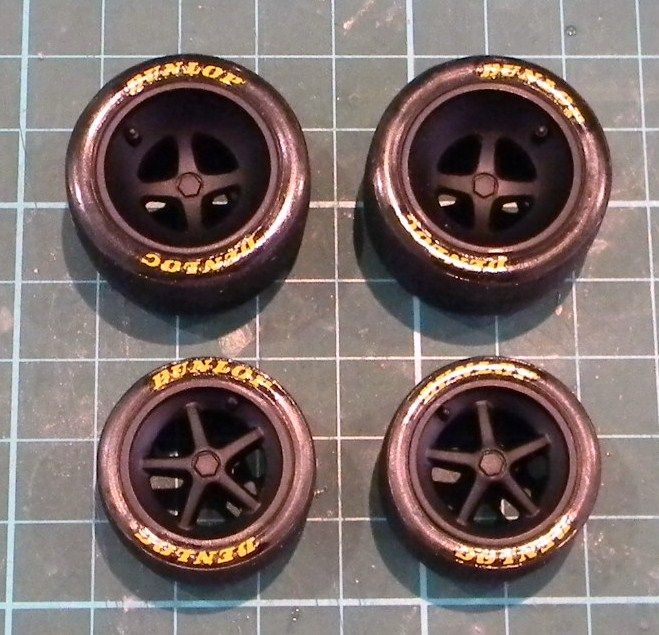
I’ve also done the flat coat for the Hasegawa Jaguar XJR-9LM wheels.


