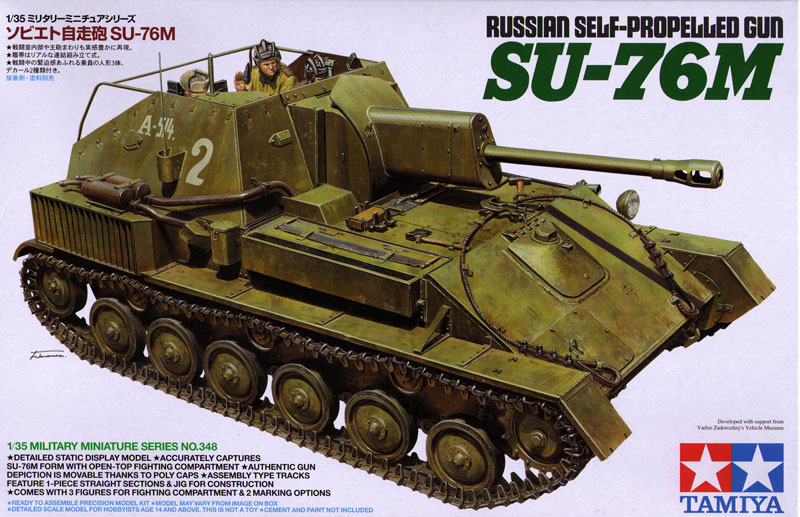
It’s been a while since I posted here, part of that was trying to get my account restored so I could actually log in and post, part of it was just obligations that prevented it from happening. Regardless, I’m happy to be able to share with you guys the latest project I’m working on. [:D] It’s the newly released Tamiya 1/35 SU-76M SPG. German armor is normally my thing, but occasionally I like to change things up.
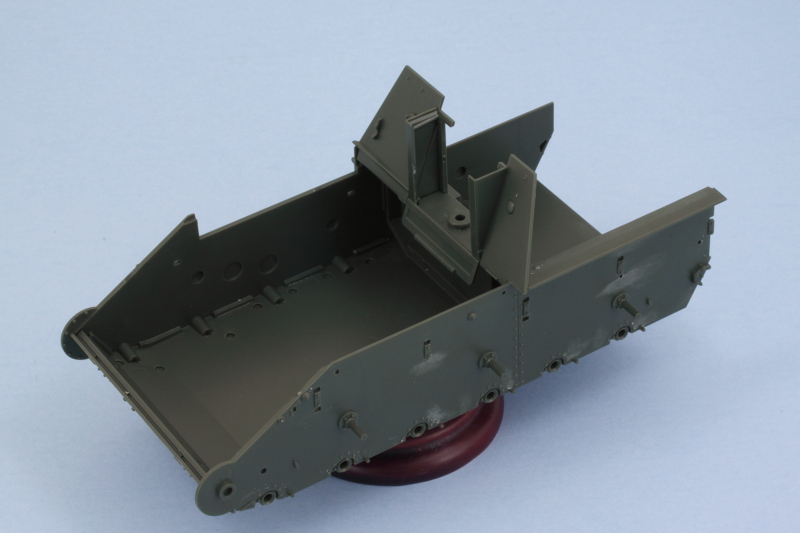
It’s got an interesting ‘flat pack’ hull design that’s a departure for Tamiya but goes together well.
I’ve been working on the fighting compartment and just about have it ready to assemble.
I was checking this one out on your site, really nice work as always. Am i right in thinking this is a tamiya production and not a re-box of some one elses.
That’s right Bish, it’s 100% Tamiya sprues and all-new tooling. It has nothing in common (other than being an SU-76M) with any of the other kits out there. [;)]
Thanks Gamera! It’s a tiny little guy by comparison to its bigger cousins, no question! It’s roughly the same size as a Marder II and was essentially designed for the same role.
This is the first build or review of the Tamiya SU-76 I’ve seen. It was announced several months ago with delivery in “2016”. This kit joins the growing list of new tool Tamiya tanks. First there were the 70’s kits many of which had electric motors: remain terrific deals for beginners or anyone on a tight budget. (I might build their ancient Stug IV just to try to make a knocked-out tank.) Since the late 90s new tool kits have come out periodically apparently bunched. (The list is not complete: good old scalemates gives you the timeline for most kits.) Around 2000 put out a batch that includes their Marder, Japanese Type 3 Medium, and Wespe: another bunch around 2008 like “Polish campaign” PZII and the Hetzer. In the last couple of years another batch of new tool kits have been coming out. As each preceeding wave were considerable improvements, today’s are really sweet. I built the Jagdpanzer IV and own the 1/35 British MK IV male (with motor which shall go in). This year the new kits have been a Panther D (Kursk - ie, no zimmerit), a M4 Easy Eight and the SU-76. (I’ve never made a Tamiya 1/48: know many modelers love them.) Each has been reviewed very highly - I’ve never seen an armor kit as well engineered as the Jagdpanzer. The SU76 is a real inspiration. There’s only a Mini-art rendition available now and like most East European kits it’s supposedly a little dodgy. It was the second most produced vehicle during WWII deployed by the Red Army after the T-34. It carried an advanced rendition of the Soviet 76mm gun and had good armor piercing and HE capabilities. It enabled the Soviets to keep their already created T-70 production facilities in use. The weapon ended up spread throughout the world during the early Cold War and was in Korea. By any measure a very important weapon, and now we’ve got a nice model of it. Also shows that when they put their mind to it that Tamiya remains the best model maker on the planet.
All very true EB! You do have to pay a little attention though to the Tamiya releases as some are just reboxes of Italeri kits, others are rebox of Tasca/Asuka, and some, like this one, are all-Tamiya. The give-away is usually the kit number. If it’s a 353xx type number, it’s all-Tamiya for their recent releases. [;)]
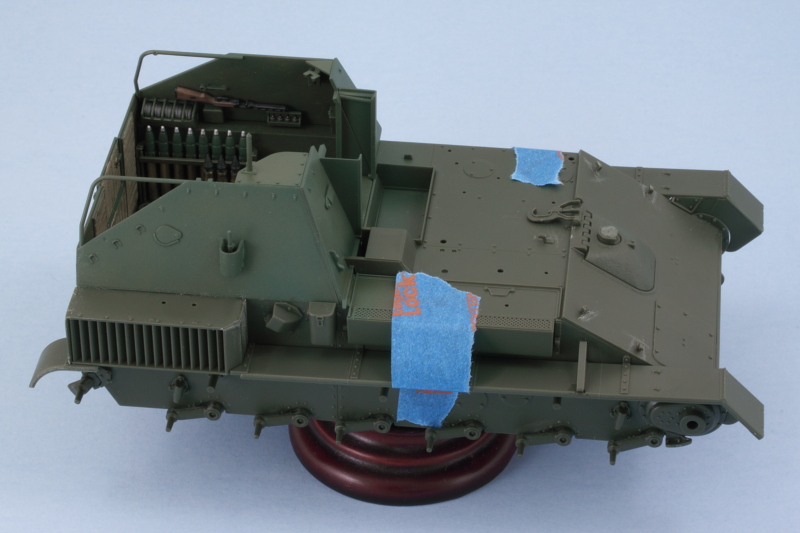
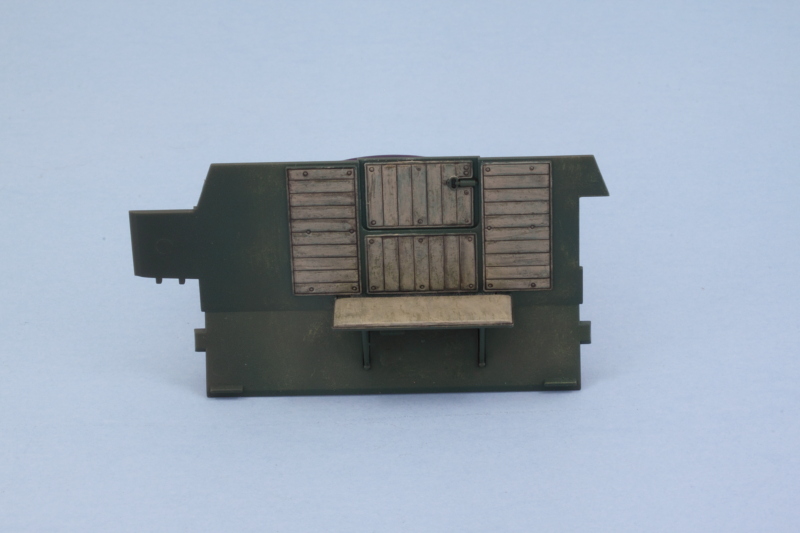
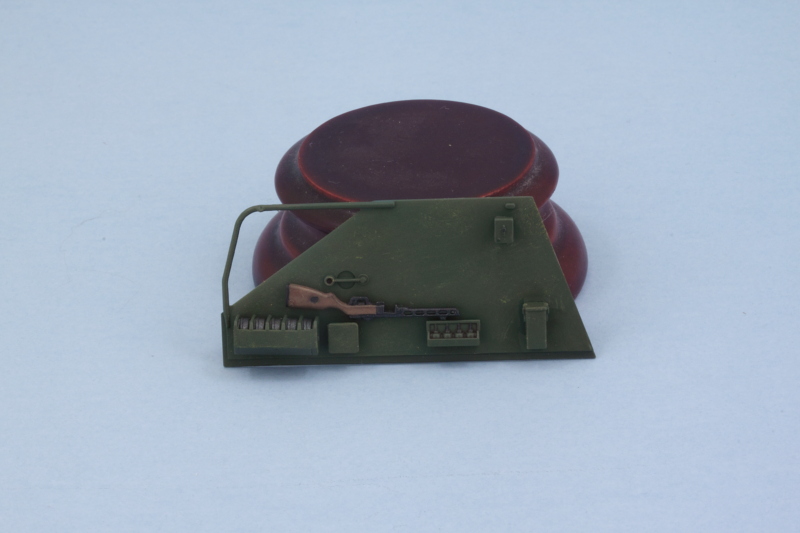
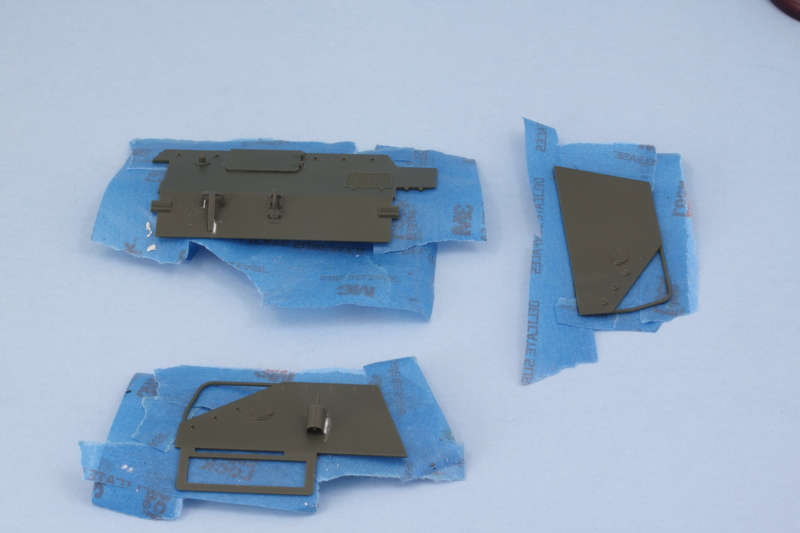
Achieved a major milestone in the build today in terms of getting the fighting compartment all together. First order of business, I decided it would be easier to paint the exterior of the compartment plates before installation. This meant adding some of the exterior details like the crew step called out in Step 18 and the radio antenna and pot called out in Step 21. Both of those parts have recessed mount points and a little bit of putty help was needed in some spots to fill those in completely before painting.
The plates and the front of the compartment were airbrushed first with Russian Armor Green and followed up with the 50/50 OD/Russian Armor Green treatment that I used on the interior.
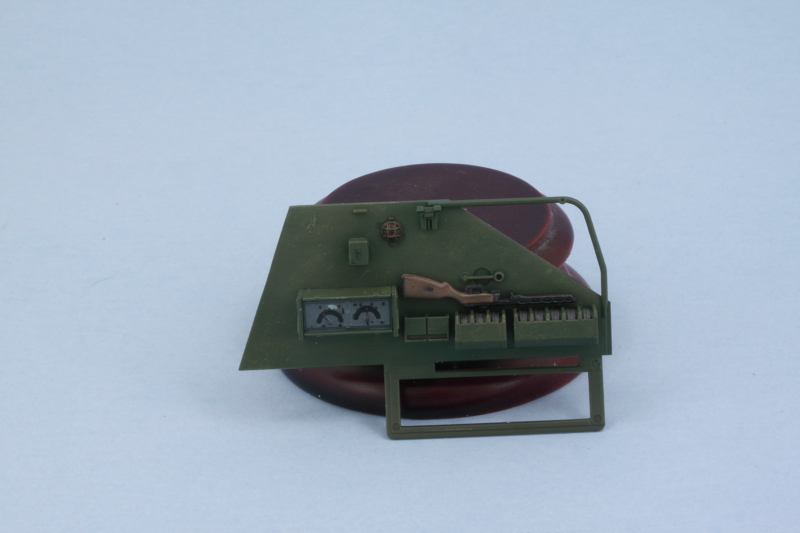
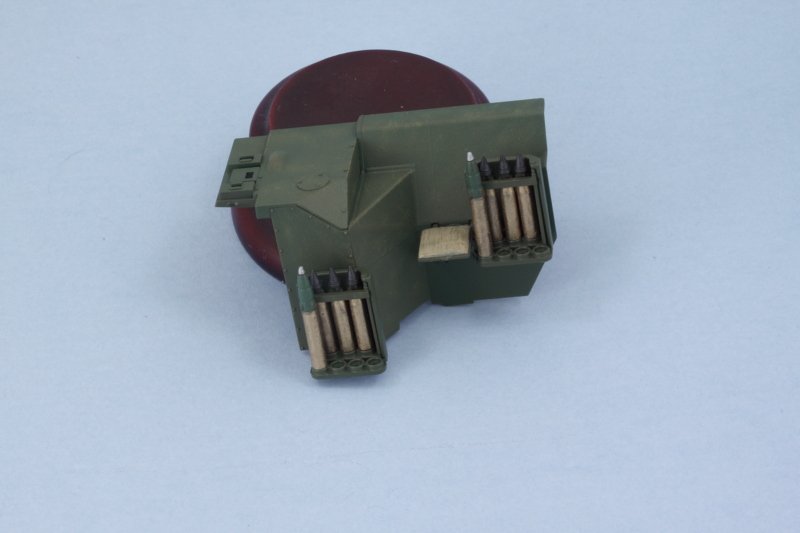
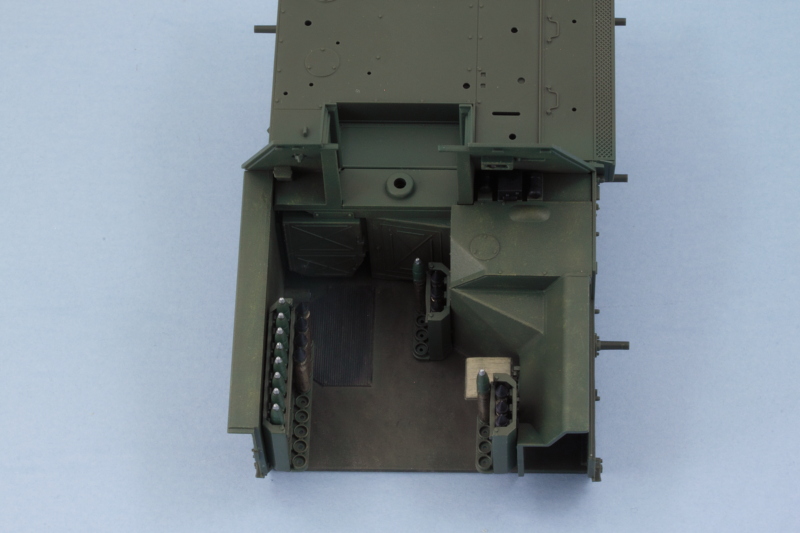
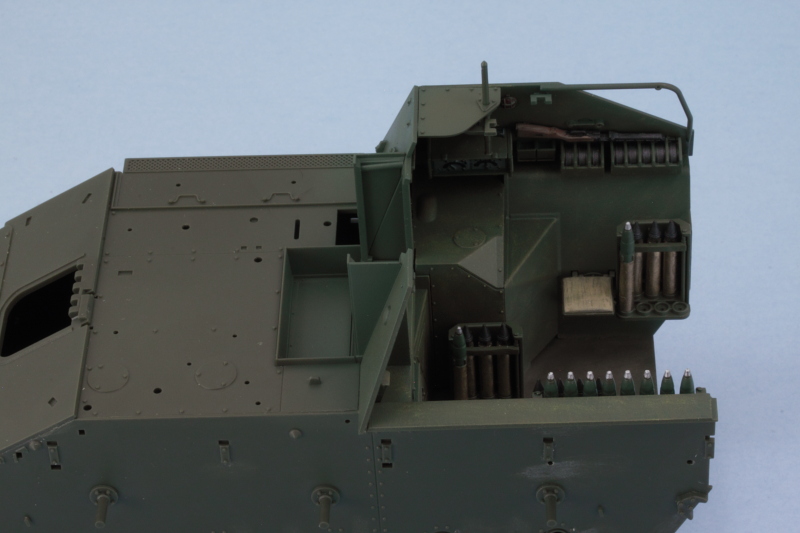
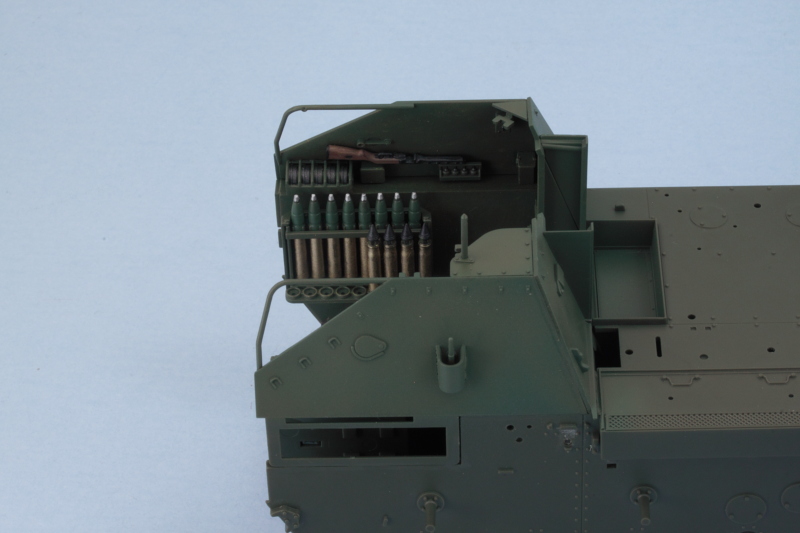
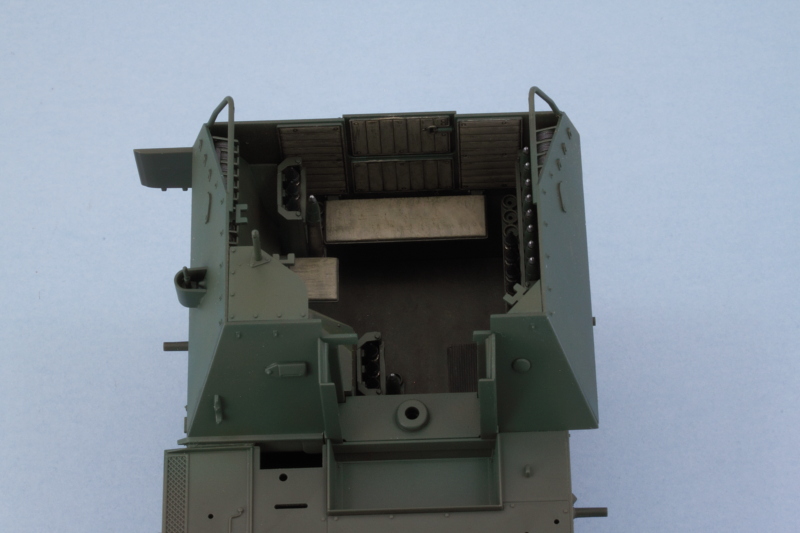
I installed the rest of the communications equipment on the right side and added the large wall component into the compartment proper. While I still had the compartment open, I added some pigment weathering in the form of Mig Rubble Dust applied to the floor.
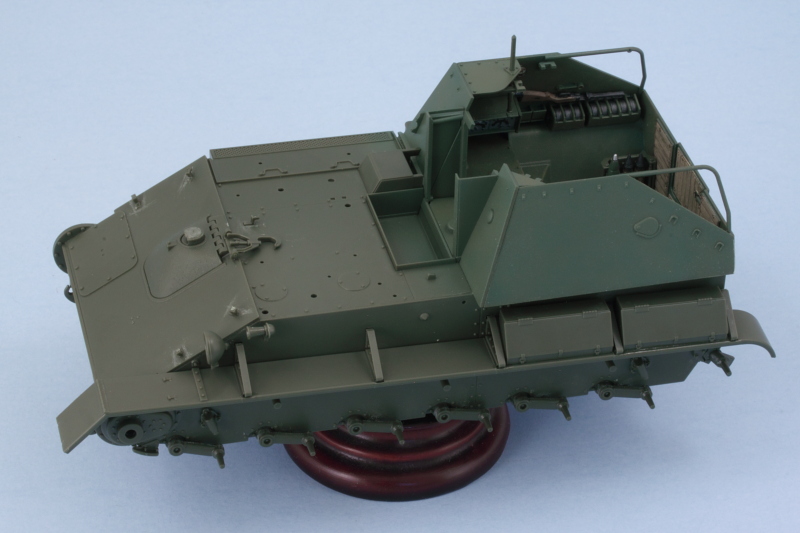
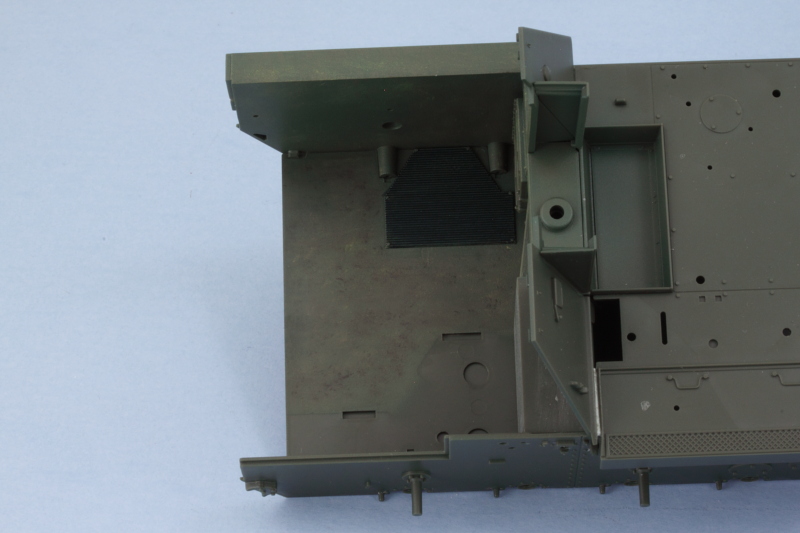
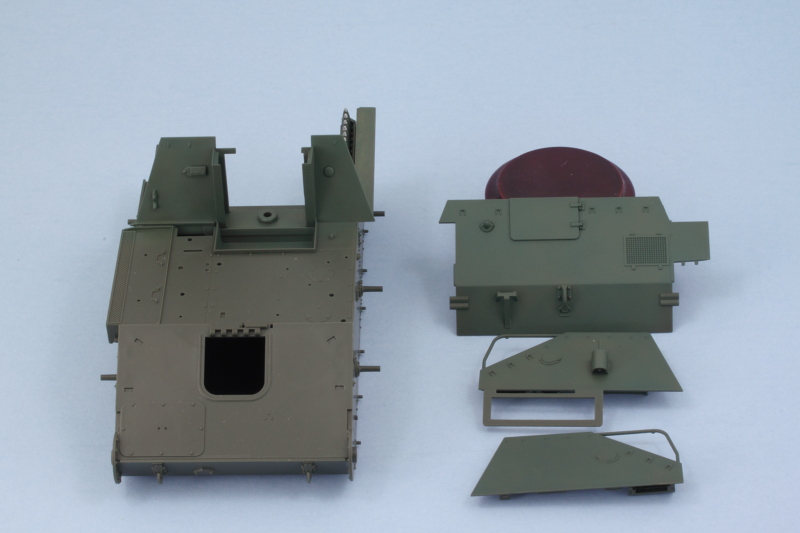
Right side upper plate was added next along with the large top plate that includes the commander’s periscopes. It has the added advantage of a larger attachment area due to the radiator box that attaches to the outside, so it was the easiest to get lined up with the front of the compartment.
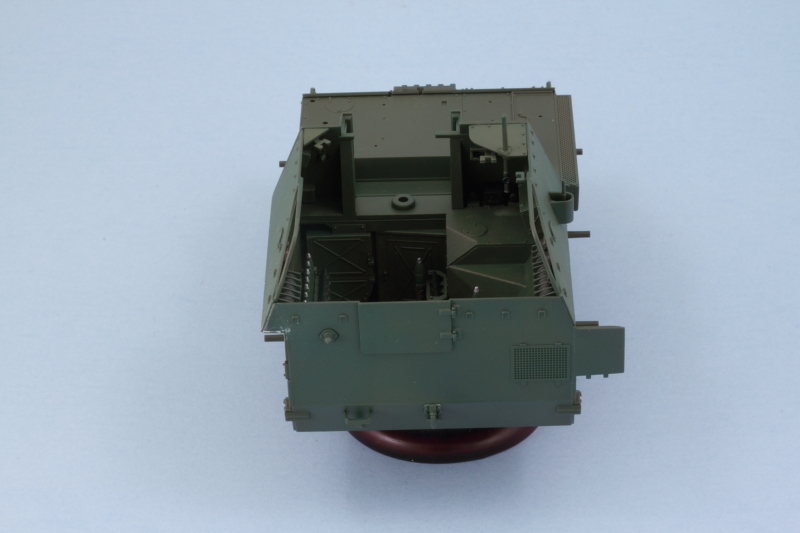
For the left side, I used regular glue along the base edge since it has the most contact surface and liquid glue at the front once it had grabbed a bit. As you can see in the photos, the greens don’t all match up perfectly just yet, that will change once it’s all set and I have the opportunity to go back over the join areas with the airbrush. My main concern at this point was avoiding having to do a lot of work with the full compartment masked off.
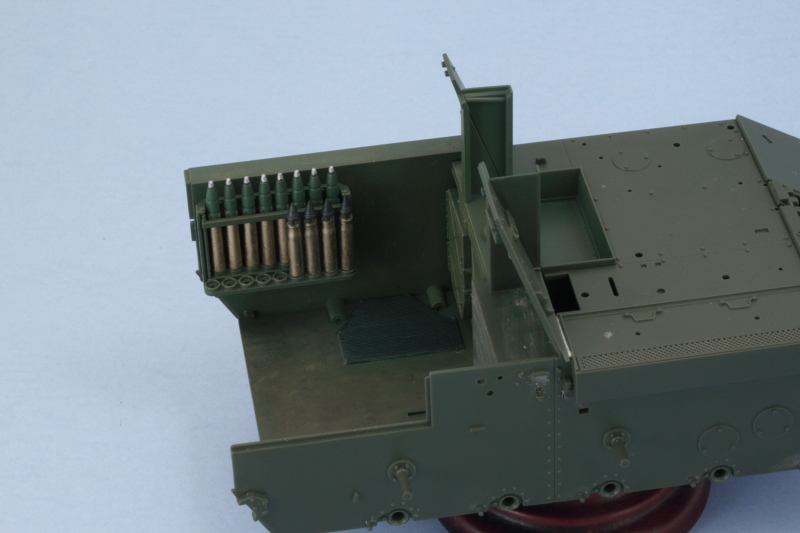
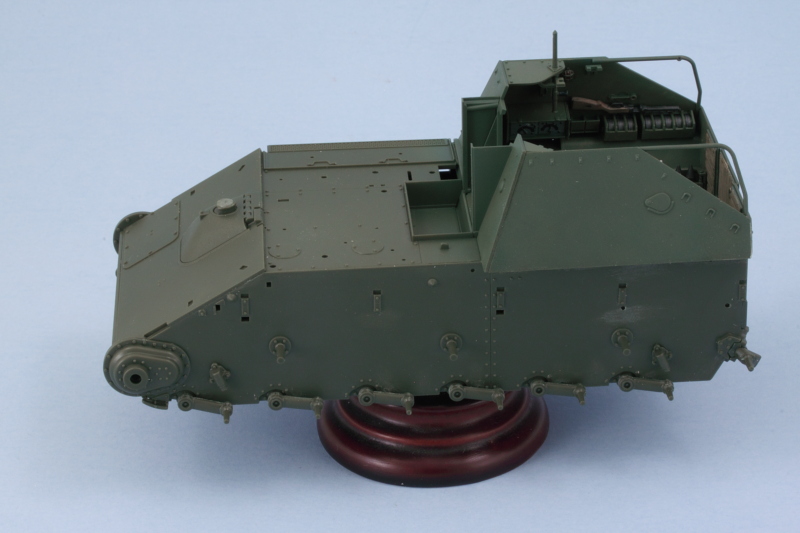
Last but not least, the rear plate was added to complete the full compartment. Overall the fit was excellent. One small minor area on the left rear plate join needed just a touch of putty and sanding, otherwise it all went together perfectly.
Next up will be spending some time on the suspension components and various other external details.
Sir, your build is looking great. I am new to modeling and was informed you were an individual to watch for tips and techniques…and they were correct. Your detail and painting are dead on. Plus a great subject to build. I’ll be here to the end. Also, Welcome back! [:D]
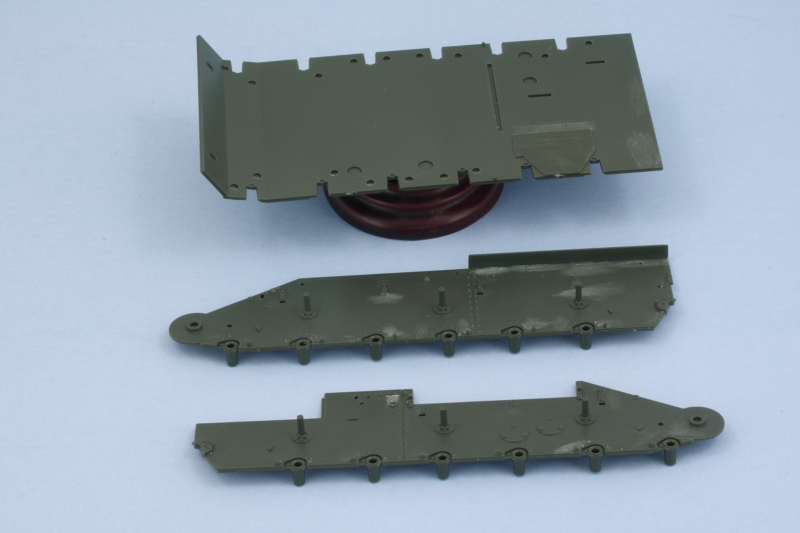
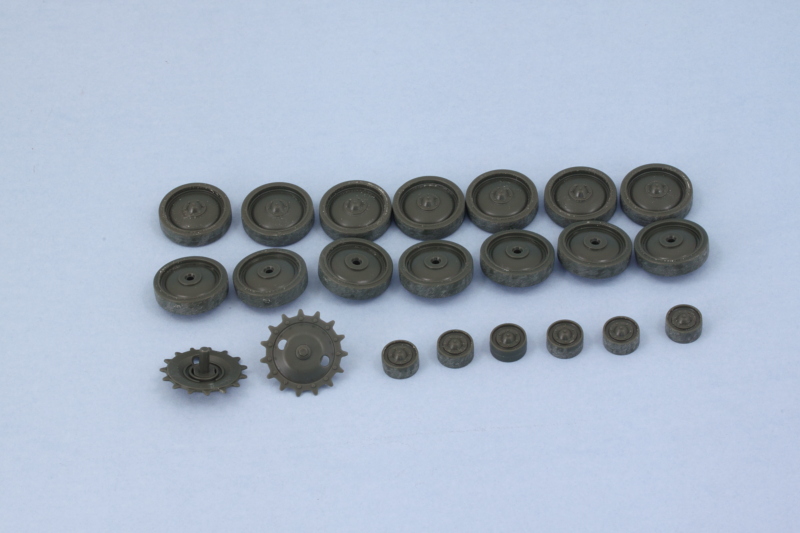
As promised, today’s efforts focused on getting the suspension components installed and ready for painting. To do this, I had to go back to Step 3 and add the final drive housings along with their polycaps. I also cleaned up the 6 return rollers since they are called out in the same step, more on them later. Continuing on, Steps 13 and 15 have the 4 bump stops, two per side. That brings us to the main attraction, Step 16, which installs all swing arms and the idler mounts. Tamiya designed the swing arms to be fixed and level with each other using a small mount pin that the arms attach to. This, of course, is also designed to support their link-and-length track arrangement covered in Steps 19-20.
While I was poking around in the steps, I went ahead and added in the driver’s hatch and periscope in the closed position. The kit parts have detail on the lower part of the periscope but nothing on the inside face of the hatch or the driver’s area.
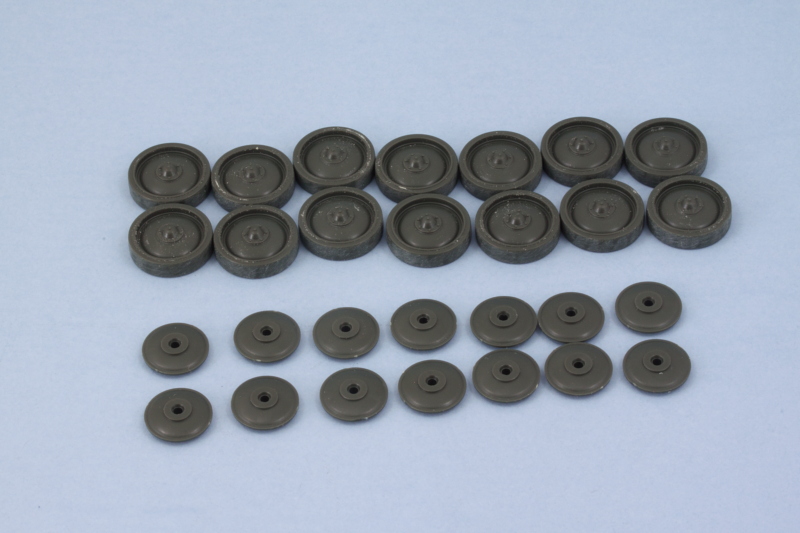
Road wheels were next under Step 17. There are 14 wheels (6 road, 1 idler per side) that have to be removed from the sprue along with a matching 14 rear hub inserts to make the full wheels. I used a sanding stick to remove the mold seam on the rubber portion of the wheels. Each of the hub inserts has 2 sprue attachment points that have to be carefully removed to keep their round shape intact, easily done with a sharp #11 blade and a little patience.
A touch of liquid glue around the rim edges got the wheels together and I also assembled the sprockets as called for in the same step. The steel return rollers from Step 3 also had a small mold seam that was sanded down to get them cleaned up.
After the glue had dried on the sprockets and wheels, I did a quick test fit to make sure everything sits level and plays nice with each other. As you can see, the road wheels cover almost the whole lower hull area below the fenders. These will be painted separately to allow for easier detailing and weathering before the tracks and fenders have to go on.
Next up will be dealing with some more of the hull details and getting the fenders together so I can maximize the airbrush time for the next round of painting.
Hope everyone had a Happy Easter (for those that it applies…otherwise, Happy Sunday!)
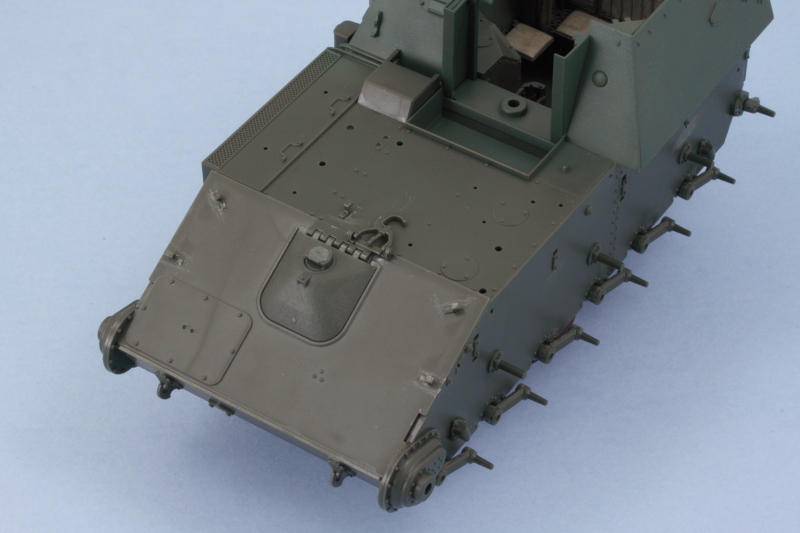
With the focus on getting the hull ready for painting, I bounced around in the instructions quite a bit hunting for stuff that I could install now vs. later. In Step 20, I added the base parts for the gun travel lock while the lock itself is added in Step 24. The lock remains movable, so that’s a plus. I also added the small rectangular hood for the exhausts after a test fit showed it’s possible to still add the exhaust pipe after it’s in place. Step 25 had the 5 retaining hooks for the tow cable, so those were added as well.
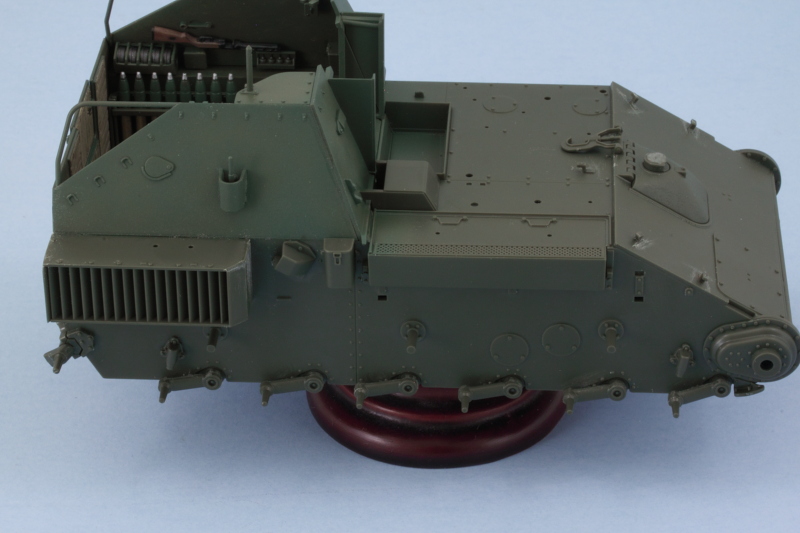
Over on the hull’s right side, I added the large radiator/air exhaust box that’s called for in Step 21. I found it easier to add the top part, B11, to the hull first since it has a large mount tab to support and align it and then add the rest of the box around it vs. assembling the box off the vehicle and installing it as a single part as the instructions call for. The top doesn’t have any solid alignment guides for the ‘finned’ side portion and getting it lined up right is critical, hence my ‘alternative’ method to ensure that happened. I added the small canister from Step 23 and the second exhaust cover from Step 24 after again testing the exhaust pipe fit to be sure I could still install it with the cover in place.
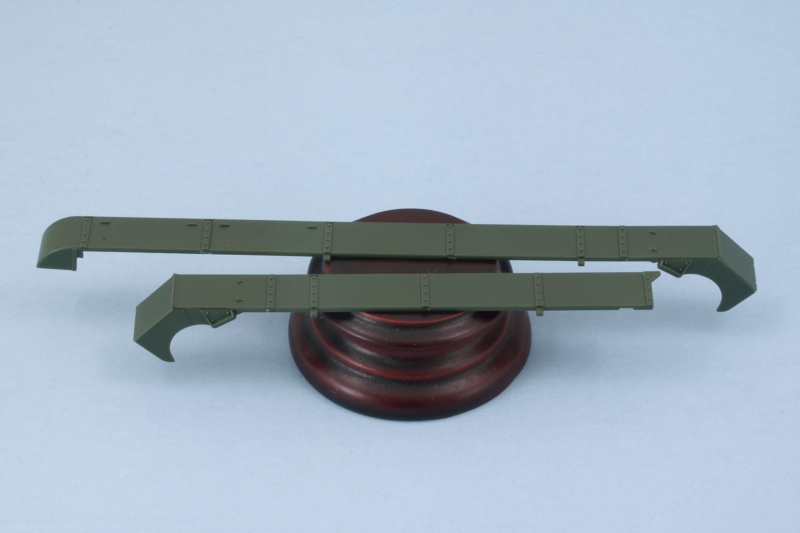
Now came the fenders. In order to fit the tracks onto the suspension, the fenders need to remain loose. In theory, since all of the top links are individual links, you could add them after the fenders are in place but that’s an iffy proposition at best IMHO. Step 22 assembles the two fenders along with the front portions of the mud guards.
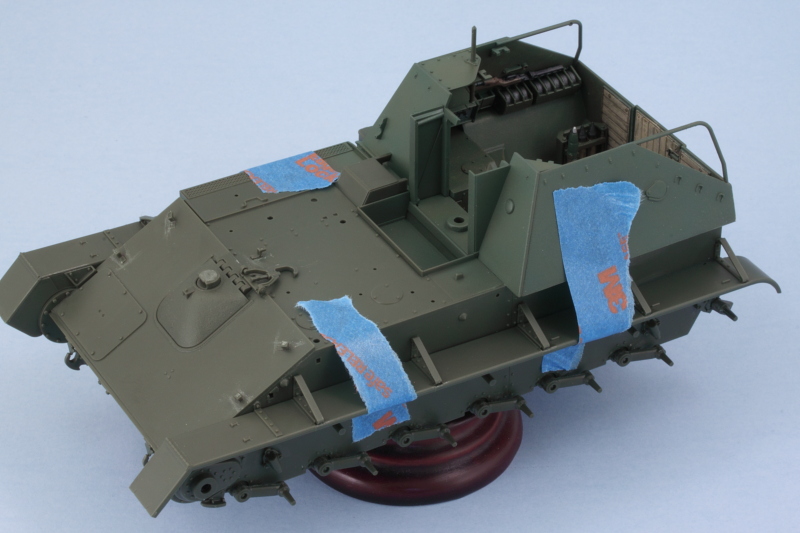
The next trick with the fenders is getting the braces added. Instead of providing the triangular brackets as single pieces, Tamiya molded parts of the bracket on the fenders, part on the hull, and has the angled top part as a single piece that’s added to complete the whole bracket. These are added in Steps 24 and 25 and this arrangement actually works out ok if you’re careful. I used tape to hold the fenders in place and added the brace tops one at a time and only glued their bottom ends to the fenders themselves. the tops were adjusted so they would fit into the openings in the hull but still allow me to remove the fenders for painting and the track install.
Once I was sure the braces would behave, I added the two storage boxes to the left fender as called out in Step 36. These boxes don’t attach to the hull side and the instructions show a nice little sub-diagram that emphasizes this to avoid any mistake. I also cleaned up the headlight and siren horn as mentioned in Step 35 and installed them as directed in Step 36.
That should put me in good shape to get the hull painted before I move on to the gun.

 here.
here.