Very nice! Way better than the old Alan/DML kit that I tackled last year.[Y] I want to see how this turns out…
Thanks Stik! I can imagine that it would be quite the improvement over the older offerings for sure! [;)] Glad to have you along! [B]
She’s lookin’ good, I love how the fighting compartment is turning out, really nice detail there.
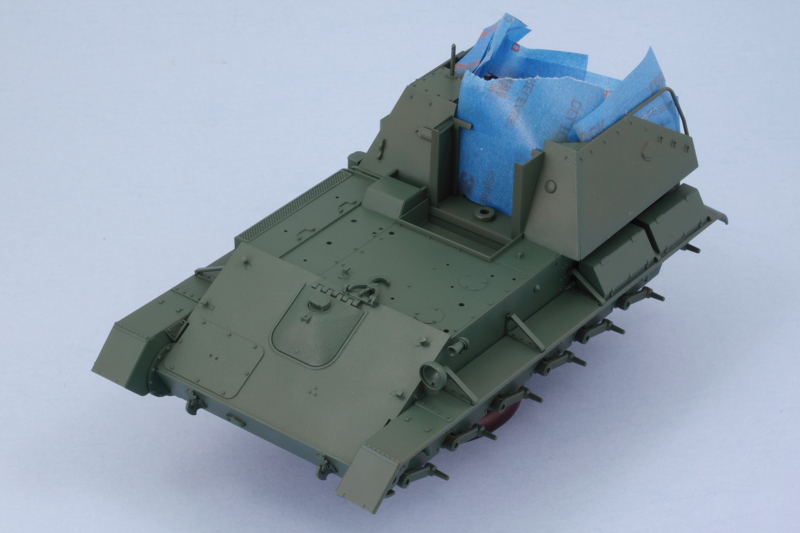
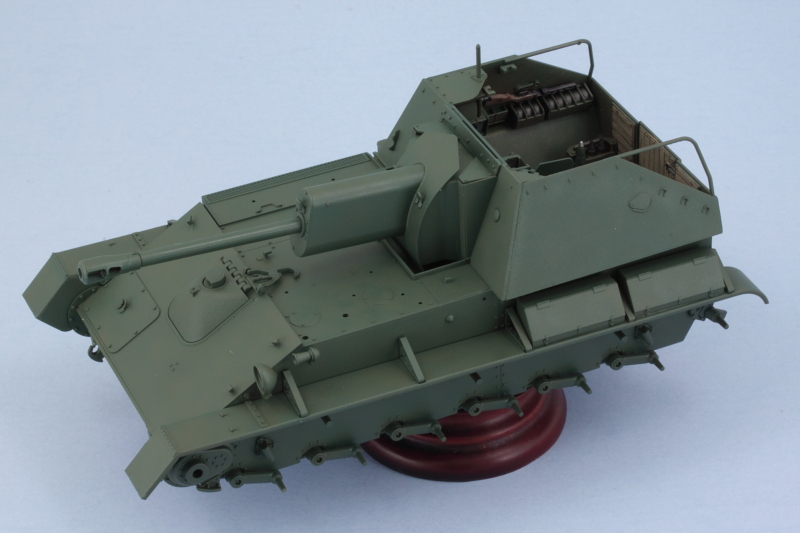
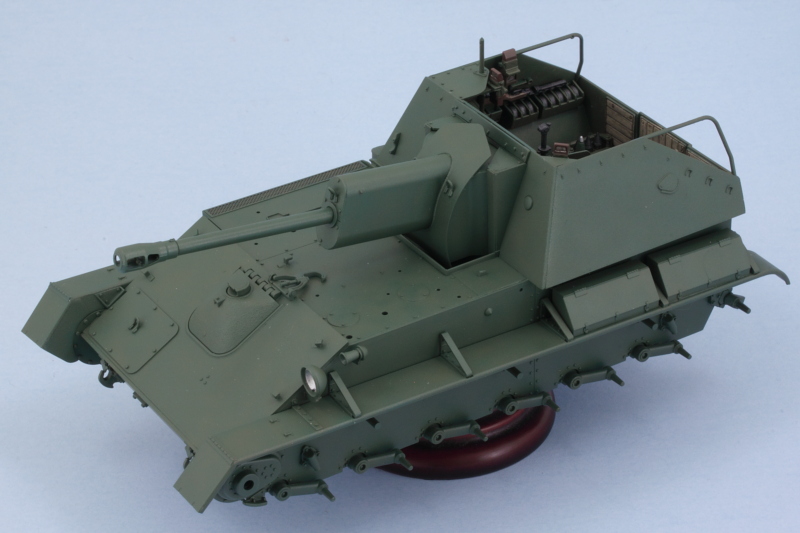
Spent some time on the hull with the airbrush today. First order of business involved masking off the fighting compartment so I could touch up things a bit and blend stuff together. I applied a base coat of MM enamel Russian Armor Green to the hull. I used some blue tack poster putty to hold the fenders in place and get an idea of where the shadowed areas would be.
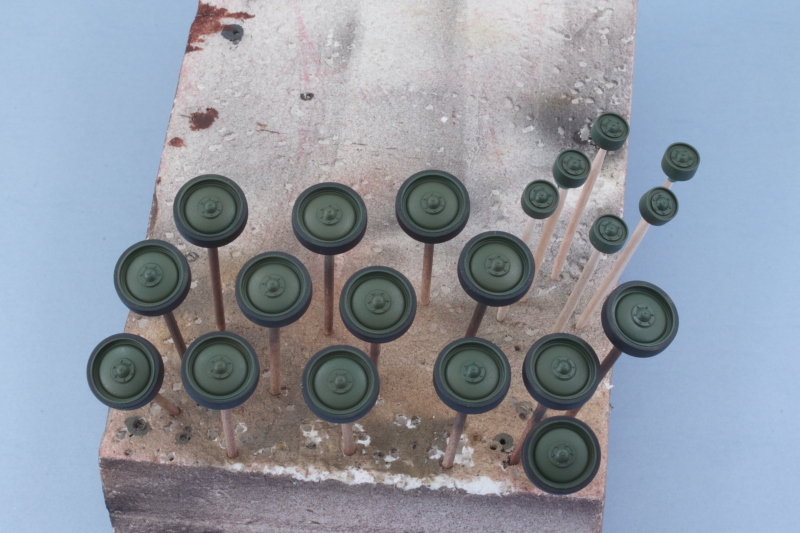
Road wheels, idlers, and sprockets got some attention as well. I airbrushed MM enamel Gunmetal for the rubber portions then used a circle template to mask the hubs. The Russian Armor Green base coat was airbrushed first followed by a 50/50 mix of OD/Russian Armor Green to get it to the desired color to go with the rest of the hull.
Speaking of which, I used the 50/50 OD/Russian Armor Green mix to shift the color tone of the base coat and provide some variation in the overall look. This was applied at low pressure, approximately 10 psi, and working section by section up close. The fenders were popped off and worked on separately, one nice advantage to having them remain loose until after the tracks are on.
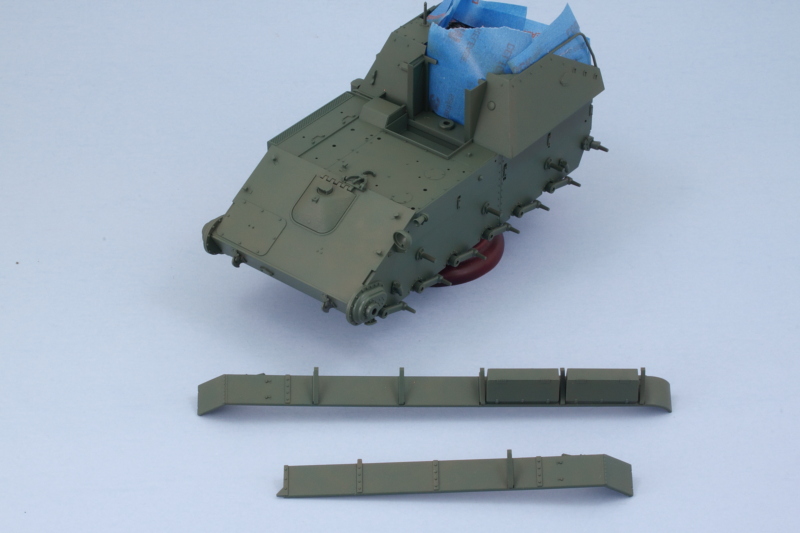
I dry fitted the fenders and removed the masking tape from the compartment to be sure that everything was looking like it all belonged on the same vehicle. I made a couple of small adjustments in a couple spots. Here’s where things stand before I start on the gun.

Still plenty to do!
Thanks Gamera! [B]
Cool beans, Bill! It’s all looking great, as usual!
Playing on the radio right now… “HEY LA, HEY LA, MY BOYFRIEND’S BACK…”! [:D]
(hey man, it’s the 21st century, don’t freak out, lol)
Hey Karl! Thanks buddy, no worries on the radio song. [:D] [B]
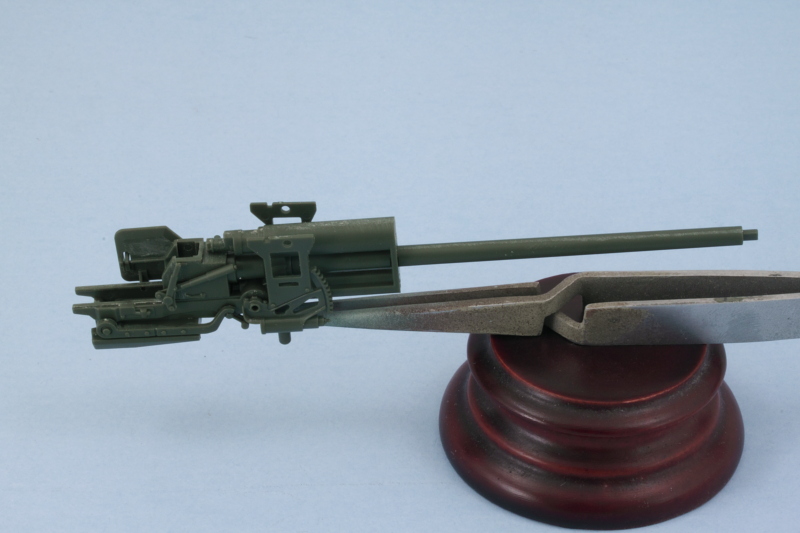
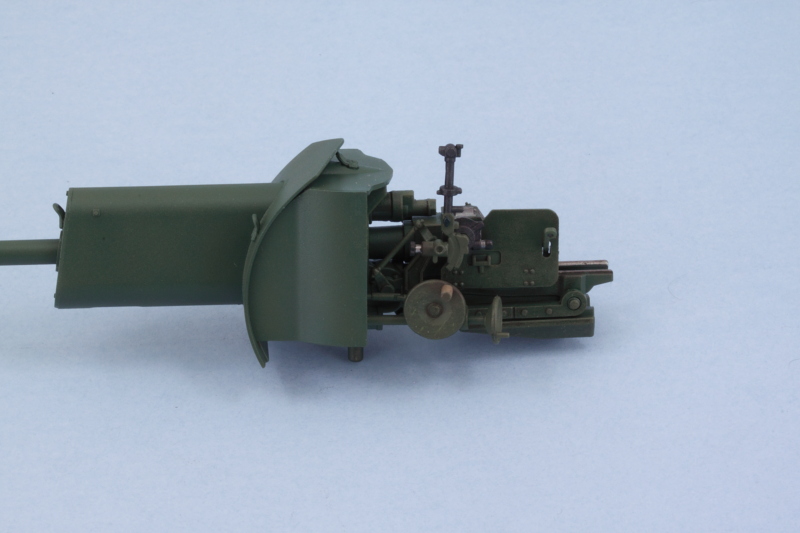
It was finally time to tackle the main event, ZiS-3 76.2mm gun. There are 6 steps in the instructions devoted to getting it together. Starting in Step 26, the three-part breech is assembled and added to the main gun barrel. The step also adds the breech block but I left it off, for now, to make it easier to paint and detail it later. The parts go together nicely with just a little bit of sanding necessary to get the joins to disappear.
Step 27 adds the recoil mechanisms and slide tray. A polycap goes in between the recoil portions and is what allows the gun to hold its position and remain elevatable. The recoil guard had some small ejector marks that needed to be removed on its inside face and I also added the block activation lever mechanism as called for. This can only be positioned one way, with the block closed, due to the use of 2 locating pins to get it in the right spot.

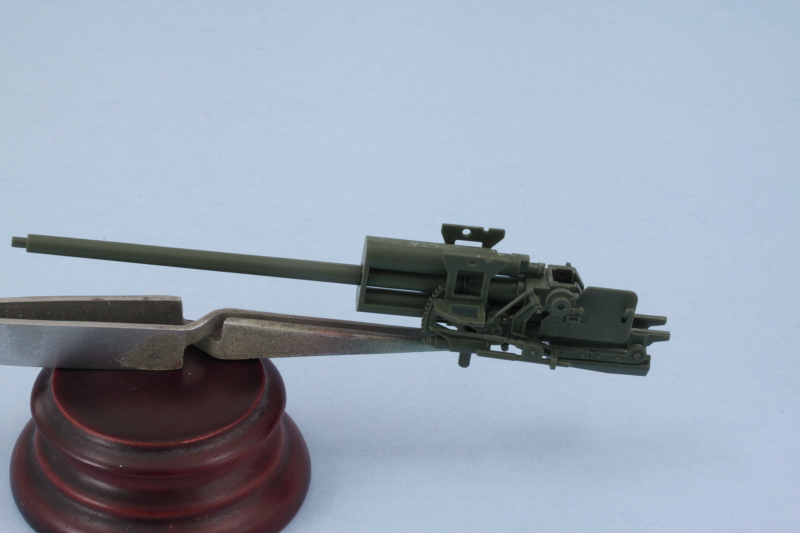
Step 28 continues the assembly with the addition of the side supports for the gun mount and the mount post that supports the gun in the hull. It also adds the part of the gun under the recoil tray that includes the rear part of the travel lock.
Step 29 is a fairly simple one, it adds the small support tabs for the mantlet sides as well as the elevation and traverse mechanisms along with their hand wheels. I left the wheels off for the time being to make it easier to paint the gun and its details and will add them later. It’s also important to note here that the smaller wheel, C77, has to be positioned just so in order for the gunner’s hand to match up with it if you plan to use the kit-supplied figures. The instructions include a little ‘note direction’ callout to help with this but it’s not an exact thing to try to eyeball without the gunner already built to help you out. ![]() I also left off the gunner’s sight but will add that later on.
I also left off the gunner’s sight but will add that later on.
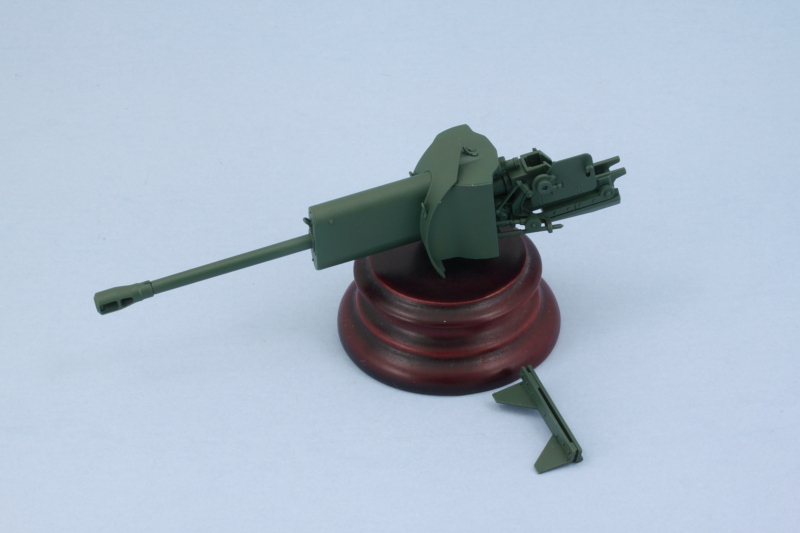
Step 30 adds the sides and top of the armored mantlet for the gun. I used a little bit of finger pressure to flex the sides in just a touch to mate up properly with the top and applied liquid glue so it would grab and create a solid join.
Step 31 assembles the external armored covers for the recoil mechanism and the front plate for the mantlet. I assembled the two halves of the cover first, then added the front plate, then added it all to the mantlet front plate. Just a tiny amount of putty was needed at the top to close up a small gap with the weld seam that’s molded on the mantlet front plate.
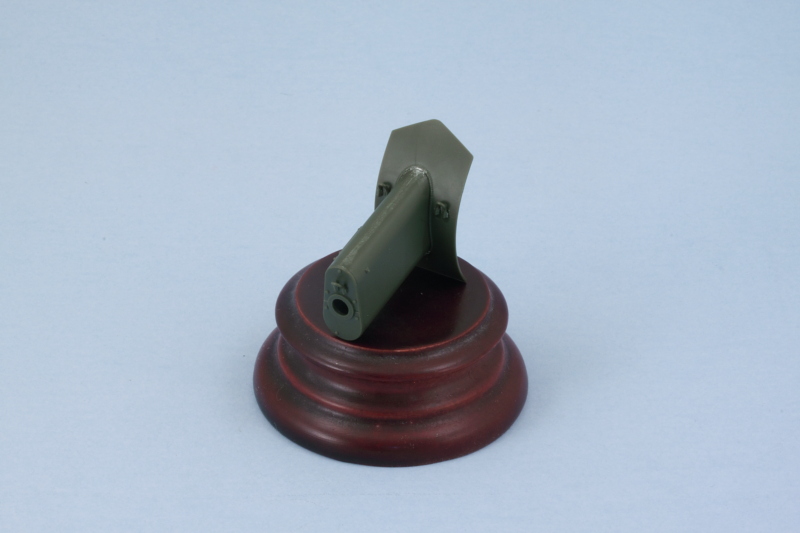
The step also calls for the assembly of the muzzle brake. This is a split-half arrangement, but careful use of liquid glue and some light sanding took care of the small join seam. The recoil cover and mantlet front aren’t meant to be glued onto the gun and instead rely on a tight friction fit to keep it in place while still allowing the gun to elevate. The instructions give you a heads-up on this by clearly telling you NOT to glue the curved plate to the rest of the mantlet structure.
Step 33 has you install the gun into place using the polycap and that also allows you to pull the gun in and out for test fitting before committing to the final installation. Step 35 assembles the mantlet top armor that locks the gun into place out of 3 different pieces that all fit together to create the spaced plate arrangement. A quick check with the gun shows everything lining up like it should. It also showed me that I had missed one of the lifting eyes on the engine access hatch on the front hull, so that got checked off while I was at it.

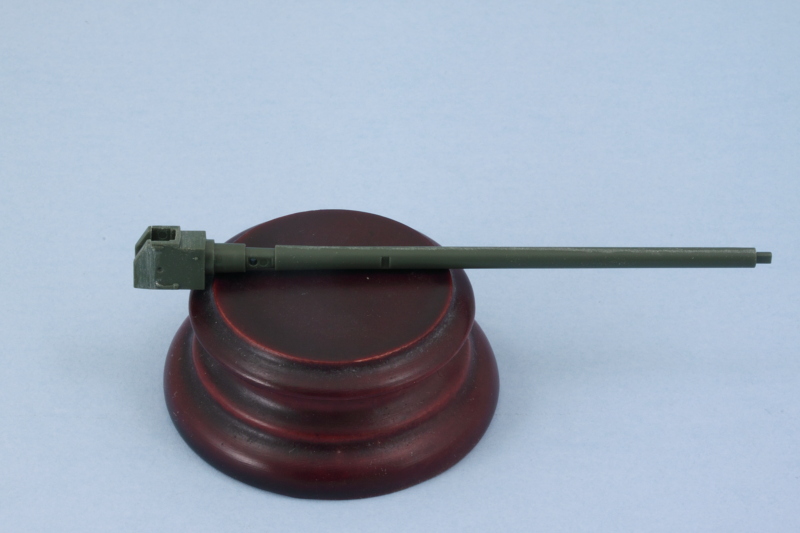
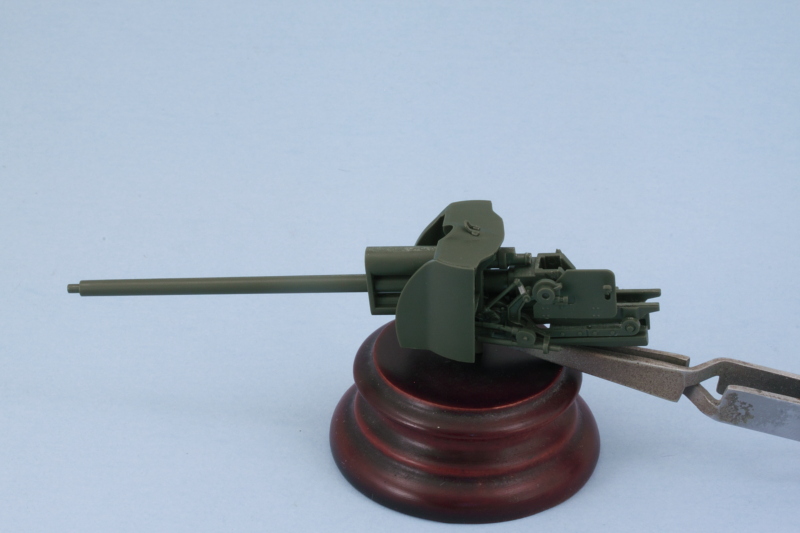
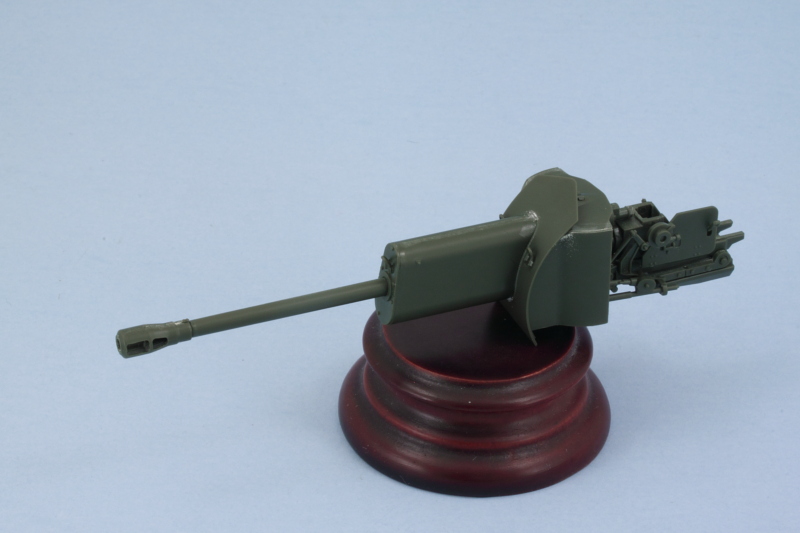
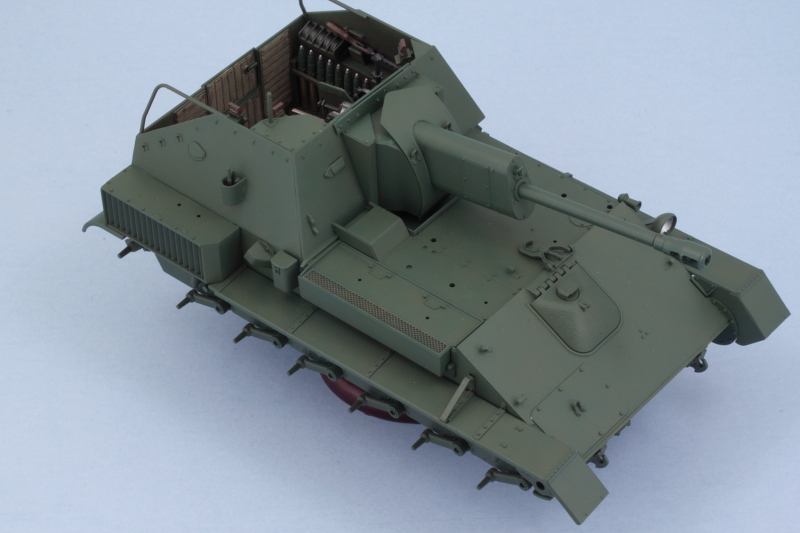
That meant it was time for paint! I airbrushed the gun assembly using the same process on the hull.
Since this was the last time I had planned to have the airbrush set up with the hull colors, I placed the gun and mantlet cover and checked for consistency. After some minor changes and adjustments, it all looks like it belongs to the same vehicle! ![]()
Next up will be dealing with all the hull equipment that needs to go on the main deck and other spots.
[Y] I like how the kit is engineered to build up around the barrel and breech. [;)]
I agree Stik, the Tamiya engineering is pretty well thought out for this area.
Great work build and really nicley done WiP. I agree about how this is engineered, looks really well done. Is that barrel one piece.
Nice work there on the gun and mount. I have a feeling it probably didn’t fit anywhere near as well on the older non-Tamiya versions.
Bish, yes, the main gun barrel is provided as one piece. [;)]
Gamera, thanks as well! You may be right, I haven’t built any of the other models out there of this particular vehicle so can’t say one way or the other. [B]
I spent the day working mostly on the gun’s details so I could get it installed permanently into the compartment. That involved working on several different areas including the gunner’s sight. The kit part has solid faces all around, so I used a micro-drill to open up both the eyepiece portion and the top sight opening itself. I also used the same approach as with the fighting compartment to weather the rear parts of the gun and mount to get them to match up.
Detail work also included getting the breech block painted and installed and the bare metal surfaces on the recoil sled picked out.

With the gun now detailed, I installed it permanently into position. I made sure to firmly press the gun all the way down into the polycap’s mount since it needs to be down far enough not to cause any interference with the top mantlet piece that locks it all in place. A little bit of liquid glue around the triangle portions of the mantlet piece and some careful gentle finger pressure got it all joined together.
Once I had that done, I also worked on detailing the 3 periscopes that go into the fighting compartment. The kit parts are molded in one piece in the green styrene, not clear, and had an ejector mark on one side that had to be dealt with. To simulate the clear faces, I applied some enamel Steel followed by a dose of Tamiya Clear Smoke. Tamiya does include a clear sprue in the kit (oddly enough, only 1 of the 8 parts on that sprue actually gets used, the headlight lens) but I don’t think it’s really designed for this kit per se. The clue is that the sprue includes 4 sets of goggles that have no possible use on this vehicle or its figures, so perhaps they just repurposed it from another kit or set? Either way, it wouldn’t have been hard to have clear periscopes for a little more detail potential since they are so prominent in the fighting compartment.
I also started on the hull details by working on the side air intake. This is molded solid with a grill pattern so I used a thinned wash of MM enamel Gunmetal to darken up the spaces in the mesh pattern. A careful drybrushing of the 50/50 OD/Russian Armor Green with a small square tip blender brush brought the mesh pattern back out so it would have some depth (or the best possible simulation of it at any rate) to its look.
Tools and the exhausts are next!
The mesh came out looking good. The build is coming along nicely.
Robert
Thanks Rob! Sometimes the old trick book has to be hauled out even on new releases like this one. [;)] [B]
Bill this is coming out great. Kind of caught me by surprise as it is not german, lol. Am I correct in assuming this is out the box without any am parts? If so, it shows the quality of the molds, everything looks sharp and crisp.
-Stephen[cwby]
Thanks Stephen! You are correct, I’m building this one OOB with no AM added. I have been following the ‘IPMS Rules’ for a true OOB (it’s ok to remove stuff like drilling out or thinning stuff down) effort so people can see how the kit comes together. I agree with you on the quality of the molding, Tamiya doesn’t disappoint in that regard. [B] You’re right about it being something ‘a little different’ but then variety is important to prevent burnout and broaden your horizons from time to time. [:D]
Good stuff!
Good to see the “Podium” back in action.
!http://www.melaniewiscount.com/mwiscount_cpopyright_fairuse_WQ/graphics/gavel_front_md_clr.gif