Yikes, it’s quiet around here. Just wondering…is anyone following this WIP/build?[:^)] Because I’m starting to feel like I’m talking to myself.
here ya go…

G
Looking great my friend!!
agentg- Thanks for the pics**[:D[**, those should come in handy since I’m starting work on the turret now.
Schnobs- Thanks for stopping by**[:)]**. For awhile there I thought this WIP was broken or something, since it seemed so quiet around here.
Work is moving along quite nicely after all that fender scratching. With the lower hull and upper hull finally put together(and the lower fenders all weathered up). Not to mention, the upper hull has finally been painted(along with the PE kit-supplied engine deck screens.)
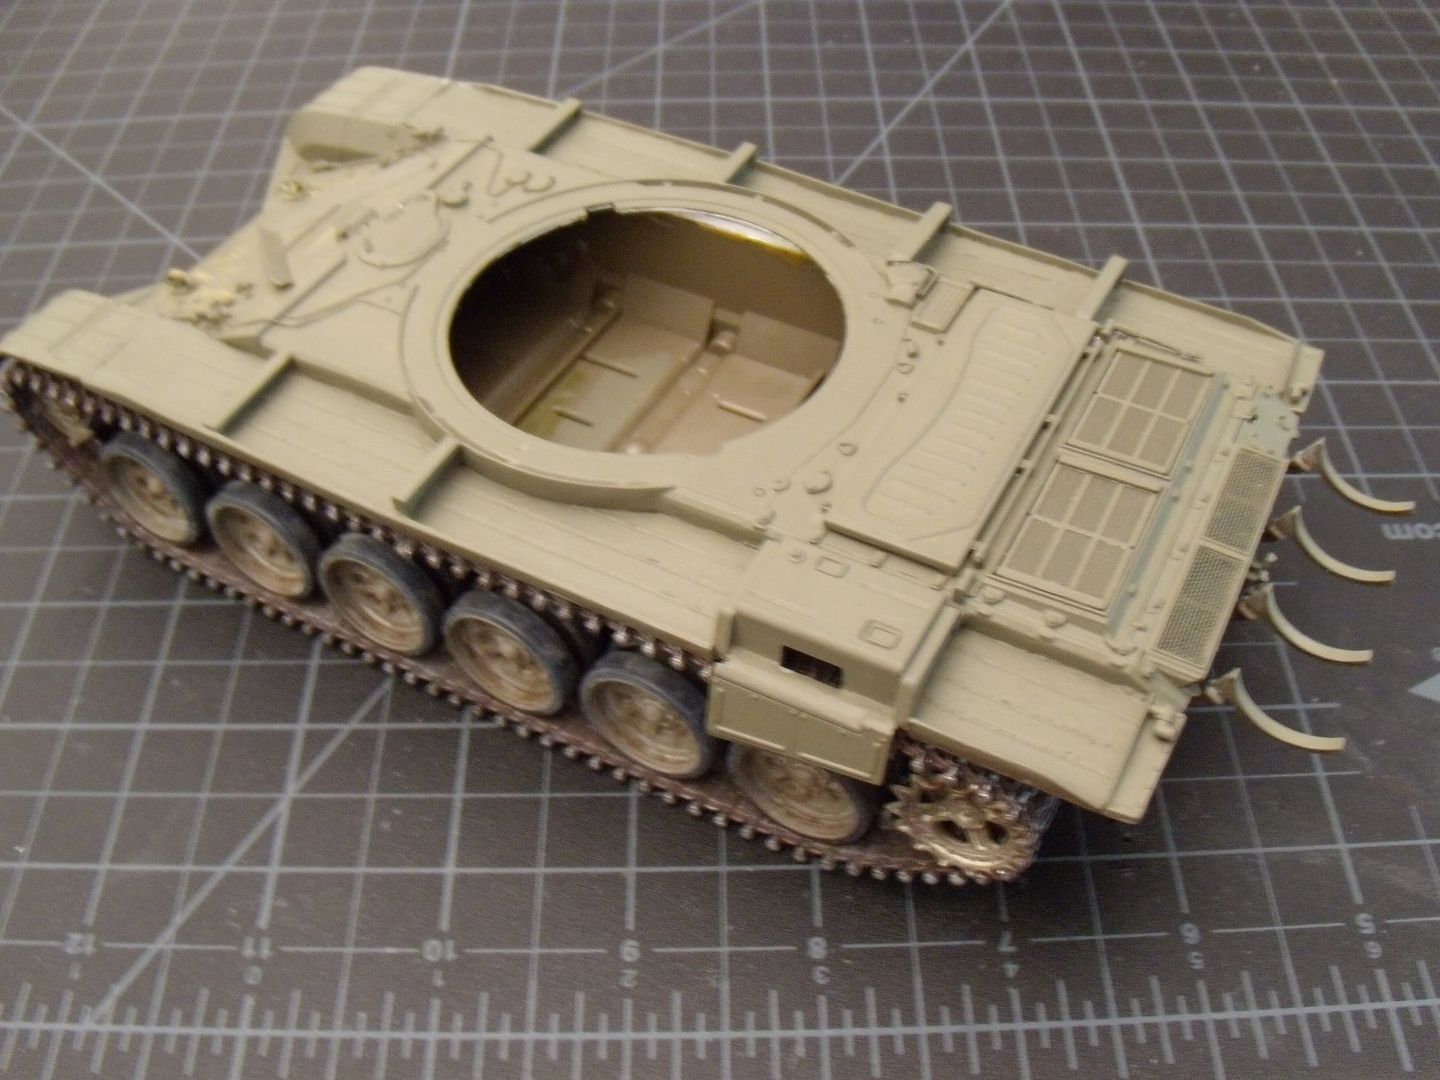
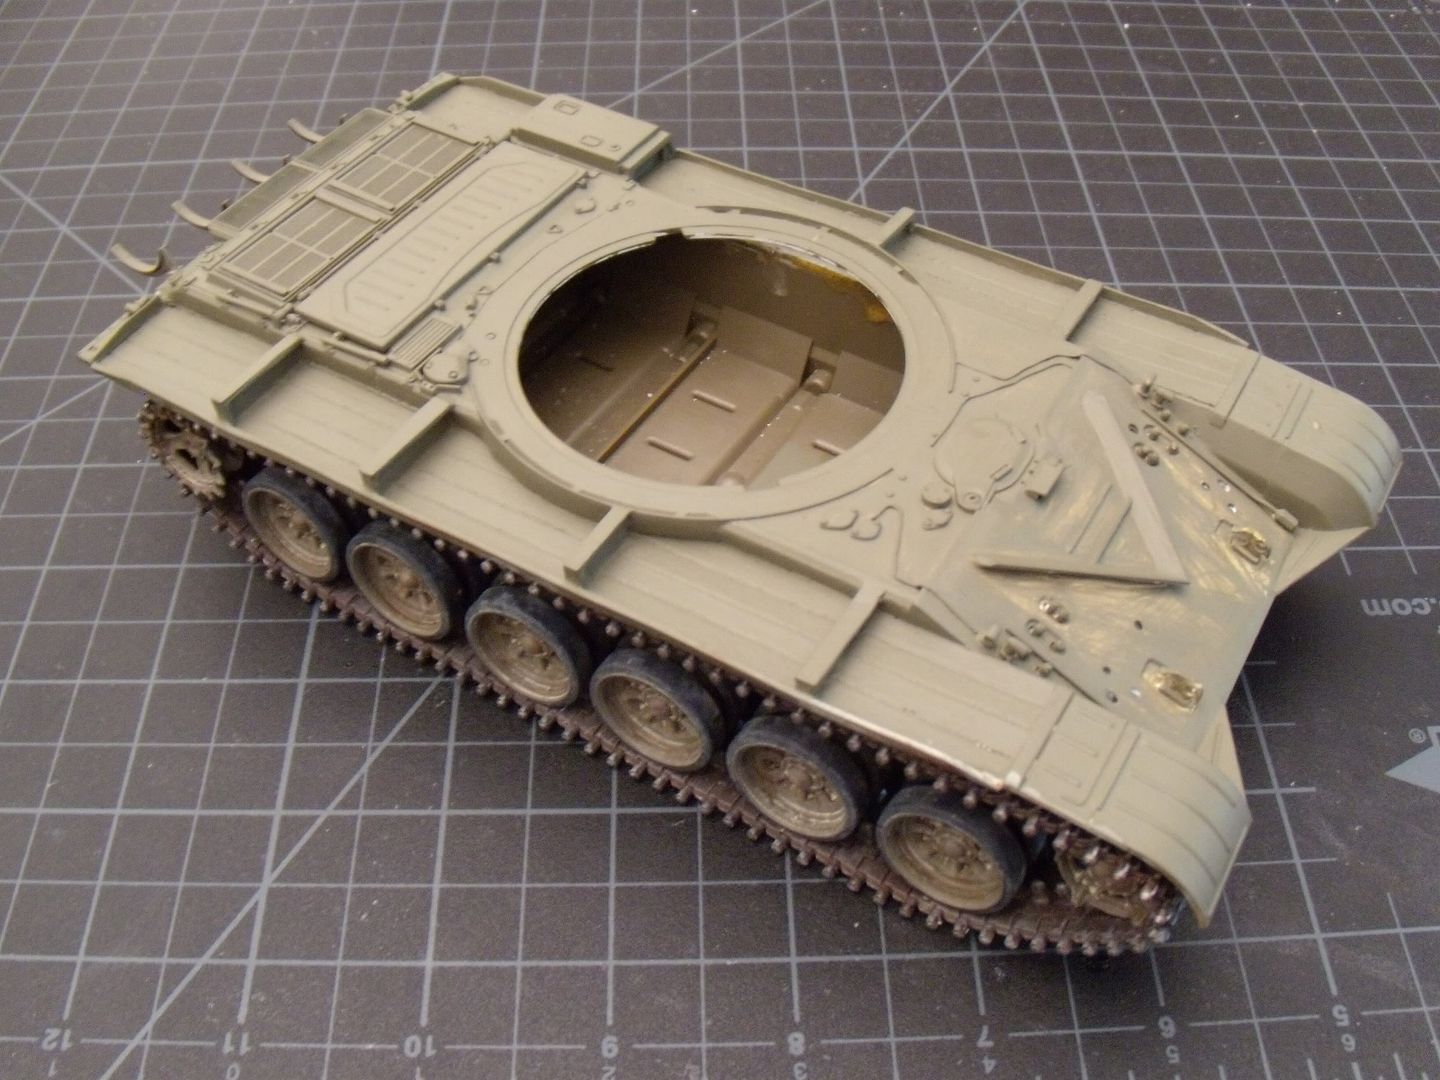
I also started assembly of the turret…which needs a bit of work. Make sure you have putty on hand because the turret is made up of two pieces, thus some gap filling will be needed.
Not to mention the turret shape is wrong. Yikes, Tamiya fell asleep at the switch on this one. After researching this problem I realized, the front of the turret, by the mantlet should not be so flat. Their should be subtle bulge/flare out, so to get this done(their is a resin turret avaible if you choose to go that route) I got the putty out again. Layering it on and then smoothing it out with my finger to get the basic shape, once dry(almost two days) I got out the sanding sponges and made it slick and smooth. Because I’m modeling an early T-72 I also had to fill in the smoke dispenser area and snorkel area.

I had time to scratch a unditching log too…okay, okay, I din’t necessarily scratch it but I did go outside and harvest it. There’s really no comparison between a log made of styrene and an actual branch. To make this log, I simply found a branch that’s same radius as the plastic, cut it off the bush, cut to size, filed down the edges, cut off any bumps (creates the effect of branches that were cut off), and then gave it a very light sanding. No weathering needed and I have a realistic unditching log. ACHTUNG! Use a dead branch if you haven’t realized it already, if use a branch that’s alive then you’ll have to wait awhile to the branch dries out.

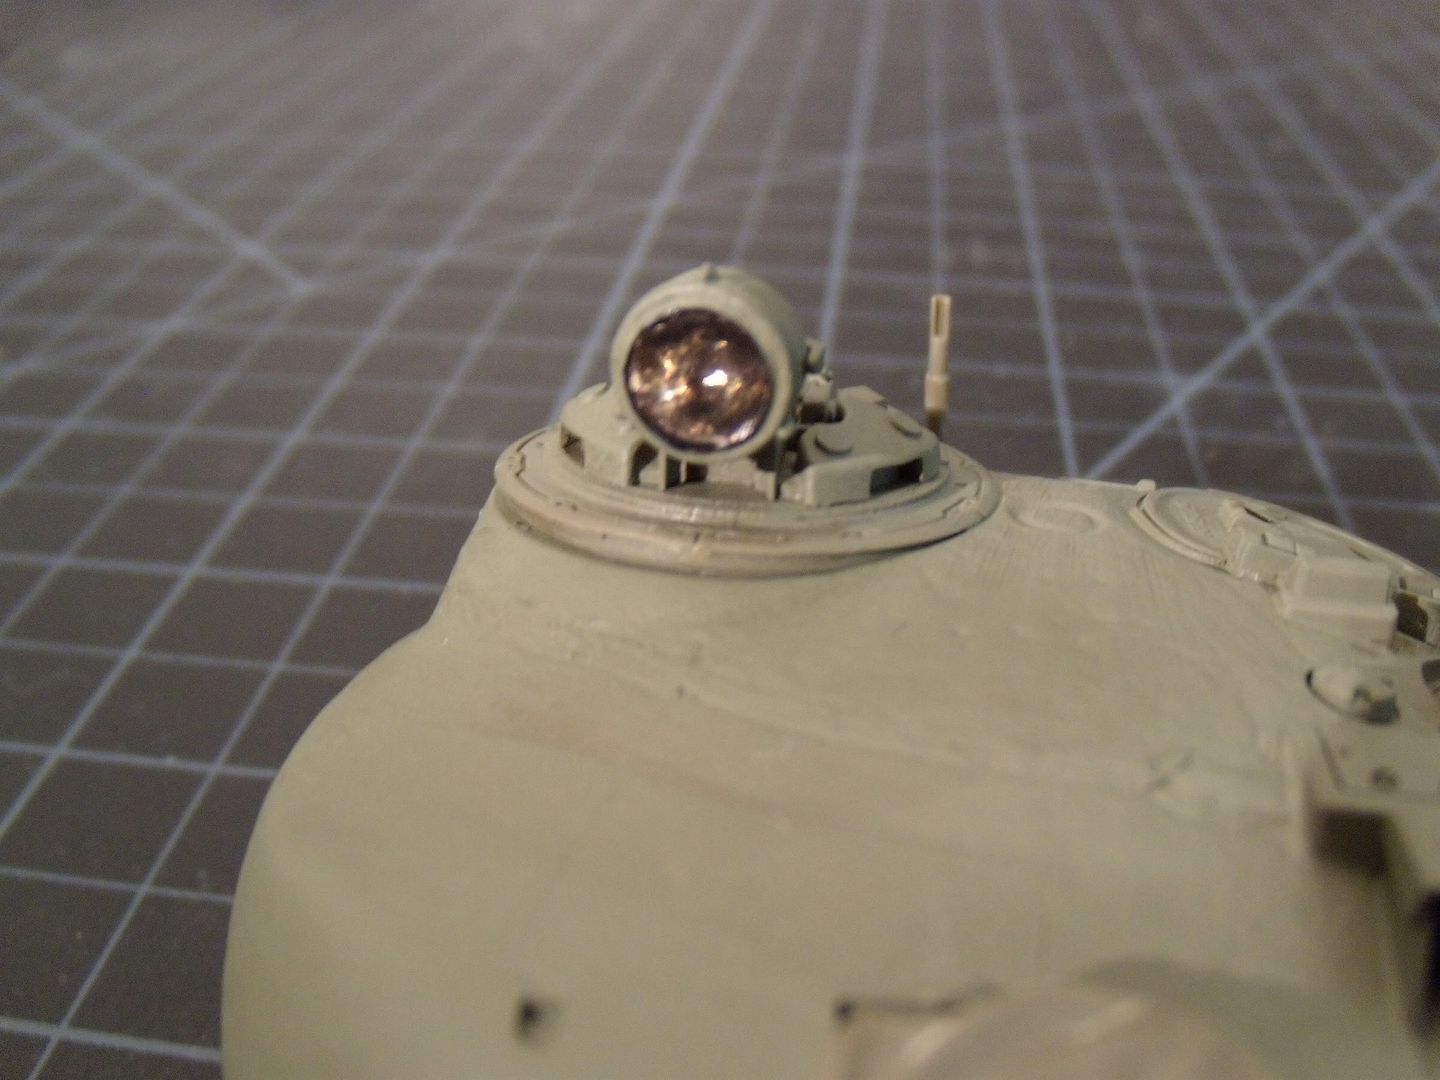
I started work on the IR light and the other searchlights on the turret(alot of lenses being made)…so will have an update on those very soon. Thanks for looking!
Wow this is looking freaking awesome. makes me want to start on my T55 or T62. Looking forward to seeing more on this build.
Rob
scratchmod- Yeah get the T-62 out of the stash, we need some more modern armor around here. [Y]
i totally agree!
camo junkie- Thanks for stopping by and the checkin’ out the build.[:)]
anytime. ya got a great looking build going here! [Y]
Real nice work there mg.
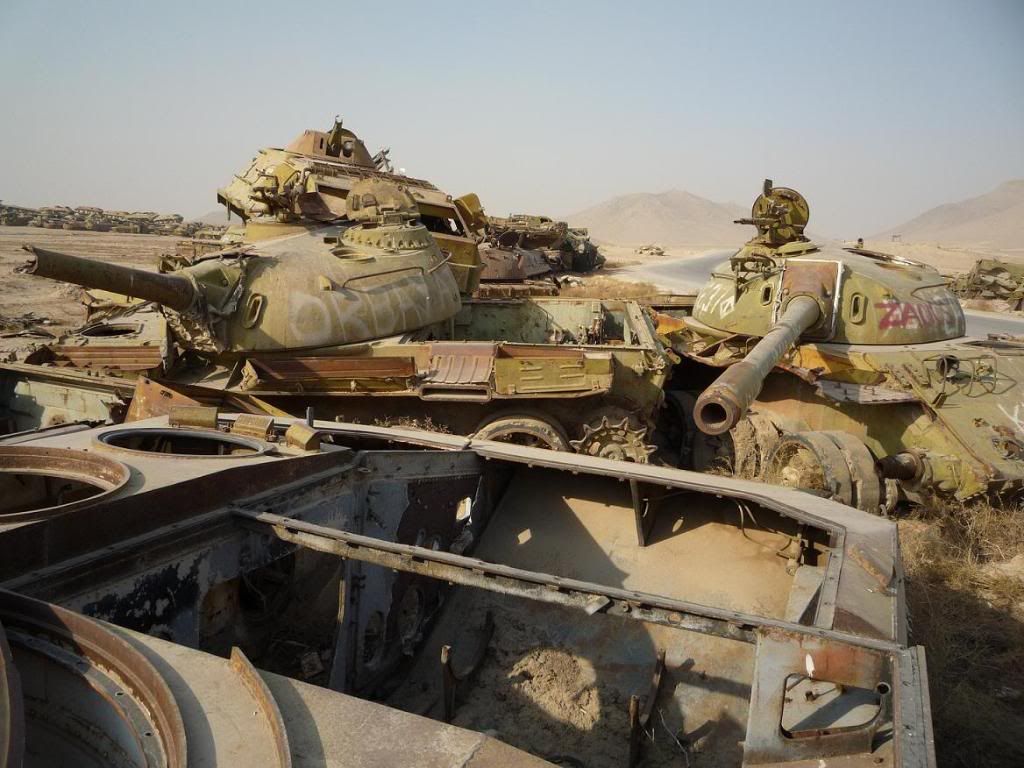
Very nice looking build you have going there! I am not sure who posted those photos from Afghanistan, but I have seen a few like that before. It’s amazing how much old Soviet equipment is still sitting around in the desert.
Chris
That particular boneyard extends for miles. It’s a literally windbreak for the road, kept it clear of snow.
G
Hey, wing_nut and killjoy, thanks for checkin’ out the build![:)]
agentg- Windbreak you say, guess that one of the few uses for soviet armor, other then being moving targets when their still operational.[;)]
Glad I finally looked in here, very nice progress. I’ve got the same kit, started a re-do on it since I built it OOB about 10 years ago…This will be very helpful!
One thing I will say, the kit tracks on mine hardened, then started popping apart after a few years on the shelf. I scored some Friuls at a show for a very reasonable price…
RBaer- Glad my build will be able to help out on your re-do. But now you’re starting to scare me, I hope my rubber tracks don’t harden and pop off. [:(] When I bought this kit at a show, I could have bought Friuls…but I got this kit so cheap($10**[:D]**) I didn’t want to spend almost $30 on just the tracks.
You did good, I bought my kit when it was new, in a hobby shop. I know for sure I paid more than $10…[:'(]
Oh, well. But if I built it, then am re-doing it, it was half-price, right?
Half-price…sure, if it makes you feel better I guess you could say that.[;)]
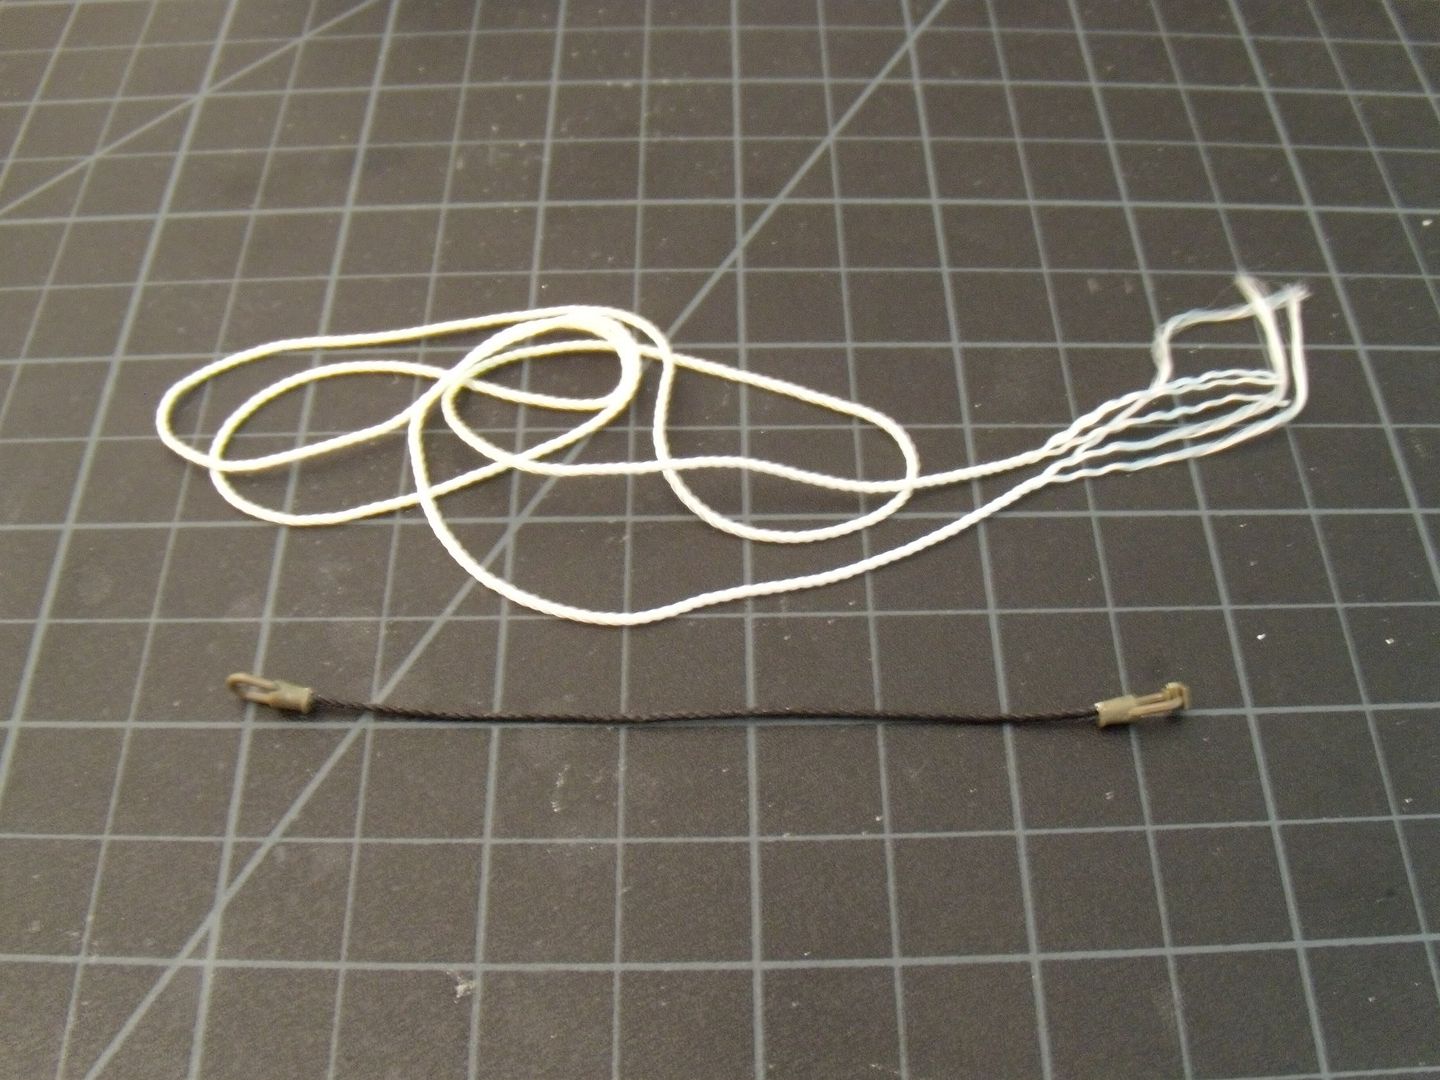
Alright now I finally have some work done worth posting about(everything else was just little tid-bits here and there). That said the two main lights are done, the searchlight and IR searchlight. ALong with a rear tow cable and FINALLY the two gas tanks.
Tamiya includes not one clear piece in the entire kit, yet their are multiple lights where a clear lens in necessary. Why Tamiya took the easy way out, I don’t know… That said, I had to get out the srcibe and drill out the plastic piece which is what Tamiy calls a “light lens.” Had some mishaps with the IR searchlight (cracking the lens holder) but I think I fixed them pretty nicely. Ater drilling out both prominent lights on the turret, I scratched some lenses for them. The lenses were also given a coat of Tamiya acrylic clear Smoke, it makes the lenses more realistic and the instructions orginally called out for the lens to be painted black, thus this variant is right on line.
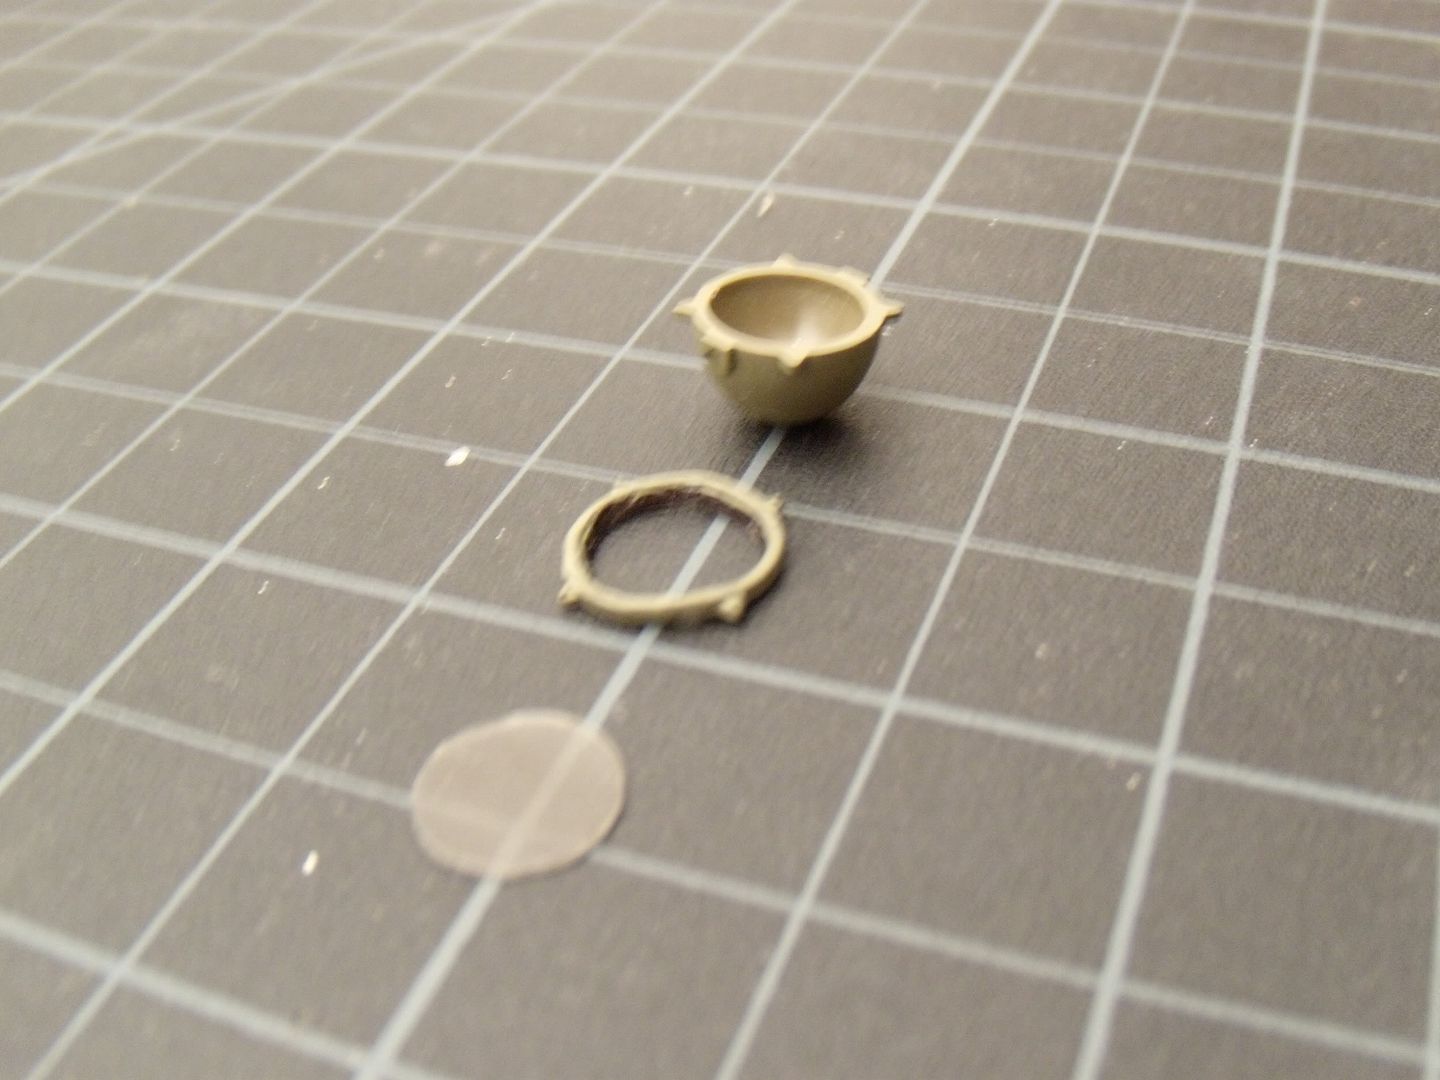
After drilling, and lens making, I tried something new for my lights. Instead of going the usual route of painting the interior of the light, I used gift wrap. Okay a certian kind of gift wrap(though aluminum foil might also be a good way to go), the one that has a shiny reflective color on one side and plain silver reflecting on the other. Not having a color I needed, I took the plain silver side and painted a portion Tamiya Smoke(for regular searchlight) and another Tamiya clear red and over that Tamiya smoke(for the infra-red light).

Once the paints dryed, I took the ‘gift wrap’ that was painted, applied glue to the insides of the lights, and then stuffed the ‘gift wrap’ inside.

Once the glue dried, I cut off all the excess ‘wrap’ coming out of the light(which was quite tricky.) Once cut I applied more glue to make sure the ‘wrap’ ends wouldn’t come off the sides of the light. Then it was just a matter of sticking the lens on, and finishing touches. So what do you think?
For the towcable, here the Tamiya kit dissapoints once again with the thread given. Sure it’s the right scale and looks good, but the ends are all split and coming apart. Even if you cut off the ends, the thread just keeps coming apart, so you gotta use you own substitute.
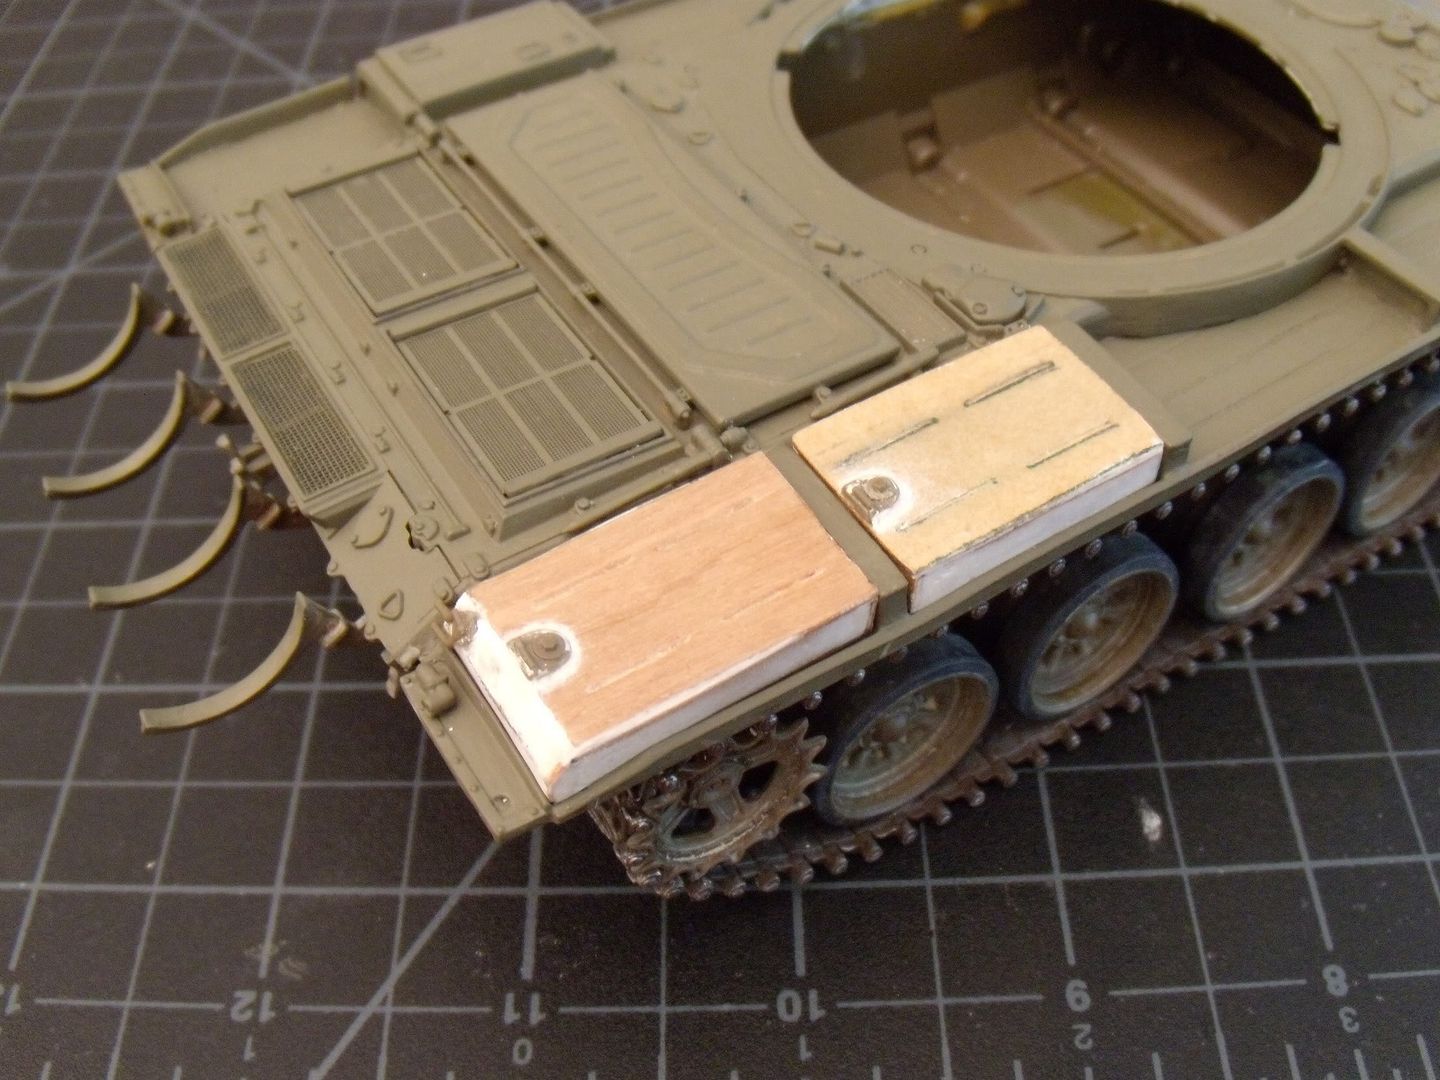
Finally, the fuel tanks. I felt that a T-72 wouldn’t have a complete fuel system(all the fuel tanks along with auxillary tanks.) Considering, the T-72 reportedly stuck around base in Afghanistan when going through some field tests. That’s why I had orginally scratched the fenders, and now I finally have two fuels tanks to actually power the tank. Scratched using veneer,(I talked about the top piece with the anti-slip marks and detail awhile back, in a past update) their complete fuel tanks, meaning they can essentiall be a stand alone piece since they have a top, bottom and four sides. The one on the right has a scratched cap and handle(the green piece) while the one has a kit salvaged paortion…hopefully they look the same. A for the one on the left, the only special thing was the angled edge to the fuel tank(which is necessary, considering it was part of the orginal piece too.) To make the angled edge I simply filled it with putty and sanded smooth.

Here’s where the fuel tanks will be postioned on the tank. Thankfully all my measurement were right on the money, otherwise I’d be having some serious fit issues.
Thanks for looking!
I like how this T72 is coming along, very nice. The trick with the gift wrap paper for the light is totally awesome, but of course will only work with the outside lens. I might have to try that out sometime. Keep up the great work.
Rob