Soviet-Afghan War T-72 ~FINISHED~ Pics on Page 4

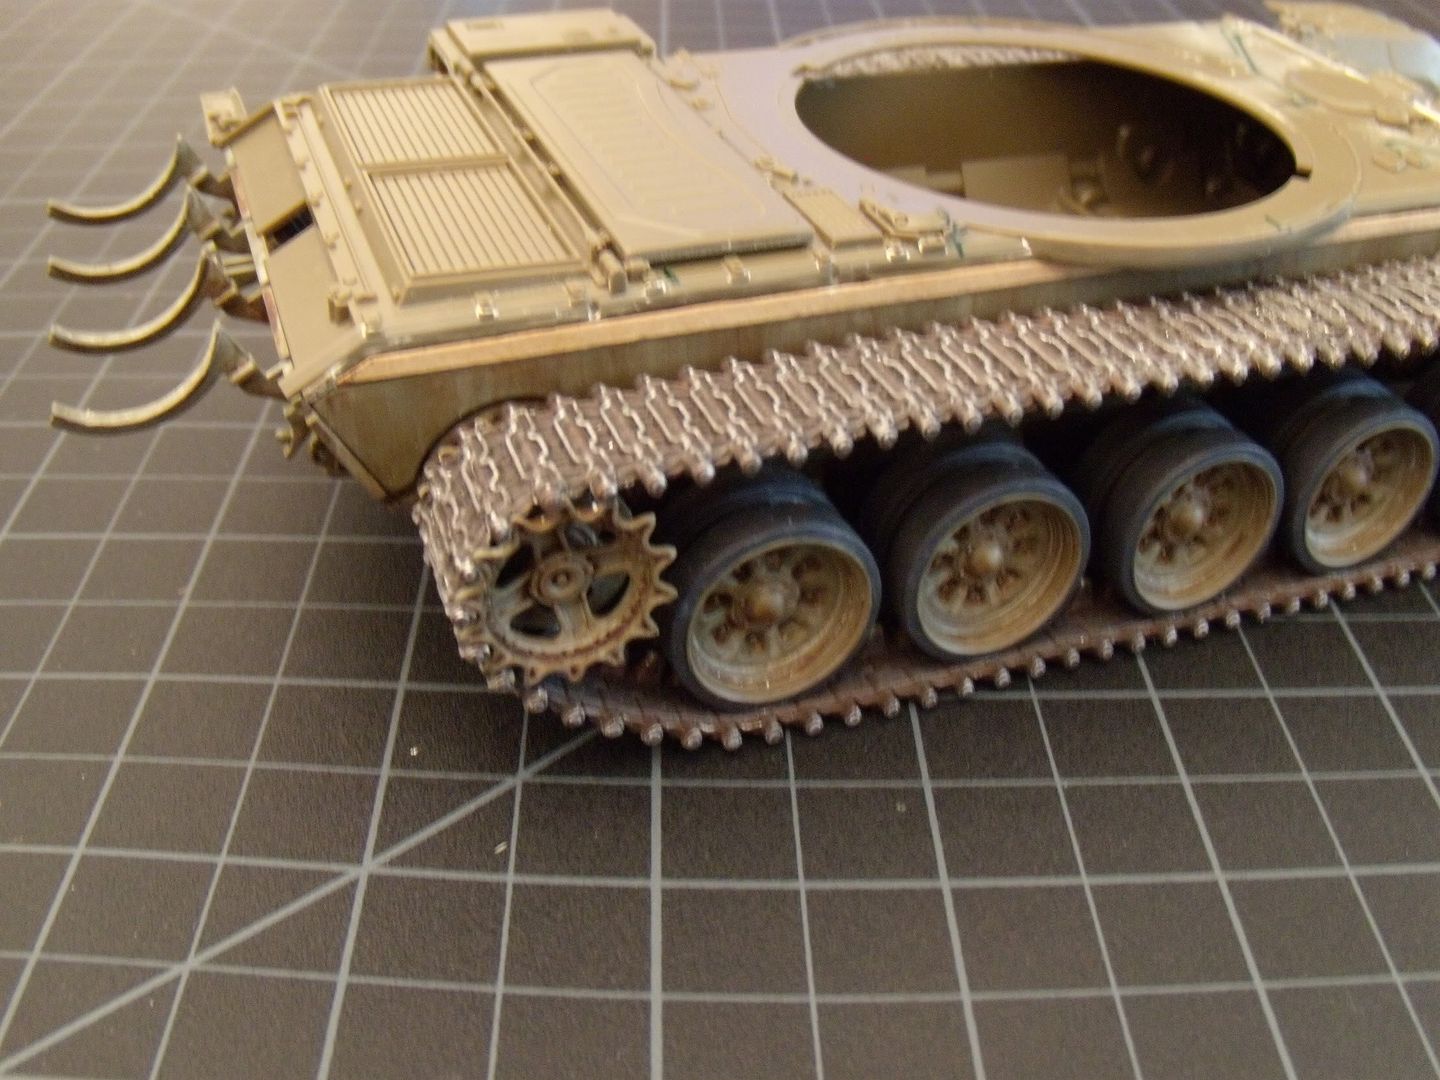
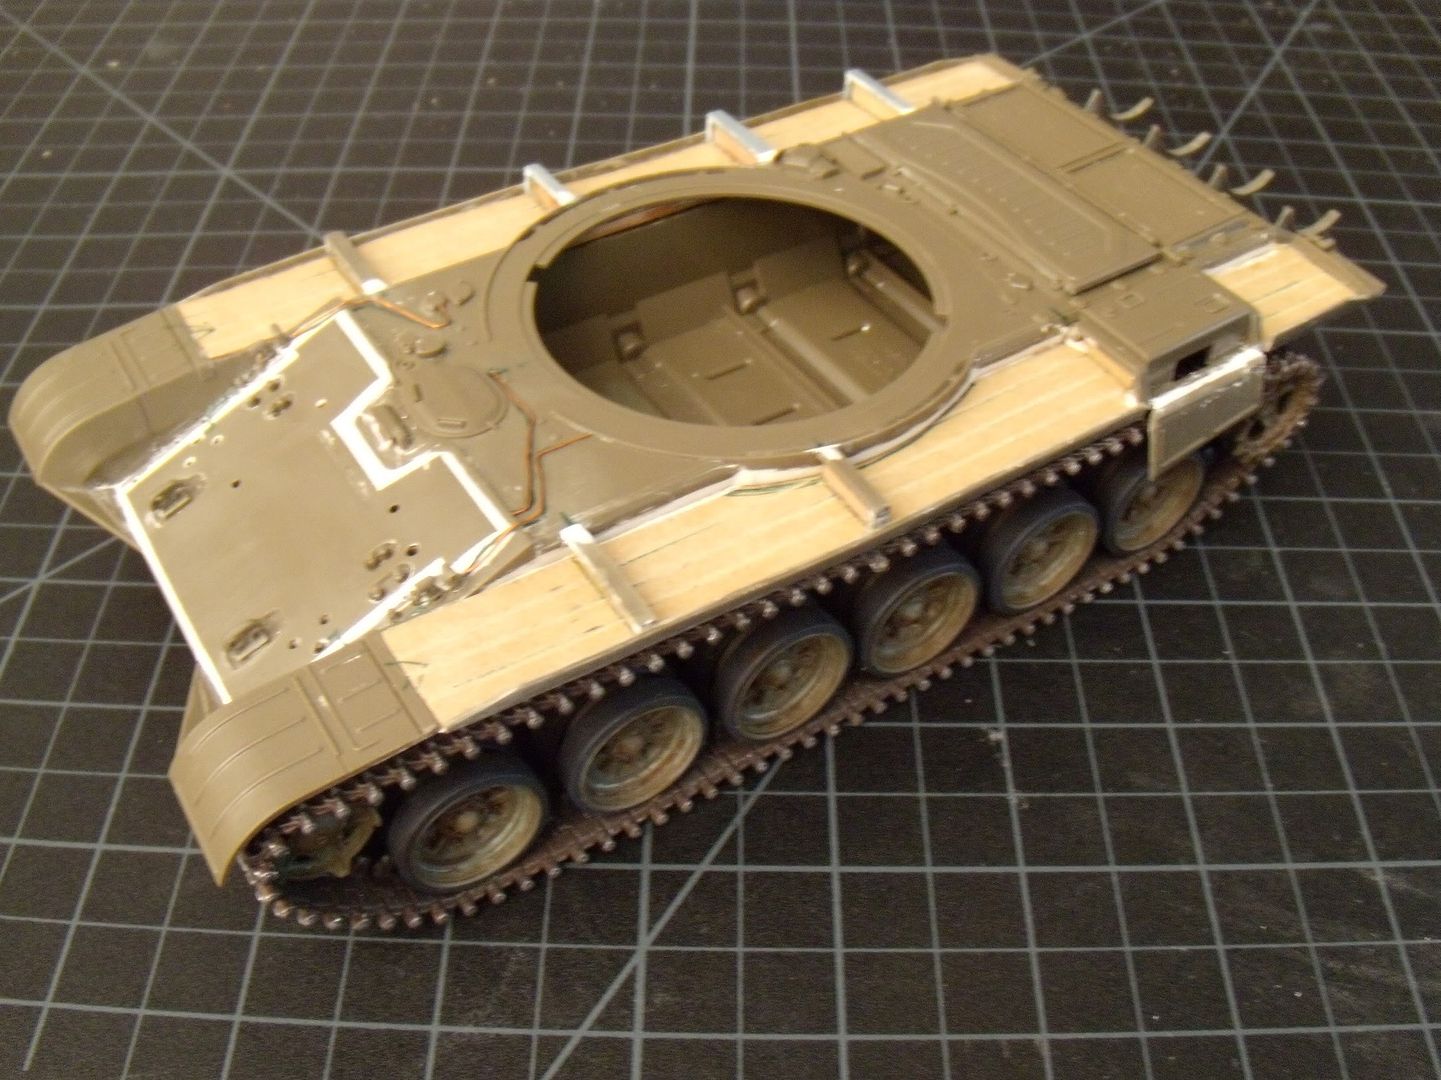
As some of you may or may not know, I’m hosting the ‘Bear Trap GB’ and for this GB I’ll be building the Tamiya 1/35 T-72 M1 kit. That means alot, and I mean ALOT of modification will be going into this build to back-date it into a T-72 that was in Afghanistan for developmental/testing purposes during the Soviet-Afghan War. As for the kit, I got this Tamiya kit for just $10.00[snYea] and it included everything(nothing missing or broken), heck it even came with an ancient Tamiya catalog! As you can see, the kit comes with rubber-band tracks[:XX](and I couldn’t justify paying the prices for AM tracks,) I did however pick up a pair of Friul drive spockets. So that will be the one AM part on this kit, everything else will be OOB or scratched. Oh, what fun.[proplr]

!(http://i267.photobucket.com/albums/ii291/mgmikael/T-72 Afghanistan/IMG_1306.jpg)

!(http://i267.photobucket.com/albums/ii291/mgmikael/T-72 Afghanistan/IMG_1305.jpg)

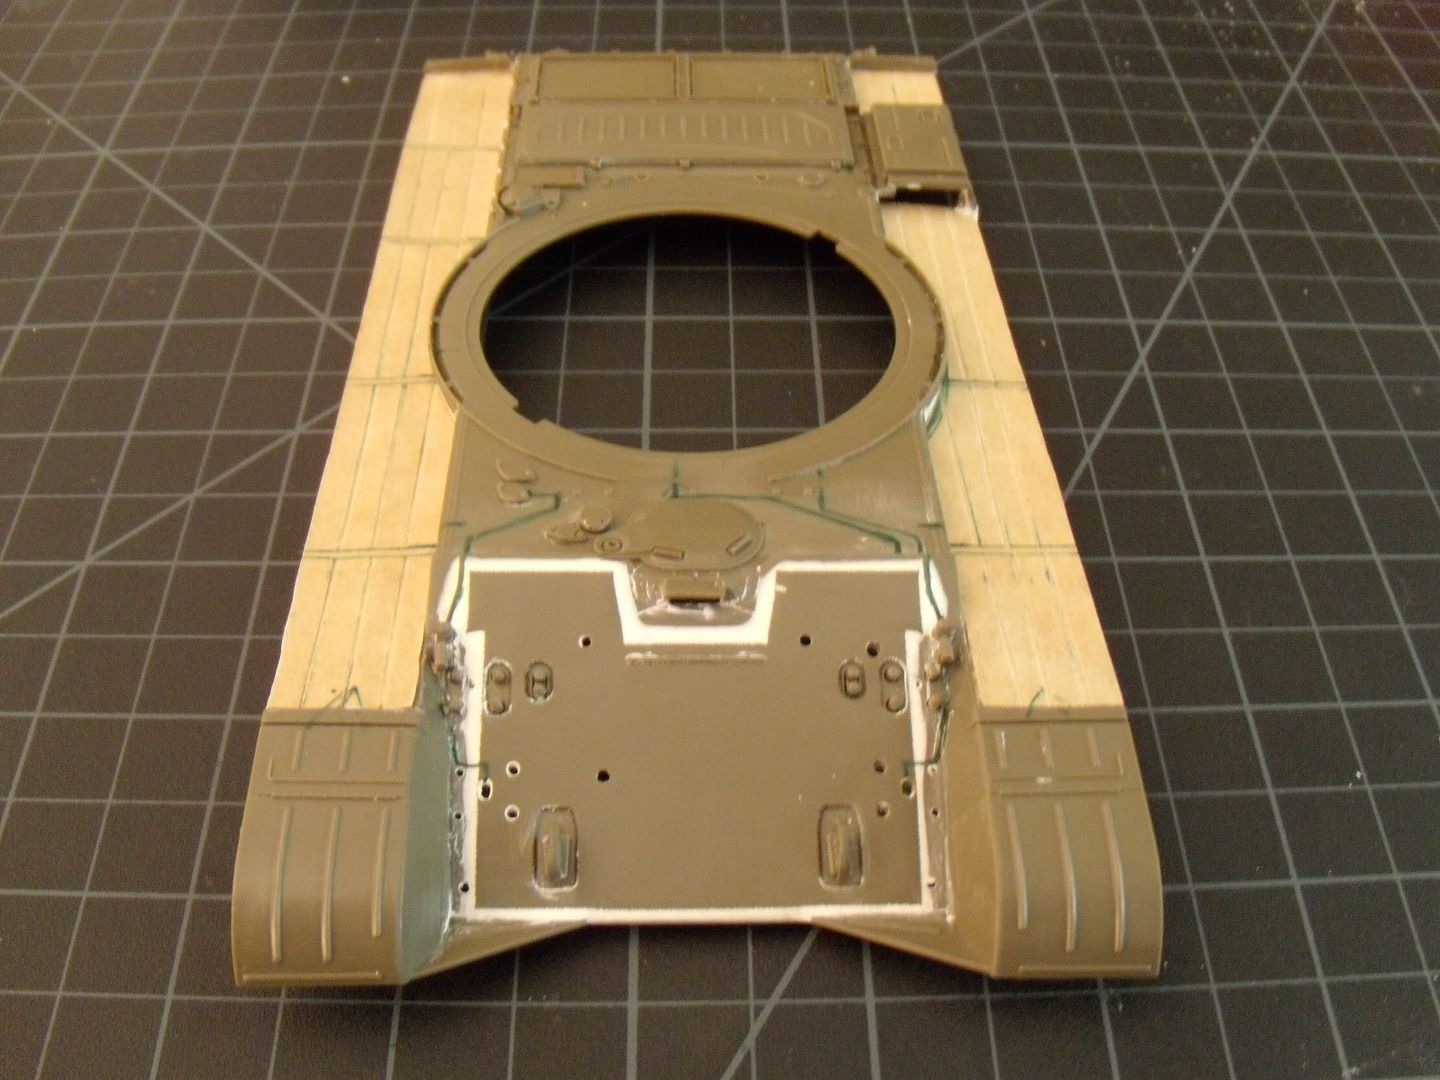
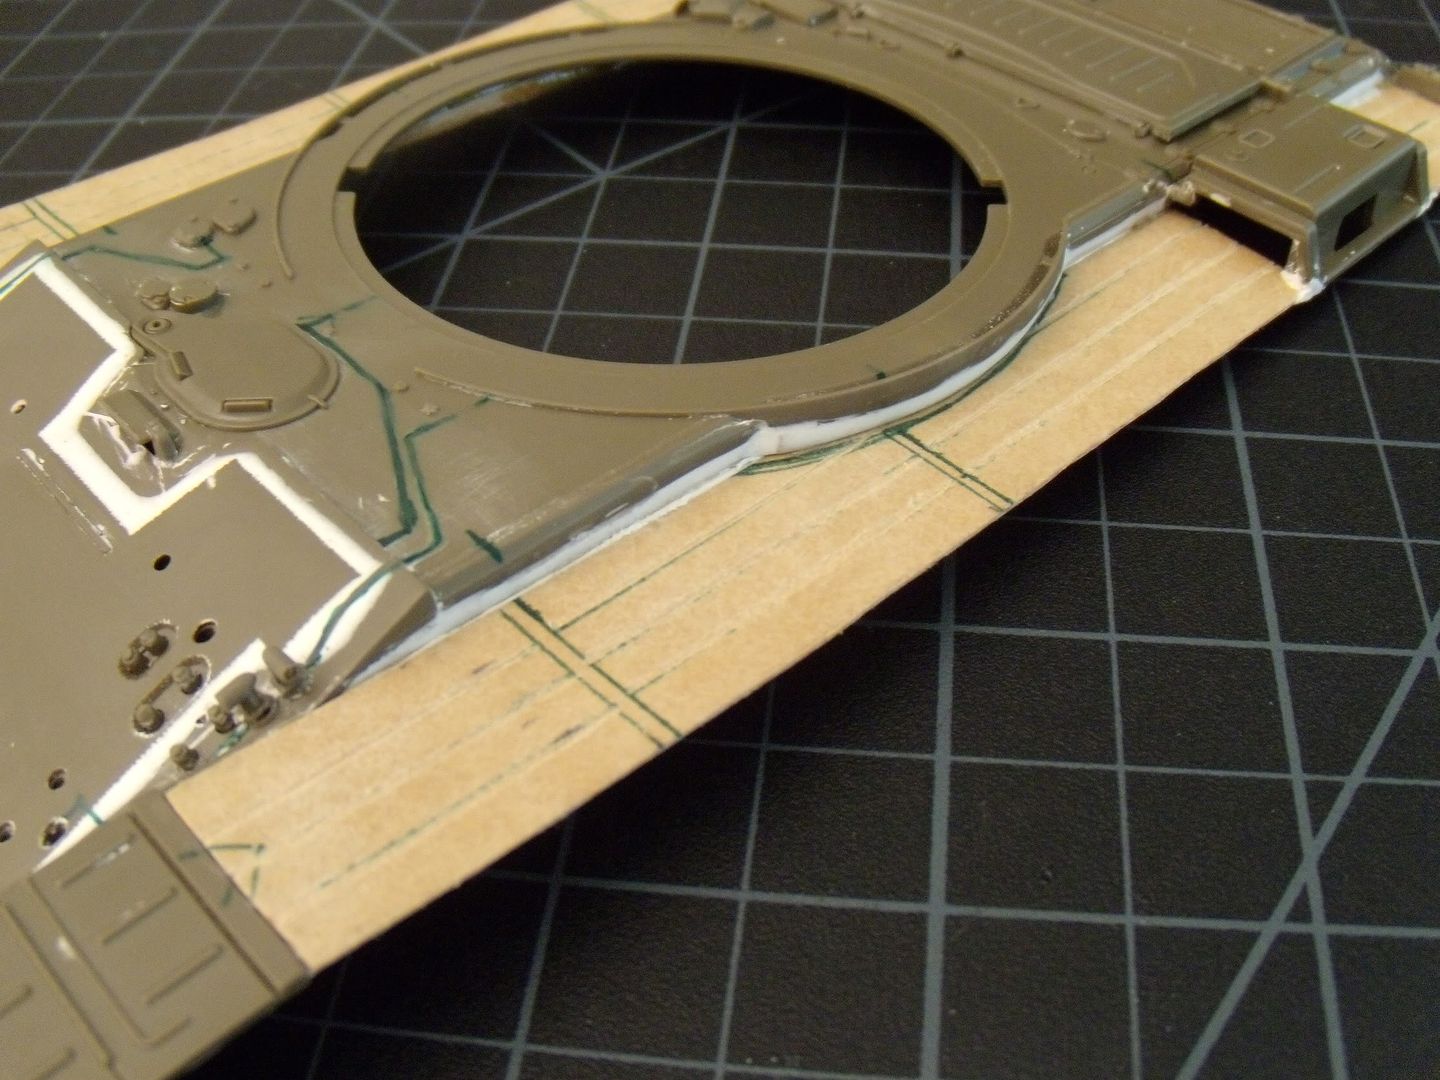
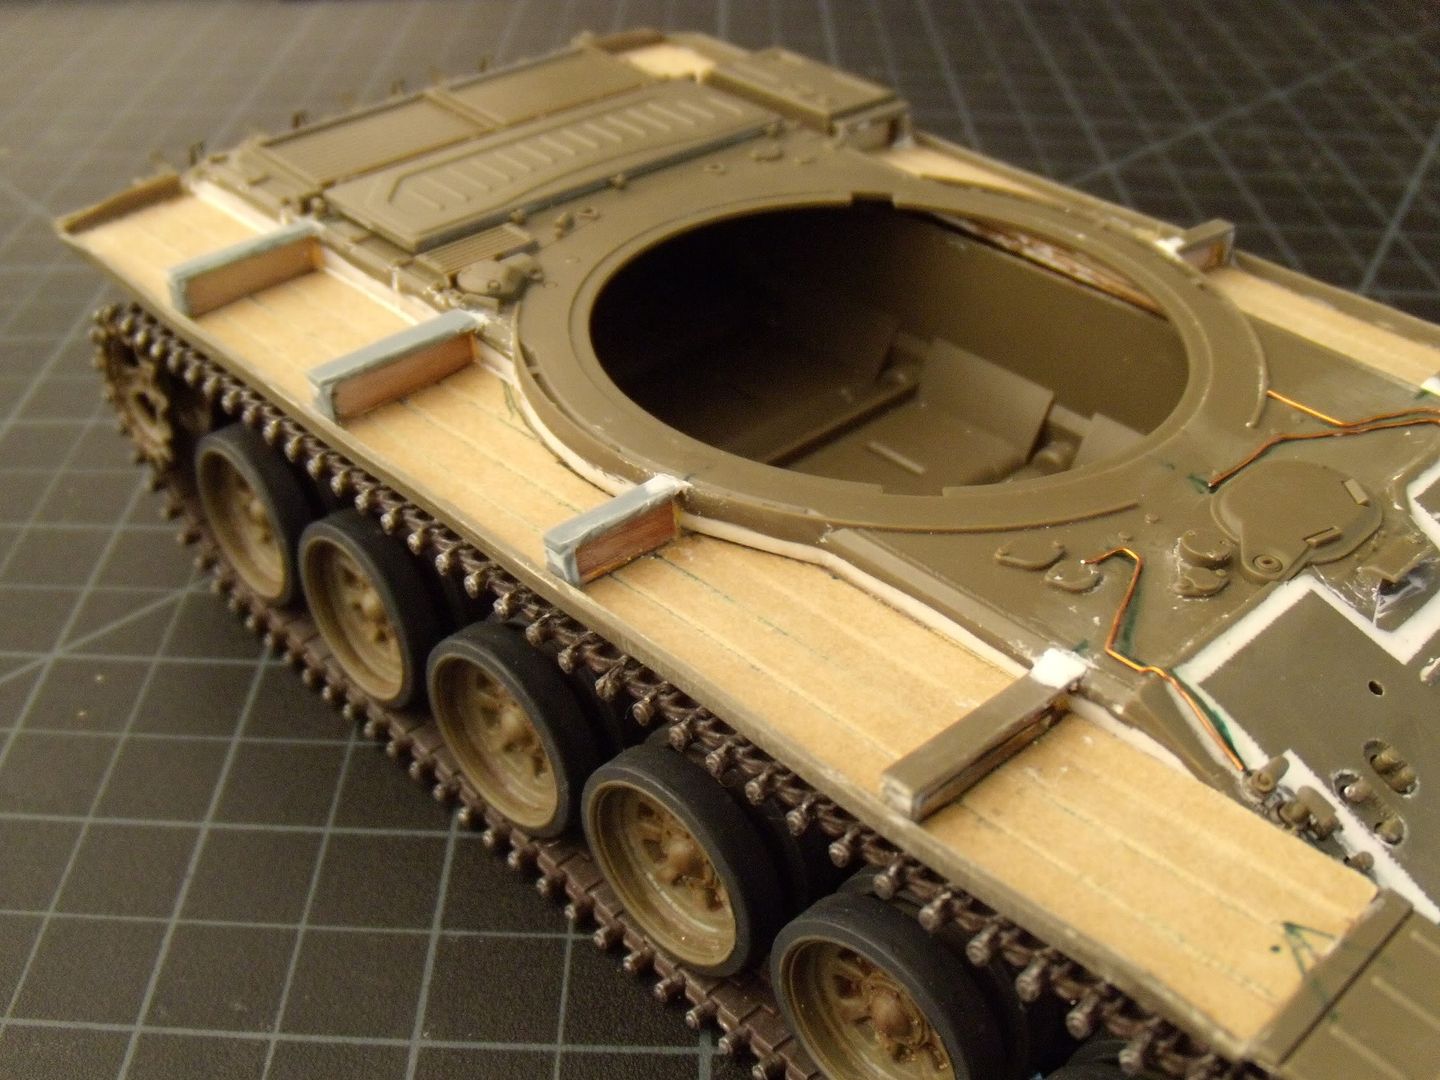
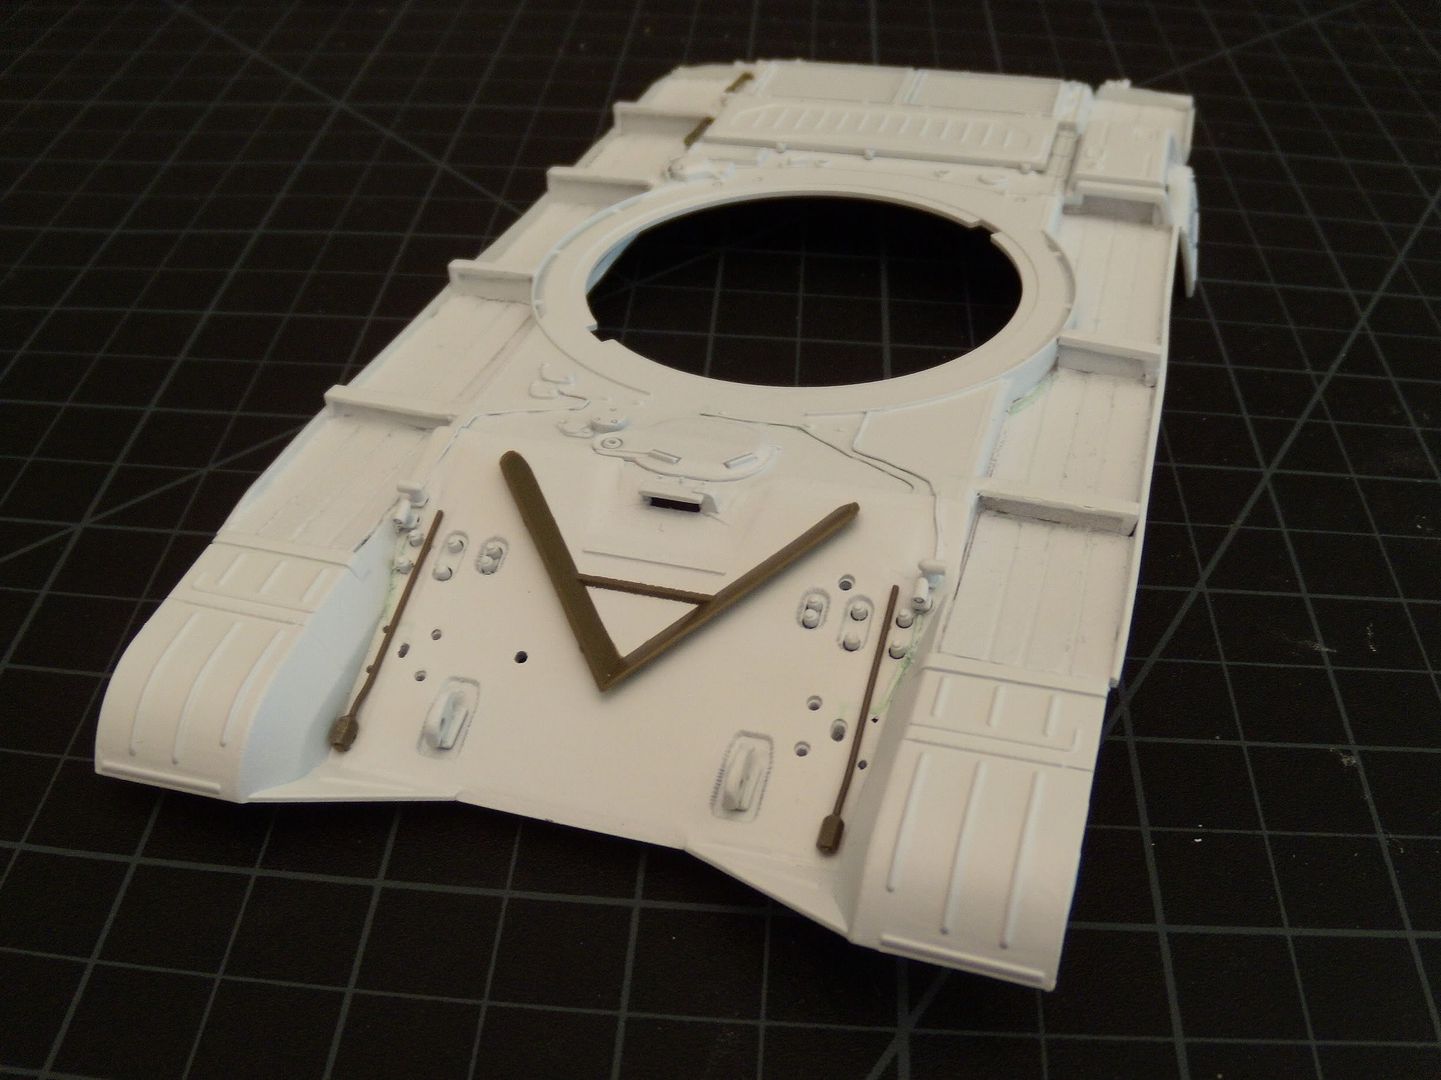
As for construction, I was able to get started on the hull. Let me just say this hull is pretty much perfect, no seams to clean, no flash, crisp detail, and only one, yes one ejector pin mark that requires clean up!(you can see it right there, dead center of hull) After getting over the fantastic hull, I started getting some pieces on like the front dozer blade.

!(http://i267.photobucket.com/albums/ii291/mgmikael/T-72 Afghanistan/IMG_1310.jpg)

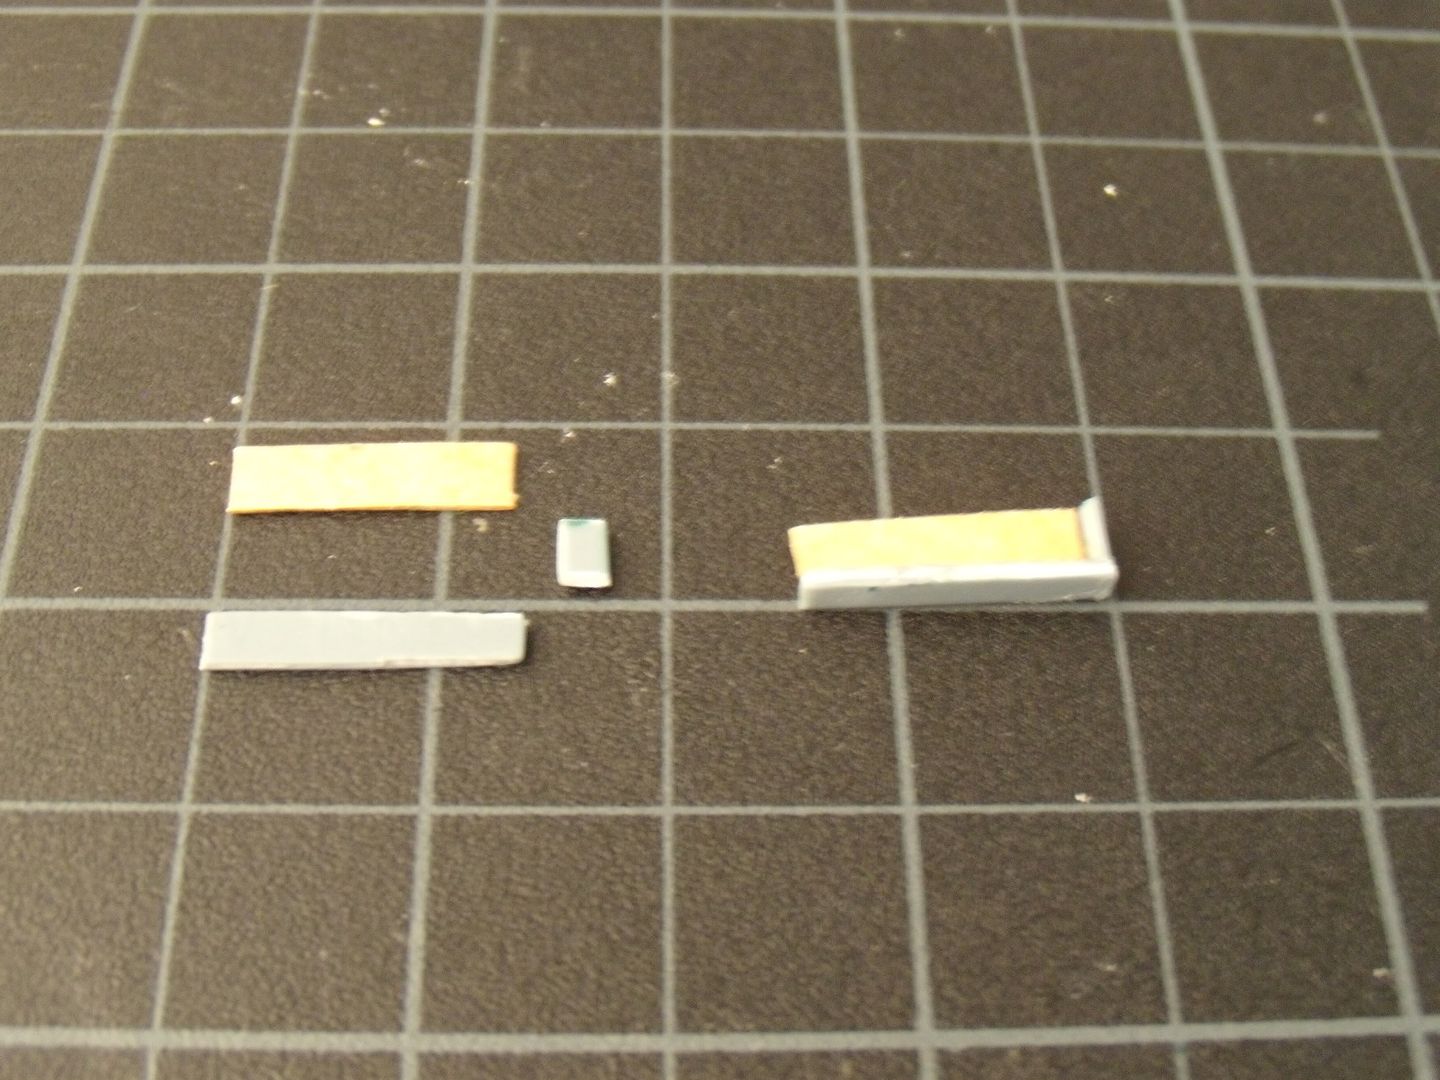
As for the suspension arms it’s another story…dang Tamiya. The suspension arms may have no seams, but they do have a large hollow portion that needs to be filled in. So I had to go and get the Testor’s Contour putty to fill in the holes, which were suprisingly deep.

!(http://i267.photobucket.com/albums/ii291/mgmikael/T-72 Afghanistan/IMG_1311.jpg)

Now the next step is to figure out the paint…I was gonna use MM Russian Armor Green but it doesn’t look quite right(maybe I’ll try an olive drab mix.) Either way I’m open to suggestions, (maybe I’ll find something at my LHS tommorrow.)

All comments, questions, and suggestions welcome!

Sure can’t complain about it costing just $10! That is pretty un-Tamiya like to make such an error on the suspension arms though. Did they canabalize them from an older kit?

tigerman- As far as I can tell, it doesn’t look like they cannablized parts from say their T-62 kit. Plus from what I read up on, this kit was a new mold when it came out in 1992 or so. Thus that doesn’t make part canabaliztion very likely, but shows that Tamiya may have gotten a bit lazy with their moldings.

I enjoyed that kit last year for the Cold War Build,look foward to seeing yours.Since you only spent $10.00 are you going for the friuls to replace the bad vinyl tracks? that was the only change I made,I couldn’t stand those tracks.

Have a look at these Tamiya colours and see if they’re to your liking.

XF-13 - J.A. Green
XF-73 - Dark Green (JGSDF)
XF-74 - Olive Drab (JGSDF)

anthony2779- I’ll go look in the Cold War thread and see if I can find your build. As for the tracks, I just couldn’t justify paying three times the kit price for a set of Friuls or Modelkasten tracks. If they were cheaper(say the low $20 range then maybe…) Oh well, I guess I’ll have to deal with the rubber-band tracks(thank goodness theirs a track shroud.)

Phil H- Thanks, I’ll go and see if my LHS carries any of them.

I bought this kit a while back, but mine was modeled for the Iraqi army. Its a great kit, mine has the metal barrel…very nice, friul tracks, and gobs of PE. I missed the suspension arms though…glad their hidden!!

Tamiya actually does this quite often with things like suspension arms. The arms on the Pz II C Polish Campaign kit that they just released in the last year for example features something similar on the suspension arms. Not sure why exactly they go that route other than it must simplify the molds and/or save on plastic or similar but who really knows?

Looks like you’re off to a great start on this one Michael!

JEFFB- Oh man, I’m so jealous. A metal barrel, friul tracks, and a PE set would be so nice. Unfortunatley for me, it’s either too expensive or in the case of the PE set…discontinued.

wbill76- That’s a shame, about the suspension problem still affecting newer kits too. You would think Tamiya would get wise and stop cutting corners.

I wish my painting skills were up to par when I finished this one…really didn’t live up to all the bling!!!

somehow I ran into trouble when tried the wash…it turned the color almost salmon in places[:'(]

I was finally able to figure out what paint to use, after a little bit of testing and luck. I went into my stash of paints, and I had a MM Acrylic Olive Drab I hadn’t touched in almost a year. The oils and pigments were seperating but luckily thet mixed back together, however the color underwent a change. It was no longer olive drab, but a very light green. How that happened I don’t know, but the color was spot on![:)]

With my luck with the paint, I was able to start progressing. The roadwheels were all assembled(just a very slight seam), I also cleaned up the Fruil sprockets. Just be sure to put the polycaps Tamiya includes in all the roadwheels and sprockets before gluing. With the roadwheels together, they were painted with MM Olive Drab and the rubber portions with Floquil Weathered Black.

Now work will be moving to the rubber band tracks.[+o(]

!(http://i267.photobucket.com/albums/ii291/mgmikael/T-72 Afghanistan/IMG_1321.jpg)

!(http://i267.photobucket.com/albums/ii291/mgmikael/T-72 Afghanistan/IMG_1323.jpg)

All comments, questions, and suggestions welcome!

start. I got a Tamiya T-055 for $10 a while back. That sure does make an already nice kit nicer

You got that right, the price can make an okay kit into a great kit. So far this has been a great kit, and that’s not even including the price.[:)]

Yikes, my last update was last year.[blndfld] Didn’t realize it’s been that long, nevertheless here’s an update that’s been much delayed and long awaited. Tracks are all finished up, primed first then painted in my standard Tamiya acrylic flat earth, then washed in burnt umber, black, rust, and another burnt umber. Then drybrushed with two shades of darkened steel. The paint might have gone on well, but damn these rubberband tracks, as soon as you start moving them around the cracks and chips in the paint occur. It’s nothing too serious, another wash can solve that problem, but these tracks are still very hellish.

!(http://i267.photobucket.com/albums/ii291/mgmikael/T-72 Afghanistan/IMG_1607.jpg)

Rubberband tracks ease of assembly=yes(since your obviously not assembling indy links together), easy to attach ends together=NO. I didn’t sew the ends, nor did I staple the ends, nor did I try to melt them together, I went the way of glue…to be exact super glue(for that instant bond) and Elmer’s polyurethane glue(for that strong bond.) Even using this combination of glues didn’t make it easy, I had to stretch and smash them to fit, surprisingly they stuck together(after holding the ends for about 10 minutes apiece). In the end the join area is not perfect(paint started coming apart) so now more repairs are necessary. Either way my final opinion is that I’m an indy-track lover.

!(http://i267.photobucket.com/albums/ii291/mgmikael/T-72 Afghanistan/DSCN0851.jpg)

![](http://i267.photobucket.com/albums/ii291/mgmikael/T-72 Afghanistan/DSCN0864.jpg)

Weathering on the lower hull came before the track assembly. I wanted something different that fit the environment of Afghanistan a bit more So I went lighter on the burnt umber then usual, but extremely heavy on grime…for that dusty/dry appearance.

!(http://i267.photobucket.com/albums/ii291/mgmikael/T-72 Afghanistan/DSCN0863.jpg)

Upper hull is where the real work has to happen, the Tamiya T-72M1 kit is an eport version of a later model T-72. So I had to backdate the hull piece for what would likey have been seen in Afghanistan. Keep in mind all T-72’s in the Soviet-Afghan War never saw combat, it was a vehicle strictly there for field testing, so that said most didn’t venture far from home base at the capital. Keeping that in mind I decided to scrap all the storage containers on the fenders of one side, and I decided to remove most of the fuel tanks also on the fenders. (lacking foresight, I removed too many fuel tanks, not realizing the tank still needs fuel to work[:(DD]) That means I now have to scratch two fuel tanks on the fenders, in addition to the fenders on both sides I already have planned.

!(http://i267.photobucket.com/albums/ii291/mgmikael/T-72 Afghanistan/DSCN0852.jpg)

!(http://i267.photobucket.com/albums/ii291/mgmikael/T-72 Afghanistan/DSCN0865.jpg)

After, the fenders I had to fix the frontal add-on armor. T-72’s in Afghanistan wouldn’t have had this much later added armor. So that obviously had to go, but replacing the whole front with resin aftermarket parts was not something I wanted to flip the bill for, nor was sanding the plate off a reasonable option, so I decided to hide it. Yes, hide it by using putty along all the edges. A lot of putty to make the lower plate and “add-on” seem like just one plate. A couple of hours of sanding later the result is not half-bad.

As always all comments, questions, and suggestions welcome. PS: if you got a pic of T-72’s in Afghanistan please share, because I’m still looking for one(though I think my chances are slim).

Nice to see this one come out of hibernation Michael! Nice work so far on the conversion/detailing. [B]

Well I have the Zveda T-72B which would have been the same as the T-72M1. Though not the same kit as the one your building as yours is Tamiya and mine is Zveda but I think the indy links for the Zveda kit could work with the Tamiya kit since I bought a set of ModelKasten tracks for the T-72. If I get started on mine in the next month or so I can set the kit track links aside for you.

BTW if your going to put your T-72 in a Afghanistan diorama I suggest buying the Zveda Russian tank crew as they look good in a Afghan dio and RBmodels makes a metal replacement 125mm barrel.

wbill76- Thanks for looking! Hibernation is right…started around Christmas, then built a JS-II for Winter Warriors, then had my spring semester in school, finally I’m free so it finally came back to the bench.

Mikeym_us- Thanks for the kind offer, but I already have the tracks painted, weathered, and installed as you can see in the pics of my last post. As for a dio, I don’t build bases or dio’s(though at times want I to), so their’s not gonna be any figs. Thanks for checkin’ out the build!

Got another update…yeah I know, suprisingly quick for me.

Anyways, got started on the fender construction. Meaning I had to fix the upper hull piece first. As you can see their’s a gap(2mm to be exact) between the upper hull and lower hull so that gap obviously had to go. Presto! Wood venner fills in the gap, yes some people might say to use styrene, but wood venner with the paper backing work just as well. You can cut it would scissors, bend it, form it, scribe it, and pretty much anything(plus I had alot of it sitting around so that’s why I decided to use it.) Though for my build I’ll be using the paper back not the wood side, since I don’t want wood grain showing up.

http://i267.photobucket.com/albums/ii291/mgmikael/T-72%20Afghanistan/DSCN0871.jpg

http://i267.photobucket.com/albums/ii291/mgmikael/T-72%20Afghanistan/DSCN0870.jpg

As for the fenders themselves, the basic shape has been cut now I have to cut to length and scribe in the detail. (The piece with the “x” is the wood grain side, it’s very nice considering it’s cherry venner so when sealed the color really pops, but for this build that’s not an issue.)

http://i267.photobucket.com/albums/ii291/mgmikael/T-72%20Afghanistan/DSCN0872.jpg

Finally the one of the gas tanks themselves. Well just the top to be exact, still have to scratch the sides. Used venner here too, but used the wood grain side(sorta by accident) however I have sanded it as smooth as it can be. I scirbed in the detail, added a styrene piece from the orginal piece, and added a putty to give the appearance of a weld seam.

http://i267.photobucket.com/albums/ii291/mgmikael/T-72%20Afghanistan/DSCN0873.jpg

All comments, questions, and suggestions welcome!

The fenders are finally attached, woo hoo! It was quite a bit of work but in the end it pays off.

After cutting the veneer and doing all the measurements, I first marked off where the fender brackets would be, after that I then made three lines(as is seen in reference photos) at an equal distance apart. To make these lnes I simply took a ruler and scribed them in(just don’t go to deep or you could make the veneer crack.) As you can see I marked the fenders for every part and detail first so no mistakes would be made…but even I still made a few very small mistakes here and there.

!http://i267.photobucket.com/albums/ii291/mgmikael/T-72%20Afghanistan/DSCN0883.jpg

Attached the fenders using some crazy glue(for that instant bond) and Elmer’s polyurathane glue(for that strong, lasting bond). Once the glue dried I simply puttied the bottom where any gaps may be and sanded smooth. Now onto making the hull-fender brackets…hopefully I can get these started later today.

!http://i267.photobucket.com/albums/ii291/mgmikael/T-72%20Afghanistan/DSCN0887.jpg

!http://i267.photobucket.com/albums/ii291/mgmikael/T-72%20Afghanistan/DSCN0884.jpg

Thanks for lookin’!!

Good news, the fenders are all finished up! So now the build construction will really quicken up in pace, since the majority of the scratching is done.

After the fenders were in place and the glue had dried, I went onto the bracket construction. If you cut the fenders out carefully(something I lacked the foresight to do) you can save time and use the fender brackets that already were part of the moldings. However I had to scratch my own, as you can see in the image below, this meant 3 parts were necessary to make up the bracket. You could always make it more complicated and get rid of the square corner by angling it with an extra piece(in effect creating a beveled edge) but this is your choice.

!http://i267.photobucket.com/albums/ii291/mgmikael/T-72%20Afghanistan/DSCN0889.jpg

Once those were put together, six in total, and all different sizes according to the hull height in specific areas it’s simply matter of attaching them. With the brackets finished I added the fender edge(this came from the kit piece with the side skirts, it was just a matter of cutting out the piece needed and scrapping the side skirts). With that done, I then did some light/electrical wiring with copper wire.

!http://i267.photobucket.com/albums/ii291/mgmikael/T-72%20Afghanistan/DSCN0891.jpg

!http://i267.photobucket.com/albums/ii291/mgmikael/T-72%20Afghanistan/DSCN0892.jpg

Finally it was a matter of priming everything for painting, using veneer meant I had to be a bit more generous on the primer on top and underside of the hull). After some drying time, I started adding on some of the detail pieces to the hull.

!http://i267.photobucket.com/albums/ii291/mgmikael/T-72%20Afghanistan/DSCN0894.jpg

As always all comments, questions, and suggestions welcome!