Sherman Firefly 1/35 Tamiya/Tasca/Asuka

Hi all, I used to make armour kits many years ago but have concentrated on aircraft for a long while now, time to take a break!

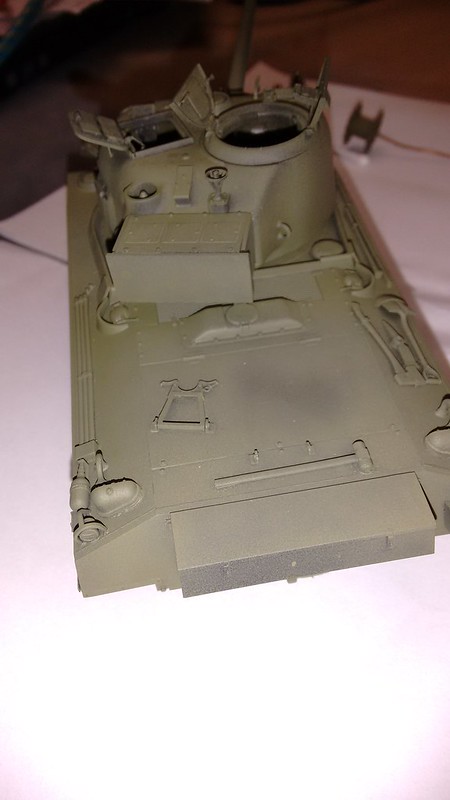
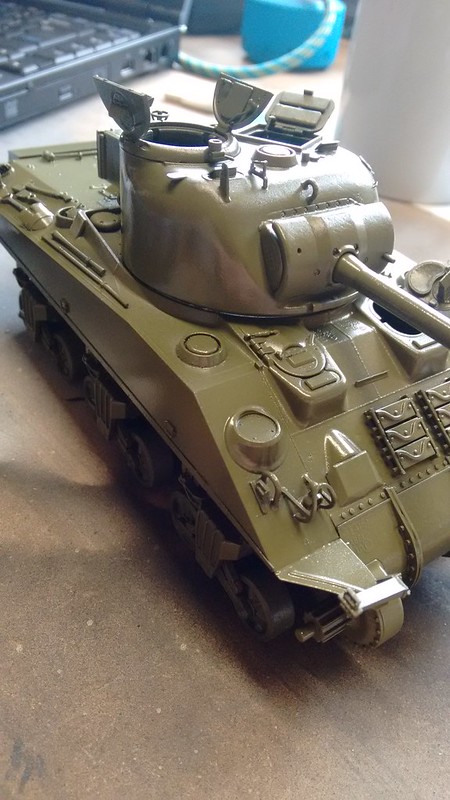
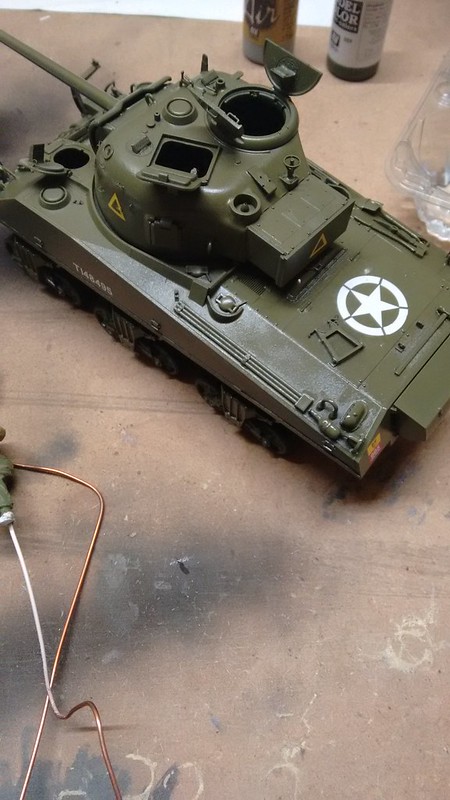
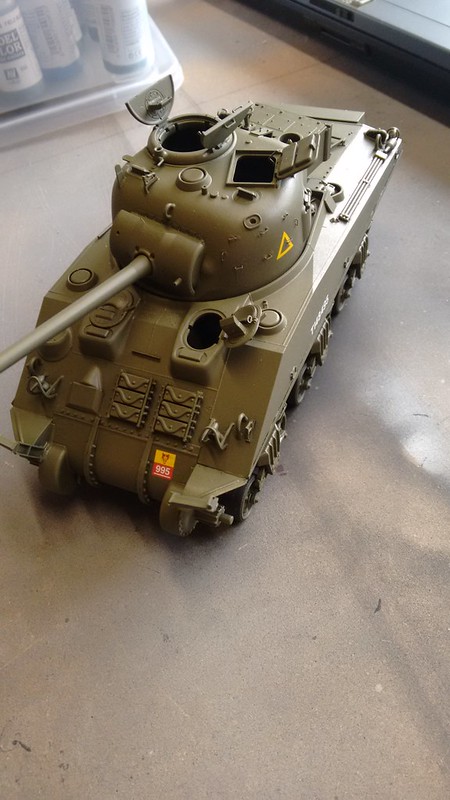
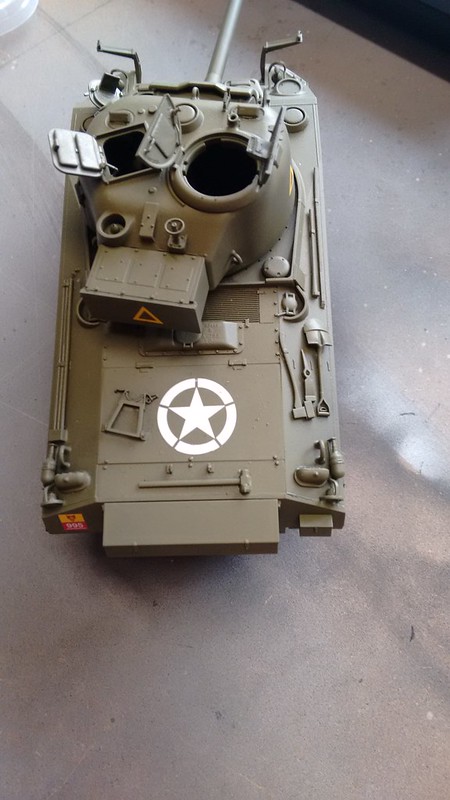
After enjoying building my 223 Afrika Korp armoured car so much I’ve put the aircraft building on ice and dived straight into another , a Tamiya/Tasca/Asuka Vc Firefly.

It’s a nice kit to build and went together with no major drama, some minor trauma though as I broke a couple of small parts as the plastic seemed hard. As this kit comes with the Tamiya British infantry figures I decided that I would dive in at the deep end and build some with the tank, this will be my first figure building/painting in about 25 years!!!

I thought that if I was including infantry then I’d better have some tank crew as well so I bought the Miniart British tank crew set, also some Hornet heads for both sets, and some Hornet hands. The detail on the Hornet stuff is great!

I am going to set it all on a small diorama base and have settled on having them all look like they’re taking a break during a lull in the fighting.

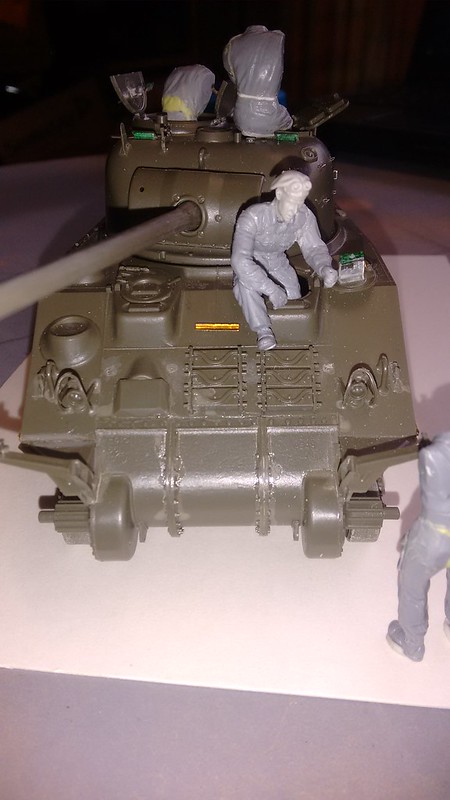
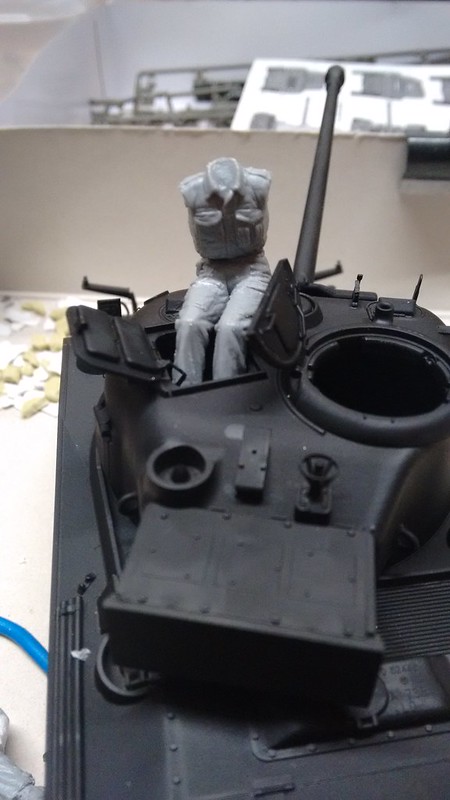
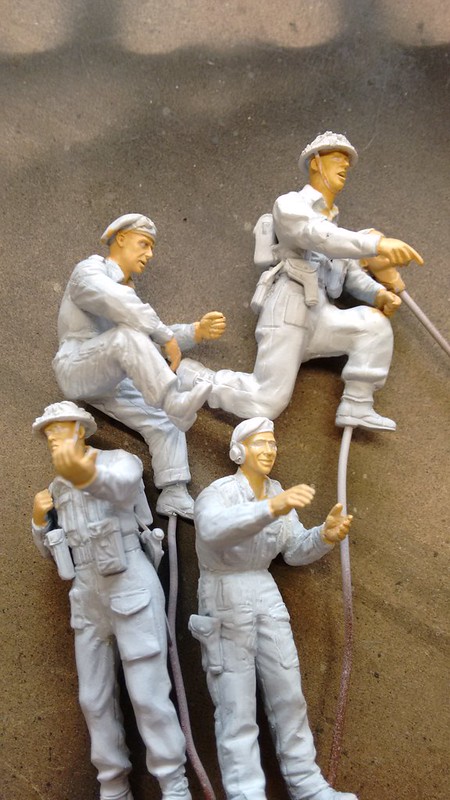
The driver is sitting on top of his hatch drinking a cup of tea (well they are British!) and talking to a standing infantryman, the cup was made from some old etch brass sprue. I also hollowed out his goggles to put lenses in later.

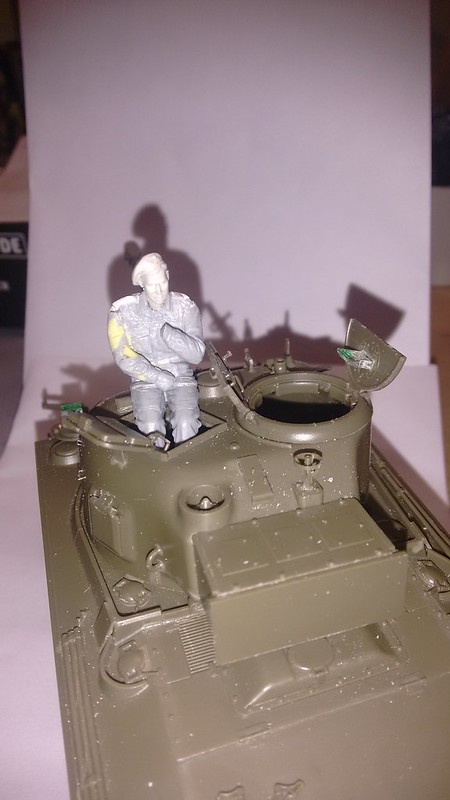
The squaddie sitting in the loaders hatch is either going to have a sandwich in his hand, or a cigarette, I’ll decide which when I get further along.

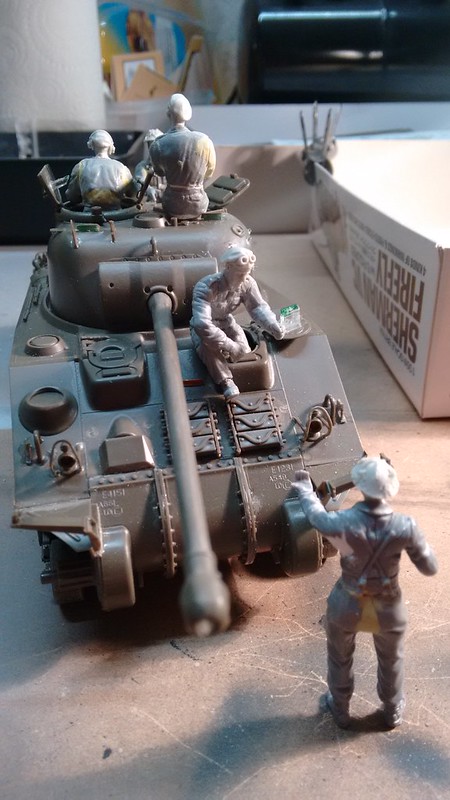
The commander is talking to the infantry officer who is on the rear deck of the tank pointing at a map.

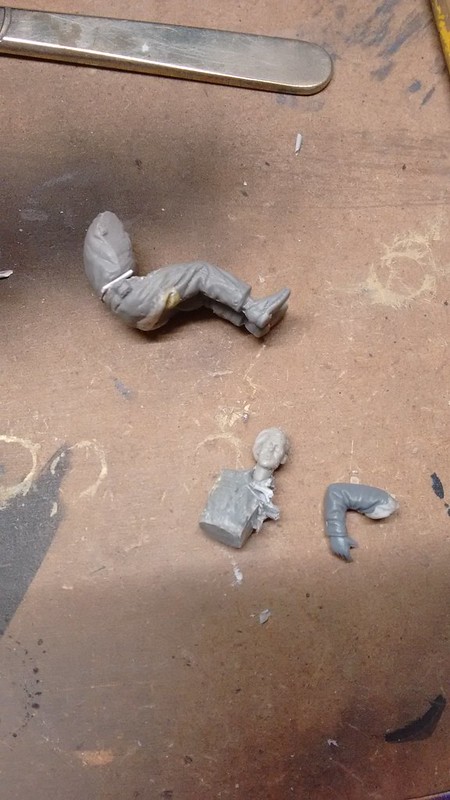
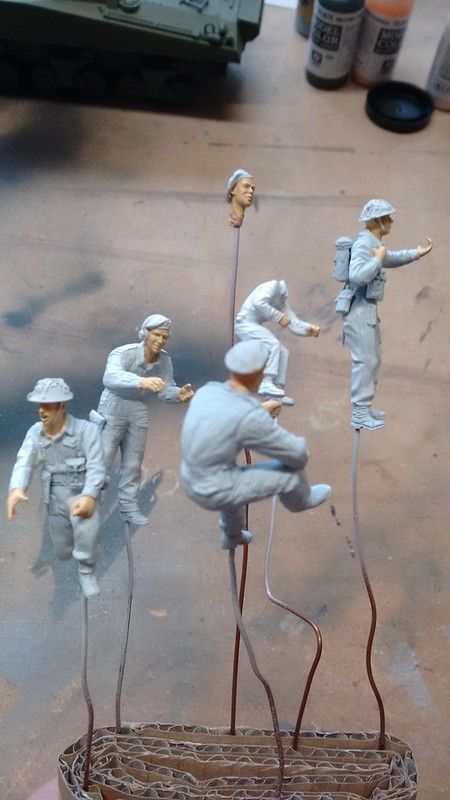
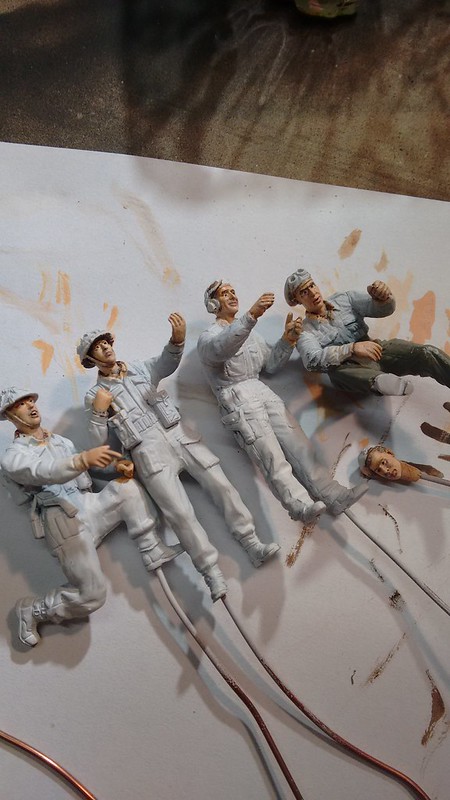
I had to alter most of the figures to get the posture I wanted, and also used Milliput for the first time in my modelling! The sitting figures had Milliput added to their backsides so as to lose the ‘floating’ effect that some figures have when just plonked on a model. The commander’s torso was cut and tilted forward to make him lean towards the infantry officer, because of this the head now had to be tilted back and a new collar made for his tank suit. The infantry officer was originally a standing figure so he has been chopped the most to make him kneel and point at the map, I ended up gluing copper wire between the sections of body to get the pose I wanted.

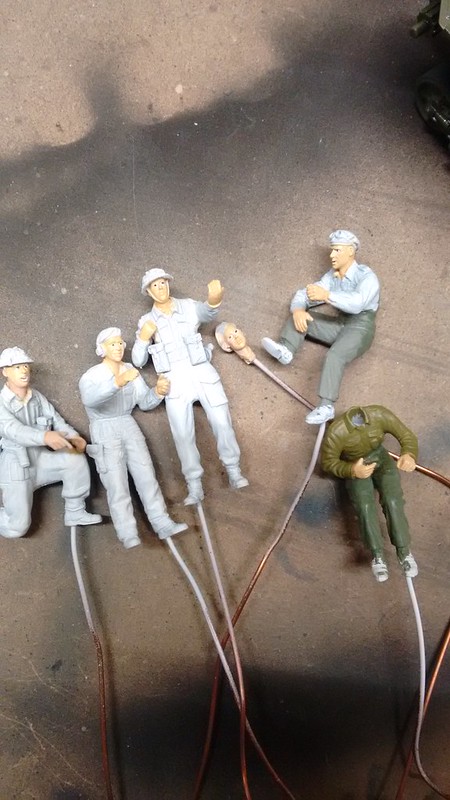
Testing the basic positions of the figures

(https://flic.kr/p/M7Ljf7][img]https://c3.staticflickr.com/6/5808/29612599834_0751fa05c9_c.jpg[/img][/url)]

(https://flic.kr/p/N2pZpA][img]https://c5.staticflickr.com/6/5468/30208408516_1c43614775_c.jpg[/img][/url)]

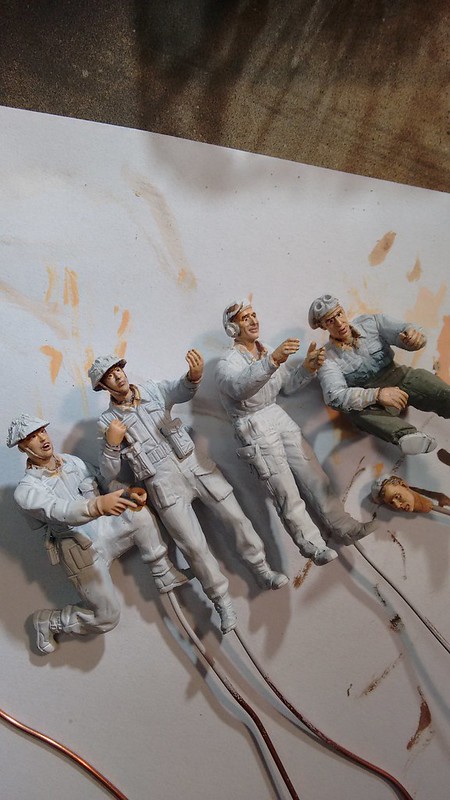
Hornet heads added to the figures. I wasn’t happy with the loader figure as his posture doesn’t look right, I’ll have to correct this.

(https://flic.kr/p/M7QGmH][img]https://c2.staticflickr.com/6/5628/29613454673_16bc6d87eb_c.jpg[/img][/url)]

Tea time

The loader figure was really out of shape.

Some alterations made with a file and a scalpel, Milliput added to shape and make a new epulette…

…and he still looks like he’s got a shoulder injury!

Time for drastic action, the torso has been replaced and reposed to lean forward slightly. I’m also trying to save the Hornet head from the original.

Loader looking better already!. Sherman has also been primed with Halfords (UK car accessory company) acrylic matt black rattle can paint.

Arms added and a sandwich Blutacked to his right hand, the left arm is now leaning on the hatch, and will have Milliput added to make contact with the hatch to show he is leaning on it.

First coat of paint on (Vallejo Russian Uniform green), it was a very light coat then I’ll darken it with some grey or brown and give the lower surfaces another dusting with the airbrush. I also ‘signed’ it with a nice thumbprint! [:)]

I darkend up the Russian Uniform Green with these colours and sprayed another coat on the lower surfaces of the hull and turret. It’s hard to see the tonal variations on my rubbish phone pics but they are there.

r

Another coat of Russian Unirform green was sprayed on, mostly from the top to try and keep the slightly darker lower surfaces, then a gloss coat was applied to prepare it for decals.

I used another rattle can for this that I got from a pound shop (discount shop where everything is £1, usually a right load of old rubbish sold there! [:D]). It was tense waiting to see if the cheap gloss coat would react with the Vallejo but it was fine, I’ll definitely be using it again at that price.

Excellent work with the figures!

i love what you’re doing with this build. Very nice work with paint modulation.

Id love to see more. :slight_smile:

Nice scene coming along,I got the same build going a few posts down.

Thanks Mike, I’ll add some more pics later to show how far along I am with it.

Tojo72, it was your build that reminded me to post this one. It’s interesting to see how another modeller approaches the same subject, hopefully I’ll learn something about figure painting!

Great work so far, i like what your doing with the figures, this is going to be a nice scene. Have you started the base yet.

Thanks Bish. I bought a plaster of paris cobbled street base off Ebay but it was too small, it was fairly cheap so I’ll just buy a bigger one and use the small one for something else.

Now for the next installment…

I base coated the figures face and hands with Vallejo Flat Flesh, then roughed in the whites of the eyes with some Offwhite. I wasn’t too careful with the white as it would be touched up later, I just didn’t realise just how much touching up I would have to do!

Vallejo Black Grey used for the eyes, I was at this for hours as I couldn’t get it right. This is probably why I haven’t painted a figure for twenty years or so!

A bit better…

Calling this done…

Does anyone know why my text between the pictures appears as links, and how to correct this?

The decals are on. They were nice and thin but a bit of a git to apply as nearly every one of them broke up, I managed to float them together on a pool of Klear.

Spurs, check out Great North Roads. He does the best plaster products i have used. the cobble road is £4.50 plus £3.50 postage, but you might find one is big enough for you.

http://www.greatnorthroads.co.uk/roads/roads.php?108

I had to use 3 on a recent build but it was big. This pic wasbeforei got the other two sections.

The text is like that because of the way you take the link from PB. If yopu use the Direct Link option and then use the insert image tab, that doesnot happen.

Cheers Bish, I’ll give Great North Roads a go. The base I bought was from Fields Of Glory models and was pretty good as well.

Regarding posting the pics, I’m not using PB any longer as I’m finding that it chugs and stalls too much. I’m now using Flickr but I cant find a share option that works OK without linking the text.

I’ve got some more progress on the Sherman to post but I’m reluctant to do it until I get the text thing sorted.

I have not tried the FoG bases. I get a lot of other stuff from them so will have to have a look.

Right, well not sure about Flickr, i thought that only happened with PB. Hopefuly someone else can help.

Right, I think that I’ve sorted out my Flickr issues now, so I can update my build.

Well, back to the spare room last night with two bottles of Henry Weston’s finest to have another bash at the figures.

I used these colours first to lay down some basic shading.

These look like a bit of a mess at the moment but I’m hoping that it’ll come good at the end. Quite a lot of my modelling is based on hope!:D

Some lighter coats applied over the top, I mostly used Flat Flesh and Light Flesh for this.

I used a plastic egg box to mix the paint which worked out quite well, I had 1 segment with water (for washing the brush), and another with Createx AB cleaner (for thinner).

I think that I’m done with the faces now. They’re not perfect but I was after a grimy look rather than freshly scrubbed parade ground squaddie’s. I may touch them up a bit after the uniforms have been painted, but I don’t think that they’re too bad for a first attempt in a long while.

I like what you are doing with those figures faces. They look a lot better than mine. The only thing i would pick up is the eyes. Check out this video one of the otehr guys posted a while back. It really helped me get away from that Marty Feldman look.

https://www.youtube.com/watch?v=GIzxQP2XxlY

I’ve repainted the eyes about half a dozen times as I’m not happy with them, this was always an issue when painting figures before. Thanks for the video link Bish, I’ll have one more go at them because of that.

Last night the Sherman got a coat of Vallejo matt clear.

The two infantry figures also had a base coat of Vallejo British Uniform.

Nice work on the tank color. I especially like the decals, they really went down nicely. The figures are coming along nicely.

The problem most people (including me) have with the eyes, is that they forget the upper and lower eyelids.

That leaves too much of the eyeball exposed, which leads to the Marty Feldman look.

You need a very tiny brush and a steady hand to get it right.

You’re not the only one who ends up reprinting the eyes a dozen times before they look good lol.

the tank however, looks great so far. Very we’ll done! :smiley: