TigerII; Thanks for the feedback. I alway set my decals on wet Klear, you have to work fairly quickly but I never get any silvering.
M.Brindos; after looking at the video Bish kindly posted the link to I had another bash at the eyes this evening and it seemed to go fairly well, maybe the two bottles of strong (8.5%) cider didn’t help last time![:D]
Eyes looking a bit better now.
After the eyes were done I brush painted the tyres on the roadwheels with Lifecolor Tire (Tyre), I really like using Lifecolor paint as it flows so well. I had previously roughed up the edges of the roadwheels by running them over a 60 grit sanding disc to make them look used, this made them a bit difficult to paint as I had to ‘scrub’ the paint in to get it in to the indentations.
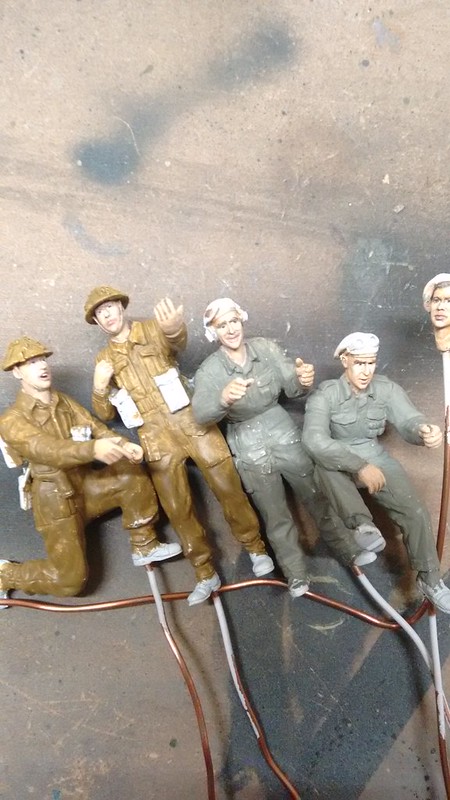
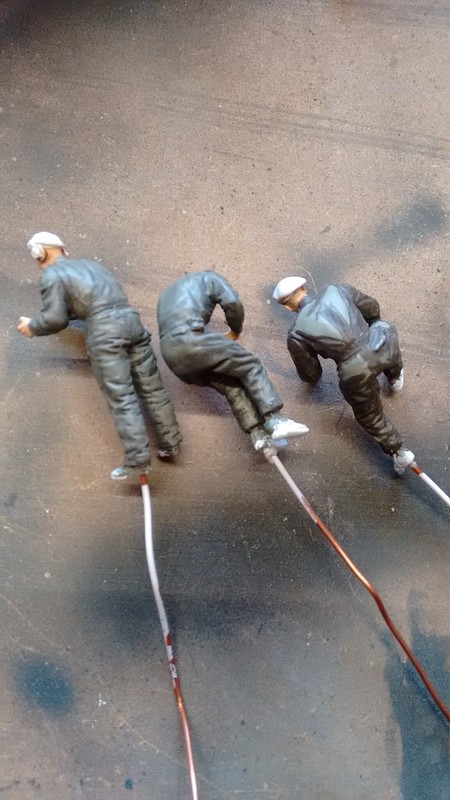
Did a bit more painting on the figures, again I’m not that happy with it! When I look at some of the great figure painting on here I feel that mine look a little rough, I’ll keep plugging away though.
Over a base coat of RLM02 I applied some US Olive Drab (I think) where the shadows should be.
Then I darkened the base RLM02 with the US Drab and tried to blend the shadows. One of the problems that I had was that the Vallejo dried a lot darker than it was when brushed on wet.
by
by
Lastly I brushed on some neat RLM02 as highlights. Not sure about them at the moment, I may have a rethink and try again, maybe I should try more cider this time!
They are looking pretty good, actually! Not nearly as bad as you think. Not at all.
But if all else fails there is one other method you could try. The chromatic method is easy to use.
Paint your main color. Spray the lightened main color from directly above, and the darkened main color directly from below.
I like to add a dark wash first for the deepest shadows.
Only works with an airbrush though. Same concept as modulation for armored vhicles. The only problem you would have at this point is masking off all of the flesh tones first.
Yep. When I get to that exact same point, I have to push just a little farther. Just keep going, and remember, its a SLOW process. You really can’t rush it and short cuts will leave you dissatisfied every time.
A little bit of progress this week, I’ve been trying to work in daylight rather than artificial but it’s difficult at this time of year!
Base coated the hatch pads and tools, lashed up one though by painting it a metal colour when it should be wood.
Used the oil dot technique on the hull and turret but kept the effect as subtle as I could, I don’t like the ‘stripy’ effect that you can sometimes get. Also I didn’t think that a Normandy Sherman would look as battered as one that had survived a few months under battle conditions, it’ll probably get a good coating of dust though.
Left side before
Right side after
So subtle that you can hardly see it! I like this as you don’t notice it, but would know if it wasn’t there.
A bit more done to the ‘lads’ inbetween the Sherman work. The uniforms have been shaded and highlighted, just the boots/gaiters and the berets to do now. I still have to paint some insignia on the infantry, they will be from the Essex regiment as their headquarters were about 5 miles from where I live and they were fighting around Tilly sur Seulles, which ties in nicely with the Lancers tank. This has been a sharp learing curve for me but I’m detremined to do more figures in the future.
After a brief lull in the action I’m back, work is getting in the way of this project at the moment!
Sprayed the kit tracks with Xtracolour enamel as I thought that it would hold better on the flexible track better than acrylic, I used X504 Exhaust as this gives a nice dull bare metal colour. I thinned it with Lidl own brand paint thinner which worked a treat and dried really quickly. Not bad for 2 quid a tin. After drying the tracks were given a wash of Lifecolor rust (can’t remember which one from the ‘rust set’ it was), then I applied some Vallejo metalcolor steel to the tracks with my finger. This was the first time I’ve used this paint and I was very impressed, definitely going to buy more of it.
I was recommended to use Alclad II Klear Kote Flat so on it went with my old Neo AB, I’ve got a new(ish) Iwata but I still like to use the Neo for general stuff like this. I left it for about two hours wondering when it was going to go nice and matt, a quick poke with my finger proved that it was now dry but still shiny? Buggerbuggerbugger, I forgot to shake the bottle before using it!
Another go over with the freshly shaken Klear Kote and all was well, nice stuff to use apart from some strings of dried clear shooting out of the AB but I think the air pressure may have been too high.
My next step was to give it a good dusting with ground up pastel chalks. I like to overdo this slightly as subsequent handling will wear it off and leave the dust in places where it will natuarally gather. I also put some dirt on top of the suspension units as I’ve seen this in a lot of photo’s, the dirt was made from two pinches of compost from a window box, two pinches of sand from the grand-kids sand pit, and some of the pastel dust to colour it. I stuck it on by wetting the areas where I wanted it with the Alclad flat.
I put some of the dirt mix on the wheels but it didn’t look right so I had a go at it with a toothpick, it looked better without it.
This is where I am at the moment, still some final touches to do such as the antenna (anyone know if it’s 1 or 2, and what length?).
Now on to have another bash at the figures, watch this space!
Looking nice, i like the dusting effects on the top. The tracks area bit to rusty for my taste and should have bare steel especially where thge road wheels run.
The rust wash for the tracks was extremely thin and only shows if you look very hard between the links, what you can see is mostly dust. The high points on the tracks were rubbed over with a finger wetted in Vallejo Metalcolor steel (this shows up best if you enlarge the second to last pic) but they still need some work, I’ll probably use a silver pencil or some Xtracolour oily steel enamel to brighten up some of the edges.
I really need to take some better pics as they are pretty rubbish! At the moment I’m using my phone camera indoors, but I’ll try and take some outside next week. Honestly, it looks a lot better ‘in the flesh’.[:)]