Update for the U-Joints. I was planning of doing them out of styrene strips. Each one would had been made of 3 different parts. I’m trashing the idea after seeing my 1st attempt. I will use a surplus PE strip to hold spare tracks in the Panzer I B set from Eduard.
Somewhat new to modeling (on my 3rd) but I am interested with this group build (retired US Army artillery officer). I am also new to the forums. I make my subjects post WWII artillery and support equipment (prefer US). Currently working on the M107, 175mm SP Gun (about 90% complete). My next kit to the bench will either be the M109A6 or the MLRS. Is there any chance of joining in. I can post some pics of the M107 where it is at currently for the group to see but would start something new for the GB.
Thanks
I’d love to see your M107 redleg12. I hope you can join this Group Build. I have an M109 in my stash and would be very interested to see your build (if you decide to do that one next).
Larry
As I said it is about 90% complete. Still working on ammo, powder cans, fuze boxes and ramming staff. Then have to work on weathering the the whole gun. Some wear work is done. Hope you like. Want to hear your comments.


This is one bada** looking gun! I think American SPGs have the meaniest look ever. Good looking build there!
Hi, I just started working on a 1/72 Revell PZH 2000 today for another SPG GB over at another forum, and I was wondering if I would be allowed to join here as well with it, if not, that’s ok with me too, just asking [:)]
Hey guys, can I join this GB as well? I’ll be building the 1/35 Tamiya Wespe.
I was eyeing that same kit for this build. What do you think of the kit Hermesminiatures?
Hoo Wa - that is one hunka burnin SPG you have going there. It looks phenomenal. Is that the Italeri kit? How much of a departure from “out of the box” did it require? I see the 107 kit appear on eBay on occasion, but have not actively pursued one as of yet.
Larry
That’s a really good choice Hermes. I like the look of the Wespe [:)]
I started it yesterday and the only major gripe is ten or so quite deep ejector pin marks on the inside faces of the side armor that need to be filled. Other than that, it’s great, and isn’t based on the old (awful!) Tamiya Panzer II like many people assume. The texture on the cast parts of the suspension is quite impressive and even the tiny lettering on the gun breech is included. Of course it will benifit from PE tool clasps and a few brass and chain details but overall I really like it.
Yep, that little 105 mm Howitzer goes together like a charm [:)] Very nice.
I have finished and will post some more pics in the next couple of days but it is the Italeri kit. I have added a metal barrel from barrel depot. For this length and size it is a must. I also have some details for the photo etch kit from eduard. It is especially freat for the vents, and some other small details. The barrel and photo etch are still available. The kit is hard to find. The only other minor change from the out of the box is the decal marking. Since my first unit was a 175/8 inch unit, the marking are from my old unit.
In general it is a great kit. It does need some seam work for some parts but in general was a blast and turned out great.
I’ll post some pics as soon as I get a chance.
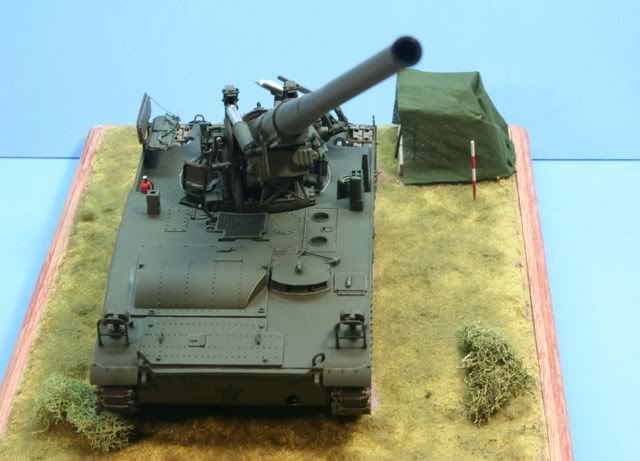
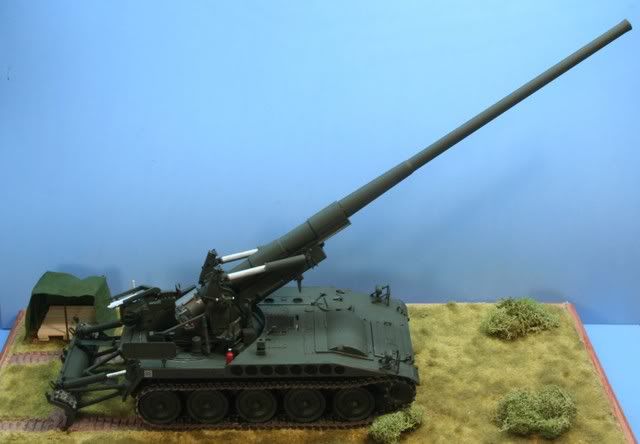
Here are the pics from my finished M107 I promised. Hope you enjoy them!!


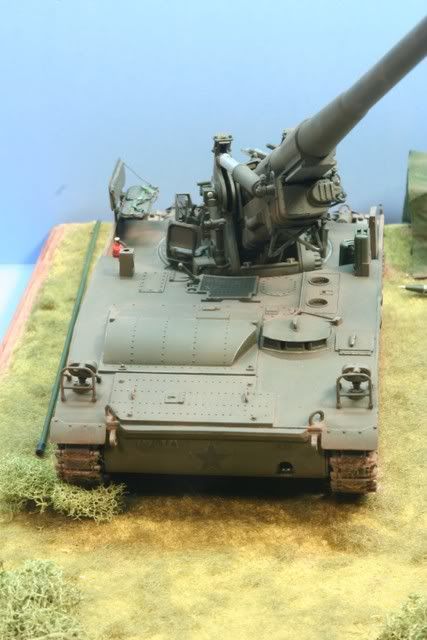
Very well done. I particulary like the moved earth effect by the spade. [tup]
Thanks!!
Currently working on an M270 MLRS, in desert camo in the firing position with an M26 missle coming out of one of the pods. It’s a challange. The missle is easy. Playing with the smoke is a blast!!
Wow - this I gotta see. I’m new to modeling and still trying to figure out how to complete a decent armor build, so dioramas are not something that I’ll be attempting any time soon. But I thought that if I were to do one eventually, I would like to do something that captures the gun at the moment the projectile leaves the muzzle. Your idea is fantastic and I will be very eager to see it in living color.
Larry
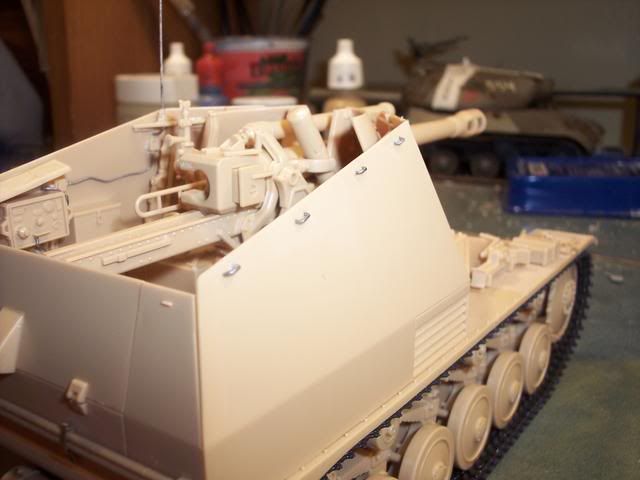
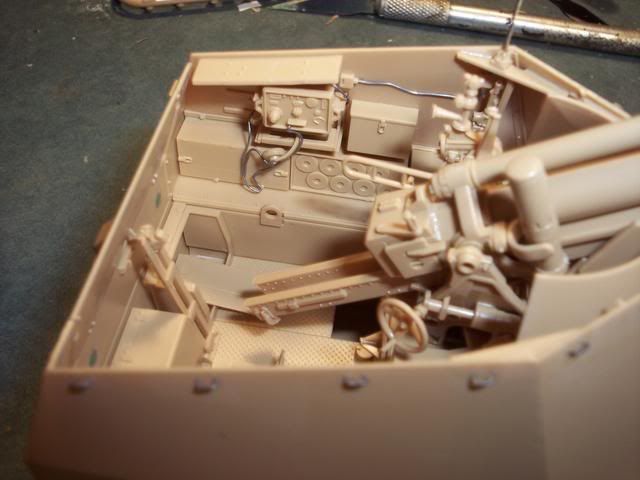
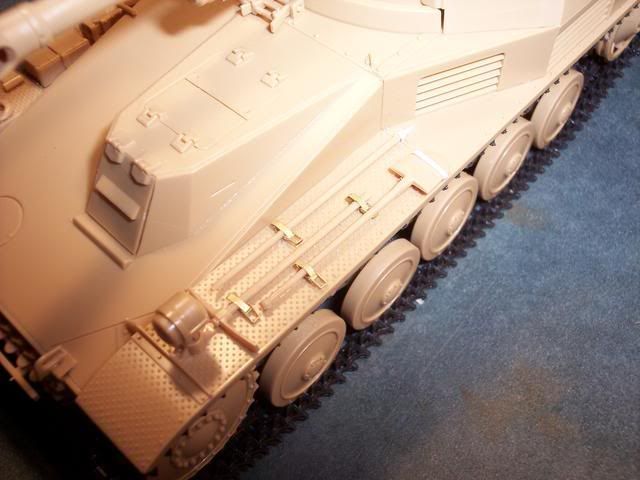
I finished construction of the Wespe this evening. It was less and less OOB as I went but still pretty much so by the end. I filled all the nasty ejector pin marks in the interior, drilled out the barrels and magazine ports on the MP-40’s, added an antenna and a headset and wired both into the radio, cut off the silly-looking molded bumps around the top of the armor and replaced them with correct tie downs made from solder, and of course added Voyager tool clasps, 10 total or 30 parts in all (they actually do open and close!)
Tomorrow I plan to paint the model, that is if I can get my air compressor back in the house - it’s in the garage and we have 2 feet of snow thanks to last weekend’s blizzard, AND on top of that it has to go in the back basement door cause it won’t fit down the stairs…[banghead]…wish me luck!
Hermesminiatures, I’d be curious to see your painting sequence since you have the kit all assembled, especially considering it’s an open topped vehicle. I usually do my painting in before adding all the tools and non-camo colored bits. If you wouldn’t mind, can you take some interim photos as you go along? I think it would be very educational for some of us still learning. [:)]
Very good looking Hermes. [tup] I like the tool clasps.
Same as Scott said, or did you just assembled the walls separately?
Good luck with your air compressor [;)]