My wife bought me Tamiya’s F4U-1 for my birthday about a month ago, and it’s been sitting there on my shelf smiling at me while I’ve worked on another project. I finally couldn’t take it anymore and opened the box. I’ve followed Bvallot’s (883) and lawdog’s (915) builds of their F4U-1s, and hope to take what they’ve taught and incorporate it into this build as best I can. I’m still new to this hobby, but I learn something new every time I sit down at the bench. So, with that in mind I present this work in progress…
Whether you call him “Gramps” or “Pappy” or just a bum, I’ve long been a fan of Greg Boyington. From my research on him, he’s either a love’em or hate’em kind of guy, with little in between. By his own admittance, he was an alcoholic, horrible family man, and “emotionally immature.” He was one of only one or two active duty pilots to join the A.V.G., the rest were reservist, and largely for that reason. But what I’ve found interesting, and perhaps more telling about his personality, is how the handful of young replacement pilots he pulled together in order to form VMF 214 would literally follow “Gramps” to Hell and back, simply because he took the time to not only teach them their craft, but to lead them; often flying the most worn out plane in the lot. Perfect, the man was not… But who is?
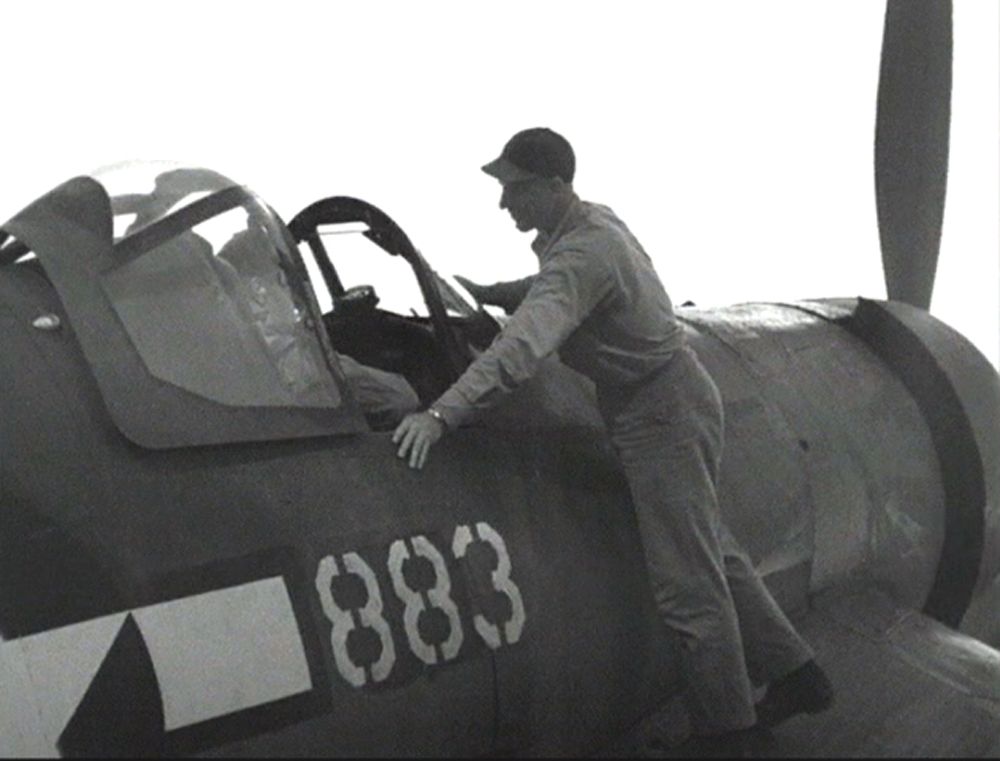
On Dec. 27, 1943 a hung over Boyington shot down a “Zeke,” bringing his total (if it’s to be believed) to 25. A photographer was on hand once he landed at Vella LaVella to commemorate the event as “Pappy” came back in 883. It is this plane that I’ve decided to recreate… Largely, because of the wealth of photographs associated with it. (Although, none of which that I can tell show the port side, and the signature “Martha”) Bob McClurg is also known to have flown this plane into combat. And for those of you who don’t know: Unlike the European Theater, pilots in the Pacific were not issued personal planes… Shoot, I think half the time they were happy to have one in working order!
One of the first things I noticed about this particular Corsair is just how war worn it is. And that’s the way I plan on approaching this build… Like Bvallot and lawdog, I was impressed with the model out of the box… of course this is my first “big boy” model [:)] Step 1 has you start with the cockpit, and I’m a by the rules kind of guy… kind of… Here’s a look:


A couple of things… First, this is the first time I’ve ever used Micro Sol, and didn’t know I should’ve used Micro Set as well. I’ll pick some up before my next build. I doesn’t look bad, but I was hoping for a more “natural” look to it. I applied three or four coats of Micro Sol, so perhaps it’s because I didn’t use the set??? Looking for suggestions.
Next, on the seat: I know it doesn’t look like much, but I’m a bit proud of the bar and harness. I originally ordered the Ultracast seat (again, first time using cast material). After priming, I was unhappy with the job, so I decided to clean it and start over. Well, the little bar broke, but no worries, because the kit comes with two seats. I opened the bag and the other seat was in three pieces apparently damaged in shipping. So after much grumbling, I calmed down and worked through the problem. I took a piece of twist tie, cleaned off the plastic, measured, bent, and glued the bar into place on the original chair. The harness is actually a labeling sticker, painted to color, and cut about 1.5 mm wide, then I painted the other side and cut to length. I bought some jewelry wire and bent the harness latches, which ARE ABOUT 1.5 mm EACH… Lots of time. Lots of bent wire shooting from the tweezers… But I think they look pretty good. Let me know what you guys think. Constructive criticism and ideas are welcome. Remember, I’m still learning though…