Thanks guys, I’ve been building 1/6th scale tank models for about ten years now, and since then I have seen the hobby grow by leaps and bounds.
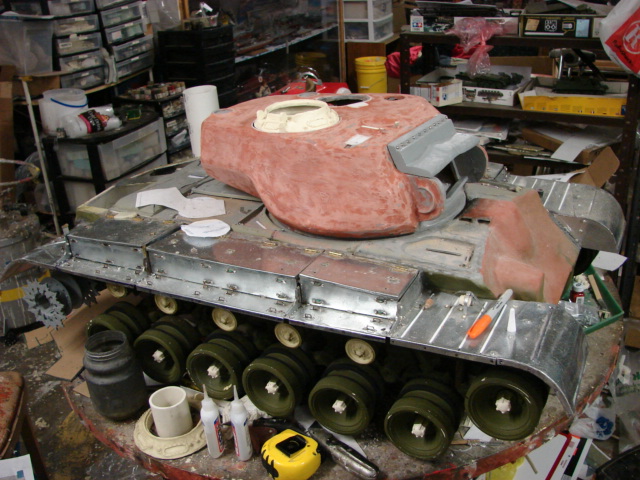
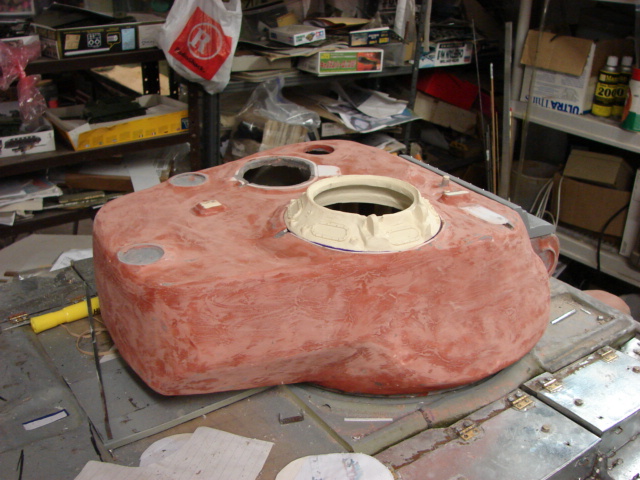
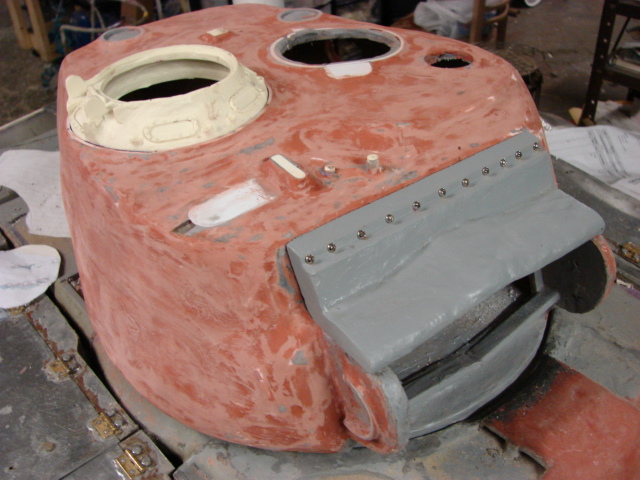
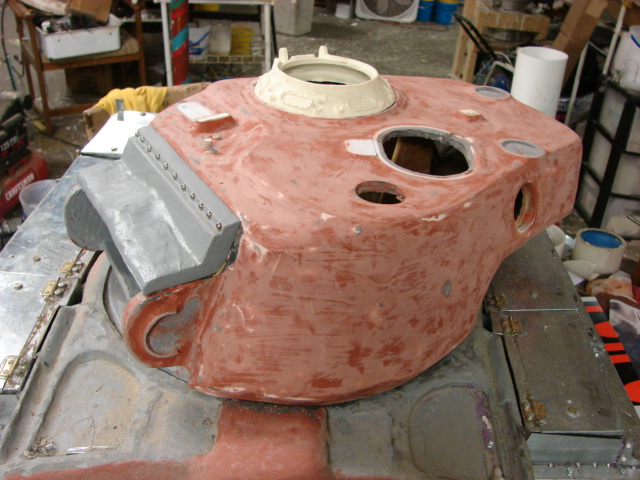
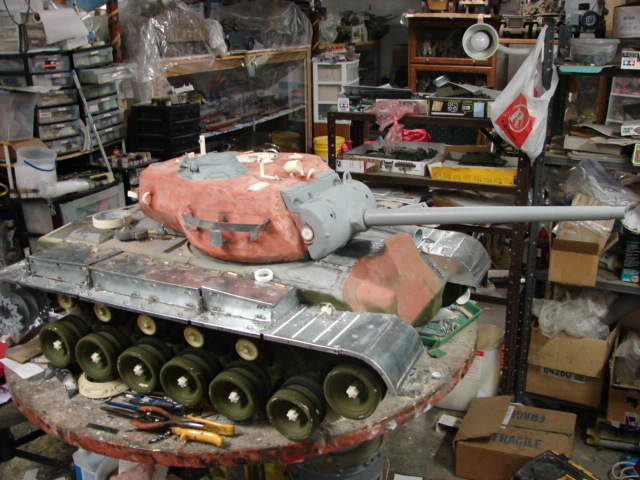
I have finished up the turret body work, and I added cast texture to the surface.
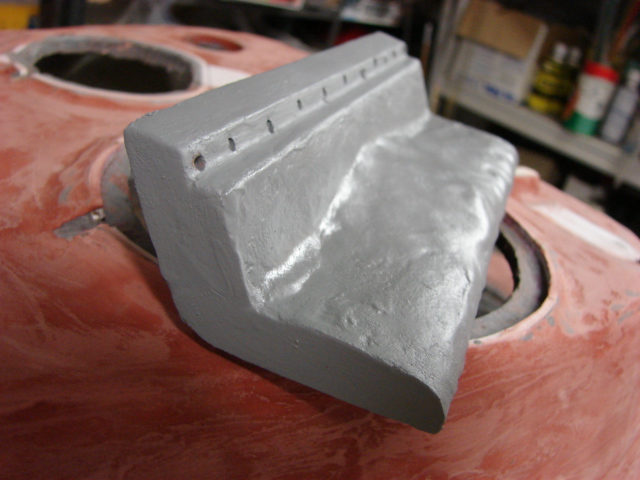
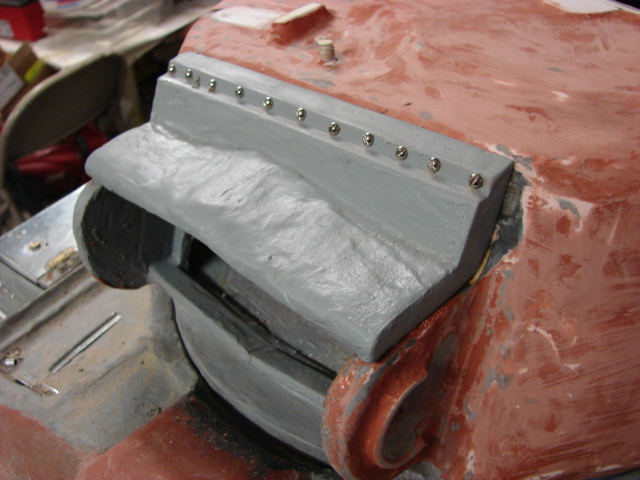
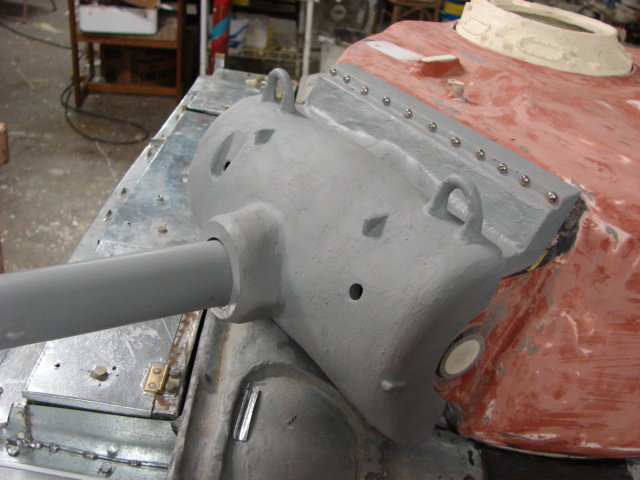
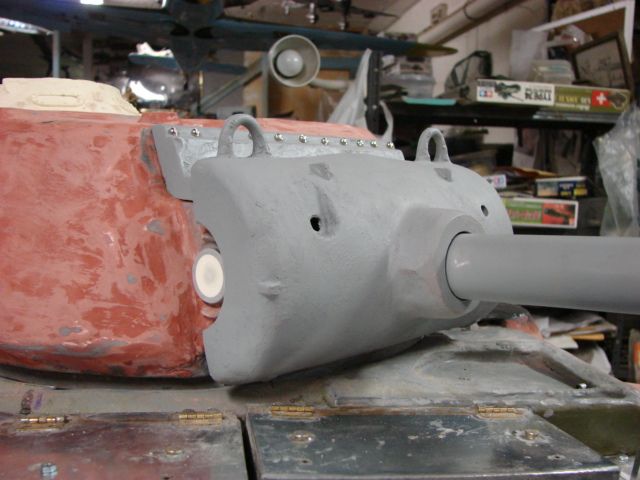
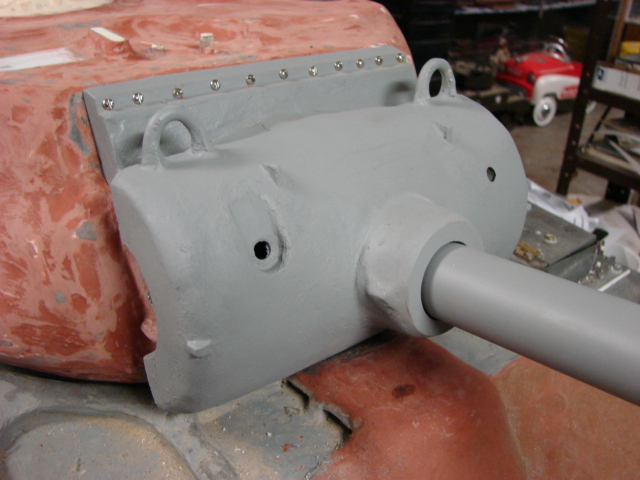
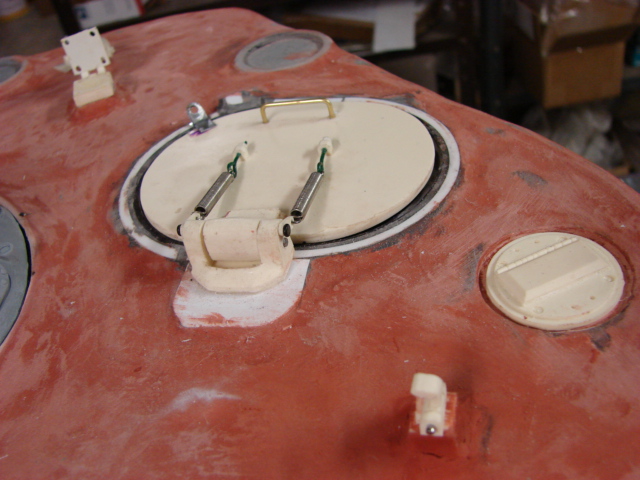
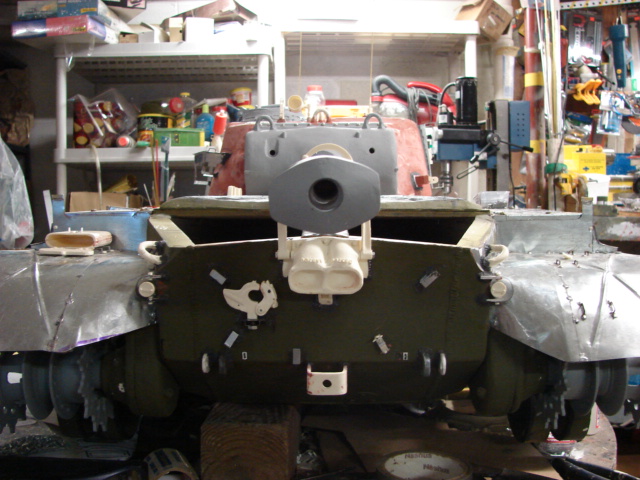
I also built and mounted the armored mantet drum top covering. The mantlet, when installed will then go over this plate. The plate is secured to the tank via slot screws as per the real vehicle.
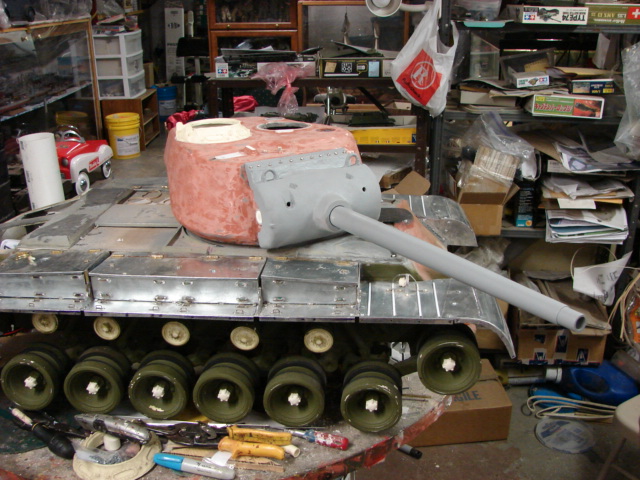
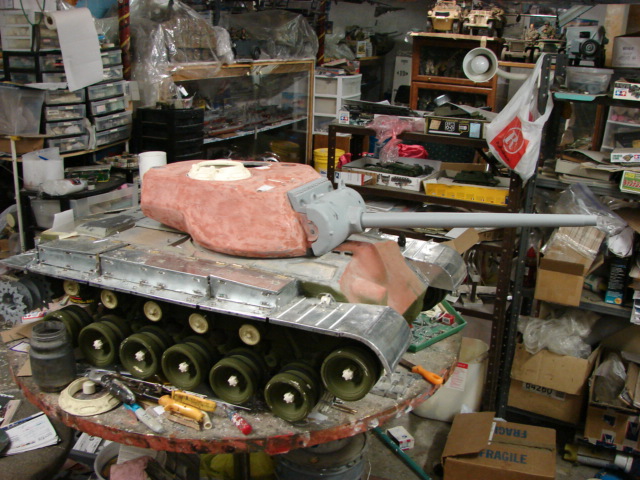
I’m now fabricating the tank’s gun mantlet and gun barrel. more progress to come.
I want to thank you. After MrsG saw this thread and some of your other builds She said she’d never complain about my stash again. (she never did anyway, but hey I’l take it)
Thanks guys, The styrene lower hull was started by another 1/6th scale model maker. The large panels can be bought from the styrene companies direct. No way would I sell this one, it’s all mine [6]
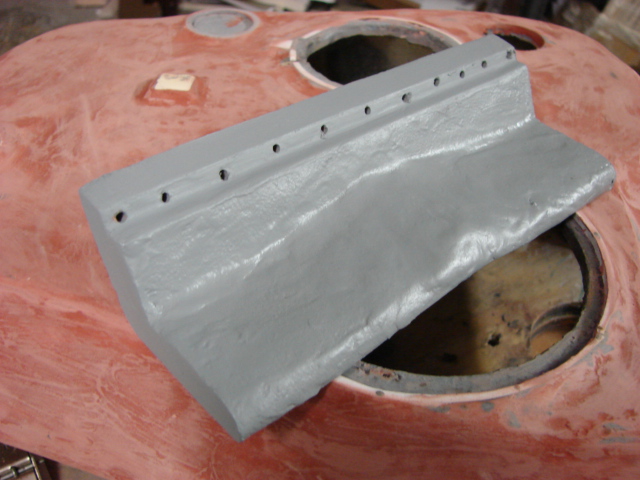
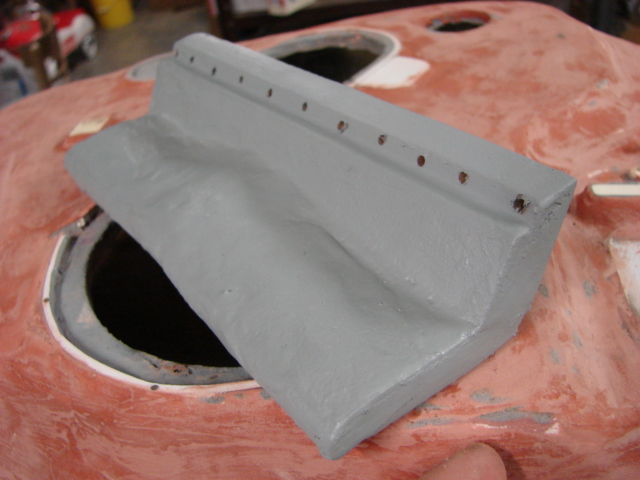
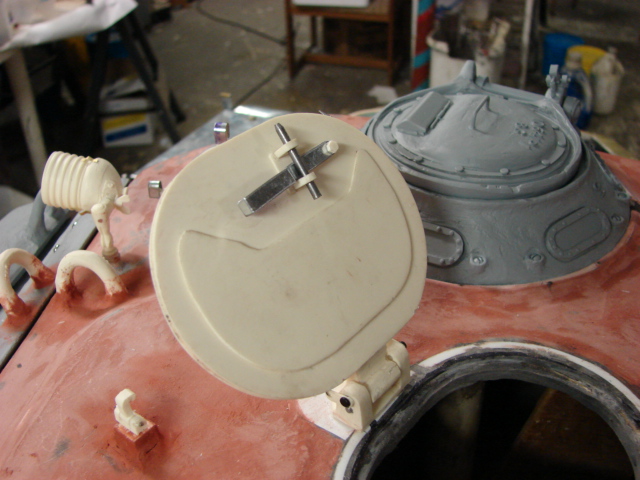
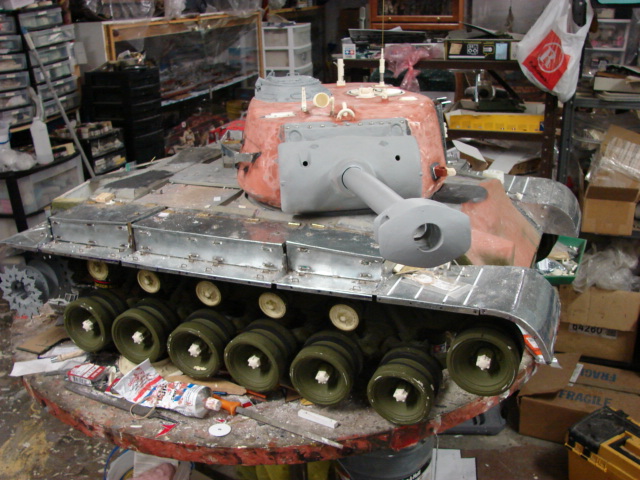
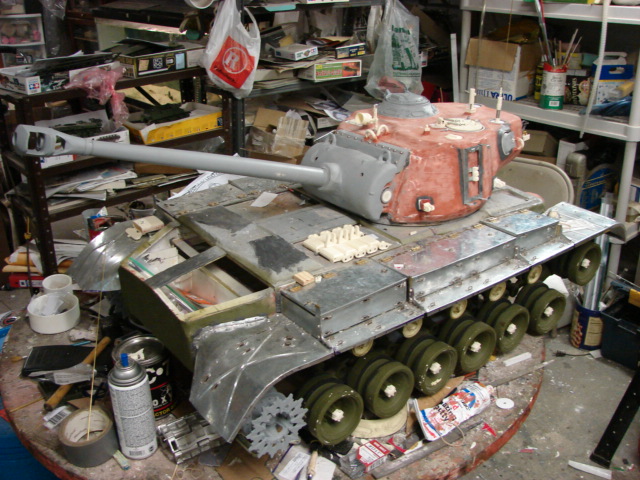
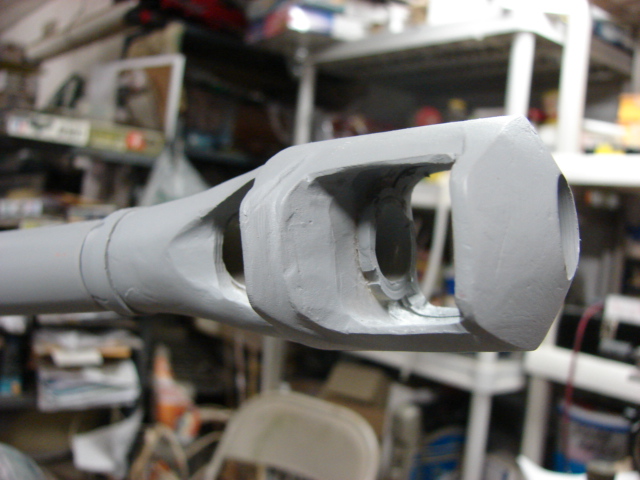
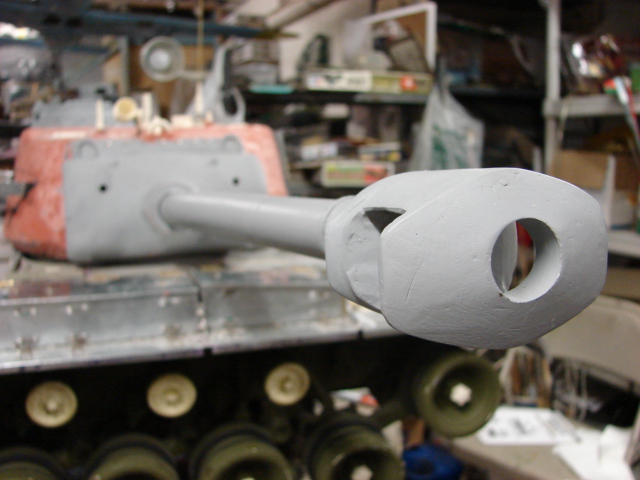
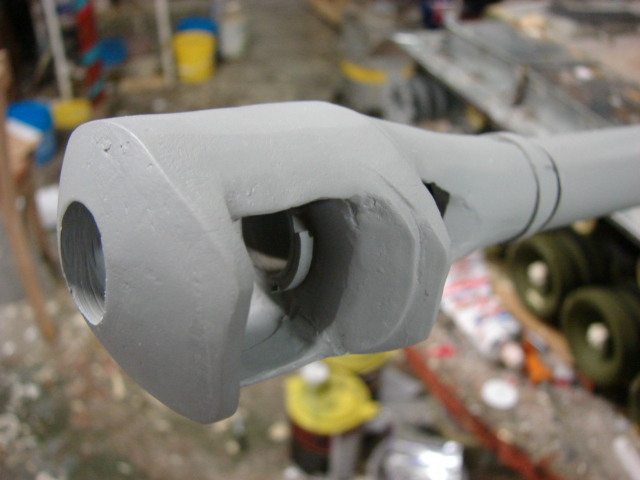
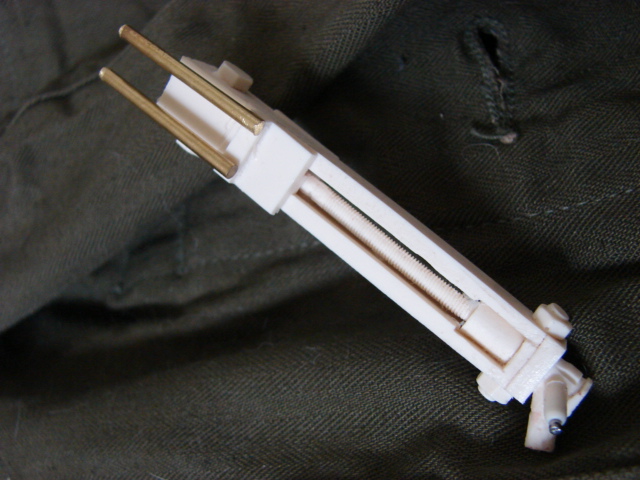
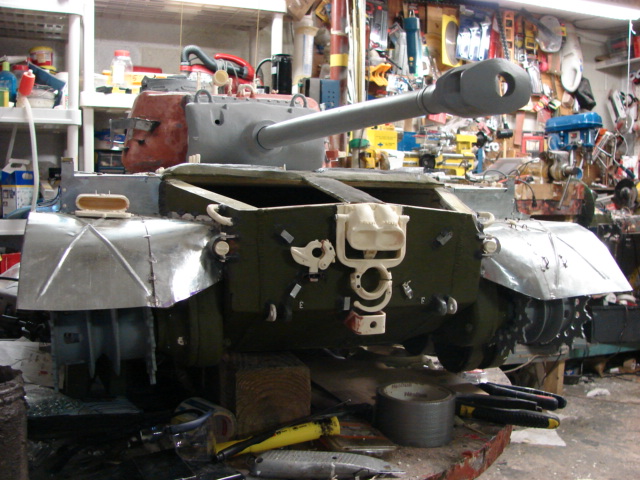
I fabricated the mantlet and the tank’s gun barrel. All that is needed to complete the mantlet will be some casting / foundry numbers. The gun barrel is constructed out of turned PVC. The gun barrel also has a retention spring that prevents the heavy barrel from drooping.
I will now be fabricating the tank’s 90mm muzzle brake.
Thanks guys, I have made some more progress on the tank’s turret.
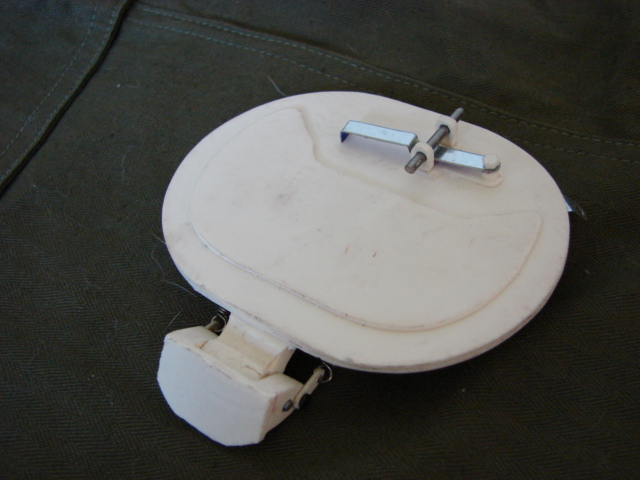
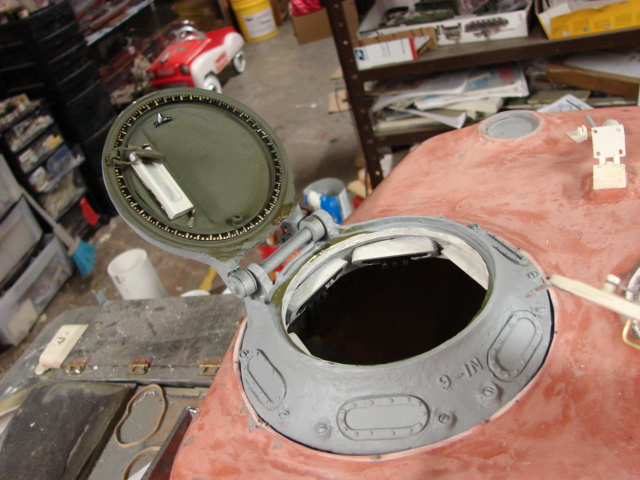
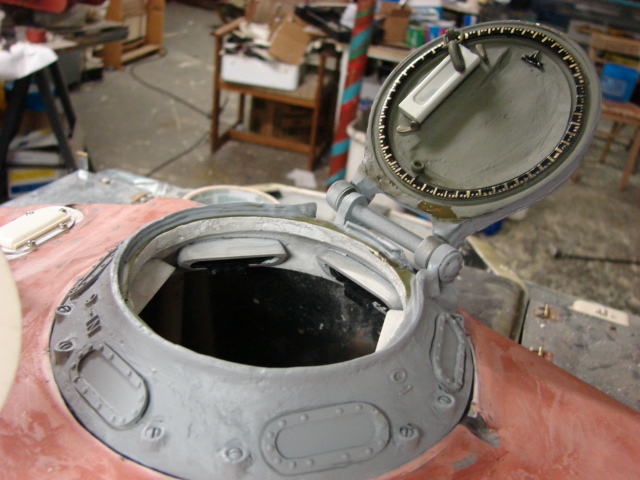
I have also completed the tank’s turret loaders hatch and added it to the product line. The hatch will work for many tanks of the period including the M4 Sherman, the M4A3E2 Jumbo Sherman, 76mm turreted shamans, and M46 / M47 Pattons.
M3 90mm gun double baffle muzzle brake. This component will work on the M36 and M36B1 Jackson Tank destroyers.
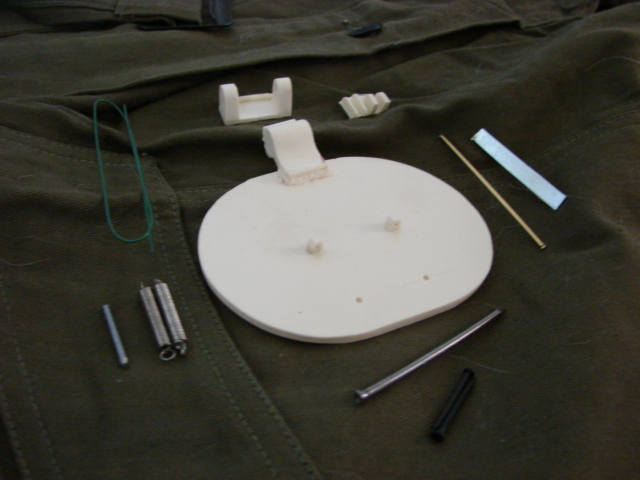
M26 Pershing family Spent shell port hatch kit. This kit will also work on the M46 Patton family.
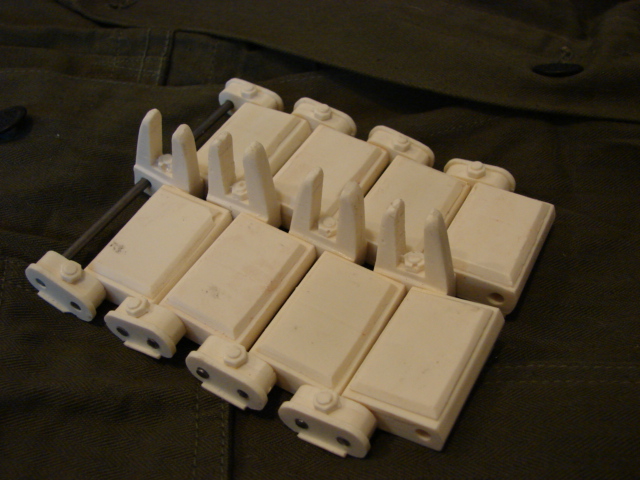
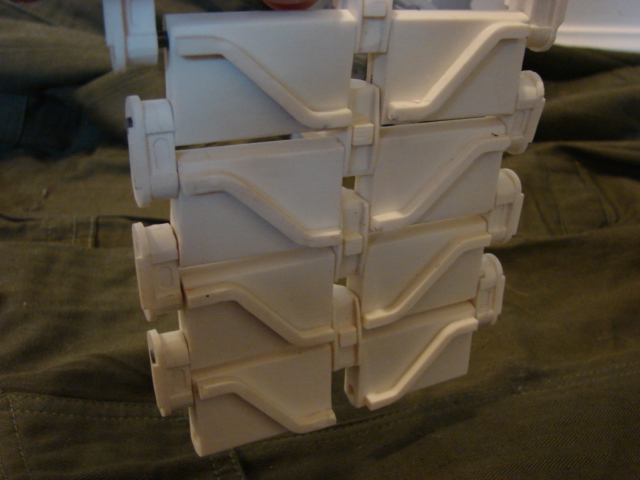
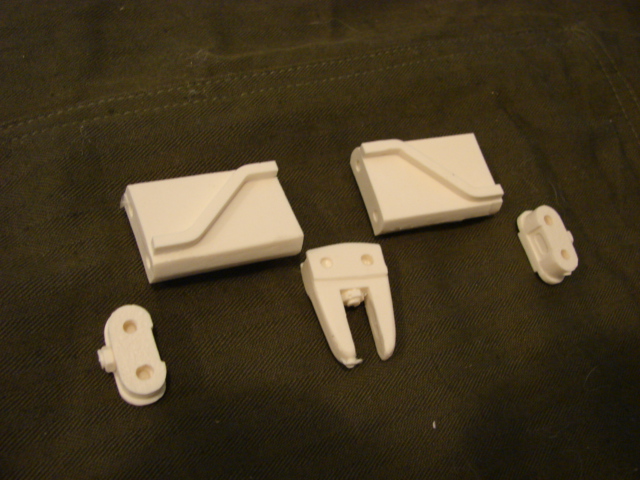
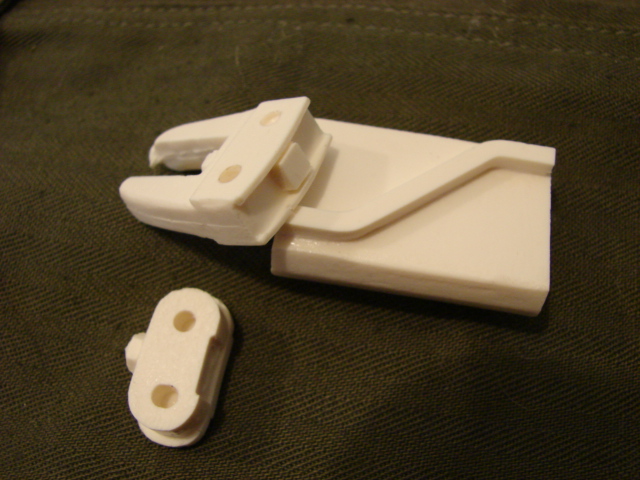
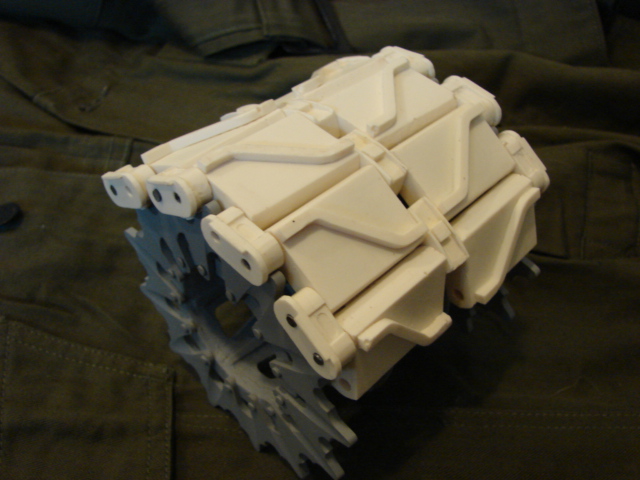
M26 family T80-E1 Live Track. The track is fully articulated and is very realistically detailed. The track is almost identical to the T80 track that is used on the M4 HVSS suspension. To transform this set for use I only need to make a different center guide tooth.
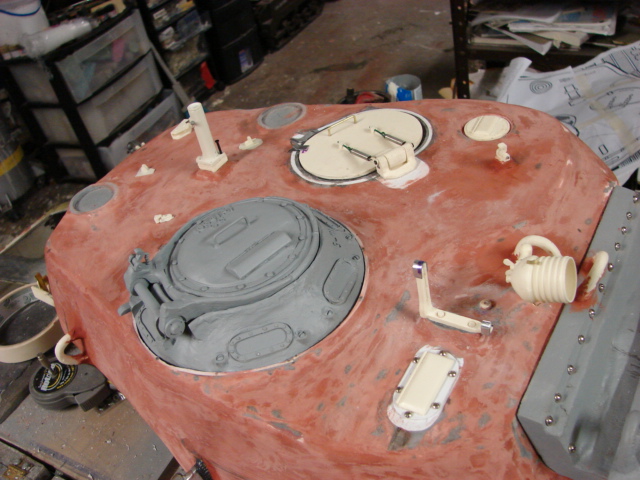
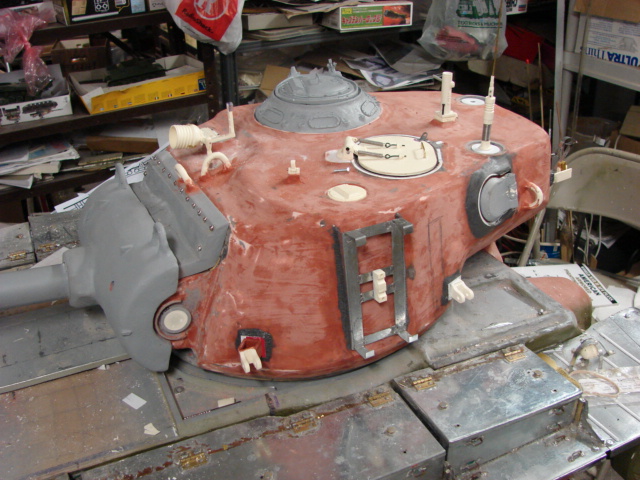
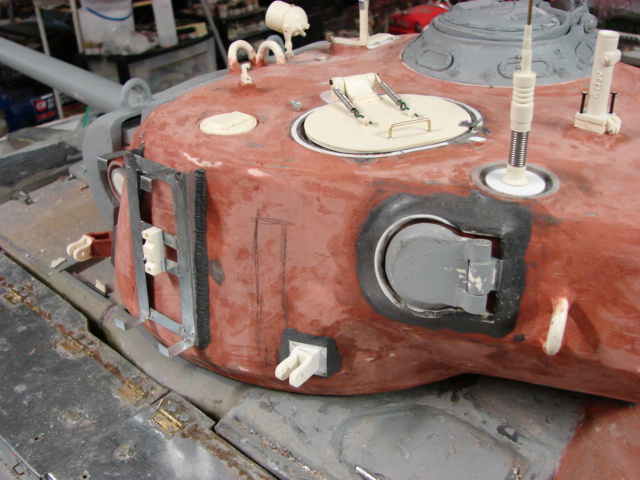
The tank’s turret detailing is almost complete.
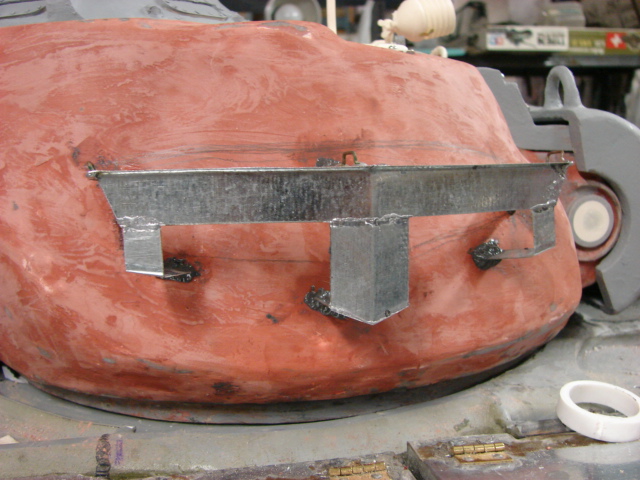
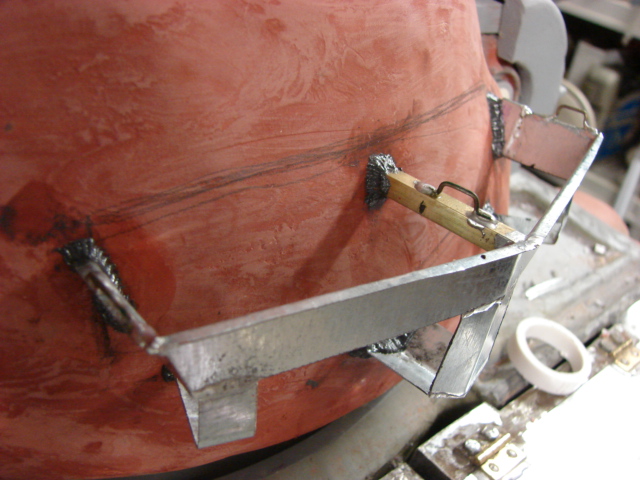
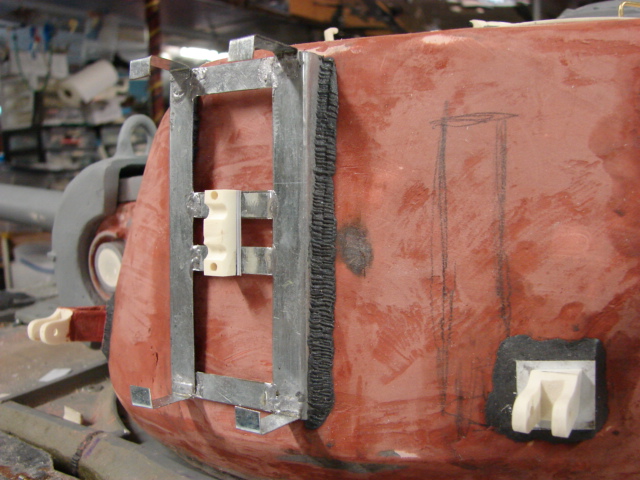
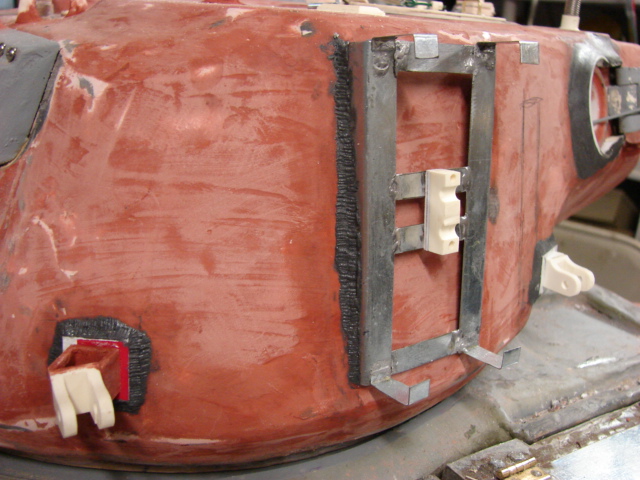
The turret spare track rack was fabricated out of sheet steel. A length of spare track will be mounted once the tank is finished.
The tank’s engine removal studs were also added. These studs are only found on early production M26 Pershings.
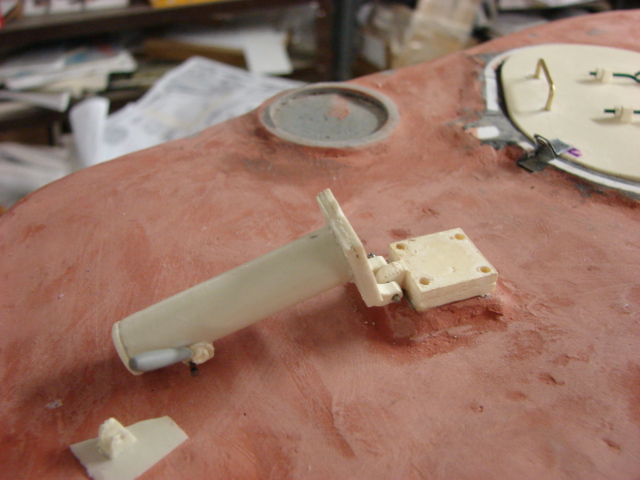
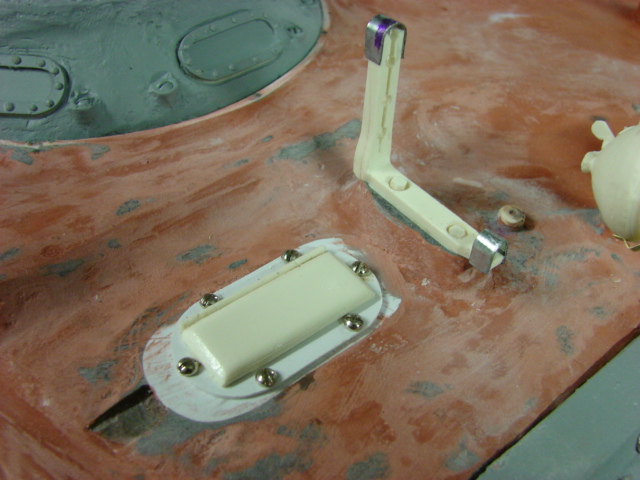
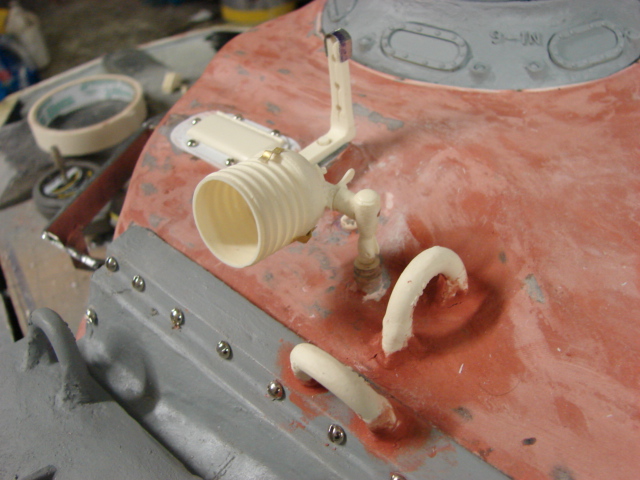
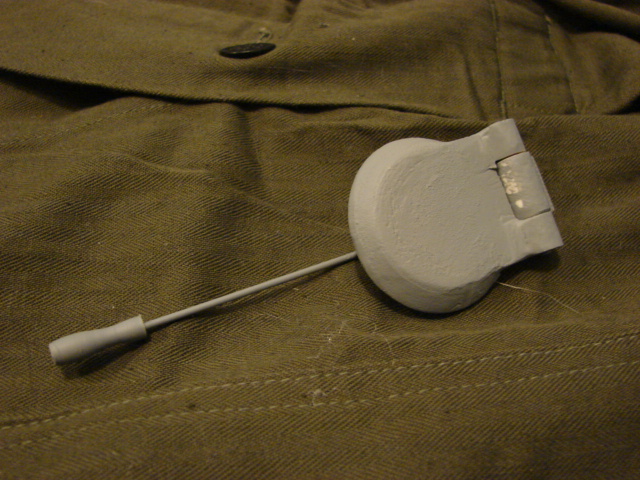
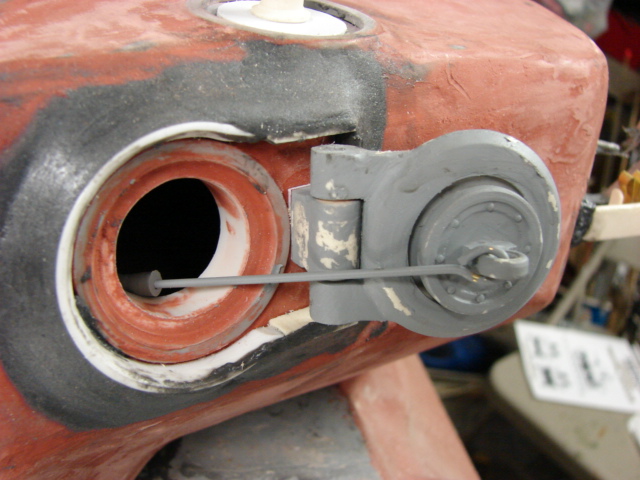
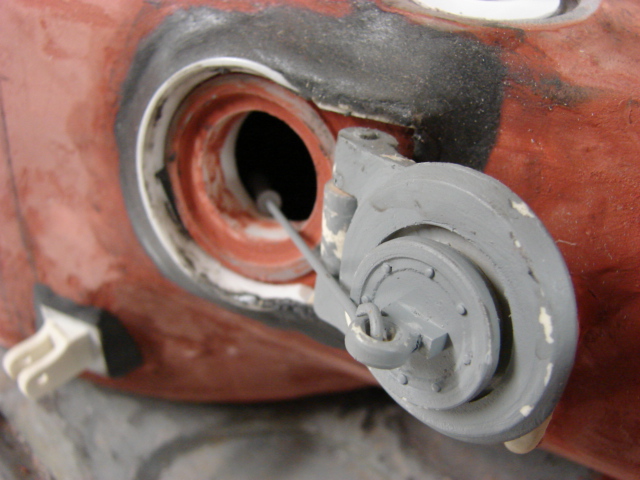
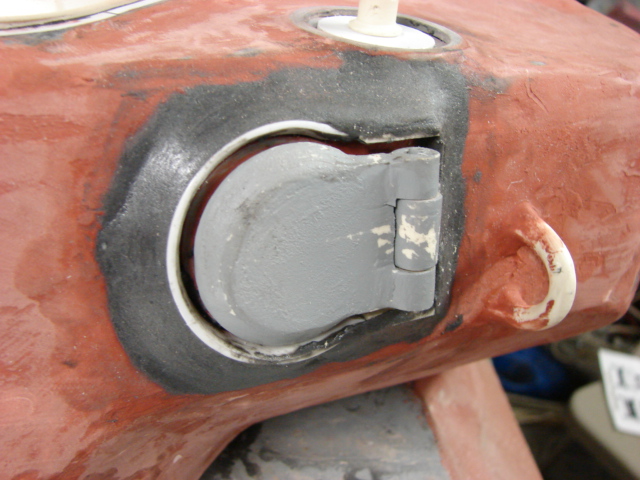
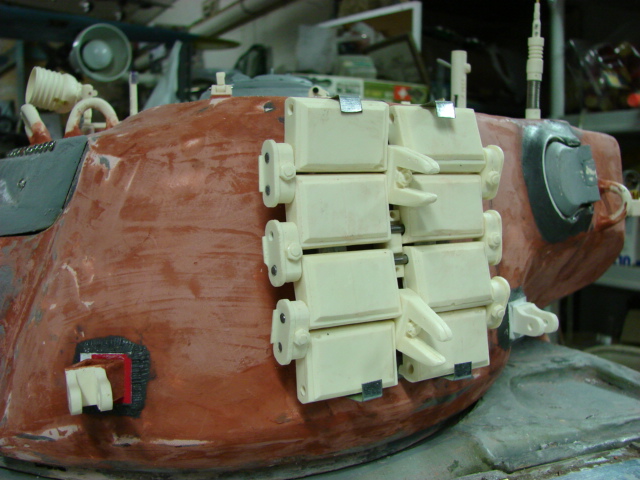
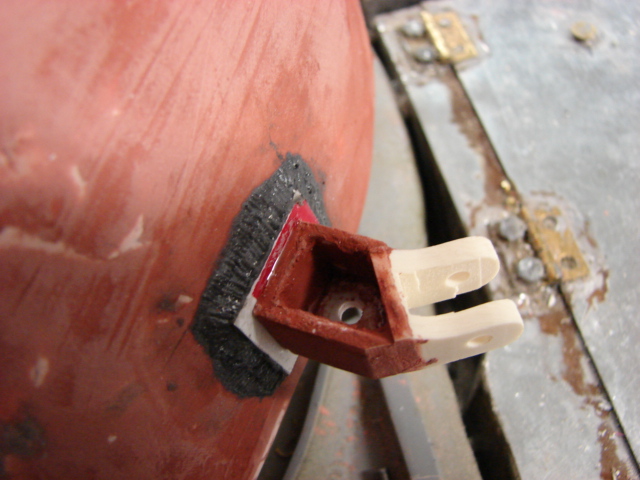
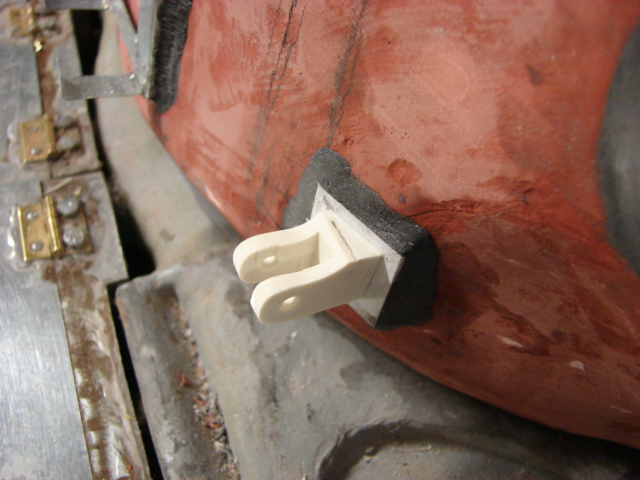
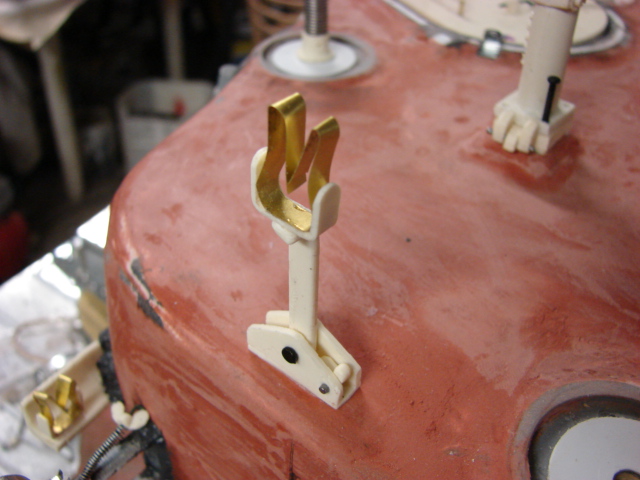
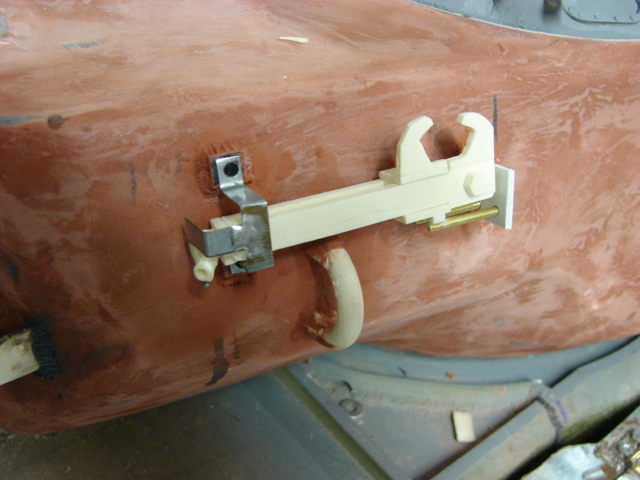
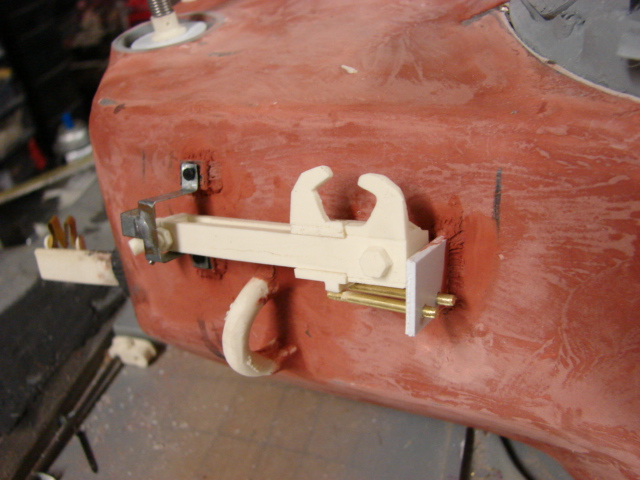
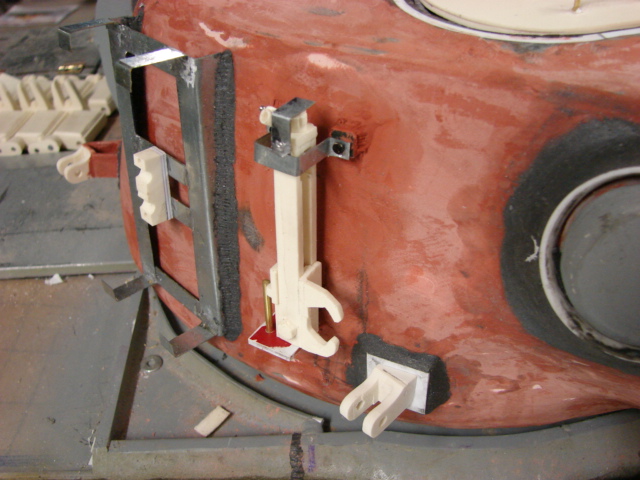
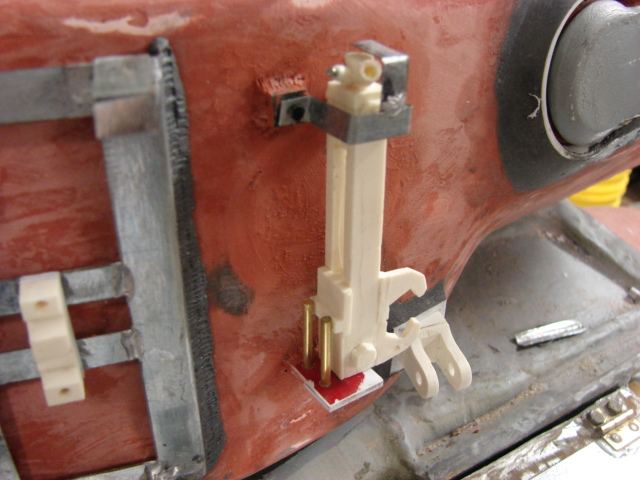
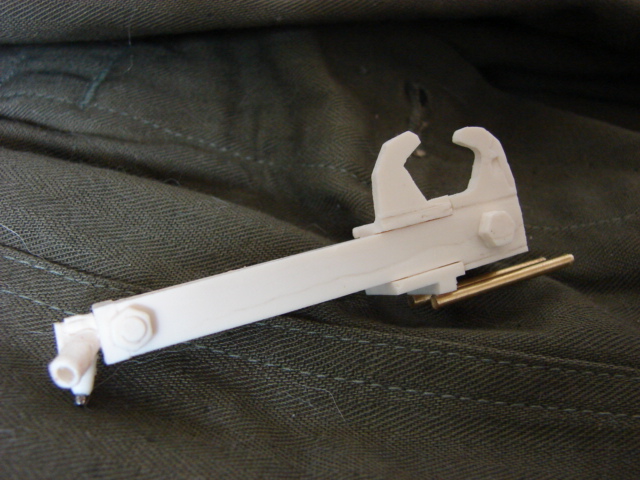
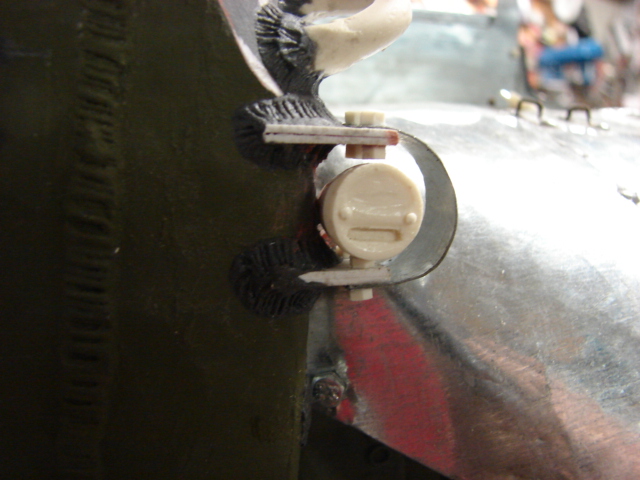
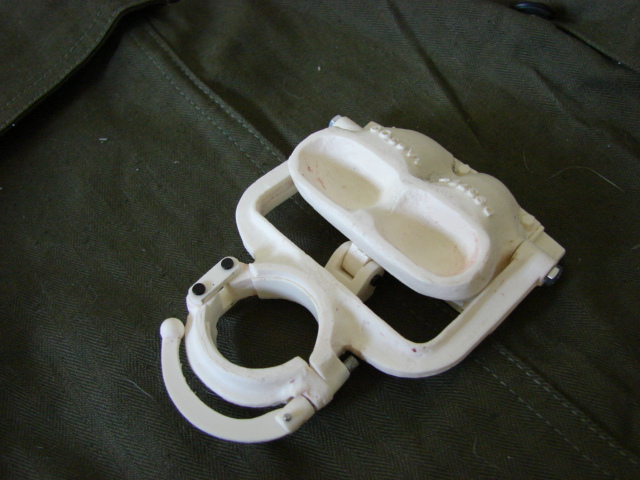
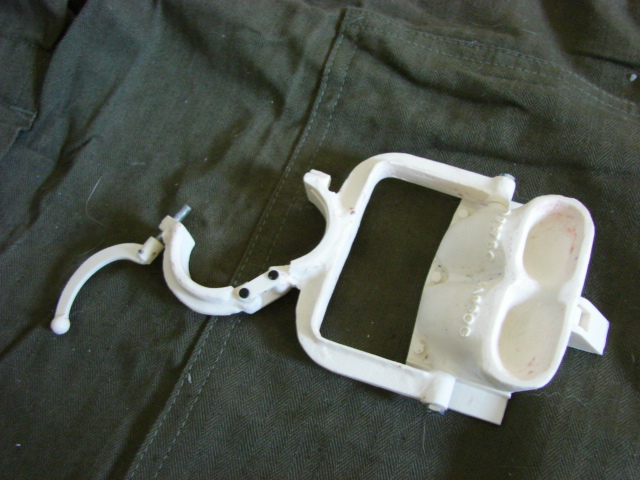
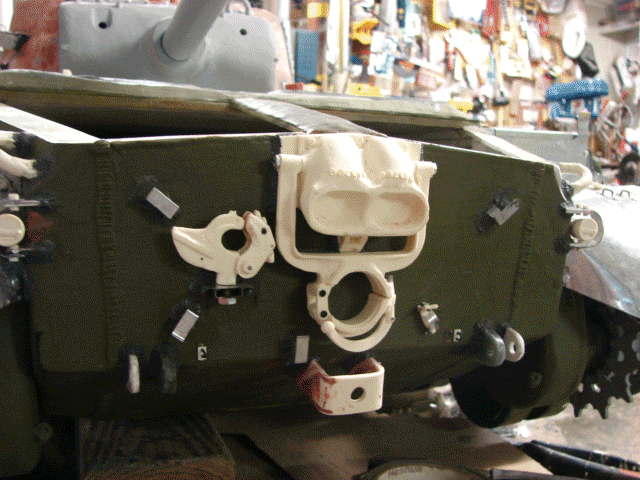
The remaining turret details have been added. These would include the MP-48 spring antenna base, 50.cal travel lock, and the spent shell port hatch.
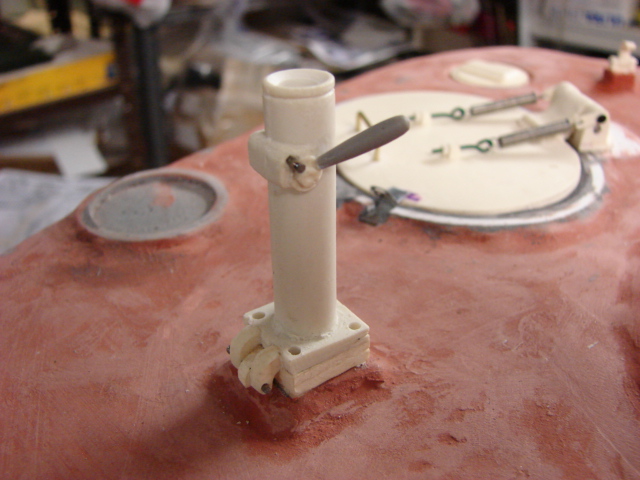
The only components that are left on the turret are the track tension jacks. Which will be done very shortly.
if I ever leave a blank post, Just take it as being SPEECHLESS!!! lol Out standing work mate!!! You have truly whetted my appetite showing a bit of the track!!! Really looking forward to that part er…parts, many parts.[t$t][:D[
This is just simply amazing! You have the skill, the correct dimensions and knowledge, and most importantly the drive to keep plowing through and finishing this beast! This makes me feel shame for losing interest in a 1/35 scale model and moving onto another, your resolve is unmatched! Looking foward to seeing this thing painted up and good to go, awesome man!
Ask him how many he’s already built like this. Be sure you’re sitting down first. Heck, I’m amazed at all the photos he takes to show this project off in such detail.
Thanks a lot guys, The feedback is much appreciated! [:)]
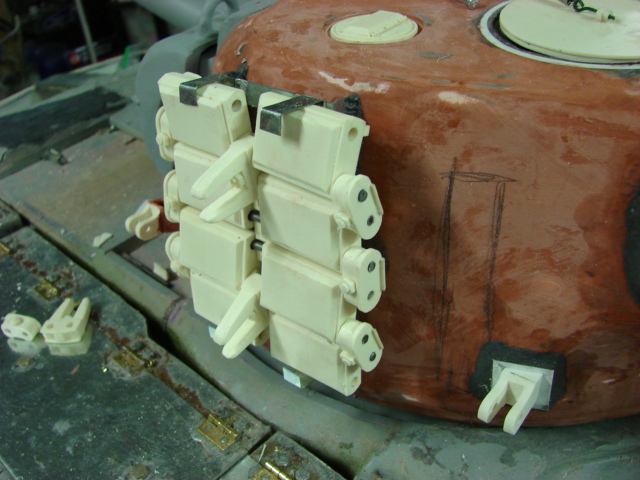
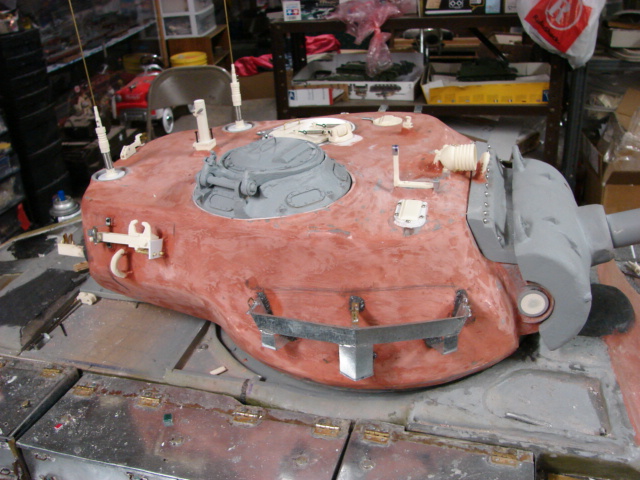
Just a quick update I have completed the tank’s turret detailing.
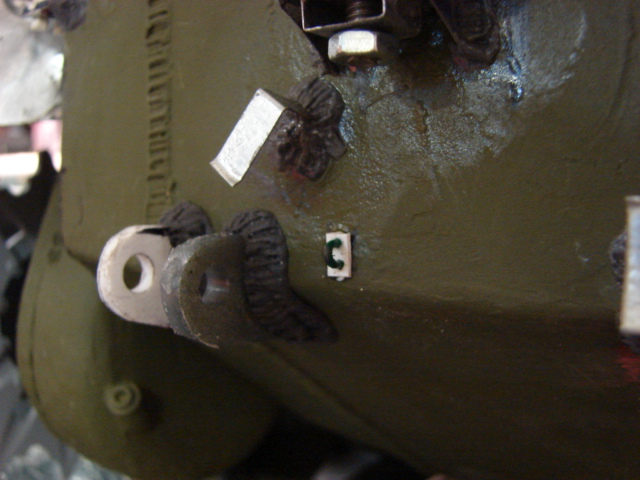
I added a second MP-48 spring antenna base, and the tank’s track connector ratchet jacks.
I have also added the jacks the product line. These jacks are used to tighten up the space between the two tracks when they are being re connected to insert the last connector block.
Now that the turret detailing is mostly complete I will now start on the tank’s rear wall detailing. This would include the exhaust manifold, tail lights, how hitch…ect. More info to come!!
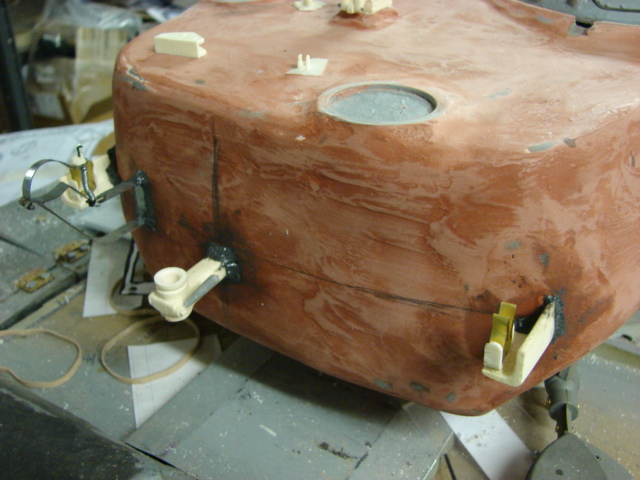
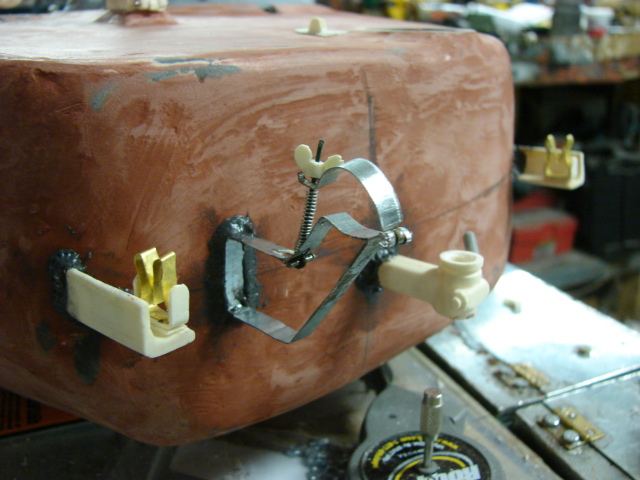
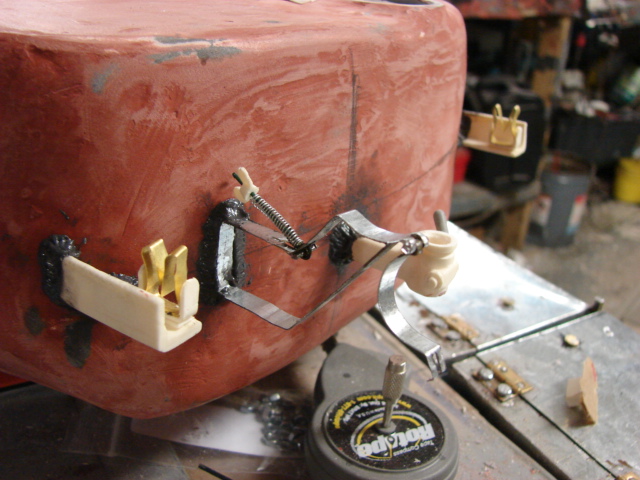
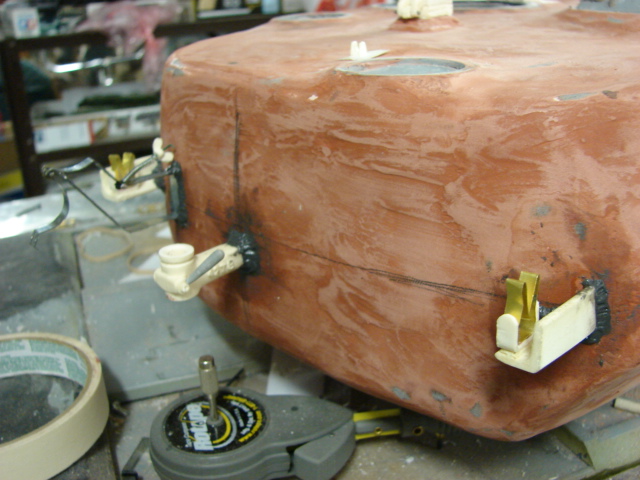
The tank’s rear wall detailing includes The Tail lights, Tail light guards
The tank’s Tow shackles were added, and the chain mounts for the tow Lug Pins.
The tank’s Tow hitch and Tow cable mounts were added to the tank’s rear wall. Unlike most tanks the M26 series usually carries it’s tow hitch in the stowed position.
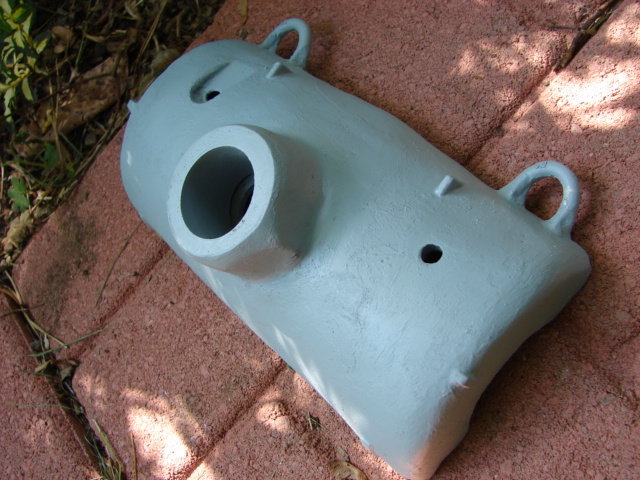
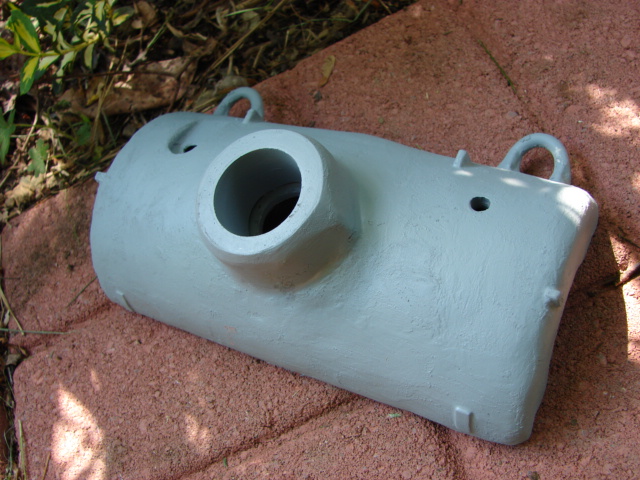
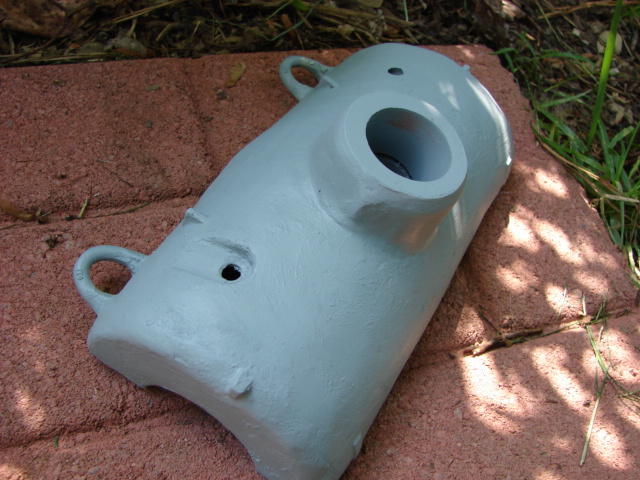
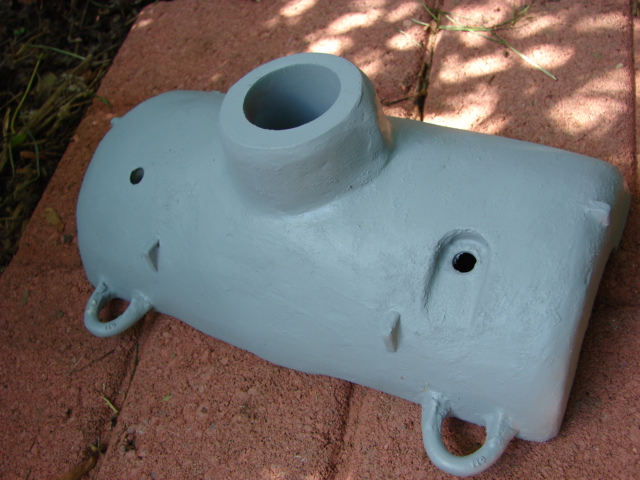
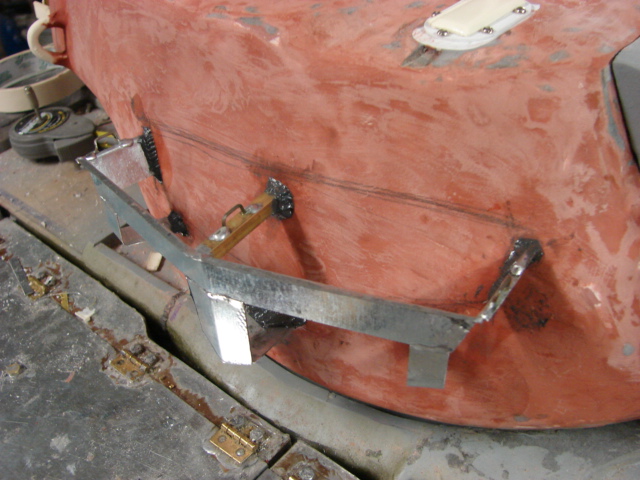
The final piece of detail, and the most important to the rear end of the M26 is the tank’s rear exhaust manifold system. The M26 series had about three different exhaust layouts.
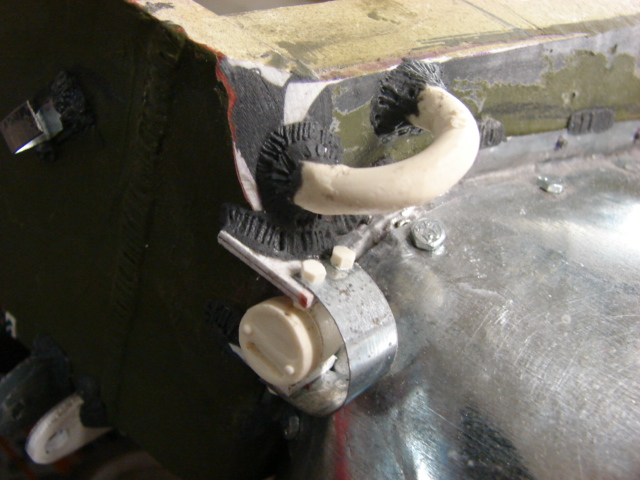
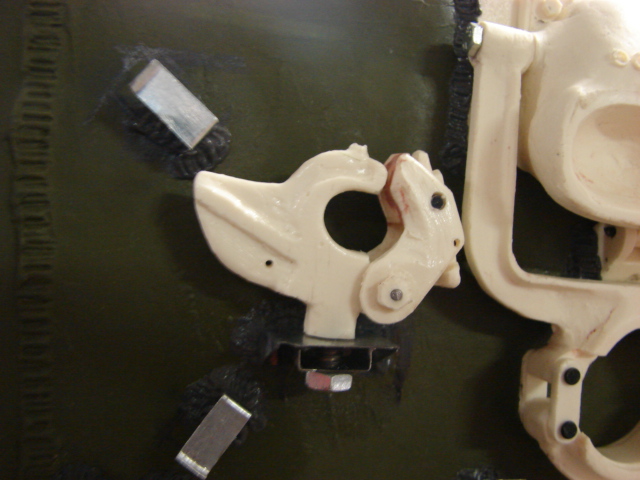
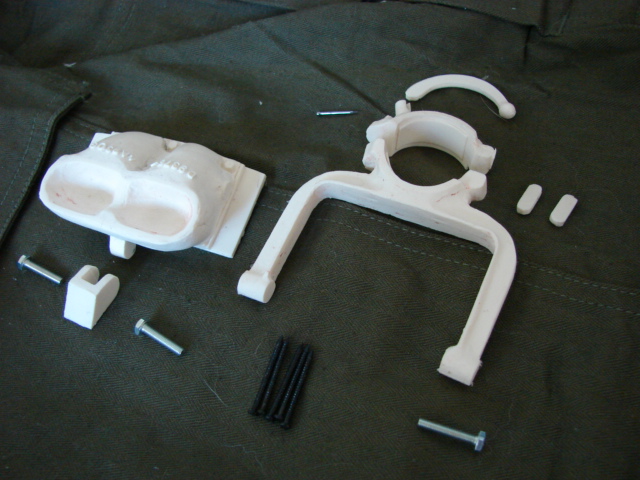
The first and earliest (T26-E3) exhaust system had the main gun travel lock mounted directly to the exhaust casting. The travel lock proved to have too much stress on the tank’s exhaust and would often break.
The second version moved the travel lock mounts from the exhaust manifold to directly besides the exhaust. The exhaust still had the mounts for the travel lock casted into the housing.
The last version (M26A1) featured a smooth round surface that was void of the travel lock mounting lugs, the travel lock itself was moved to the tank’s upper hull behind the center gas cap.
For my model I went with the early T26-E3 style exhaust manifold system. The travel lock is full function and does clamp onto the tank barrel. This item was added to the product line.
The tank’s rear wall detailing includes The Tail lights, Tail light guards
The tank’s Tow shackles were added, and the chain mounts for the tow Lug Pins.
The tank’s Tow hitch and Tow cable mounts were added to the tank’s rear wall. Unlike most tanks the M26 series usually carries it’s tow hitch in the stowed position.
The final piece of detail, and the most important to the rear end of the M26 is the tank’s rear exhaust manifold system. The M26 series had about three different exhaust layouts.
The first and earliest (T26-E3) exhaust system had the main gun travel lock mounted directly to the exhaust casting. The travel lock proved to have too much stress on the tank’s exhaust and would often break.
The second version moved the travel lock mounts from the exhaust manifold to directly besides the exhaust. The exhaust still had the mounts for the travel lock casted into the housing.
The last version (M26A1) featured a smooth round surface that was void of the travel lock mounting lugs, the travel lock itself was moved to the tank’s upper hull behind the center gas cap.
For my model I went with the early T26-E3 style exhaust manifold system. The travel lock is full function and does clamp onto the tank barrel. This item was added to the product line.
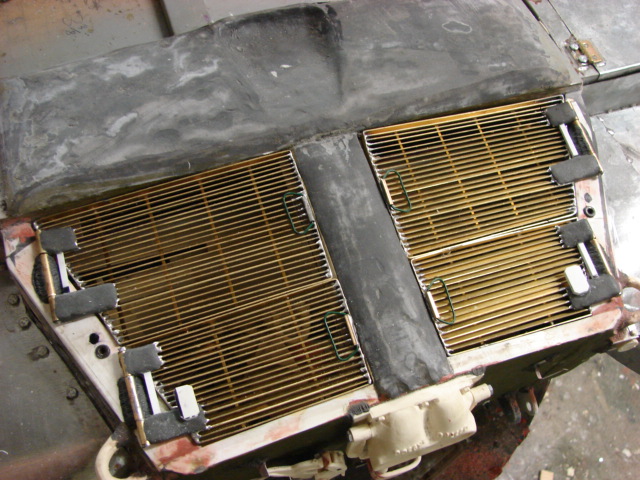
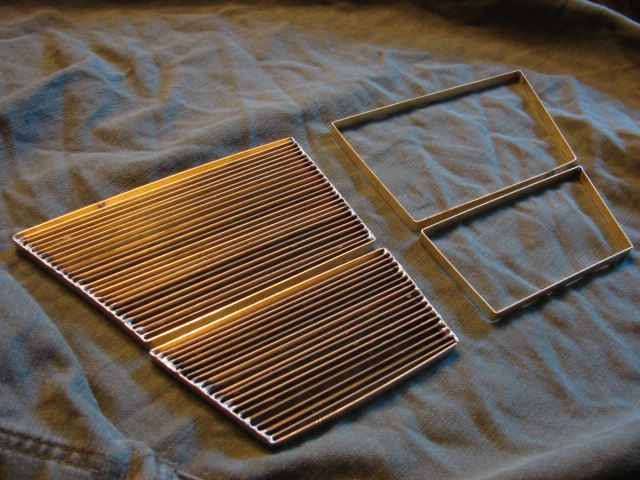
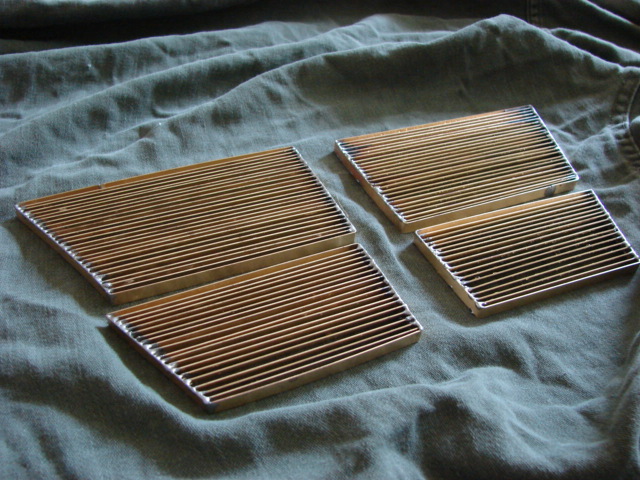
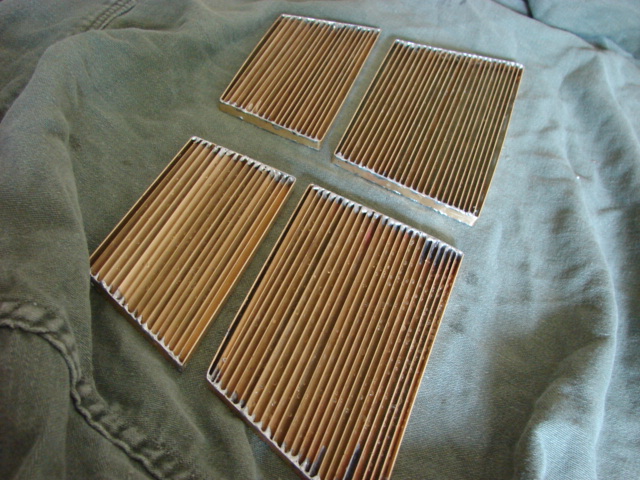
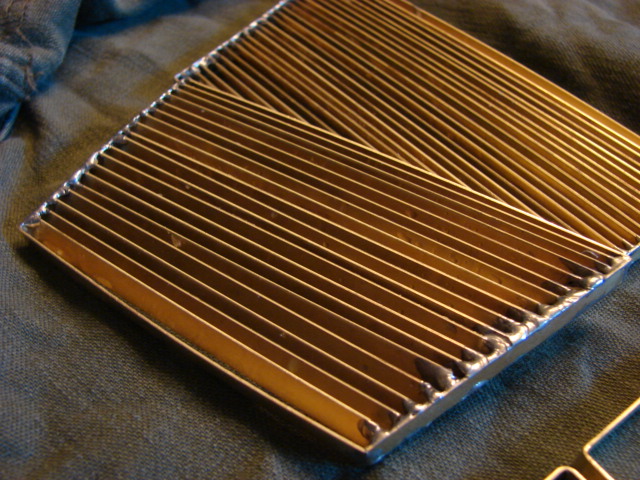
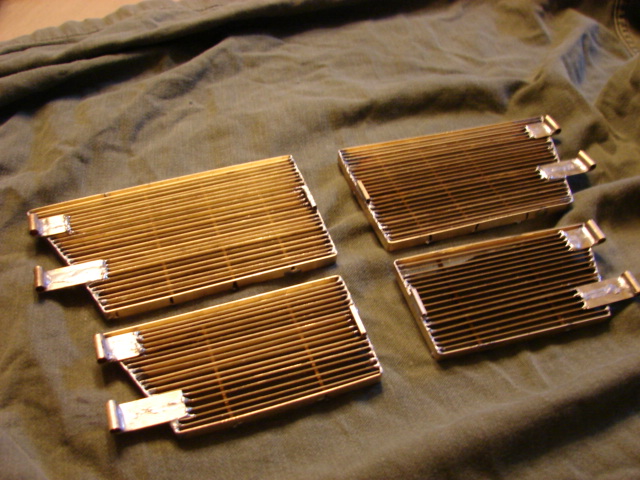
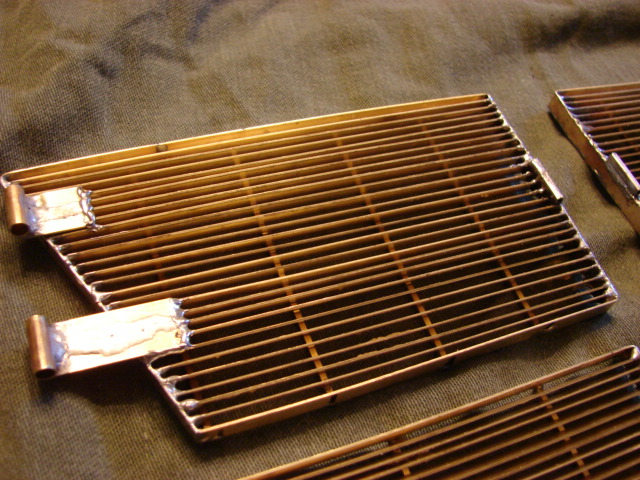
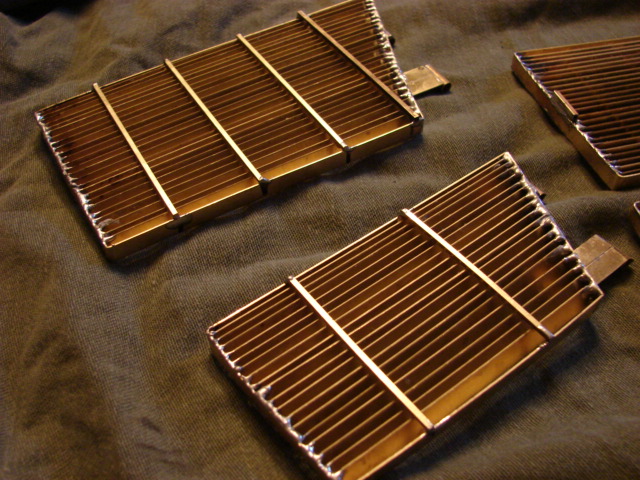
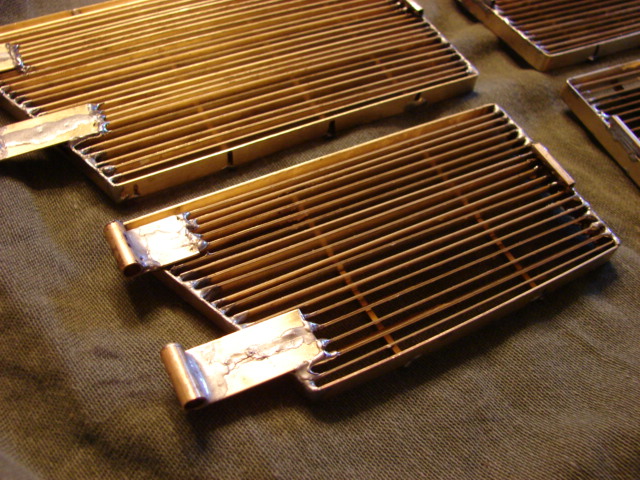
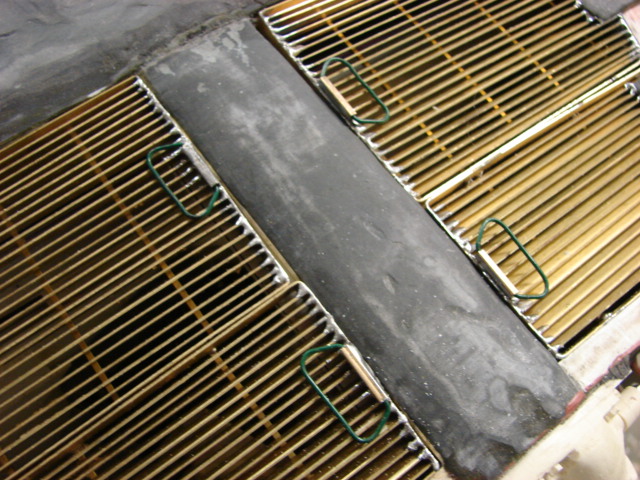
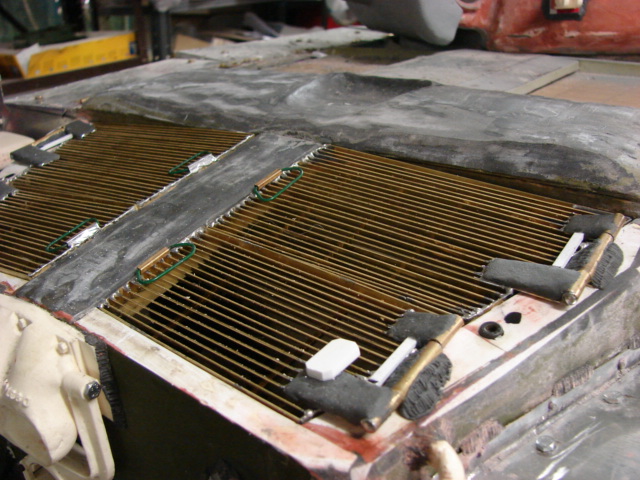
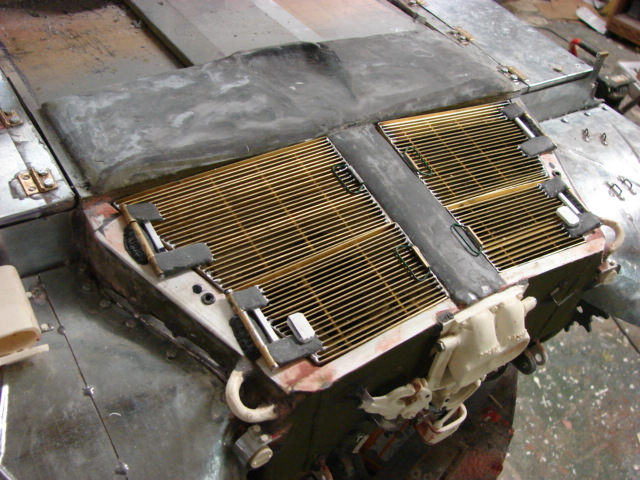
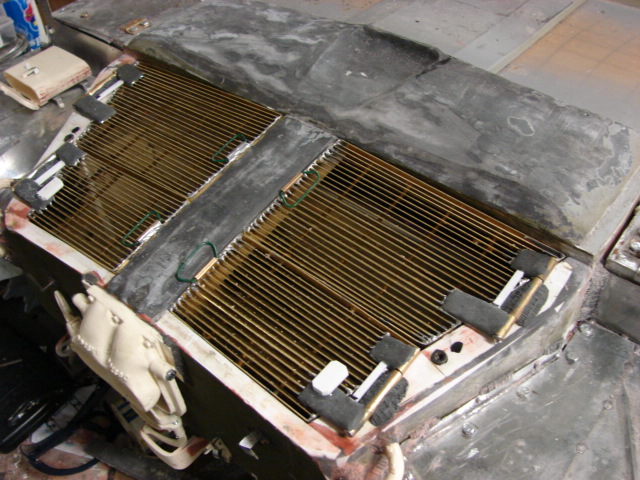
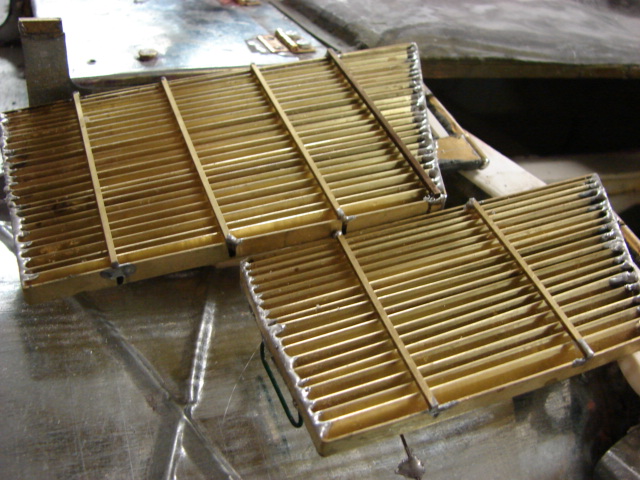
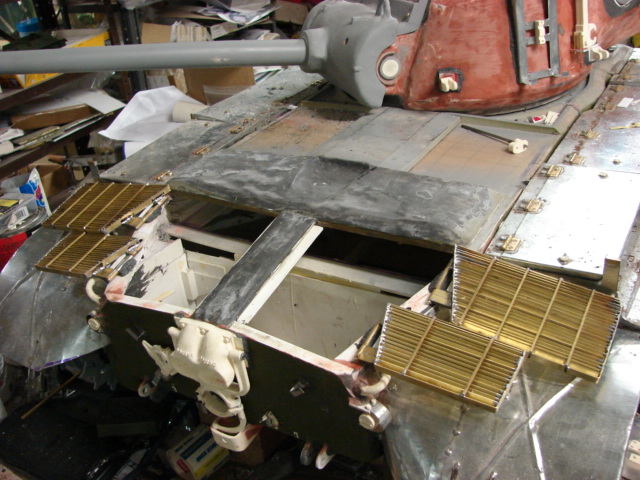
The grill work is all fabricated out of brass strips. The grills are all soldered together.
The rear grill slats are angled to the tank’s rear. These details aere also built into the brass grills.
The inner portions of the grills have support struts that are present on the real vehicle and make the grills more rigid.
The grill grab handles were added and are functional
I was able to make the grills are fully functional. To make them static it would have required the same amount of scratch building, so I decided to make them fully functional.
I will now be focusing on the main engine grills. They will be built using the same method. more info to come.