This tank looks great. I sort of jumped on the bandwagen too late, and missed most of the WIP stuff, but I’ll get around to seeing it all, eventually. Exelent work so far. I can’t wait to see the finished results.
[:|]I’m Speechless…all I can say is[:D[[:D[[:D[[:D[[:D[
I will certainly be watching for the finished product…incredible!
RODC
[dto:] Looking good mate!!![t$t]
Thanks guys,
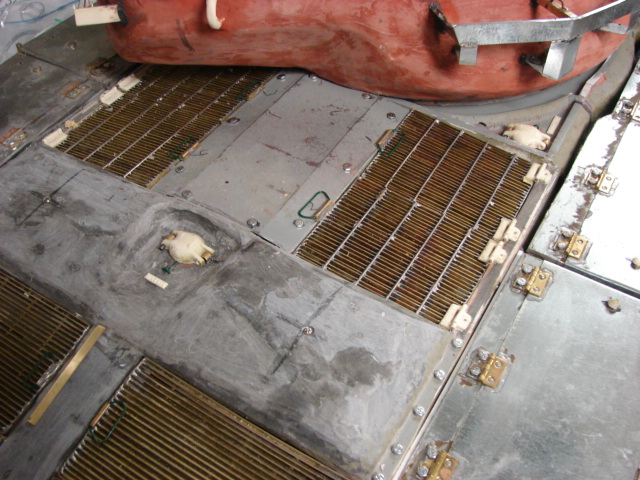
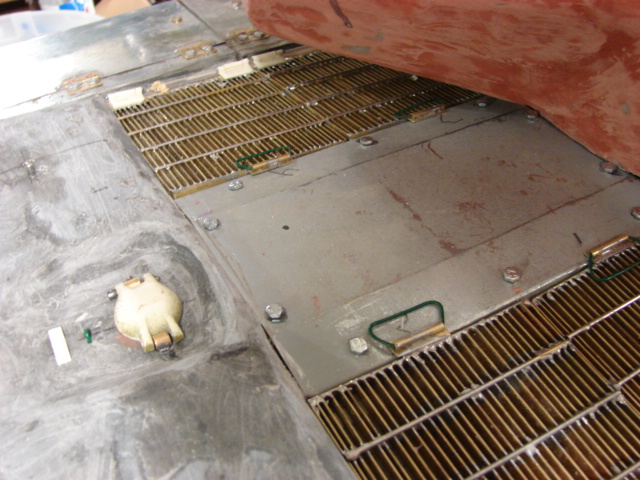
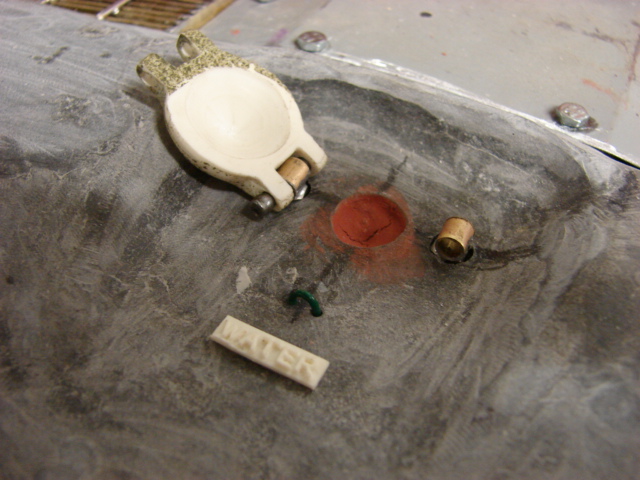
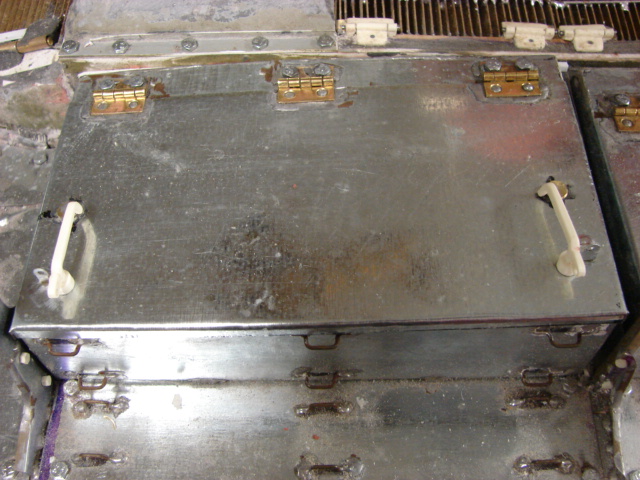
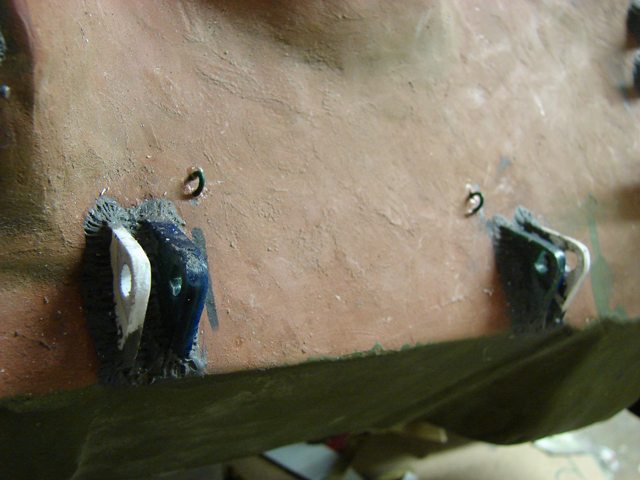
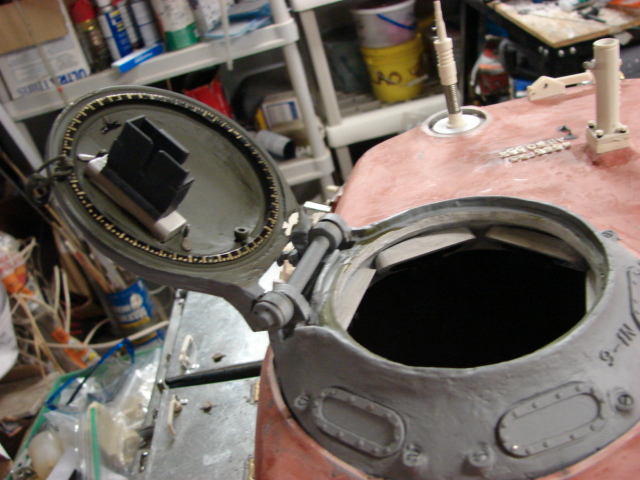
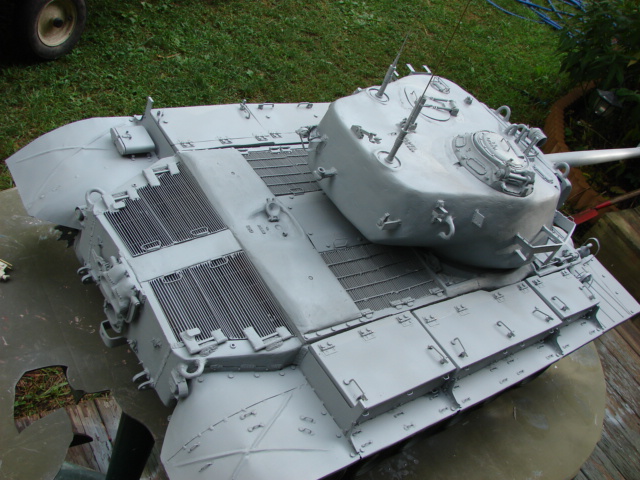
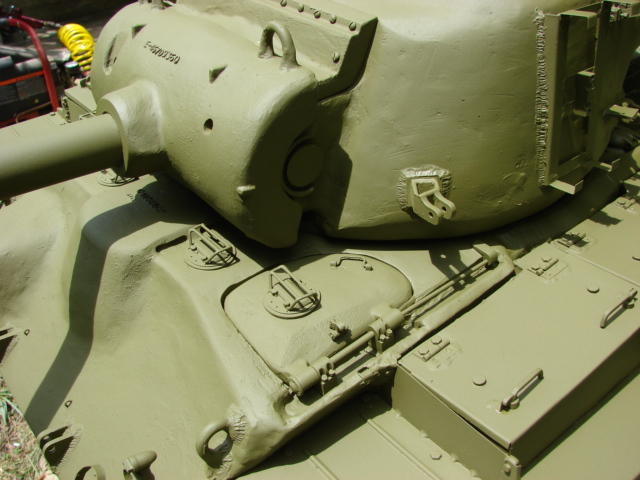
Just a quick update, The main engine grills have been fabricated and installed.

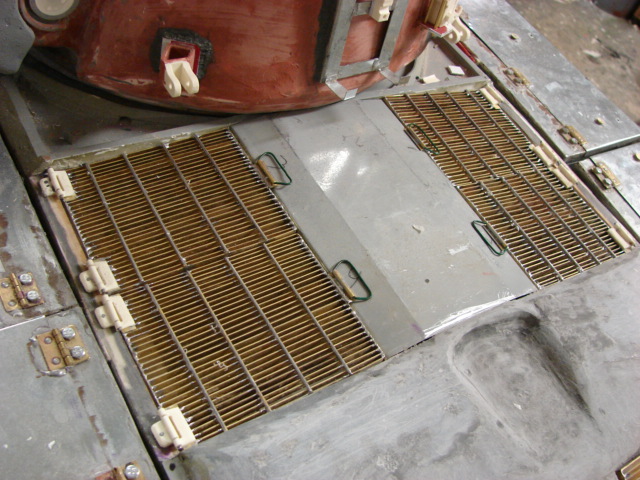
The grills are made out of the same type of brass as the other rear grills, only the slats on the engine grills are vertical and the slats on the transmission grills are slanted.
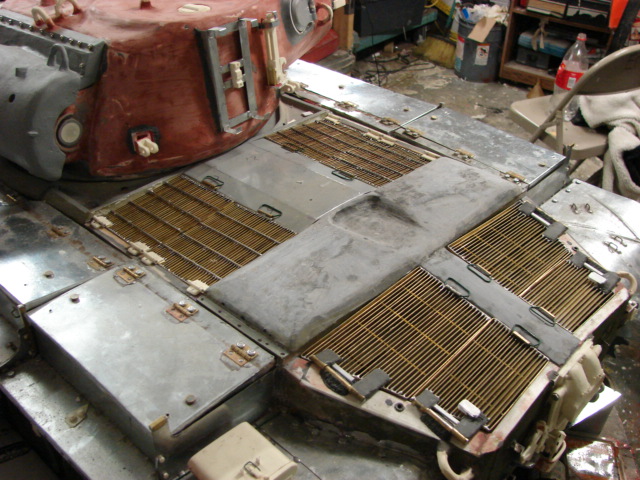
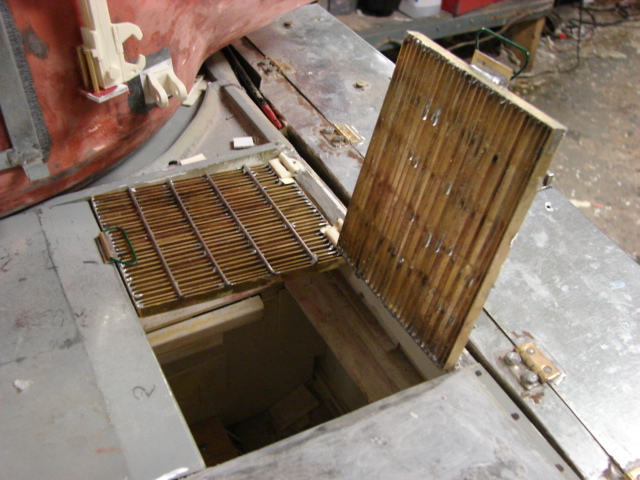
The tank’s grills are all metal construction with the exception of the hinges which, are resin and are fully functional.

Now that the grills are completed I can now proceed on the fuel caps, which will finish off the tank’s rear deck.
Stunning as always mate!!! Beautiful work!![t$t]
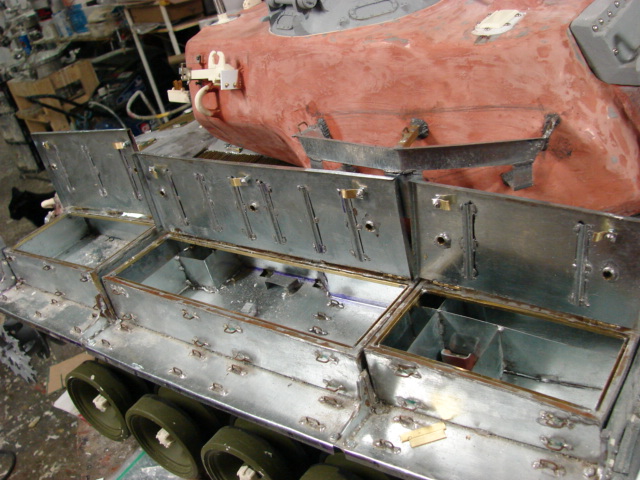
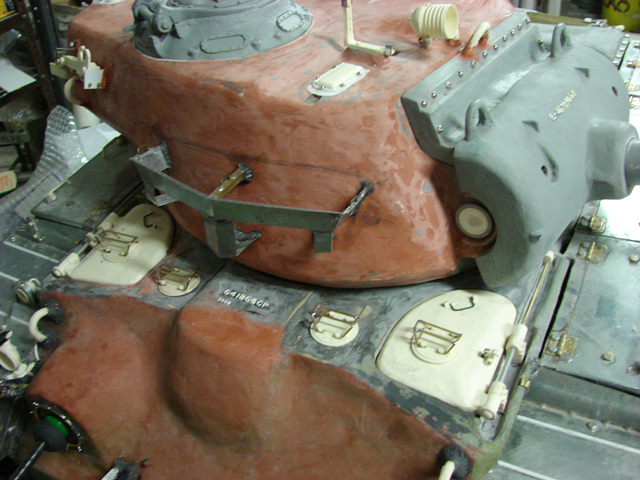
I have made a lot more progress on the tank.
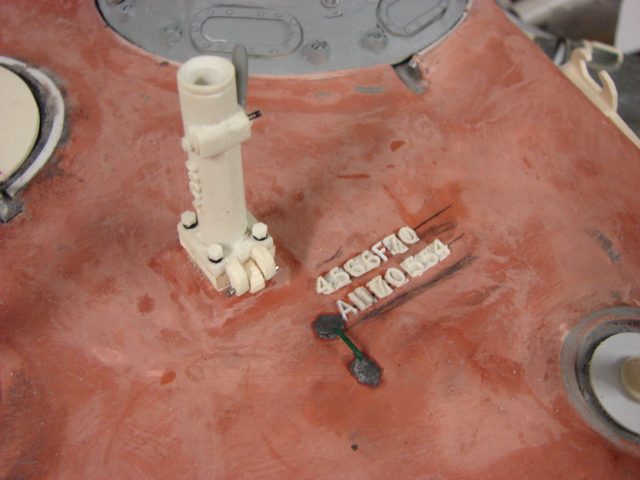
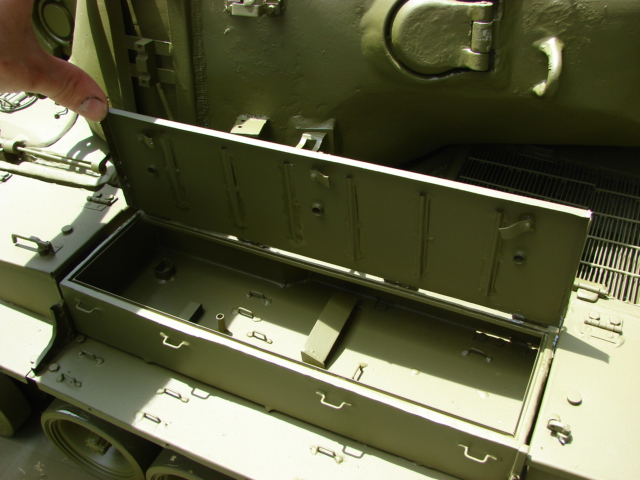
I have completed all of the tank’s rear deck detailing, this includes the fuel caps, and fastener details.
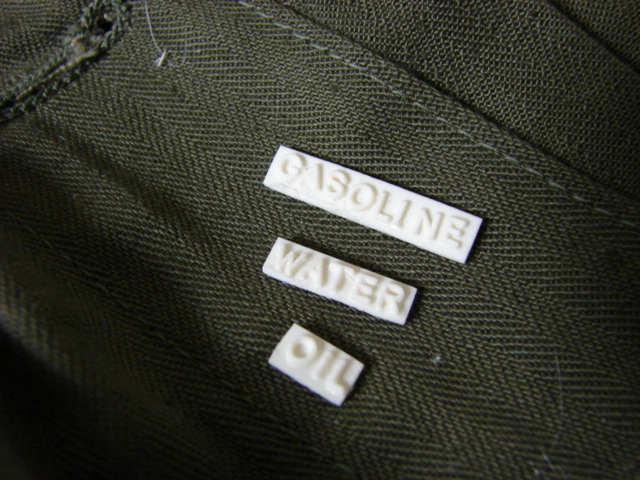
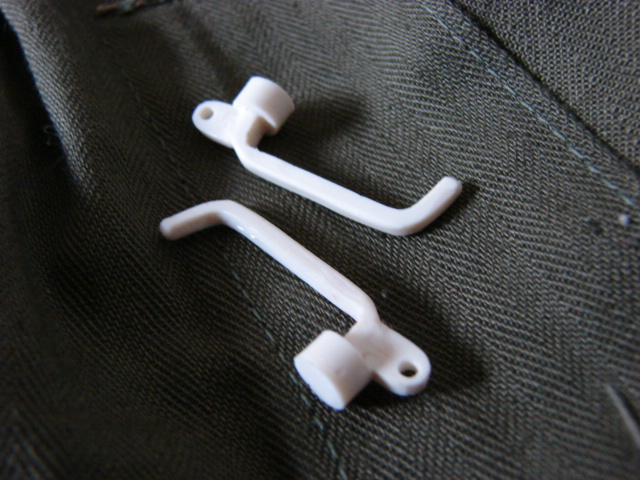
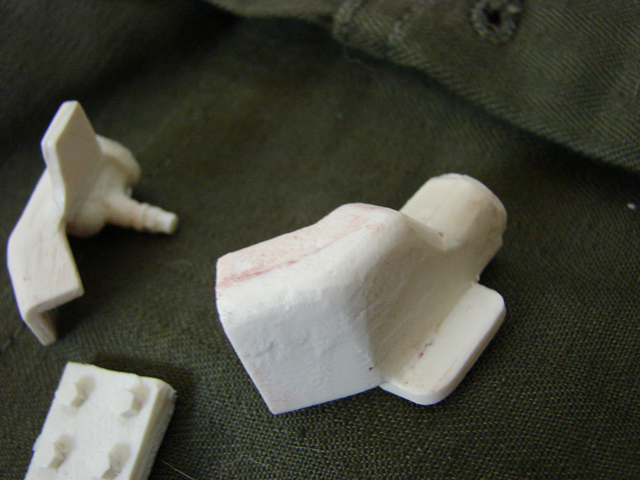
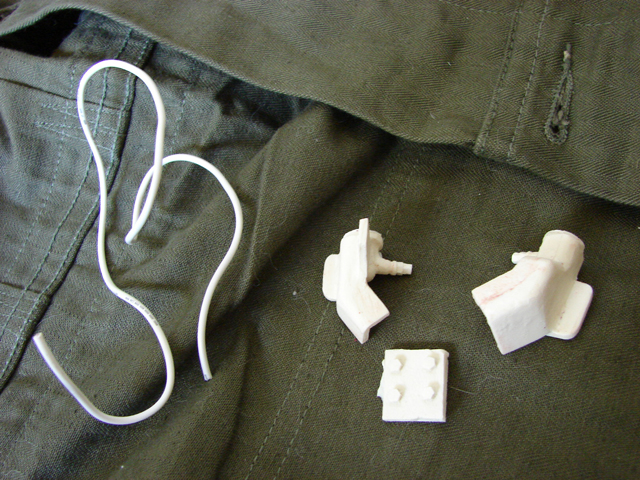
I have also added two new parts to the product line http://www.eastcoastarmory.com/ustankparts.htm
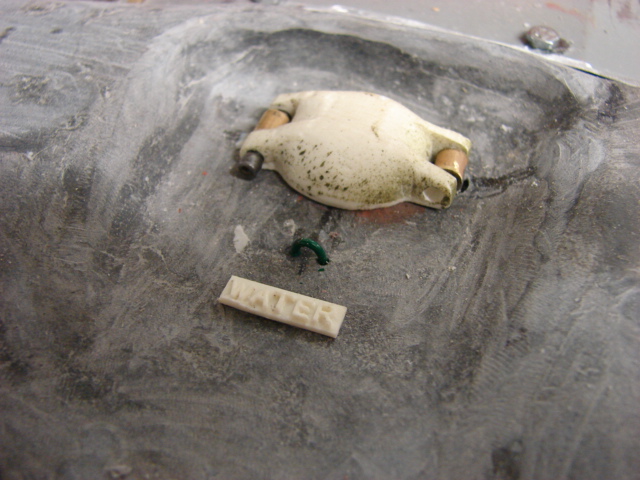
Resin US AFV engine fluid identification plates set.
Resin M26 style storage bin handles set. These handles will work on any tank from the M26 Pershing to the M60 MBT.
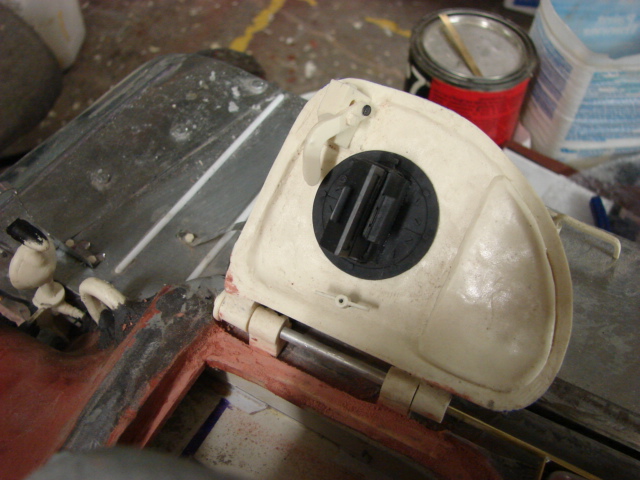
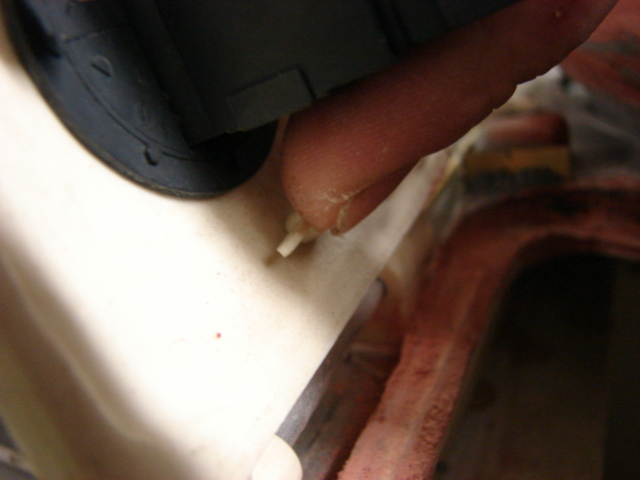
Like my other tanks I made the armored fuel caps functional. A lock pin and retaining chain will be added later.

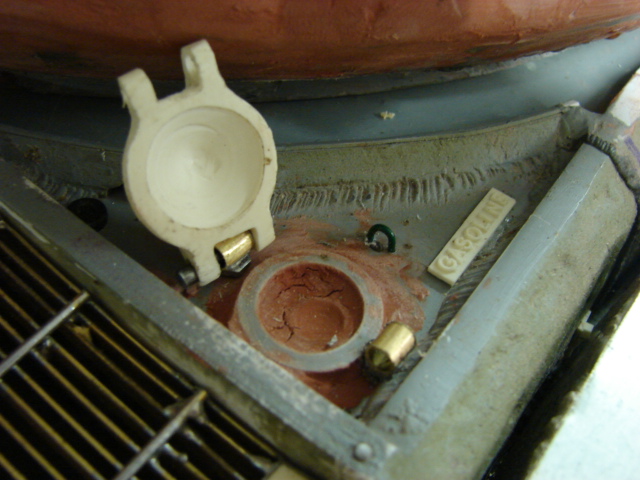
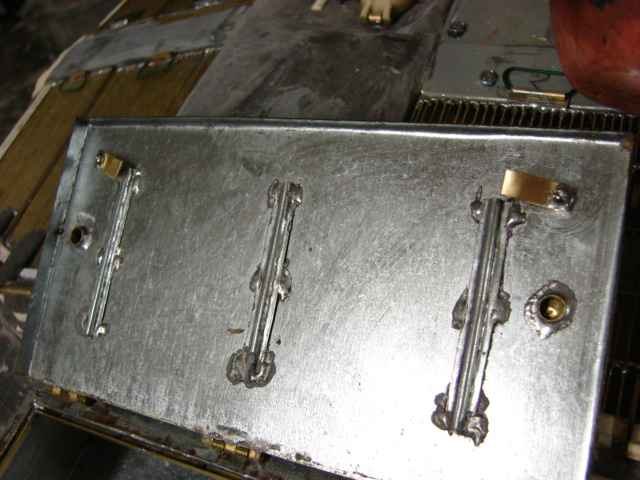
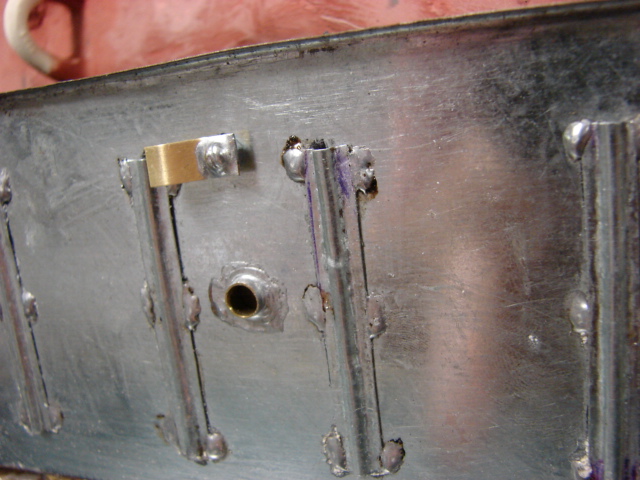
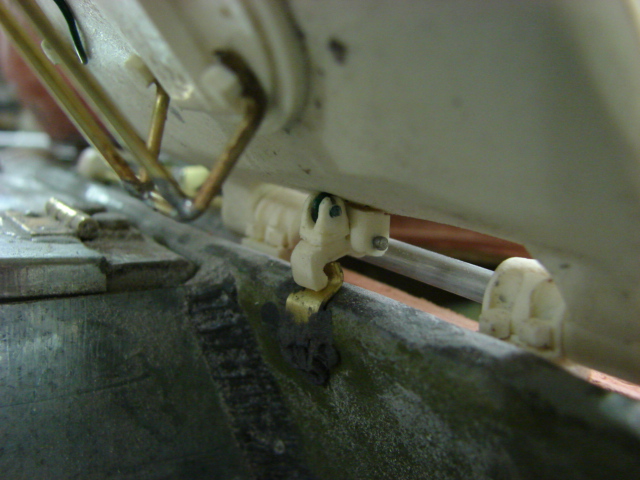
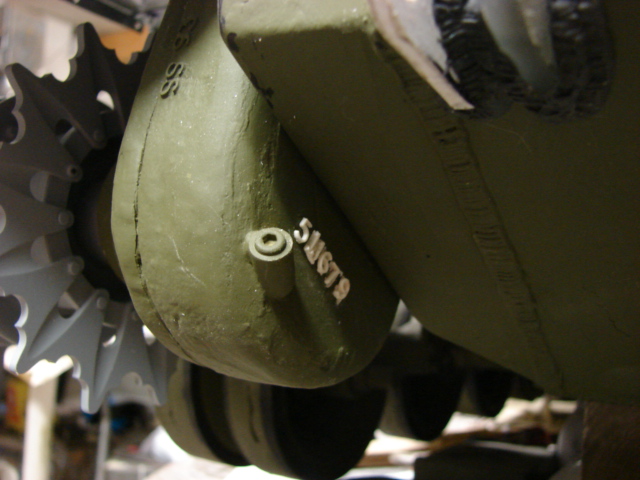
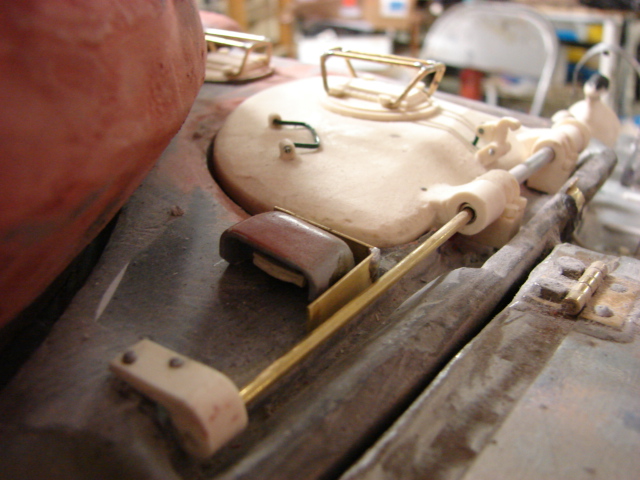
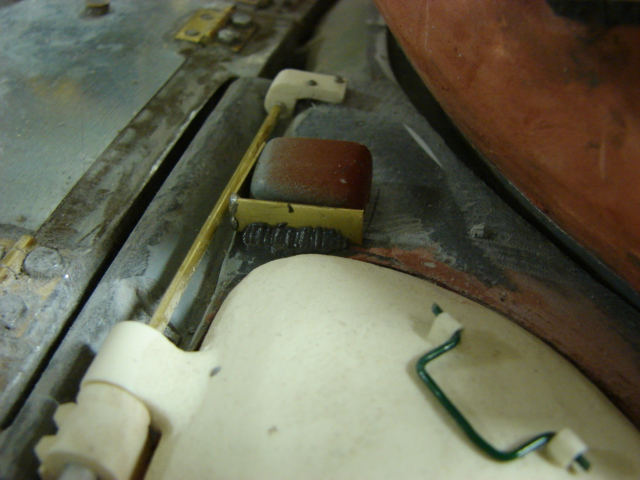
I was able to add the final bit of detail to the tank’s Bins. I made the Bin handles fully functional, so that when the turn they actually lock the bin doors shut. the lock itself is a brass strip with a screw soldered to it. The screw then gets inserted firmly into the resin handle. On the bin Lids a small steel bracket is soldered to the lids directly behind the handle bracket. These brackets are for pad locks to lock the handles to the lids in the closed position.
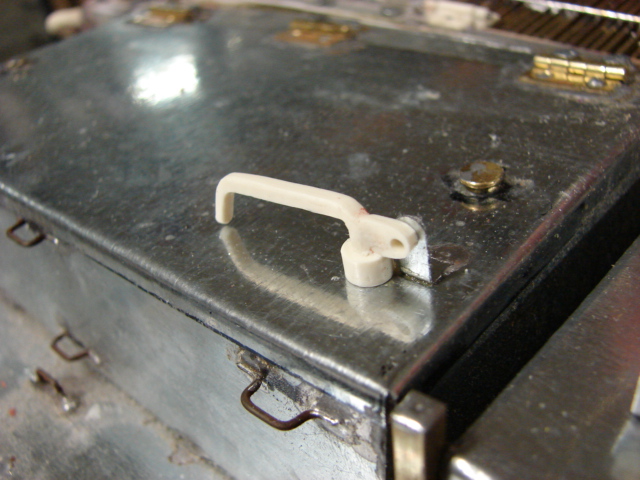
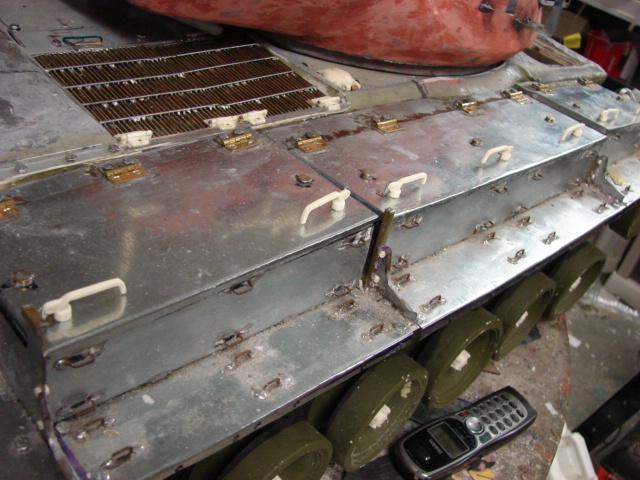


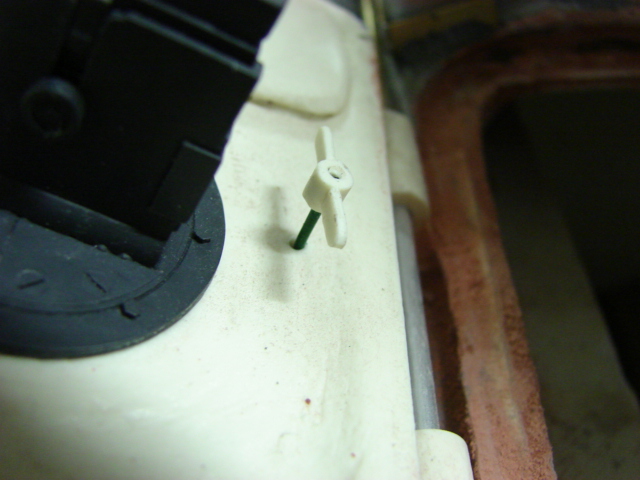
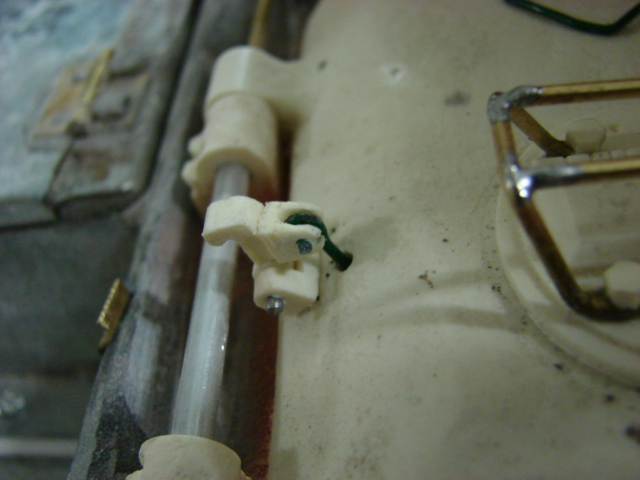
Some shots of the locking tabs
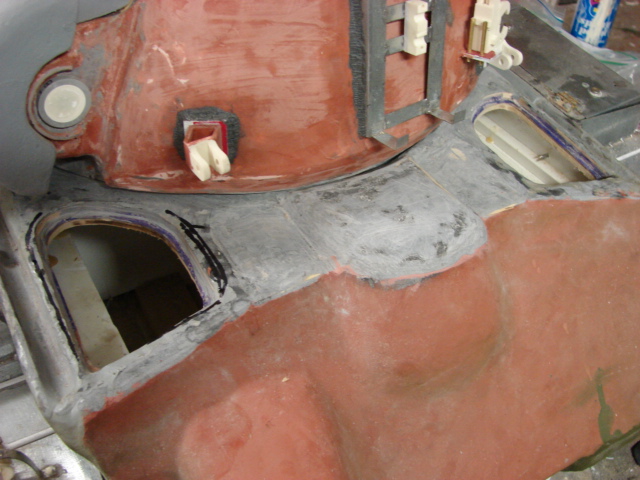
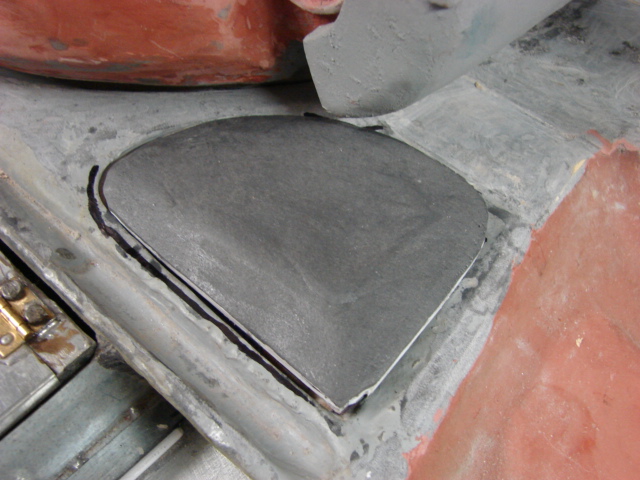
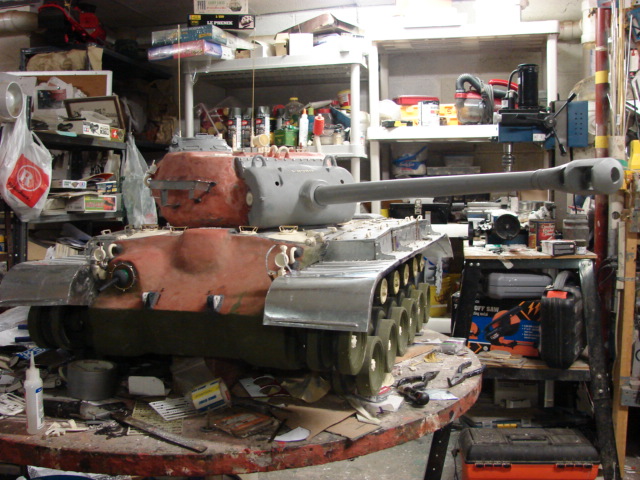
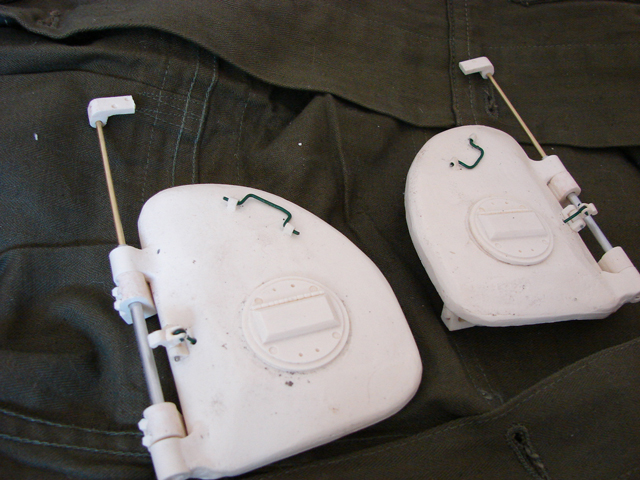
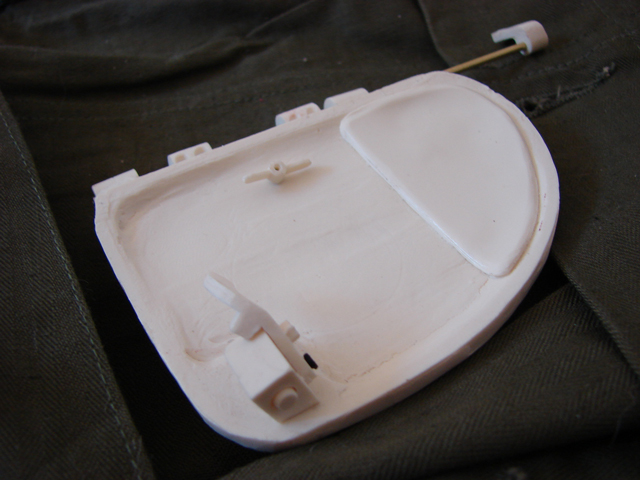
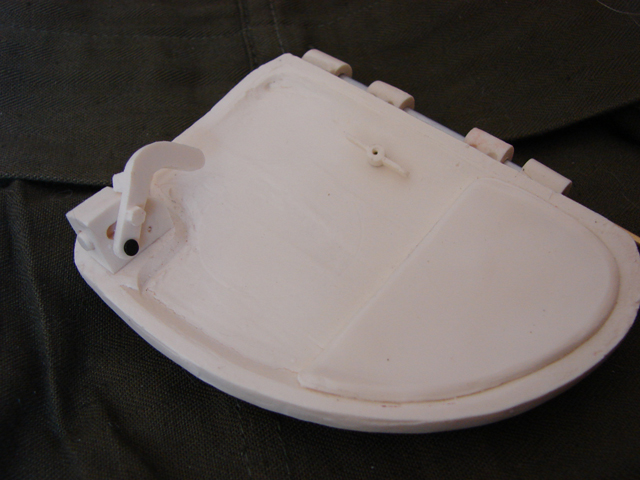
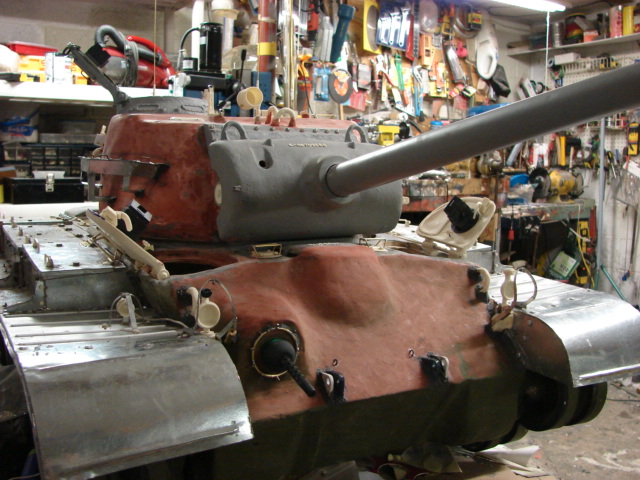
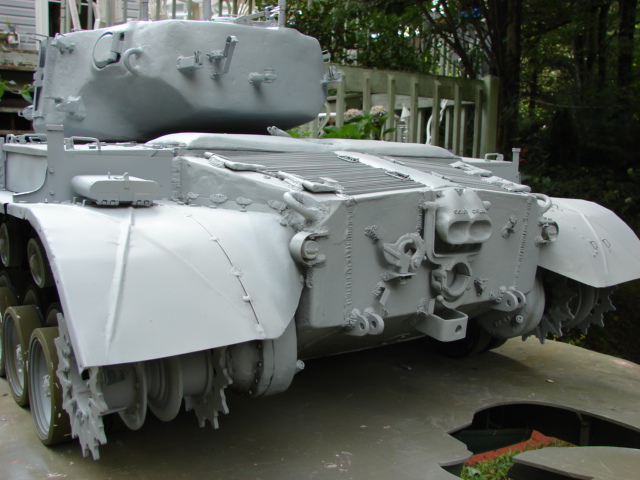
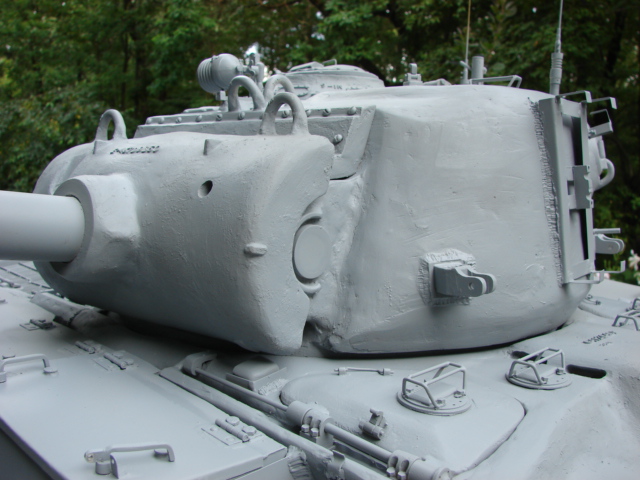
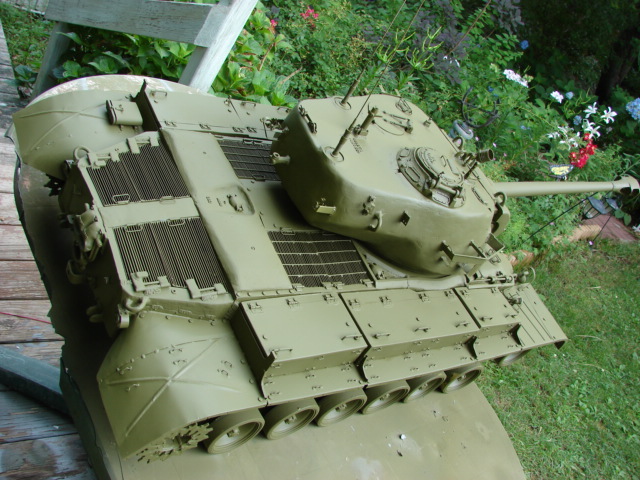
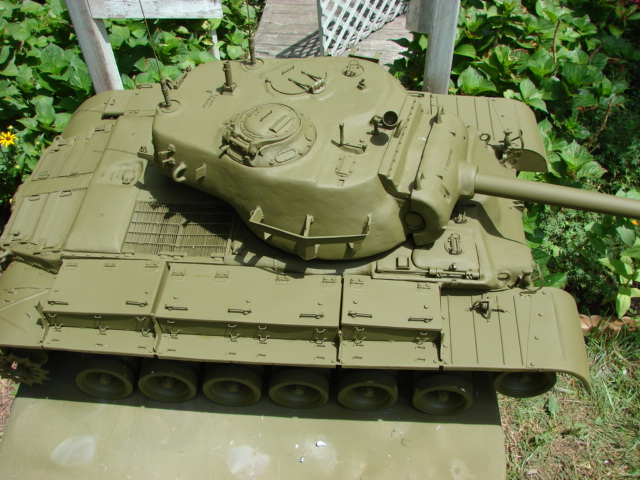
Now that the rear portion of the tank is complete I have now started working on the front. I have already cut out the spots for the bow hatches and have started the bow hatch masters.
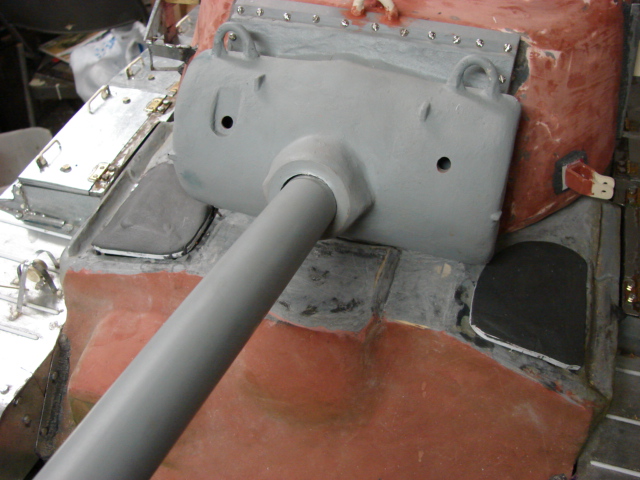
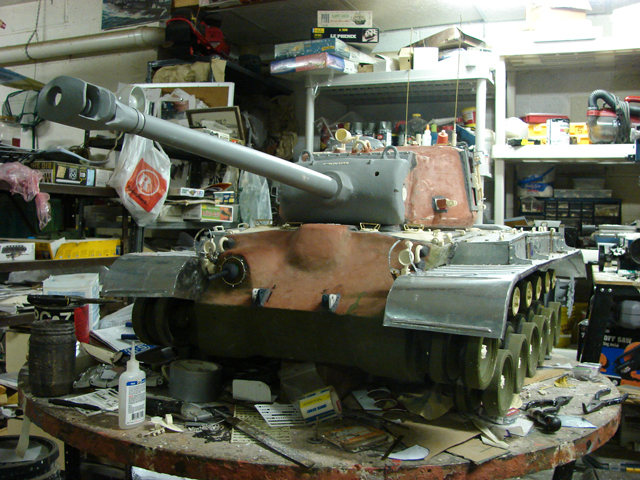
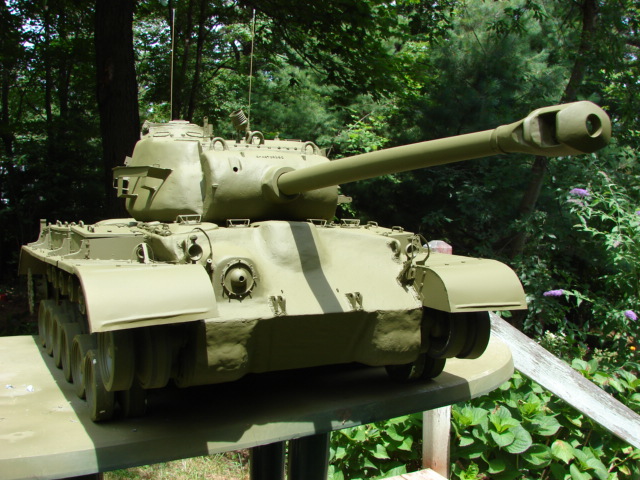
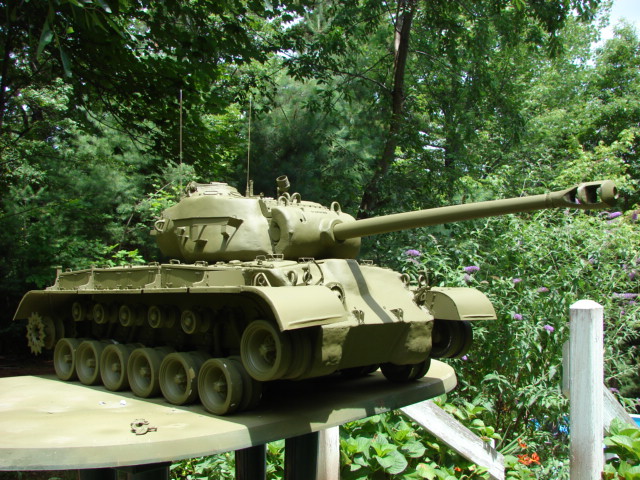
The tank is now in it’s home stretch for detailing. Once the last bits have been completed the M26 will go into painting!!!
Man, that’s turning out to be a big tank. Take a look at the cordless phone next to the road wheels in the 10th photo.
It’s amazing how much work you are putting into this monster. I would scratch-build 1/6 scale small-arms and improvised AT wepons, but I would not (under any circimstances) try to build a 1/6 scale tank.
One quick question: can you take a photo of this tank standing next to a car, to give sort of a sence of scale size?
Complexly stunning mate!!![:O][t$t]
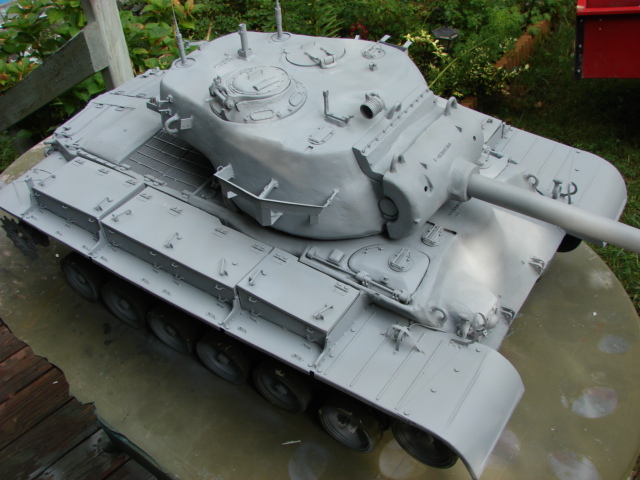
Thanks guys, I’ll have a scle picture soon. I have added the last of the details and the tank is now ready for painting!
I have also added the last of the M26 family parts to the product line. http://www.eastcoastarmory.com/ustankparts.htm
M26 Family Hatch set.


Resin M26 family head light posts set

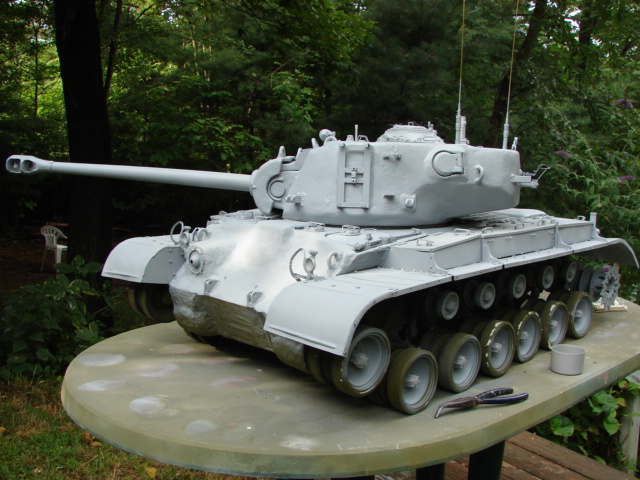
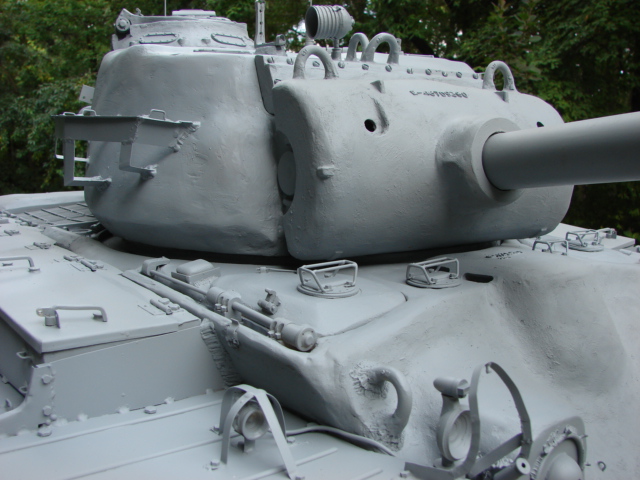
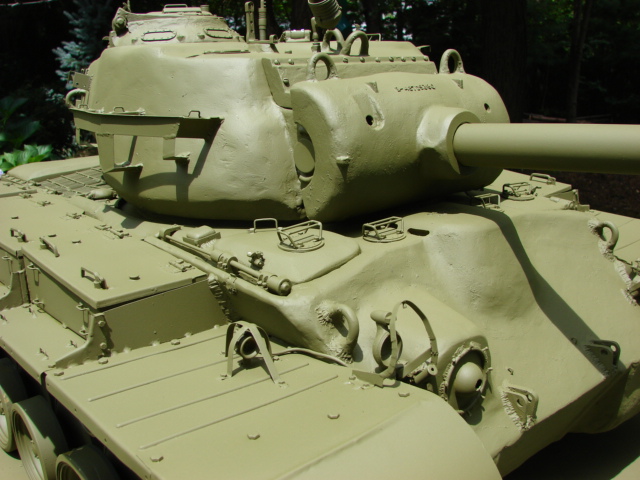
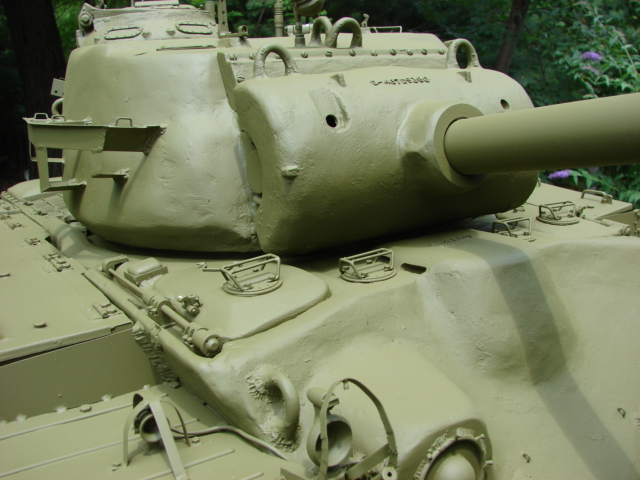
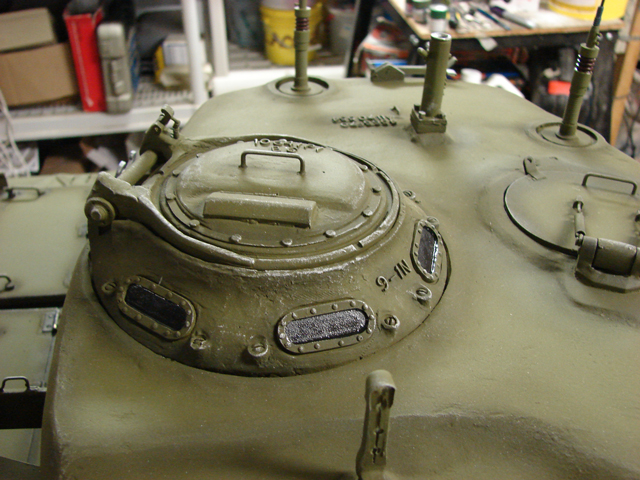
On the hatches I installed a set of Panzerwerk inner periscopes.
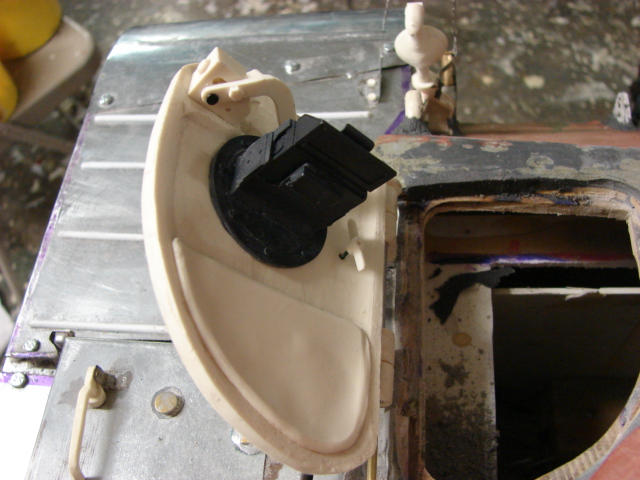
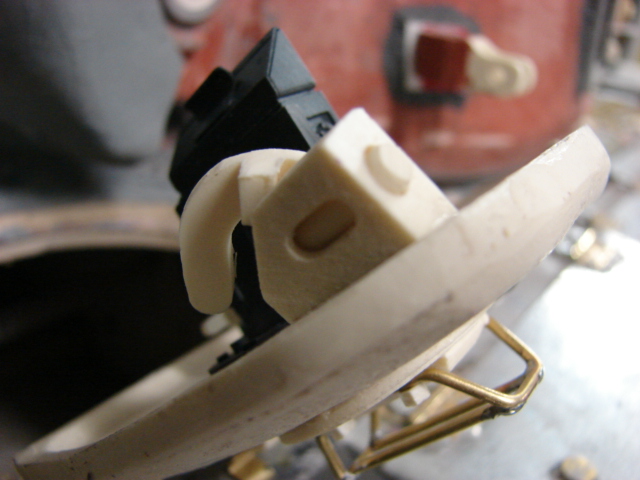
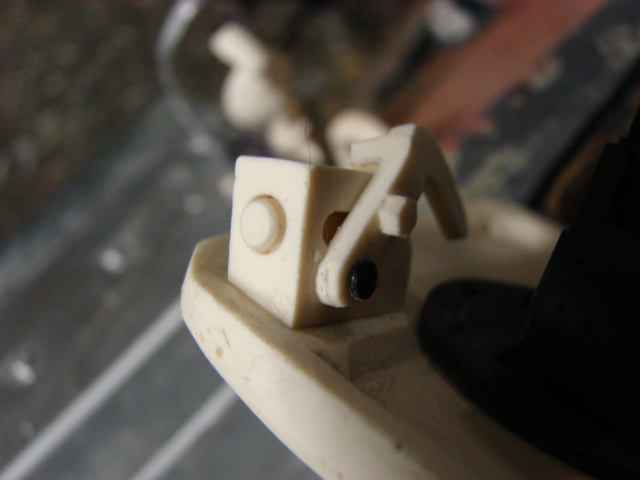
On the hatches I was able to make hatch retaining latch functional. On the M26 The latch retaining latch was at a spot where you could not reach with your arms, so the latch was designed with a T shaped handle on the interior of the hatch that would release the latch. The way this worked was the latch was connected to the handle via a push rod. All of these functions are built into the model and the latches actually lock and release on the latch snags.
The hatches locked close on the M26 with a large locking stud that is operated with a locking grab handle. All of these details are molded in to the casting.
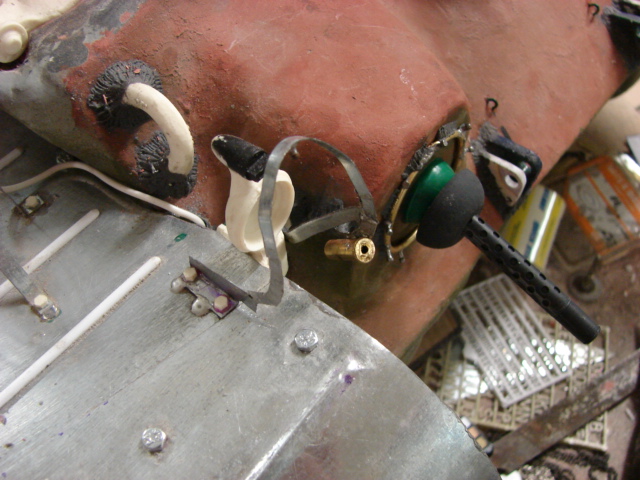
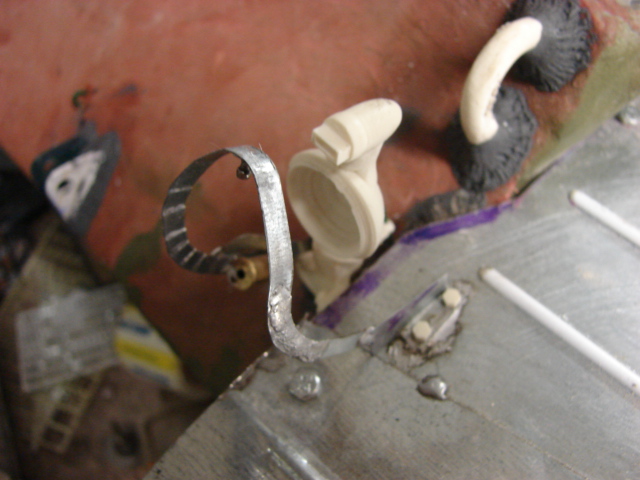
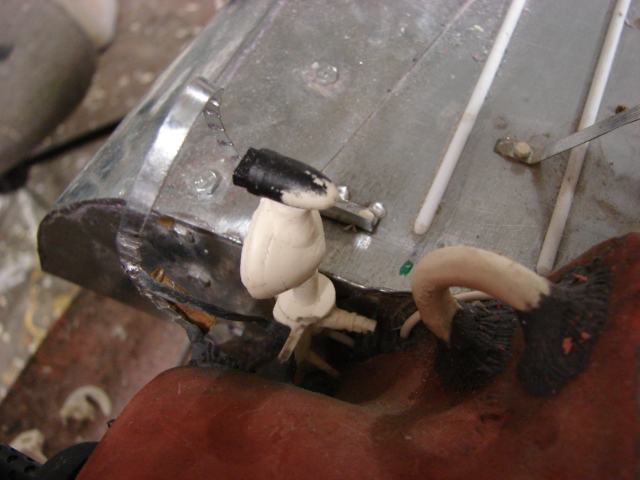
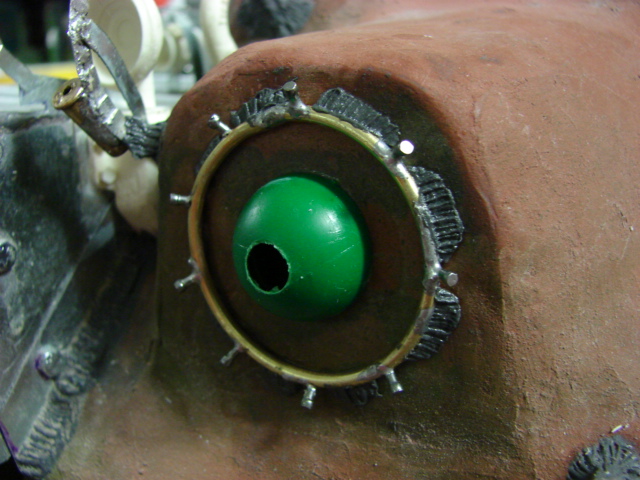
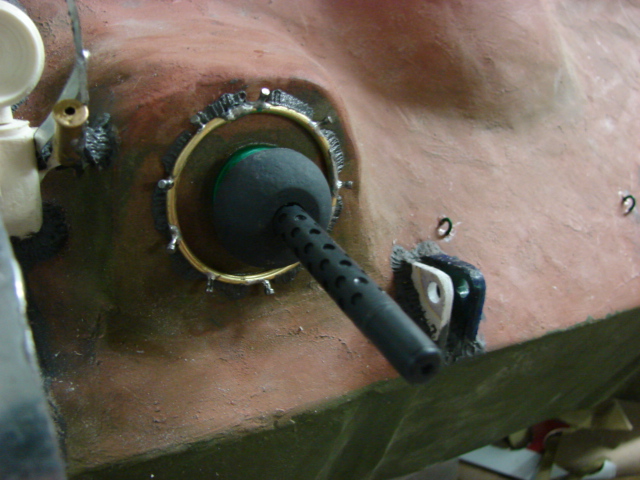
The tank’s head lights and head light post were added along with their brush guards. the head light lenses and canister chains will be added later after the tank is painted. The left and right posts are different. Both posts are a hollow design. The head lights are fastened into the post via a vise type locking bolt. The headlight power cord extends out of the bottom of the post and gets inserted into the tank’s hull. All of these details are represented on the resin castings and my model.
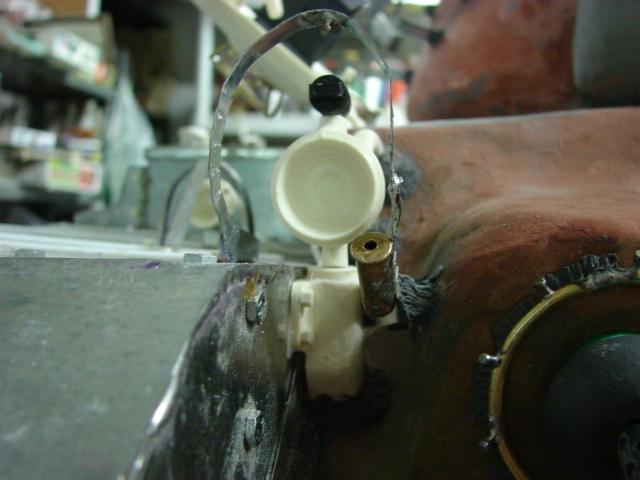
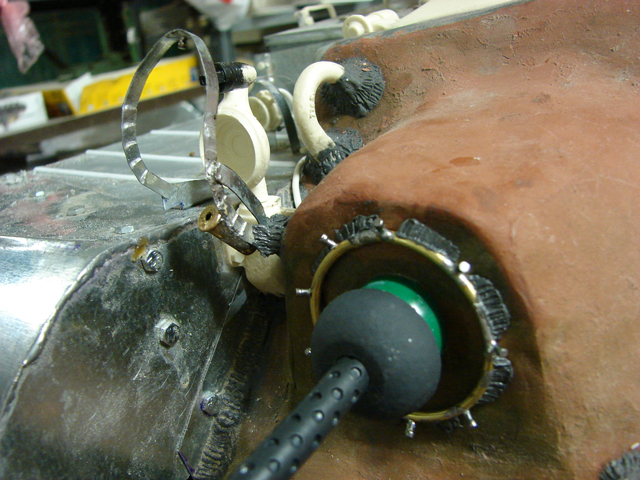
The M26 headlight brush guards have what looks like a tarpaulin snap point on the upper part of the guard. This detail was added to my model and was and was soldered on
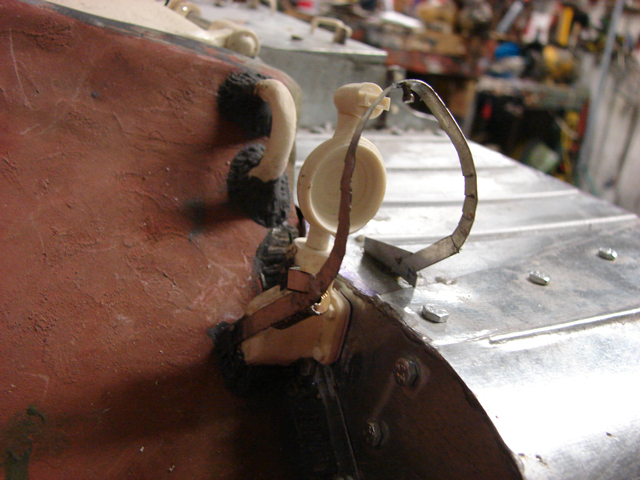
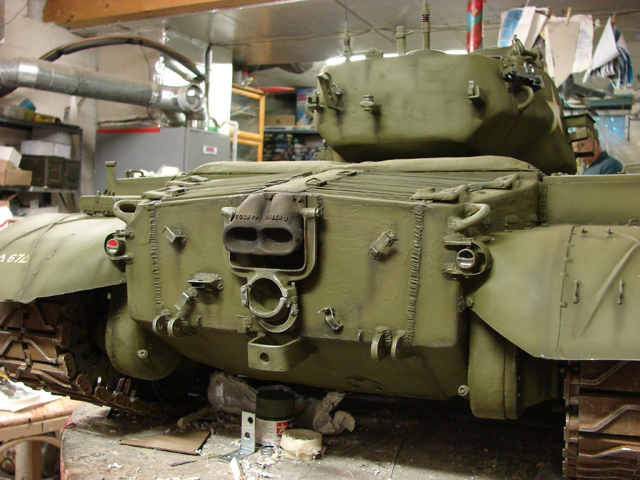
The tank’s bow 30.cal was also completed. The bow 30.cal protective tarpaulin rack was all fabricated out of brass and wire brads. the whole component was soldered together. The Bow MG itself is from Panzerwerk.

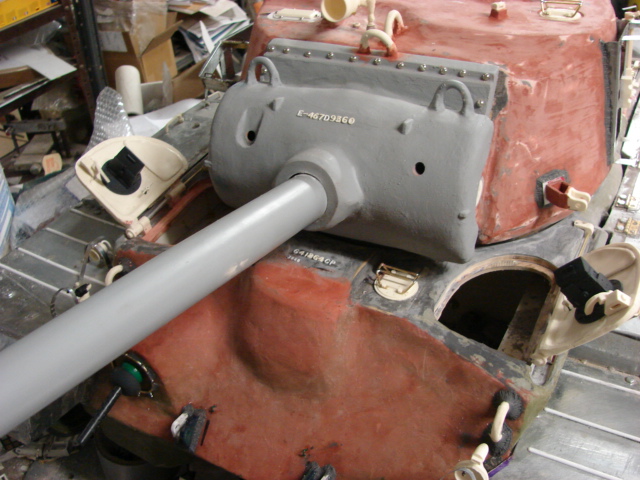
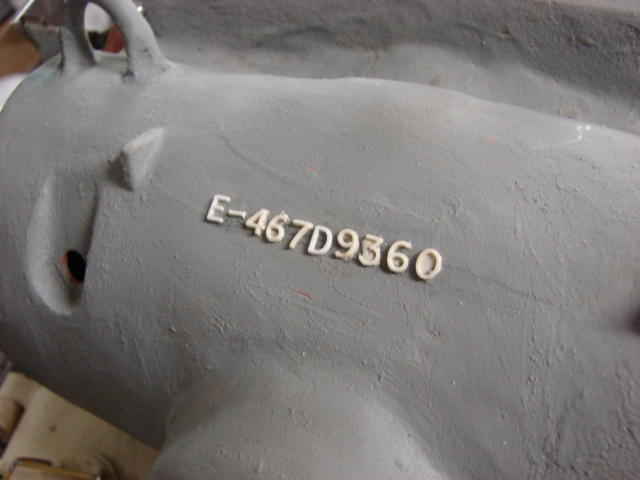
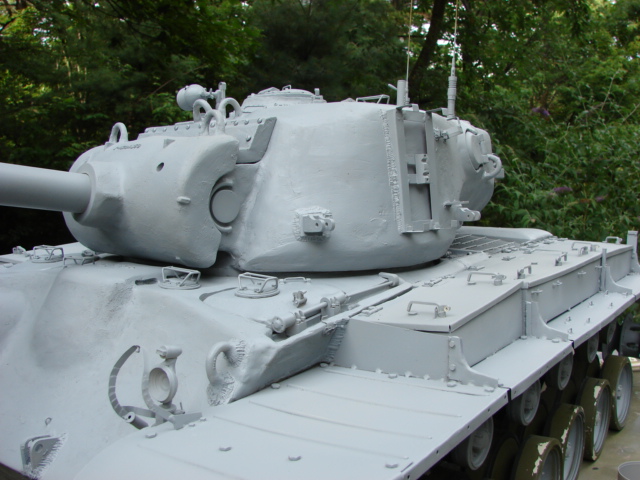
The tank’s front tow shackles, lift rings and casting numbers were added aswell.

The tank that I’m building is an early production M26, and on the early M26 there were two periscopes mounted on either side of the front blower vent. These periscopes have been added along with all the periscopes guards
I was also able to install the tank’s fire extinguisher. The M26 used the same type of fire extinguisher as the M5 Stuart, which I already have.
For the tank’s copula hatch periscope I also used the Panzerwerk rein periscope. The periscope mount itself was modified by removing it’s bottom base.
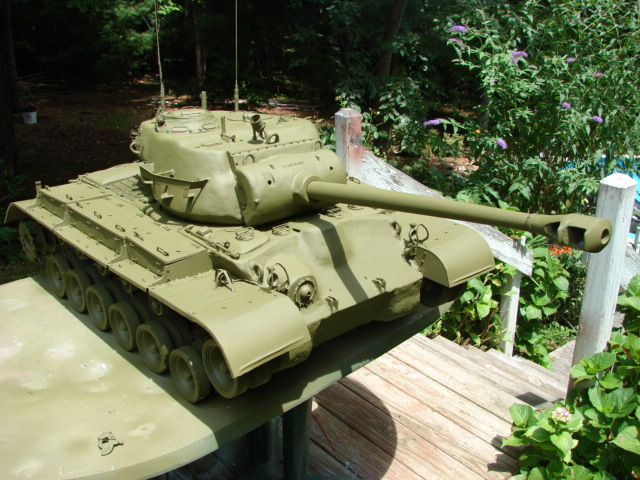
As soon as the weather breaks I will be able to give the tank a good wash and begin to paint the Tank!!! ![]()
Amazing work armour!!! Can’t wait to see her in clothes!!![t$t]
Today I was able to get the tank hosed down and applied it’s final prime.
It’s nice to see the tank in one color.
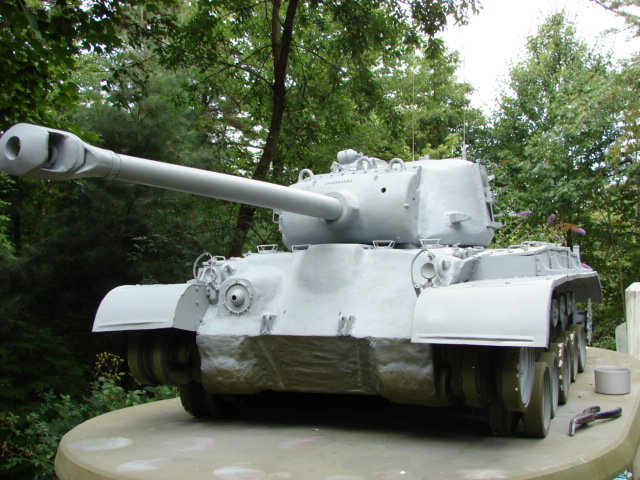
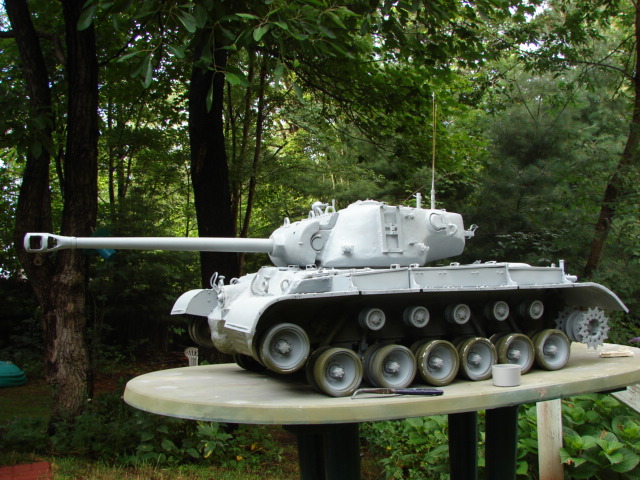

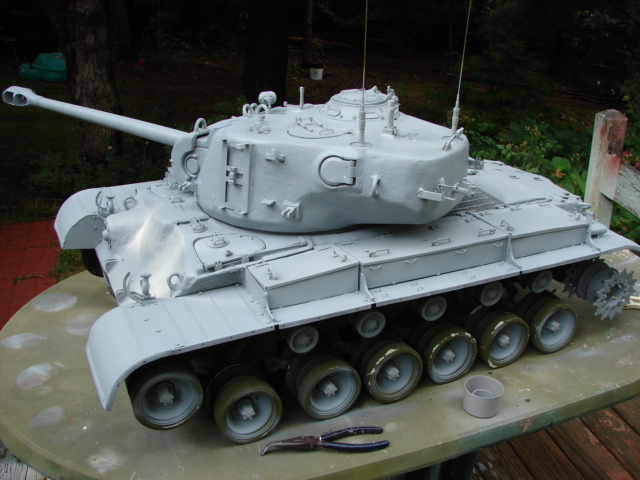
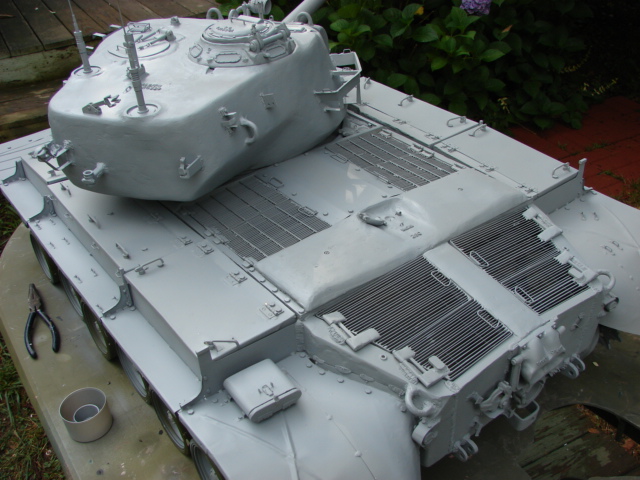
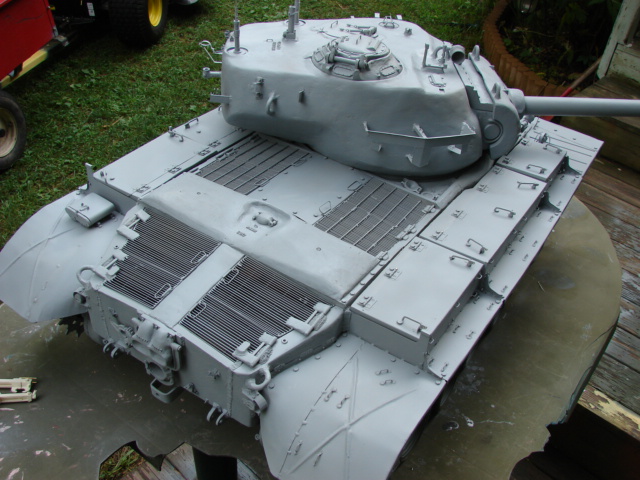
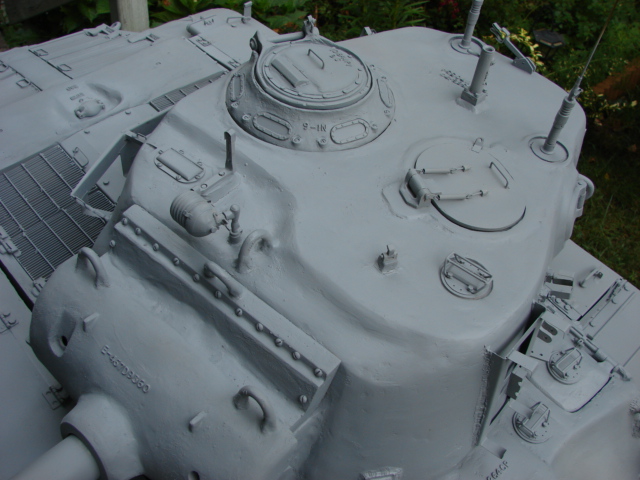
Tomorrow I can apply the base coat.
Here are also some scale images showing the size of the model in a trailer when I was towing it to the place where I paint my large tanks.
.JPG)
.JPG)
.JPG)
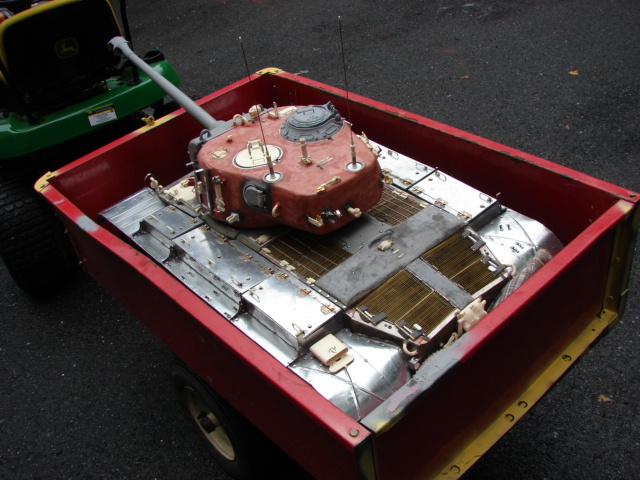
WOOHOO!!! Yes, she looks great finally in one color!!! WOW!!! The size comparison in the garden trailer is tops lol, it’s HUGE!!! Looking forward to the green!!![t$t][:D[
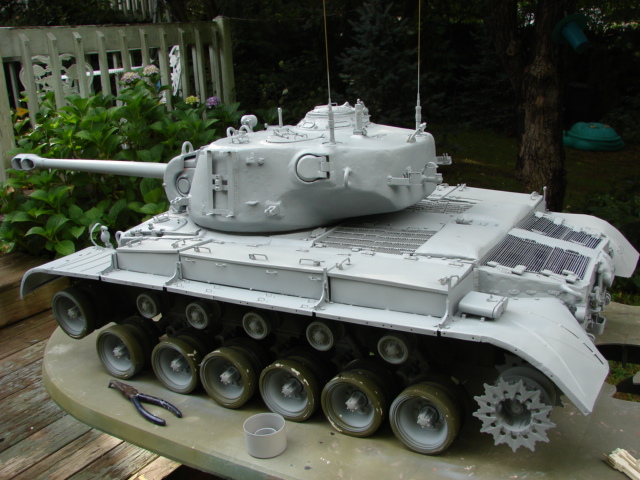
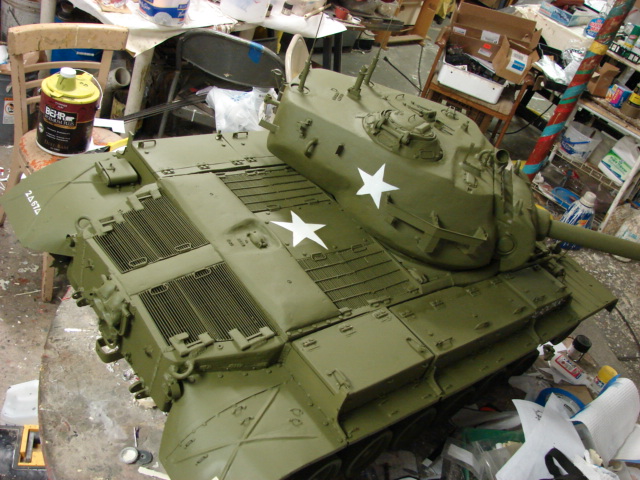
Thanks again, The weather today was perfect for painting and I was able to get the tank painted in it’s base coat of OD. For the tank’s OD I mixed up my own color for the base coat. It is a different shade of OD which makes it stand out from my other 1/6th scale US tanks.
the tank is now ready for it’s markings and weathering… More to come very soon
Armourguy…simply one of the most amazing modelling feats I have every seen. I do have a couple of questions though…
(1) How many of these beasts have you built and can you post some pics of the others?
(2) HOW BIG ARE YOUR DISPLAY SHELVES…ha, ha…
I can’t wait to see the finished product with markings…fantastic…simply fantastic!
RODC
[dto:] on the above. How many 1/6 scale tanks (or anything else) do you have?
I swear, that tank grows each time I see it[:|]
I have one question, though. Your updates say that you transported the tank on the 14, and painted it on the 15th. Does this mean that the tank was so heavy, that it took a full day for the tractor to pull it there, or did you transport on the 14th, and leave it there untill the 15th?
Man, the thing takes up the whole trailer.
Mabe I out to try this for myself, one day…[sml…]
[:O][:P][t$t][:D[[::DD0]
Thanks guys, The tank only weighs about 50lbs. The reason why it took me two days to get the model painted was that after I wahsed the tank down I needed to let the whole model dry. The weather also needed to clear for me so I could apply the base coat.
I currently have about 20 of these 1/6th scale tank models. I also have about a dozen or so in the pipeline.
most of my collection is at the following website. http://www.eastcoastarmory.com/battlezone.htm . I have many of my 1/6th builds on the FSM armor forum.
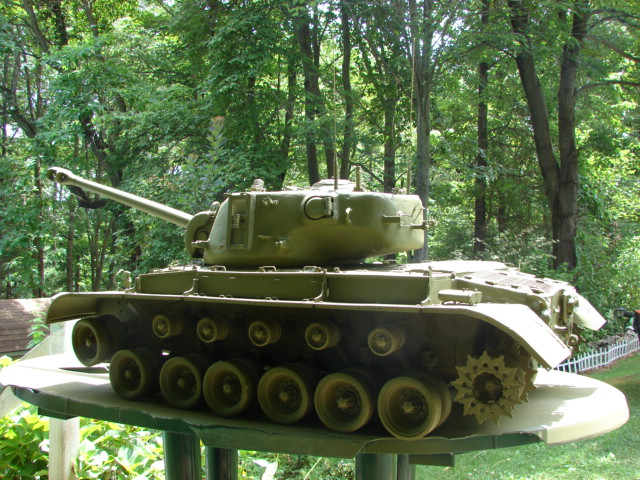
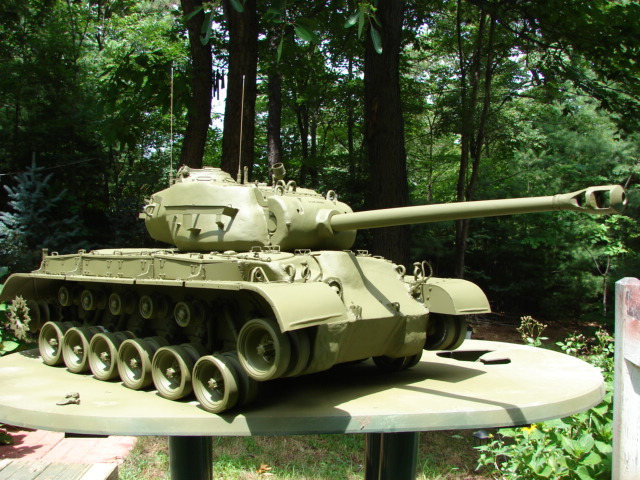
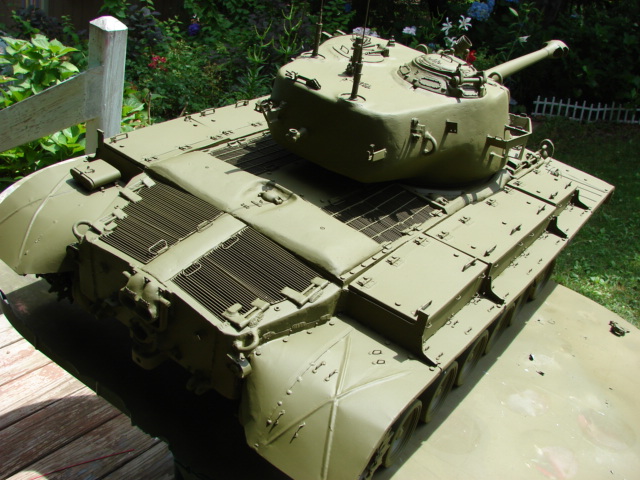
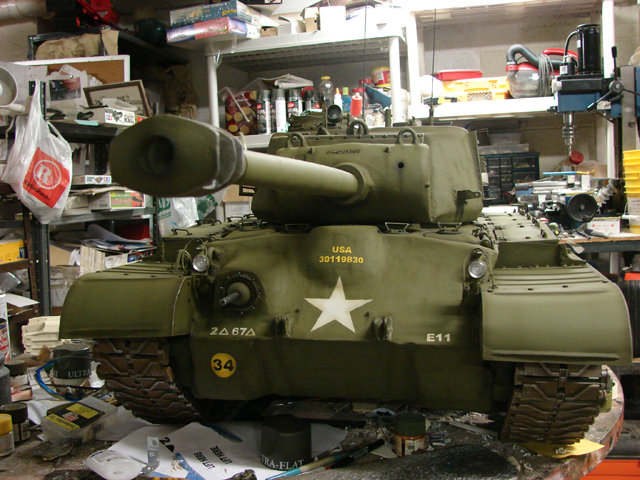
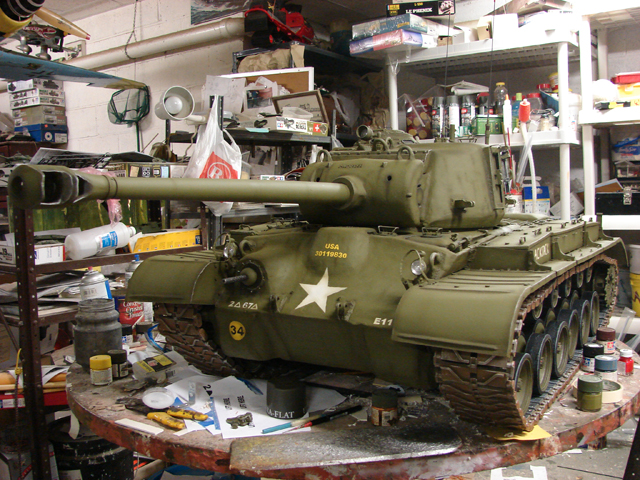
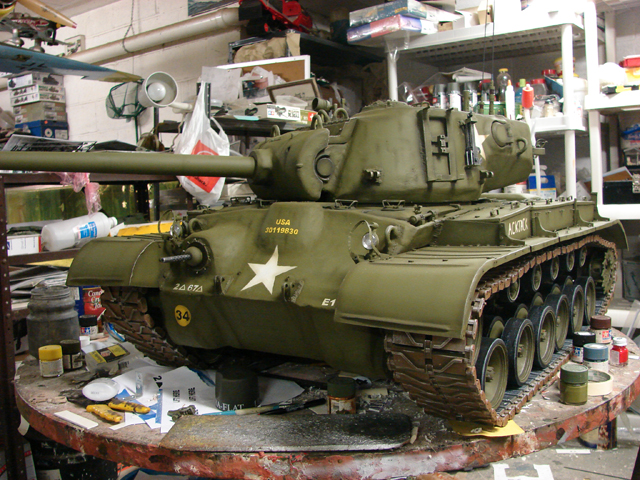
The markings have been added to the tank. All of the markings are all painted on and are not decals.
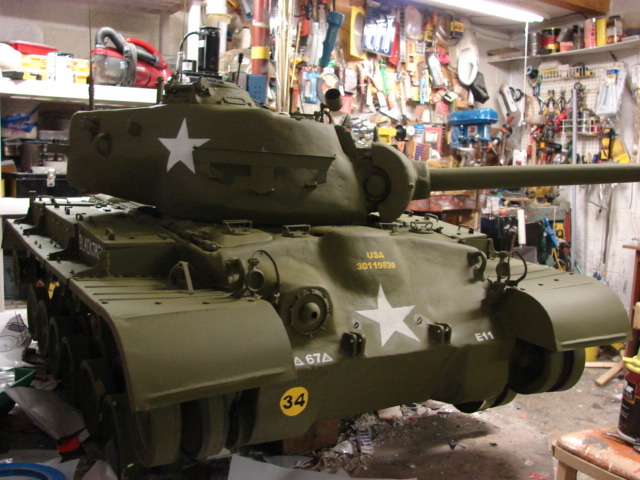
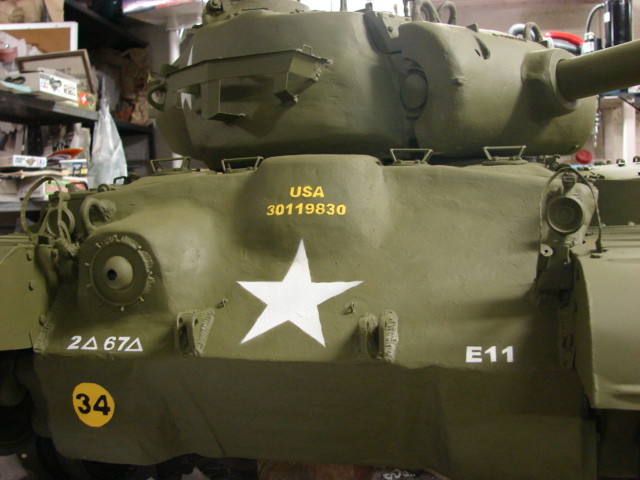
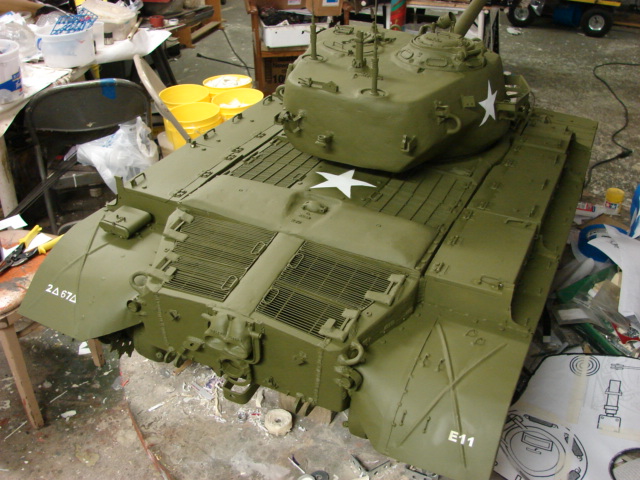
The tank’s weathering has also been applied.
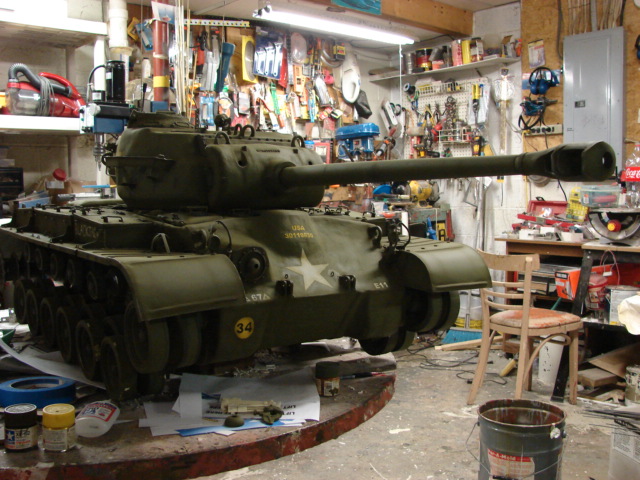
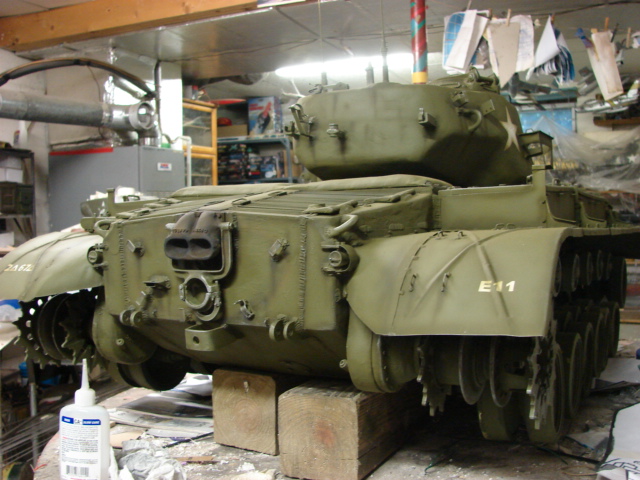
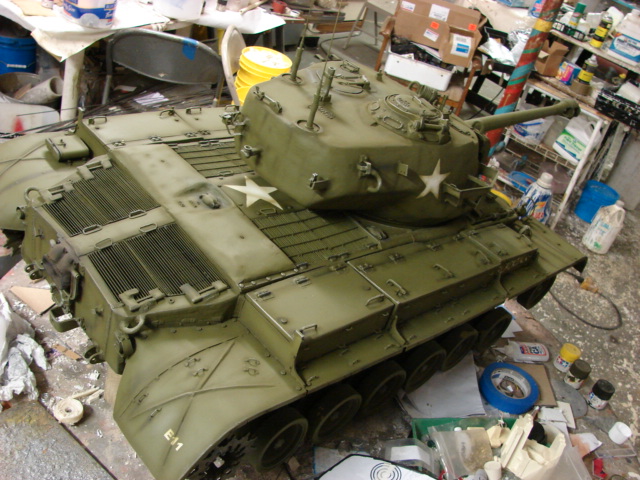
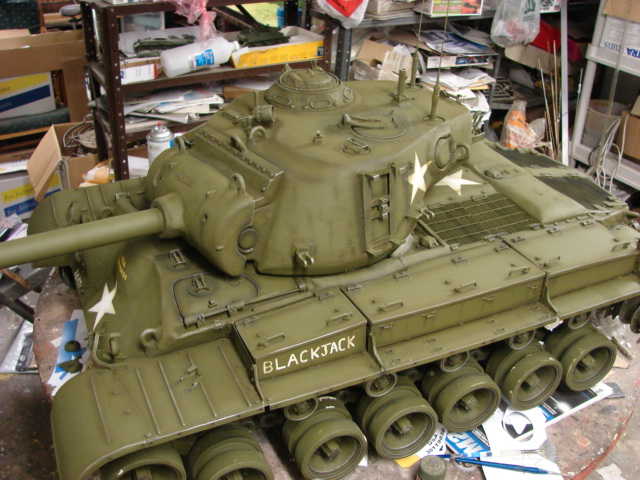
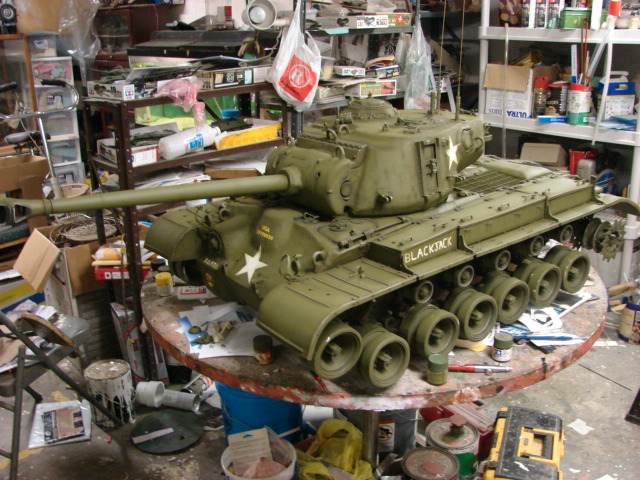
I can now move on to the next step which is painting the tank’s tires, and assembling, painting and installing the tracks. More to follow!
Thanks for the link. I’ve always been interested in 1/6 scale tanks, because I like the detail I’ve seen in them (I collect 1/6 scale wepons and equipment, and seeing how some rifles I got could possibly fire real 1/6 scale ammo, I have been drooling over how much I could possibly add to the adverage tank)
Do you, by any chance, have any tips you could pass on to me (a 16 year old teen-ager) when it comes to getting a 1/6 scale armored vehicle?
Do you also have any reccomendations for a good first kit in this scale?
WOW she’s really coming to life now!!! BEAUTIFUL!!![t$t]
Thanks guys. Railfan, when it comes to 1/6th scale kits there are a few options. Besides being large, most of the 1/6th scale kits can be expensive, with aftermarket parts the price can go up further.
The easiest 1/6th scale kits that I can recommend are the 1/6th kits from Dragon. They have several soft skin vehicles, and artillery pieces. The beauty about these kits is that they are very simple to put together, and are nice kits built OOB. They are probably the most cost effective kits on the market.
If you are looking for something a bit larger there is an ABS plastic kit of a SDKFZ 250. If you want something American the only mass produced plastic tank that requires little scratch building or aftermarket parts is the 1/6th scale M5 Stuart tank from 21st century. These have been out of production for some time, but can still be found on ebay.
There are also several other kits on the market made out of metal and rotomolded plastic. These kits are for the more experienced model builder, and I don’t recommend these models for a 1/6 scale beginner.
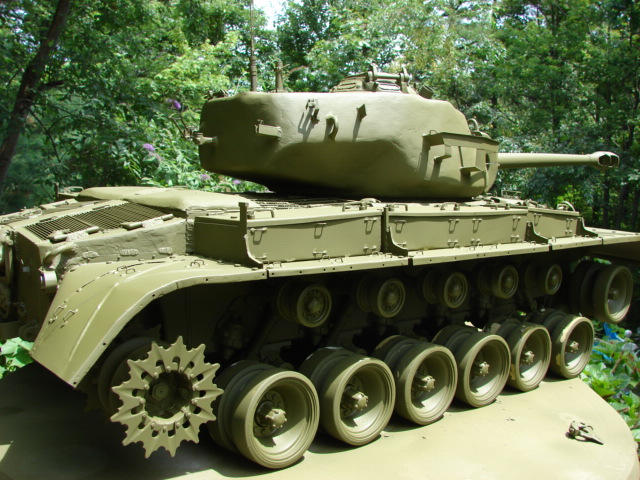
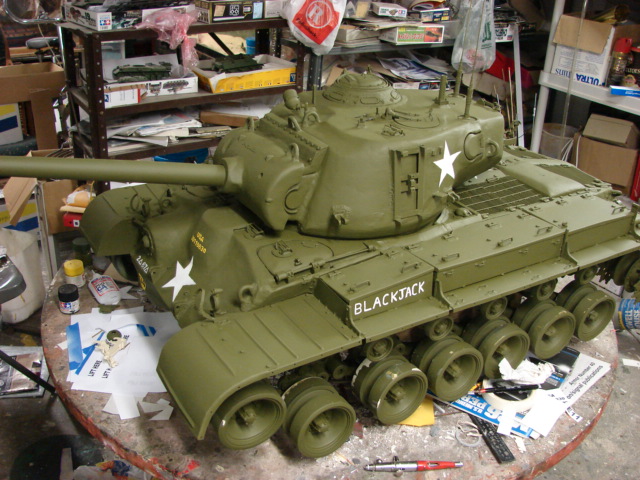
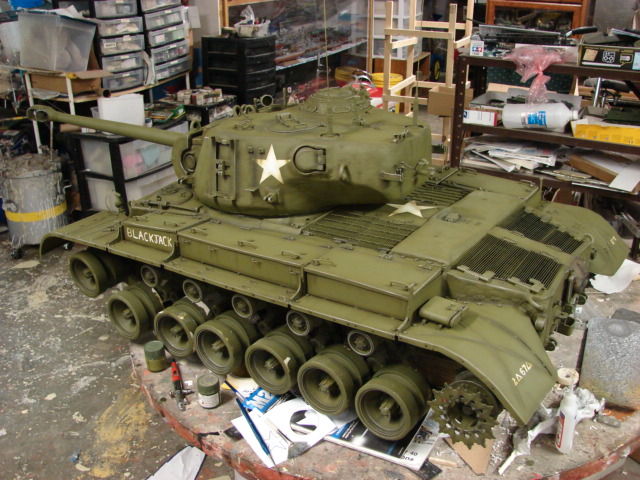
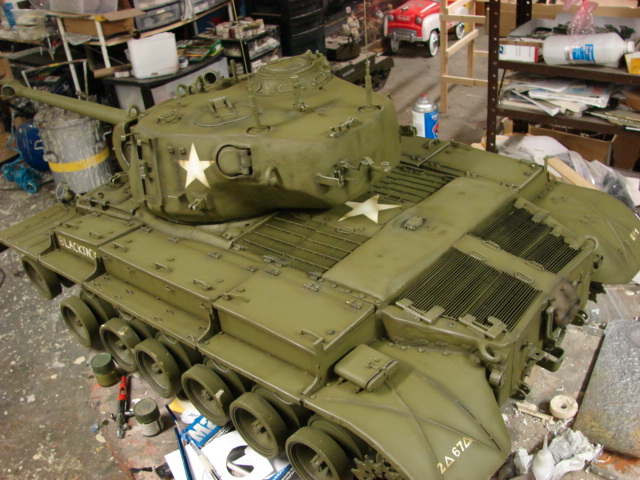
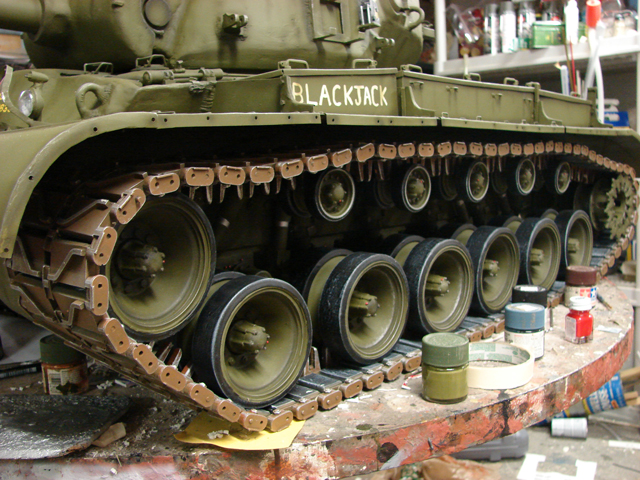
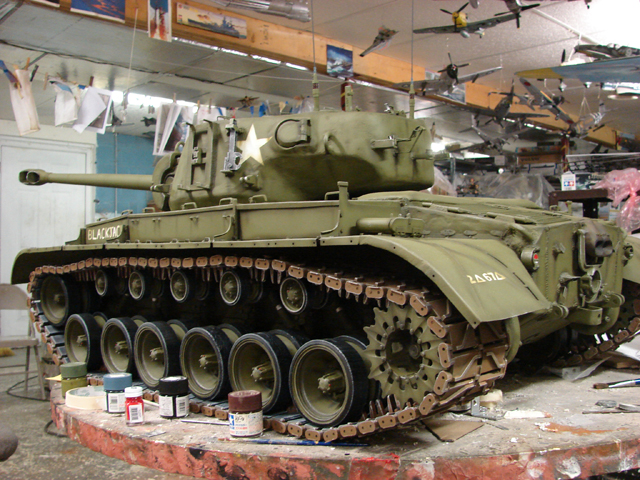
I have completed more of the model.
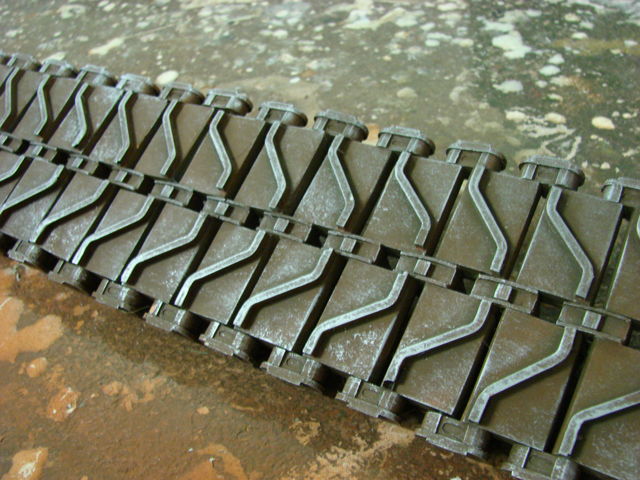
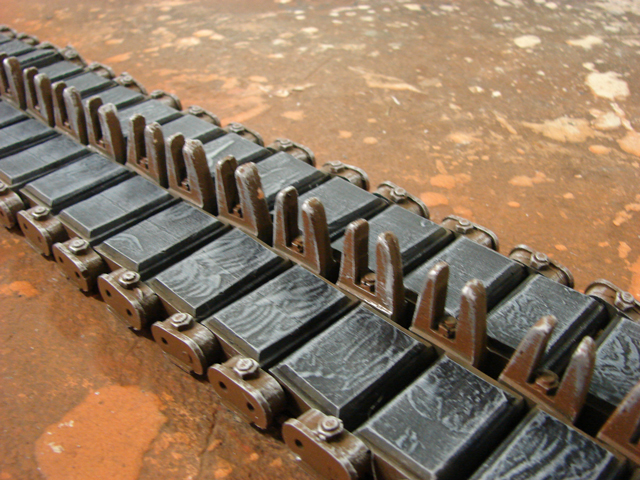
The tank’s tracks has been assembled and painted.
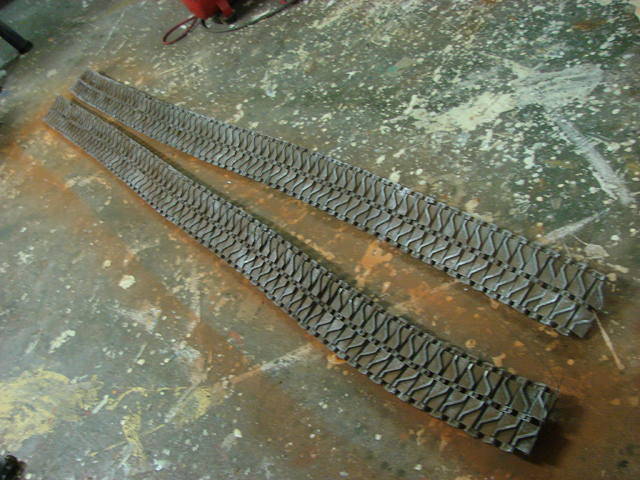
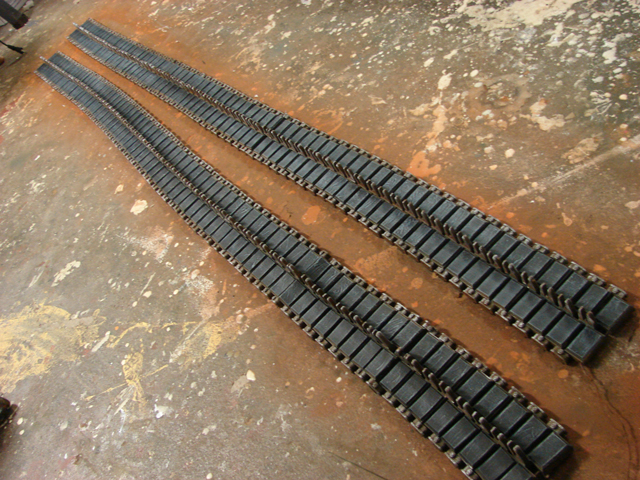
On the real tracks the track’s exterior is steel, and the inner portion is rubber clad. This detail was molded in and painted into the tracks
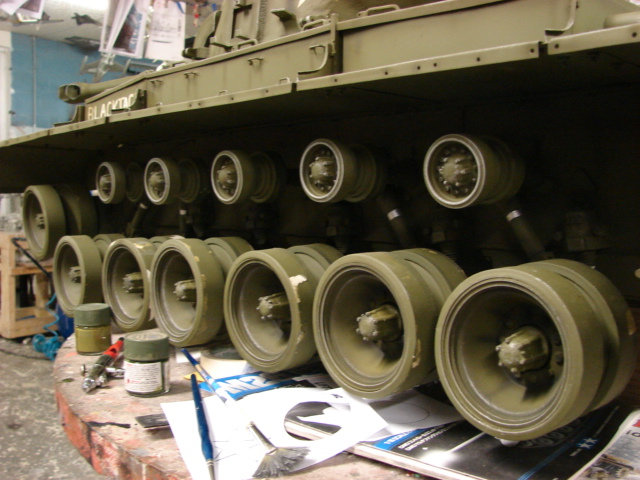
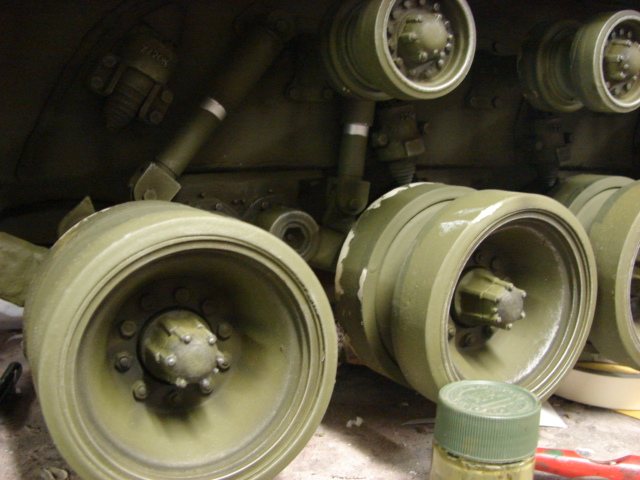
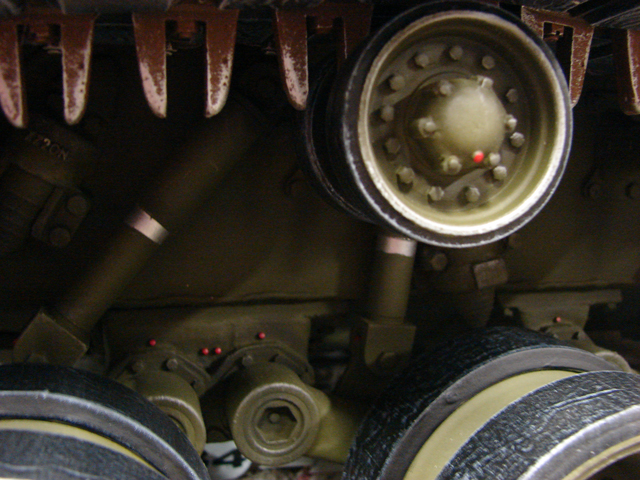
The tank’s road wheels have been painted and weathered. Also all of the grease fittings on the road wheels and suspension were painted in red.
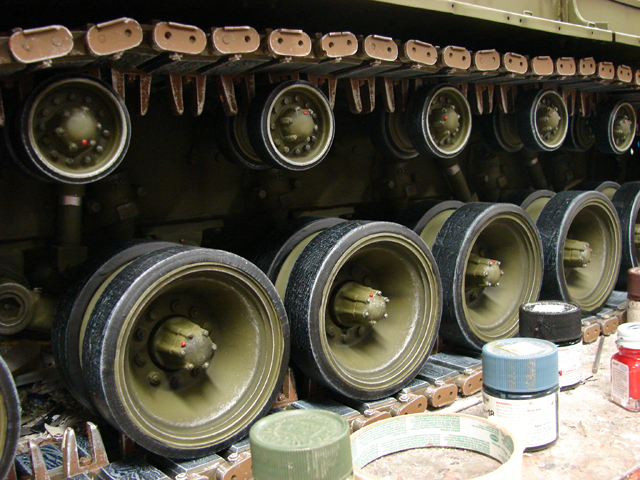
The tank now sits on its own suspension and it’s own weight.
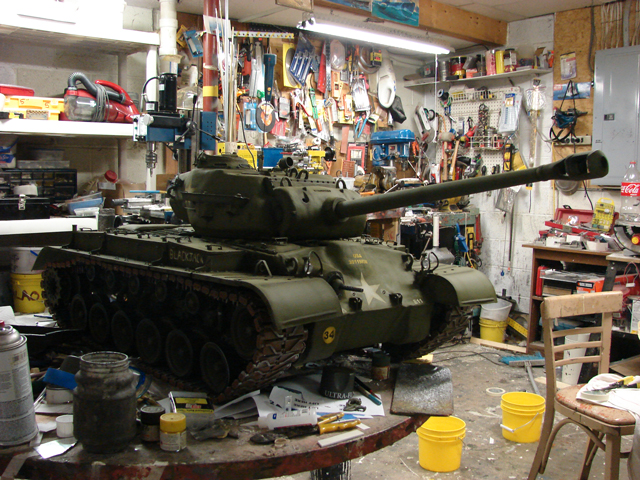
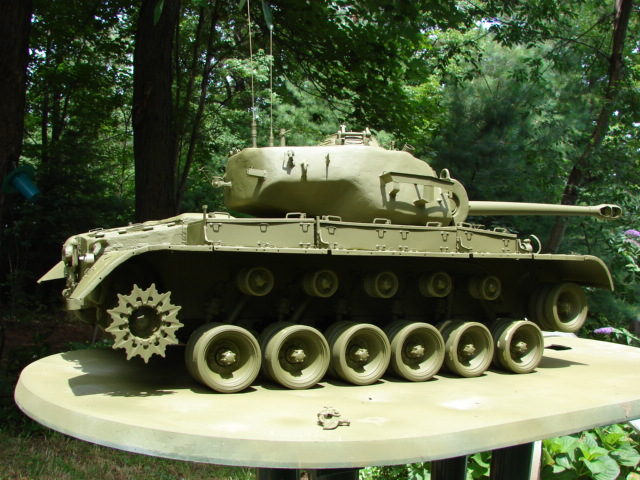
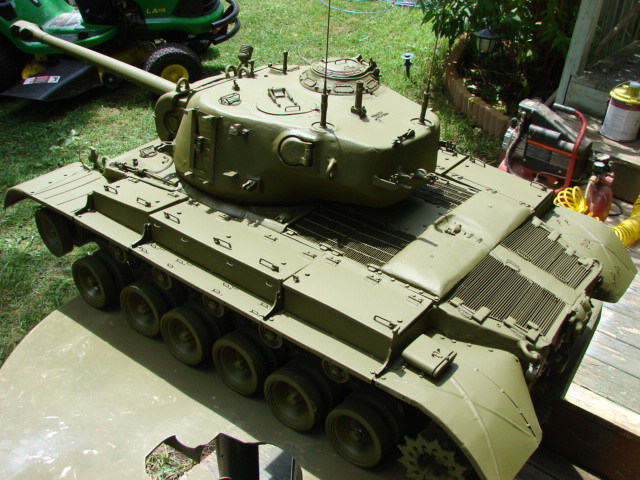
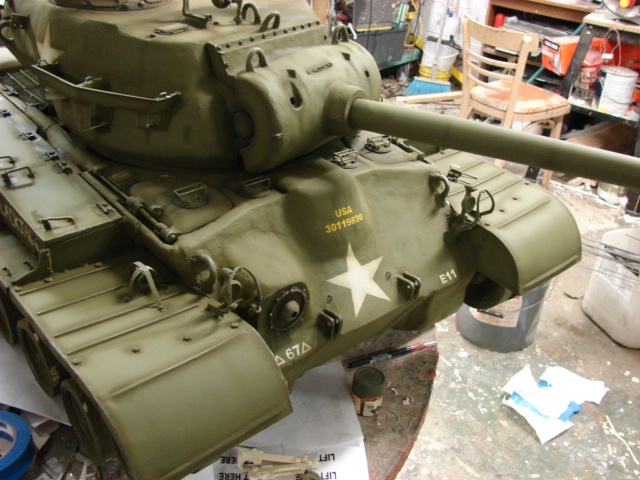
With the tracks out of the way I was able to finish off many of the small paint details.
These would include the red fire extinguisher handle

The commander’s copula periscopes.
The tail lights
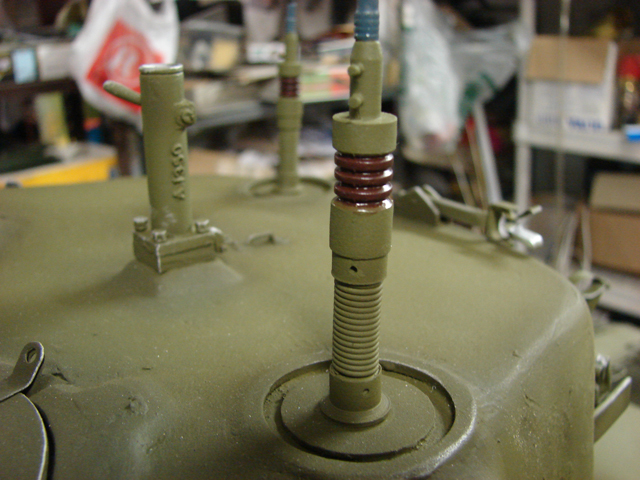
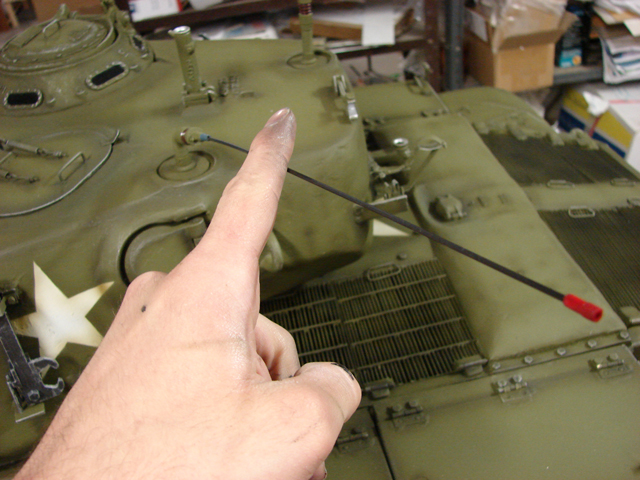
the Mp-48 spring antenna base insulator, and antenna rod.
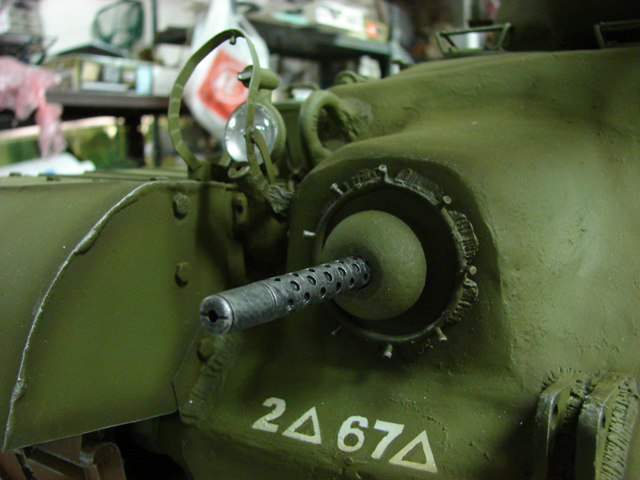
The bow 30.cal MG
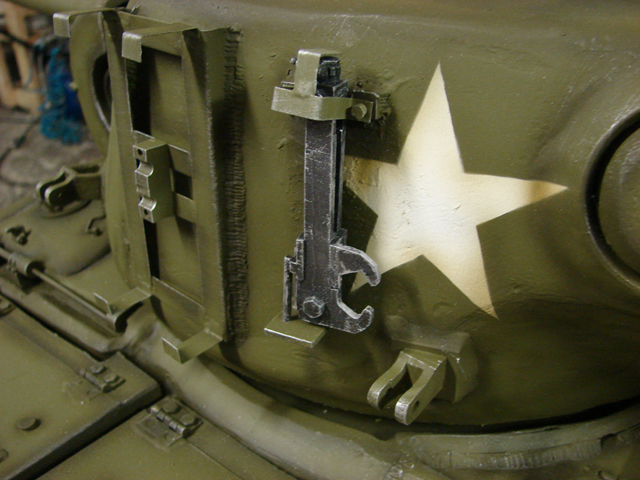
and the track tension ratchets
All that remains now to finish the tank is the spare track, chain work, tools, fuel caps, and the 50.cal. More to come soon.