WOWSERS!!![:D[[t$t]
The “cool factor” is genormous here.
Holy Cow! That is really impressive! I can’t wait to see the final product!
Thanks Guys,
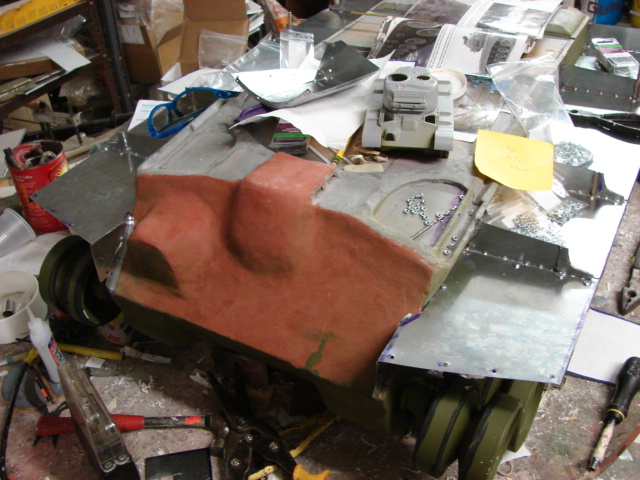
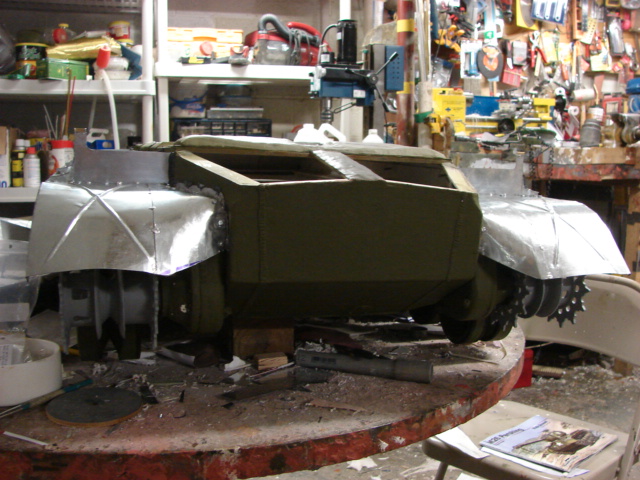
It’s been a while since I had any progress, but I have been working on the tank’s side fenders and fender detail.
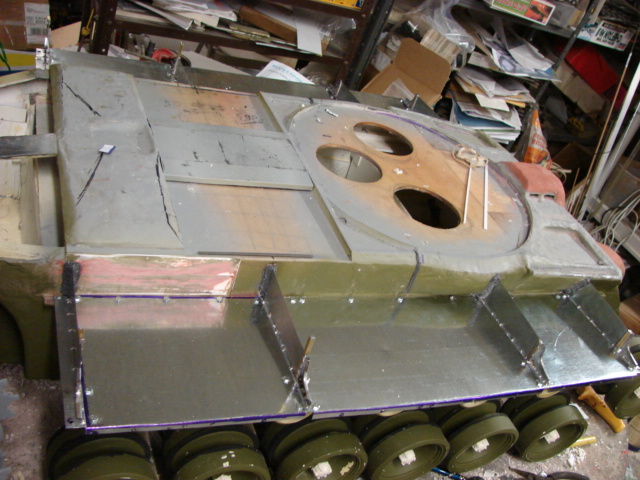
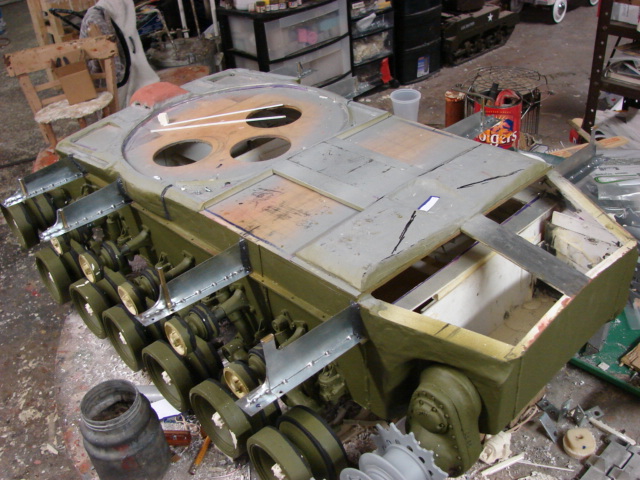
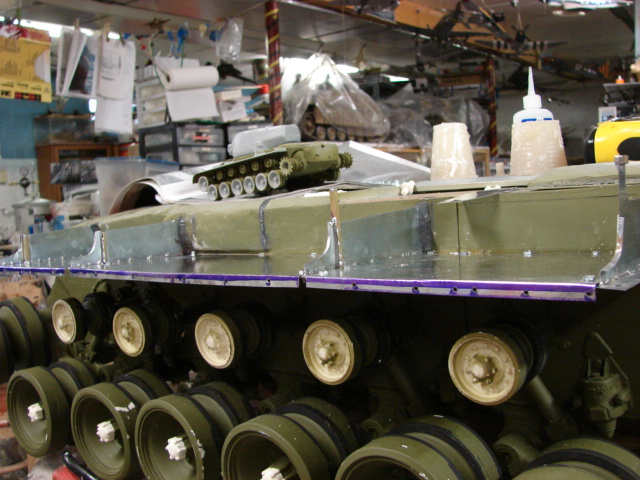
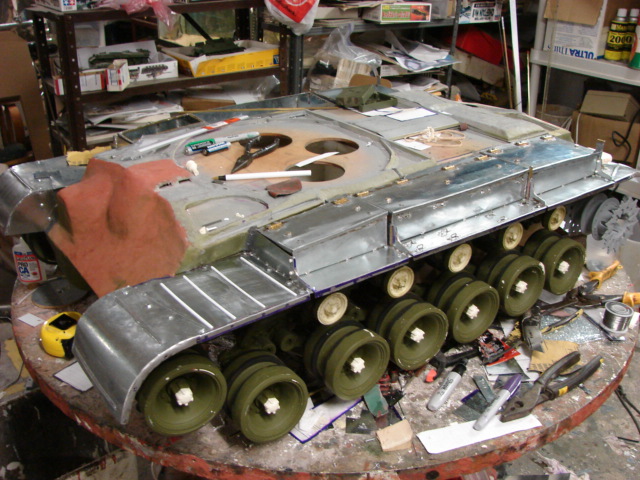
Like most late war tanks (comet, Chaffee, JS2) and post WWII tanks (Patton, M60, Centurion, T55) the M26 has a very elaborate and complex fender / storage container design. Because of this the fenders themselves are going to be a very important focal point.
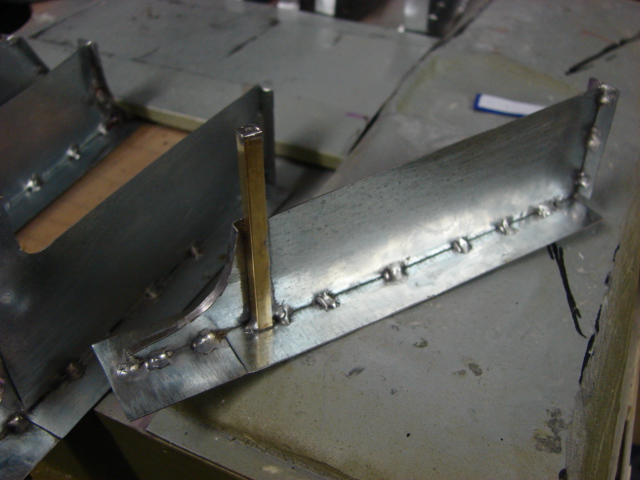
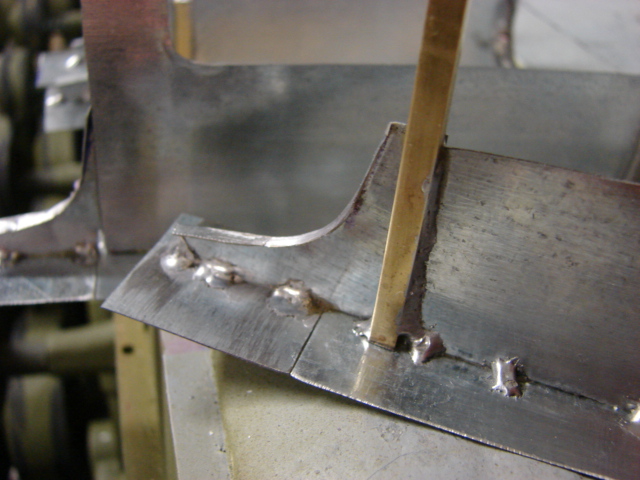
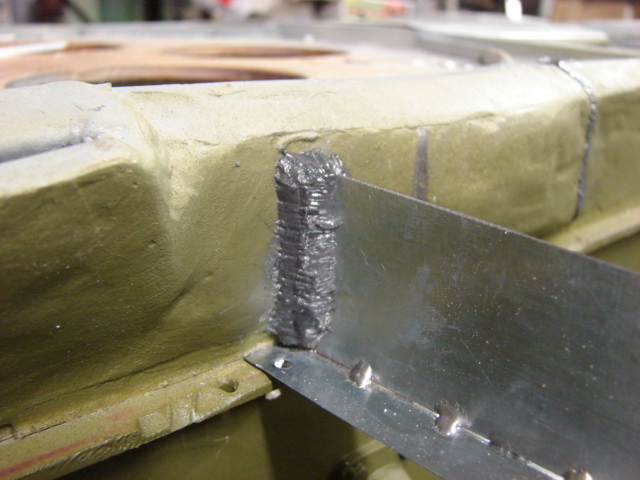
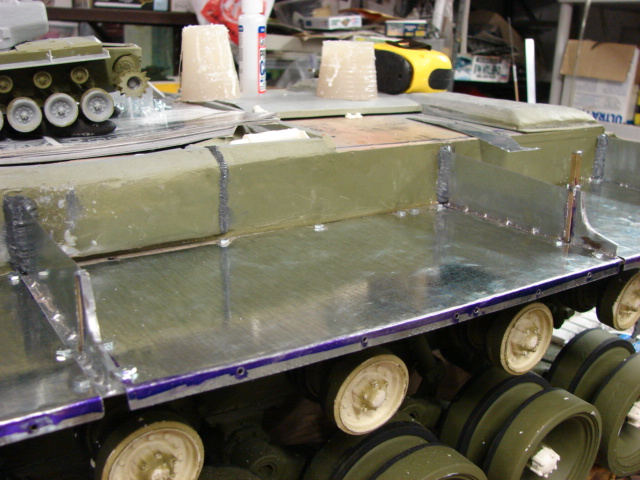
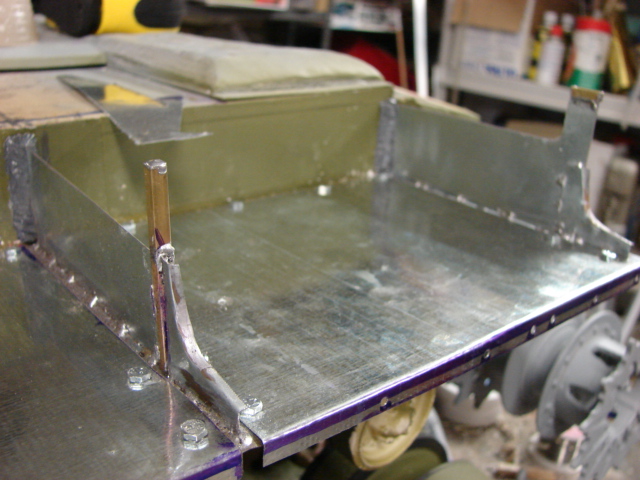
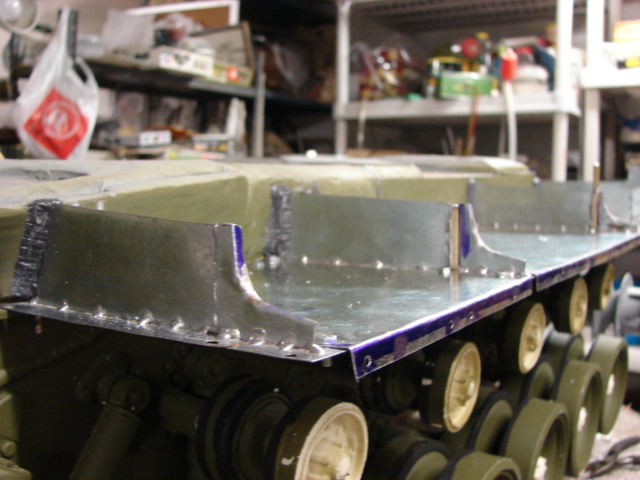
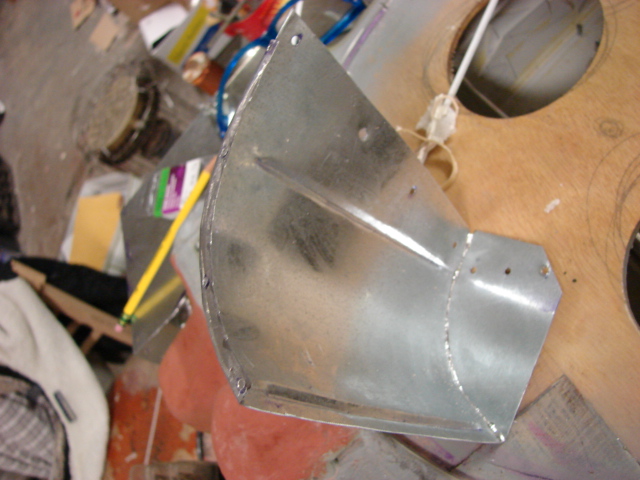
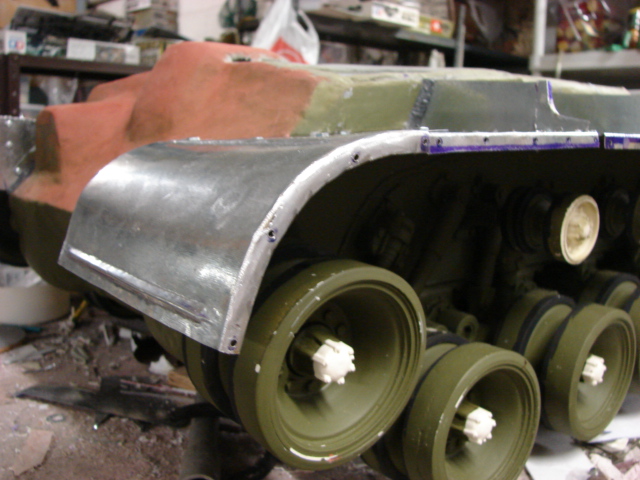
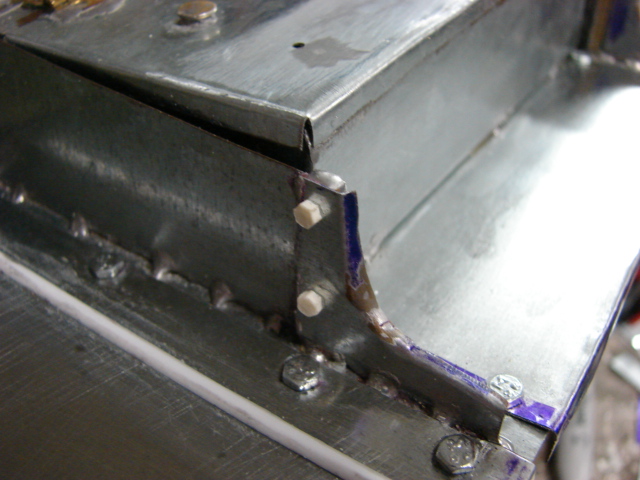
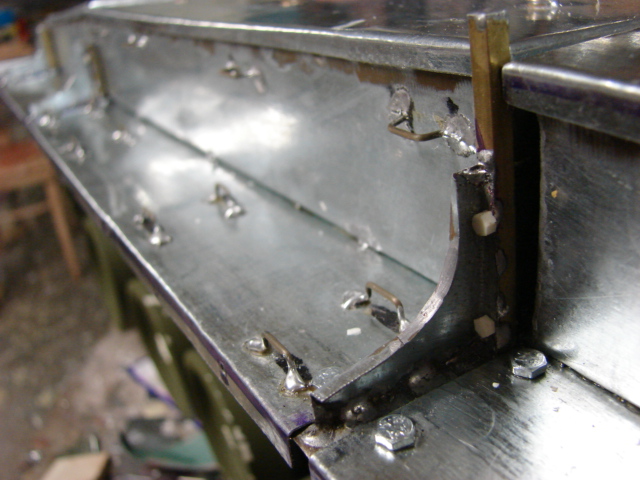
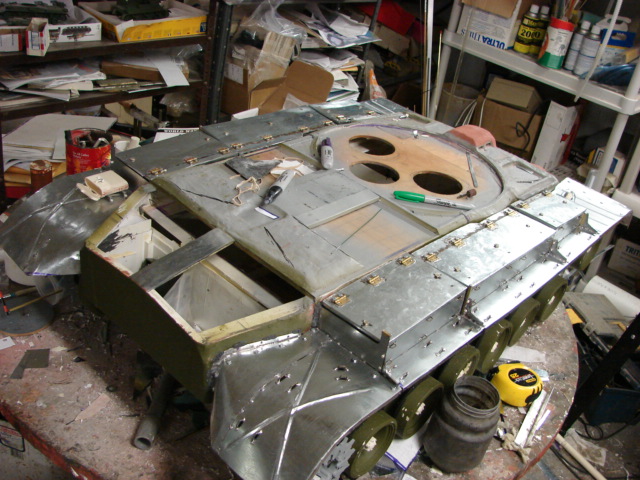
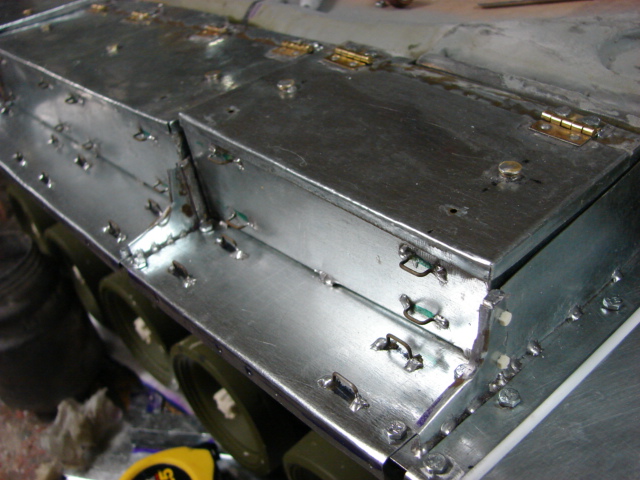
All of the fender components are scratch built and are constructed out of soldered sheet steel and brass. The parts are then mounted to the hull via steel fasteners.
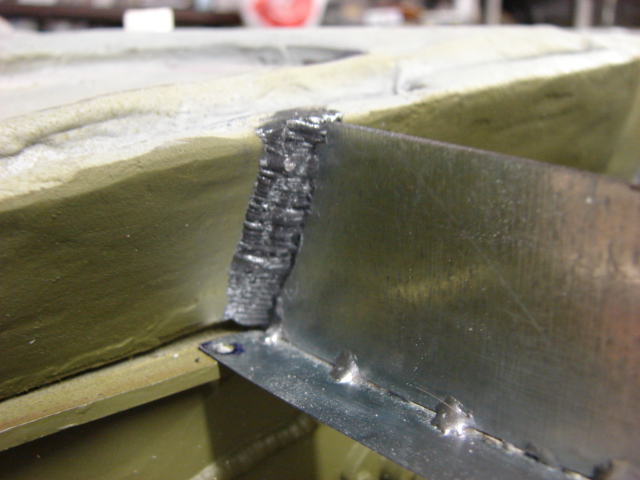
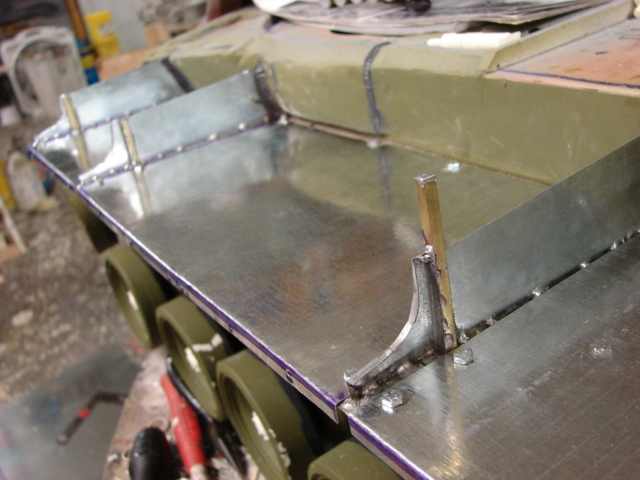
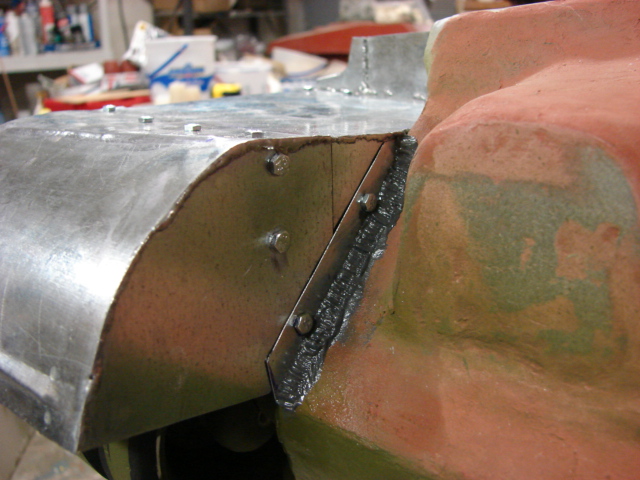
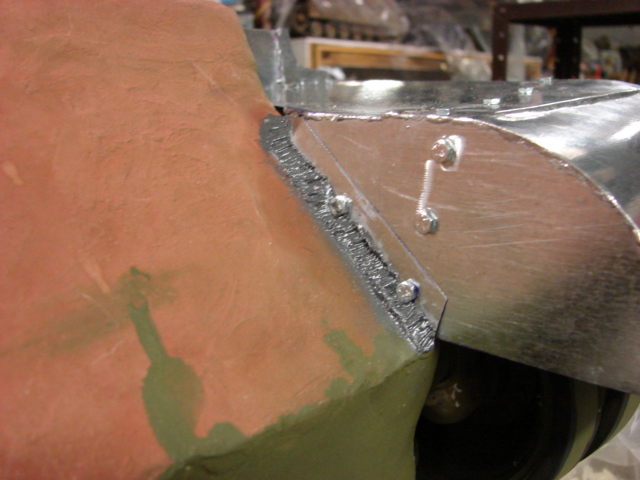
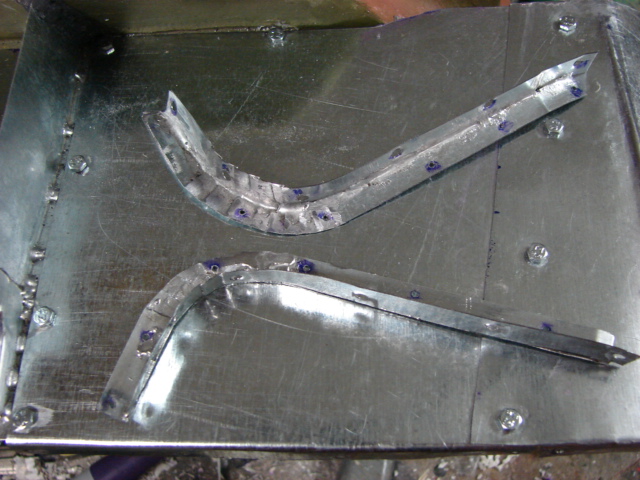
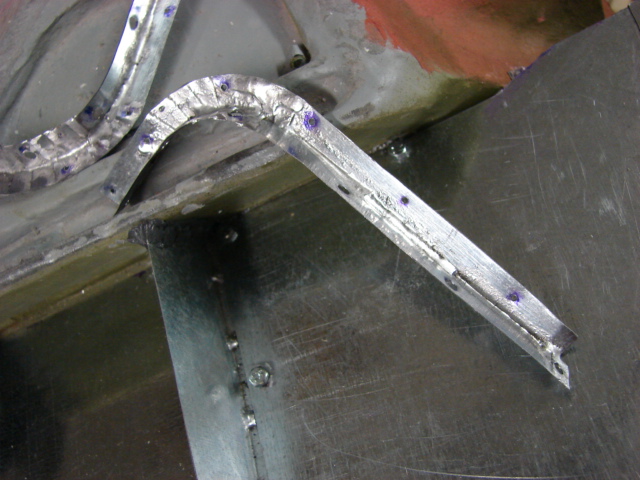
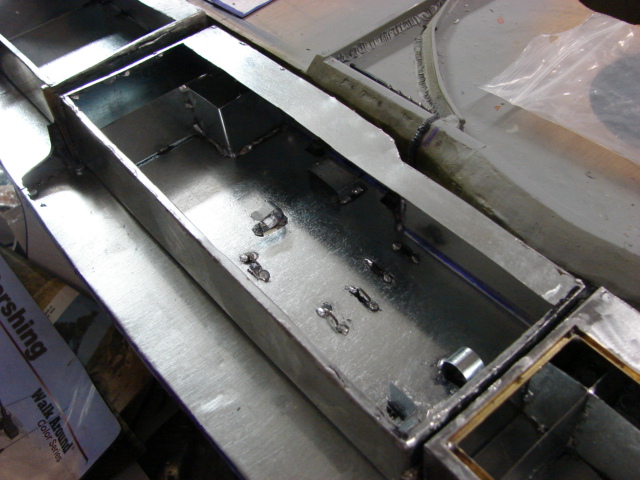
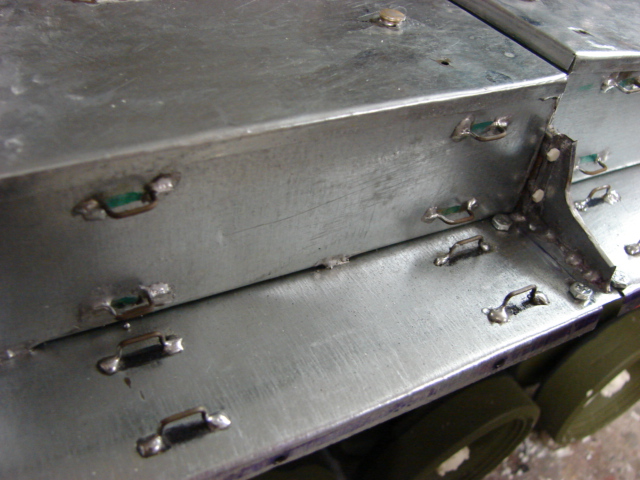
The part of the fenders that was constructed first were the fender support / mount arms. The arms feature the correct “spot weld” seams that are present on the real vehicle. The arms were first attached to the hull with fasteners and glues. Epoxy was then added on top of the fasteners giving the arm more strength, and covering the fasteners with accurate weld seam detail. Small resin hex heads will be added to all of the corner extender points, but this will be after all of the sheet metal fabrication is completed.
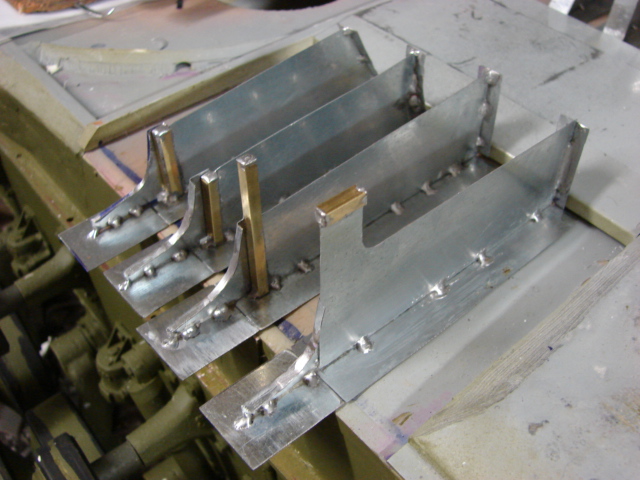
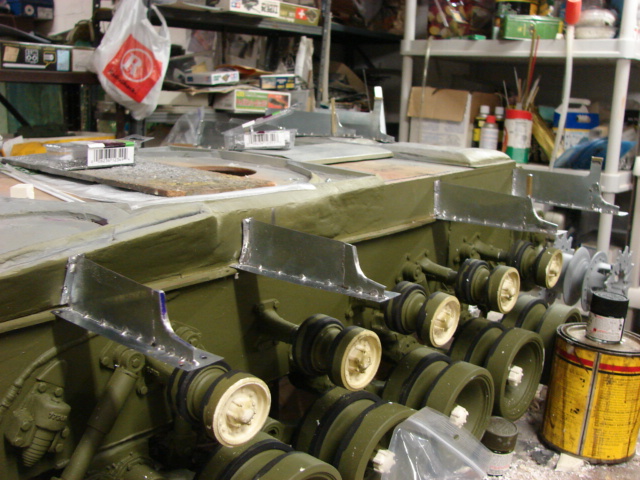
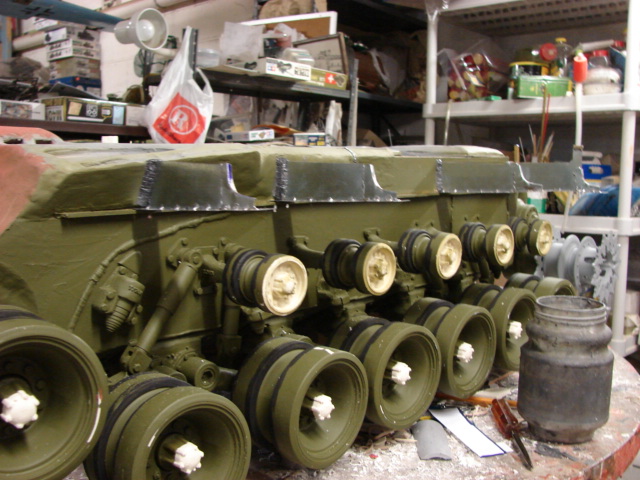
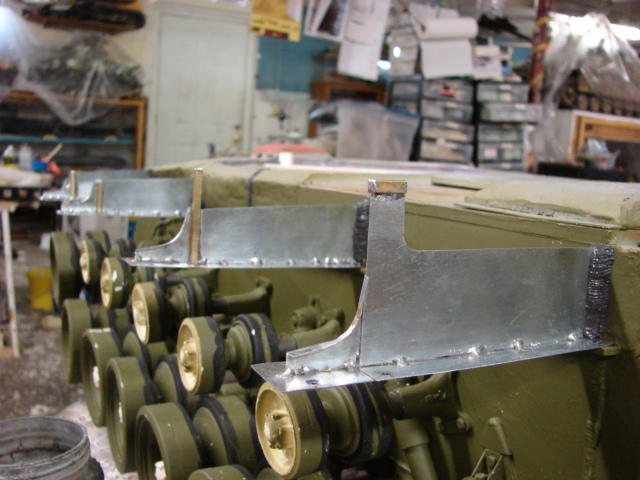
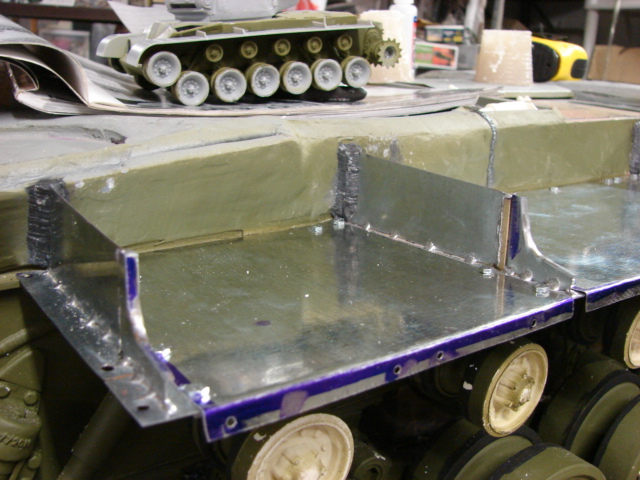
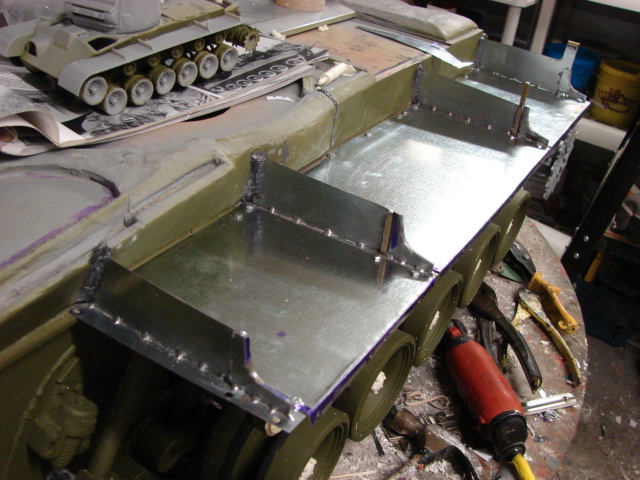
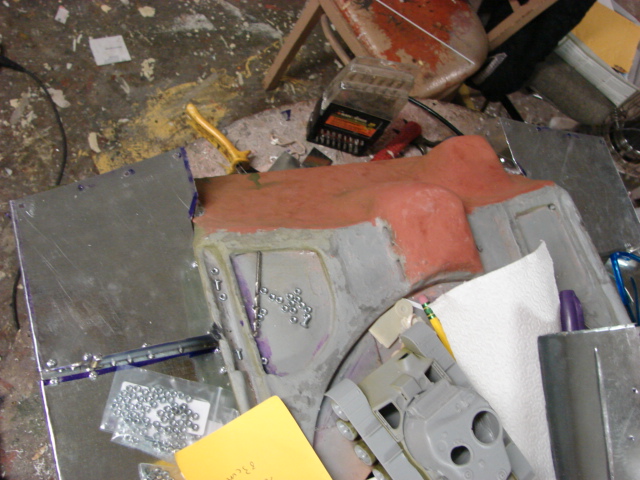
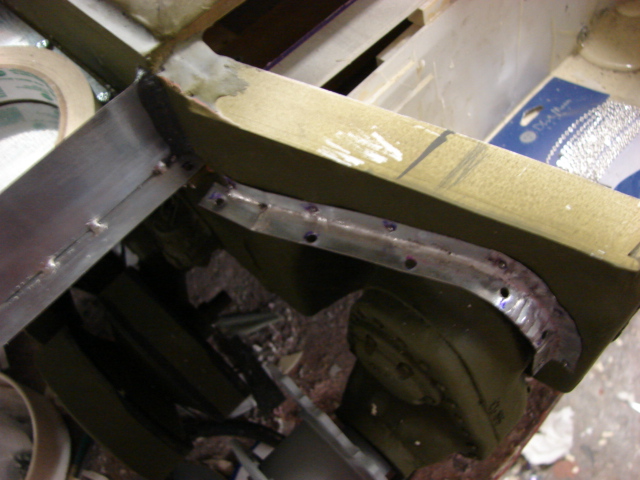
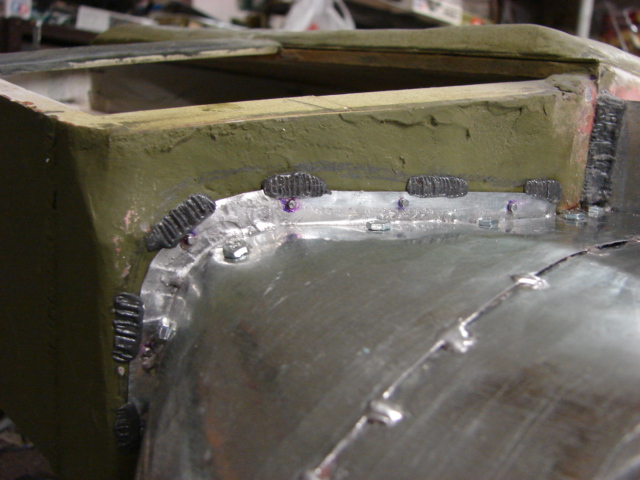
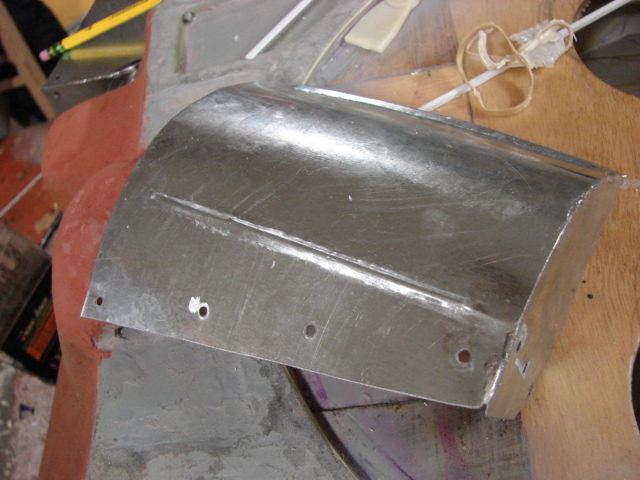
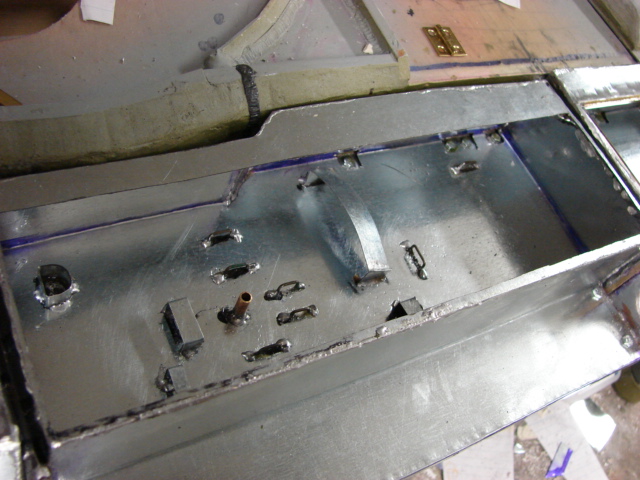
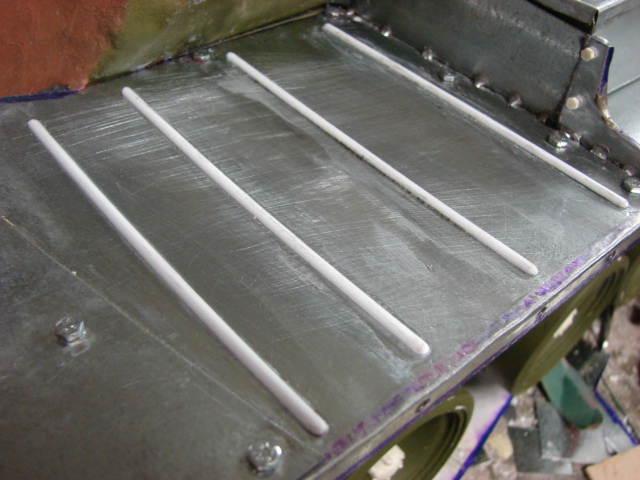
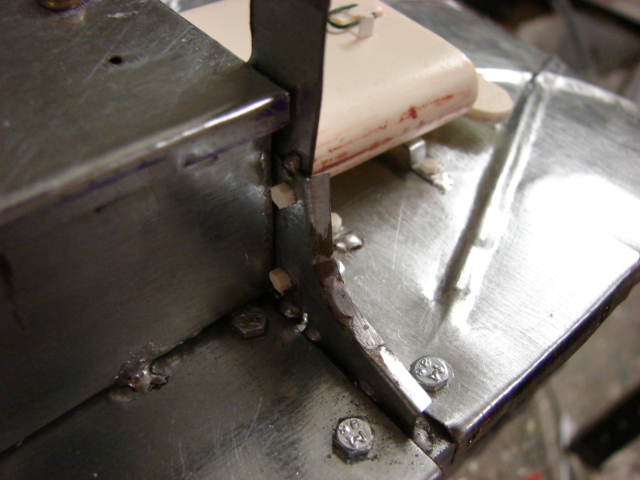
The sheet metal fender panels where then cut, shaped and mounted to the suspending arms. The panels themselves have the side skirt mounting holes drilled into them. The tank’s functional storage boxes will be fabricated and soldered directly onto these panels once they are complete.
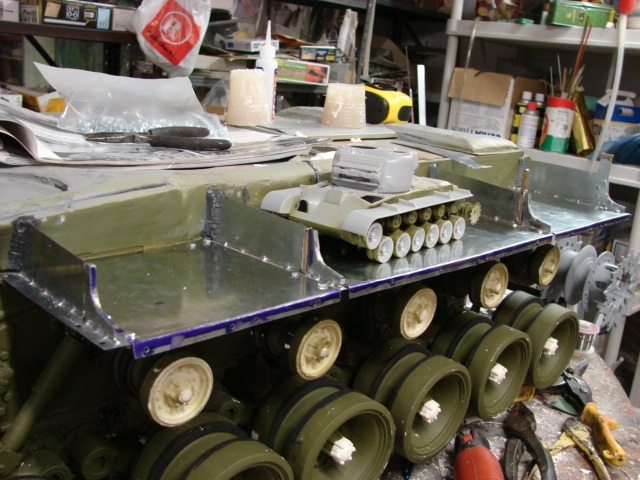

The next fender parts that need to be created will be the front two fenders and the front and rear mud flaps. Once they are complete it will then be off to the fender storage boxes! More info to come
I think we have long ago exhausted the superlatives, so I’ll stick with WOW! I am really enjoying watching this one come to life!
Chris
[dto:]
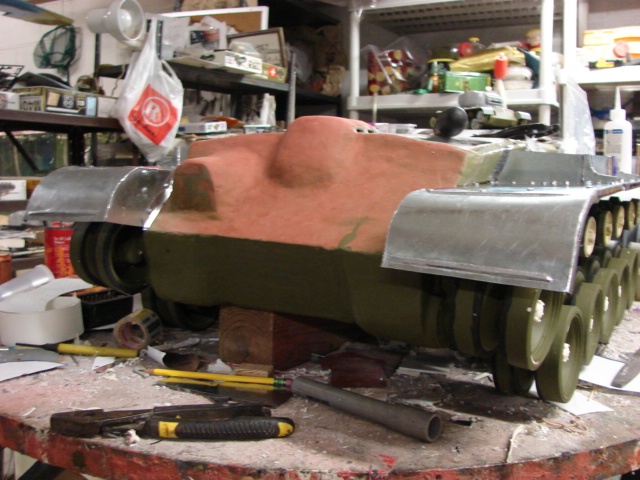
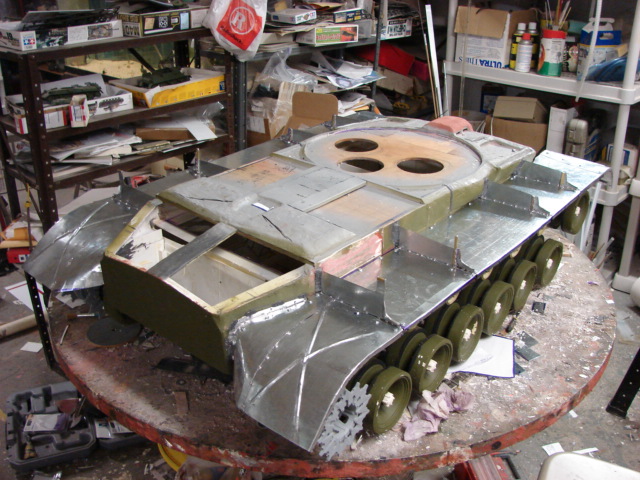
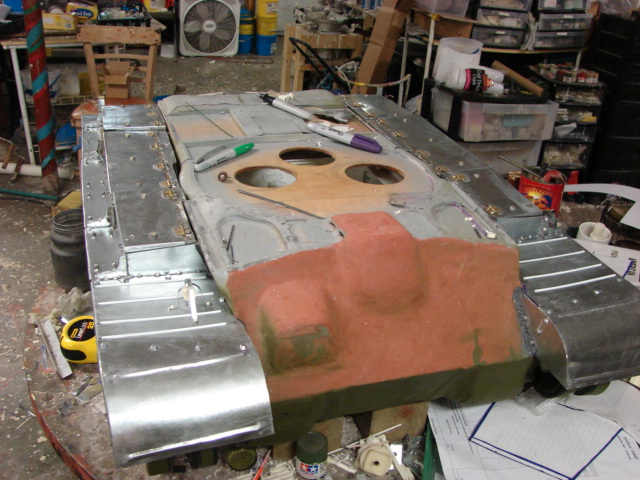
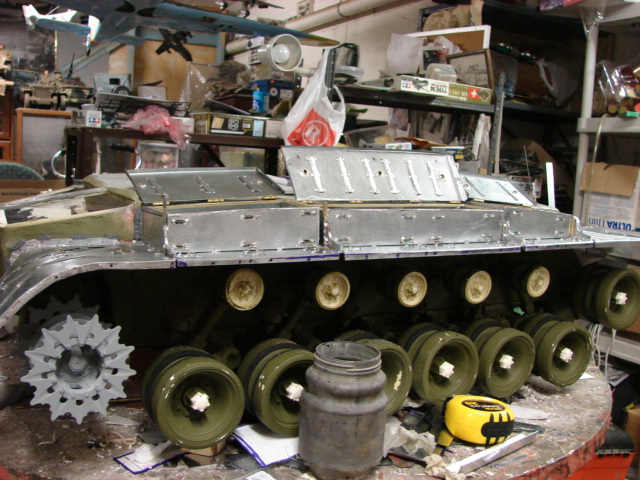
Thanks Guys, I have made some more progress on the tank’s fenders and completed the mud flaps. The tank now has its width complete.
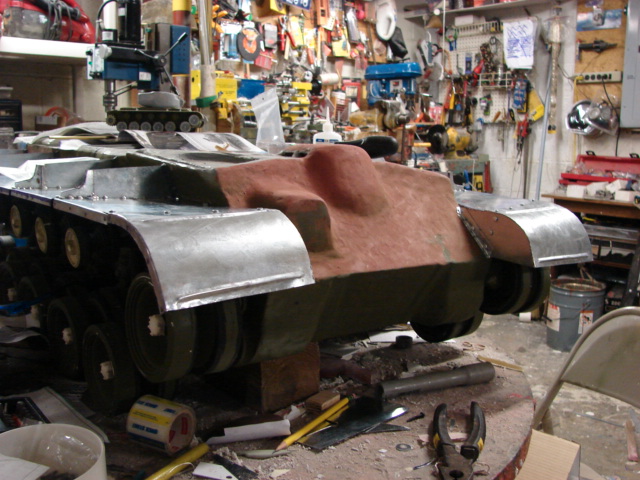
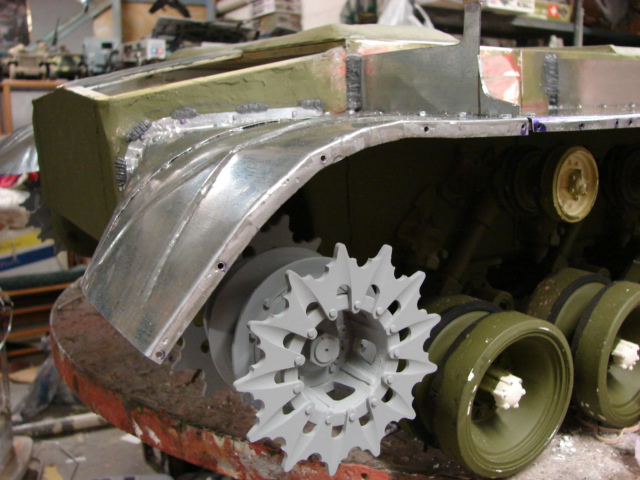
The tank’s front fenders were completed first. Unlike the other panels that are simple straight panels of steel the front portions bend inward and overhang the front armored plate. The panel’s corners also angle outward from the tank. These panels will also receive 3 stiffener crimps. These crimps will be created out of half round styrene and will be added later.
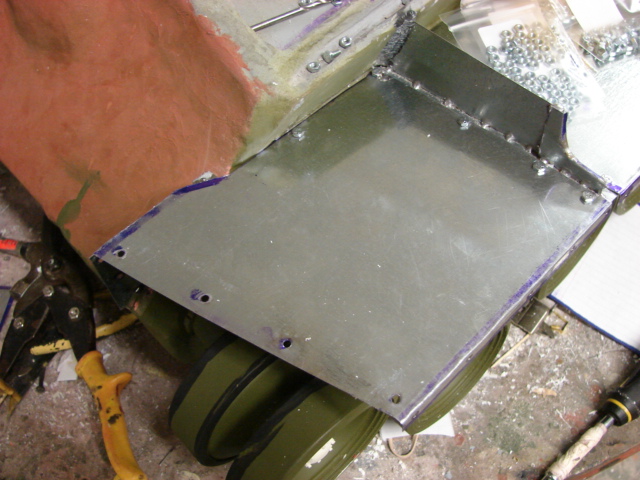
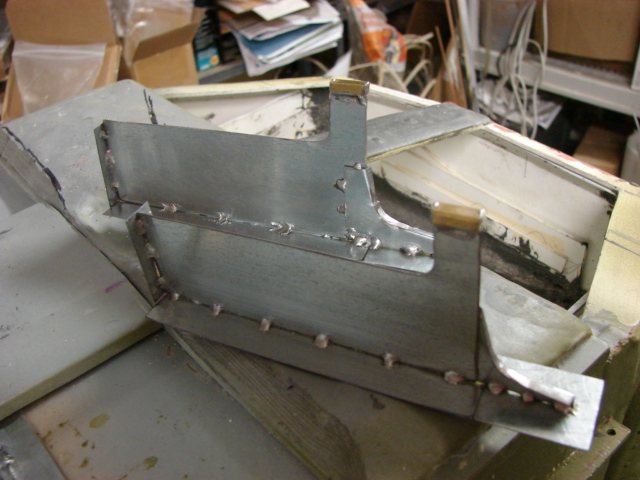
To mount the tank’s front and rear mud flaps to the tank, I had to fabricate the mud flap mounts. The mud flap mounts were installed to the tank with small fasteners and have epoxy weld bead detail added to them
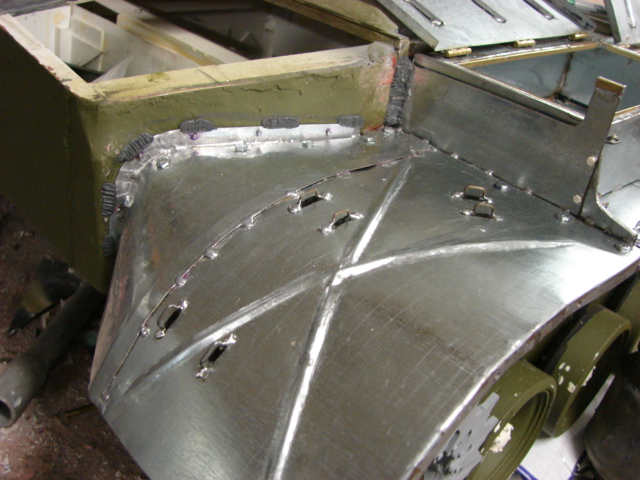
The tank’s rear mud flap mount was particularly difficult to fabricate.


Like the rest of the tank’s fender components the mud flaps are created out of sheet steel. the mud flaps feature real pressed stiffener crimps. The mud flaps attach to these panels via fasteners.
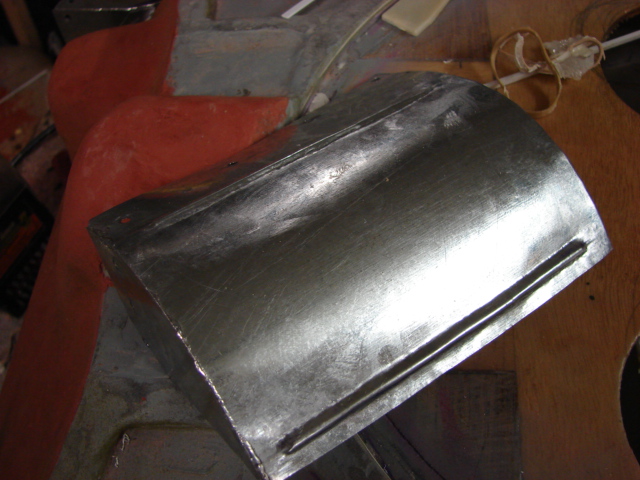
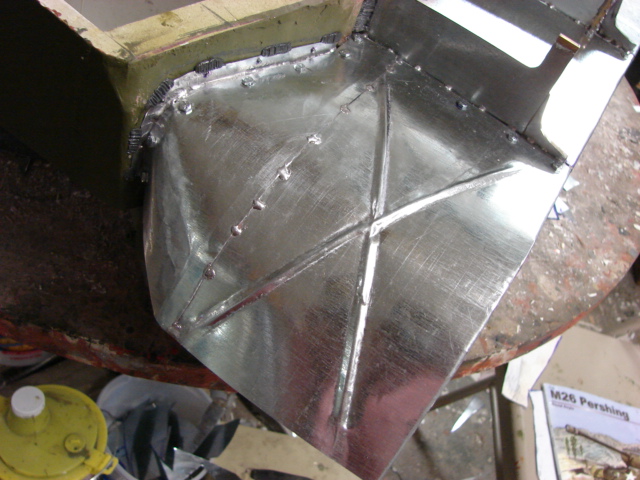
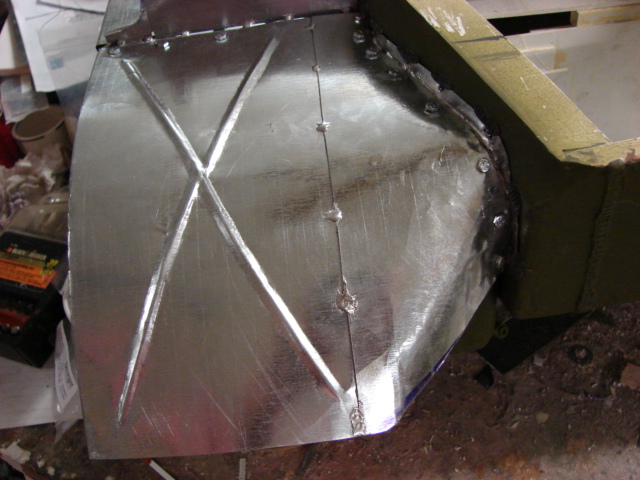
The tank’s rear fenders were very complex to fabricate, I added the distinctive X crimp. The part of the fender that connects to the tank’s hull had to be sculpted out of sheet metal. On the later M26A1 and M46, large turn buckles were added to the front and rear portions to the tank’s fenders. These were not present on the early production zebra T26.
The tank’s storage lockers will be next followed by the tank’s turret! More info to come.
WOW that is really looking great!!! Your attention to detail is amazing!!![:D[
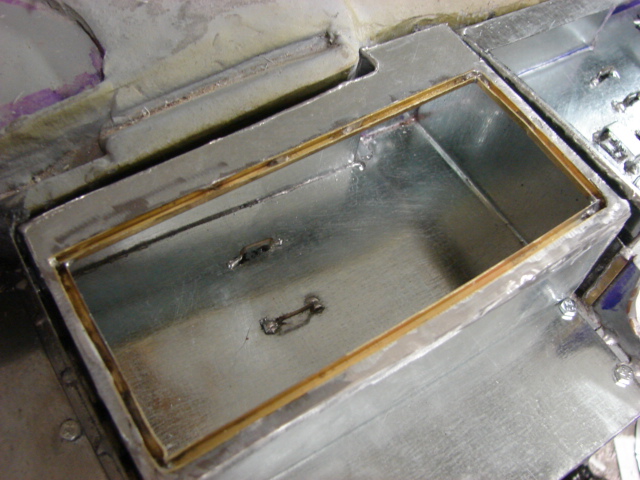
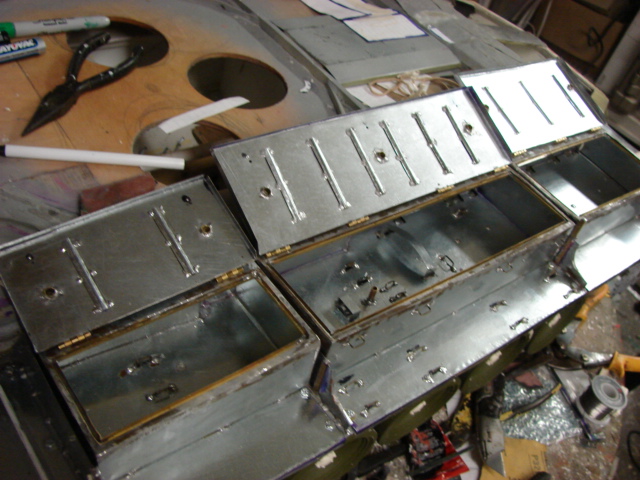
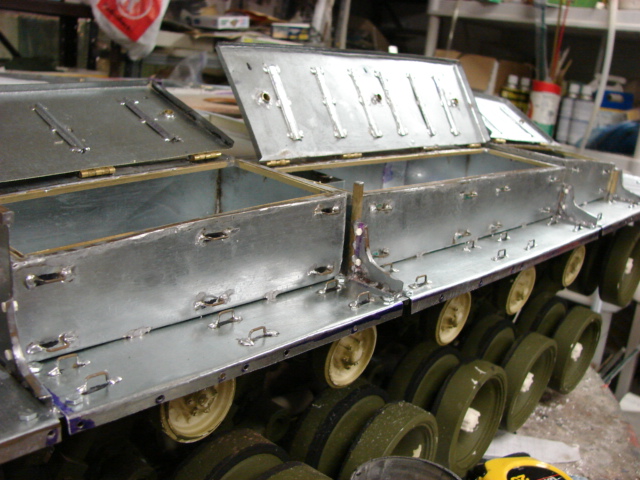
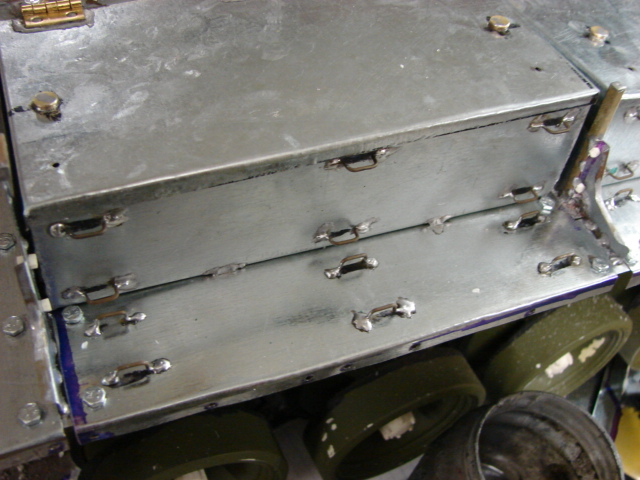
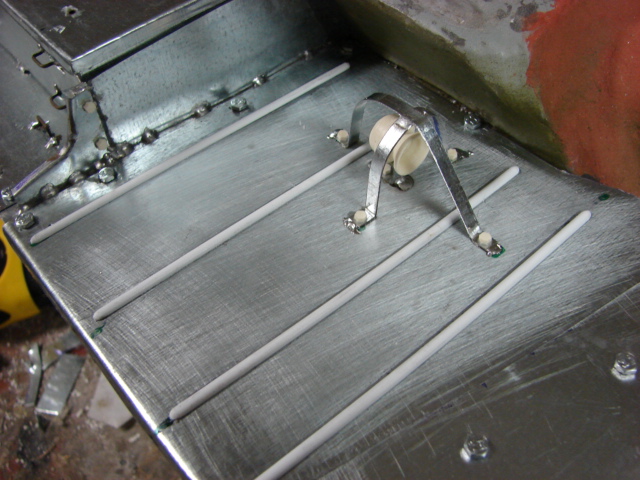
As a quick update I have created the sheet metal fender boxes. The fender box interior tool posts have been created and added. The boxes are all sheet metal construction. The tool boxes have a gutter that runs around the edges of the box interior. The gutters are fabricated out of a 1/8th inch brass channel that is soldered into place. I have completed 3 of the gutters, but I ran out of brass stock and have to place the boxes on hold until I can resupply [:@].
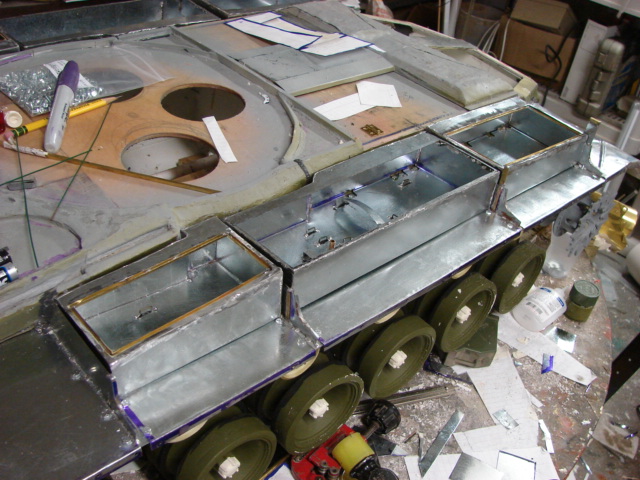
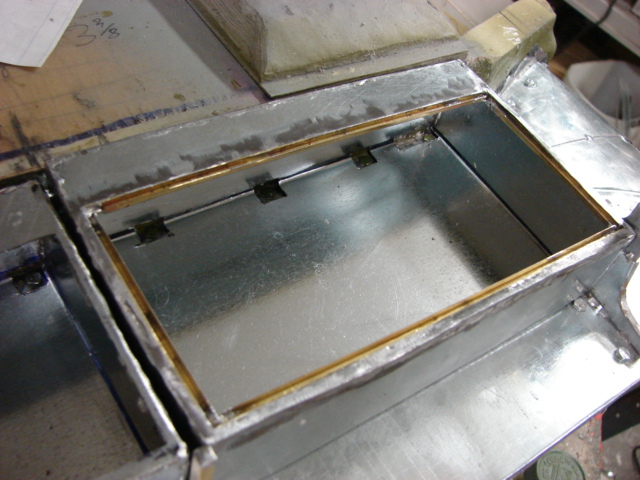
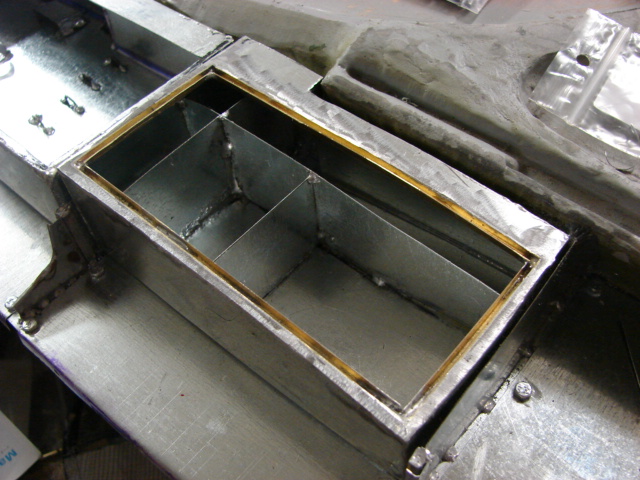
Once the gutters are complete, the box lids and lid details will be constructed thus finishing off the boxes and fender details.
[:D[[t$t]
And your family moved out when?? I’ve heard of big projects but this is too much. Even those model rocket nuts out west can at least fly their projects 2-3 miles up. You should restore the real deal for a museum…in Europe.
I have completed 1/2 of the tank’s fenders.
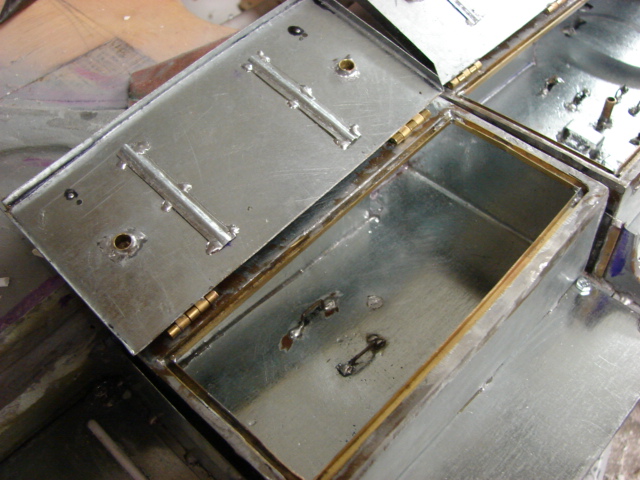
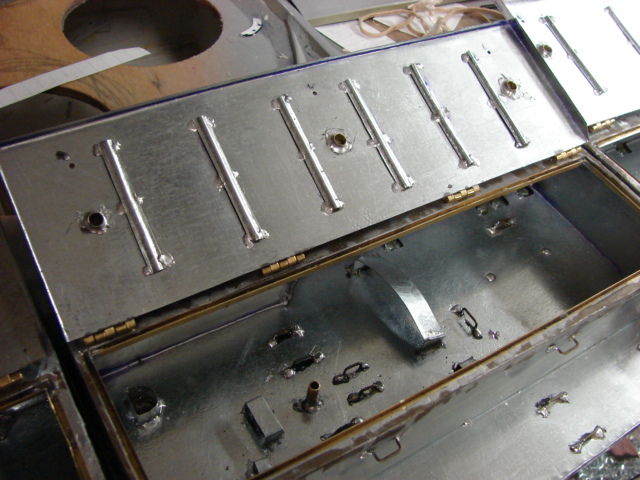
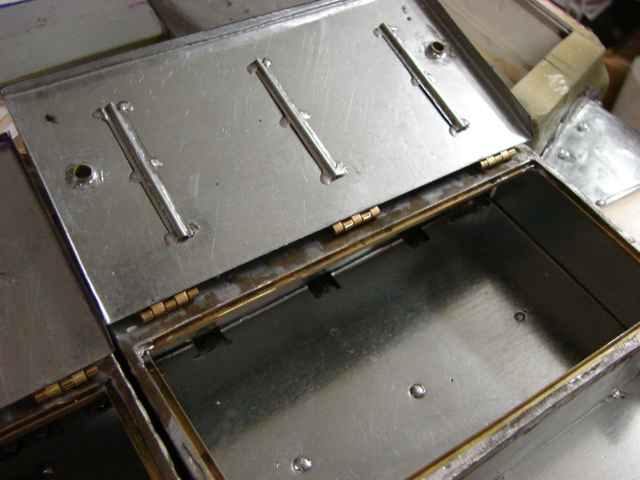
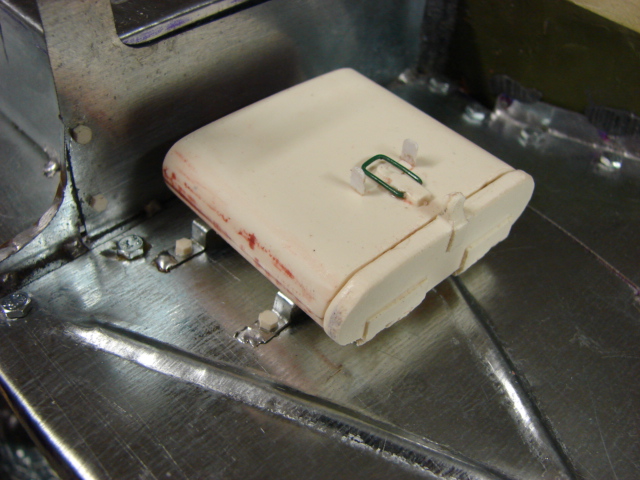
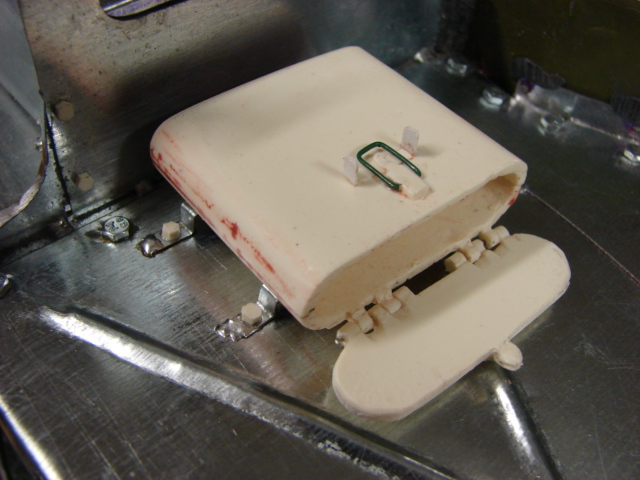
The storage boxes have been completed with the exception of the working latch handles which will be casted in resin shortly. The storage box lids are also all brass / steel construction and all components are soldered together.
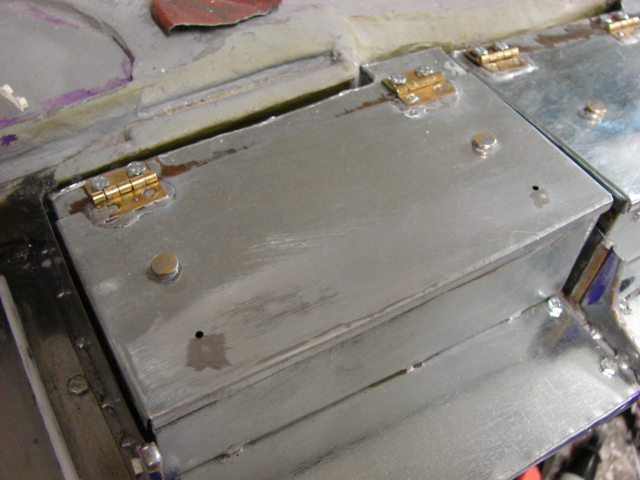
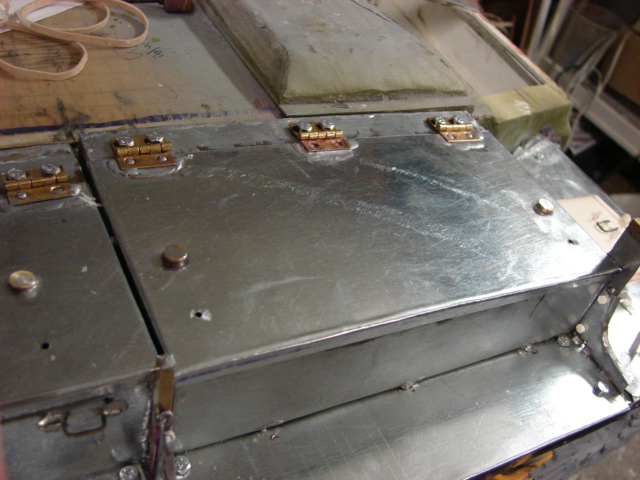
The storage container inner lids feature the ridgidity straps and the condensation vent details.

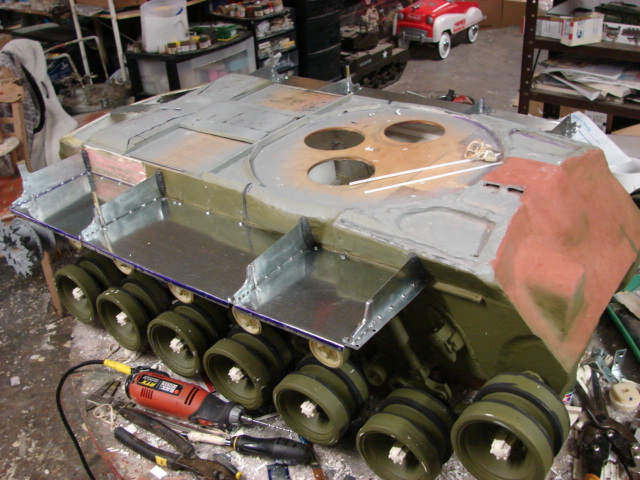
The remaining fender details were added. These would include the rear armored first aid kit container, front fender rigidity crimps, and fender tip hex bolt head details
I will now focus on the fender details on the tank’s other side. Once that is wrapped up I can finally start on the turret
Beautiful work mate!!! REALLYYYY looking forward to seeing that turret build and installation!!![t$t]
Just a quick update, I completed the tank’s right side fenders. With these out of the way
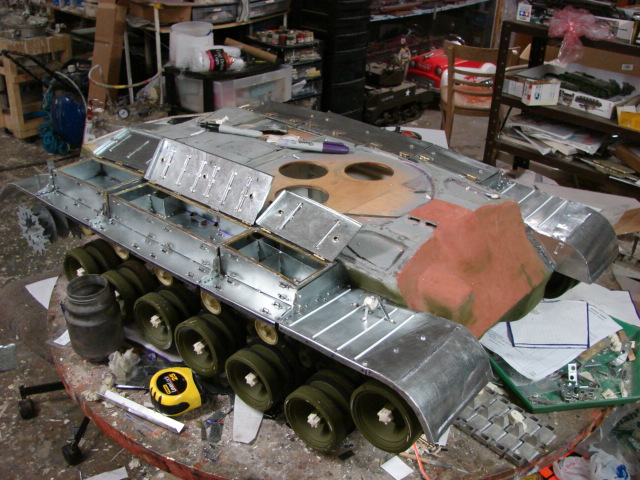
The tank’s sheet metal work is now complete. Now that the tin work is completed I can say that this tank has had the most complex and intricate sheet metal work of any of the 1/6th scale tanks that I have built second only to the BRA Jag (which is all sheet metal construction).
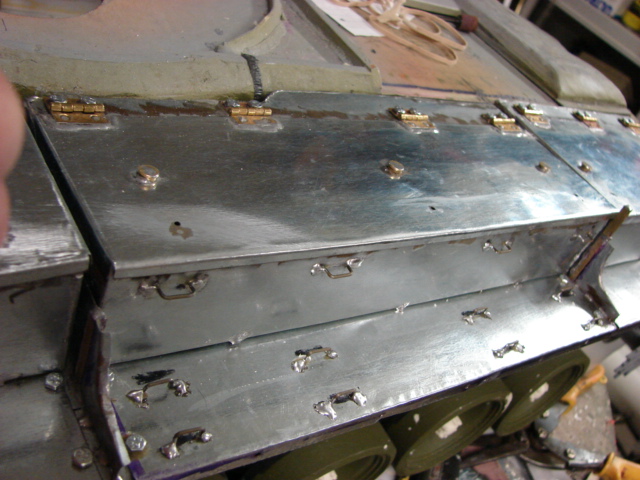
The right hand fender boxes were completed and mounted to the fenders. The right hand side boxes and fenders have numerous foot loops soldered to the boxes and to the fenders.

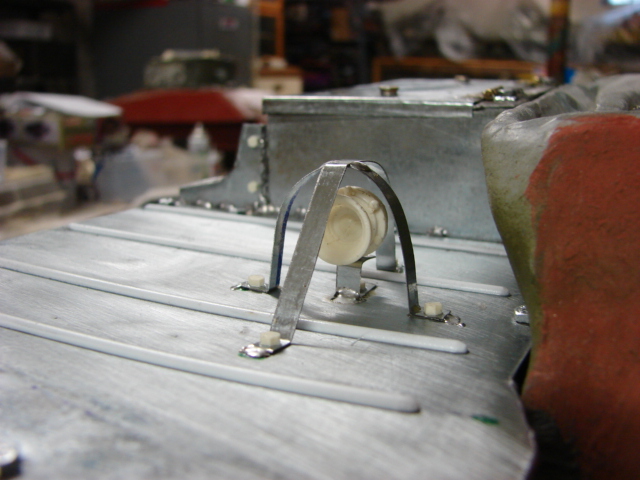
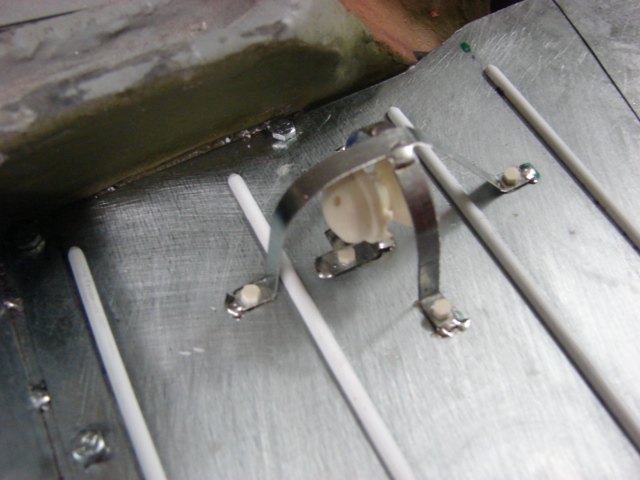
The tank’s front horn and brush were also added to the tank. The horn’s power cord will be added along with the head lights later.
It is now off to the tank’s 90mm turret! More progress to come
I keep saying it, WOW!!! Really looking forward to seeing the turret coming to life as well!!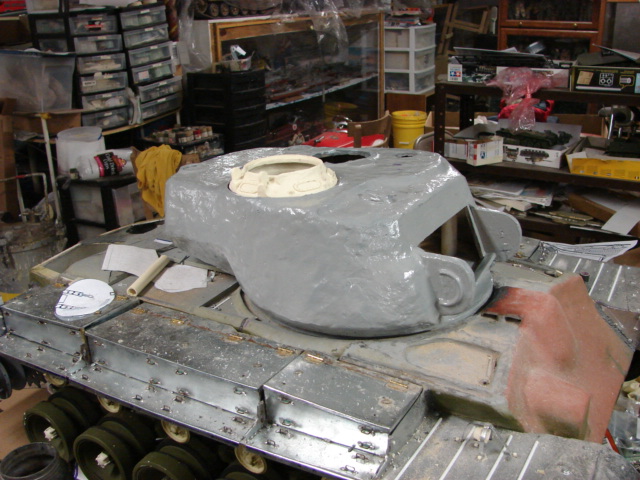
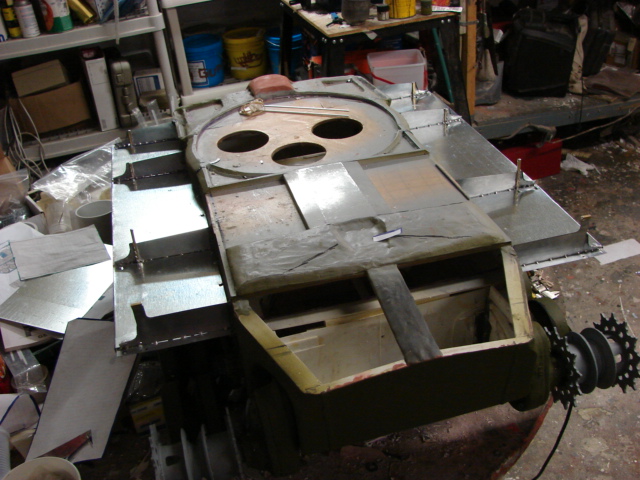
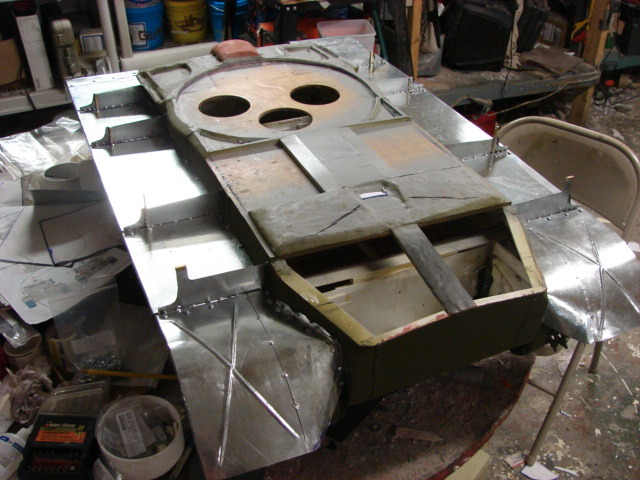
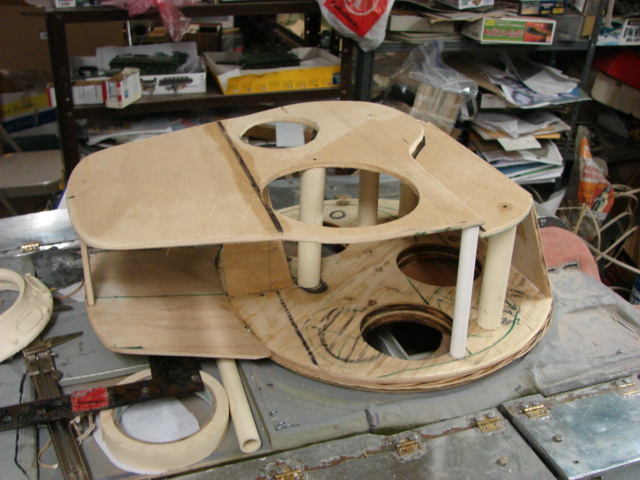
The tank’s turret is fabricated out of a 1/4 inch plywood skeleton. The plywood is then thoroughly coated and soaked with fiberglass resin. The fiberglass resin transforms the wood to plastic.
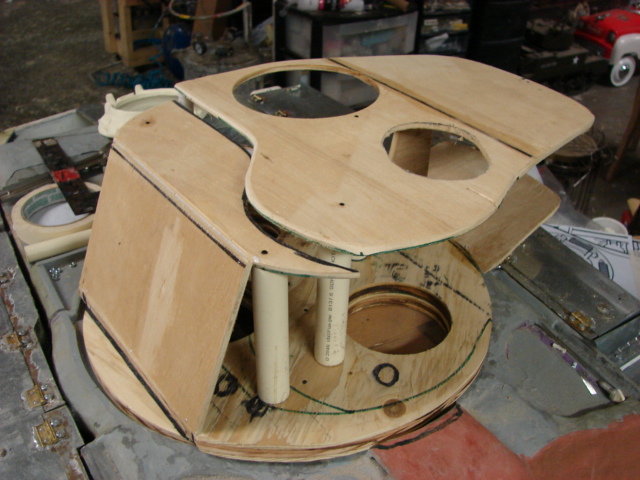
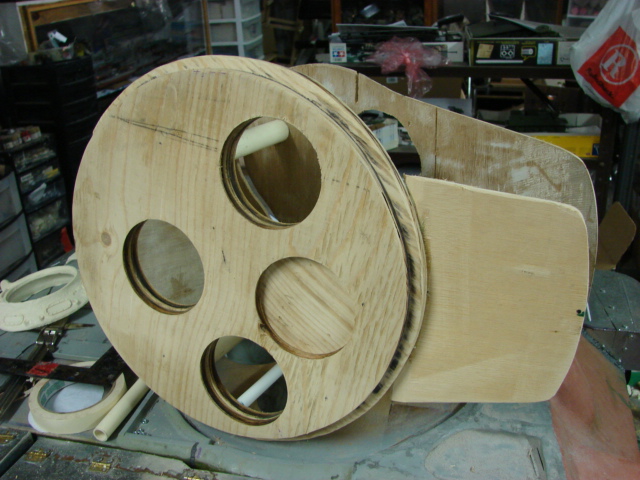
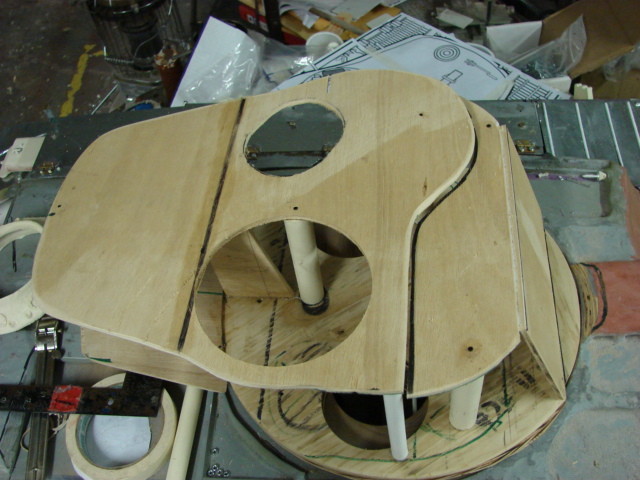
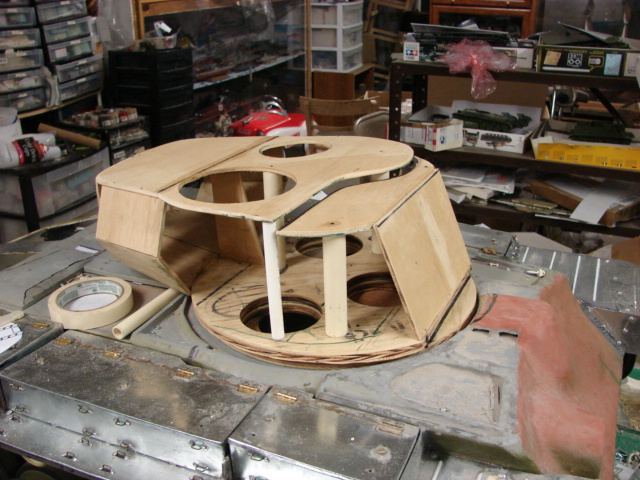
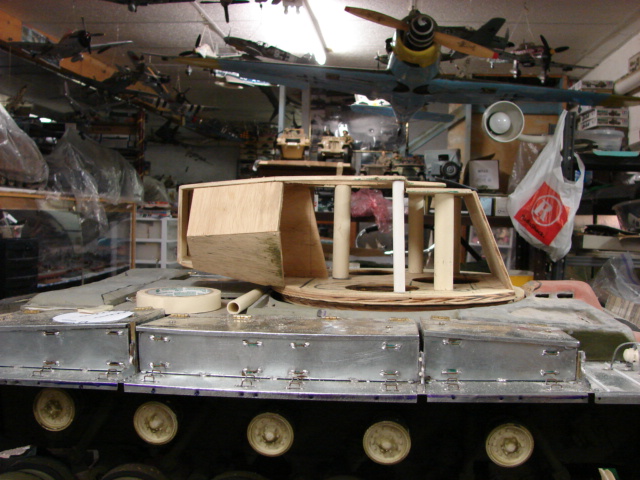
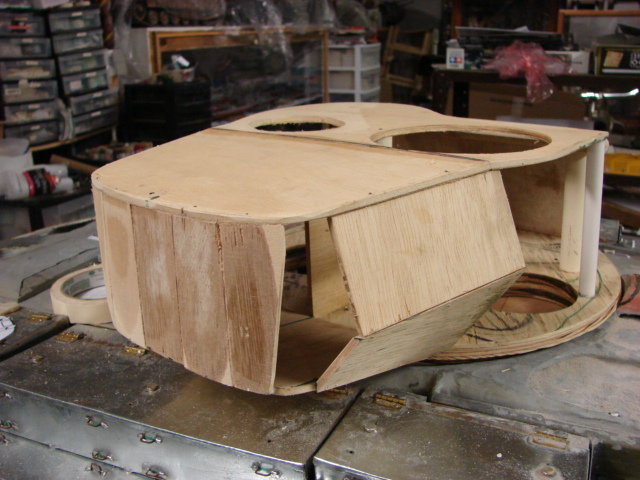
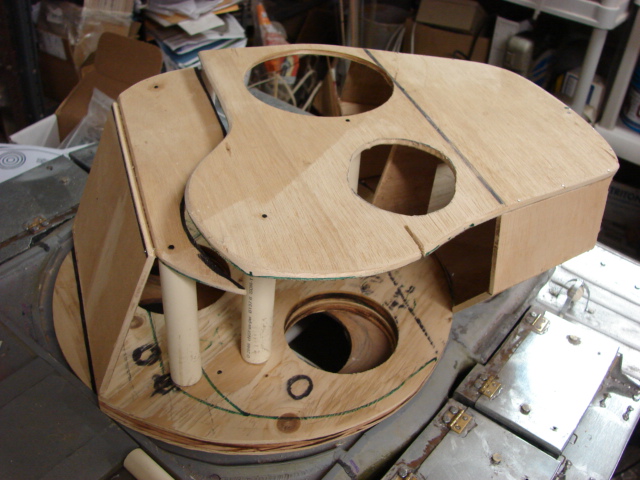
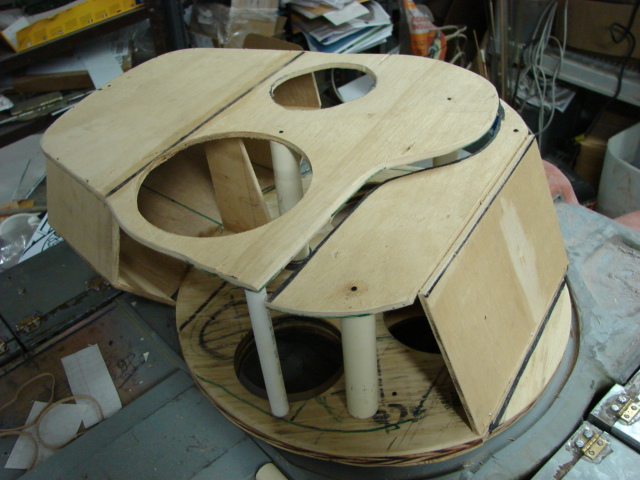
The turret’s basic body work and shape has been completed. The casted in details for the copula, loaders hatch, and other fittings have been “casted” into the turret’s surface.
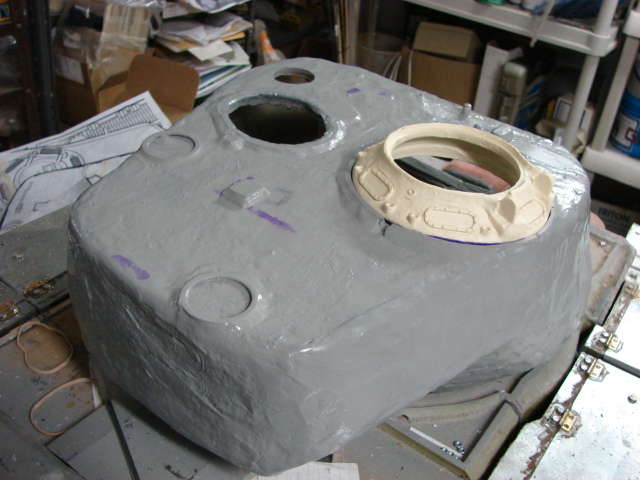
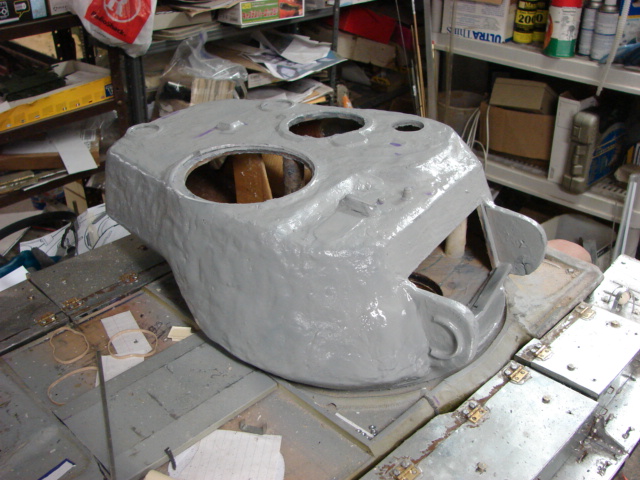
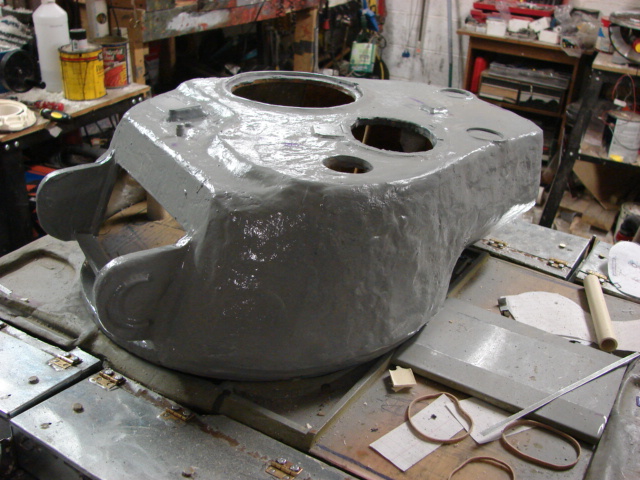
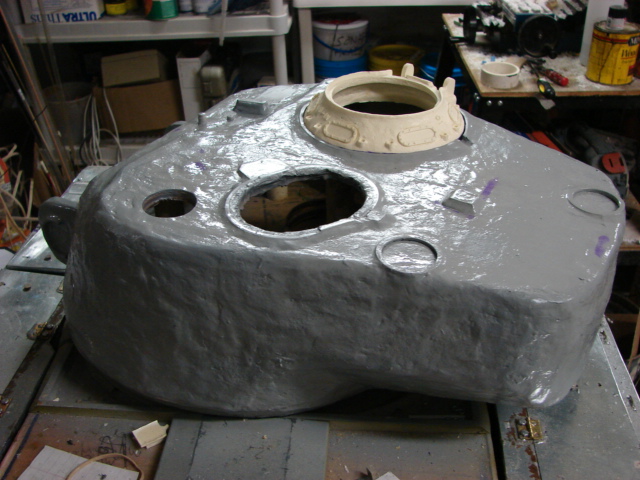
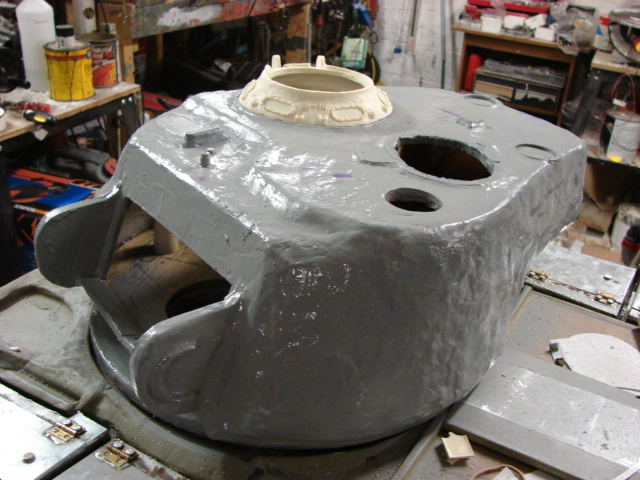
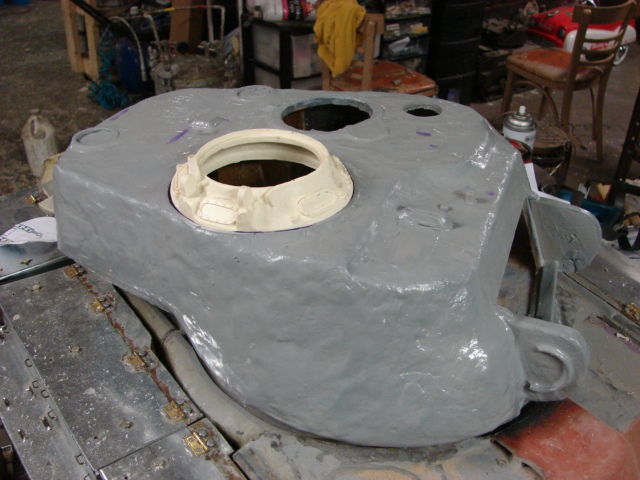
Currently the turret’s surface is far too rough and sanding and filling will be required to finish the turret. The sanding will be the next procedure that I will perform on the model. More info to follow shortly!!
Please use a dust collection system and a good mask when sanding. The particles of debris will be so fine… and we don;t want this project to be your last. How long is it… about 4’ ? And what are you going to do with it?
Thanks for your concern, but I do have a professional dust and particle respirator. This is also not my first 1/6th scale vehicle. I’m building the tank for my own personal 1/6th scale tank collection. Currently I have about 20 of these 1/6th scale tank models. I also have about a dozen or so in the pipeline.
most of my collection is at the following website. http://www.eastcoastarmory.com/battlezone.htm
Very impressive collection mate!!! Stunning detail on all!!! [:D[[:D[[:D[ How long have you been building these 1/6th scale jobbies???
Great work. The suspension is wonderful.