Good work Arnie…
Rob
Good work Arnie…
Rob
I don’t recommend basswood for spars. It’s too soft - especially when shaved down to tiny diameters.
Hardware stores, craft stores, and home centers usually carry dowels made out of one of three materials: birch, maple, and oak. Birch and maple make good spars. (For a long time modeling handbooks recommended against birch because of its alleged tendency to assume gross shapes. It seems the lumber suppliers have licked that problem; I’ve got dozens of birch dowels that have been lying around for years and are as straight as they were when I bought them.) Oak is lousy, because the grain is so coarse. Maple isn’t as nice as birch because it tends to break - at the worst possible moment. Of the three, I recommend birch.
Places like Woodcraft sell walnut and cherry dowels: www.woodcraft.com/…/search.aspx . Walnut is awfully dark and pretty coarse-grained for the purpose; cherry is a little bit dark, but the color varies from sample to sample, and it’s beautiful stuff. If you play around a bit with some stain (I like Minwax) you can make the color a little more orange, and it will look just about right. (And in the case of the Constitution, you’ll be painting a lot of the spars anyway). I used cherry for the spars of my little Model Shipways Phantom, and I’m very happy with the results.
The wood ship model companies sell birch dowels that are already tapered. The taper probably won’t be just right for your purpose, but it’s easy to touch it up.
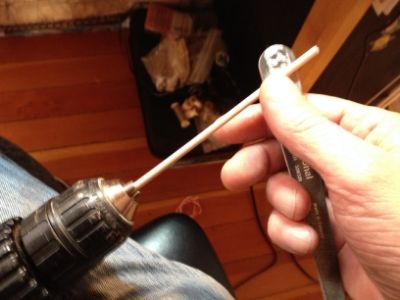
Some people swear that the only way to make a wood spar is to start with a square stick and plane it down, but I’ve gotten along perfectly well for many years using the old electric drill trick. (I’ve got an old Unimat lathe, but it’s not big enough for larger spars.) Cut the dowel an inch or so too long. Clamp your drill in a vise on your bench. Arm yourself with some sandpaper in various grits and a soft rag. Chuck the dowel up in the drill. Assuming you’re right-handed, hold the end (with the rag, to avoid burned fingers) in your left hand, and the sandpaper in your right. Turn the drill on (at a pretty high speed) and lock the trigger. Have it with the sandpaper. It won’t take more than a few minutes to get the taper right.
Many spars have sections that are either square or octagonal. For those, you need to start with a larger dowel and carve/sand/file the section in question first. Then use the drill to take the round sections down to the right taper.
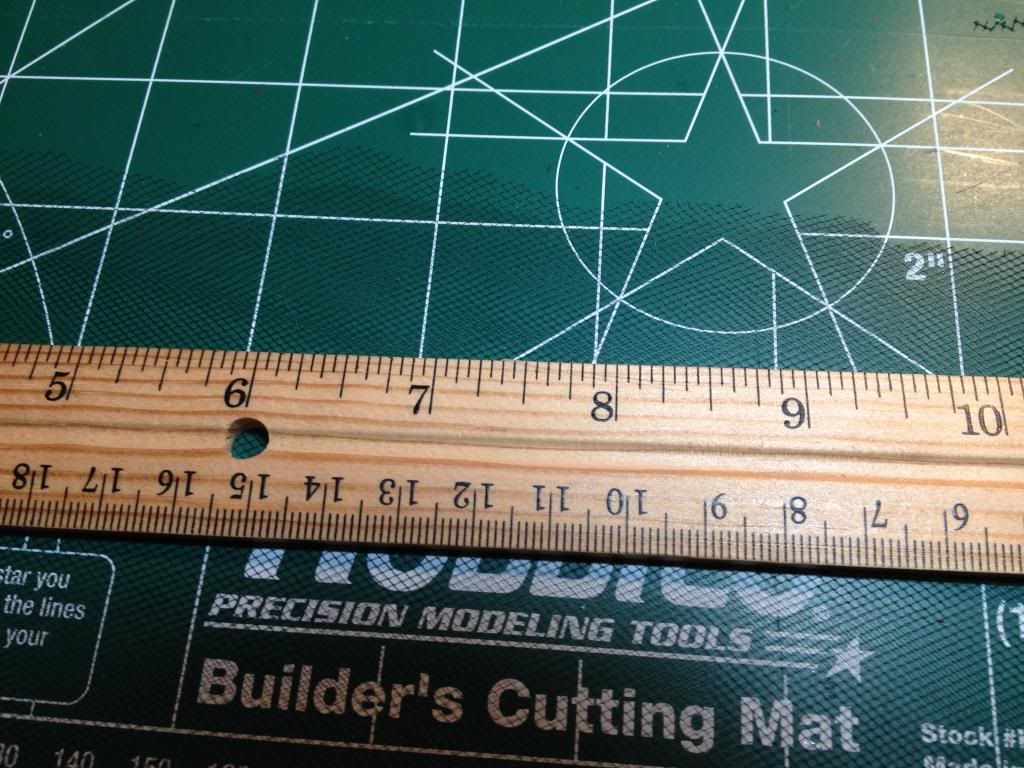
A digital machinist’s caliper comes in mighty handy for checking the diameter as you go. If you don’t already have one, nowadays such things are remarkably cheap: http://www.woodcraft.com/Product/2081537/31416/General-Tools-6-Carbon-Fiber-Digital-Fractional-Caliper-Model-146.aspx . You may in fact be able to find one at your local Lowe’s or Home Depot. It will come in handy for all sorts of things.
Hope that helps a little. Good luck.
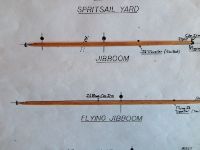
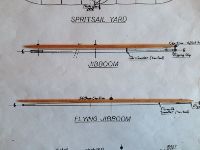
JIB BOOM / FLYING JIB BOOM
Thanks for the heads up JT. I actually typed in bass wood when it should have been birch wood. I am using the dowels that I ordered from Blue Jacket as outlined in their parts list for the Connie. Very reasonably priced, especially since my LHS does not carry them.
This is yet another first for me and I was unnecessarily worried about it as it turned out to be not only easy, but fun to do. As I have been working w/ wood for the first time w/ this model, I am finding it much nicer to work w/ than styrene and am now seriously considering my next build after the upcoming Alabama to be entirely a wood kit. Anyways…
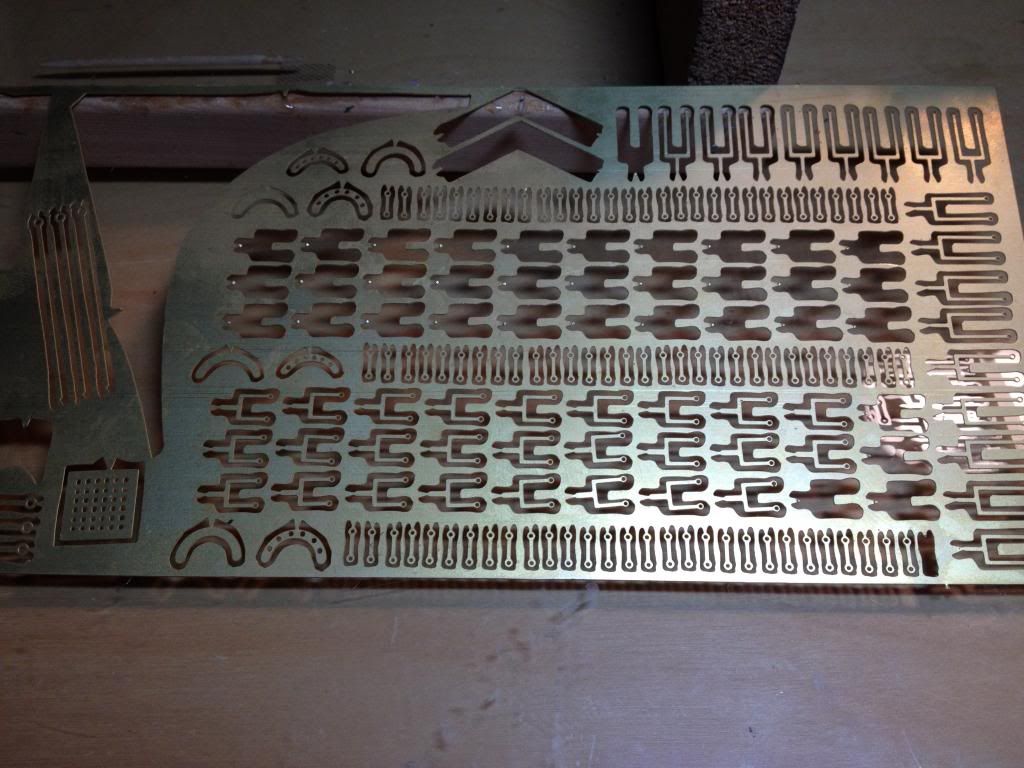
Assembly materials: Brass sheeting, hexagonal styrene, birch dowels

I followed the advice about using a drill to do the tapering using my cordless variable speed propped in my lap, left hand on the trigger, right holding the sanding stick.
It went really quick and easy. I checked it against the BJ scale plans rather than using calipers and adjusted until I got a match (or as close to one as I could)
I finished up by trimming the extra length off the ends and final shaping, then staining w/ min-wax colonial maple.
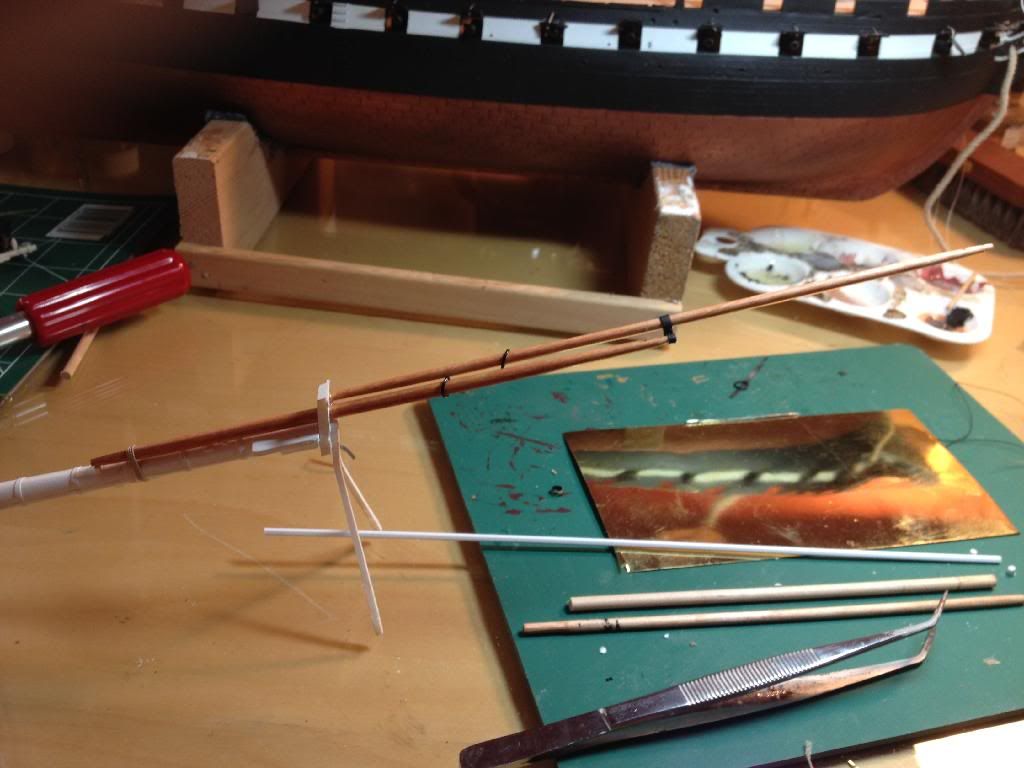
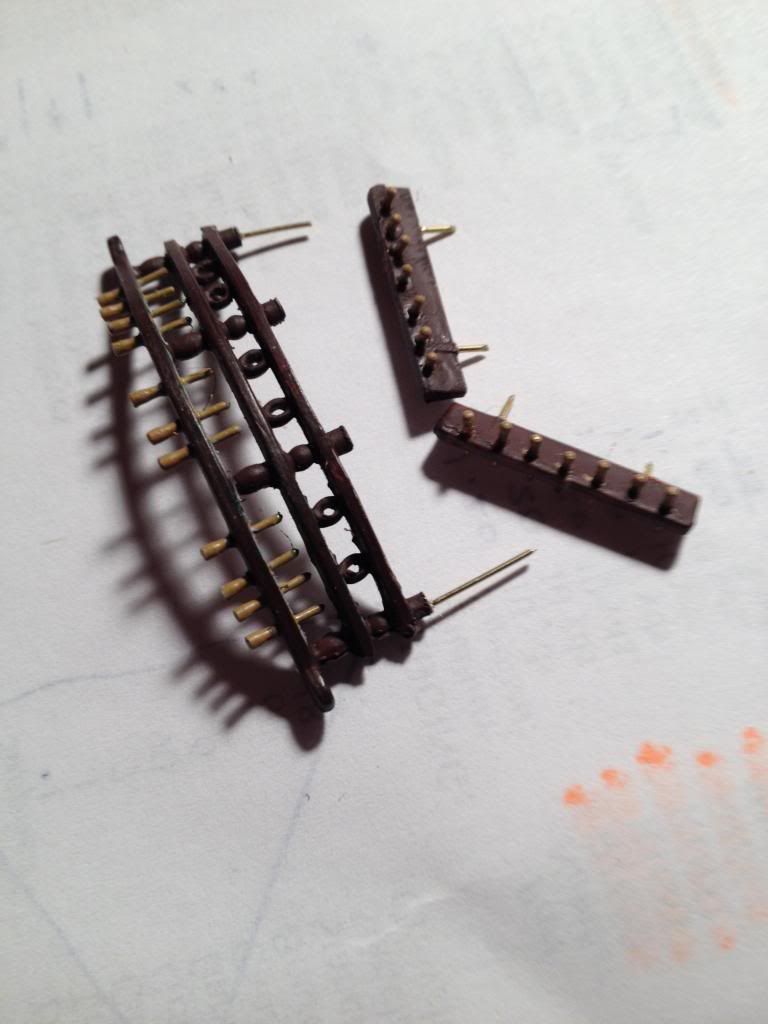
Using scissors, I cut some narrow strips from the brass sheeting and made bands, one for the flying jib, and one for the cap end of the jib boom. The octcagonal styrrene connector was glued to the band for the flying jib. The BJ instructions did not have much instruction on this, but it did have an image of what it should look like, and I think I came pretty damn close if not right on.
The flying jib boom is offset to Port by 45 degrees and slightly above the jib boom and buts into the bowsprit mast cap. I ended up deciding to use epoxy to lock it in place as I was nervous that w/ all the tension from rigging, there would not be a strong enough bite w/ such little surface area to glue to.
I have to say that I am quite happy w/ the results considering this is my first endeavor.
The black rings on the jib boom and flying jib are travelers for the running rigging that will come into play later. I still need to attach a number of bullseyes and blocks for the rigging, but that will have to wait for supplies in the mail to arrive. As you can see, I used the kits bow sprit and maritngales. They fit the BJ plans profile almost exactly, Although the BJ rigging plans calls for a set of fairleads that I will have to add as well as the blocks and bullseyes.
Well there you go…Isn’t adding wooden aspect fun…? not to mention they give the model a wood finish…almost making it appear as if the entire model is wood. I use anything to get the job done.
Looks like you’re on your way.
Rob
IN NEED OF ENCOURAGEMENT
I staged all the deck furniture and some details that I have done, as well as the bow sprit and booms to get a better idea of where I am at and see what kind of problems I was going to have with the overall length of the ship since my work space is really quite compact. [ I have read of some of you that are working/ have worked from a closet space… which I can not imagine as I feel so crampped as is. ]
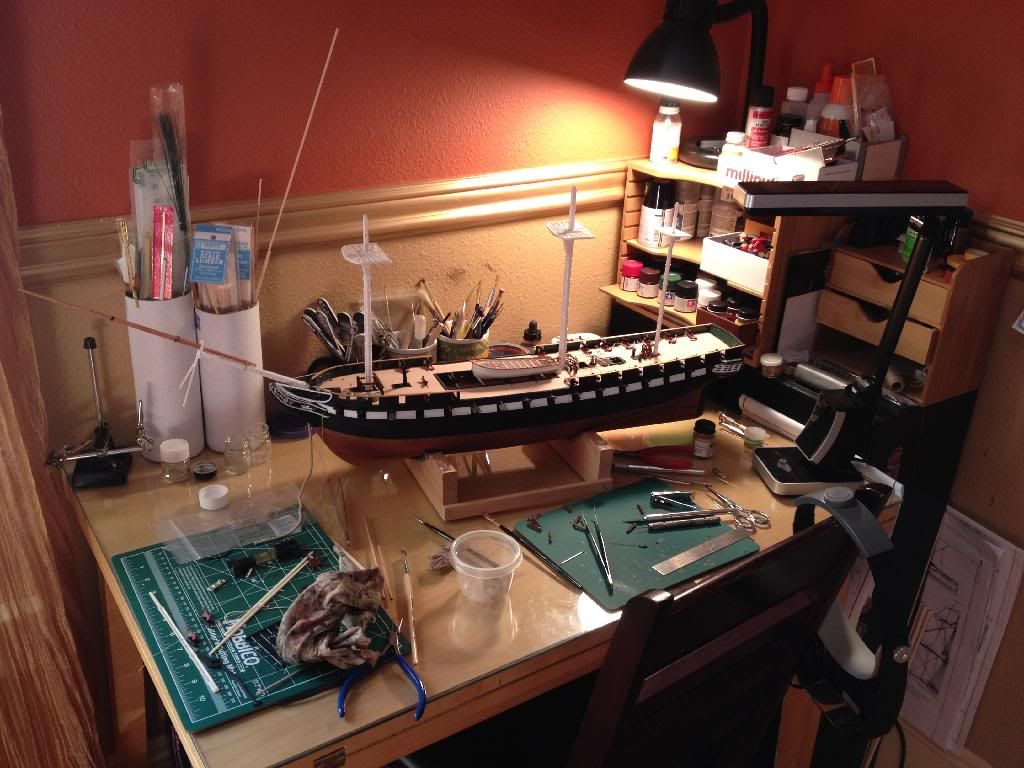
As can readily be seen…this is going to bring up some issues, so I will need to be extra careful once I step the bow sprit.[BTW: notice that my table top is glass. This is a 25x35 inch piece of tempered glass which I ordered special that cost me only $45 . Worth three times that from my perspective. I can not reccommend this enough. I have been a huge Testors work mat fan for some time, but this is so much easier to clean up any kind of spills, or scrape off any dried up paint or glue from. No replacement ever needed.]
I would have liked to save the bow sprit for later, but of course it is THE starting point for doing the rigging. I will however not be gluing down any more deck furniture than I have to before doing as much rigging as possible.
I had no idea what a boost I would get from this staging, but it really is starting to look “ship shape” and I am excited to do more after seeing how good it is going to look. I was really getting into a slump w/ all the carronades and all the pieces in different piles and stages of completion.
Axiom: Take a minute to see what you have acomplished and not dwell on whats left undone.

another BTW: I got really nervous reading through JayMans build for his Connie where he apparently had some critical issues w/ the rake of the masts so I went ahead and placed mine to check it. The BlueJacket plans show the rakes as 91 deg. for the foremast, 92 deg. for the main, and 94 deg. for the mizzen. I tested them using a level and protractor. I am happy and relieved to report that, at least in my kit, Revell hit the mark on these. I wont have to make any modifications for it to come out right.
Unitl that time…enjoy.
Looks outstanding…![]() Plus your build space may not be huge…but it does the job.
Plus your build space may not be huge…but it does the job.
Rob
AND NOW FOR SOMETHING TOTALLY DIFFERENT
So I am sitting around waiting for supplies and going through my reference photo cache and found this in the folder.
I had kept it with the idea that I might try to make one for final staging details, but with time on my hands decided to give it a go now.
Here’s the result.
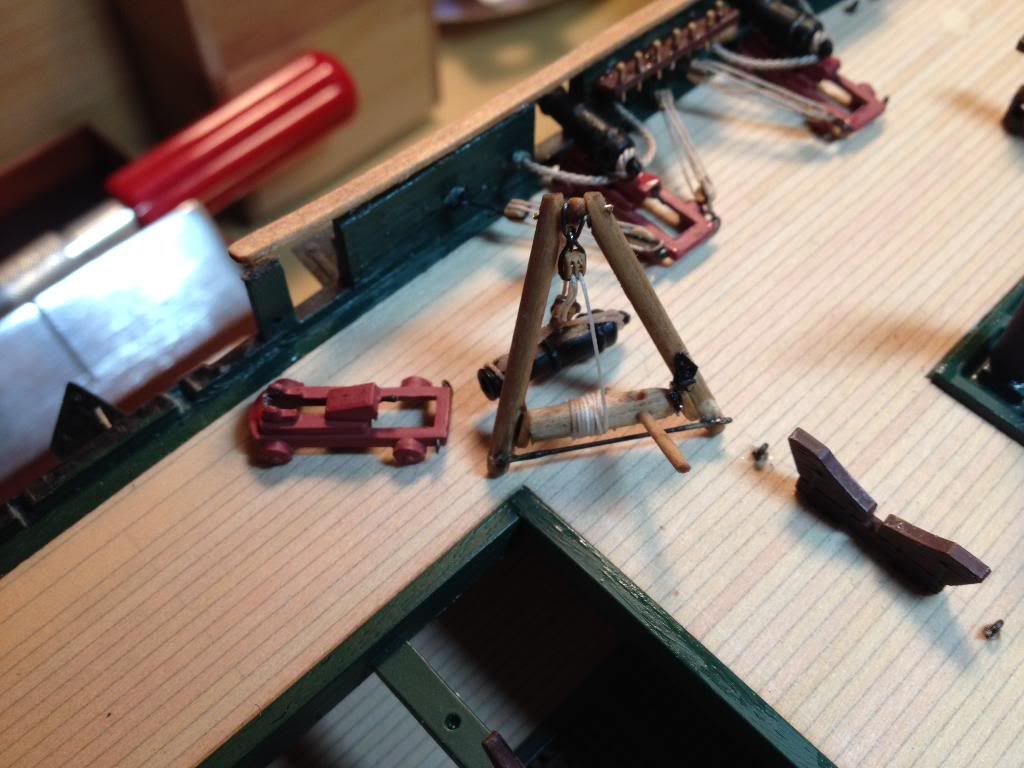
For fabricating something this small and not really able to see the details from the photo, it came out pretty good. I used some old watch parts for the cog wheel and the locking bar. Looks good enough from viewing distance to pass. I haven’t decided yet just how to use it, if at all.(and yes… I know I need to re-glue the cap rail down)
Also I got this little goodie in the mail the other day.
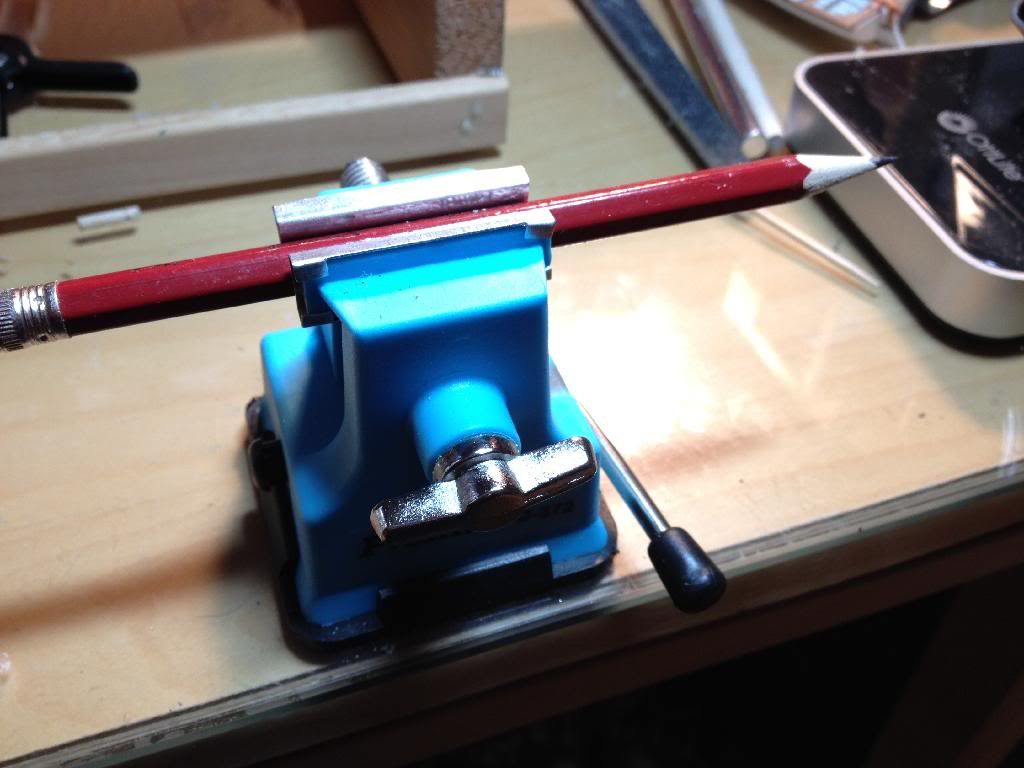
$5 from Amazon. This thing is so nice. Very small with a fierce suction grip that just wont come loose. I actually paid more for shipping than I did for the vise. Type in ‘mini vise’ in the search box and it should come right up.
Very nice work. I attempted to build this one years ago and actually got it mostly built. I worked on it pretty steady for two years straight and by the time I got to the point of attaching the sails I was so burnt out that I set it aside and never resumed work on it. It’s still sitting in a corner of my workbench collecting dust. And it’s hard telling how many spiders have made it their home. I’ve been thinking about either buying the kit…as far as I know it is still available and I’ve never known of it ever being out of production…and building it again applying lessons I’ve learned from my previous attempt or buying a more expensive wooden kit of it. Old Ironsides will always be a special ship to me because I’ve actually been on board it.
Thought I’d stop by and give a huge thumbs up to your work here, Arnie. I’m keeping an eye on this one as well. Oh…and I’m taking notes! ![]()
As Time Goes by:[8]
I just realized that I am rapidly coming up on a year that I have been working on this build and I still have a long way to go. Phewwww! I guess that’s what happens when you can’t bring yourself to compromise.
The last two months have been full of holidays, honey do lists, work, and sundry exigencies so I haven’t had a lot of time to work on my model but I have managed to get a few things done and figured that I was overdue on posting…so here is the latest.
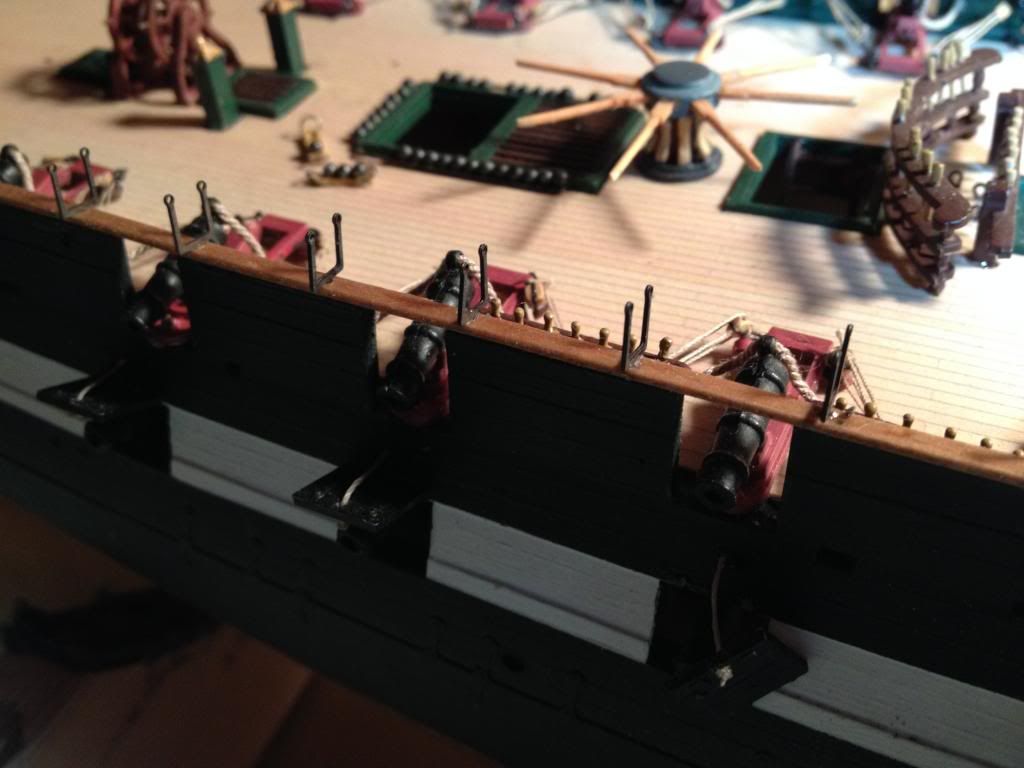
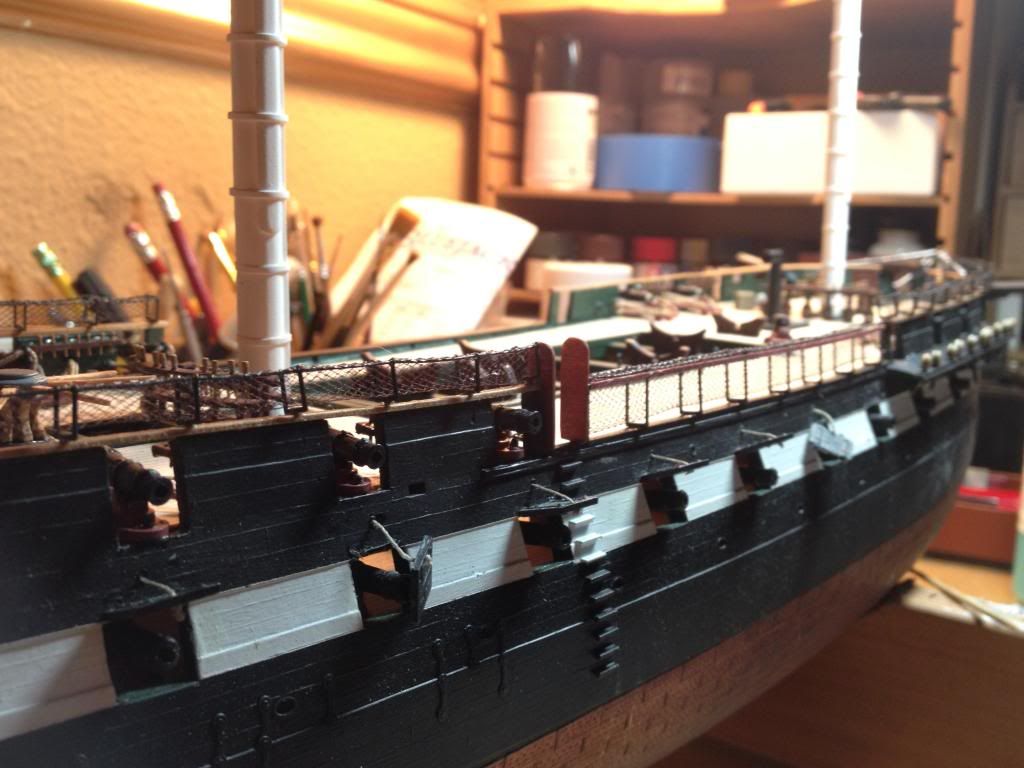
I managed to get all the cannon rigged with the exception of two of the forward 24 pounders, the reason being that one of the cats decided that one of them was its new chew toy, all but utterly destroying it, and rather than be one short, I decided to even it out and leave two off. I may stage the one I have left as being placed with the tripod lift that I built. Well see.

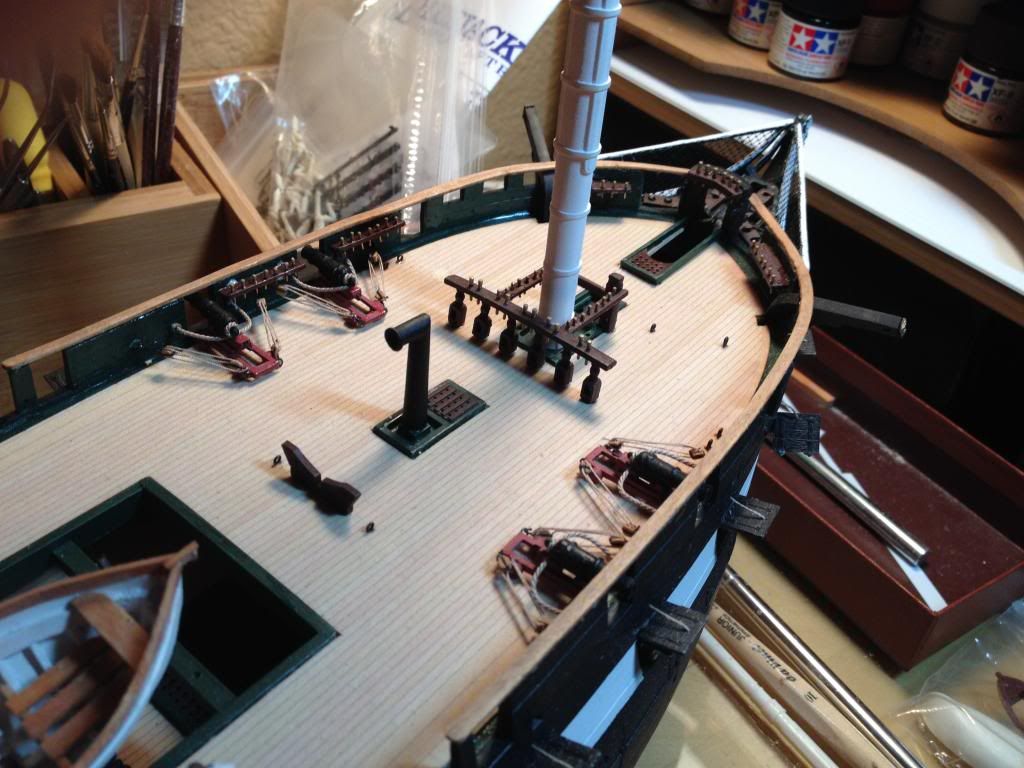
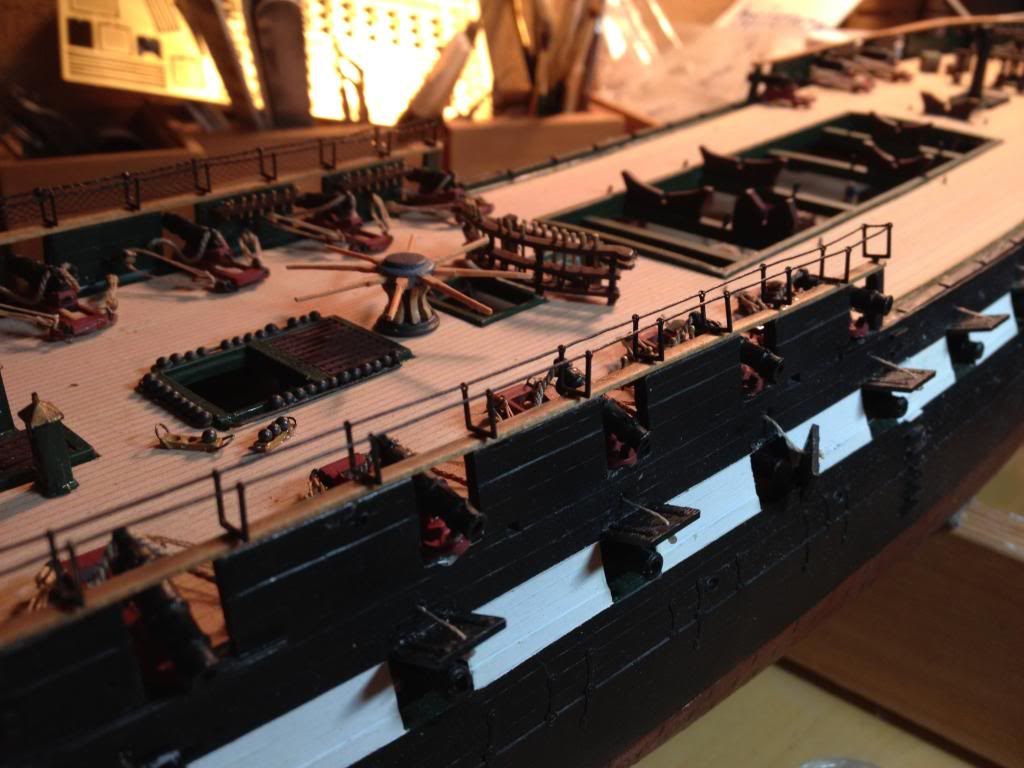
Note the two missing cannon, and I added the pin rail to the bow as per the blue jacket plans. I realized after’ that I have not rigged the side tackle strictly correct. They should not have been belayed to the center of the bulwarks. I will probably go back and fix this later, but just now I am so sick of rigging cannon that I just can’t bring myself to do it. I still have a few pin rails that need to be placed on the starboard side and a shot rack around the charlie noble and that will wrap up the spar deck except for detailing, much of which I will not do until I get most of the rigging done.
I also added the BlueJacket cathead fittings, which I had to file down since the kits catheads are actually smaller than what the BlueJacket plans call for. The photo is the best I could get w/ out a macro lens.
I added brass rod to the pin rails and the main fife rail. drilled new holes for them, and all are epoxied rather than using testors to make sure there won’t be any screaming from a rail pulling loose later.
I also managed to get the masts done in wood from the top mast up. Can’t say that it was easy, and there was plenty of firewood on the bench by the time I got some satisfactory results, and they are far from perfect, but for never having done this before they came out pretty good. I still need to touch up w/ the stain I used but I test fitted all and I am quite happy w/ the outcome. Wife was aghast when she saw how tall it was going to be. (huge grin)
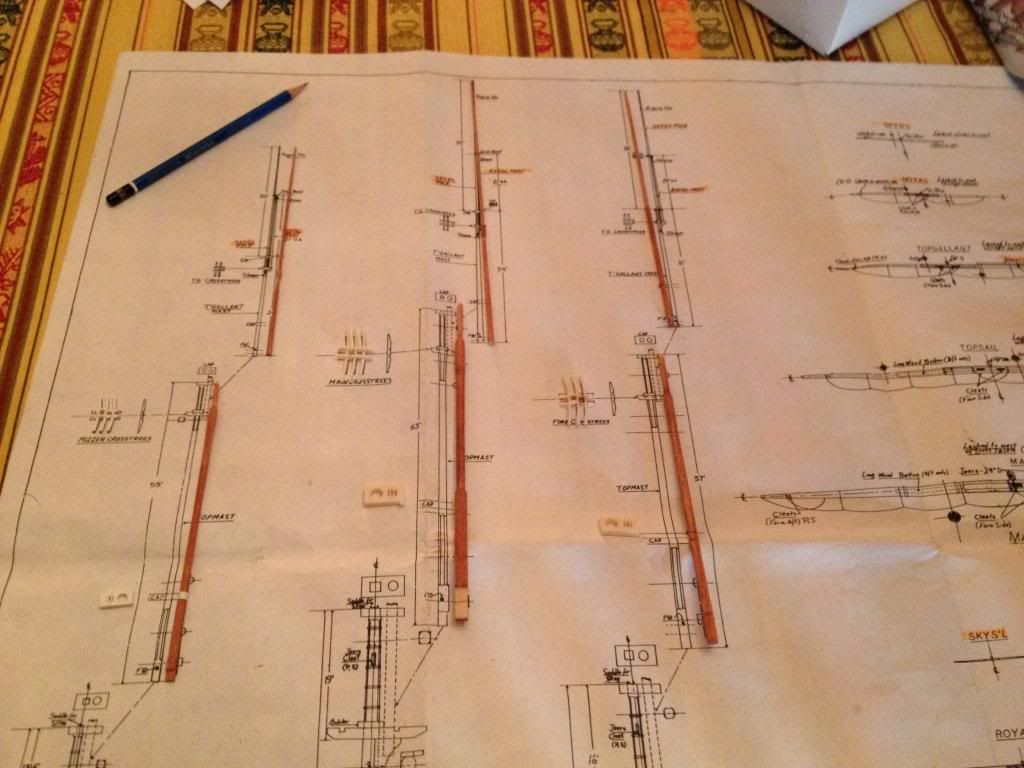
The T’gallant and Skypole masts are one solid piece of wood that I then had to “build up” the “cheeks” that the cross trees rest on. A lot of work to say the least, but seeing all that real wood soaring up like that made it so totally worth it.
I plan to add the royal masts using brass rod, but may go w/ the kit parts since I am going to have to paint them anyway. I also have bagged the idea of making the yards from wood since they will all have to be painted black anyway, although I will probably do the top gallant and royal yards out of brass or wood since the kit parts are so flimsy.
As I go along here making compromises, I have to remind myself that one of the main reasons that I like working with plastic models is that you don’t have to recreate the wheel every time and spend “years” (plural) to attain a finished model. And honestly, at this stage, I am being much less fickle about historical accuracy and just want a finished model that I can be proud to display.
I am currently working on the channels and will post w/ an update hopefully sooner than this last one.
Print same, tape to bathroom mirror, delay decision.
Arnie,
Beautiful work, as always. I was glad to see some progress! Watching your build is giving me so many new ideas. I haven’t made too much progress since my last post (too busy trying to figure out where my next tank of LP is coming from), but I’m plugging along. Keep up the excellent work!
PS> Mind if I “borrow” those Bluejacket plans when you’re done? ![]()
GM
am·biv·a·lence
amˈbivələns/
noun
noun: ambivalence; plural noun: ambivalences
Smitty;
I am pretty sure you were kidding (for the most part) about the BlueJacket plans, but I thought that I needed to say something about my feelings on copywrited material, which they are. I am more than glad to give away or pass on tools, supplies, ideas, and plans of my own creation as I like the “pay it forward” idea very much. But copywrited stuff is usually something that someone else has worked hard on as a means of income. I just could not bring myself to deprive an excellent company such as BlueJacket of their justly deserved income. I want them to be around for myself and future modelers to depend on as a resource. Thanks for understanding, and for the compliments as well.
Well said, and I didn’t expect you to have any feelings one way or the other.
WOW … I did not see this beautiful building log before! … what an interesting document. Have to study more intense and will - just as from Force9´s one - learn a lot for my future acitvities!
Great project! Very nice details …
Arnie,
I was only kidding about the plans. It’s very difficult to convey sarcasm in text. ![]() I know that if I had the plans in my toolbox, I wouldn’t want to part with them either and I agree with your viewpoint on it. Buying the BJ plans is on my ‘bucket list’ for this build, but I’m having a very difficult time justifying to myself (and my wife) spending that kind of money right now. But tax time is coming
I know that if I had the plans in my toolbox, I wouldn’t want to part with them either and I agree with your viewpoint on it. Buying the BJ plans is on my ‘bucket list’ for this build, but I’m having a very difficult time justifying to myself (and my wife) spending that kind of money right now. But tax time is coming ![]()
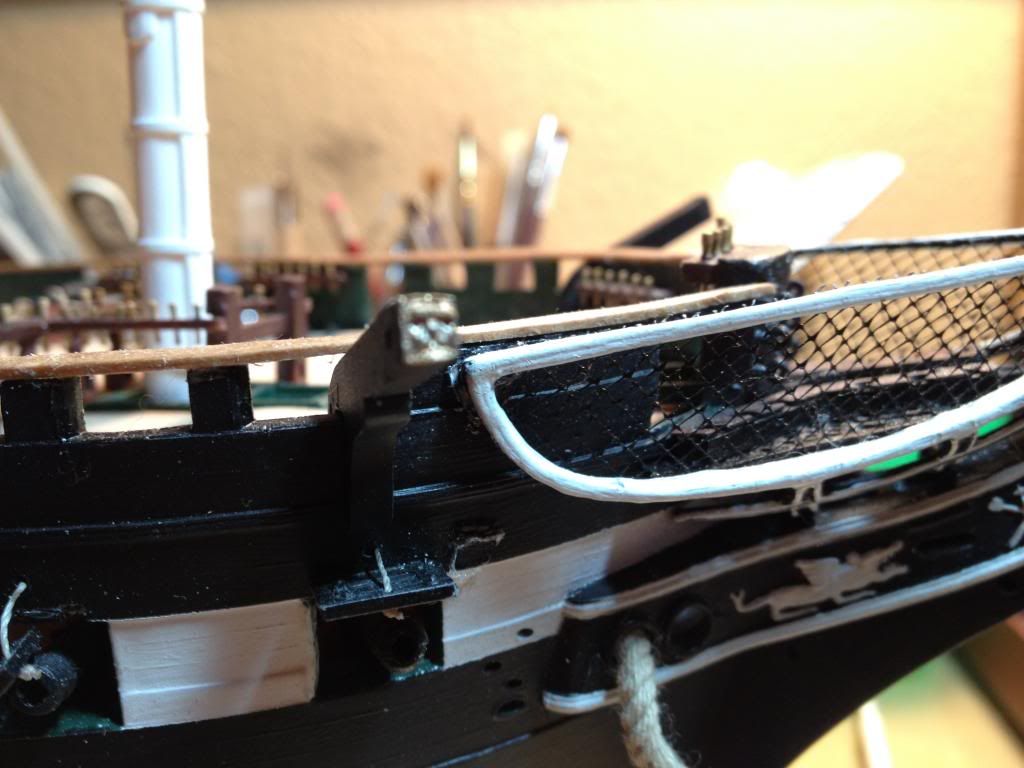
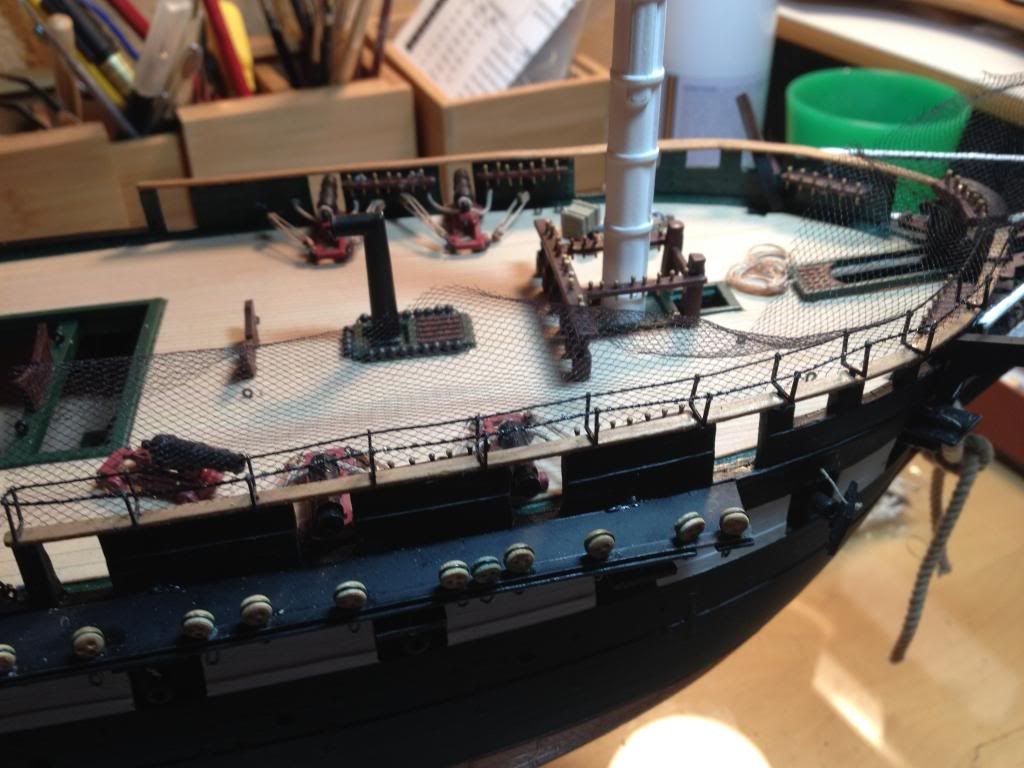
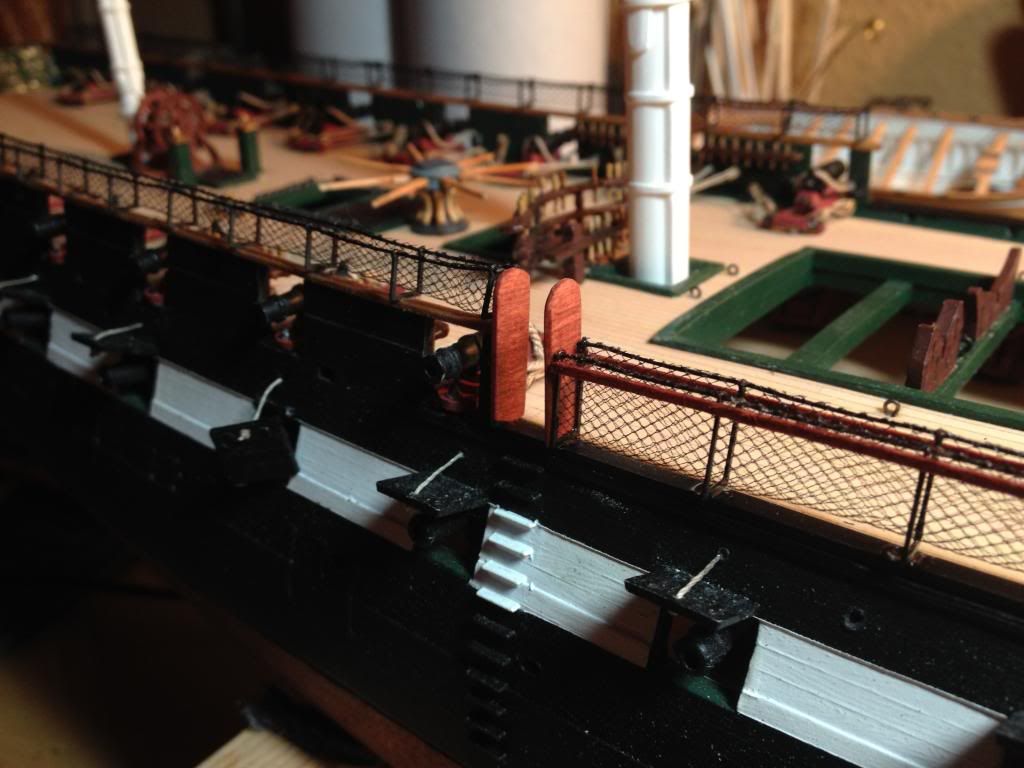
Installing the hammock cranes
I started working on the channels and realized that the deadeyes were too large, so while waiting for new ones to arrive i set to work on the hammock cranes, which I was going to leave until nearly last, but decided what the heck.
I had figured this was going to be a quick and easy install, but of course it proved to be more difficult than I had thought.
I fortuanately had the BlueJacket PE for the stanchions so i did not have to worry about working w/ delicate plastic parts.
Installing the stanchions went pretty smoothly. I used the original plastic rails to mark out where they should be placed and drilled new holes for them.
Rather than paint them, I used blacken-it on them, glued them in and then ran the “cables”
I looped the cable around the forward end and added an eyebolt to tie them down at the aft end. I did the same for the forward cranes except adding a tie down at the bow.
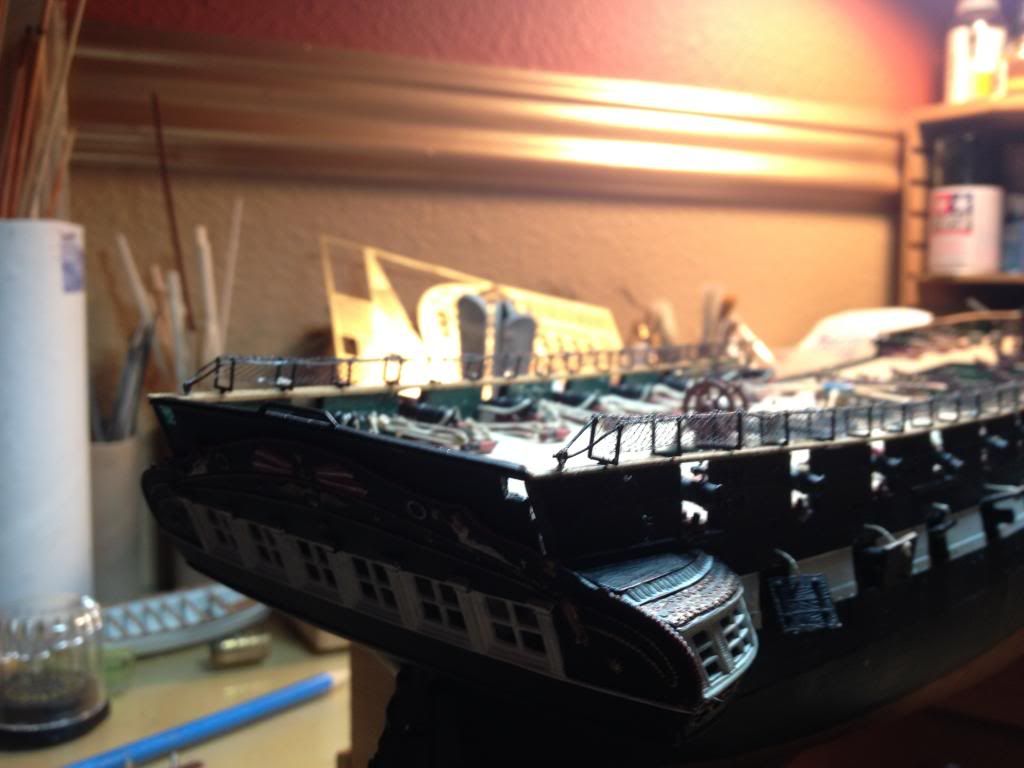
Adding the netting took some figuring and finegaling. I used some toile (pronounced twahl) that I pick up at a local fabric store. I got the smallest mesh that they carried and it seems to work well for this scale. What I ended up doing was using a ruler to cut a swath the same width as the ruler which proved to be plenty wide enough.
I then just laid it on top after running a thin coat of CA along the cable on one side
. The tricky part was then getting the mesh to stick to the cable. I found the best way was to use the back end of my tweezers to gently tap it down and then after it set to go back over it with another coat of CA.
The next step was to use the back end of my tweezers again to gently and carefully push down the netting in between the stanchions. Using a piece of dowel to hold it down I then repeated the gluing process on the other side.
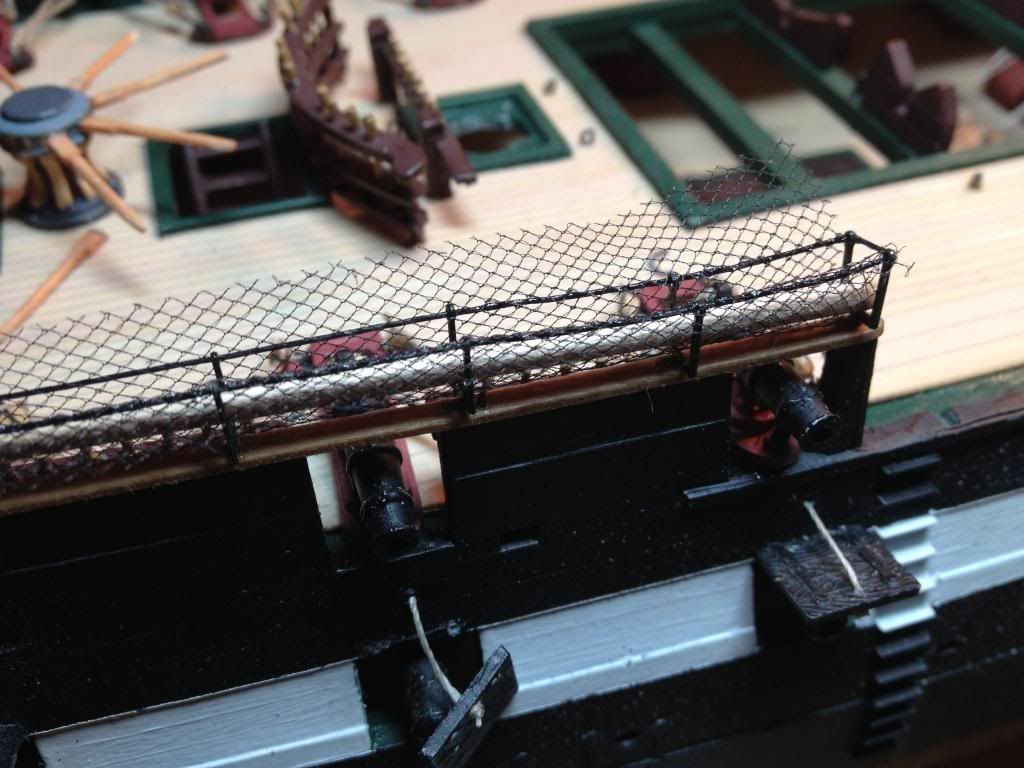
Once that set, I went back with my xacto knife and very very carefully trimmed off the excess. It did not come out as perfect as i would have liked, but the results are more than acceptable.
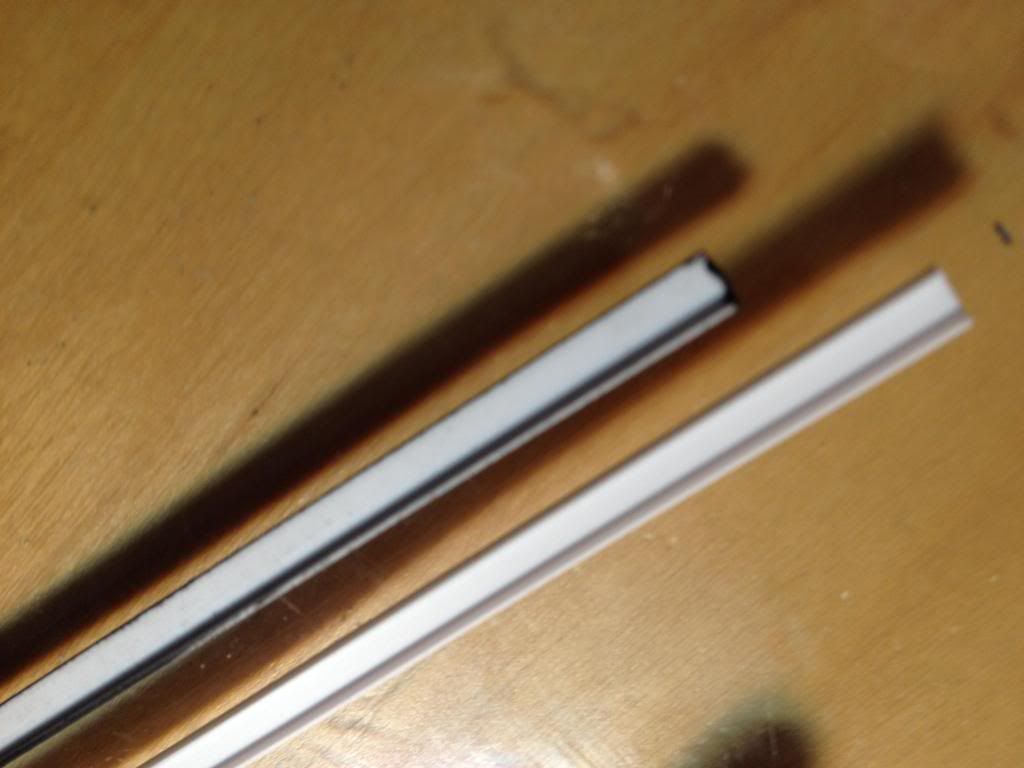
For the mid ships I had to find a way to deal w/ the “grooves” designed to hold the kits pieces.
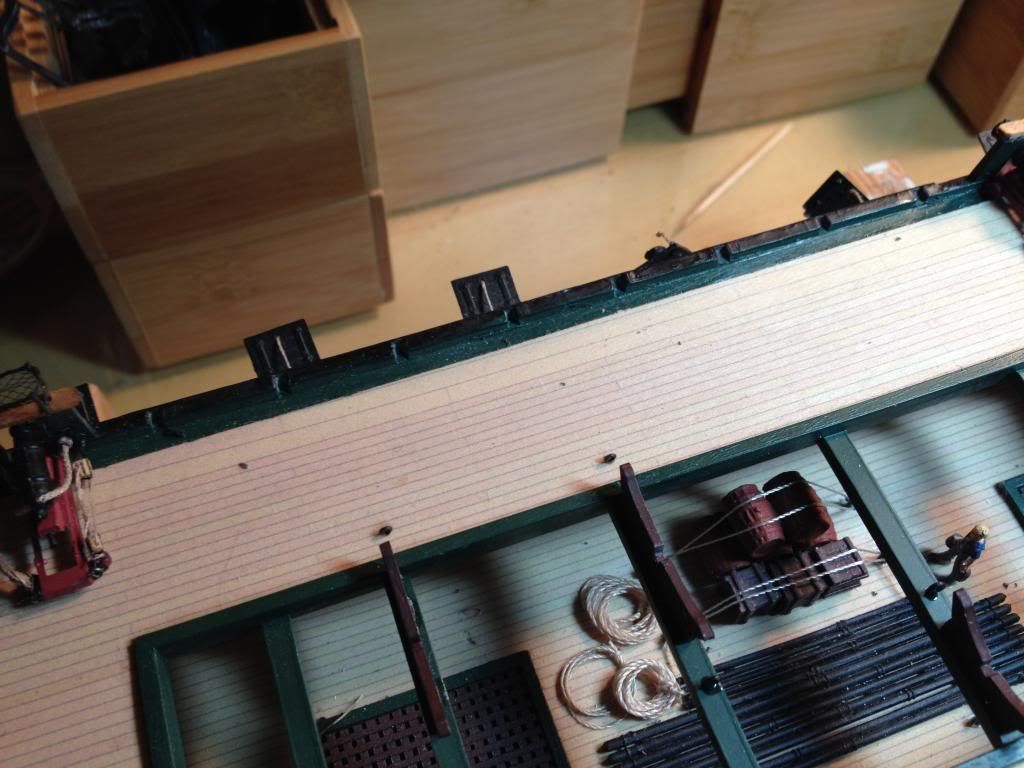
I had thought to putty them in but then came up w/ the idea to use some channel styrene that I had that was the right width, although I did have to shave one side off as it wouldn’t completely straddle.
I painted them black, glued them on and drilled the holes to add the stanchions… Once in place I added some bass wood “slats” and some gangway boards. The gangway boards are traditionally embellashed w/ some sort of carving or decoration, but I left them blank for the time being, If I can find some decent decals that might be appropriate, I may add them later. I still have to finish up the port side, but I have the process down pretty good now and that should go fairly quick.
I am really glad I went ahead and did this now as it adds some real dimension and finish to the deck.
Your work is so clean and pristine! Absolutely extraordinary! Thanks so much for sharing these photos with us. They’re inspiring, at least for guys like me who can barely assemble a kit out of the box. Thank you sir!
Very nice work Arnie…
You may be the first documented case of a Revell kit utilizing the BJ PE hammock cranes! I used Blacken-It on the ring bolts on my gun deck. Even with a pre-bath in Acetate, I still got some with a “rust” effect instead of a clean black. I’ll have to get better before using on the hammock cranes.
Great progress!
Evan
Thanks Evan;
I had that same problem w/ the eye bolts. surprisingly not w/ the hammock cranes. I had to go back, wash off and re-blacken the eye bolts. that seemed to work pretty well. some I just left a little rusty for effect and since they would not be in direct line of sight areas. That front curve on the netting proved to be a biotch and is still not to the best of my liking, but from view distance looks pretty damned good.
I am in the process of trying to figure out the correct blocks etc to use on the bow rigging. Have to say that the BJ plans are not all that insightful. Any idea if the blocks coming off the catheads are deadeyes of thimbles? I am guessing thimbles.
Looking forward to your next post.
And thanks for the Kudos Wendyl ![]()