"Rite of Passage" the 1/96 Constitution

Arnie’s diagram is for a fiddle block, which uses non-coaxial sheaves. As the diagram shows, they are often of different diameters.

Which makes for complicated equations versus using a double block with coaxial sheaves of the same diameter.

Blocks are sized to fit the lines they serve. Around 9 times diameter (3x circumference) for natural fibre, and 3x diameter for wire. You size the fiddle block using the smaller sheave for this reason.

Some tackles have names, too. A Gun tackle uses two single blocks, the bitter end of the line to the becket of one block, then through the other block and back again–this can be either a two-part of three-part tackle.

A Luff tackle uses a double block and a single block; the bitter end to the becket on the single block, then through the two blocks to make either a 4-part or 5-part hoist.

Moving to one double and one triple block gives a Gyn tackle, a 5 or 6 part hoist.

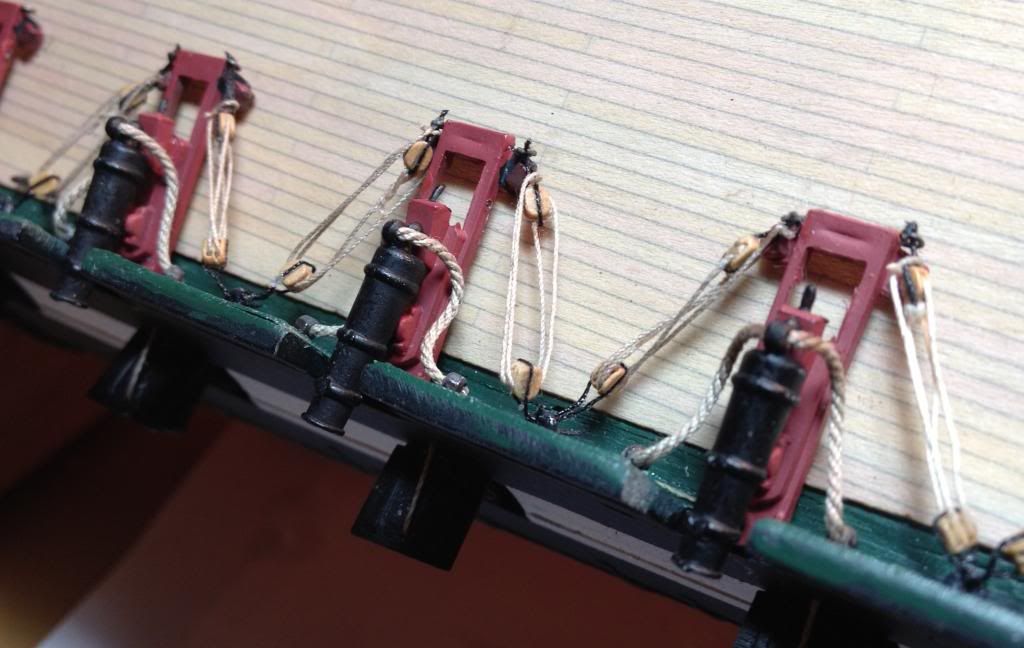
The recoil tackle on the main guns is set up as 4-part luff tackle, if memory serves. One reason to use gun tackle instead of other tackle is in speed. The more sheaves in a tackle, the more line to reeve it. Every added sheave makes for an easier pull, but it’s also proportionately more line to pull.

Let’s say a gun tackle needed a “pull” of 6’ of line to move the blocks three feet. Changing to luff tackle adds more than six feet of line in the three foot “throw” of the tackle. So, instead of pulling 6’ of line, you need to pull 13-14’ of line. This is not as fast, and leaves a lot more line on the deck–neither of which are ideal for a fighting ship.

Yeah. math–you can grow up all you want to, but, you still wind up using it every day.

I honestly thought I was “blowing in the wind” posting about the pulleys. Did not expect this kind of response. Cap is right. The diameter / circumference of the wheels complicates the math. I just wanted to show how simple it can be. And thanks for the further clarification Capn. Very interesting, at least to me.

Pulleys a different animal. Mac brings up a good point though which is that in physics there’s no free lunch- in fact you pay but that’s a detail.

Sheave diameter and offset axles are lesser factors than number of circuits. I can’t really tell from the picture I posted exactly how that bridge crane is rigged, but it looks like 6 or so wide blocks. That’d be 24 to one since they are doubled, which means that machine would take in about a half mile of cable to raise that load bar more than 100 feet.

The (clearly) tireless engineers at Link-Belt; FMC; American; Bucyreus; et al, who cipher not only how many parts to put into boom and lift rigging for cranes, derricks, draglines and the like–let alone the spindle speeds to work all that gear–have my endless admiration.

Luckily for me, I never had to apply much of this, except by rule-of-thumb, and generally only for evolutions like making up a tripod of dunnage poles to be the base of an impromptu gin-pole derrick. That, and growing up with Knight’s Modern Seamanship and The Bluejacket’s Manual will give a person fundamentals they did not know existed.

Beautiful work. I like it

Looking great!

So after beating my head w/ the tackle for the carronades, I’m now on version 4.2 and waiting for more supplies, I decided to take on the bow heads and railings which led to a lot of frustration that I wont elaborate on at the moment (I promise to come back to it tho).

Axiom: when frustrated, take a break or work on something else.

Which takes us to the pinnace for distraction. I ordered the resin cast pinnace from Blue Jacket a while back. Honestly, I wasn’t too happy when I opened the box. The detail of the interior is exceptional, but the outside of the hull looks like the aftermath of a serious teenage acne outbreak. Wish I could show you a pic, but I guess I did something wrong and deleted it.

Anyway, I spent more than a couple hours puttying and sanding, puttying and sanding, to fill in the craters. That done I primed and painted then laid the footlings w/ styrene. Nice! I used basswood for all the seats etc. stained w/ colonial maple. I also added a top rail so that I could add the oarlocks. Had to break out the steamer again for that part.

This went much easier than the cap rails I did earlier since I did not have to bend the wood against the grain.

Gluing them on was a bit tricky (btw… testors cement does not work well w/ wood…thank got for CA) but they came out pretty good. I then used a rat tail file to carefully file down the grooves for the oarlocks and then painted the insides black. The rudder actually proved to be the most difficult part and did not come out as well as I would have liked. I will probably get bugged by it enough after time and re-do it, but for now, meh.

I still need to do a lot of touch up and add details, one being the mast which will be placed stowed, but for the most part, I am really happy w/ it, and it was just plain fun to do.

My carronade supplies just arrived so I will be getting back on those next and post when I get something to show.

PS. Anyone know what the mast should look like? Dimensions? Rigging? If so a pointer would be greatly appreciated.

Wow! Your work never ceases to amaze me. Extraordinary to say the least!

I found the pics of the pinnace, a little late, but …

Like I said, a serious case of acne craters.

Lots of putty… lots of sanding

But the interior is nearly perfect.

It’s a bit late for me to dig trough for Constitution-specific references, but, ship’s boats of the era usually used a lug sail. The lug sail is a lopsided rectangle which resembles a gaff-rigged sail. It has a lug spar the length of the angled head of the sail. This was hoist to the very top of a stump mast.

The rig is handy for boats as the spar and the mast could both be about the length of the boat. Rigging for the mast–when used–was often just a forestay and two backstays of a single line each tied off at the gunwale to an eye, cleat, or the thwartclamp.

Oh, and to really vex, these boats were often to the discretion of the captain, sailing master, or boatswain in charge of them. So, they might have two masts. Or, they might step a second mast “on the fly.”

I fear that, with references in hand, you may feel a bit thwarted by your thwarts, though.

As a rule-of-thumb, thwarts are about 16" wide, the oarlock/thole pin/oar notch is about 1 thwart aft of the after edge of the thwart, about one thwart above the deck board/grating, and they are about 3 thwarts apart for spacing. At 1/96, that’s 5/32" to 11/64" wide, spaced about 1/2" apart. (I know the parts in the Revell kit vexed me–those thwarts, as moulded, are closer to waist-high.)

Great info there.

Thanks Cap’n. That’s really a big help w/ the mast info. I did use the dimensions from the blue jacket plans for the pinnace, so the thwarts and their spacing are pretty close, assuming BJ’s plans are accurate. The oar locks are a bit off, but my shaky hands could do no better.

Outstanding mods to a great ship. Super job.

Rob

No sweat Arnie,

Just do not read Freeston’s Model Open Boats–unless you are in need of an inferiority complex. (Shoot, I’ve built a couple of 1:1 boats, and his craft daunted me at full scale [sigh]).

I know that when I last built a Connie, twenty-mumblemumble years’ ago, I way over-obsessed with the boats. For all the efforts I put in casting plugs (repeatedly) from the plastic boats, I could have just built the things up from scratch to much more uniform result.

BOW HEADS AND RAILS

To put it simply, the bow heads and rails in the Revell kit are atrocious. Force9 came up w/ a nice solution for the supports between the rails, but I thought I would go one better and build them from scratch using the BlueJacket plans. I had ordered their britanica metal rails and already had the PE for the grating and the heads. Well…the bow of the Revell kit just does not match up w/ the Bluejacket model. The PE grating did not come anywhere close to fitting, and the rails just did not look right scale wise. I did attempt to use them anyways (the rails) and after many hours of exasperating trial and error finally gave up and decided to go w/ the Revell kit pieces w/ some modifications.

I cut out the existing two, way out of scale, heads from the grating and fitted the BJ PE heads in its stead. Strictly speaking, they are not correct for the time frame that I am attempting to stage the model in, but sometimes you end up sacrificing accuracy for appearance.

This means that I also won’t be able to use the forward boomkins w/ out some fairly serious refitting, but the BJ plans do not call for them, and as they are a part of the running rigging that I do not intend to include, no great loss. I guess I can always go back and figure something out later if I need/want to.

I ended up painting the two top rails solid white as the detail just did not come out on those pieces. There is a bit of 'corrections and touch up to do, but they came out satisfactorily enough. Note that I also “fleshed out” the hawse ports w/ some chain links that I picked up at the local craft store to meet the specifications that I outlined at the beginning of this log.

The carronades are coming along very nicely, but excruciatingly slow. I figure I am averaging about two hours per gun. It is much more tedious and difficult than I would have thought.

Axiom: It’s a good idea to know how deep the water is before you jump in.

The way they are now will be their final fitting (version 4.2). I went back and added a “bridle ring” for the breech rigging to pass through by using some crimping beads that I had. They are just a little bit larger than scale, but still look soooo much better and more accurate.

The cordage comes from Syrene, where I ordered my blocks from. Pretty expensive stuff, but I finally got the right sizes w/ out having to build my own rope walk. I really need to finish these before I can place the pin rails, so it may be a while before I post again.

Looking very nice…for sure.

Rob

Thanks Rob, and all others that have made compliments.

I really get my inspiration, and often guidance from the learned and experienced community we have here. This is my first stab at working at this level of modification and detail, much of which has been a somewhat steep learning curve for me, and I could not have gotten this far w/ out everyone’s input, help, and encouragement.

I like how you Hyper detail your standard kit. Exactly what I do myself. You’re doing an exceptional job.

Will you be rigging with deadeyes and lanyards as well?

Rob

Yes Rob;

The plan is to replace the masts from the top mast up along w/ the jib boom and flying jib boom w/ basswood and brass rod (sky sail masts, stunsill booms,etc) following the BlueJacket plans that I have, as well as the deadeyes and lanyards for the shrouds. I will only be doing a very small part of the running rigging. Working on the jib boom and flying jib boom now.

Will the mast and spars be replaced with wood ones?