Beautiful work as usual, Arnie. You continue to inspire!
LET THE RIGGING BEGIN!
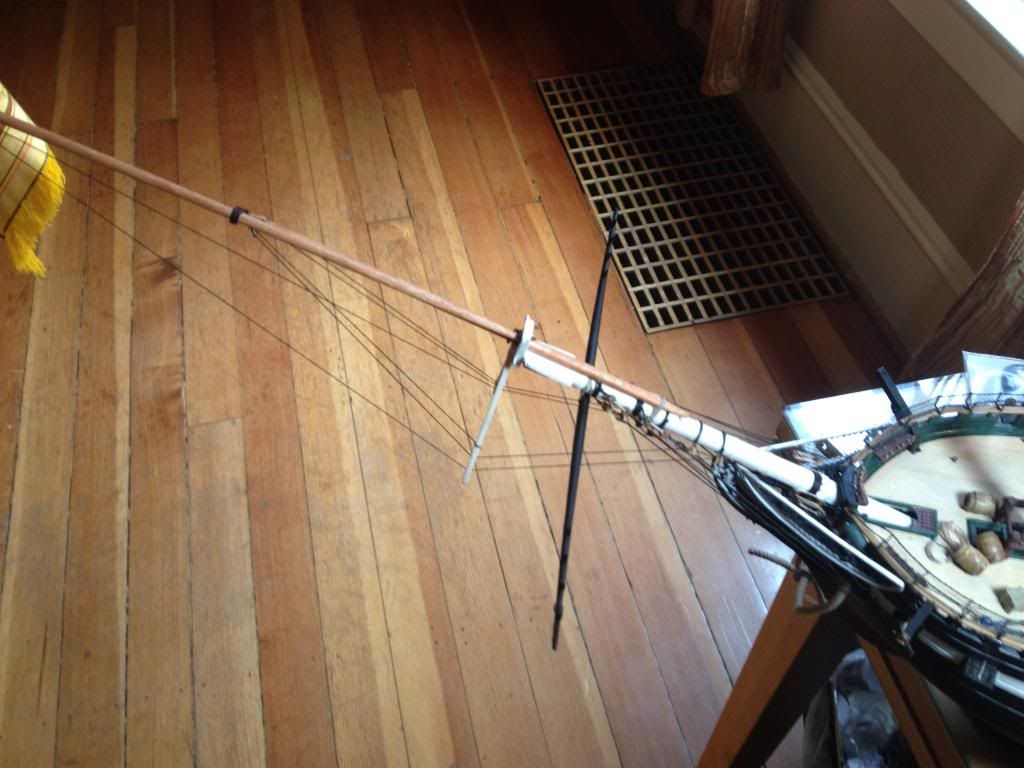
I have fair amount of touch up etc, to do on the spar deck, but it is all just a matter of maybe 2-3 hours of work, so I decided to go ahead and get started on the rigging. I really wished that I could wait on stepping the bowsprit until last because of the limited work space that I have. Turning her around and around with that jib boom and flying jib boom sticking way out there means a broken something just waiting to happen. But it really is THE starting place for the rigging.
I scoured a number of resources as well as my BlueJacket plans to do my best to make sure that I got all the fittings and sequence right. Needless to say, none of them agree entirely. I found that the “Anatomy of a Ship - The 44 Gun Frigate - USS Constitution” by Marquardt to be the most helpfull in giving me a nice clean picture of the rigging its self, and the BlueJacket plans for the fittings and rope sizes. I have made some allowances and compromises in deference to my skill level (first time rigging at this level of detail) and the constraints of the Revell kit, but am not at all displeased w/ the outcome so far.
Gammoning the bowsprit in place was quick and easy, specially since I had had the foresight to only tack on one side of the bow rails instead of gluing it permanently in place, making it easy to access the rigging points and apply the frapping.
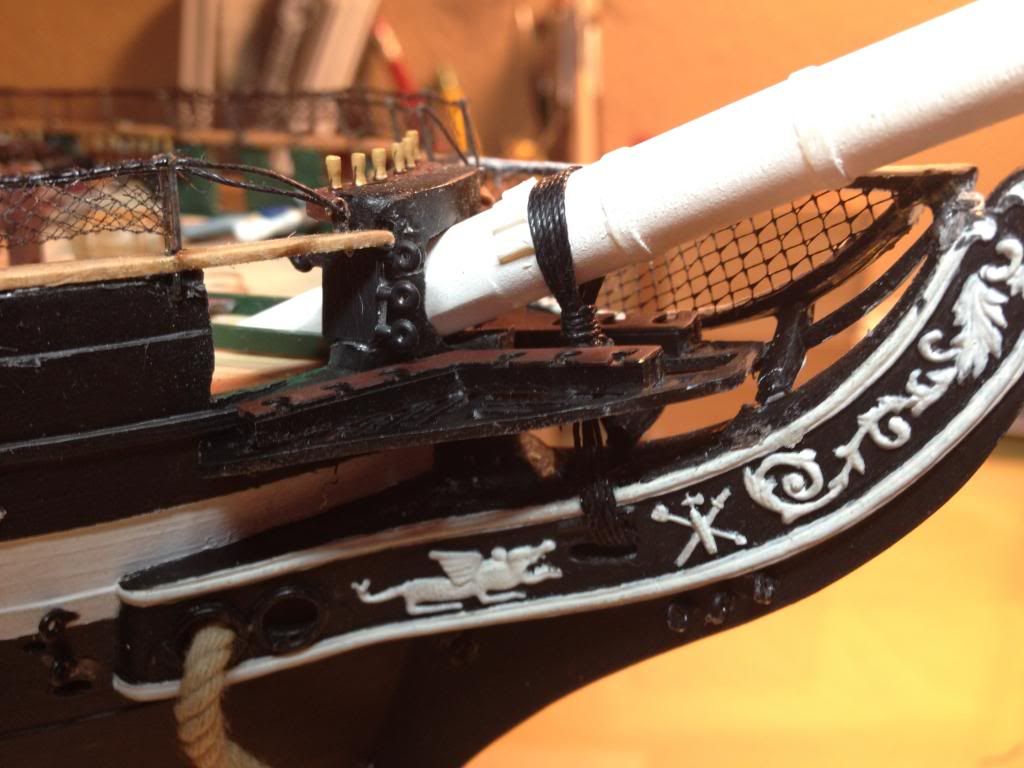
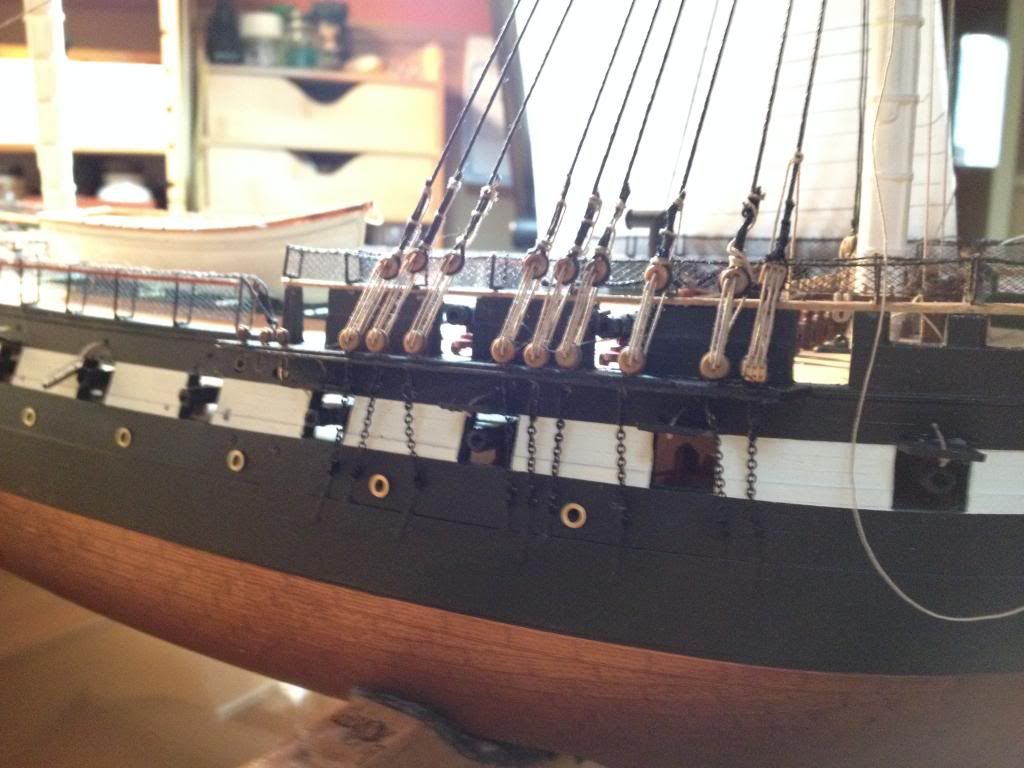
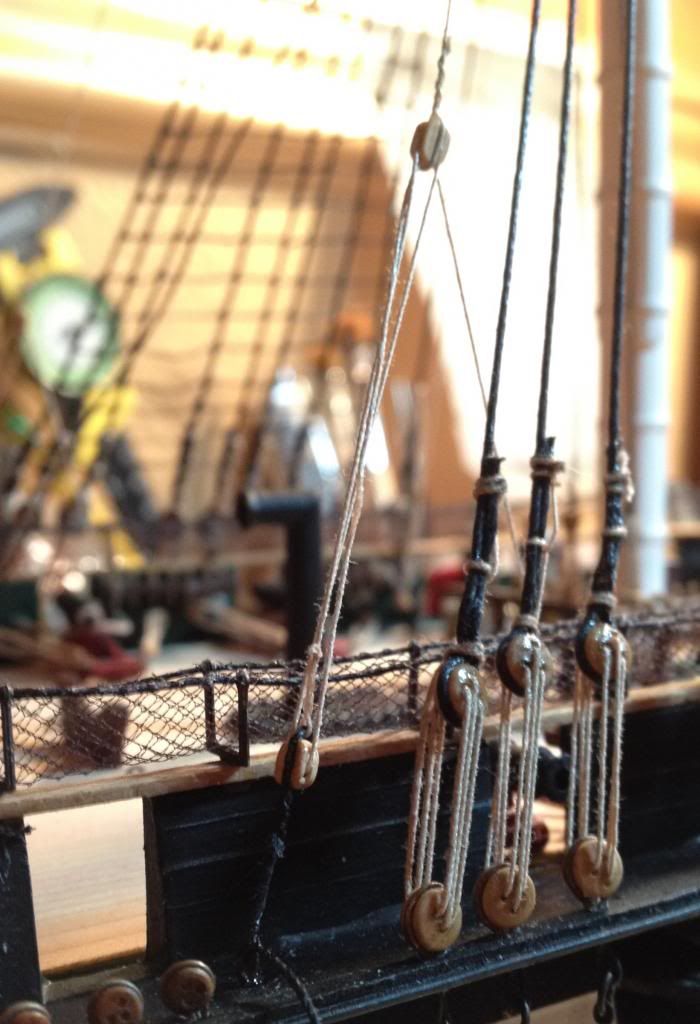
I then started off the rigging with the bow sprit bobstays and shrouds. I used 3/32" deadeyes for the bobstays and 2.5 mm bullseyes for the shrouds. [ to the best of my interpretation, bullseyes and thimbles are essentially the same thing]
I initially used a piece of brass wire as a guage to set up the length of the rigging for the lanyards.
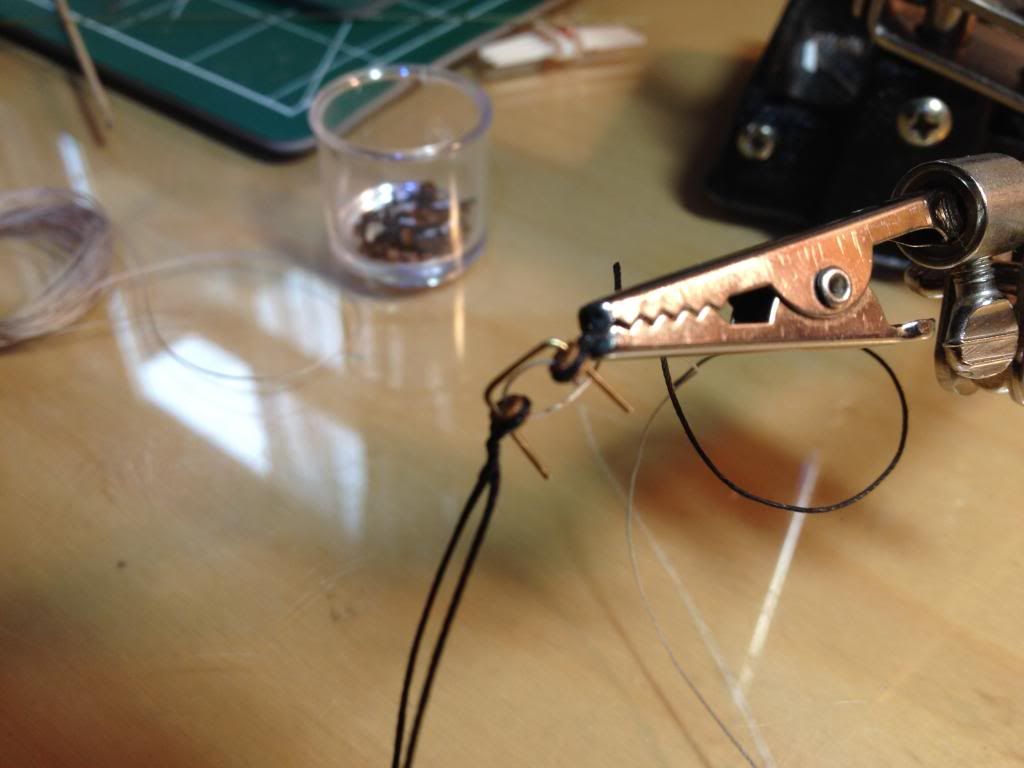
I later figured out that it was actually easier and quicker to just use a set of dividers and make adjustments to the lanyard until the length matched. I cheated a bit and instead of seizing the strops, I just twisted the wrap around, a tiny drop of CA, and snipped off the short end. You have to get real close to tell that they haven’t actually been seized.
The hardest part here was getting the fittings placed right on the bowsprit and at the knight head.
Nothing close to perfection here, but… by the time I get done with the rigging on this build, I should be a lot closer to that ideal?
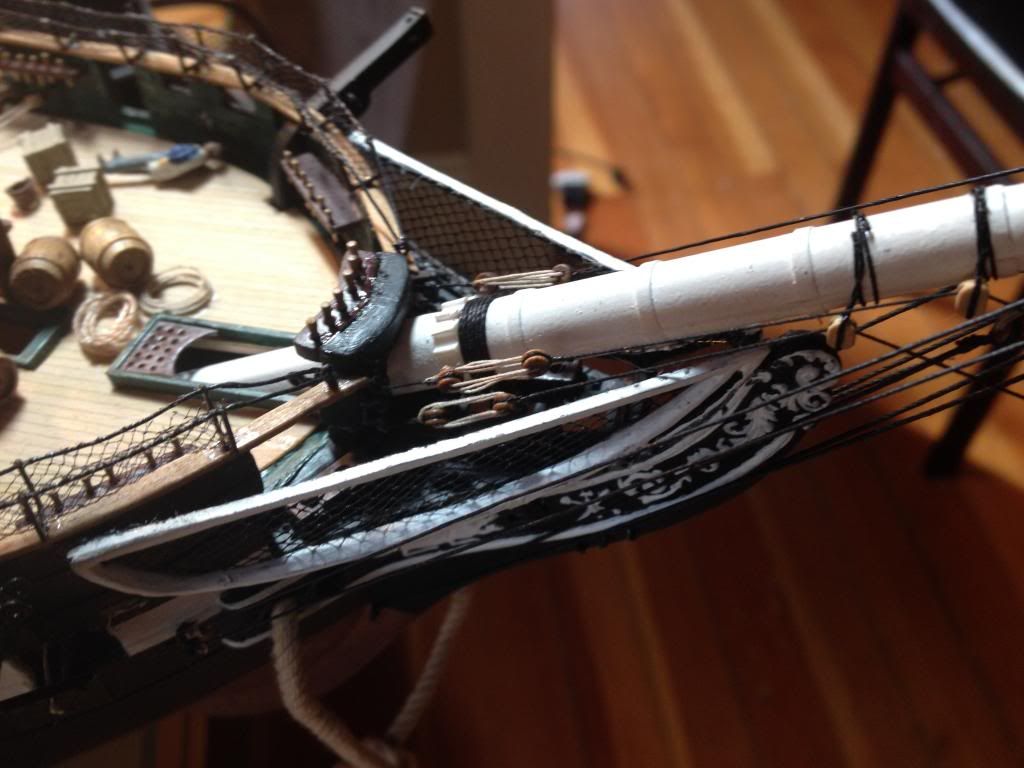
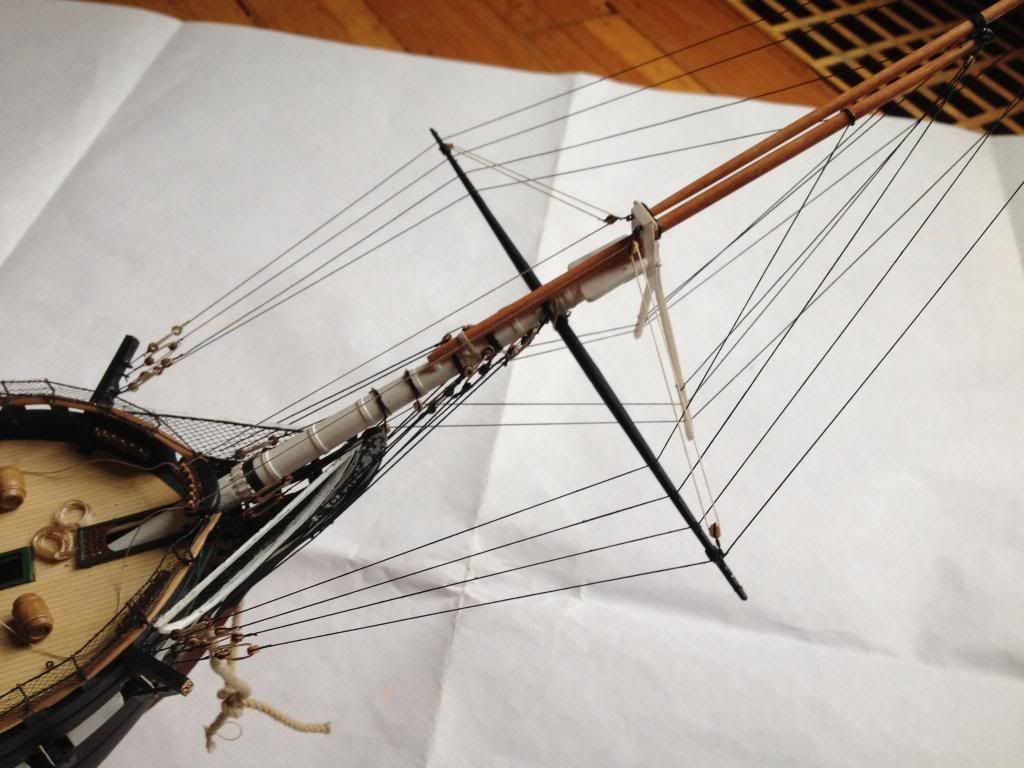
Next on the docket was the martingales. These called for 1/8" single blocks on the sprit and booms, and deadeyes at the knight head (shown above)

Ideally the martingales should be perpendicular to the water line but I just had to much fear in my heart that they would break if I forced them any more than I did [one of those kit constraints].
I still need to run the jib boom guys and sprit sail lifts before I move on the the foremast, but I am hoping to get most, if not all of that done this weekend. Apologies for the quality of the pics. Although my new Iphone has a much better camera, it still leaves a lot to be desired. Must admit that I am really pumped up at this point since doing the rigging at this level was one of my main reasons for choosing this model to begin with. Still, I can see that I far, far underestimated how long this was going to take, and my original project completion date of February of so has come and gone and I still have a long ways to go.
Axiom: the first thing to break is invariably the one that was the most difficult to do.
As always, extraordinary work Randy! You’re an inspiration to all us tall ship modelers. Thank you sir!
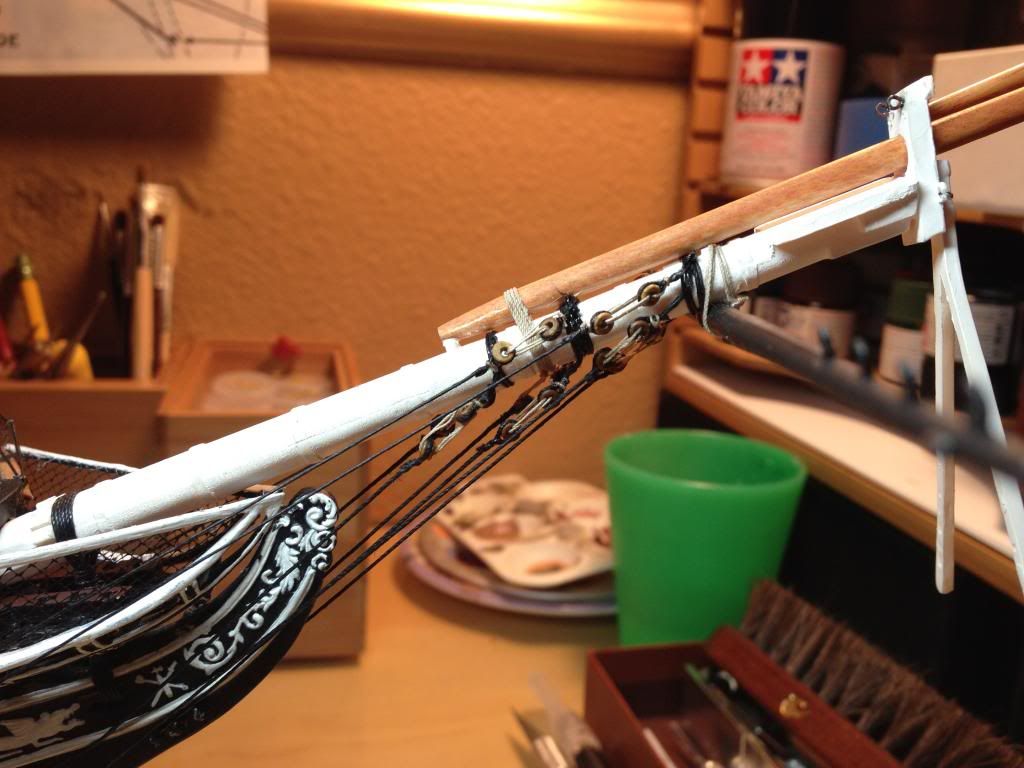
As hoped, I did get to finish up rigging the bow this weekend. I followed the BlueJacket plans for the jib guys, which meant adding two eyebolts to each cathead. Adding the pin rail to the bow allowed me to belay the sprit sail yard lifts so that the lines are straight and clean looking. The BJ plans calls for fairleads on the bowsprit, but I decided to leave them off.

Now its on to the foremast and the channels for the shrouds.
Great work, Arnie! Your Constitution is very elegant, and I only hope I can come close to that level of awesomeness when I finally get around to opening mine!
Well done!
Thanks David;
I’ve seen your work and have no doubt that you will more than rise to the occasion.
Arnie,
Beautiful rigging work! I can hardly wait to see the foremast rigging. I am going to have to pick up a set of the BlueJacket plans when I start my 1/96 Connie.
Steve
Great job Arnie…I too enjoy quality rigging detail applied to plastic models. Foregoing the plastic Dead eyes and Bull eyes. Nice work indeed.
Rob
Thanks to all of you for the kudos. I can hardly wait to see the foremast up and rigged myself. Kind of on hold waiting for some cordage and deadeyes to be shipped. Hope to have something more to show in the next week or two.
First some pics, then a hopefully not long winded synopsis.
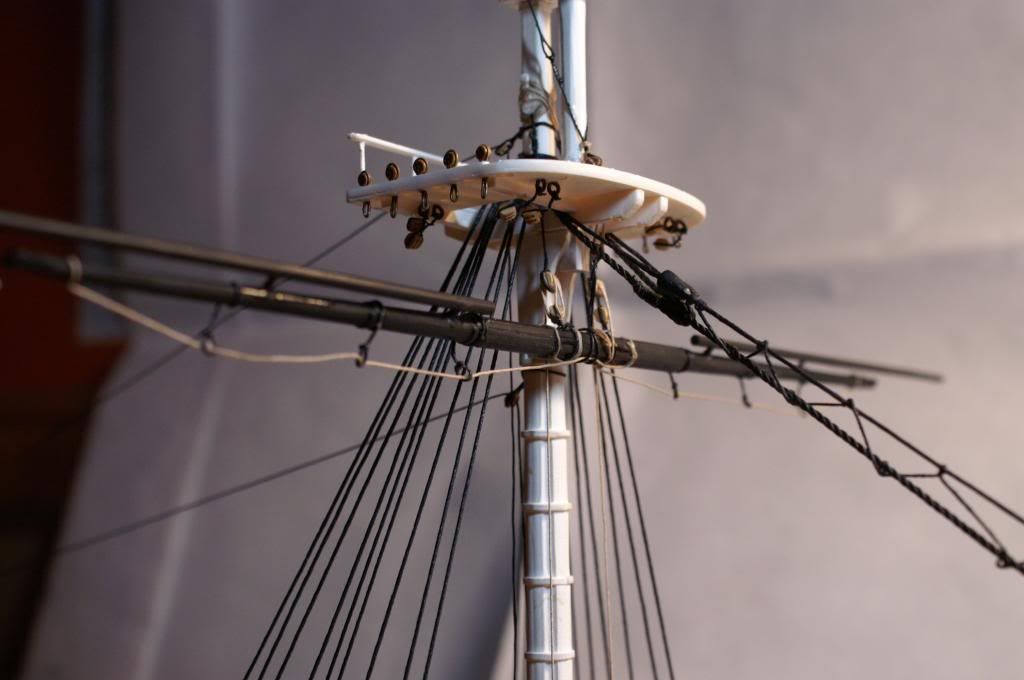


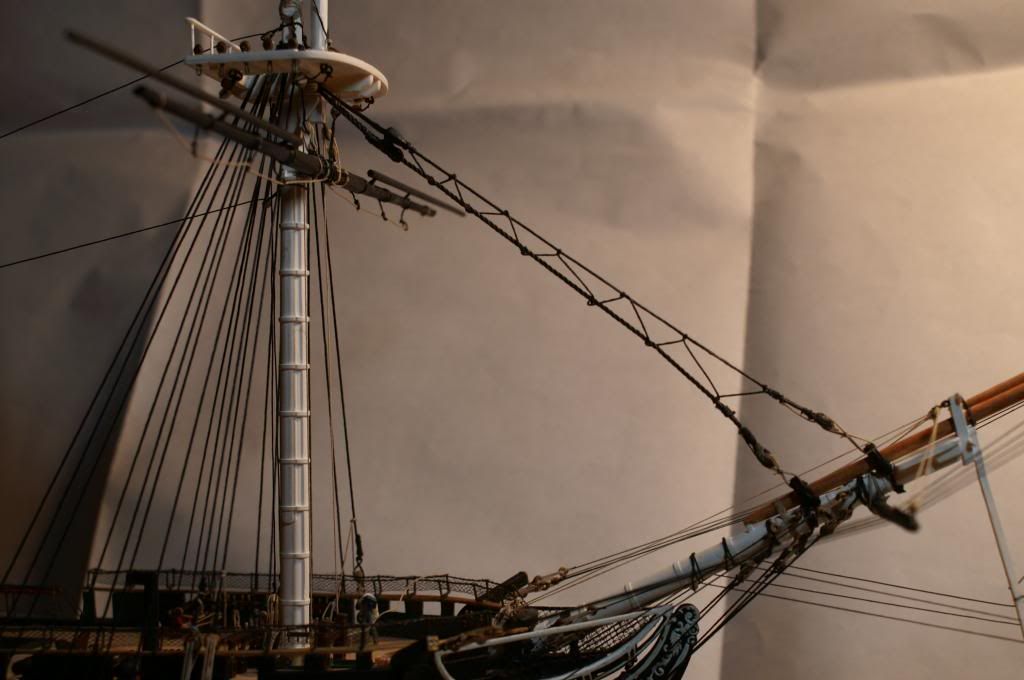
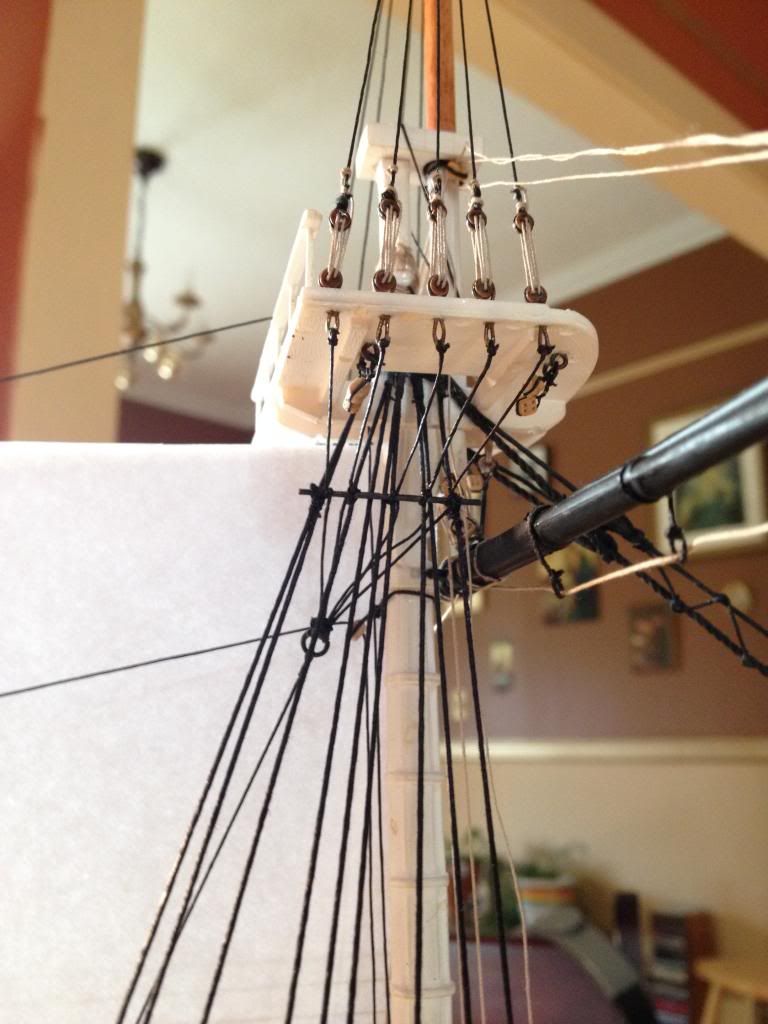
Well, as can be seen, I have most of the lower foremast rigged including the stays. Running the shrouds was actually the easiest and fastest part of the whole process. You can see in the next to last pic that I only rigged the first and second shroud and the rest are just tied down in anticipation of needing access to the pin rails. I followed the BJ plans on this where there are only 9 shrouds total. The first shroud is a single rather than a pair and is rigged w/ blocks instead of deadeyes. Its designated as a “swifter”. Not sure what that means or why it was rigged differently than the other shrouds. If anyone has knowledge of this I would be glad to be informed about it. You probably notice that I cheated somewhat w/ the chain plates which I was agonizing over how to do them. While perusing Longridge for ideas, there was an illistration using regular chains. I had some left over chain from the rudder and some extra belaying pins which I nipped the heads off of, drilled holes and used them to attach the chain to the backing link. I used a small piece of brass wire to connect the chain to the deadeye strop and used CA to secure it. The connecting loop is not soldered, but you really cant see it since the gap is to the back. I am going to have to order some more chain.
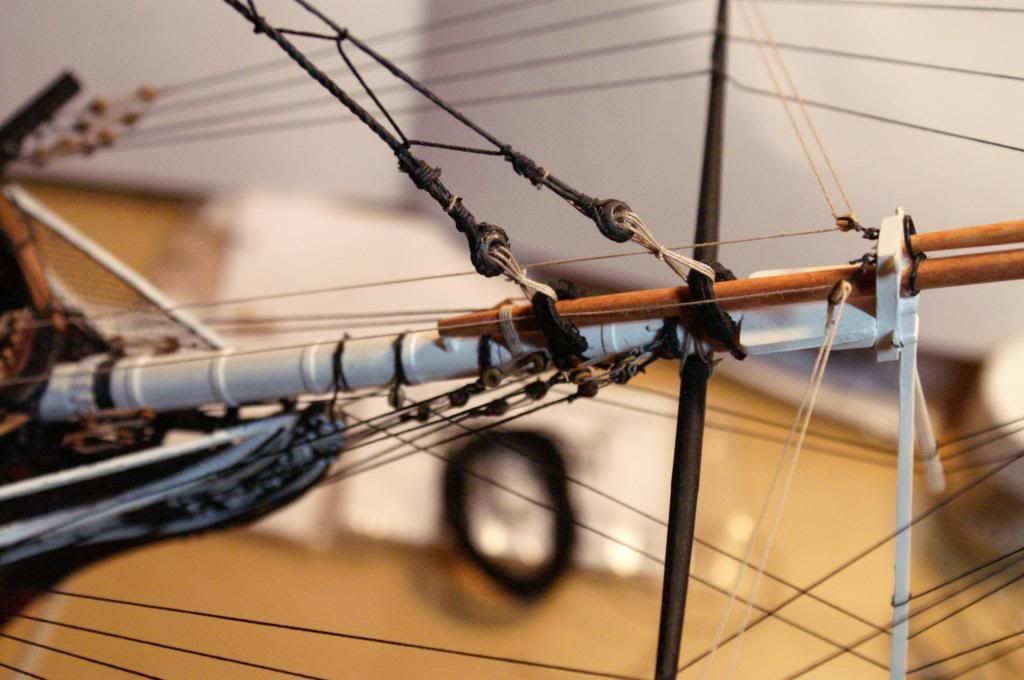
In the first pick you can see where I attached the forestay and fore preventer stay. My research showed several different locations, This is what I settled on. The snaking turned out to be a real pain. I finally ended up using CA to stiffen each run to maintain an even spread. All in all it turned out pretty good. Oh…and the mouse for each stay is way, way out of proportion. I used some miliput to make them, but somehow did not realize that I was making them way to big.
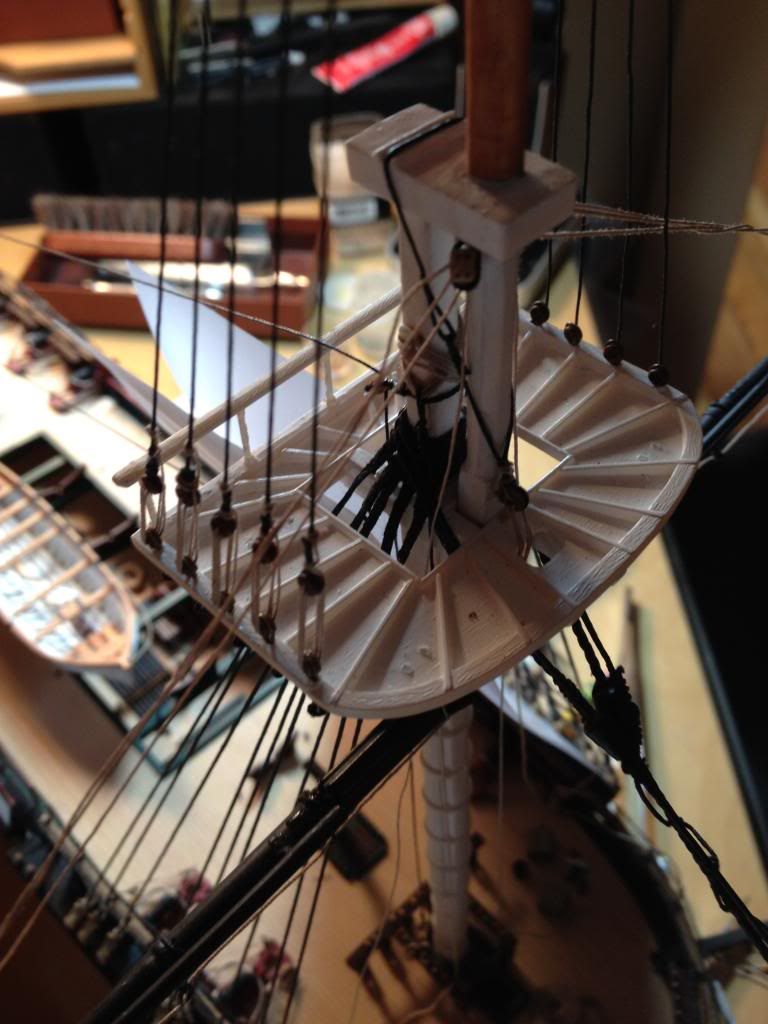
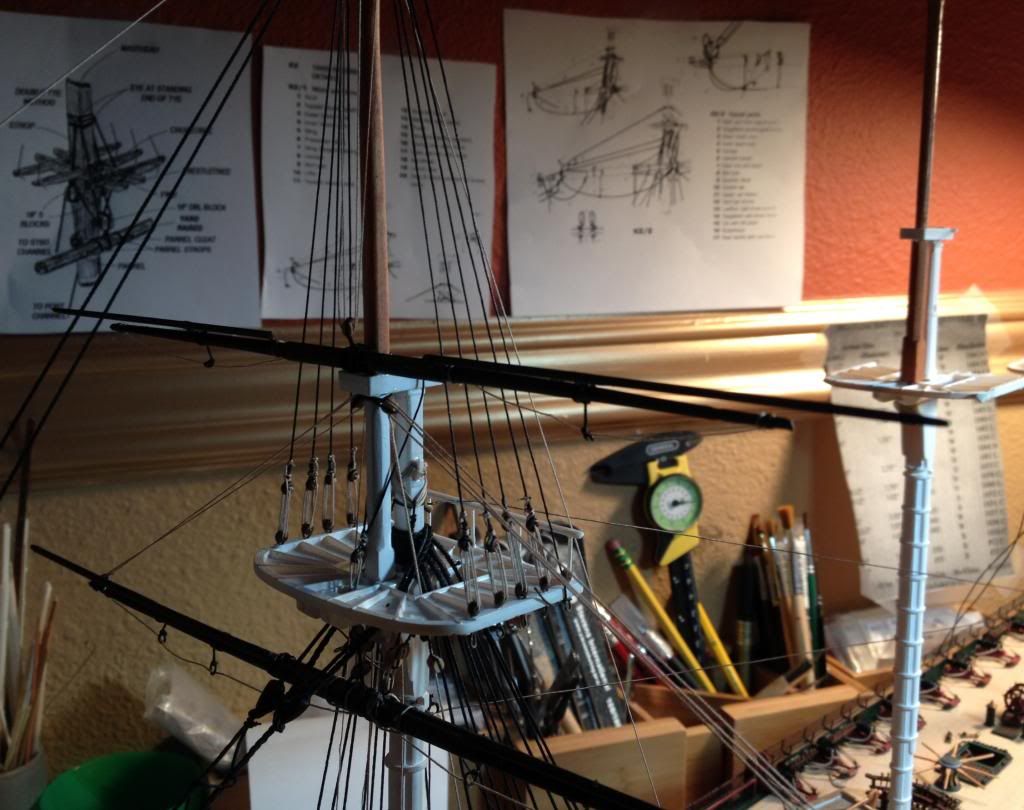
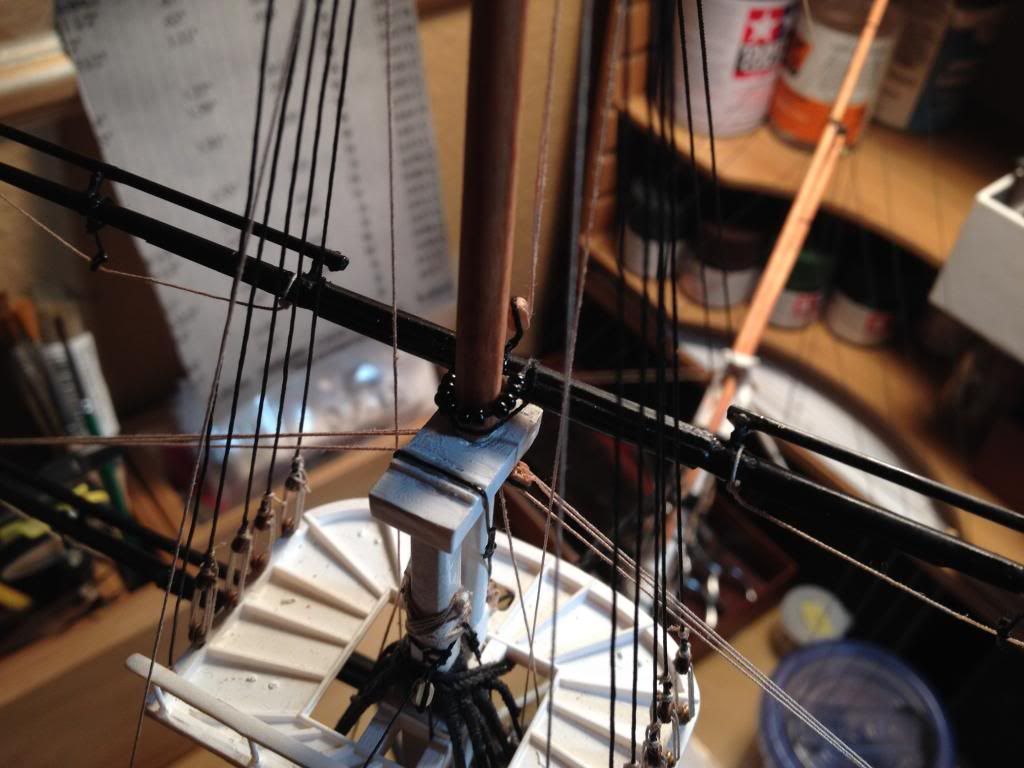
The next shot shows the jeers, sling and horses for the yard. I chose not to use black for them solely for asthetics. Rigging the jeers and the sling was quite arduous and you will note that I did not take any real close ups so that you can’t see my mistakes, The hardest part was getting the jeers sling on the masthead right. I had to run the jeers line up and run a turn of the sling around the jeers strop line which I then weighted down with a clamp so that I could adjust the “hang” of the sling for each side. Again, not ever going to be in a museum, so they came out good enough. The next pic gives a top down view showing the yard sling as well. The two blocks w/ black line running aft are for the main topmast stay and preventer which run down to a set of blocks and lanyards attached to an eyebolt on the deck next to the fore mast.
The third pic shows the hearts and stay collars. I ordered the BJ britania metal hearts and really wish I had gotten wooden ones instead. They just did not want to blacken or hold paint. I finally ended up soaking them for 10 minutes in blacken it, then spraying on some dull-coat. Still not happy w/ the results, but now its done and looks okay. The lanyards are, through my own lack of focus, the wrong size. They scale out to 3.5 inch, but should have been 6. I may go back and rectify them at the point where it is just annoying me too much.
Overall, my work is coming out a bit more sloppy than I would like, but I have to take into account that I have never attempted to do this kind of rigging before and I don’t know all the ins and outs of making things work right and I am constanly jumping between reference materials, checking and rechecking. My office floor is strewed w/ plans and open books and notes. So it is all going very slowly whilst I figure out how and then undo and fix the things that I did wrong. I am hoping that by the time I finish up with the fore mast from bottom to top, I will have a much better handle on how to go about this and the rest will go much quicker.
As always, I welcome input, suggestions, and considerate criticisim.
What a work of art.
Awesome job, as always Randy!
Looking very good for a first timer! It is clear that you are focused on the details - even if you are your own harshest critic.
The deadeyes look great - where did you source yours?
Keep on keeping on!
Evan
Thanks for the Kudos everyone.
Evan… the deadeyes are walnut and are actually model shipway products, which fortunately a relatively close by hobby ship carries a decent supply of. My experience w/ ordering from Model Expo has often ended up w/ me often getting a " on back order" notice instead of what I ordered. Granted, none of those items were from model shipways. I have a considerable amount of cordage that I ordered from BJ which has been working out fine for the standing rigging, but all my blocks and running rigging are from Syrene. (BJ supplies totally white cordage for that, which a lot of is pre- waxed, so even if I were up to dying it all, the pre-waxed lines won’t take the dye. Syrene is a bit spendy, but so totally worth the money to me.
Shake, shake, shake yer booty.
I have had little to no time to work on my build this past month and a half, and w/ my shaky hands keeping me from working quicker, things are moving at a snails pace just now. I am hoping to get more time coming up soon.
Anyway…here is the progress since my last post.
This is the starboard side and my first run on doing the shrouds and chainplates which did not come out as nice as I would have liked. You can see that in spite of using a jig for the deadeyes that they did not come out perfectly even, but pretty close, and the tie offs are rather sloppy and uneven as well. The port side came out much cleaner. I guess that I will be staging the model so that it is viewed from the port side.
I also added the BlueJacket airports. It looks so crisp and finished w/ the brass that I doubt that I am going to paint them and fall back on my argument that I am staging her after her 1858 overhaul. New airports seem reasonable enough.
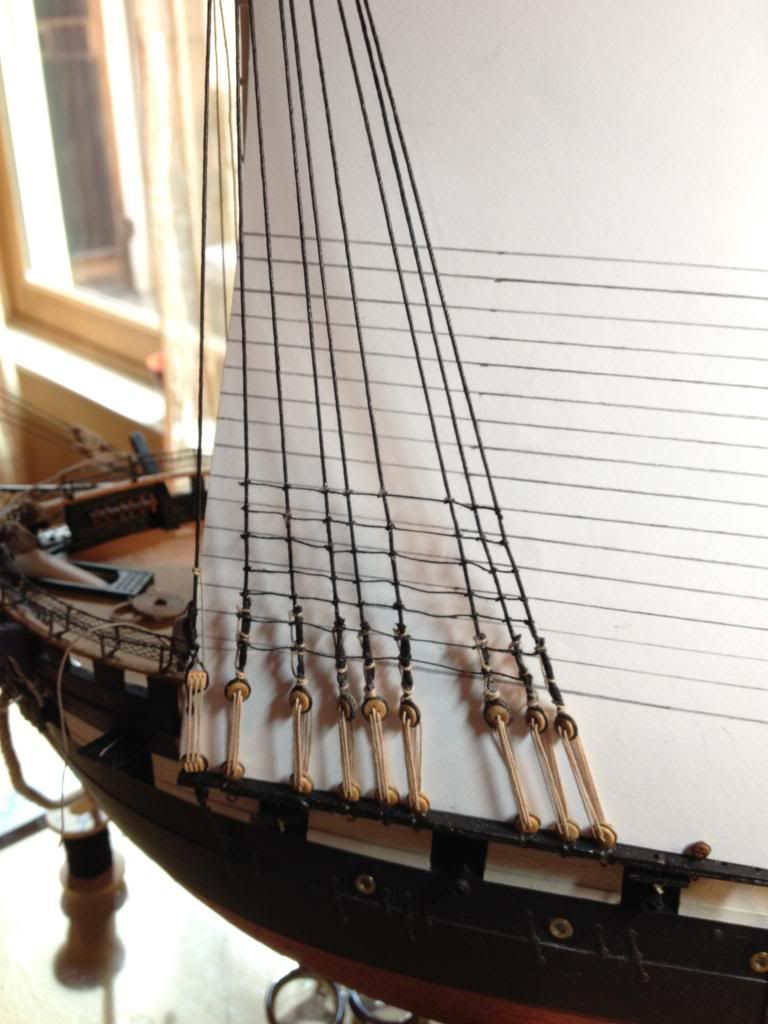
The above is the port side (much cleaner - by the time I get to the portside mizzen mast, they should be nearly perfect) and I have begun running the rat lines. I ran w/ a clove hitch for the first two courses, but fell back on a simpler overhand knot. Looking at them, I can’t tell the difference and it goes considerably quicker. Still, it is quite tedious and my palsy slows me down even more. Meh…no hurry.
I also managed to rig the topmast shrouds on the starboard side. You can see the port side is just tacked for now. The running rigging that you see above the jeers are the lifts for the main jack. I will only be adding the braces and halyards and no clew or bunt lines as these pertain to the sails which I am also leaving off. I figure I have definitely exceeded my skill and ego on this one and am calling it a win just to finish w/. only that much done.
This is a shot of the futtock and betnick shrouds that are rigged on the starboard. These proved to be quite challenging. Addding the futtock stave made from brass rod was actually really quick and easy which led me into a false sense of ease. Attaching the futtock shrouds to the stave and then the tails to the thimble was an interesting puzzle in vector calculus so as to get all of them to have the right tension on them. Note that the port side is not done yet. I am saving it for a day when I am already frustrated and angry (joke).
Okay
That’'s all I have for now. Hopefully I am freeing up some more time to work on her this month.
Until then.
Arnie,
She is coming along nicely and I love the chains; how many links per inch did you use? I know how frustrating it can be when doing rigging and it is not coming out as well as you would like. Heck, I have taken down rigging that I was not happy with. It can be a major pain but I know that it would be bugging me until I did something about it. Just my two cents worth. You are doing a bang up job that you can be proud of. Thanks for posting the pictures since I, like so many others, have this kit in their stash and I am learning a great deal from your WIP.
Steve
Thanks Steve;
The chain is 21 links per inch. .
From what I could discern from various resources is that chainplates varied from ship to ship, in part based on what was available in the area where they would be fitted or re-fitted. The use of single flat or round iron bars (as she is currently configured) came into popular use around the late 1830’s.
I seriously thought about redoing the starboard, but once you have set the shrouds and the fighting platform and jeers, it is pretty much a done deal and there is no going back w/ out trashing a whole lot of good work as well. Hind sight tells me I should have rigged the deadeyes before I ever attached the main jack and platform…The upside of making mistakes like this is that the lesson is usually painful enough that you are going to do your damnedest not to repeat it.
Looks awesome, Arnie!
I’m about to try making chainplates in a similar way for my current build…hope they look as good as yours!
Well done!
Another brief update.
I think I have finally broken out of my funk on this build and am getting all excited again.
I decided to try and use the kit spar for the fore topsail yard, but w/ some modification
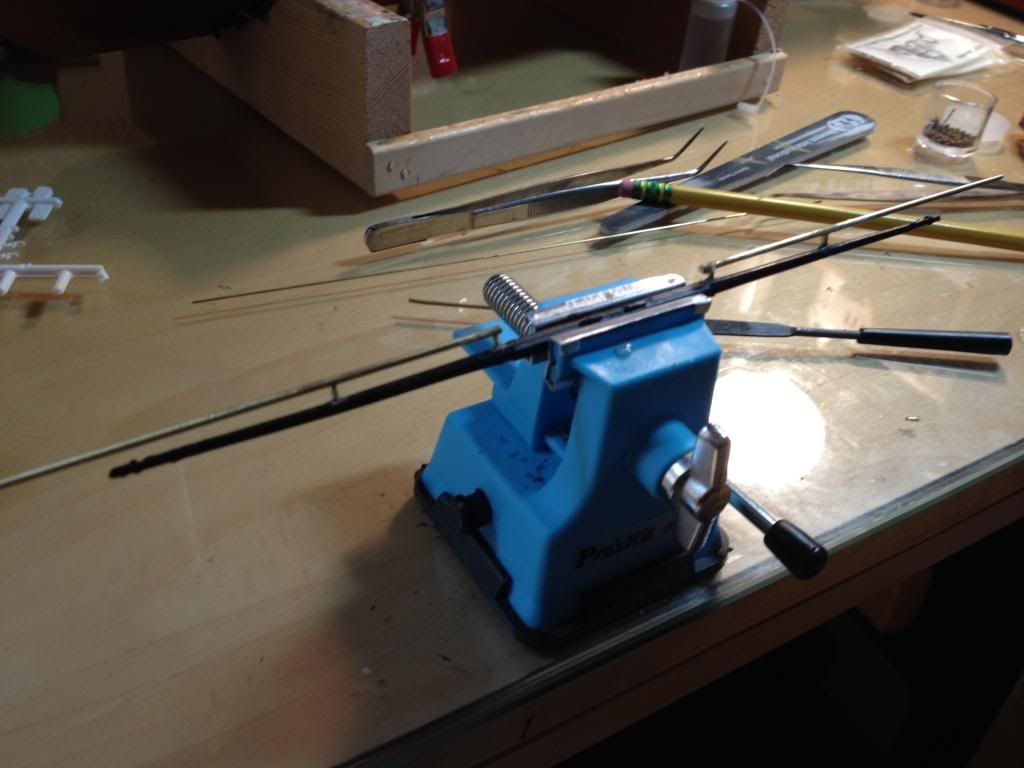
I drilled holes all the way through and epoxied in some brass pins to which I then attached brass stun’sail booms which worked quite well to stiffen up the yard. Attaching the boom to the pins was a bit more of a challenge than I really had figured. Two tiny points of attachment like that w/ my shaky hands! I finally managed it w/ CA and a spray of zip kicker (never could have done it w/ out it). It makes me seriously consider learning how to braze, which I believe is definitely the saner way to go on this.
Here it is w/ the halyards in place. I went w/ the BlueJacket plans on this one and ran a single block from the center of the yard. Marquardt calls for two blocks, very similar to the fore jack below, but I have been following the BJ plans pretty closely and did not see any reason to depart from that, especially since it is the easier rig.
I did screw up a bit on the parells. When I did a dry fit, there seemed to be the perfect number of them to hub the mast. [BTW… I used the parells from BlueJacket, but they just look too big to me] Somehow the actual fit left some gaps. Also, the BJ plans calls for two courses, one above the other, the bottom one which I had a senior moment on and forgot to add. Ah me.

Here it is done w/ the halyards and lifts all done and tied off at the deck.
The halyards have an interesting tie off to the channel rather than the deck.
The plans call for the eye bolt its attached to, to be set a little farther aft, but I set it here, part for aesthetics, part for ease. The final tie off is to a bulwark pin rail.
K. I hope you are all getting some heads up from my mistakes and can save your self some woe somewhere down the line. I will try to finish up the spars for the fore mast this week and get the results posted then. No promises though.
You are doing great and thanks for posting even the mistakes, I know I learn from them.
Steve