"Rite of Passage" the 1/96 Constitution

Force9

First off, thanks for the compliment and I am looking forward to your next post on your Connie build. As for highjacking…please feel free. Your insight and knowledge is always a welcome addition.

And thanks again John for the beautiful deck. I think it takes the model to a whole other level. (And no one I know that will ever see this first hand will be any the wiser about the butt pattern).

I got started on the spar deck by pulling parts and laying them out for fitting and replacing the belaying pins. I got to the ramp thingy (part 140) that goes up from the deck to the bow sprit, took one look, and thought “No effing way am I going to use this!” So I pulled out my Bluejacket plans and am going to do my best to follow their layout.[ I am soooo happy I invested in them]

In doing so, I had to overcome a few problems. The first being that as I went to set the bow sprit in for fitting, the part that it seats on popped out of place. Of course! The part being on the gun deck, and the spar deck now and forever in place, getting it put back in, entailed a copious amount of not for prime time language (I was the only one home at the time, so I just let it rip). That situation remedied, I was then looking at an un-centered, in relation to the deck, bow sprit that has a 1/16" gap on the port side and is flush against the deck on starboard. I honestly don’t know if this is Revells fault or mine. The pieces are all in their allocated slots per assembly directions, so I am going to ausage my ego and blame Revell.Anyway, the following pics show my remedy.

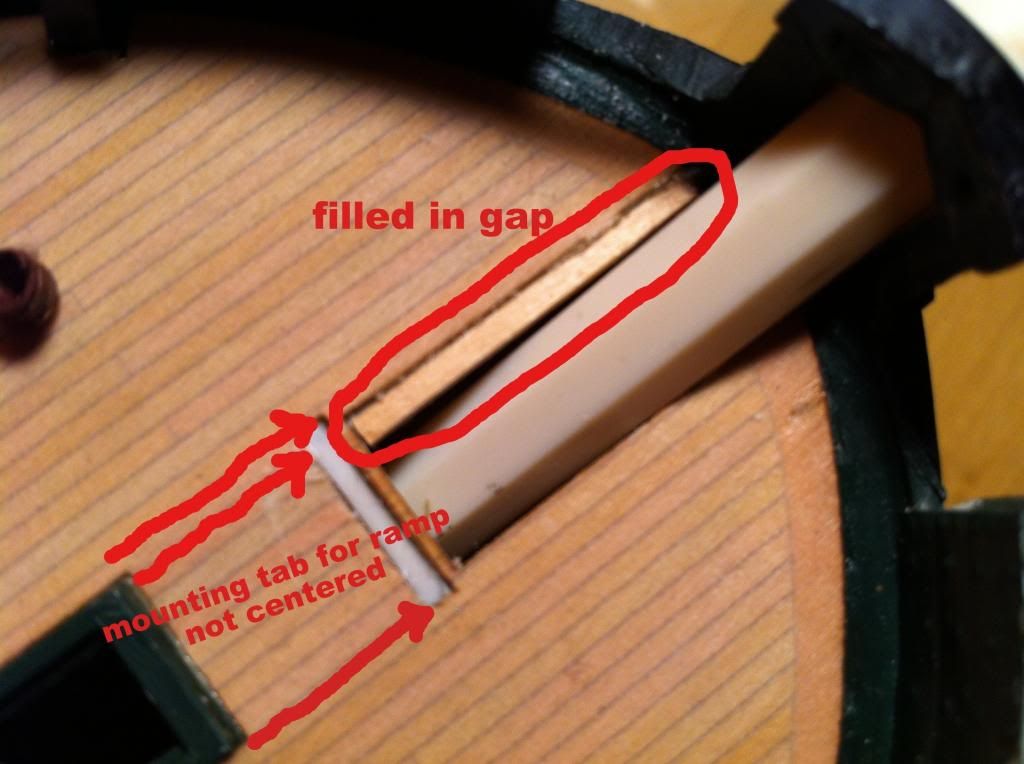
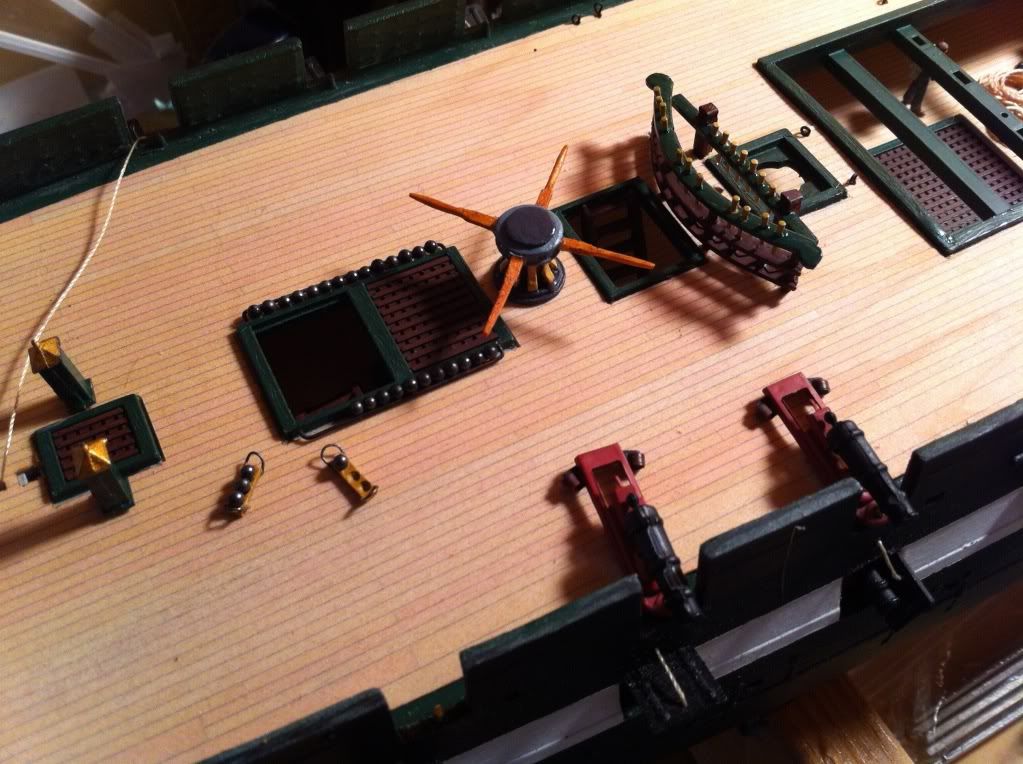
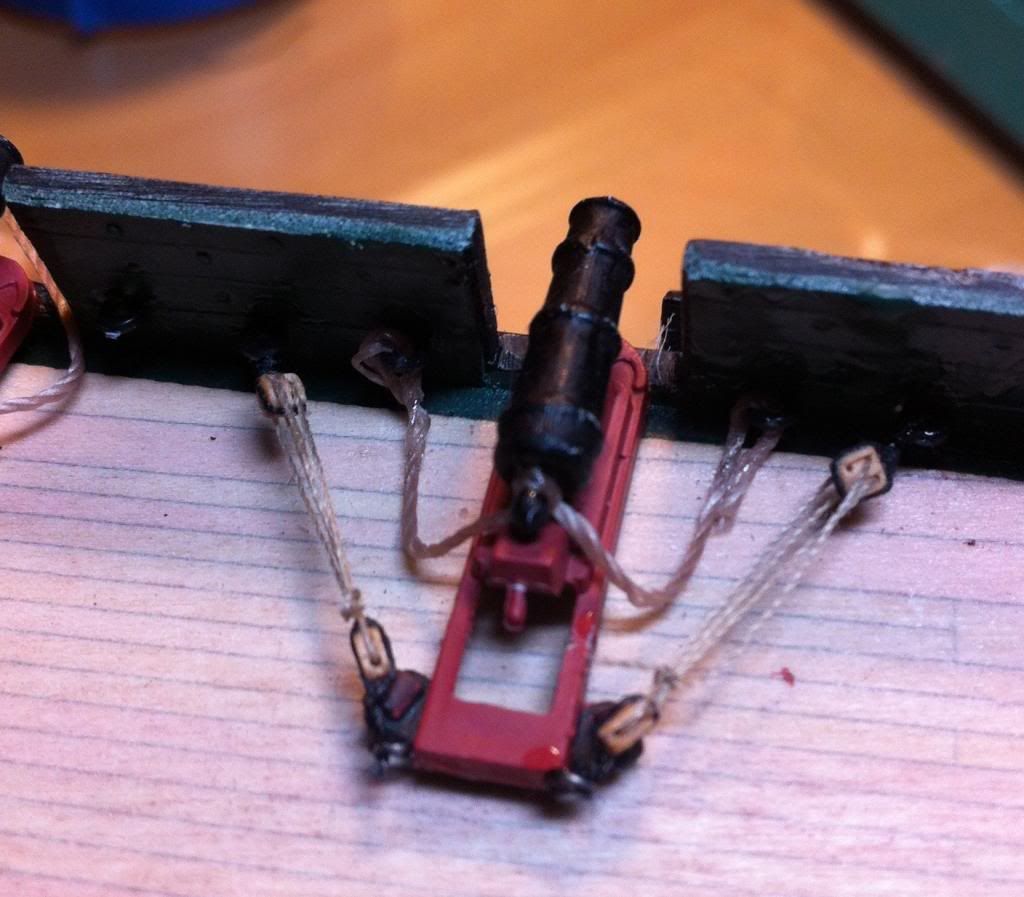
I filled in the gap with a piece of scrap basswood and then covered that with a cutting from one of the deck cutouts that, thankfully I saved. As you can see, the mounting tab for the ramp thingy isn’t centered and it is a little bit too far aft to follow the Bluejacket plans exactly.

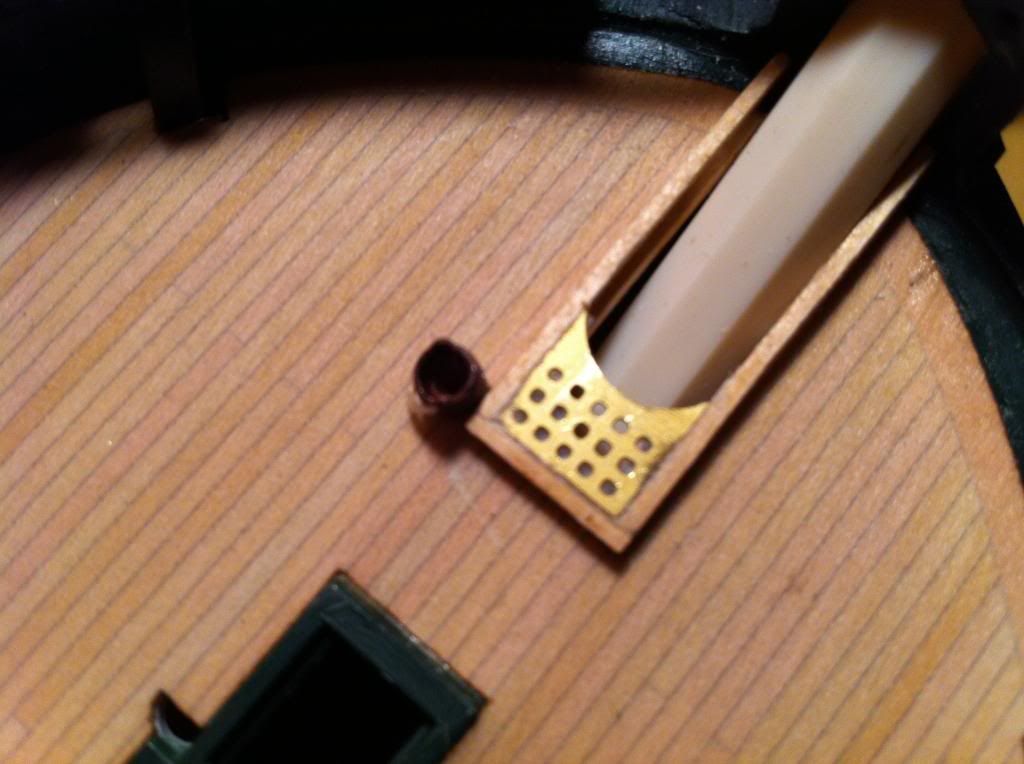
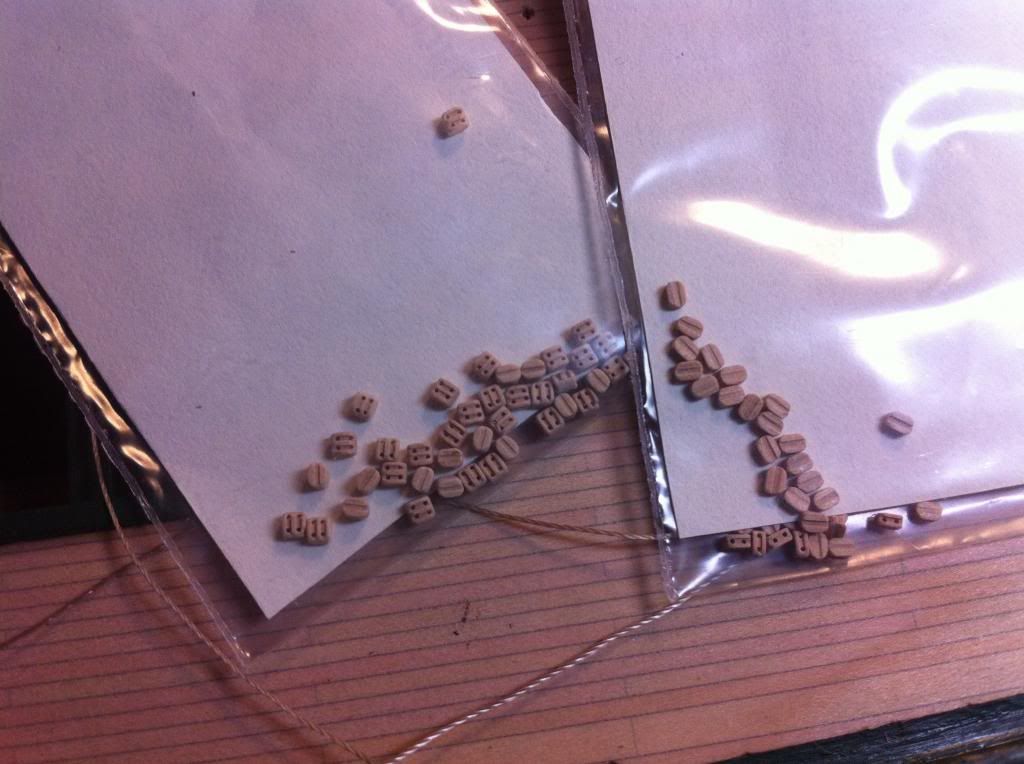
I didn’t have the right size styrene, so I made the coamings from basswood and used the Bluejacket PE grating.[I finally convinced them to send me the PE set after all. Yeah Bluejacket!] According to the plans, the grating should nearly butt up against the boom, but since that damned mounting tab had to be covered, I ended up making the coaming sides a tetch longer. The bucket is sitting on the part of the tab that sticks out to port. There is still a bit of a gap between the bow sprit and the coaming on the port side, but to do it any other way would have been even uglier. As it is, I can live w/ it.

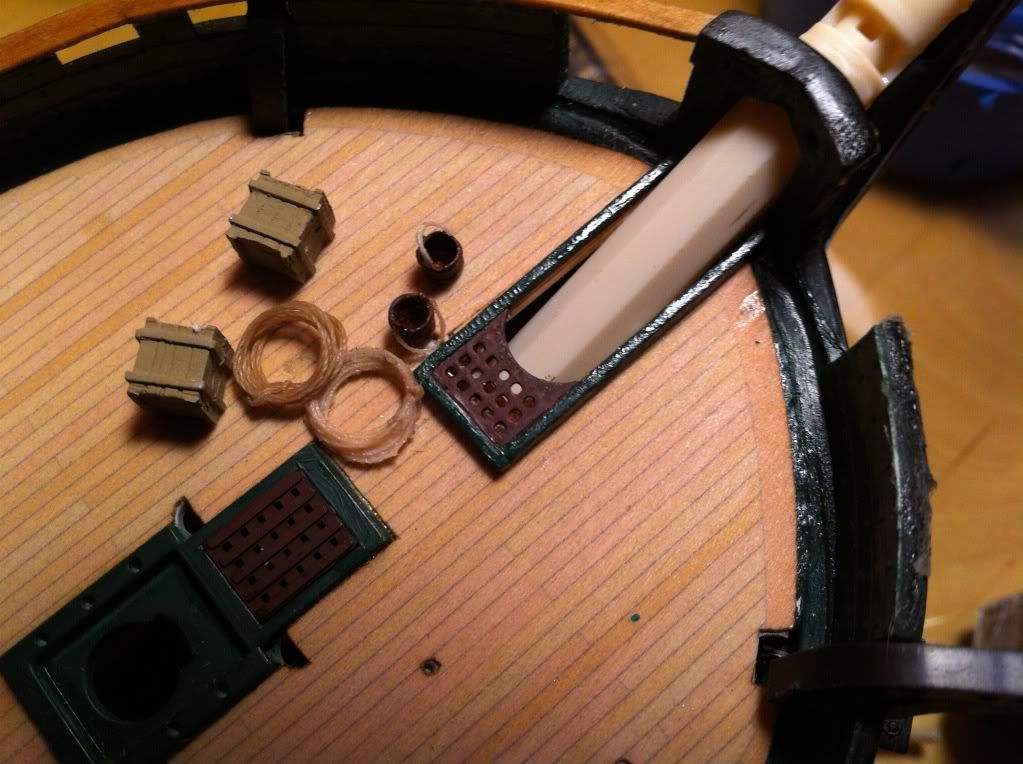
I haven’t glued anything dow here, and some touch up and dull-coat are in order, but, all in all, much better than that ugly ramp thingy. [painting wood is a whole different animal than painting plastic.In hindsight, I should have sealed the wood with a varnish or something before painting] And yes, the buckets and rope coils are hiding the tab part that still shows, and a couple of scrapes on the decking [more not for prime time language] that I made while paring down the tab. I may just redo this in styrene at some point. I don’t like how ‘bumpy’ the paint finish came out.

Things are going much, much slower w/ the spar deck, so it may be a while before another post.

Axiom: There is no such thing as trash when modeling.

Looks fantastic, Arnie! You’ve gone a long way from OOB!

Nicely done. If you know ahead of time that you will be painting the parts, I recommend using styrene. Wood is finicky stuff, and only the best hardwoods like holly avoid a discernable, non-scale grain. It’s good stuff at 1/48, problematic at 1/87 and 1/96 unless you use only the smoothest and best quality, and gets very awkward as the scale gets finer. I built a series of wood railroad stations (5 slightly different based on the Southern Pacific Railroad Common Standard Plan) in 1/160 completely out of styrene sheet and strip and they looked better than if I had tried to use wood.

I must confess that when I am not building model ships, I like to build aircraft and rockets. Balsa is great to work with, as it is soft and sands so incredibly easily. However, it is very soft, and when you paint it, it “fuzzes up” something terrible. UNLESS you use a good sanding sealer. Aero Gloss is by far my favorite brand.

www3.towerhobbies.com/…/WTI0001P

Do about three coats, sanding with a fine grit paper in-between each one. The first coat really gets soaked into the wood in a big way; the second coat less so, and the third really lays down a smooth surface. When all is said and done, the sealer fills in all the pores, and virtually transforms your wood into a plastic-like material that is very hard and strong (hard enough for rocket fins that bounce on the ground upon landing.)

I would think it would work good on basswood, too. You might want to pick up a bottle and check it out. (Oh, and get the matching thinner, too, for cleaning up your brushes!)

Advantage balsa for ease of shaping and bending; advantage styrene for no need to finish prep the surface prior to painting. I use both, depending on the needs at hand.

Thanks John and GM for the tips. I think I will get a bottle of the Aero Gloss, sand down the coamings that I made from the basswood, and give it a try. No doubt it would be less work to just rebuild it from styrene, but I want to see how it comes out for possible future use.

Here’s a small update

With our Oregon rains setting in hard and early, being outdoors has been less than pleasant so I have been spending more time at the work bench. i replaced all the belaying pins w/ ones from Bluejacket and gave all a coat of paint, I put in shot racks along the hatch just abaft ot the capstan, and the capstan as well.

The racks and the capstan are modeled after pics from the current Connie.

I aplogize for the poor quality of the pic. The capstan on the current Connie had a brass cap and stainless steel sides. I did not think they would have stainless steel in 1858 so I painted that part light grey, and the brass paint I have for the cap was just wrong, so I painted it dark grey. I am pretty happy w/ it, but I would love to get some input on color scheme here, also w/ the pin rails. I painted the top pin rails green and the heavey support timbers brown. I am thingking all brown or maybe all green. Nothing except the shot racks are glued down at this point, so easy to change. The shot racks are brass wilre that I used blacken it on. Getting the 'bends to be the same length and parallell was tricky. Installing them even trickier, but nothing worth seamans language about. I plan to do one more up near the foremast.

The little shot trays on the deck are pure supposition on my part. I wondered how they got the shot to the decks and came up w/ the trays. i figured two men (boys) could easily transport 3 balls at a time this way. I found plenty of info on what the ‘powder monkeys’ do, but nothing on how the balls were moved,. If any one has insight/ info on this I would appreciate knowing about it; Input on the paint scheme is also very welcome. Right now I guess I like it but am ambivilant.

I added the capstan arms? spokes? usind bass wood stained colobnial maple. Rough,Not my best effort . I shall try some more later and see if I can do a better job (good practice for doing the yards?) I left it at four for the time being ( 8 total) as I havent decided that I really want to do more than that. So let me know what you think about that as well.

Moving sooo slowly now. I like it.

Axiom: if its going to end up hidden, it’s not a mistake.

Following Force9’s lead, I decided to redo the wheel housing using the current Connie’s helm as my guide.

I came up w/ what I thought was an awesome idea. I downloaded the drawings from the Connie site.

Then I re-sized the pic to scale and printed it out. Then I cut out the stand part and glued it to some basswood sheeting and carefully carved it out using the pic as my guide. Then I glued a piece of .01 styrene sheeting to the back and cut it out. The next step was going to be to glue another piece of the .01 to the other side, cut it out, sand, file and shape for a finished product.

You can see why that’s as far as I got w/ that idea.Maybe if I did 20 or so of them I would get two that worked, but I couldn’t face it. Just getting these took far too long. So I fell back on Force9’s method w/ a slight variation. Instead of laminating two pieces of styrene, then bending them to shape, I used a single solid piece. I made a jig first, then I had read somewhere that boiling the styrene would allow you to bend it like steaming wood does. I am happy to say that in fact that does work, but not quite as well as it does w/ wood. Still, I was able to get the shapes that I wanted pretty near perfect after a few tries (you need to let it boil for about ten minutes at least, and then you need to work quickly w/ it) The end result is not nearly as nicely done as the ones Force9 did, but considering my skill level, I am fairly happy w/ it.

Haven’t decided if this will be the final color(s) or not yet, and I need to do some clean up but overall, much, much better than what came w/ the kit.

Axiom: If you are trying something for the first time, clear your calendar for the day.

Notice something? The drawing has ten spokes; the kit eight. There’s always been something about that wheel. Truly.

Your base color is good. Have a look at the WW1 guys’ GB. They do wonders with that umber, and Testors “wood” grain effect.

i did not notice the discrepancy being so focused on the stand and not the wheel. Good catch there GM.

Tackled by the Tackle:

So I decided that I wanted to run the side tackle on the carronades on the spar deck. I ordered some 2mm single and double blocks from Syrene [amazing quality! Not a single bad block out of 100 total, and I have not had to file, sand, or re-drill a single hole that I didn’t accidentally get glue into. I can not recommend them enough. http://www.syrenshipmodelcompany.com/ ] and set to work, and set to work, and set to work. I knew there was going to be a learning curve on this one, but not so damned steep a one.

Here’s my objective:

A single block on the carriage and double on the bulwark. I would have done well to reference this photo before I got started on this.

Axiom: Do your homework first.

I had it in my head that the blocks were stropped in iron w/ the hook end, Not as in the above, stropped in rope w/ the hook attached. So I started out by trying to figure out how to strop the blocks using twist tie wire, which was the smallest gauge I could find that was still flexible enough. I did try a smaller guage of brass also, but it was just too hard to bend at that size of block. So I stuck w/ the twist tie wire and also added eyebolts to the carriage using it. The wire seemed a bit too large for the scale but looked reasonbly good. Sometimes you have to use a bit of “willing suspension of disbelief” when trying to work in scale. Threading the blocks turned out to be the easiest [although not by any means easy w/ my shaky hands] part, and I got a practice run placed.

Not the worse, but far from my expectations. I freaked out having spent many hours getting to this point and threw it out to the forum hoping for help. As it turns out, the best help I got was the pic of the carronade on the present day Connie.[remember? The one I should have looked up in the first place.]

Back to the grindstone, I pulled the eyebolts and moved them to the rear of the carriage. As it turns out, there is a little lip at the back end where I could place and glue the eyebolts under the carriage. Then I went back and tried some different cordage till I got one that worked for me to strop the blocks w/ and just bagged the idea of the hooks. At this scale its not really an issue and made my life considerably easier.

Still room for improvement, but much much better. Moving the blocks to the end of the carriage and the other one to the center of the bulwarks expanded everything enough to catch that wonderful geometry going on there. The breech tackle is somewhat frazzled, and I may replace it, but it came out pretty good as well. The hardest for this part was getting the slack right. So, as it stands, this is going to be my template for the rest. [21 more? sigh.]

“Until the time Eustes, until that time.”

Arnie,

Did you get the pear or the boxwood blocks? It’s hard to tell from the pictures (for me) since the color may not “translate” from the images on their site to the images you’ve posted.

Their prices seem very reasonable for the quantities and I may get some for a future build. I know JTilley recommends getting just what one needs to work on for a few weeks and then order more but, from what I’ve gathered regarding the sale of companies like Model Expo and Bluejacket, I may want to stock up [*-)].

Mike

Mike;

These are the boxwood blocks. I liked them the way they came and didn’t bother w/ staining them. I may go a different route w/ that idea when it comes to the rigging. The glue does change them a little, but obviously I don’t see that as a problem.

I just ordered a minimum to see how good they are, and as I said earlier, that’s damn good. I will probably go over my rigging lists and figure out what I need and then order the bulk of what I will need.

Here’s a pic.

Randy -

Your work continues to amaze and inspire. Before you get too far along, you should check this out…

I have moved on to working on the CSS Alabama. The Revell 1/96 kit is really honked up; they just sort of tweaked around their model of the USS Kearsarge which was roughly comparable, and then moved around the deck stuff a little but and Presto! They had an Alabama. But the biggest problem was that they didn’t mold new guns, and the gun sweeps for the pivot guns mounted in the deck were all wrong, and when you are done with the kit it doesn’t really look like the Alabama looked.

So I did some hunting around and came across a firm named “Cottage Industry Models.” They make a really cool gun set for the Alabama in 1/96 scale - I picked it up, and it’s awesome. I also ordered a 1/32 model of the 7" Blakely Rifle by Flagship Models, and inside was a little packed of awesome rope, by… Cottage Industries. You gotta check out this rope! You can get 15 feet of it for just a few bucks!

http://cottageindustrymodels.com/?page_id=153

Here is a photo of the actual rope in my Blakely kit. The larger is for the recoil rope, and the smaller is for the tackles. But I gotta think that the smaller rope in 1/32 scale would be perfect for the recoil rope in 1/96 scale. And it just looks so much like teeny-tiny real rope. Check it out!

Here is the photo from their site:

Hmmm… Photo did appear on the last post. Let’s try that again…

John;

Yeah, that’s some really nice looking cordage. Definitely better than what I got from BlueJacket. What’s the turn around on order time?

I have checked out cottage industries before. They have some ironclad models that I have drooled over. Someday.

And thanks for the Kudos.

Arnie60, no doubt you as well as Force9 and a couple of others on this forum, dwell in the upper echelons of rarefied air when it comes to the modelling world! Such attention to the smallest details is mind-boggling. Quite impressive!

So as I am rigging the side tackle on the carronades I got to thinking about the force advantages of using pulleys and realized I really did not know just how they work. I figured I would share what I learned here in case anyone else was curious.

Lest assume we want to move 100 lbs. In a 2 t0 1 ( this would be two single blocks) there are two lines that carry the load around the pulleys, so the weight gets distributed equally on those two load lines, i.e. 50 lbs each in this case, so that in effect, the free side that is being pulled is the same as pulling on 50 lbs, not 100. In the 3 to 1 (this would be a single and a double block) you would only be effectively pulling on 33 1/3 lbs of the total 100. So simple!

Here’s the math behind it.

MA is the mechanical advantage W is the weight or load T is the tension or force of gravity n is the number of load lines.

I know, its nerdy, but, being a former math teacher I can’t help but see the mathematics and geometry in all the parts of a sailing ship. Its all really quite elegant to me.

For sure, you definitely would not like me as a student in your classroom. :slight_smile: Math and geometry was all Greek to me. But thanks for the lesson anyway.

Gotta love that mechanical advantage!