Hi all,
I picked up model building for the first time since high school when my son got into the Titanic and saw the kit at a hobby shop. Back in the day I did some airbrushing, but never learned to scratchbuild, weather, etc; I could barely be bothered to fill in the seams. Loved building, though, and spent hours listening to the radio and getting lost in the work. The first model was just ‘out of the box’ with some paint.

Researching the Ttanic online, however, lead to all kinds of discoveries about the intersection of model building and Titanic obsession, and soon I was trying my hand at another, this time with some mods. I’ve clearly been sucked back in…

There was no main anchor well, so I carved on out and glued a small piece of sheet styrene underneath. Added the portholes and hatch covers on hatch #1 with sheet styrene and an pin vice. Carved off the bollards and moved them closer to the hull on both sides. Drilled out the ‘bell’ on the fo’c’sle funnel to get the shadow effect without painting. Removed the moulded railings and stairs.

Cut off the steam pipes from the tank house to the #3 funnel and replaced them with custom-built items (still too big).
Added hatches between the anchor chains using little squares of sheet styrene. Cut out the top support for the bow crane and replaced it with a support in each side. Added conduits between the anchor winches and the #1 hatch. Primed and painted the lower sections of the well deck crane supports. Painted the canvas portions of the #2&3 hatches and added brass paint to the top of the anchor winches and windlasses.
I was researching what to do about the superstructure windows that are missing on the Revell. I decided to ‘hint at’ the windows that should be there by drilling a series of portholes in the right places. Just something to trick the mind into seeing additional complexity…
Completed the ‘Y’ and ‘T’ steam conduits on the bow.
Added the supports beneath the A-deck cranes and the aft boat deck overhang.
On the poop deck, I carved away the molded railings and added a little detail to the steering gear deckhouses. Drilled out the funnel bell to provide some depth.
The B-deck hatches were raised up with a piece of styrene, and all of the molded railings were cut down. Doing so created holes in the deckhouse above the #4 hatch that I have to patch Thin styrene was used to simulate the missing doors.
Out of the box, the boat deck second-class entrance includes the door overhangs but isn’t recessed beneath them. This results in two odd-looking quarter-round molding. I carved these out, which left holes that I still haven’t decided how to fill.
Drilled out the vent holes at the top of the tank room and added a styrene piece to raise the deck house on the starboard side of the funnel casing. Unfortunately I did this after replacing the steam pipes and so had to angle it against them rather than having them land on it.
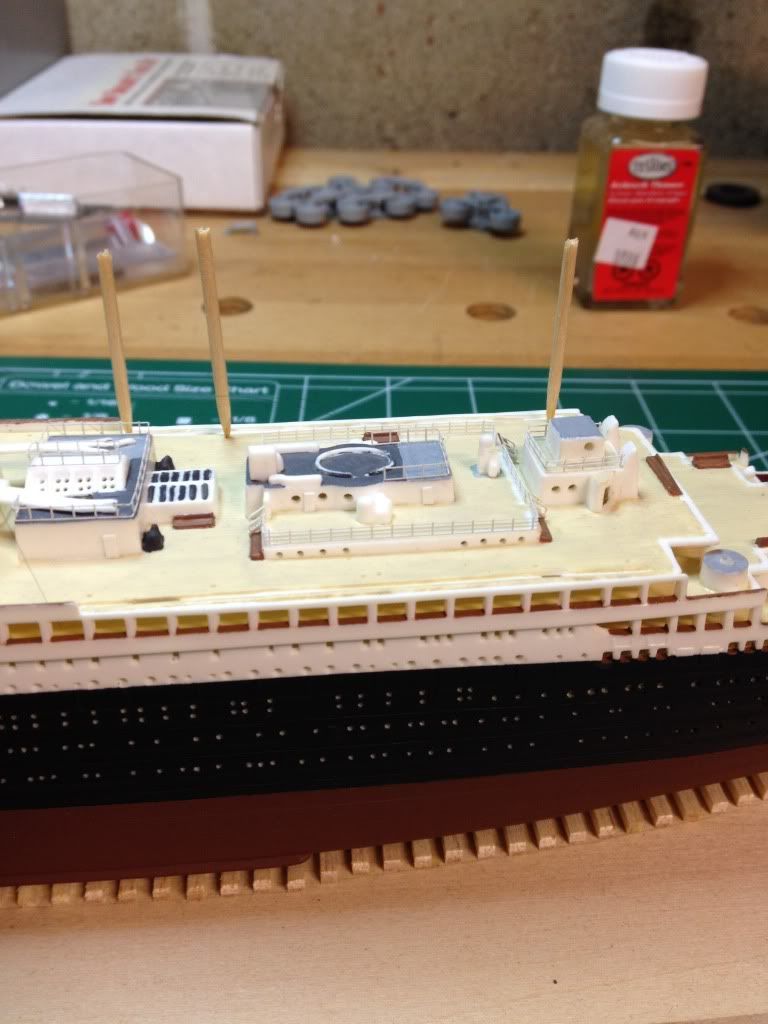
The shot that follows captures the drilled-out funnels. Note that I did not carve off the curved portion of the molded railings above the reading room. This was because I had no experience with photo-etched railings, and I concerned about creating a curve.
Cut down the stair well surrounds on the boat deck; the kit had them incorrectly curve up into a complete quarter-round. Created a French vent in the well deck, and carved off the molded-in stairs.
Created a main anchor using a slice of poly tube and a piece of scrap plastic.
The front vent is missing from the 570, so I made one up from 1/3 piece of poly tube combined with sides, edge and braces from the thinnest poly sheet I had on hand.
Began adding the photo-etch railings and stairs, and got into the slow process of rigging the funnel stays, which is where I’m at today.