Wow, fell off the front page! That won’t do.
I should have a small update tonight on the Cr32. Been massaging seems and fixing the nose.
Wow, fell off the front page! That won’t do.
I should have a small update tonight on the Cr32. Been massaging seems and fixing the nose.
Couple of quick photos of the pit before I close it up. 1/72 Tamiya corsair.
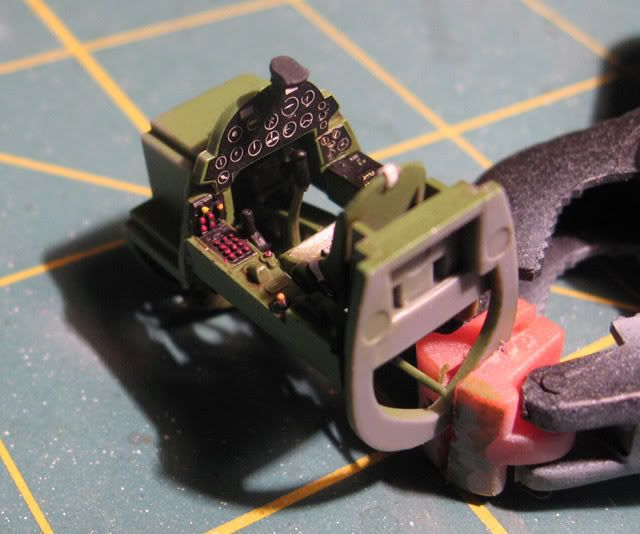
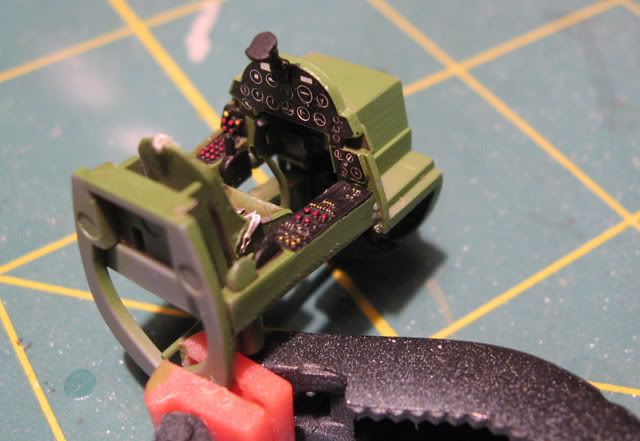
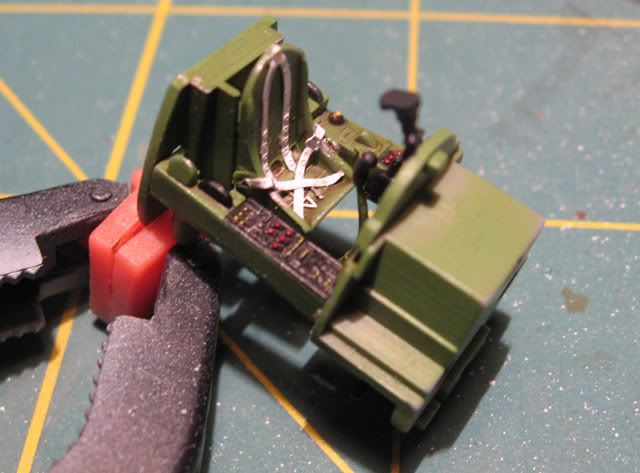
Seatbelts are actually an old RAF set I had laying around. Never got around to ordering some for the USN and the seatbelt decal that came with the kit looked awful.
**Dave -**the quality of your work on this one is spectacular as always. [^] I always liked the look of the Holey Belts myself.
I Cant ([:-^]) seem to draw myself back to my project for this GB just yet. The mojo on my P-40 is still strong and I need to keep with it [;)]
[sigh] LOL
Dave- Outstanding progress, and the subject matter= SUPERB!!! [^]
But, a Corsair at the RA GB? Not complaining, just curious. [;)]
Doh!!![D)] Trying to rush cause I’m at work. Meant for the NAW GB. Ooops!
LOL, you have no one to blame but yourself. [swg]
You know who’s fault it is…
LOL!!!
Eh - No Biggie, lots of OT~RA stuff shows up here. As long as it keeps things interesting no harm done right ?
Classic Dave ! [(-D][tup]
HOW DARE YOU TRY TO INFECT THIS GLORIOUS, INFACT, ULTIMATE GB WITH THAT CROOKED WINGED CHARLATAN!!!
Sooooo funny, ive done it myself, but luckilly i managed to remove the post before anyone else saw it. Just wait till Sarge gets a load of this LMAO.
…Guy
Eh… I’m blaming it on Monday morning and on the fact that I’m still recuperating from my nine year olds Birthday party yesterday. It can’t possibly be my fault! [;)]
In know what you mean! Those nice year old birthday partys can get WIIIIIILLLLD![(-D]
Arrrg! [oX)] Got wind of it I have! I kinda have a soft spot for Corsairs lately so it’s fine by me. LOL! Looks Great Dave.
No joy on the Decals yet Guy. Dern Canadian proprieters! I think they got it out for me! I’ll give it to tomorrow and see if I can contact him again.
HK I don’t know if I mentioned it yet but I am really watching your build and using it as a ref for the old Smer kit which has zilch for details. Especially on the pit. Watching your fine work is helping me immensly!
The only thing that has me confused is this?
razordws wrote the following post at 03-09-2009 12:46 PM:
Eh… I’m blaming it on Monday morning and on the fact that I’m still recuperating from my nine year olds Birthday party yesterday. It can’t possibly be my fault!
Now with all the things you have been blamed for Dave… Why wouldn’t you take the blame for the nine year old? [:-^] I mean really no way possible it could be anyone elses fault there! [:-,] Guy I think you need to take Dave aside and have that little talk about the Birds and the Beez! [(-D]
Oooo… Bill did you see this!!! [8-]
http://www.hyperscale.com/2009/reviews/decals/aviaeology72004reviewmp_1.htm
You haven’t met MY nine year old! [:-^]
Maybe not the kind of party some of the single blokes on here would think of as wild but you still wake up with a wicked headache. [(-D]
Made a little progress. In this update I tackled the broken nose.

I lined the inlet with a cut piece of PE fret to serve as a backbone for the CA. Next I filled the missing area with medium CA and let it set up. This took a couple of applications.


Once the CA had set up I carefully peeled away the PE fret which left the formed CA. Some work with the sanding sticks and the area was repaired. Did you know that very, very thin CA is flexible? The area is very delicate and I hope it survives the rest of the build.


I used styrene strip to repair the broken cooling fins on the nose. These were trimmed to shape after the CA set up. They are a bit thicker than the resin but it’s going to have to do.

Tonight I’m in the process of cleaning up and fitting the cabane struts. I’m using bits of wire at the attaching points to allow for movement for alignment once it’s time for everything to go together. Hope it works. All for now.
Troy, that was a really great fix and it came out great. Great skills my friend. One question on the chin repairs though. How did you keep the CA from being glued to the PE part. Did I missunderstand how you did that.
Steve
Good question, I wondered that too. But my PE has never stayed stuck with CA…[:I]
I had a theory that luckily for me, worked. That is that the PE metal was so smooth it offered no ground for the CA to stick to, no surface texture for the CA to grab. This thought and the knowledge that CA has no sheer strength lent me the nads to give it a go. I’ll have to admit saying as I started to peel the metal away to saying, “Here goes nothing”. But as I rolled, not pulled, away the metal it was imediately aparent that all was well and it left a nice ring of CA right where I wanted it. Something I’ll have to try and remember again in five years when I may need to do it again.
That is a superb tip on the CA repair to the chin Troy. Thanks for sharing it, and the photos to show how you did it- much appreciated!