Captain Bondo - I like your next projects. I have been wanting to get a Sunderland myself ever since Dave posted a pic of his. See it is all Dave’s fault. I am looking forward to seeing this one built with your fine attention to detail. [tup]
Thanks, Lufty and Sean. I thought Part 1 was a little…obscure. Those kits are for the FAA GB as is the rank discussion. For this fine build I’ve started the Cant Z 501, which could be a viddy, perhaps with a little more Italian flavor, like a fine Barollo or a Valpolicello…
By the way Frank, we’re getting impatient about the premier of DR. FRANKENSTEIN.
Hey all, I started on the CANT today. Well you know how it is. I seemed to be at the bench for ages and when i finished i didnt havbe an awull lot to show for it LOL.
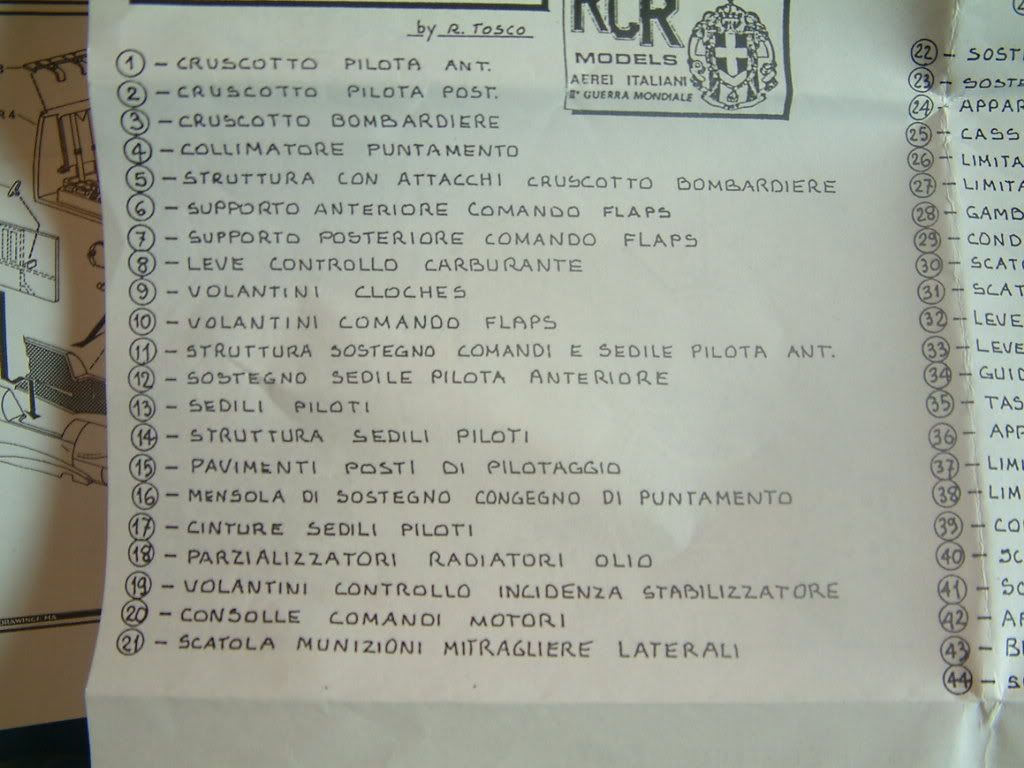
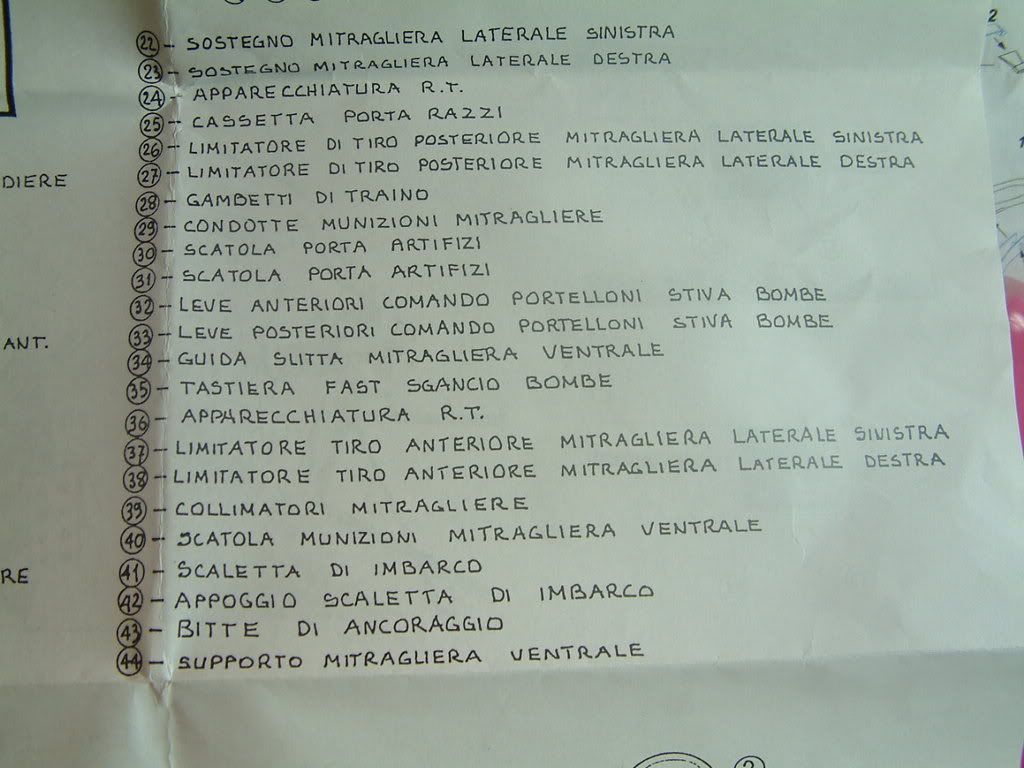
I have a request for the Bondomeister. he instructions for the RCR PE fret im using is all in Italian, any chance of a translation from Mrs Bondomeister?
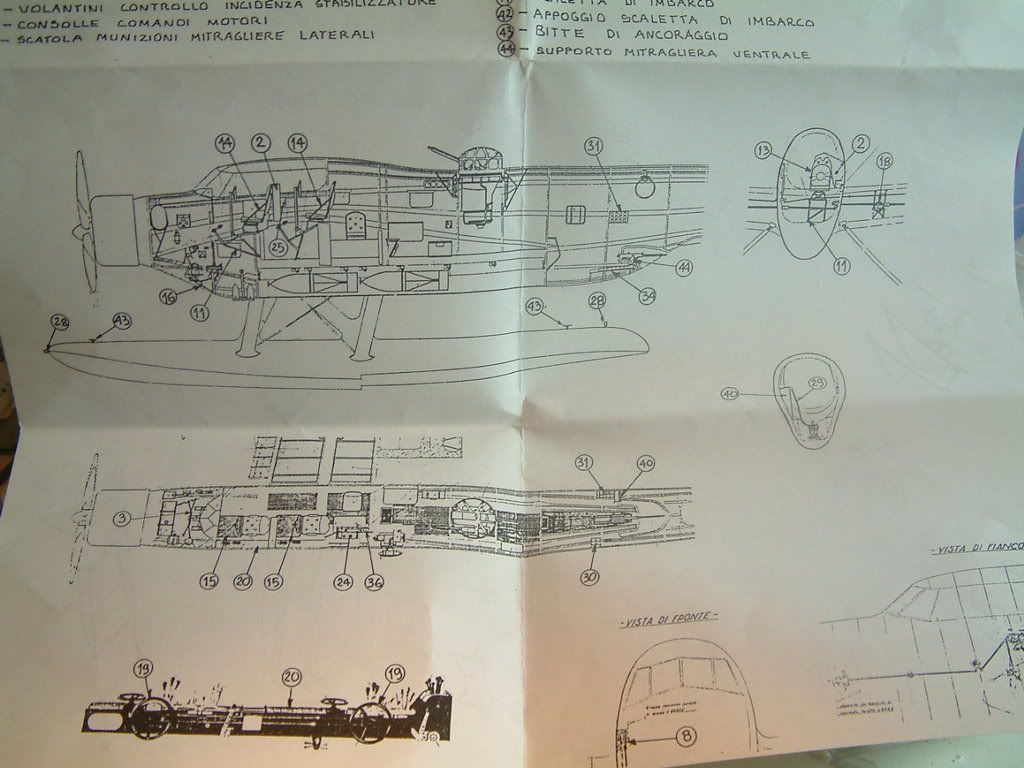
im sure if i knew what half the pieces were, placing them may be easier LOL. As i say the instructions are woefull to say the least. They give you little pictures of what the PE bits look like when assembled but not in situ. Then they give you a picture of the plane that has been snatched from a 506b manual with the numbered pices on this, in 1/72 scale LOL. Very strange. They also give you lots of pictures of the real plane with numbers where the pe goes. This would be great if the pictures supplied hadnt been photocopied about a squillion times and the pics were legible. I know moan, moan, moan, what are we? Modellers or assemblers.
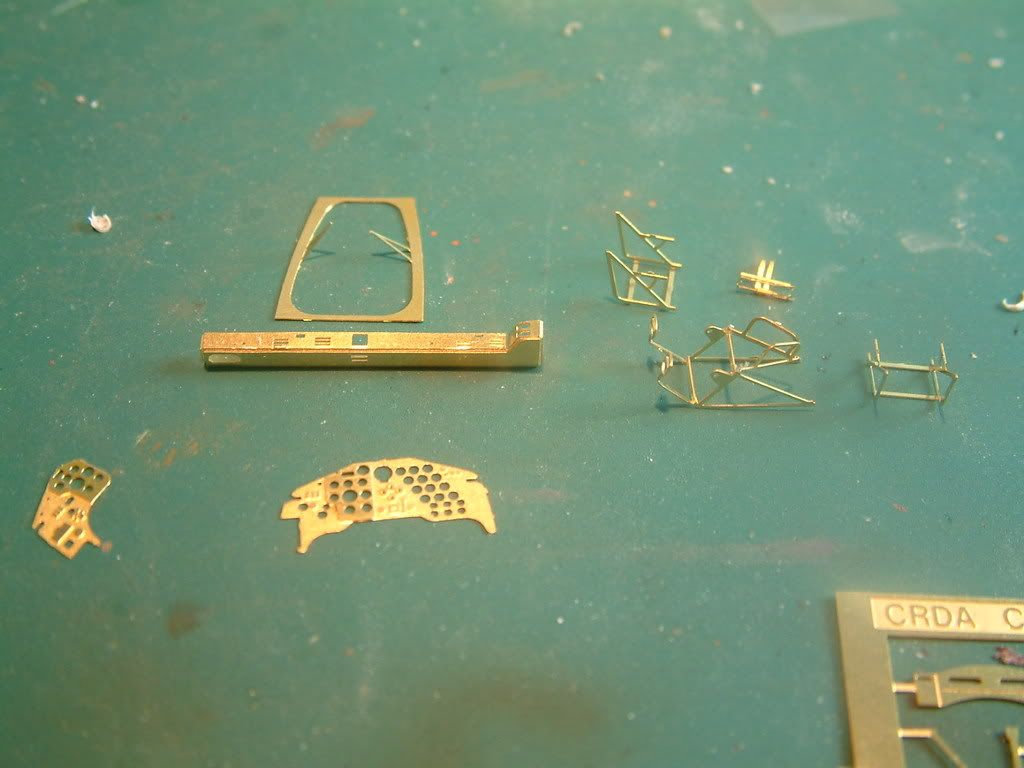
Heres a pic of the pe ive made so far,
It seems like some nice stuff to work with, not too flimsey at all.
I really need to find some interior pictures of the 506b. If anyone has some, id really appreciate them. I wont make it homework, then that way i might get some help LOL.
Well, since I cannot post a part 2 video, thought I would try to appease the masses with a progress report WITH PICTURES!!! I finished the clean up where the wing attaches and rescribed the lost detail. Also did some cleanup behind the oil cooler. Next up, attaching the radiator flaps and such! [:D]
Looking great Frank. I have to try my hand at drilling out the nose scoops like that. The really add that extra bit of detail that put your models over the top.
Frank, Frank , Frank… do you really think we are so easily appeased [V]? Now if you had offerred a spinner pic [:D]! Not that I want to see ANOTHER video of you in the optivisor but Guy is insisting that we torement you until you give in.
Not much, but this is all I have so far! I used my jeweler’s beading tool set, and a custom tool to make the rivets and screws on the spinner. I also thinned the openings to better represent the thin sheet metal of the spinner. I haven’t painted it yet, but I used some Pro Modeller Wash to accent the detail.
[yuck] What are you guys talking about? There aren’t even any prop blades in it? And don’tbe trying to make them outta Spagetti! I am off too work but will razz everyone later! Great stuff Frank! Afraid to know what a special tool is? Probably get me banned for life! [XX]
Thanks Sean! That really does mean a lot to me. [^]
LOL, spaghetti prop blades? Now THERE’S an idea! Don’t think I have the skills for that though. What about you, McNeal? [:D] As for that special tool, I realized after I made it that it is made to standard size, NOT metric! [sigh] Oh well, hope nobody notices that.
Work has kept me busy and too tired to look at the boards after work, but late, here’s my comments on the color matches. For the Italian dark olive green, NATO green is a perfect match, including FS number, I use Light Ghost Grey for the undersurface which has the same FS number, neutral grey maybe alittle too dark for it. The light tan is variable as the Italians used different colots and the manufacturers didn’t provide an equal product, The various colors could range from a yellow orchre (dark yellow) to a light sand. British interior green or pale green would be a good replacement for the Italian interior colors.
Thanks Guy! For the line of rivets around the middle, I did it by hand with a beading tool. Took a while to keep them even, but I like how it turned out. [tup]
Much as we all appreciate the fine stuff you turn out…im sure we ALL would appreciate some video genius from your good self.(Im bigging this vid up something wrotten, dontcha think LOL)
Remeber Frank, i did BOTH of mine with a mobile phone. You must know someone with a good phone big boy? I love nagging btw, did you guess?
Yeah [:-,] Frank - No Excuse. I spent half a day reading the instruction book for my Camera to figure out the video feature. If I could get it done anyone can. [C):-)]