I recently completed an aircraft using a mishmash of decals. I had picked up an Aeromaster set to do “Donnie Boy”, a P-47 Razorback. I trim all decals as close to the edges as I can, so that I am putting down as little clear decal material as possible. The Areomaster decals cover very nicely. They settle down with the proper setting solutions. My preference is the Micro Scale system. My problem came with the application of stencils and some places in the squadron codes where there are patches of clear decal film. Every thing looked good until after I had applied the clear flat coat and some silvering popped up. Just to be clear, my paint is Model Master Enamels, clear coat of Future, decals applied with Micro Scale system, and then flat coat of Krylon rattle can. This process seems to have worked before, but I can’t be sure that I’ve used the Aeromaster stencils before.
I would like to stir up a little debate here, about decal brands and setting solutions. So here is my first shot. I think that Aeromaster and Eagle Strike decals run a little thick. They have great color and settle down nicely with the Micro Scale solutions. But their stencils and clear spaces in the squadron codes do show silvering. I happened to use a couple old Monogram stencils that did much better. I had to be very careful with the Monograms, because they were old, but I wonder if they weren’t a little thinner and sat down better. Now, I also want to add that I think that Micro Scale and/or Super Scale make a thinner decal that sets down better than other decals. But they are fragile and are best when they are newer. I’m not familiar with other setting solutions, so there may some strong opinions there. I’d like to hear what everyone thinks about decals, solutions, and surface prep. Sorry for the ramble, but this could be an interesting exchange. I put it in the Aircraft Forum because it seems like an aircraft discussion to me. Thanks, Rick
To me, decals are a necessary evil and I generally hate them.
Now that that’s out of the way…
I’ve seen some of what you are talking about. Thick, thin, whatever they are it seems to me there is no definative way to deal with them all. Nothing works the same for all of them in other words. On this we can agree. In places where I find some silvering after the flat coat is on and all is dry, I’ll poke the decal a few times in key places with a blade and soak them good with Solvaset. Most of the time this helps, sometimes takes a couple of tries. This is how I handle problems with the big ones.
For smaller decals like data and stencils, I’ll apply a small drop of Future to the spot and apply the decal to the Future, roll it out with a toothpick just a bit to make sure it stays put and don’t float around, then leave it. I’ve never had a stencil or small decal silver like this.
Ouch sorry to hear about your problems here. I hate it when decals go bad since it’s pretty much the last step, all that work and then WHAM at the end.
I’ve only used a few AeroMaster decals but never had any problems using the MicroScale system on them. The only thing I’ve had problems with using the MS solvents on are Hasegawa decals. On those I’ve yet to find anything that works well. Using the blue label they go down ok but silver. Using the red label or pretty much any other decal solution they wrinkle and stay wrinkled. Normally I use aftermarket decals but sometimes no one makes any for the kit. Since you’ve opened a discussion here I’d love to hear any ideas anyone may have on how to work with Hasegawa decals [bnghead]
My usual procedure is gloss-coat (Unless I used Gloss Enamel), Then Micro Scale Micro Set, then decal, then Micro Sol., then I give the entire thing a dose of future, than flat-coat if I need to. No problems with anything so far. But you need to make sure the decals have had a chance to cure properly before putting on the future. Some folks like to skip the future and just flat coat, but I don’t know how well that works since I have never done it that way. I also leave a tiny bit of clear decal sheet around the decal. I find it helps kind of blend in the decal a bit better. No more then a couple of hair’s breaths.
My experience has shown me that it isn’t the decal that usually causes the issues–its the prep-work before you ever lay it down that causes most of the problems. After that, the rest of the problems come with sealing it…I’ve gotten decals thicker than a slice of bread look like they were painted on if the surface was prepped properly and they were sealed properly…Gloss, decal and gloss again…layers of gloss give the illusion that the decal is painted on…after that dullcoat to your heart’s desire…
Yeah, I’ve been doing mostly the same using these steps:
1). Gloss
2). Decals
3). Gloss
4). Panel line wash
5). Matt
Don’t think I’ve had any problems with any decals other than the Hasegawa ones going this way. Am going to try next time brushing some Future on the model and immersing the Hasegawa decal in it.
Even applying a gloss finish doesn’t mean that the surface is glass smooth. If you magnify it you will see a very rough surface. Rough enough to trap and hold molecules of air under the decal.
A Polishing Stick is your friend! Give the area where the decal is to sit a quick light rub, wipe away the micro dust with a damp cloth and the surface is now 10x smoother than before.
Also don’t be afraid to use your new and very sharp knife blade to poke some vent slices in the decal before soaking in water…this will allow the air to escape easier and the solvents to penetrate the decal membrane to help it settle down tight against the surface.
If your current setting solution isn’t strong enough step up to Solvaset from Walthers…great stuff! You can dilute it with water to make your own toned down solution as well.
Dry Transfers when you can source them are much better for application to model that are painted with a flat paint. Dry transfers grab onto and once in place will look and weather just like the paint around them. I wished more companies produced their markings in this format!
You can also try using Gunze’s “Mr Mark Setter” (blue label).
This is a setting solution which is like a very dilute glue. It will work on flat painted surfaces without the need for a gloss coat and will assist adhesion on stubborn decals and decals which either by manufacture or by over-soaking, don’t have sufficient adhesive.
I’ve been experimenting with this stuff and it works very well.
I’ve also heard of people doing something similar with diluted white glue.
Now that’s odd Gamera, of the kits I’ve built over the past 10+ years, probably half are Hasegawa and I’ve had no problem with them, using MicroSol over a Future clearcoat, all covered up with ModelMaster rattle-can dullcoat. I rarely bother with MicroSet, I go right to the big guns. I’m in the Maritimes - maybe my humid surroundings actually help the process! [;)]
a quickEDIT after seeingDMK’s post below…
Decal age - those Hase decals I’m referring to would be relatively new (sealed in box until just before use), which may have an effect on how they behave as well.
I agree with this. Think about how decals work. Basically, you have a small piece of clear material with some painted letters or design on it. In order to make that clear layer invisible, it needs to lay completely flat with no air under it.
Like Grant said, the surface of the model is rarely smooth. We can polish the paint smooth, but often we still have panel lines and various surface features under the decals. So, we can either melt the decal to the uneven surface (decal softening solvents), or we can fill in the gaps under the the decal (future).
Another problem is the glue of the decal sheet. If the glue is old or weak to begin with, it will appear lay flat when wet (like Saran wrap will), but rise from the uneven surface when the water dries. Once this happens, there is no way to get a glue under the decal after the fact. Solvent sometimes helps this if it is strong enough, but that is risky because you may completely dissolve the decal in the process and it still can’t get under the decal after it has partially attached itself to the model. Future can also act as a glue under the decal, but again this has to be done before the decal is applied to the model. Another option is to add some glue to the decal water (I use Alleen’s Craft glue when I do this).
Another procedure that I sometimes resort to is to dip a cotton swab in micro sol and roll it over the decal, with slight pressure, from the center outward. This will often cause trapped air to migrate to the edges of the decal and out. It needs to be done with care and caution, so that you don’t tear the decal. I’ve had it work even after the decal has dried for a day.
Vance: weird! I’ve been using Future and MicroSol just like you described. The last time it happened was with a F-4 I did early this year. No problem on the large decals but the small stencils silvered. Popped holes in them with a needle and my trusty number 11 X-Acto blade and applied more MicroSol while the decal was still somewhat wet and then later after it dried and it still wouldn’t snuggle down.
I have a set of super fine (up to 1200 grit) Micro Mesh sandpapers I use for NM finishes and a super fine sanding stick I use for canopies that I’m going to try next time I use Hasegawa decals. And I think I’ll try the Future trick too just to make sure that it’s good and flat.
Just confusing to me since I’ve used SuperScale, AeroMaster, Tamiya, Trumpeteer, HobbyBoss, Zotz, and pretty much every other decal brand and nothing else has silvered on me in years. Only the Hasegawa ones… [:(DD]
I position the decals, wick the water away, dry & push any air bubbles out (or occasionally poke a hole or two), then I hit it with the microsol right away, before the adhesive has much of a chance to really dry. That may be helping my odds as well…
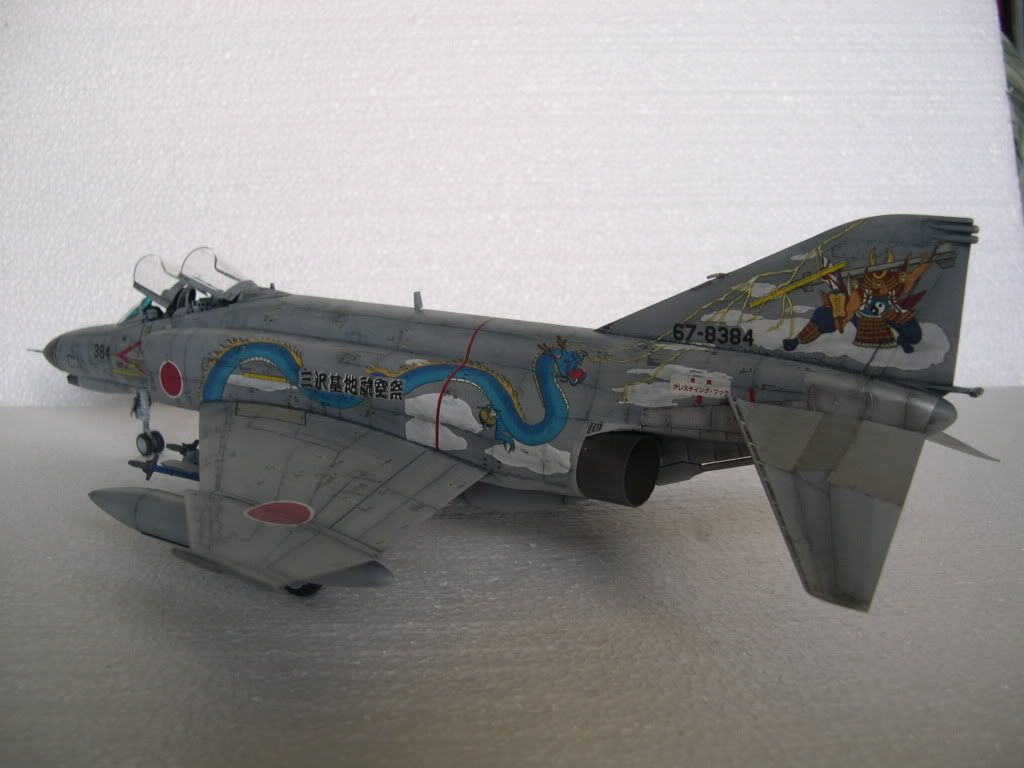
Anyway, here’s the F-4. All the artwork was by Zotz Decals. The dragon is about 6inches/15cm long and about 2inches/6cm high. The samurai is about 3inches/9cm high and wide. The decals on the other side are the same size. NONE of the Zotz decals despite their size gave me any problems. They snuggled down and look painted on.
However about half the tiny Hasegawa stencils silvered. Just weird to me… [:^)]
Thanks for all the help everyone. Going to pull some old Hasegawa decals out and experiment on them next time I try using some.
And the most crazy thing? Later on I thought that you know- the Japanese ground crew probably would have painted over much if not most of the stenciling while applying the artwork- so I could have just left it off…
I know how to work with Hasegawa and Academy decals…I line my garbage can with them and use AM decals. On occasion I’ve seen Academy use Cartograph printed decals (which are usually excellent), but for some reason beyond me, they still are bad. a good example is the Academy F-15I.[:'(]