Mr. Reed typically carves his water out of wood and uses various techniques to paint it with a translucent effect. Incredible.
Mr. Reed has published four books (that I’m aware of) on ship modeling.
Modeling Sailing Men-of-War concentrates on a British 74-gun ship-of-the-line: http://www.barnesandnoble.com/w/modelling-sailing-men-of-war-philip-reed/1004105187?ean=9781557504449 . This model has a solid hull, planked with (as I remember) boxwood strips.
Period Ship Modeling: An Illustrated Master Class covers two models of the American privateer Prince de Neufchatel: http://www.barnesandnoble.com/w/period-ship-modelmaking-philip-reed/1115445437?ean=9781591146759 . One of the models is a waterline one, with sails set, displayed in a “sea” base. The other is full-hull, rigged but with no sails, mounted on pedestals.
Building a Miniature Navy Board Model describes an utterly fantastic three-deck ship-of-the-line on the tiny scale (by most of our definitions) of 1/16"=1’ : http://www.barnesandnoble.com/w/building-a-miniature-navy-board-model-philip-reed/1027731773?ean=9781848320178 .This book, more than the others, is perhaps best regarded as a demonstration of what’s possible for a master, rather than a practical handbook for one’s own hobby.
I’ve bought and thoroughly read those three. I haven’t seen the remaining one, http://www.barnesandnoble.com/w/waterline-warships-philip-reed/1111492732?ean=9781848320765 . It covers a small-scale British destroyer. The photos on the Barnes and Nobel website are enough to establish that Mr. Reed’s modern warships are just as good as his sailing ships (i.e., better than just about anybody else’s).
I don’t like to bestow labels like “best” and “most fabulous” on anything related to model building. But Phillip Reed’s models, in my mind, are on just about the same level as Donald McNarry’s - and as far as I’m concerned there is no higher level. The books are an endless source of inspiration, information, and delight (or, depending on your emotional state, suicidal depression). I know my models will never be in this category - and that I’ll never have the sheer breadth of experience that McNarry and Reed apparently share. (How many people do you know of who could build a waterline, twentieth-century warship like that - AND scratchbuild a plank-on-frame model of a ship-of-the-line one-quarter the size of most real Navy Board models?
Another thing I like about Mr. Reed’s approach is his flexibility when it comes to materials. He handles hardwoods as well as any modeler I know of, turns intricate parts in brass, and “plunge forms” the hulls of small boats out of styrene sheet. Some of the bulkheads on that Navy Board model are made of clear styrene, with the windows left transparent and the paneling added in hardwood.
Great stuff. All the books are highly recommended. But if you want to buy them, get 'em while you can. At least one of them is already out of print, and commanding huge prices for used copies on the web.
Hello Force9! I have been following your build with a measure of awe and inspiration. I built the 1/96 United States back in the late 70’s (Thermopylae before that) and just completed a badly damaged Cutty Sark 1/96 that had been sitting with just standing rigging and backstays completed for 18 years. I am now doing my duty and paying homage to the Revell 1/96 Connie (vintage 1976 kit) and I am blown away by your attention to detail.
If I might pick your brain for a moment, I either missed it or you did not mention the specific color you used for the yellow ochre, Model Master has a dark yellow that is close but not what you pics represent, did you mix your paints? Same question regarding your bulwark green and the gun carriages, did you use insignia red for the carriages? Japanese Imperial Navy green seems close for the bulwarks but I am concerned it might be too glossy.
I have yet to start on her as I am still mapping out my plans for modifications however your build is truly inspiring and while I simply do not have the time for the detail work you are doing, I am positive I will follow your version of her as it is when she was in her glory. I will be furling sail (sorry Professor Tilley) as believe when in port for short stays, unless maintenance or refit was required, the sails would have remained furled in the yards, I have done so with somewhat decent effect on Cutty Sark and as this model is undamaged like she was, I should be able to pull it off. The rigging is what I love to do the most but your hull and spar deck have made me rethink my priorities.
One last question, I will be ordering pins and eyelets from Blue Jacket and I am curious what size you used and did you use CA to cement them?
Thanks in advance and I am looking forward to you mast and rigging photos!
Dan
Hello Dan!
I think most of the info is imbedded somewhere within my build log… For the stripe I used Vallejo Interior Yellow with two thin coatings of sepia wash to add a deeper tone. There is a yellow ochre available from Vallejo that might suit as well. The inner spar deck bulwarks were painted with Vallejo Gunship Green. I have not yet painted any gun carriages. I may go with a rust red. I’ll confess that I’m not a fan of mixing custom colors. I never seem to make enough for large areas and the next batch never quite matches. The alternative is to mix way too much and endure a lot of waste. Vallejo and others make a wide enough spectrum of colors that I generally go with the nearest off the shelf color.
The Bluejacket pins are part no 119 (1/4"). The eyelets are various sizes… Jotika in England makes very small PE versions that I use extensively. They come in sheets of 250.
Glad to have you aboard and eager to see another build started!
Evan
I can attest Vallejo Yellow Ochre looks nice for gun stripes.
Evan, I also bought gunship green for the bulwarks on my Connie, but I thought it looked a bit off when comparing it to present day pictures (a bit too olive-ish) and ended up using plain dark green with a coat of van d yke brown oil wash, then a slight dry brushing with the gunship green… have you altered the gunship green in some way?
Roberto
I did cover the Gunship Green with a dark green wash and wiped it down. This deepened the tone and helped to “pop” the rivets for more dimension. I thought this was close to the green bulwarks on the Hull model.
I should note that I use some sort of wash on nearly every surface. The use of washes is a matter of personal taste - some prefer a dramatic effect with lots of weathering while others go with a lighter touch. I’m in the latter bucket. I don’t weather my builds - I just add washes for tone and dimension.
Evan
Thanks Evan,
I did actually see you used the 119 from BJ after I posted, as well as the Jotika eyelets, I will be replacing all the Revell eyelets and belaying pins with these items. I am building my pin rails from 80X250 evergreen because it is substantially thicker and wider than the Revell pieces and will allow me to have more surface area to attach to the bulwarks as well as larger hole to anchor to, plus I agree with what seems to be the consensus here and will be adding a couple more pinrails.
I have always weathered my build as the “shiny” look takes away from the realism I try to achieve. I weathered the copper hull with a very thin greenish black wash on my Cutty Sark to good effect and believe I will do the same here. The spar deck is a problem for me, your approach produced amazing results and I leaning that direction however scaledecks.com’s version is very appealing, I will be aging the deck regardless of the route I choose with the tried and true wood tan over a flat black base.
The problem with “over aging” a Naval ship is that no self respecting Naval officer, even months at sea, will allow too much deterioration, therefore a fine line must be walked to get the look right. I will be using the gun placements as outlined in the kit however I am still undecided on port cover usage.
The real big issue for me is the pathetically flimsy top masts Revell provides. I still get shivers thinking what horribly useless items they were in my UUS United States build nearly 25 years ago. It strikes me odd that they are so much more robust (relatively speaking) on Cutty Sark and my Thermopylae build in '75 and I still spent countless hours attempting (and failing) a decent looking repair on her broken main and fore top masts, I had to settle for “that’ll have to do” and leave it at that. I do not know what your plan is to address them when the time comes, but I am think of an unobtrusive as possible splint of either styrene strips or oak doweling. If it doesn’t work I may build my own out of oak doweling as I am a decent wood worker and always love such challenges.
I think your coloring of the gunstripe is very nice and will give it a try, I am leaning heavily toward the Japanese Imperial Navy green for bulwarks and coamings as it is very deep in my test sprays after a light wash is applied to dull it out.
Any suggestion on top mast reinforcement from you or anyone else would be appreciated
Dan
Dan
The flimsy spars should all be replaced with something sturdier. Wood makes good sense, but sometimes a flimsy wood version is a poor substitute for a flimsy plastic version. Brass is often used, but many of these spars need cleats and straps, etc. added and brass does not lend itself to taking glue. I have been experimenting with styrene tubing with brass rod inserts as a compromise. Still a long way from anything final.
Evan
I agree regarding flimsy wood vs flimsy styrene Evan. However, I would be using nice oak doweling which is infinitely superior to basswood or pine. My other thought is Evergreen .80 strips, either as a splint or possibly to replace the mast altogether, might try both and see which one I like best. It’s far enough in the future I can ponder different options. Right now I am in the middle of making pinrail and fife rail pieces to accept the 119 BJ belaying pins, using .80 Evergreen at 250 width and discarding the weak Revell pieces, plus adding 4 more rails to accommodate all the rigging, rigging is my favorite part of the build and I will be rigging clew and sheet lines with sails furled in the yards. I always rig from the pins up, it gives me more control and my 55 year old eyes see better up top anyway.
Will be posting pics as soon as I figure out FSM’s shall we we say, unnecessarily complicated photo insertion method.
Happy modeling!
Dan
Brass is certainly a possible alternative for making small spars. Styrene is a lousy material for small spars; the same attributes of flexibility that made it excellent for hull planking pretty effectively rule it out for spars.
At the risk of sounding blunt, if a wood spar is flimsy it’s because it’s made out of the wrong kind of wood. Basswood is out of the question; too soft. I think I can say that few serious modern modelers like oak. (Too splintery, and the grain is way out of scale.)
The woods that, I think it can be said, veteran American ship modelers like best are boxwood, pear, holly, and cherry. Unfortunately all of them are pretty hard to find (with the possible exception of cherry). Those are all hard, stiff woods that take a nice finish and won’t bend significantly under the strain of the rigging.
For my models of H.M.S. Bounty ( http://cs.finescale.com/fsm/modeling_subjects/f/7/t/155394.aspx?sort=ASC&pi240=1 ) and the Continental frigate Hancock ( http://cs.finescale.com/fsm/modeling_subjects/f/7/t/155391.aspx?sort=ASC&pi240=1 ), I turned the spars out of degama (aka lancewood). It’s an extremely dense hardwood that refuses to bend. (It is, however, willing to break. I found that out the hard way several times.) I used my dear old Unimat SL lathe; for the first few passes I used a metal-cutting tool bit in the cross-slide to get the stick down to about 1/8", and fine sandpaper for the rest of the job. Some of those spars taper to well under 1/32" in diameter.
Whatever material you use, it’s extremely important to get the taper right. David Steel’s Elements of Rigging and Seamanship, or James Lees’s more modern The Masting and Rigging of English Ships of War, 1620-1860, will show you the rules.
Unfortunately the dealer from whom I bought the degama went out of business about 35 years ago; I have no idea where to get that species today. For my last wood-sparred model (the Model Shipways Phantom) I used cherry. Woodworking supply companies sell cherry dowels down to 1/4" in diameter. It’s a little dark to be ideal, but really nice stuff to work with.
Hobby shops and places like Lowe’s sell dowels in three species: oak, maple, and birch. Of those, I vote for birch. For years I’ve read stories about birch warping, but I’ve been using it for a long time and have never found that to be a problem. Maple is good stuff too, though pretty brittle. As I mentioned earlier, I don’t recommend oak. Unfortunately the dealers often don’t specify which species of dowel is in a bin. Birch and maple can be hard to tell apart.
Model Shipways says the dowels in its kits are beach, but I have yet to buy one with spars made of anything but birch.
Hope that helps a little. I know I’ve expressed some rather strong personal opinions; take them for what they’re worth.
Here is the latest…
It is amazing how many holes need to be drilled into a sailing ship model! I’ve been busy with the mini spiral drill and #76 bit for the past few weekends.
It is also amazing to uncover the various nuances that go into these builds. I’ve been drilling the many small holes for the Jotika eyelets that will be installed around the interior of the gun ports. Most references indicate the breeching terminating on a ring bolt positioned near the trucks in line with the bottom of the gun port. The outhaul tackle, however, is often shown leading at an angle to an eyelet positioned about midway between the two guns. It would seem to me to be more efficient if this tackle ran more parallel to the gun barrel - no waste in lateral effort when hauling on the tackle. That would seem to be the arrangement on most of the contemporary ship models… An eyebolt for the outhaul tackle positioned about midway up on the gun port and near the opening. The ring bolt for the breeching rope positioned directly below in line with the bottom of the port.
We can also see this type of set up on the remarkable War of 1812 wrecks of the Hamilton and Scourge that lie preserved at the bottom of Lake Ontario. Both were swamped by a sudden squall and lost at the same time. (Actually the wrecks were once remarkably well preserved but have now become encrusted with an invasive species of mussel):

The boarding cutlasses are very cool.
Here is the approach I took:

None of these eyelets are glued in… Just a sample of positioning. I’ll blacken them and glue the upper eyelets, but I’ll attach the lower ring bolts to the breeching rope when I rig the cannon off the ship before attaching these to the bulwarks.
Evan
John I certainly appreciate your opinions and input, if I didn’t want opinions or advice, strong or otherwise, I would not have asked, and your knowledge in this area exceeds mine to say the least. I suppose I have the luxury of not being a serious modeler in the sense you speak of in that I took an 18 year hiatus and prior to that most of my builds have been straight OOB, so experimenting is half the fun for me. That said, I have a very strong skill set working with wood (funny I’ve never built a wood ship model that) and my experience with oak differs from yours, however I’ve never used it in such a small scale before, I use it to make custom window, door, and furniture trim as well as flooring, so I suppose I will have to experiment a little before settling on a solution for the top masts, which is long way out to say the least.
I am not as concerned as Evan is regarding period correctness, not because it doesn’t matter, but simply because I have not the time and from the look of his build thus far, nowhere near the skill he possesses. Nor is wood grain or other such details as scale quite as critical, (you’ll know that when you see my pin rails). Believe me I can make oak look like cherry if need be, especially as it will be painted which hides the grain completely if done correctly, but your points are too valid to ignore so I will definitely have some thinking to do when I reach that stage. I have the disconcerting situation of having my mini lathe finally die a horrible death so turning my own topmasts is an issue. I will be using the kit provided spars, for some unknown reason I seem to have rather delicate touch when it comes to rigging and tension on the lines, but these topmasts are a joke, I will have to find a solution.
I am seriously sooking forward to how you address the issue Evan as you will reach that stage long before I do.
Thanks for the input boys and happy modeling!
Dan
Don’t get me wrong. Oak is a beautiful, essential wood. But for ship model spars, if you try birch or cherry I’ll bet you won’t go back.
If your lathe’s out of commission, you can do a perfectly satisfactory job by chucking the dowel up in an electric drill. Use a soft rag in your free hand as the tailstock.
Good luck.
Nice work Evan! I agree, doing a build other than OOB really requires a lot more work to prepare the hull, but the end result is so worth it. I take it you will be adding your belaying pins down the road as it looks as if you’ve already mounted your pin rails, I also noticed they’re green as opposed to brown, I intended to do the same regardless as it will be much easier to airbrush that way.
The shipwreck shot really tells you a lot about pin placement, I guess my pinvise will be getting another workout, really surprised those cutlasses are still in place and not pilfered, or maybe they have been by now.
Did not mean to hijack your thread with my silly questions, but the responses have pointed out things which will be very useful in this build. I will be posting pictures on my thread I started hopefully some suggestions there will improve my technique, 18 years is a long time to take off from this craft to just jump back into a build like.
Dan
I agree on Cherry John, just so expensive is all. Besides, as I said spars are coming from the kit itself, it is the mast tops that give me pause, I’ve done the dowel in drill thing before on larger pieces for fine frame work for home trim and and such not related to modeling but never to the scale required here, I suppose I could give it a try using my router to shape the wood, thanks for the suggestion, the scale is what kept me from considering it.
Dan
Don’t want to keep hijacking your thread Evan, you can see my progress as I start on this kit here:
http://cs.finescale.com/fsm/modeling_subjects/f/7/t/164251.aspx
A very nice start on yor build!
Folks -
I’ve reached that point in the build where there is nothing more I can do to delay the inevitable… I have to start accounting for the rigging and making sure that I’ve incorporated the necessary end points into the half hulls before I start to glue it all together.
I consulted the usual suspects:
- The Revell rigging plans
- The Bluejacket kit manual and rigging plans - Larry Arnot/Tyrone Martin
- AOTS USS Constitution - Karl Heinz Marquardt
- CONSTITUTION - All Sails Up and Flying - Olof Eriksen
- The Charles Ware 1817 Sail plan (National Archives)
- The “Hull” model in the Peabody Essex Museum (PEM) collection.
I’ve been poring over these different representations of the rigging layout of Old Ironsides for many months and have started to form some sort of plan. For the most part I will follow the guidance of Olof Eriksen, but fall back on the Bluejacket plans in some cases. Eriksen’s work is focused on her 1815 configuration, so I’ll try to insert some 1812 era modifications wherever appropriate - mostly using the Hull model for corrections. Ultimately this is all going to involve a fair bit of guesswork and intuition tempered by the realities imposed by the Revell model itself. In some cases the molding of the hull will impose limitations that are more than I’m willing to modify - I’ll just roll with what is there.
Here is my first compromise:
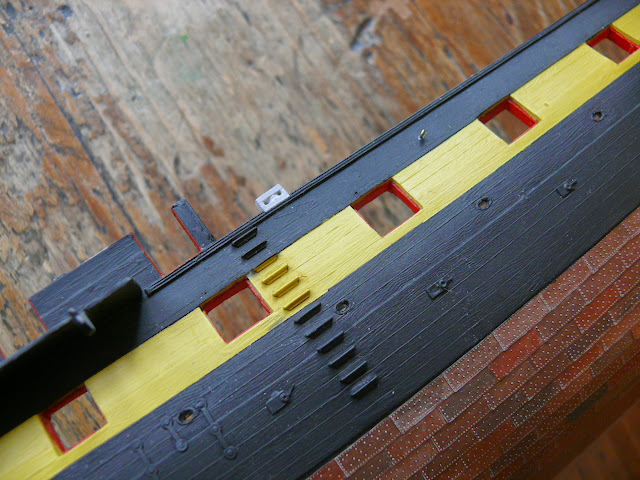

Some may recall that I eliminated the chesstree included in the kit and filled in the holes at the gun deck level that originally allowed for the Fore Sheet and Main Tack to enter and get tied off within… I just feel that by 1812 these lines would’ve been led to the spar deck to allow for better control and coordination. Eriksen shows the Fore Sheet entering thru a sheave in the spar deck bulwark just forward of the last carronade before the break in the bulwark at the waist. The Revell kit does not have much of a bulwark at that point. I couldn’t widen it because the “entry port” is situated here with the cleats/steps leading up the side. I was not willing to move that stuff over with all that scratch building… Marquardt offers a solution. He shows a sheave added on the waist for the Fore Sheet to pass thru and tie off to a cleat mounted nearby on the deck. Do I think this is historically accurate? Nah… But it suits my purpose.
The first eyebolt near the sheave is the tie off for the Fore Sheet. The eyebolt mounted forward on the waist near the fo’c’s’le bulwark will eventually have a block mounted for the Main Tack to lead inboard. I still need to drill the hole just aft of the fore channel for the Main Tack tie off point.
Here is the sheave I cut into the spar deck bulwark for the Main Sheet:

I mounted a cleat on the inside to tie off the Main Sheet:

More to come shortly
Thanks for the interest
Evan
Evan your work is fantastic! I have decided to follow your plan regarding the decking. After much work and a couple of adult beverages, I have managed to clean up the gun deck enough to be serviceable, I plan on spending much more time on the spar deck but it is nowhere near as warped as the gun deck so it should go well.
it seems to me I saw on someone’s blog here that they used split rings on certain eyebolts, was it you or someone else? and if you, I can’t seem to find the size you or whomever used for the .3mm eyebolts, let alone where they were purchased, ring any bells?
Looking forward to your next entry.
Dan
Thanks Dan!
I think you’ll find the deck scribing much easier than it first appears… I got into a nice rhythm and really appreciated the amount of control I had over the result. Just be mindful of the pattern for the planking butts… It is not random. I used a four butt layout, three butt is also common. The planks should meet over an underlying beam. Those positions can be derived by paying attention to the edges of the hatches.
(You should not show any plank butting in between hatches - those would be continuous planks. I think I included some on the gun deck - oops!).
Both the Spar deck and gun deck had some warpage on my kit that was easily remedied by glueing some thick styrene stock underneath with some firm clamping as it dried overnight.
Here are the small eyelets and rings I used on my deck:

Don’t let Prof. Tilley catch us using this stuff - He’ll admonish us with a reminder that these are easily made with thin wire and moderate dexterity. With the same adult beverage close at hand and a good game on TV, you could crank out many dozens…
Evan
Thanks Evan,
Already have the butt ends laid out so no problem there, a nice stiff straight edge jig like you used and I can work it out pretty quick I think. I had already ordered the eyebolts, now I know which split rings you used. A nice single malt (or 2) and an evening of listening to the next set of songs we have to lay down and you’re right, I can knock out a bunch of eyelets. You’re not using the split rings on all of them are you? Just the deck and bowsprit I would think. I don’t disagree with the good professor, I just don’t have the luxury of time to do all the wire work.
I am still curious about your decision on the top gallant masts, you mentions spars which are simple enough to turn to the correct taper but the top mast is a little more challenging. Still a ways to go before I get to that but I try to think ahead a little
Dan