Need opinion/suggestions on a decal issue, please. Just started applying decals to my P-51 today.
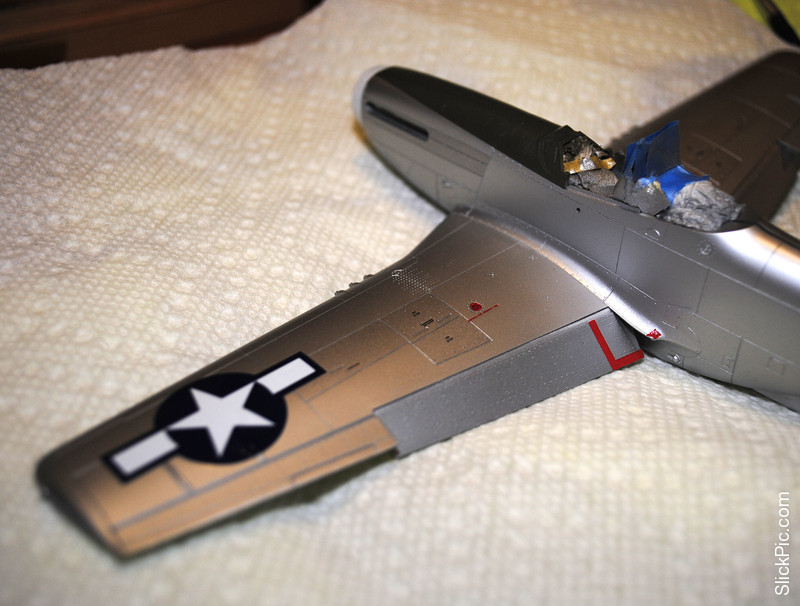
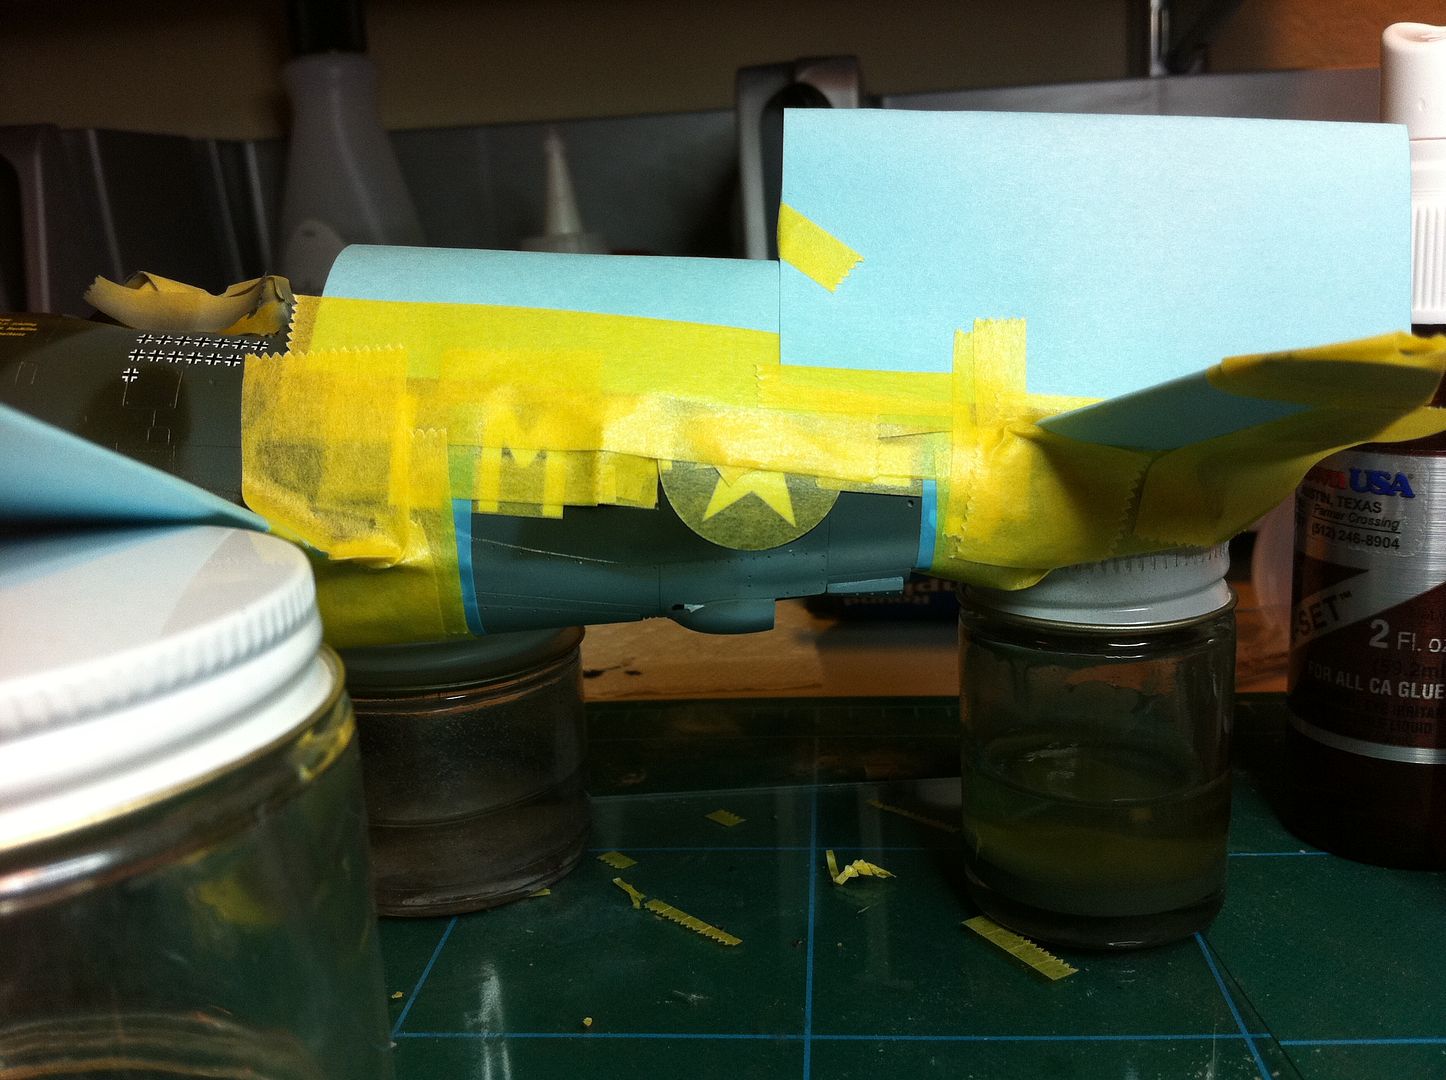
No problems, until I got to looking at the invasion stripe decals, which I definitely plan to use. Looking at the underside, I realized that the stripe decals are supposed to go right over the drop-tank pylons:
Obviously, I wasn’t thinking far enough ahead when I attached the pylons, which are pretty darn firmly affixed with Testors liquid cement. What are my options here? Do I pry the pylons up, creating who knows what kind of mess, or can I split and trim the decal around them?
With another finish, I probably would have just painted the stripes in the first place, but with the delicate MM metalizer finish, I’ve planned all along to use the decals. I could definitely use some advice before I plow ahead here. Thanks in advance for any guidance.
My recommendation? Mask and spray the invasion stripes. Decals never line up right, IMO.
For the outer borders you could use something like parafilm or even damp newspaper to mask without necessarily pulling up the metalizer. Use Tamiya tape for the actual stripes (I believe 10mm is more or less = to the 18" width of the invasion stripes).
The F-86 instrument panel done, using a mix of the Eduard Airfix and Fujimi photo etch frets. None of them is 100% accurate, but at this scale it’s difficult. Thank goodness Eduard had the vision to put extra control levers on the fret, I lost a couple (first time doing PE work[:$]).
Also a bit dissapointed with Acadamy, the wings is not that of the F86E but for the F86F, it can be modified, but I’ll see if I want to go that far in this scale. More details later
SF: Well what Doogs said will result in the best looking stripes and probably the least trouble. Still I’d be a little paranoid about spraying them with the other decals down, you can just put the stripes down around the pylons and then carefully paint the area around them with a brush. Won’t look quite as good as what Doogs suggests but with less worries about over-spray or peeling something up.
JR: Looks great to me! Yeah love Eduard putting the extra parts in there, most of the time I use quite a few of them!
Yeah, I know Doogs is right, and next time I have invasion stripes to deal with, I’ll spray 'em, but at this point, I’m kinda all in with the decals:
I’m going to cut a small slit in the decal so I can work it around the pylon, then trim around it and hope I can keep the whole thing lined up and smooth. I’m goin’ in. Wish me luck!
Jolley Roger: Looks great, especially in 1/72. I’m impressed.
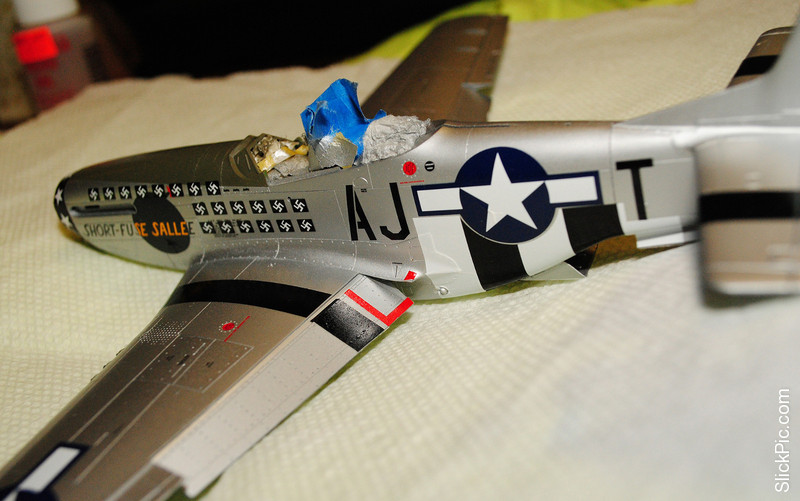
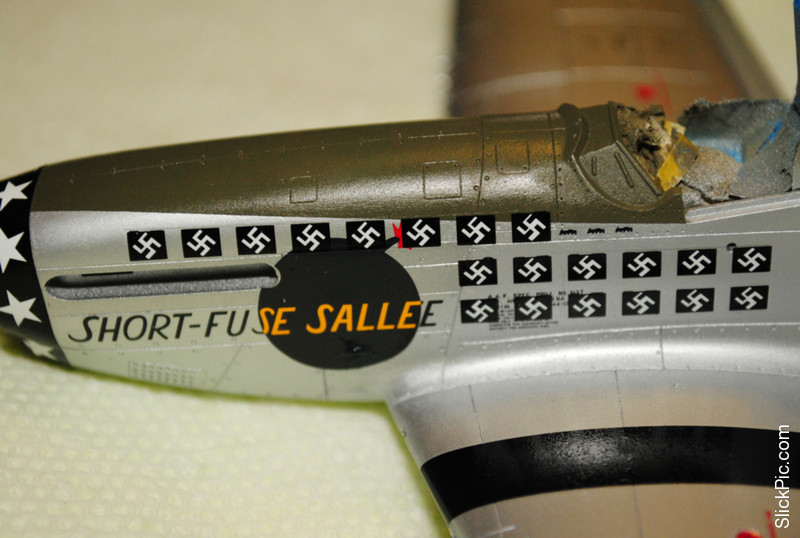
Doogs: The Cartograph stripe decals aren’t that bad to deal with on their own, but I vastly complicated the whole thing with my miscue on the pylons. Small mistakes leave big messes sometimes. I just didn’t feel confident enough to tackle painting them after laying down the metal finish and already starting the decals. So I’m muddling through and am glad the problem area is on the underside.Hey, it’s a learning experience.[:)]
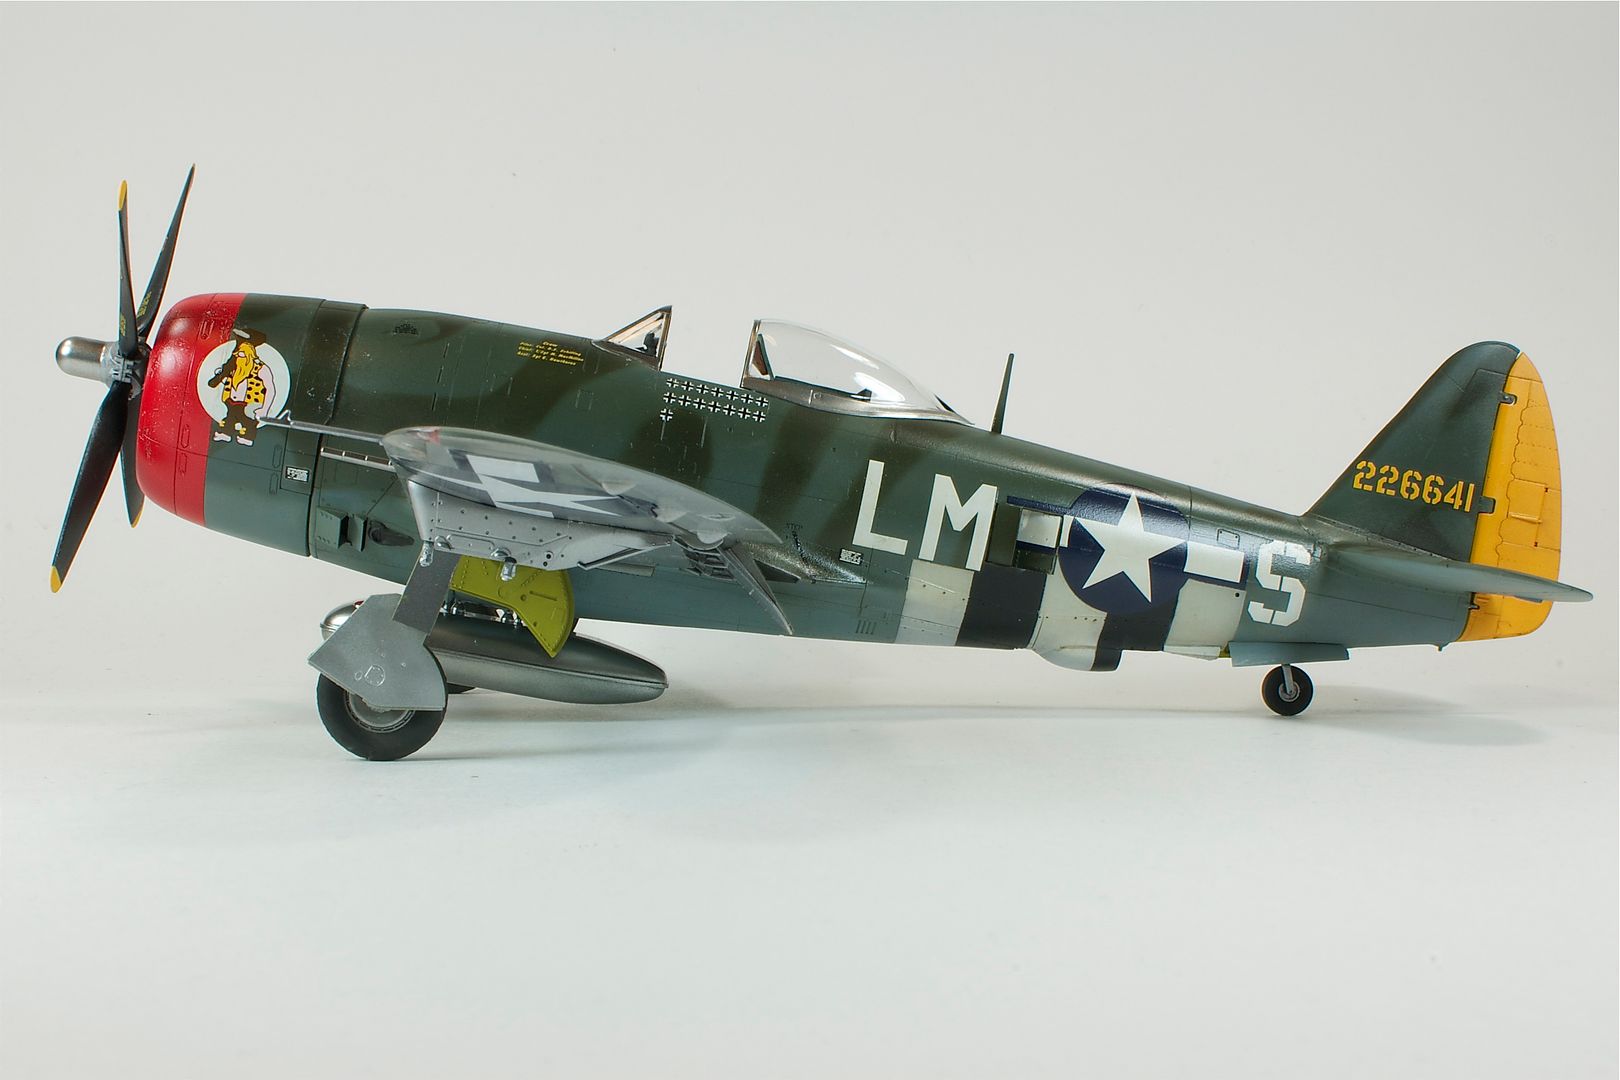
Next time I deal with invasion stripes will very likely be on the Academy P-47 in the Gabreski markings very similar to the Jug you show. And I expect I’ll think everything through a little better and paint the stripes!
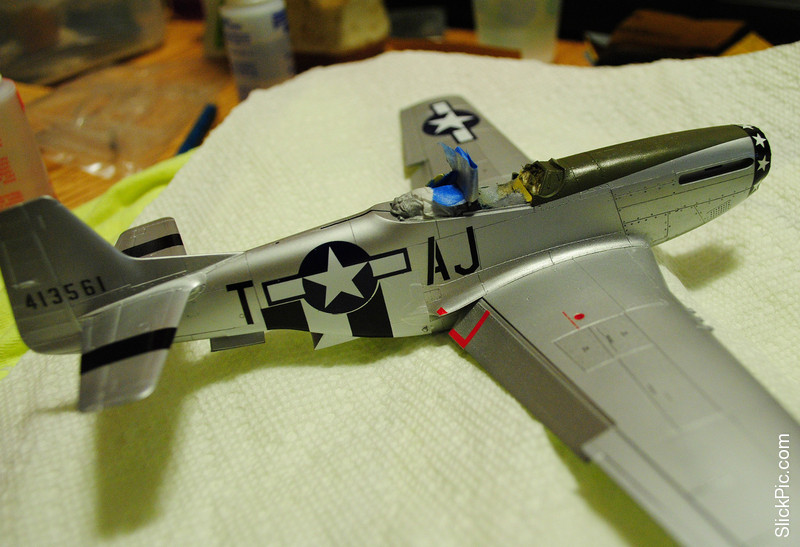
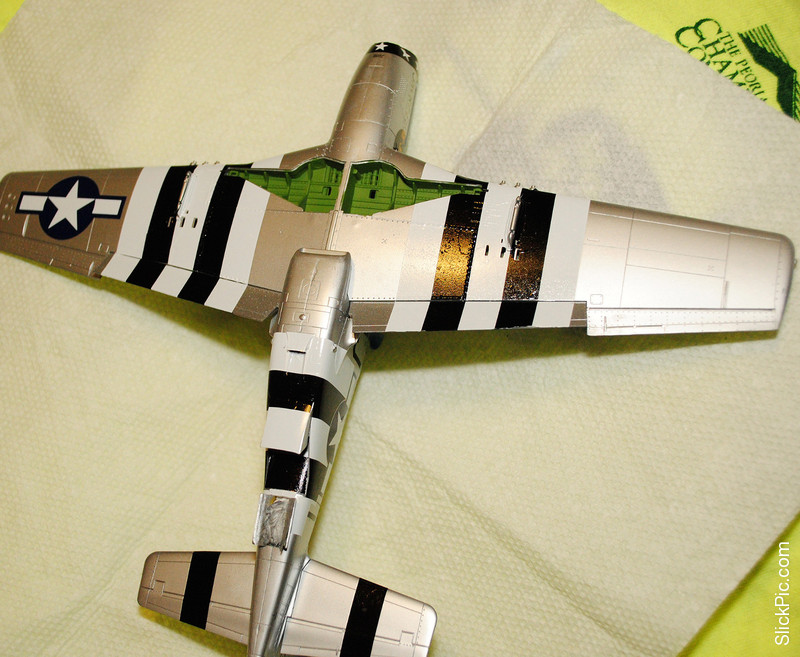
I think I’m done with decals on the Mustang and, whew, I’ve gotta say this was the most challenging decal project I’ve ever tried. I remember when I was a kid, I hated decaling simply because mine always looked like crap. I’d throw on the main insignia, which invariably bubbled and silvered, cuz all I knew to use was water. Tiny little stencils? Not a chance. So to tackle something like this on my fourth model since coming back to the hobby was a stretch. Toss in the metal finish and the stress levels were pretty high. Then factor in trying to fit invasion stripe decals around the pylons I shouldn’t have attached until later and, well, I was sweating for a while yesterday.
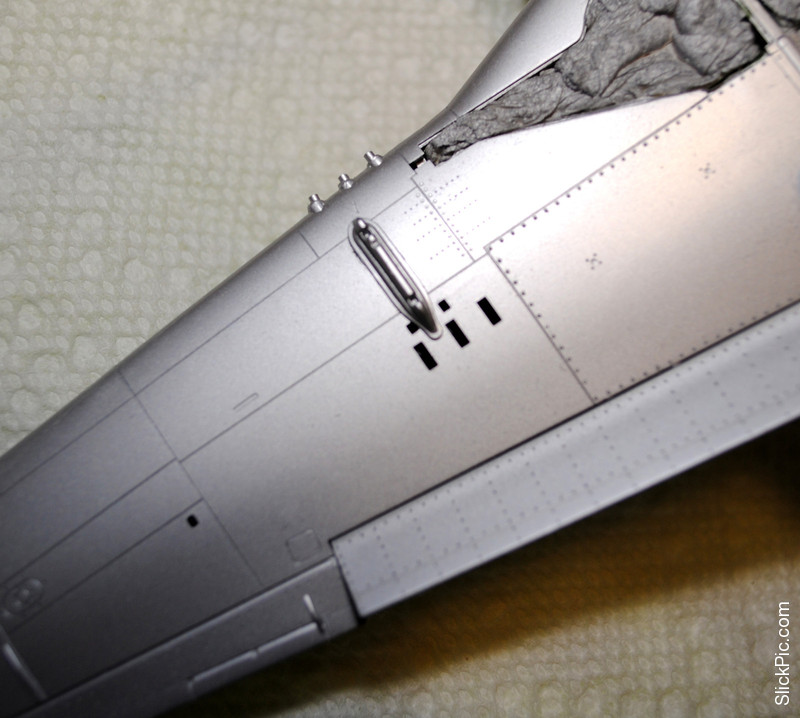
I must say I can’t recommend the invasion stripe decal route, and I’ll plan to paint them next time. All things considered, though, I’m OK with how it’s turning out and it’s definitely been a learning experience. I’ve got a few spots I may hit with Solvaset to try and smooth out a little more. While the decals on their own weren’t that hard to deal with, my miscue with the pylons sure complicated the process. And Doogs was right about some of them not quite lining up exactly. And so many little pieces to fit around nooks and crannies.
Anyway, here are a few pics:
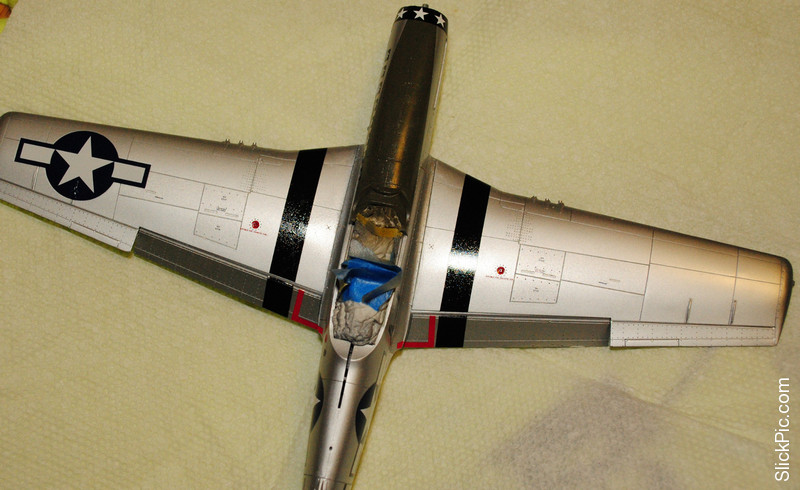
Despite obsessing over the stripes, the scariest part was actually the two-part swastika decals. The kill marks and the ‘Short Fuse Salle’ nose art are all one big piece. But, of course, Tamiya doesn’t provide actual swastikas and doesn’t show them anywhere on the box or the instructions, just these nasty looking black and white blobby things. I’d even ordered some separate kill markings before I took a really close look at the decal sheet and figured out that you have to lay down a black and clear overlay decal that magically transforms the blobby things into real swastikas. Well, you get once chance to line this sucker up exactly on top of the first decal, desperately hoping the whole thing doesn’t start setting up and refusing to move. I almost had it when the front edge of decal No. 1 started peeling up, folding and sticking to decal No. 2. I’m still not sure what I did, but suddenly it smoothed out and all was well.
I feel like the hard part is behind me now. I’ll still need to touch up some black and white spots in the stripes, do a panel wash and light weathering, apply a semi-gloss top coat, mask and paint the canopy and finish up wheels, prop, etc. The end is in sight.
My Bearcat is coming along. I took my time to lay the NMF coating down with several misted coats. After three nights i am starting to get where i want it to go. The Talon delivers again! Pics soon
Thanks! I use the Talon, as well. Had it for a couple of years, I think, but still feel like a rank beginner. I still have a lot of trouble getting the right consistency in my paint. One reason I liked spraying the MM metalizers. They seem perfect right out of the bottle.
Hmm… I dont know if the enamel Talon is any different but the acrylic doesnt need any thinning. I just get good results every time. The trick is to really mist it on an be patient applying multiple ultrathin coats…
Ok lets try this again, typed it all once and the [cnsod] computer burped [bnghead]
Miss Owl the front page is updated with your Thunderbolt.
Stoutfella a very well executed save on those stripes man [Y][Y] Thats gonna be one sweet looking Mustang when finished.
Gotta put in my [2cnts] worth here.
I too like Talon paints and powders. The trick with it is spraying it on in very light misted coats as Kermit said. The tough part is with the first 3 coats it doesn’t look like anything is going on, however by the time you get to the 5th coat the aluminum starts really popping out at you. It is hard to keep ones self from adding heavier coats as you paint but don’t do it, just keep the light misting coats going on and you will be rewarded. Also a bit of a hint I only let the paint dry for about 5 minutes between coats, letting the carrier set a bit then add the next coat. Talon is very tough too I have masked it after allowing it to dry 4 hours using blue painters tape with no lifting and no primer under the Talon.Here’s one I painted and decaled in 1 day.
Jolly Roger man I gotta tell ya I cant make a pit look that good in 1/48 scale [:D[
DoogsBIG, HUGE, UMONGUS B-25 pictures [::DD0]
waiting for Kermified Jug pictures
Ruddratt glad to hear you are getting back to the bike [Y]
Have to say, when I’ve tried Talon, I can never get the stuff to “light mist”. For me it’s one of those paints that has two operating levels - zero paint flow or full blast. Don’t know why.
And sad news - I’ve put the B-25 back in the box. In part because I’m waiting on aftermarket. In part because I just need something less epic right now. And in part because of the heat and #$@!!$# bugs. It’s crickettown here right now, along with spiders. I think it’s when I saw the finished bomb bay had become a giant cobweb that I lost it.
Good news is I’ll be picking up with two different partial NMF kits. One’s another B-25 I’m doing as a commission piece - a 1/48 Revellogram B-25J. The other’s Tamiya’s two-sprue wonder, the 1/48 P-51B, done up in the RAF Dark Green over bare metal of Henry Brown’s “Hun Hunter ~ Texas”.
Brown’s one of my favorite Mustang pilots, a fellow Dallas boy, and his -B has a fairly unique scheme that’s neither OD/NG or NMF…
The pony just might get you back on track. No fuss no brainer fun builds.
Ok i promised some NMF stage pics:
Ok, you got me, i used some artificial light on the model to catch the shine [;)] But it does…shine now. Took about 5 or 6 coats to get here and i like the results. By means of experiment i tried priming with future after all the sanding i did. I figured the self levelling qualities just might fill up a few scratches left. This went ok-ish but i really feel it did help the NMF coating.
Very slightly visible should be a gentle preshade where i outlined the panels with black paint prior to priming.
Today i am going to spray the flat black anti glare paneling and that should complete the major paintwork…
Kermit: I’m eager to see your Bearcat further along with this ‘mysterious’ Talon finish [;)]
Doogs: Sorry to see the B25 mothballed, but I’m sure your 51B will be a gem.
For my part, I’ve done some touchups and laid down a semi-gloss top coat on ‘Sallee’ and added wheels, so she now stands on her own. I want to go back and put a flat coat on the anti-glare panel and the prop (to seal the decals). And then I should be done, with pics to follow shortly.
My only complication for the day is a leaking water heater, which probably means a plumber putting in a new one, which means my painting ‘studio’ space will be occupied by pipes and wrenches. Something in our water eats up heaters. Previous one lasted only five years, this one seven.


 waiting for Kermified Jug pictures