Spend days doing this. This is my first go with resin. These parts just do not fit. i expected a little fit and finishing to be needed but jeez this is ridcoliclioclus.
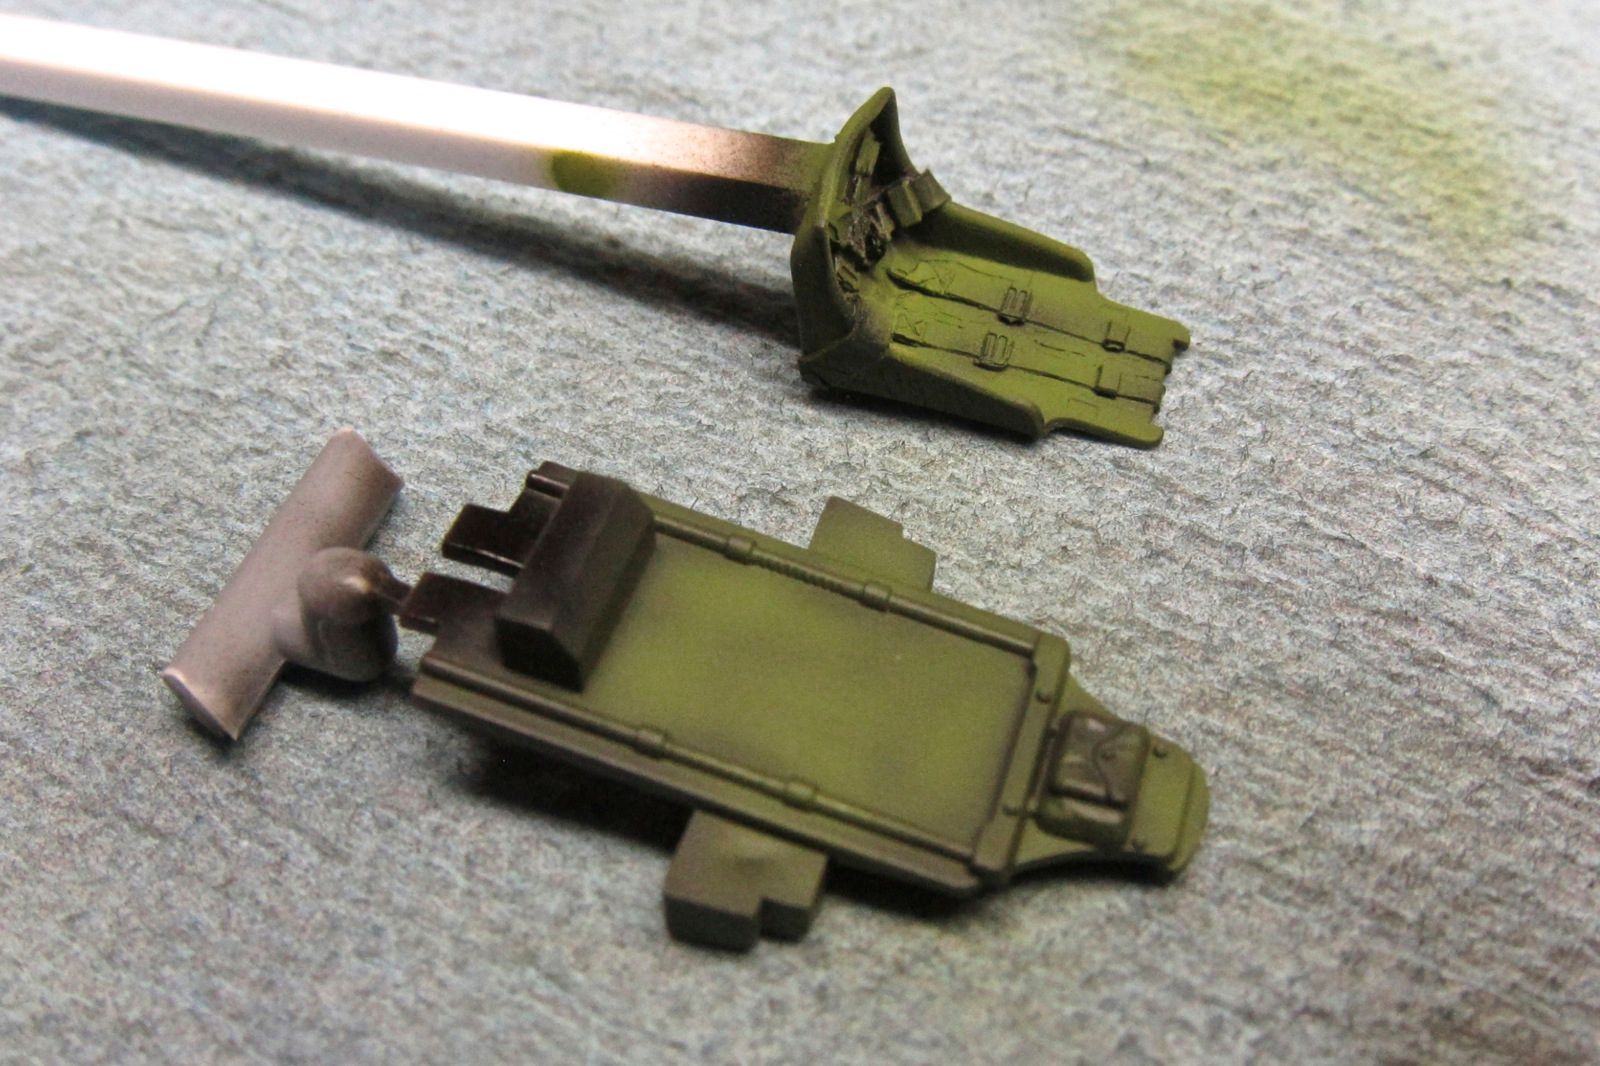
First a comparison between the Aires and CMK wheel wells. Aires wins hands down on detail (excuse the dust)
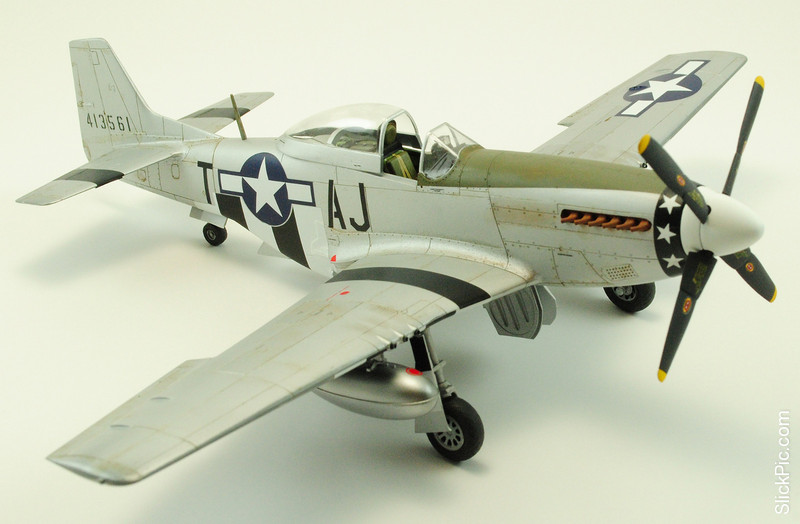
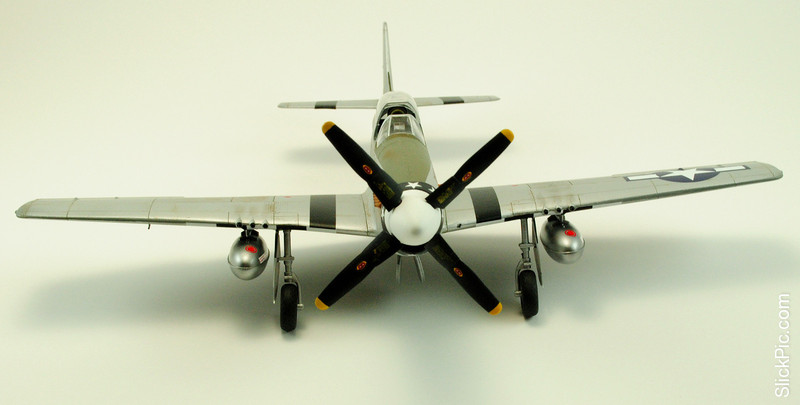
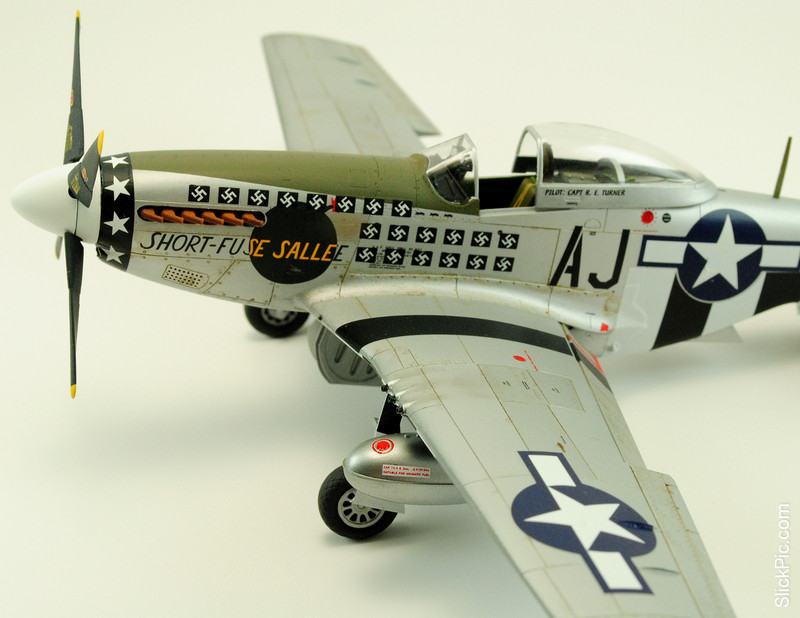
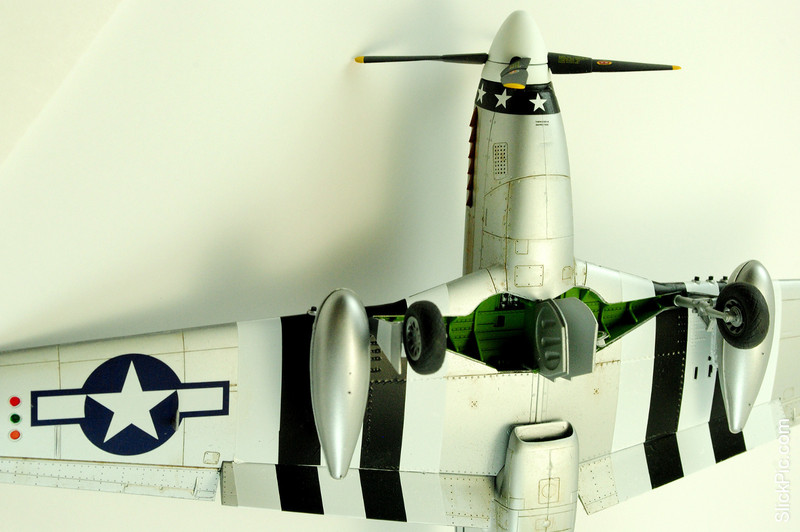
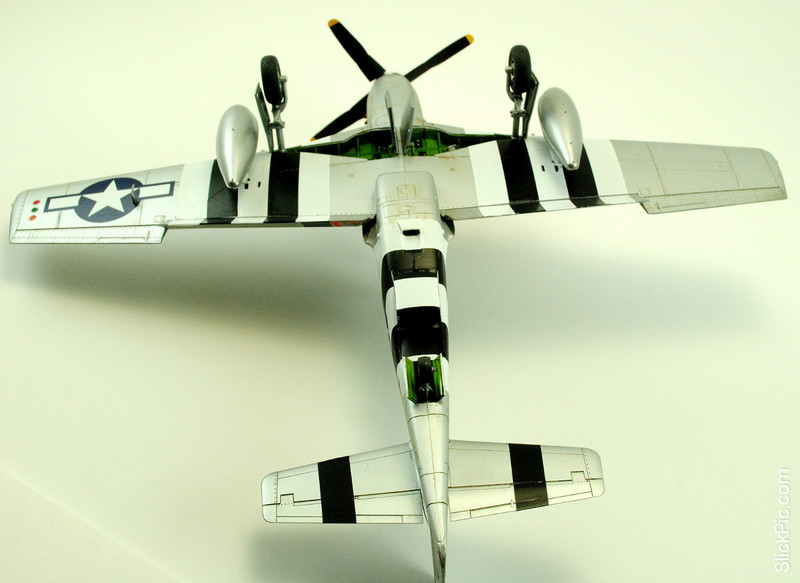
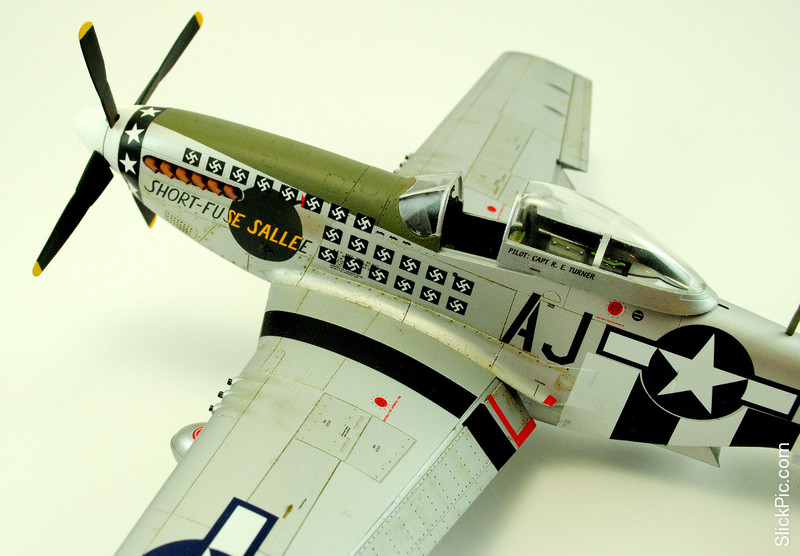
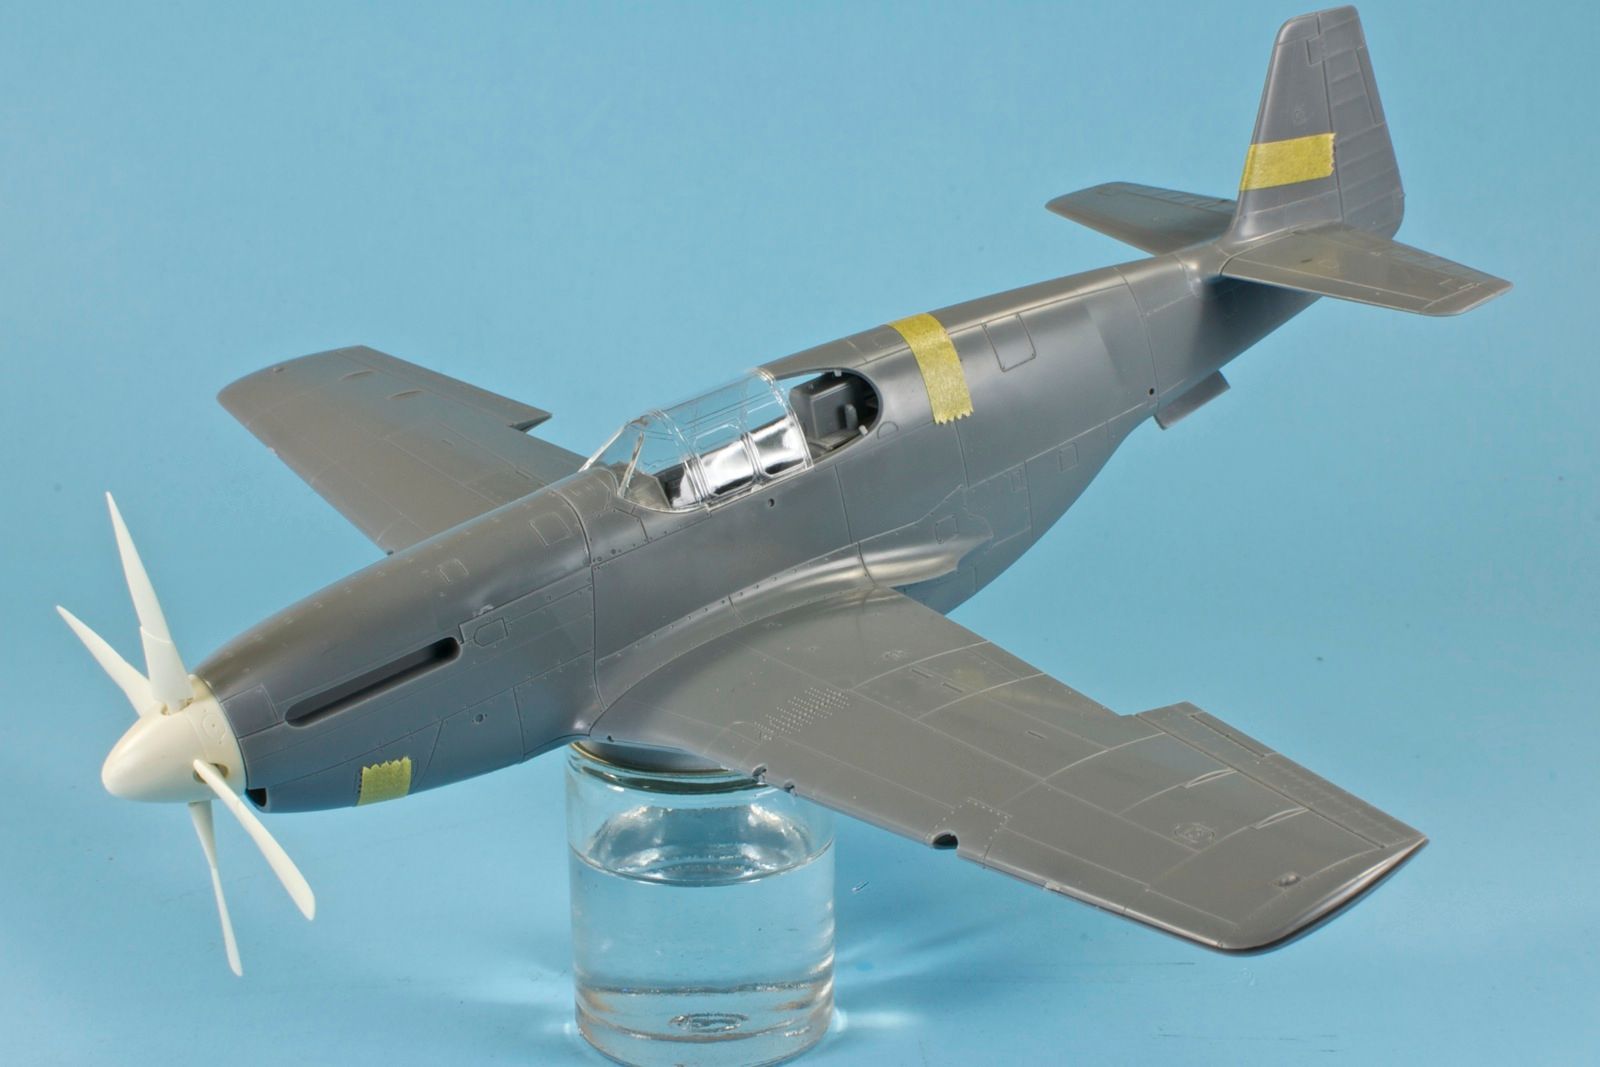
There are certainly some things that, in hindsight, I would have approached differently, the invasion stripe decals in particular. But overall, I enjoyed my first shot at NMF.
My son got home from Scout camp yesterday and, when I showed him the plane, he said that he liked this one the best (of the four planes I’ve now completed). So, hey, how can I argue with that?
Speaking of my son, for Father’s Day, he gave me the Revellogram F-80 Shooting Star. Now, coming back to the hobby, I intended to limit myself to 1/48 WWII prop planes only. The F-80 doesn’t exactly fit, but again, how can I argue? So I may do that one for this build a little later and give the Alclad a try.
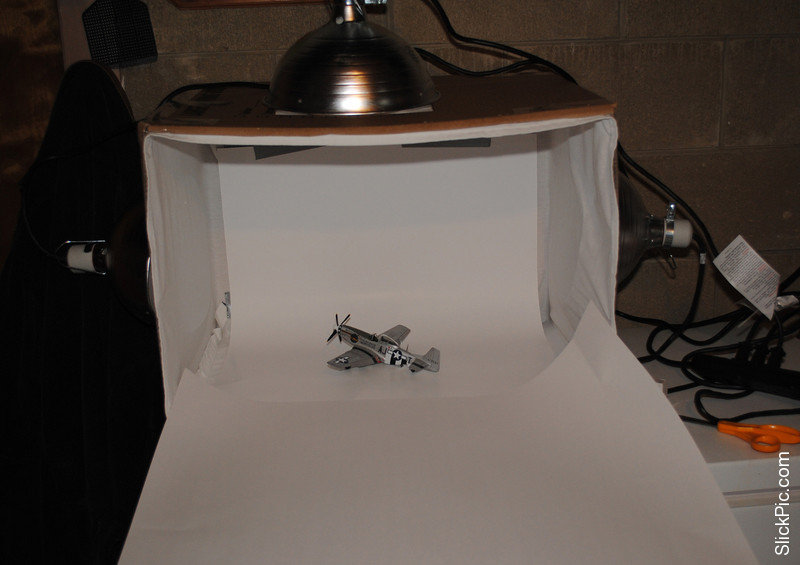
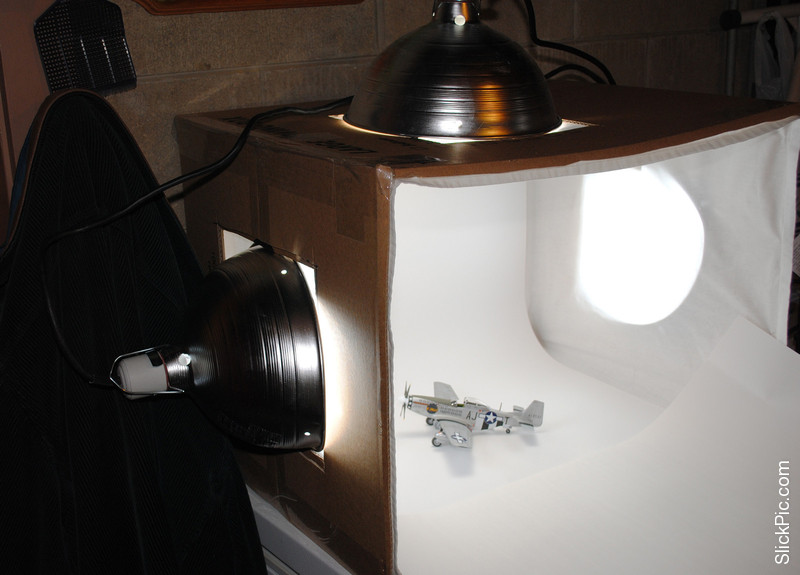
By the way, these photos were taken using the light box I constructed this morning according to the FSM how-to video that was posted on the home page recently. Easy, not too expensive and I finally have nice even lighting. I’ll do some experimenting to find the right camera settings, but I’m pretty pleased. Only trouble will be finding some place in our already cluttered house to store the thing.
stoutfella - she came out very nicely indeed! Gotta love Tamiya’s P-51 kits. I’m still waiting on a slew of Ultracast bits for the -B, but did a bit of work last night (got the paper tanks together) and it felt like hanging out with an old friend.
Speaking of Mustangs, I was just outside taking out some trash when I heard an airplane overhead. Not uncommon around here, but the engine note was very distinct from the usual airliners and Cessnas. Looked up and, sure enough, saw a P-51 making its way across the sky.
Capt: Nice work there, I’ve heard complaints about the booms but the two Hasegawa P-38s I’ve built seemed to go together pretty well though.
Talentless: Ick, that’s one of the reasons I hate resin replacement parts. And yeah I’ve sanded clean through them on more than a few occasions. Good luck, nice work there I hope things work out.
SF: Beautiful job sir!!! Despite your problems with the invasion stripes and the kill markings everything looks top notch to me. The NM looks just plain great! And as Doogs said the P-80/F-80 was slanted for Second World War use but just missed it so it is sorta a WWII plane.
Beautiful model Stoutfella and i do love your photobooth. Mine consists of two sheets of blue cardboard, one curled up against the wall and whatever lightswitch i can turn on in the room. Nothing near the absolutely great setup you have made![y]
Well, i promised Randy an update a day ago so here we go… I have added the anti glare panel using matte black and applied the decals. Usual Academy thick and unwieldy quality there…
I do love Academy for making very affordable kits that actually have near tamigawa fit and crispness of the molds but them decals…ughhh.
Next up will be taking care of fitting the undercarriage and little bits…
Stout - congrats on the first completed build for the GB, and it’s a doozie! Really nice work there! [Y]
Kermit - great progress on the 'cat so far. I hear ya about the Academy decals - they’re a dog to work with. I’ve used Gunze’s softer & setter on 'em - really helped 'em behave themselves and act like decals should.
Mac - sweet lookin’ office for the '38. Definitely looking forward to this one!
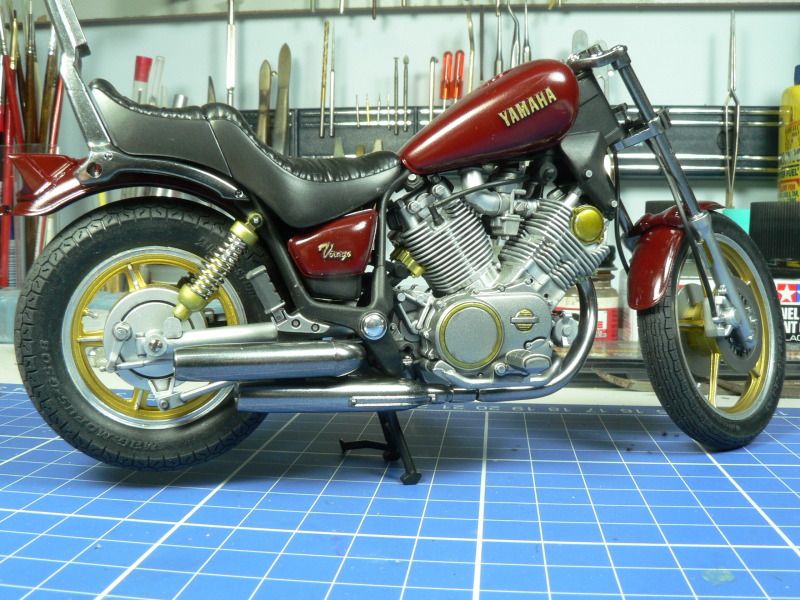
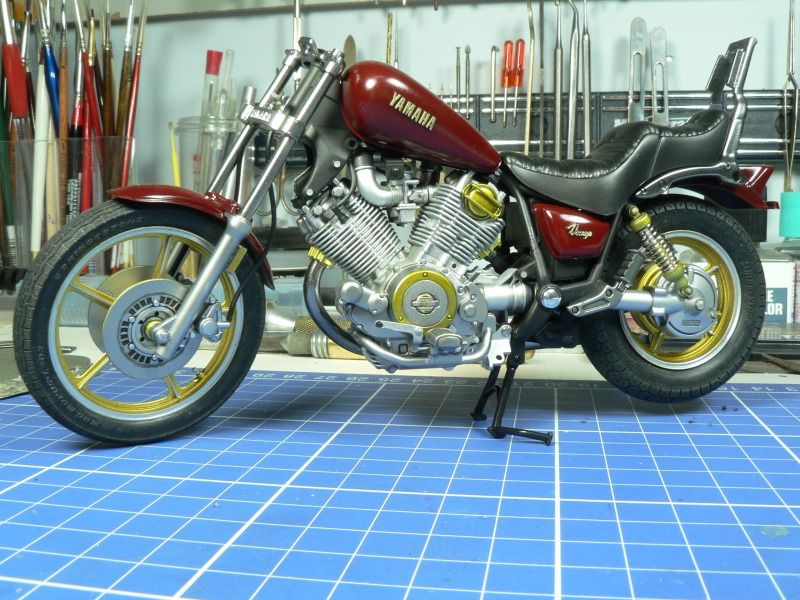
Been making really good progress on the Virago - just too lazy to post pics with that hungry dinosaur I call a PC - eats up a lot of quality bench time. I’d like to post at least one more set of pics before she’s done, so hopefully tonight.
Ruddratt and Jolley Roger: Thanks again for the good words. I think it would be near impossible to end up with a bad result from that kit. I’ll look forward to seeing the 1/32. Furyan did a super job on one of those in the last NMF group build. Check page 51 of NMF GB III.
Got some first-look test-fit goodness with the P-51B…
Test-fitting this one reminded me why I keep saying it’s possibly the best-building kit in the scale. This thing is literally held together with three pieces of tape. One on the fuselage, one on the tail, and one under the chin.
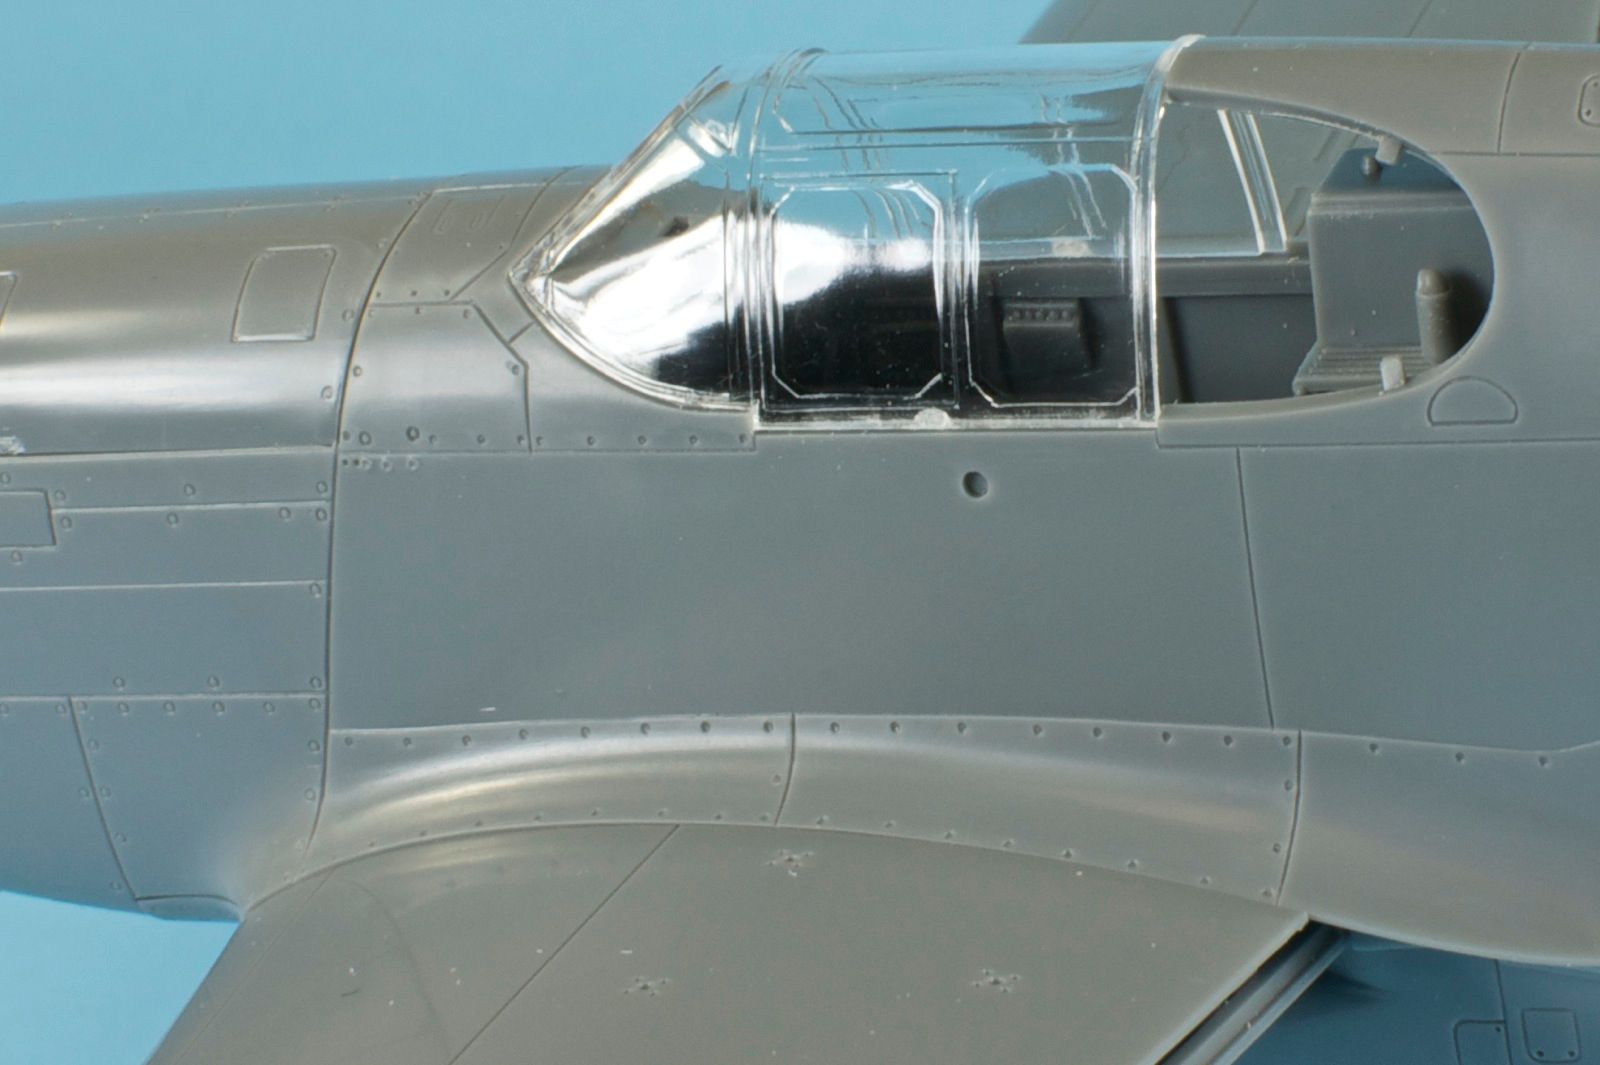
A closeup of the canopy and the wing root. The fit on these two critical areas is just phenomenal. Last time I built one of these, I didn’t even have to glue the upper wing root. Don’t think I’ll need to this time around, either…
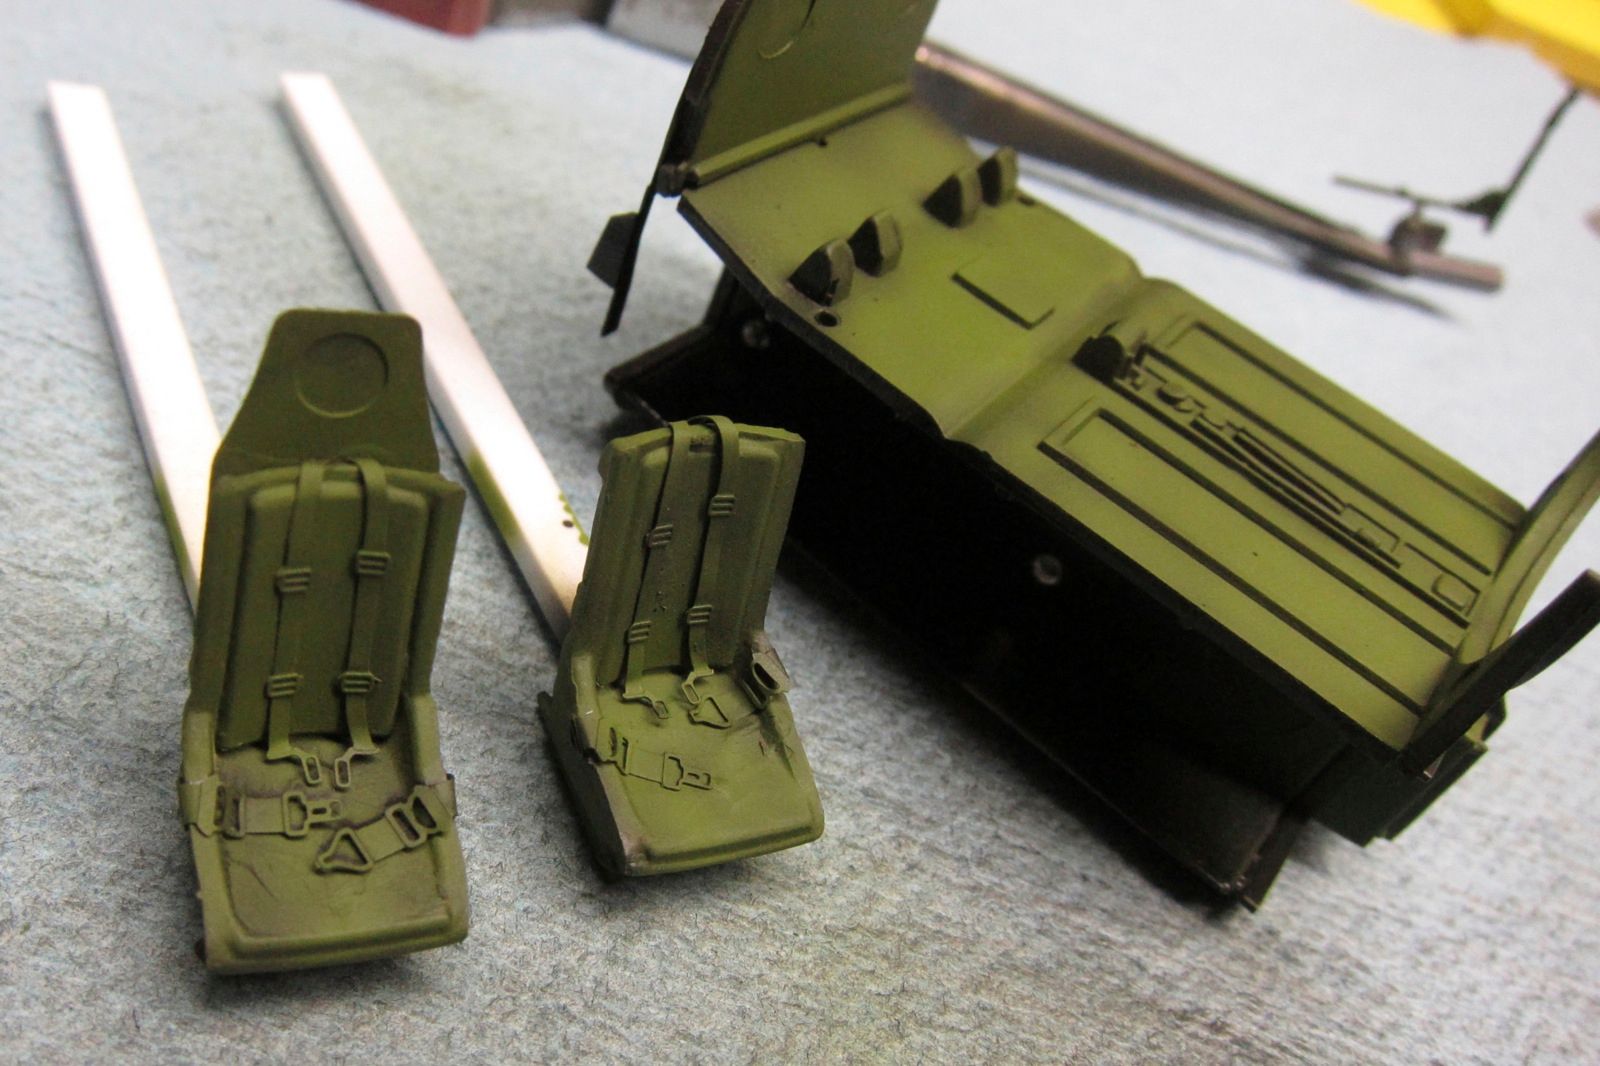
Mike_espo I would call that a very good start man ! That pit is gonna be a nice one, love the detail work and the IP is really well done. You gonna dirty up the burner can with pastels maybe ? If I recall correctly those engines produced a lot of soot, just a suggestion of course.
Doogs I to am sorry to hear the BIG 25 is on the back burner but I can sympathize with you having lived in Boyd for a while. In the spring we were invaded by fire ants, swear there was a hill every 10 feet of a 2 acre yard. Finally got them under control as it went into summer, then after a rain in the early fall it was water beetles !
I have that same Tamiya P-51B in the stash too sure looks like a pleasure to build. I will get you 2 new builds on the list today.
CaptBigMoney yup that kit is a definite challenge to be sure, but it looks like you have that P-38 headed in the right direction.
Stoutfella CONGRATULATIONS !!! yours is the first completion for the group. As has been said above, you have done the model justice, very well done Sir. You I believe said this was your first attempt doing NMF ? It looks like you have done many of them in the past and knowing how fragile the Metalizers are, you handled it like a pro. [Y][Y][t$t] Your build is posted on the front page. Cant wait to see your next one.
Talentless man that Aries does look a bit taller then the CMK version. I for one have never had much luck with resin addons other than wheels and props, course that could be that I am a bit hamfisted. I am looking forward to seeing how they turn out for you.
Richard WOW nice !!! Been wanting to see these pictures of the Kermi-cat [:D] I’ve heard horror stories of the Academy decals and must say you got them to lay down and behave very well. I really like the markings you have chosen too, [Y] keep the pictures coming buddy.
OK fellas, finally got some pics taken and uploaded. Gotta say, in spite of how far out of my comfort zone this kit is, I’m havin’ a ball building it. Man though, that Alclad II chrome is some tricky stuff! Very easy to get heavy handed with it, and if that happens it kills the effect completely, looking more like aluminum. Too little, and it’s way too dark. It relies heavily on that uber-glossy black base coat. After a lot of trial and error, I found that 2-3 very light coats of the Alclad at about 12psi worked best, but it was tough maintaining that consistancy, and I still had some pieces that ended up with a better finish than others. Overall though, I’m quite pleased with the reults so far. Used a little creative license and went with colors on the fenders to match the tank and battery covers instead of chrome.
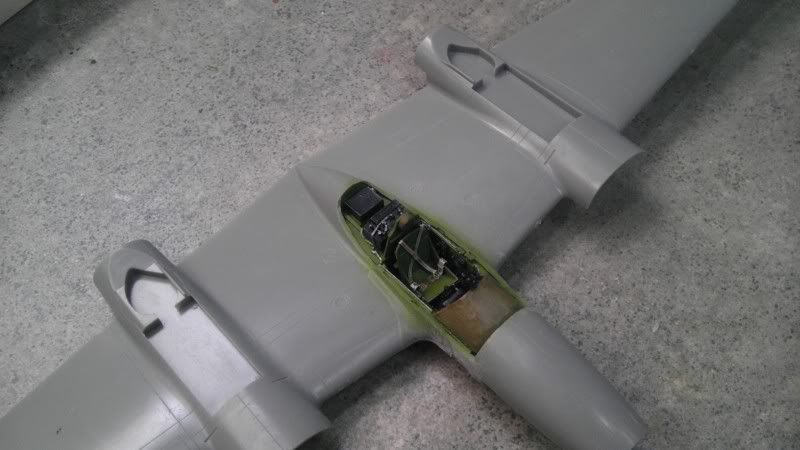
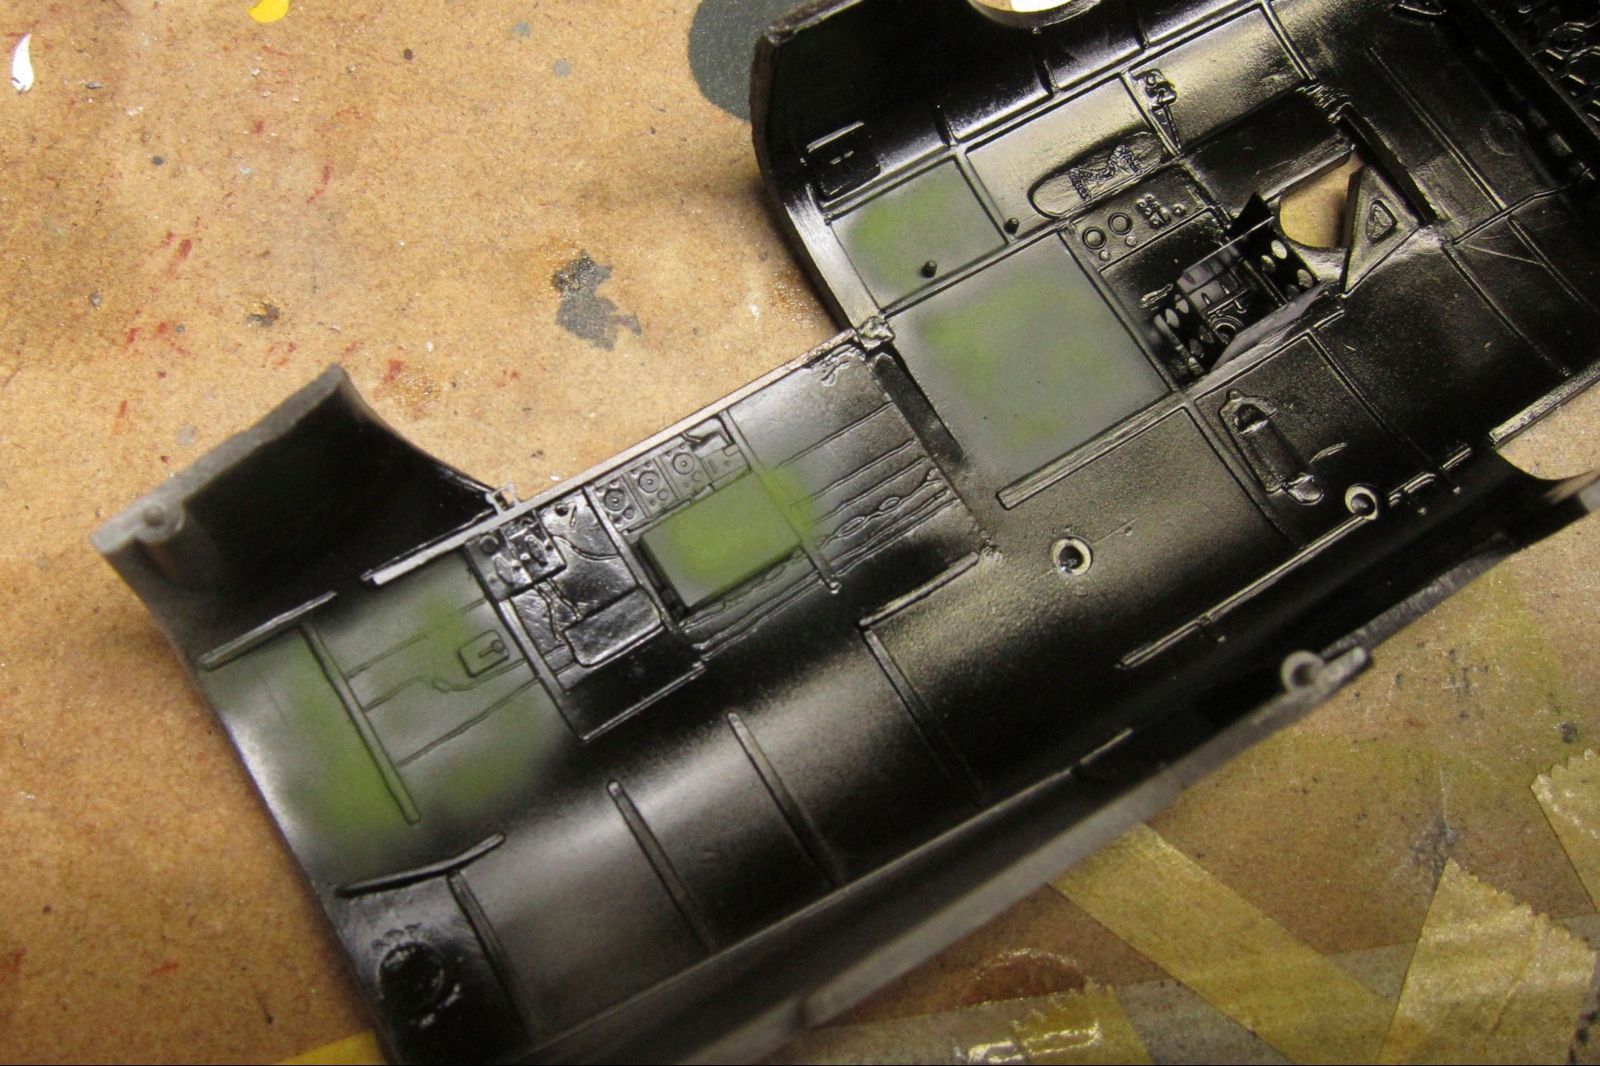
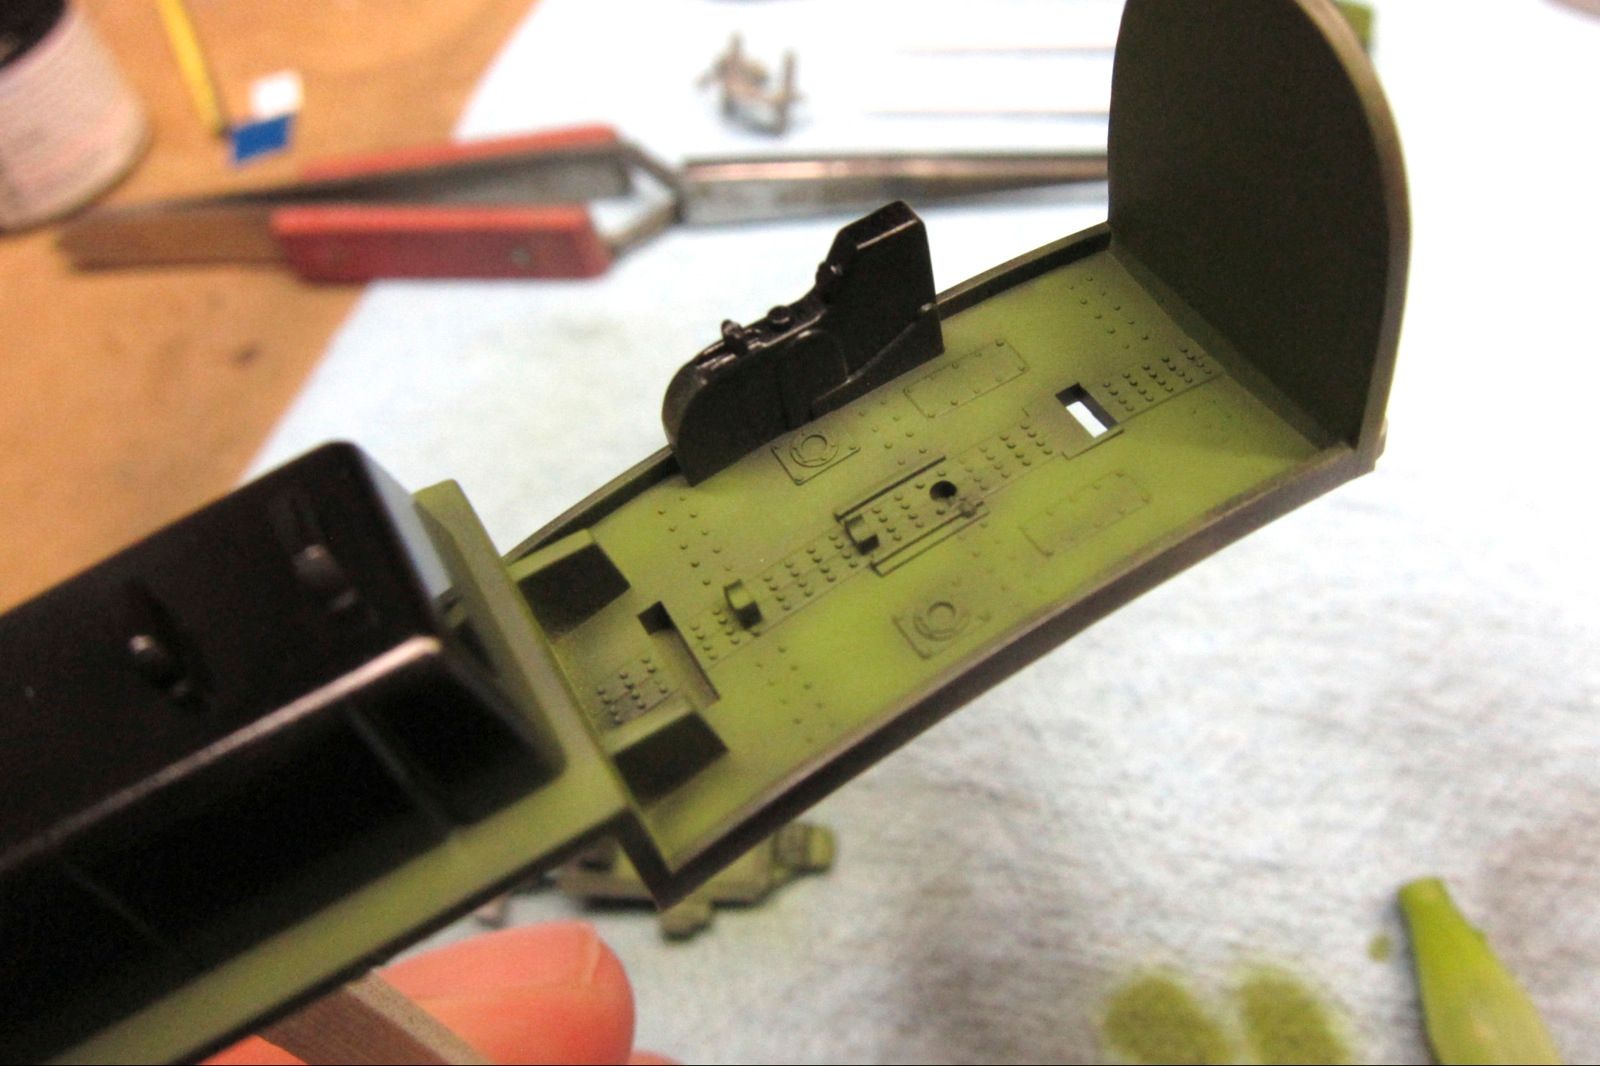
On a few recent builds, I’ve been less than happy with my cockpits. Interior green over primer just looks way too clean and uniform, even with heavy-handed weathering.
So this time around I’m trying something I’ve used to good effect on armor builds.
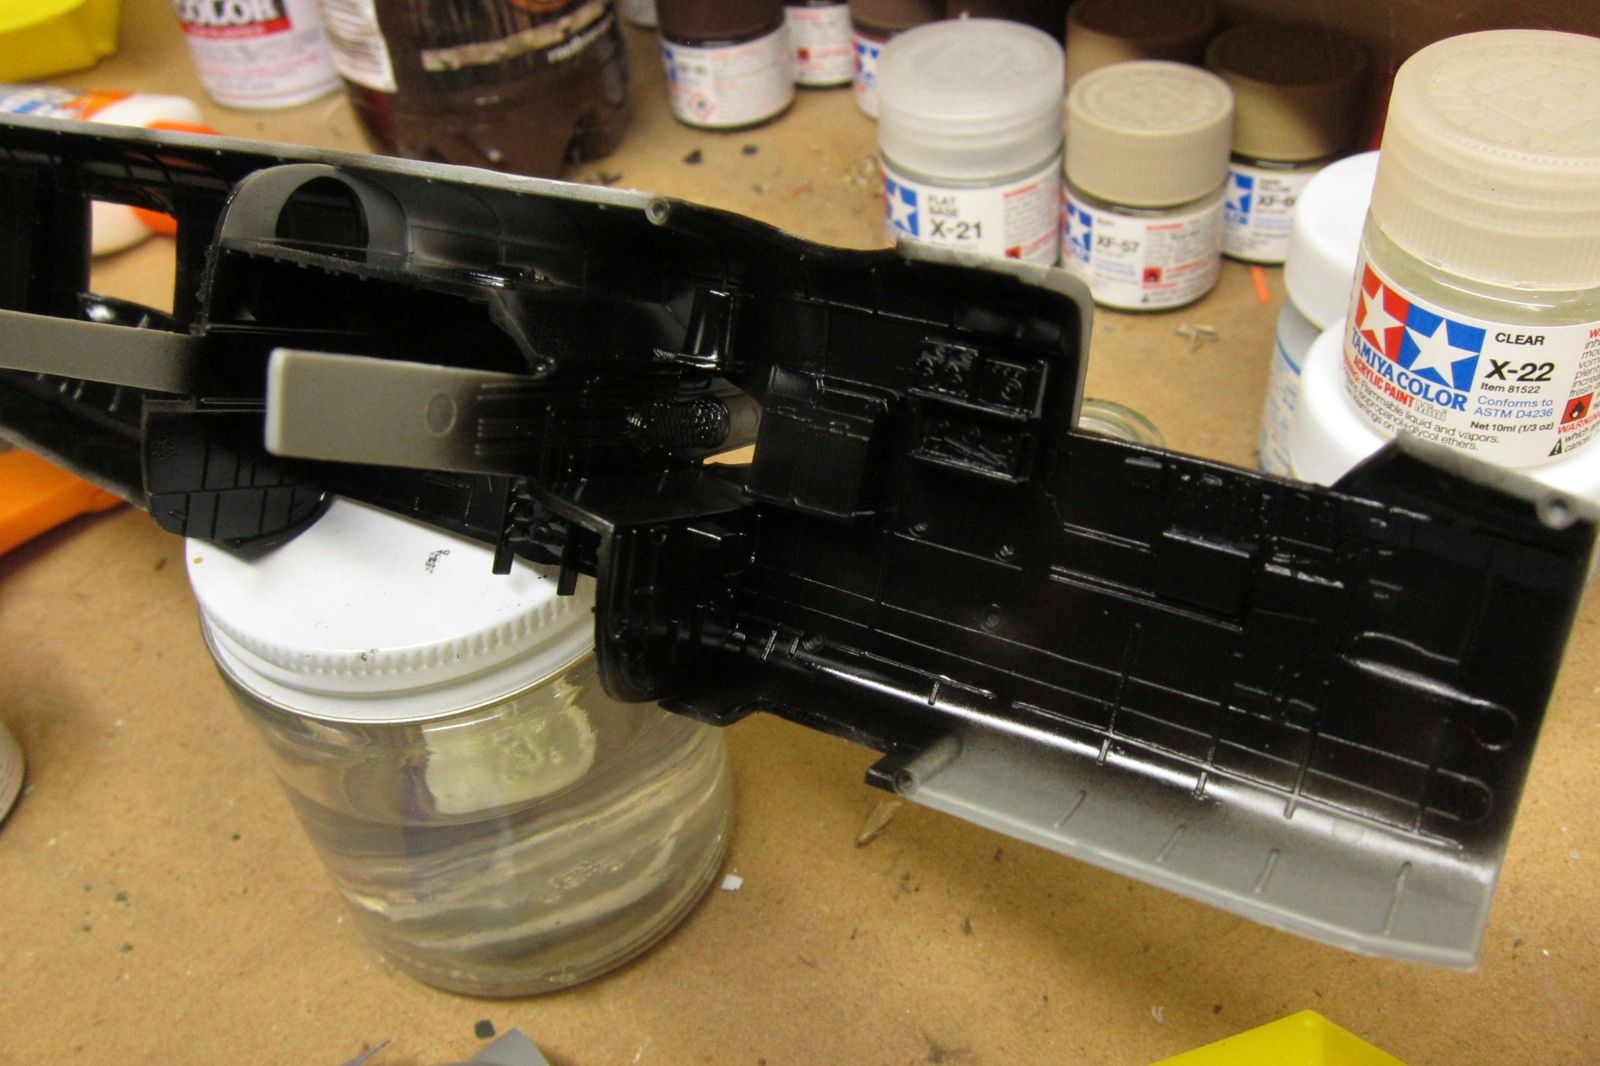
Started out painting all the interior pieces with Tamiya X-1 Gloss Black. I’d have used flat, but need to Alclad a few areas, so hey, X-1 for everything!
Next, thin MM Interior Green, building up haphazardly and in light coats.