In addition to flattening the bottom of the trucks, if the decks are painted you must remove the paints beneath the trucks. I do this with a small drill, around #60 or so-easier than scraping. The hole needs only to be very shallow, through the paint but not too far into the deck plastic.
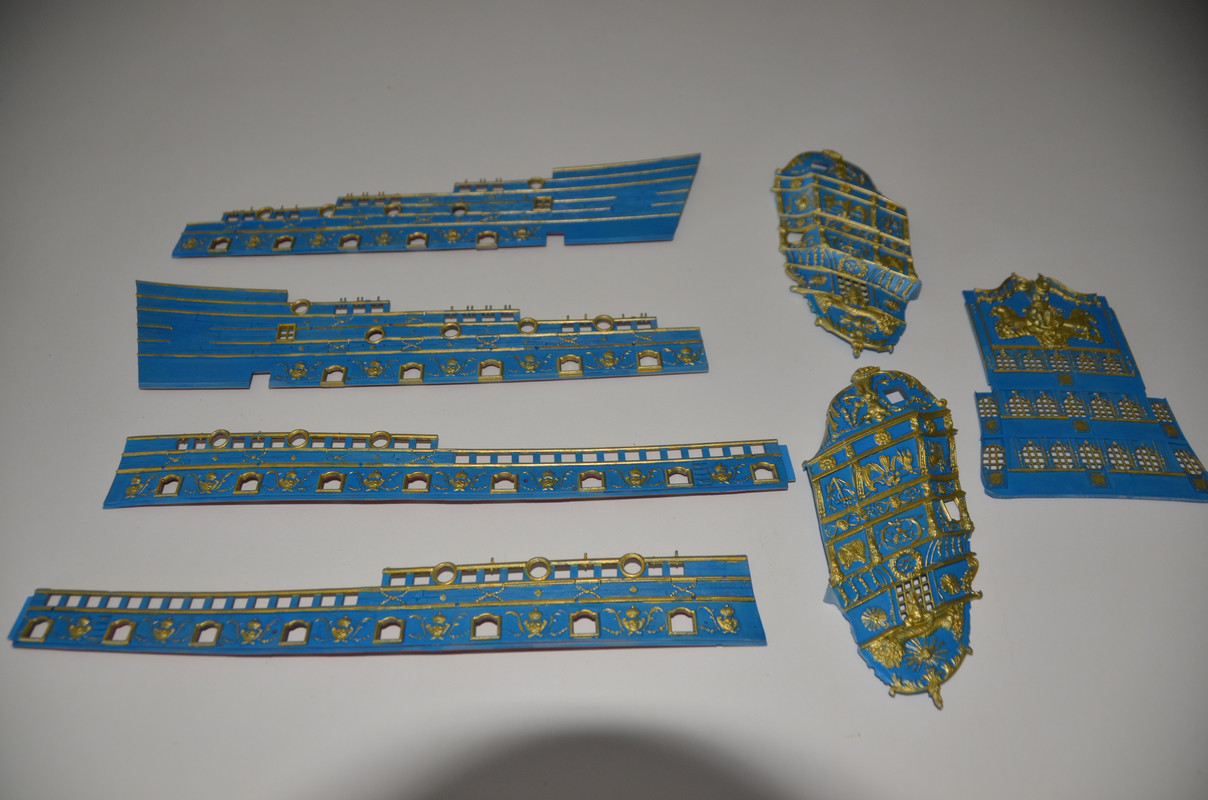
I have finished painting the gold details for the side and back of the ship, it took me over 5 days to do so, using a very small brush and a lots, lots of patient. Attached is how they came out.
If any one is interested, the gold paint I used was Tamiya gold leaf, it goes in easy and has a very nice gold color.
Now I have run into a problem, the instructions are telling me that I have to prepare some of the rigging, and specify a specific numbered tread, the kit came with 4 reels of threads, but they are not numbered and the instructions simply tells me that I am to use either No. 10, or 16, or 40, or 60.
Which is which? are the lower numbered tread the thinner, or, it is the larger? In electrical wire the lower number is the thicker wire, is it the same with treads? I did a search in the Internet, and now I am more confused. It appears that there is no standards as how to show the size, I found a chart that is supposed to help, but it appears you have to have a PH.D in math in other to use it, I barely can add 2 + 2, LOL
Thanks
Joe
In my instruction booklet on the page first page is a small section called rigging cord notation. The various cords are lettered from A to F and a description of each is shown such as heavy brown or medium black. That chart should answer your question
Yes, after looking at the instructions very closely, ( As you know, they are not easy to read, and my eyesight is not as good as it used to be )I found were the measures for the different treads are listed, according to the chart, the smaller the number the bigger the tread. For example No. 10 = 0.9 mm, while No. 60 = 0.25 mm.
All the 4 spools of threads that came with my kit are white, so, dye then black, use only white tread or buy the correct colors. The No. 10 tread is not included, so I will have to find it of the proper color.
Thanks for the help.
Joe
I find my threads at Michaels, JoAnns, or Hobby Lobby. For a ship that size I have no problems finding thread. For my smaller scale kits it is a little harder- like others I use a fly tying supply place for five and ten mil thread.
I find three sizes of black (smallest for sizing) and two for white/tan get me through most models.
My biggest problem is that neither of my daughters wants me to go to any store, due to having lymphoma about 6 years ago, (Thanks Vietnam), I am considered in the high risk group, if either of my daughters find out that I went to a store, they will get very angry with me.
Joe
Don, I decided to go to Hobby Lobby tomorow, no, I am not telling my daughters, I will simply take the appropriated precautions.
If I may, does the treads at the store show their size, like in mm, and/or by a number? The kit comes with the size of treads and the corresponding number, for example, No. 10 is .9 mm.
Is this how they are labeled in the store? Do I just eyeballed to get the closest size?
Thanks Don
Joe
Generally the eyeball is fine. I cannot imagine that Heller checked the scale.
The thread will be numbered. If you can find a table that makes sense to you, good luck. I never have, and there also are different systems in different countries.
A favorite thread unit of mine is the “denier”. That’s the number of grams that 9 kilometers weigh. About all I get from that is the higher the number, the thicker.
A couple of things. Black for standing, tan for running.
An apparent range of sizes has a nice effect. Standing rigging being the thickest.
The shrouds on the lower masts might be 6" diameter on the ship, which would be 0.75 mm or 1/32 inch.
That’s not thread; that’s cord.
The anchor cables might even be twice that size.
Try to find cotton.
Run it through beeswax.
Bill
Thanks Bill, Your recommendations are greatly appreciated.
Joe
It is also a good effect to use thinner thread for the ratlines on the shrouds- almost smallest you can work with. I have five mil monofilament, but I would not use it for ratlines as it is a real struggle to work with, and you do so many knots and other operations with ratlines it would drive me bonkers. I do simplify ratlines by using a simple overhand knot. I use a lot of monofilament, but not for ratlines. As Bill says, cotton is very nice for ratlines and running rigging because it is so flexible compared to monofilament stuff or even rayon thread.
I have a spool of black tread provided by the Admiral, is very thin and I think it will go very well with the thicker shroud rope ( about 1 mm ) that I will be using.
Thanks
Joe
I went to Hobby Lobby today, I found several treads of different sizes, but, I had to choose them by sight, because, since sizing of treads is not standardized, I could not match what the kit needs and what was available, so, I may have to guess as to the size of tread needed for the model.
The store paint selection was limited to mostly Testor paint of which they had a a good variety of colors, they also had about 20 bottles of Vallejo, but, they did not had any Tamiya paints. Tomorrow I am planning to go to Michael’s to see what I can find there.
My daughter found out that I went to the store and got very angry with me, what can I tell you, apparently she loves her daddy a lot.
Joe
I was about to start installing the lower eyeballs for the shrouds when I noticed something, I do not think there are sufficient eyeballs of the appropriate sizes to complete the model. There are 3 sizes of eyeballs, since I could not find what size belongs were on the instructions, I went by the logic that the bottom shrouds go with the bigger eyeballs, apparently it depends on which mast you are working with. Anyhow has anyone that have done this model have run into this problem? Are there sufficient eyeballs for each area?
Maybe they are right in from of me and I am unable to see them.
Also, I am on page 15 of the instructions, what a nightmare, many of the lines do not show were they are supposed to end, they are all numbered, however, I am unable to find the termination of some of the numbers. If this is an example of Heller instructions, I do not think I will be buying another Heller product.
Thanks
Joe
PD. Yes, I know, you guys warned me about this model.
Heller rigging instructions are on a par with Trumpeter color callouts–largely imaginary.
I strongly suspect all Heller rigging instructions were written by the same author, while drinking absinthe and chain-smoking clove Galois while contemplating going on strike. All while being no closer to the sea than some bistro in St Dennis.
That sample text then being edited to specific kit by some intern using a “model” built in Spain for the Tourist trade as a guide. The sort of thing carved from a single plank of wood and rigged in coarse Jute twine.
Ok, I’m biased. I view Heller kits as bases for semi-scratch building. The hulls are ok, the detailing reasonable; but all the spars and rigging are toast, and you want you refernce material to size things correctly.
That’s my doux sou, and ought be spent appropriately.
having fun , I have the imai rigging instructions , which are japanese , but alot better . if you PM me , I can send them to you if you want .
Hello! I have not been posting updates on the build due to reaching a point were I did not know how to proceed due to the confusing drawings on the french version of the instructions, but, thanks to Steve9, who send to me the Japanese instructions of the same ship, I was able to continue, attached is were I stand today, about to start doing the shrouds.

Hoping I can work with the dead eyes provided by the model, they are very small and do not have a channel to keep the rope in its place.
Until next time
Joe
Update: The member who send me the Japanese instructions was Steve5, not Steve9. Sorry Steve! I am a lousy typest.
Joe
Well , this is my next update. After several days of doing the shrouds, I finally did the 6 in lowest area of the mast, I had run into several problems and, at one point, I got so frustrated that I was about to put the model in the garage and forget about it. Instead I drop the project for a couple of days, which let me to come up with ways I could solve my problems, then I continue and finally I have the 6 shrouds made.
I still have to do the rat lines, but, before I start I have to put back all the parts that came unglued while doing the shrouds, if you shake the ship it sounds louder that a baby’s rattle. Following are 2 photos showing my progress.
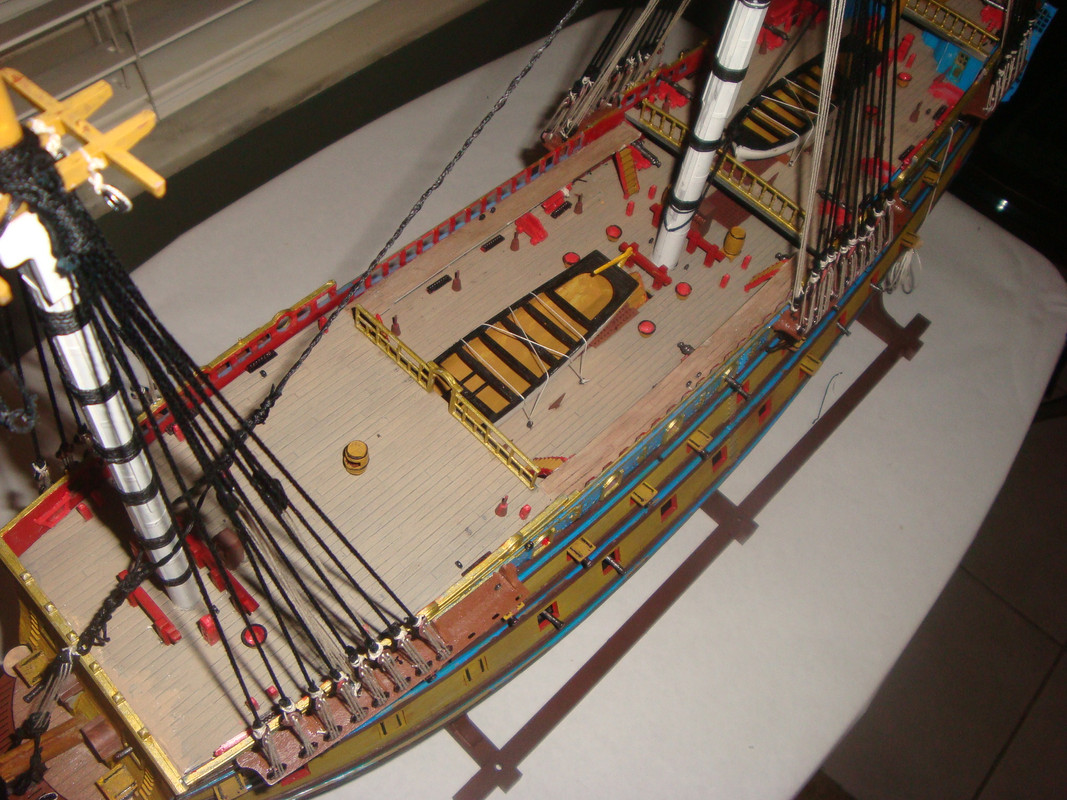
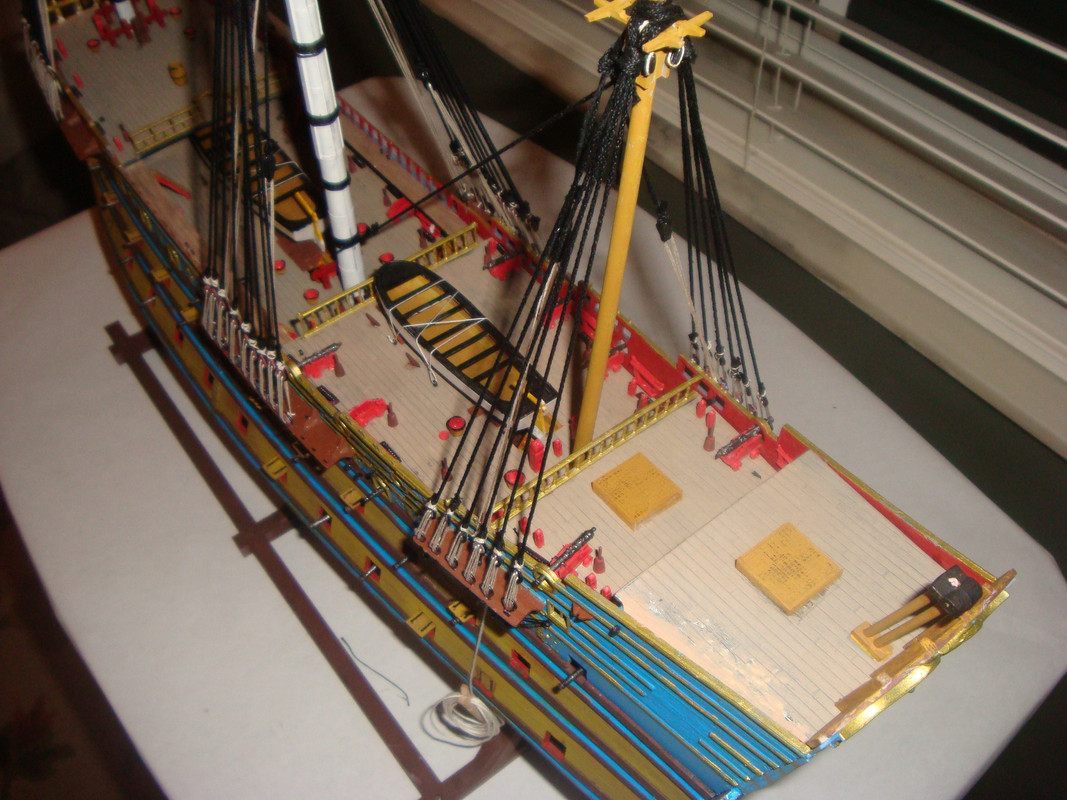
Well until next time.
Joe
Looking great! You’ve passed me by! Your build is an inspriration to get mine into my rigging stand and do the mainmast shrouds and ratlines.
Thank you, your comments are helping me get motivated to continue with this built until it is done, I give myself another 3 to 4 month to complete the built. I hope that this time period is a reasonable one.
Joe
I have started to add the rag lines, so far I have completed 2 and working on the third one. As you all know it is a slow tedious process and I only can work on it for a short time before the antiquated computer system that resides in my head starts failing, so rest in between sessions is a most.
You may also notice that I am adding ropes to the doors of the gun ports, This is an addition to the model since the kit does not calls for it. I have not finish them because I, so far, broken off 4 drill bits, so I am waiting for some new ones to arrive. These drill bits will break at the minor provocation, they have to go in straight or they will break on you. Well here is the photo:
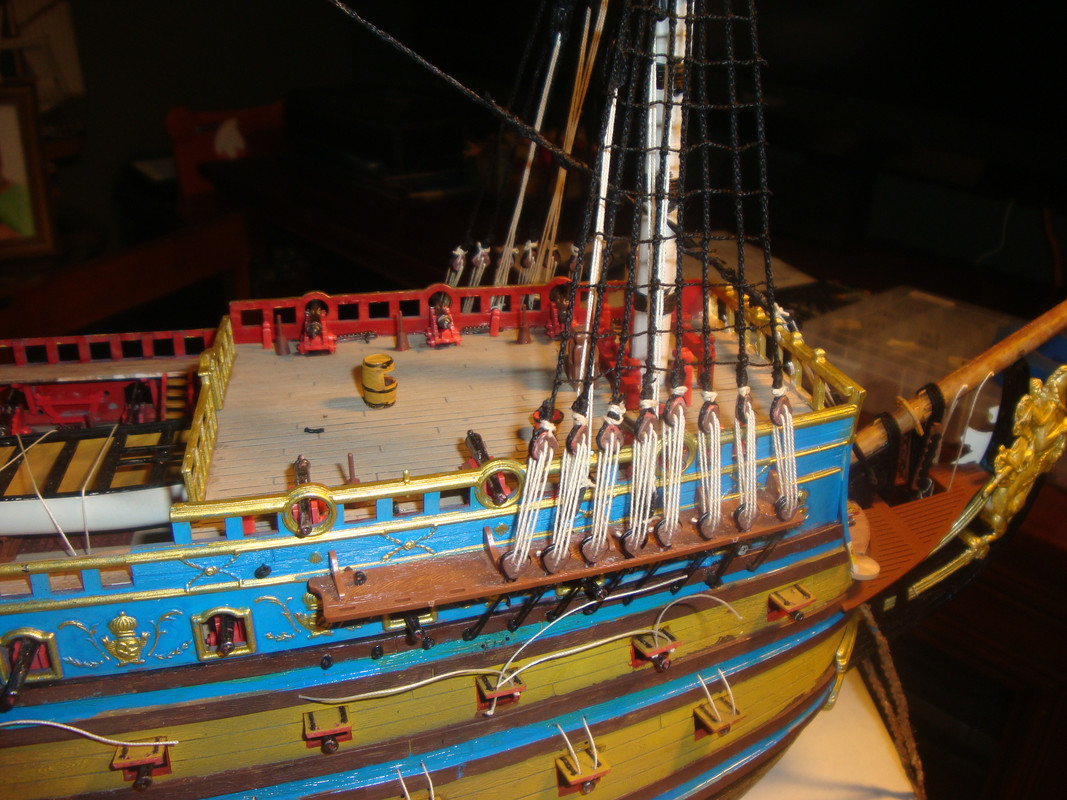
Until next time
Joe