Today, August 9 2020, I will be starting the built of the Le Solei Royal, I have done some preliminary primer applications, and starting to put together some of the 108 canons of this ship.
I have found out that there are several members of this blog that have build the same ship, therefore, I am planning to take the liberty of looking at their progress to “steal” some of the tricks they used to do their ship, I hope they do not mind.
Well, it is time to go to work!
Thanks
Joe
PD those of you who completed, or are still building the Royal, please provide the name of your tread so I can find it, I need to know where they are so I can “steal” the ideas on how to built it. LOL I tried to search but with no luck. Thanks
I have seen this particular tread before, it is interesting because it talks about the many faults of the kit and also offered subjections on how to fix them. At least I learned something new: farrels, It looks like I will have to learn how to fabricate them.
I was going to ask about the blue color because, since the plastic is already blue, I figure that I could get away by using the color of the plastic, but, I also found other parts that will have to be painted blue and it would be very difficult to mach the color, so, I going to search for a good color as close as possible to the original and use to paint all the blue areas.
I was looking at the dead eyes and other small parts and I wonder if is possible to use these dead eyes, they do not seen to have a way to attach them to the rope, I may have to search for dead eyes and buy them.
Again thanks for all your guys advise and GMorrison I will do a search the way you suggested
I just got the gumption to get back to mine- I am rigging one mast at a time. I have the bowsprit and spritmast, and the lower foremast done. Time to tackle the mainmast. I take a break after each mast and work on other things. That model is a multi-year build.
Well, it looks like this kit will take quite a long time to build, but, I hope it will not become a multi year project.
I have put together the 2 halves of the hull, and now working in preparing the cannons. I think a made a mistake when I painted the top half of the hull using a middle brown color, after that I did a wash with very diluted dark brown, then after, I did another wash with lite gray, it came out very nice, the problem lies on the color, instead of the mid brown as a base color I should have used something like ochre, I wanted to redo it, but the Admiral likes the way the brown turned out. And, as you know, where the Admiral commands, the sailor obeys. LOL
It turns out to be a good looking model regardless how accurate one builds it. I finished mine in 8 months, built it out of box with the exception of setting it in a water line and tissue paper sails, now if i were to build it today then as Don says a multi year project for sure!.
There’s quite a few different methods on how to do it, I’d just google it and look for some you tube videos from modelshipworld. I just used the plastic sail as a template and coated the paper with thinned white glue and let it dry, then used and acrylic wash to add the desired color, I used desert yellow and red brown mixture, but pastels would be a great option also, then I stencilled in the seams with pencil.
I displayed my sails in various stages of deployement.
I did use the kits deadeyes, once sanded to add some graining and painted they look good.
Thanks for the prompt answer. I will try you way to see I I can handle it, it sounds like an easy way to do it. Originally I was planning to use another way which involved cutting the paper in strips and then gluing then to crated the looks of a real sail, but it is tedious and time consuming.
My goto was 100% rag content paper, linen if possible, or cotton. This is typically marketed as “résumé” paper. And, it’s typically available in various shade of ecru, tan, or beige.
I used to have a carefully-hoarded supply of German mechanical pencil lead in sepia brown. Several moves ave vanished that trove.
At 1/96-1/100 sailcloth strips look plasible at about 0.24-0.25" wide–it’s the 0.02" (6-7mm wide & 0.5mm edg) selvage joint to glue them together that want to moot the point.
As above, the vac-form sales will help line out the sails. They can then be soaked thoroughly and drapes over the vac-form to set into curves.
For reef points, tie a double figure-8 knots into suitable thread at about 2 scale feet apart. Coat the thread with PVA and let dry. Nip the thread at the knot end and use CA to glue those to the sail. Front ones are easy, they just lay there. After ones want to hang down which is trickier.
Carefully study some period drawings. Sails, the way they were reefed and their shapes varied quite dramatically from the flat rectangles of 19 th C ships.
I tack away from making sails myself, as sails mean sailors and those lie beyond my modeling interest, although I like to sail.
Ill dig up the post where Tilley, while waiting in an office lobby, amused himself by toting up all of the rope required to fully rig a 18th C frigate.
Ok, attached is a photo of all the cannons ready to go to battle, putting together all of the 108 canons was a very tedious operation, if the canons are an example of the work ahead, I better get prepare and purchase a bottle of Advil for the headaches. LOL
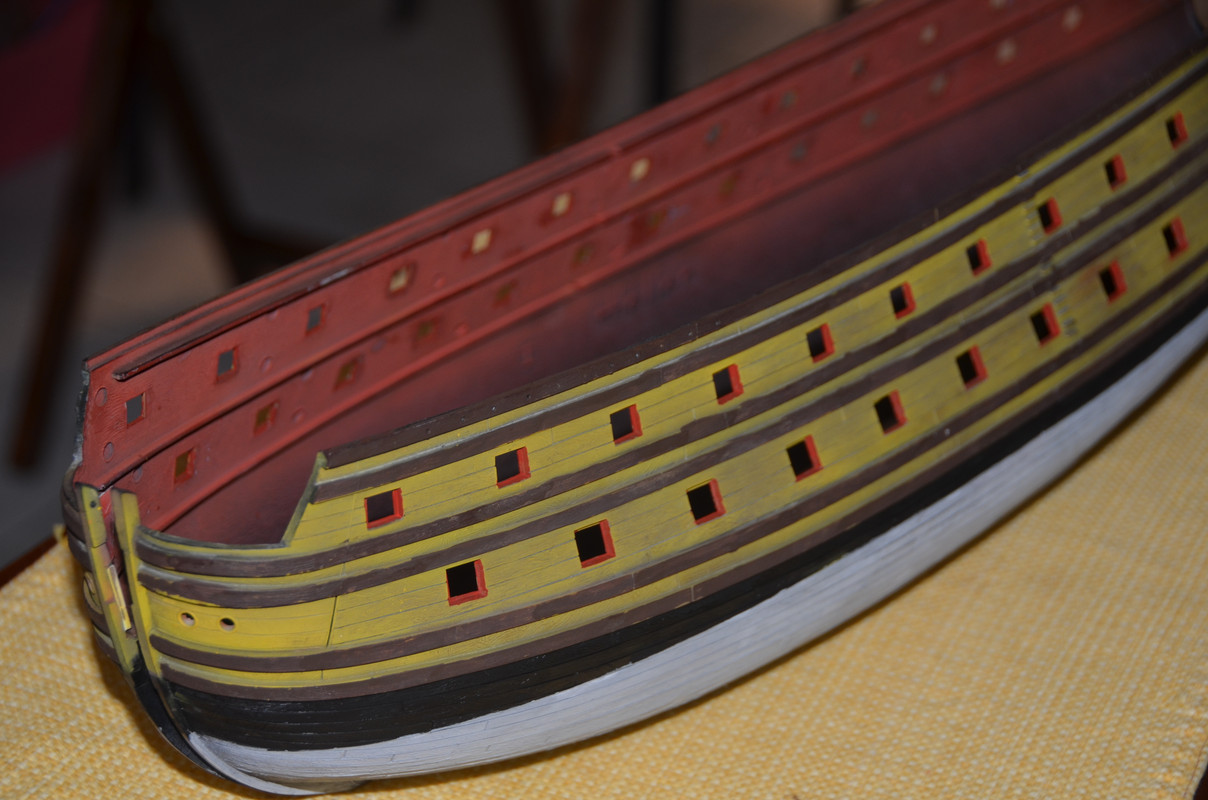
Following is the hull after I repainted it using a combination of base yellow and a wash of dark brown. Originally I did a base of brown with a wash of light gray, it came out really nice, but, it was the incorrect color. After a couples of days thinking about, I decided to go ahead and redo the hull to closely resemble the drawing on the box of the kit. I was a bit apprehensive because I did not know if I was to damage the model beyond repair, but it turned out pretty decent, and most important, The Admiral approves.
Next is continuing with the assembly of the hull. This model, as you guys told me, is going to take some time to complete. I have ordered the book illustrating the proper way to rig a ship of the era, I am still waiting for delivery.
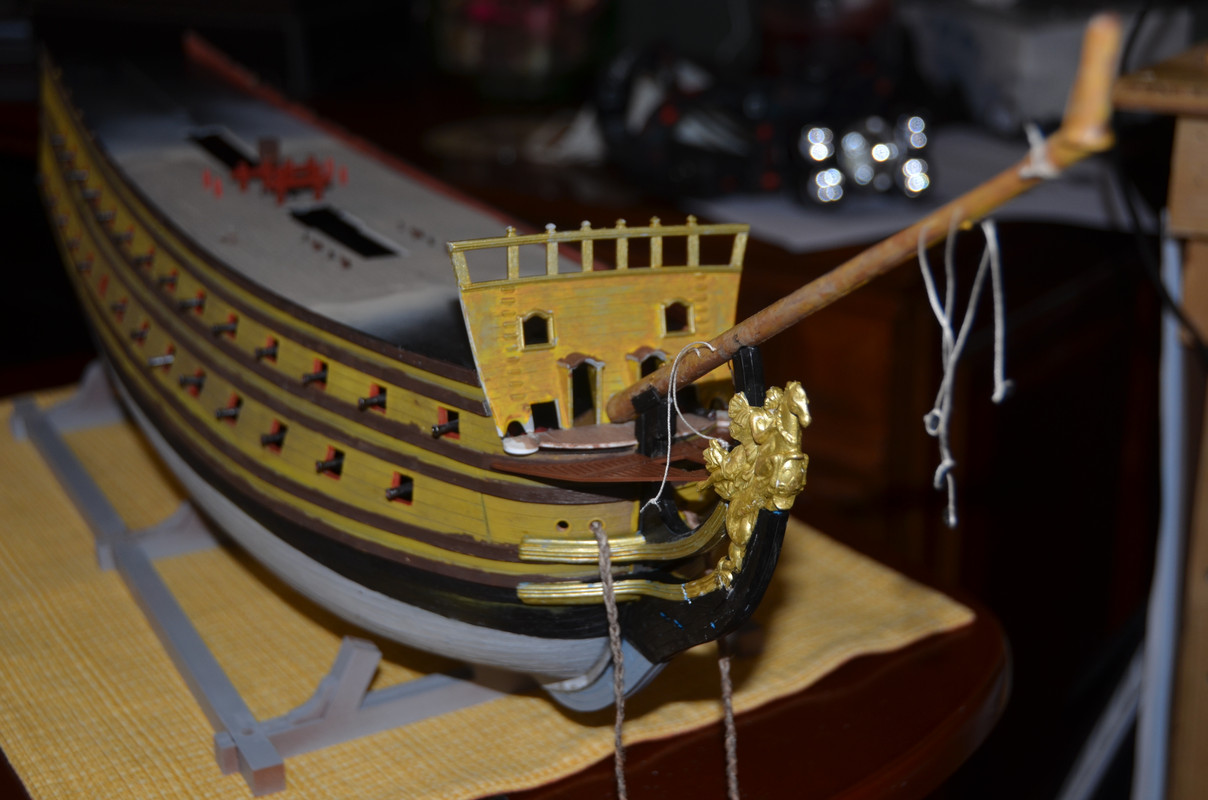
Well, I am back with an update, the building of the ship is going slowly, I had a hard time fitting some of the parts, while installing the second deck, I knock off about 4 canons and 2 couple of canons with their carriage. The canons can be easily put back, but the carriages, since the second deck is already installed and glued, I have no way of putting them back, so, those positions that are missing the canons and their carriage, I will have to close the gun ports and not show them. Attached is how far I have progressed:
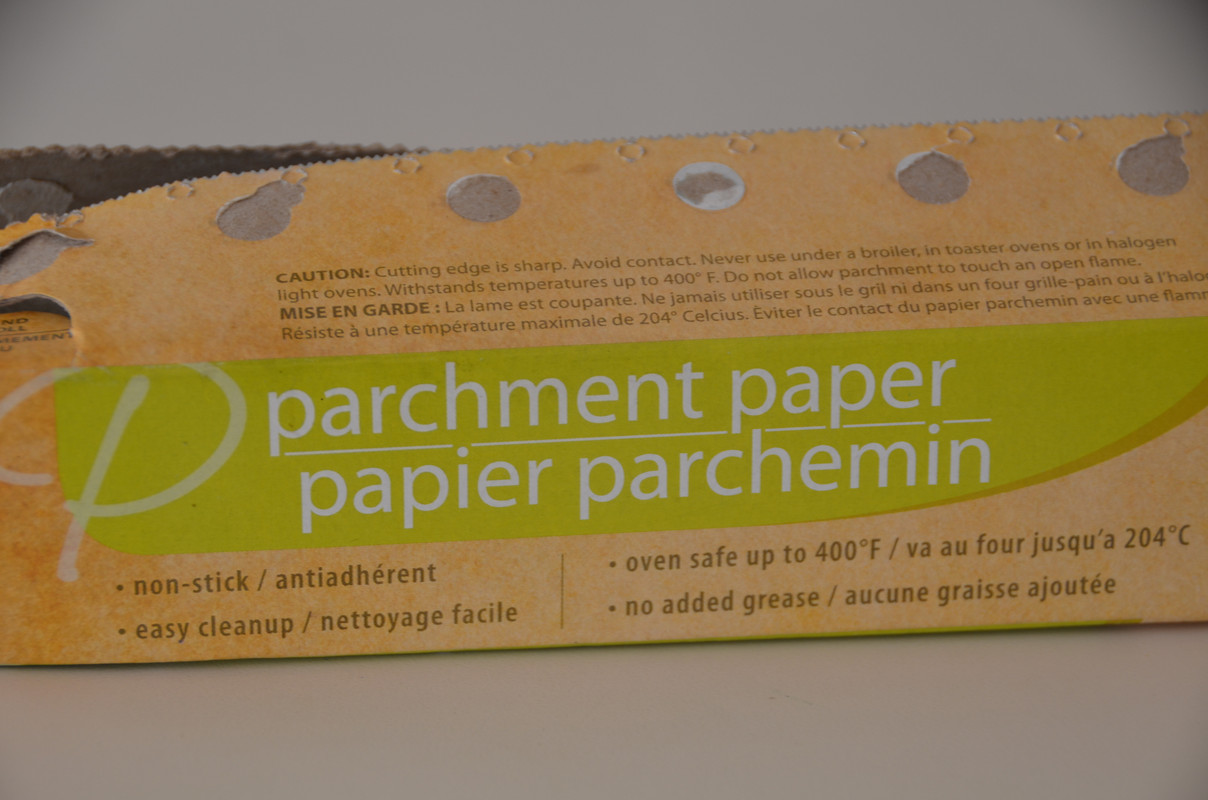
Now I have to wait until I get more primer, it was ordered but it has not show up as yet. Meanwhile I started playing with the making of my own sails, I am using parchment paper provided to me by the Admiral. Before experimenting with this paper, I tried bond paper and drafting paper, but, of the 3, the parchment paper appears to be more realistic.
I did made a mistake, I used a black wire to be able to shape the sail, but did not realized that the black shows up on the paper, I may simply paint over it and hope it won’t be noticeable, on the next sails I will use copper wire and I hope for the best.
Next photo is the the type of parchment paper I used, the Admiral use it in the kitchen, no idea for what.
That, my friend, is a rite of passage. You could probably shake them back where they belong, enough to glue them again.
Often builders, knowing they wont be seen; drill a hole through the whole assembly and stick a pin into the deck. Another way is to sand flats on the bottom of the trucks for better glue surface.