The kit

Guys, I ended up filming the sprue review to make a video on YouTube, but it didn’t work out.
If you want to see the details of the parts still on the sprue, check the two websites below:
The assembly manual in PDF is available on Scalemates (updated by me).
https://www.scalemates.com/products/img/4/5/1/1324451-97-instructions.pdf
My initial considerations:
A large part of the kit is a reuse of previous versions of the Panzer IV from Border itself. Newly, we have two new sprues, one for the 37mm gun and another for the protective plates and fighting compartment. Additionally, we have a new upper chassis part that removes the turret hole and adds the anti-aircraft mount.
The kit is obviously better than Tamiya’s and CMK’s due to the new technologies available. Throughout the assembly, I will comment on what I found good and bad.
2 Likes
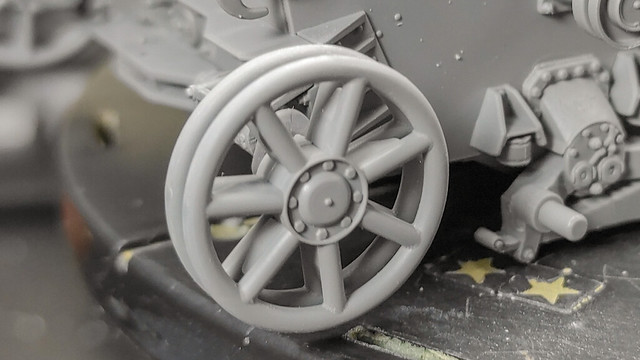
Rolling system
I didn’t strictly follow the order of the assembly instructions… in this one, I started with the wheels, rollers, the drive wheel, and the rear tension wheel.
Here we have the full set assembled.

4 Likes
Here are the rear wheels that tension the track. I’m still deciding whether to replace it with the newer version, as this version was used in the vehicles produced towards the end of the war (based on the late H or J version of the Panzer IV).
4 Likes
Detail of the suspension and the return roller. There is a set to replace the suspension stops, but honestly, I don’t think it’s worth it, as they end up being hidden anyway.

3 Likes
The wheels have the inscription CONTINENTAL clearly visible. I also made some wear on the rubber of the wheels.

3 Likes
The traction wheel is very detailed, showcasing the screws very well. Of course, it’s not like a resin one from T-rex, but it’s very good.

3 Likes
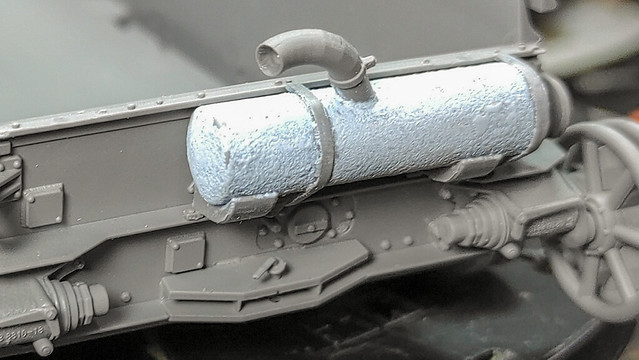
To create the texture of the exhaust, I diluted Tamiya putty in acetone and, with an old and stiff brush, I “patted” the dilution onto the exhaust. Then I fixed the details by cleaning with acetone and, finally, I used 800 grit sandpaper very lightly to smooth the surface. It was the first time I did this and I really liked the result.

The upper front glacis is assembled. I found the weld effects that come with the kit very good and I won’t redo them with putty… it’ll be for another project.

Detail of the lower front glacis. Here you can see the external details of the transmission and especially the support and pin for towing the vehicle.

8 Likes
Welcome to the forum, Ricardo! Nice work there. I particularly like the texture on the exhaust pipe.
1 Like
Thank you, @S.Hollowell this was the second time I used this technique.
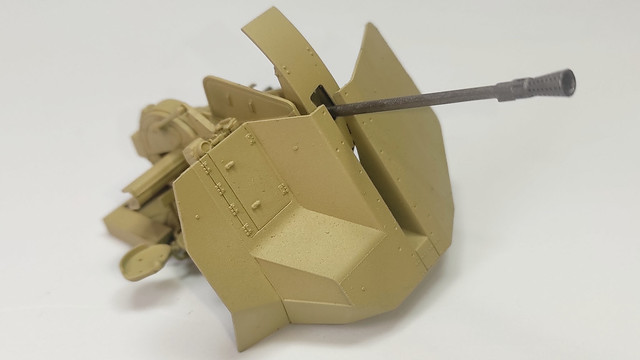
Details of the Upper Part of the Chassis
Side view with the installation of the blades

Top view of the upper right side

Detailing of the combat compartment that will receive the 37mm cannon


Front view with the driver’s visor to the right and the seal of the place where the chassis machine gun would be.

5 Likes
Very well done. I too like the exaust treatment idea. It has many possibilites for other rough metal texture items.
1 Like
It looks like you’re doing an excellent job on the build. Finally, a suitable replacement for the "vintage’ Tamiya kit.
1 Like
Very nice work so far. I’ll be keeping tabs on this project.
1 Like
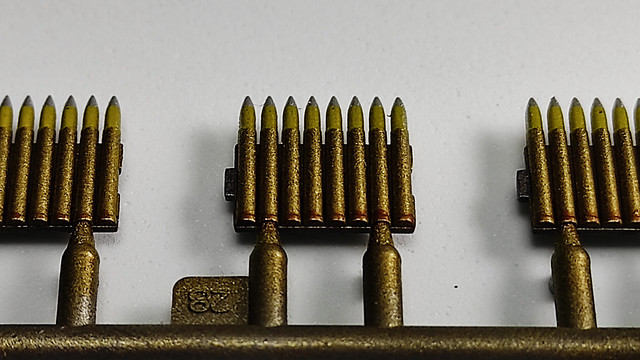
The ammunition clips
Initially, I used the black primer from Ammo (2023), then in the airbrush and masking were (all Ammo):
- 0197 on the ammunition casings;
- 0048 in the projectiles;
- 0195 on the heads of the projectiles;
- 0045 on the ammunition clip.
Then the wash with Interiors Wash (1003) and finally a touch more aging with Shader Light Rust (0851).

The result…


5 Likes