Simply amazing! You certainly know how to bring a build to life!
Fantastic stuff Chuck. Theres always something with your posts that i look at and think ‘What a great idea’ With this post it was the clear acetate as a guide for rivetting.
I recently read a great article on a guy who completely rescribed an Airfix sunderland. He ran tamiya extra thin into the rescribed lines to smooth them out. Looked like perfection when finished. Might make your life easier if it works for you.
…Guy
OH I gotta keep an eye on this build !!! Great work!! Me thinks I might learn sumpthin here. Gummy Bears anyone ??
Thanks, my friends!
That’s a good tip,Lufty- I’ll have toput that into practice.
Well, I’ve managed to barter for a CMK engine set- more fun for the future! Top of wings and fuselage are fully riveted, and I’m in bachelor mode as the wife heads off to visit her mom. Modeling weekend ahead!
well I just discovered that guy has another hidden talent! He’s really good with Adobe Photoshop. That was pretty good putting the real plane right next to the paint bottle!! Beautifull build Guy!
p.s. I really did think it was a real plane when I first looked at the pic
gary
Cheers for that Squeakie, Its a great subject for Chuck to build but mine was a huge dissapointment for me. My paint was just…Wrong. Contamination or something. The pit came out sweetly its just the horrid paint job. Hopefully Chucks wonders will give me the urge to strip and repaint. Never done that before. Bit daunting.
…Guy
they’re on Ebay all the time. I bought one for $15 on there, but most of the time they’re around $20. The wheel well set is new to me, but did buy the interior set to toss in the box.
gary
Thanks, guys!
I went to the optometrist this week- and discovered that my prescription was way off! New contact lenses and I can see again! I was getting kinda worried there, but all is well- and the build is on!


1 Like
Hey chuk, last five pics not working.
Edit: Nevermind, seem to be working fine now.
Simply Wonderbah! Love her new attire! Glad you got your eyes checked out and fixed! Now you can see to really add some details you missed! Like 1/48 scale fruit flys stuck in the radiators! Geeze Chuk! ?!?! Your work is extemely fine enough to give me a complex if I had room for another!
I was going to ask in your previous post what did you used for the PE Templates to scribe those inspection points in the tail? I missed that one somehow? Were they an add on like the landing lights on the KI -45?
As far as your art work! Top notch! That poor pfenning is nekid though give him some lider-hosen! He’ll catch cold! [bow]
If I’d been drinking something I would have snorted it out my nose. [(-D]
Good stuff, Chuk! [tup]
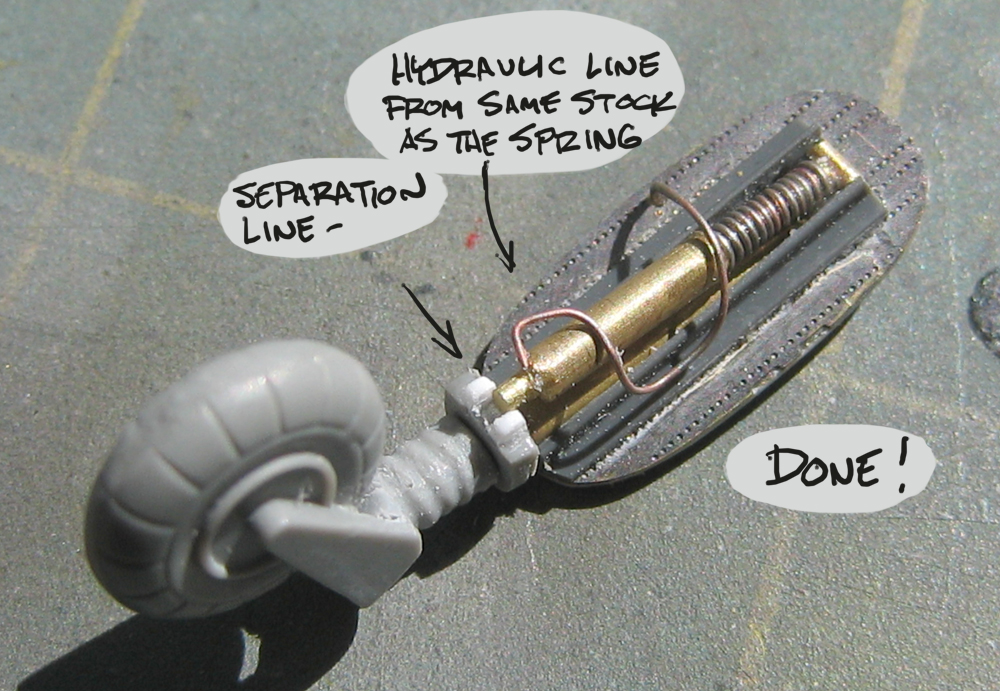
That tail strut is very nice, have tried something like that in 1/32 but never in 1/48th. Think that I’d go blind!! Looking forward to next weeks episode!
Matt
Mmmmm Fritzi, Hubba Hubba. Fantastic attention to detail Chuck. The artworks great too.
Im going to try to post a good period pic with my replys to your posts. That way you might get a good pic youve not seen of the 410.
![Messerschmitt Me-410 [me410-1]](http://www.betexa.cz/images/products/me410-1.jpg)
…Guy
I spent a lot of time last weekend consolidating four…count 'em, four spares boxes down to two, and I did see some little metal gears, I think. Maybe I’ll have to try to make a version of chukw’s riveting tool! I do have a soldering gun but have never used it, I don’t think. Perhaps I can figure out something that won’t require the soldering gun.
As always, looking forward to more!
[bow] Bitta, Bitta, vas ist los? I must vatch dis built und zee how it is done, ya! You are number ein in mine buuk. Once again you-da-man.
I can’t help but laugh every time I see this character.He reminds me of the Professional Bowler Jason Couch.
http://www.bowlingdigital.com/bowling/files/images/2006JasonCouch_small.jpg
Google pictures of him if that link doesnt work. The resemblance is uncanny ![]()
Oh, and Chuk, awesome work. I will be watching this start to finish, wishing I had your skills.
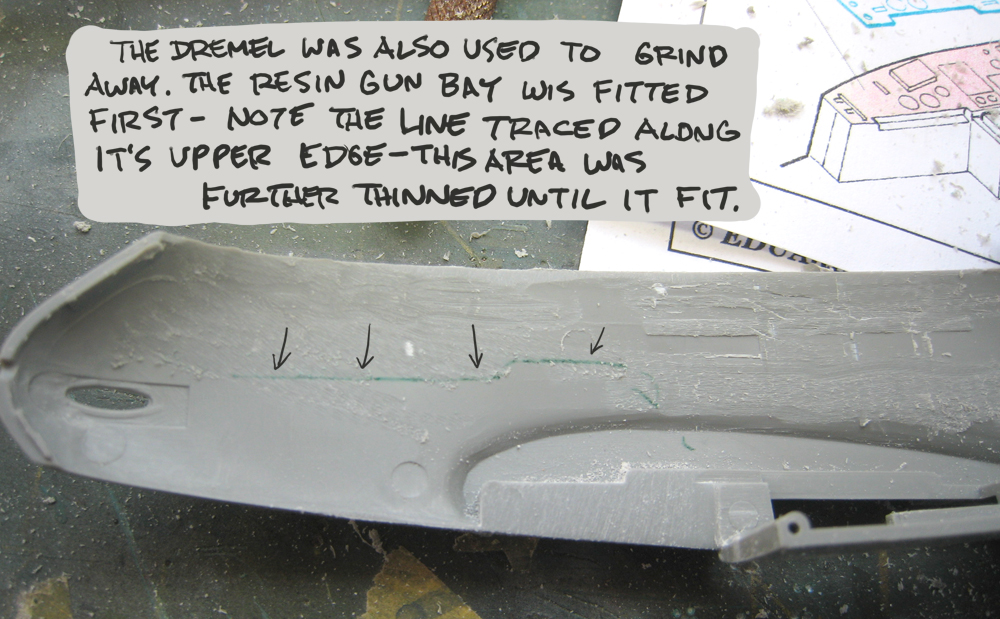
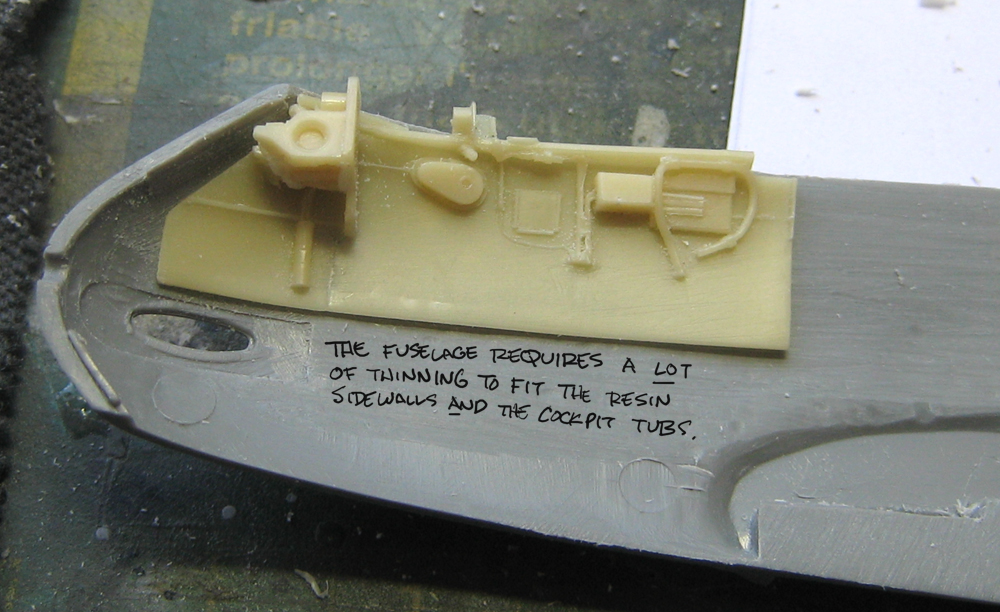
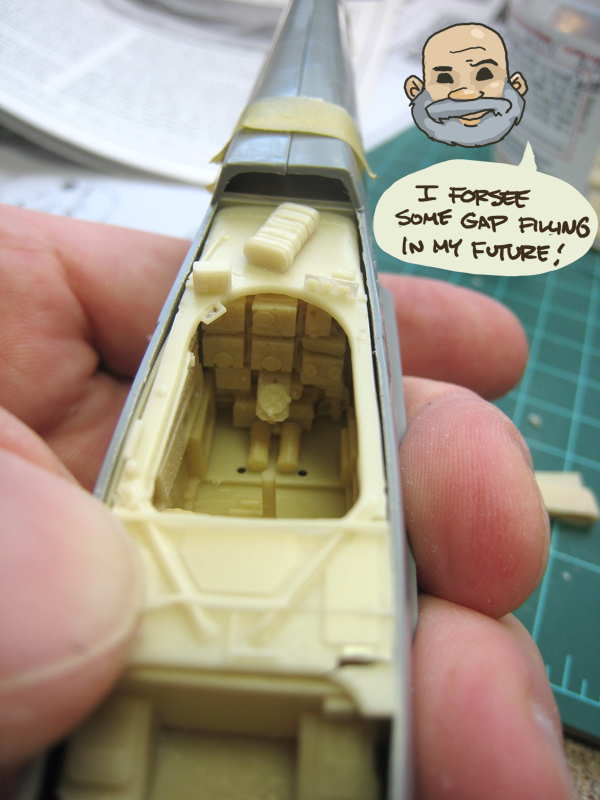
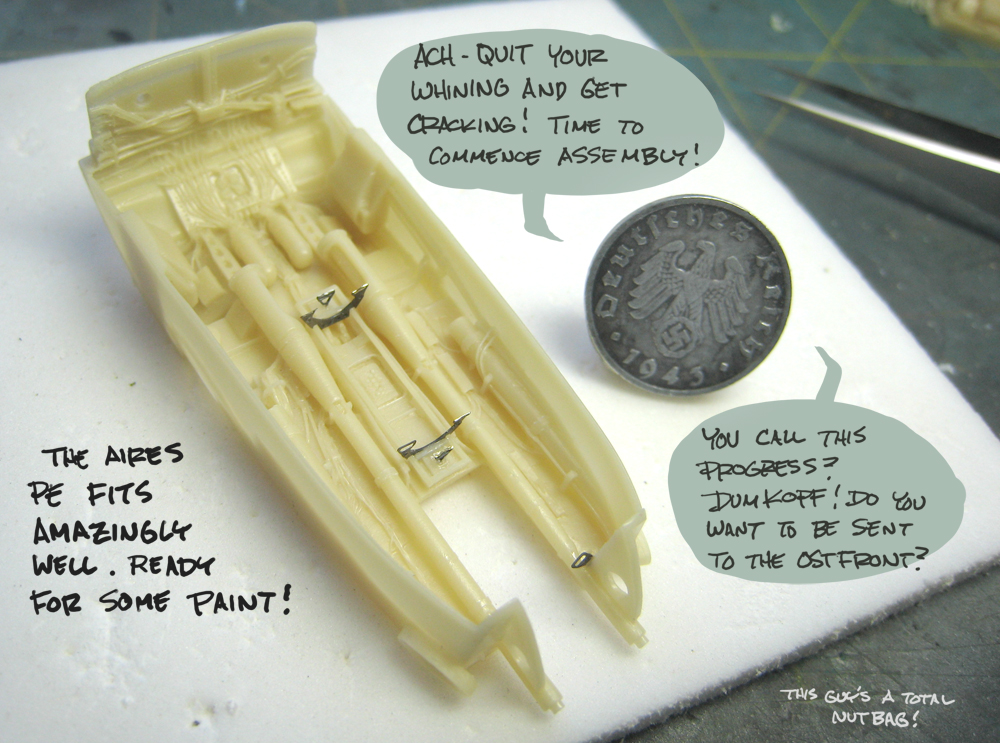
Hey, thanks, guys! I’ve always read that these Aires sets are fiddly- and they are! Not only that, but the resin is pretty stinky, too- I keep the vents going and the vacuum cleaner at hand. It’s a matter of scrape, sand, etc…
sfcmac: I used a Verlinden template for thos little roundhatches- got 'em from Squadron years ago. I’ll be making my own PE radiator bugs soon- NOT!
Lufty, keep them pics comin’! Many thanks, bud!
Go for it, Jim! I’m sure you can patch something together- it’s all in fun.
Deeve, I’m not up on my pro bowlers, but that’s uncanny! I was thinking that the Captain is the kind of tired and war-weary piloiy who’s seen too much, but is still ready to take on Indiana Jones in a fist-fight. ;D
For the rest of youse mugs- thanks again- and see you soon!
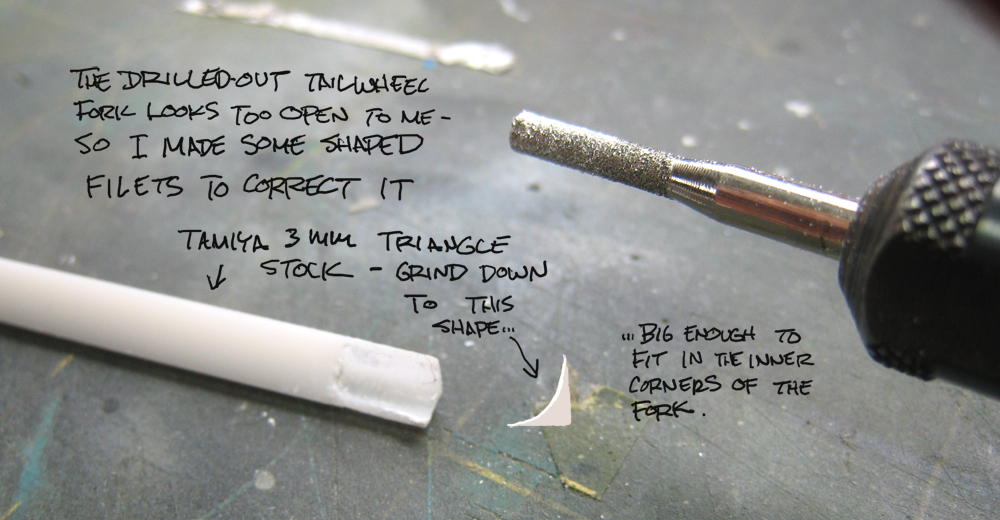
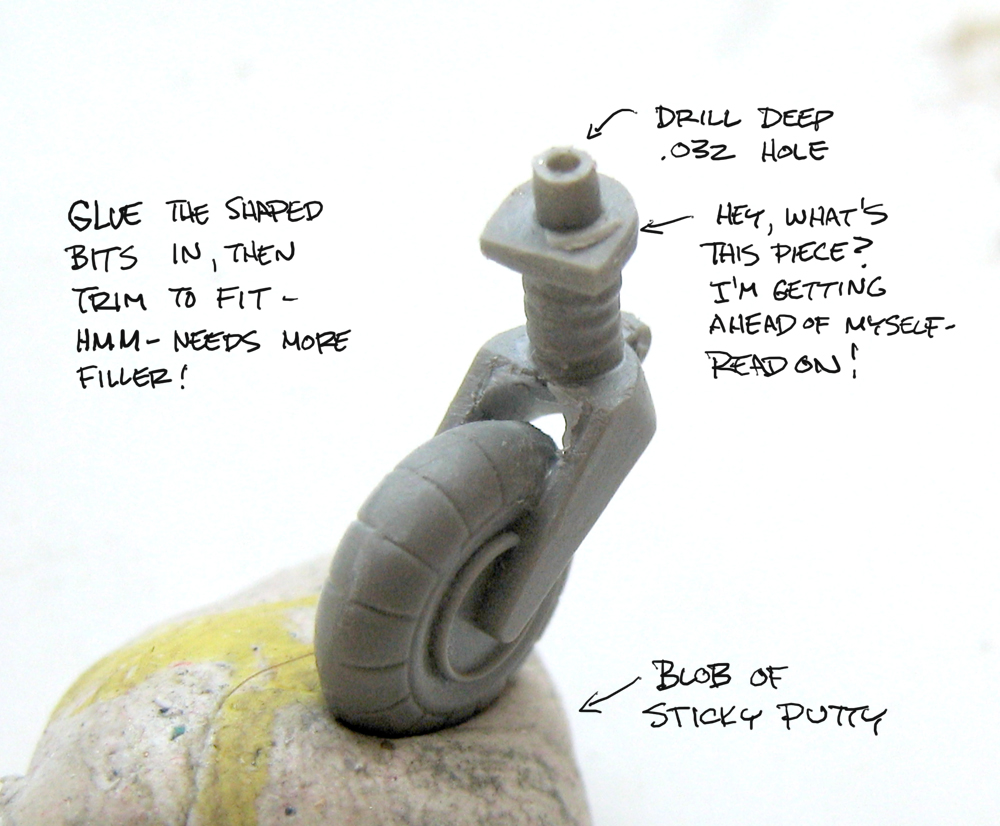
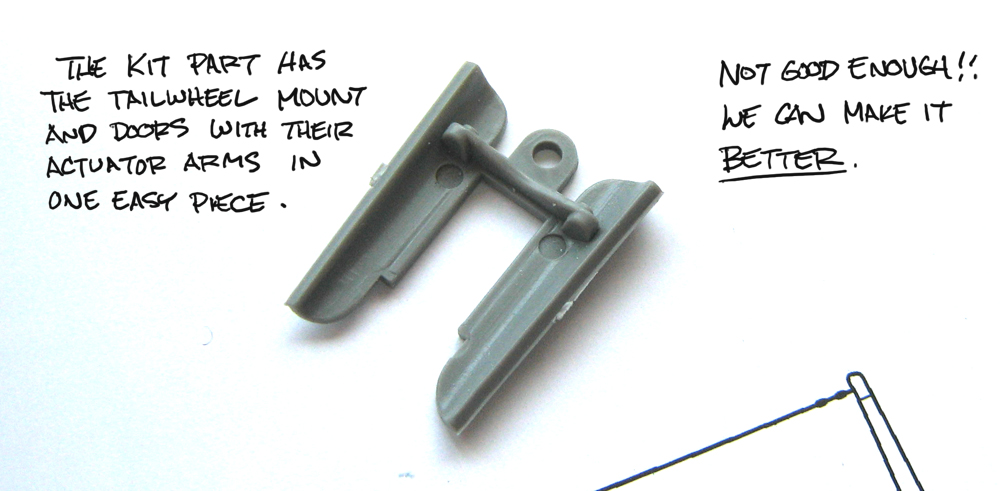
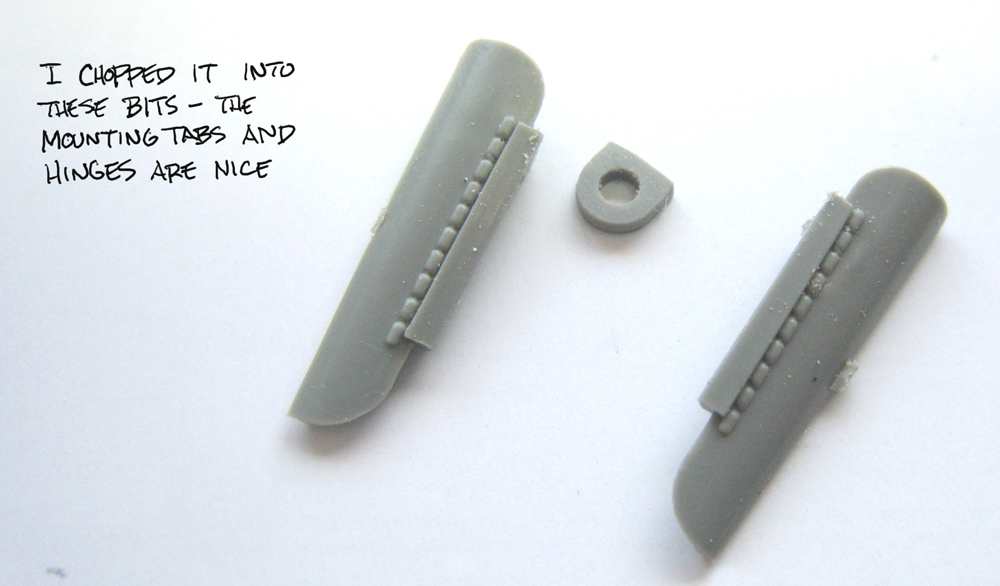
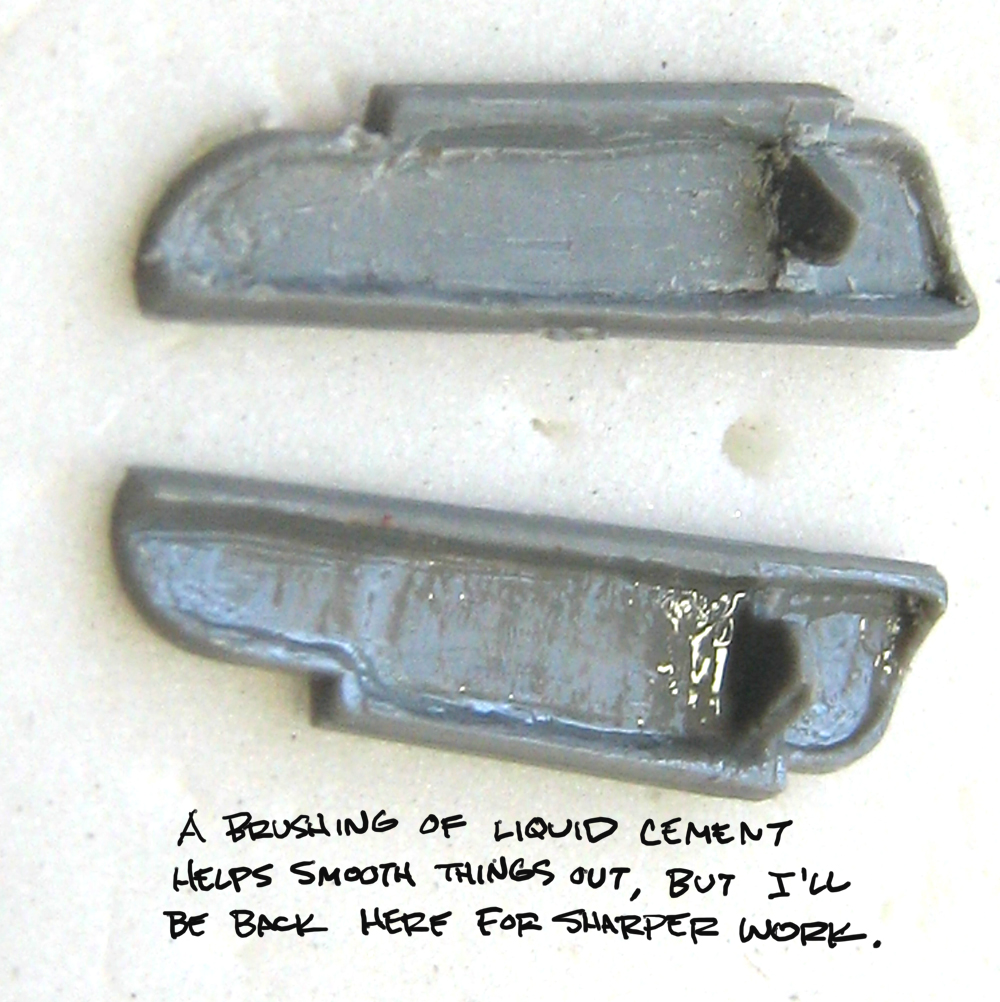
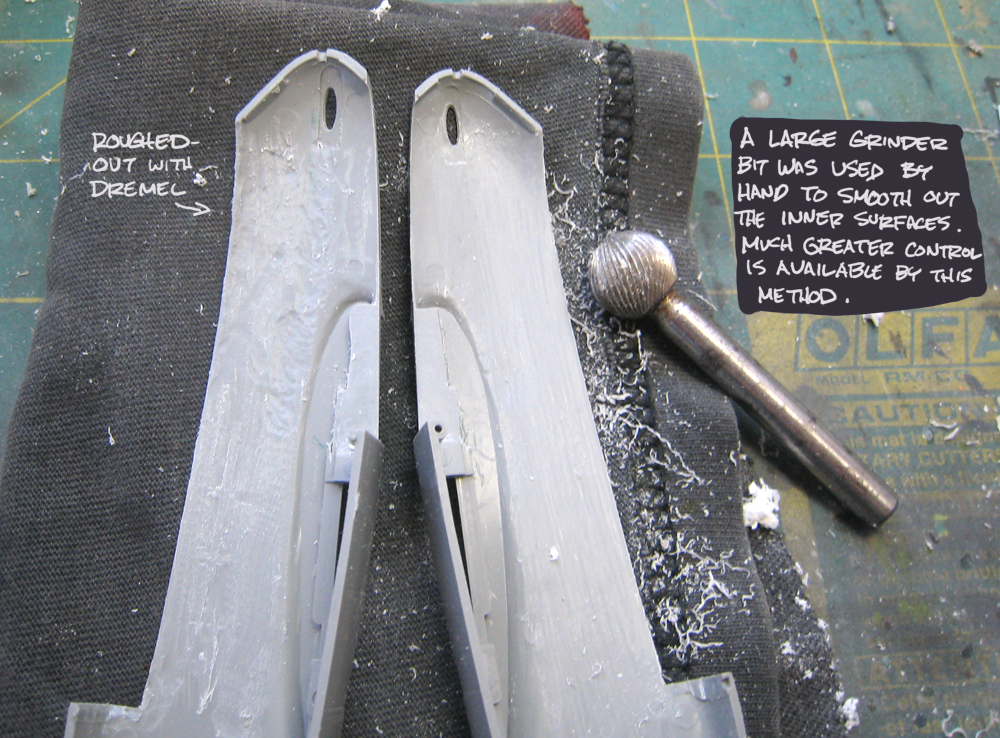
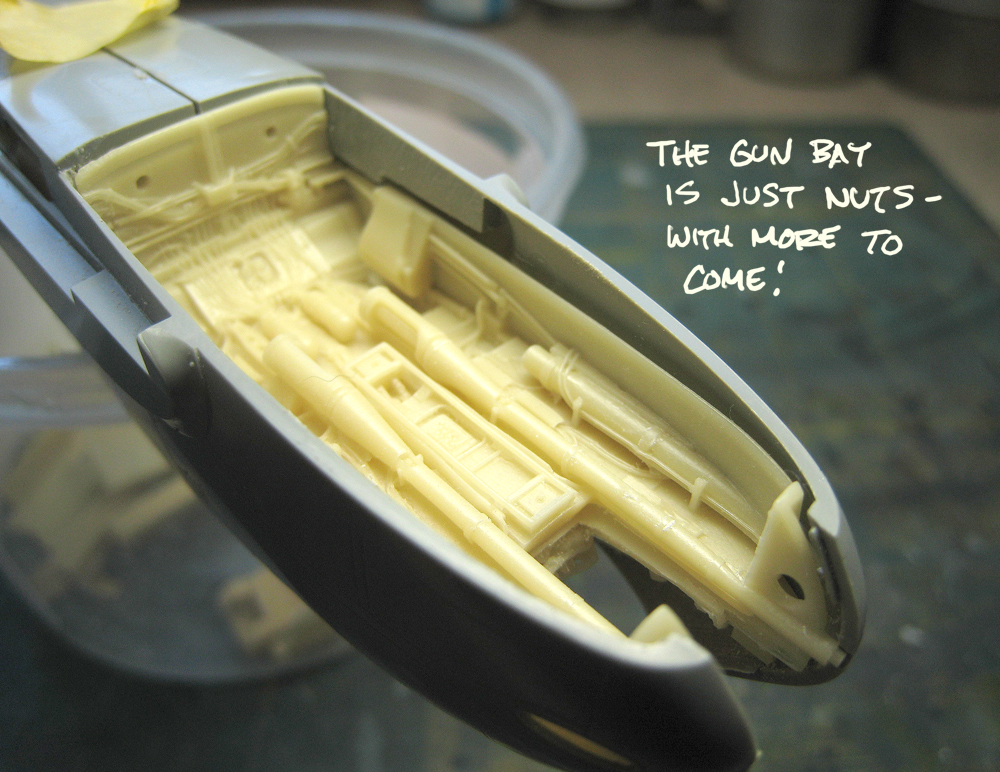
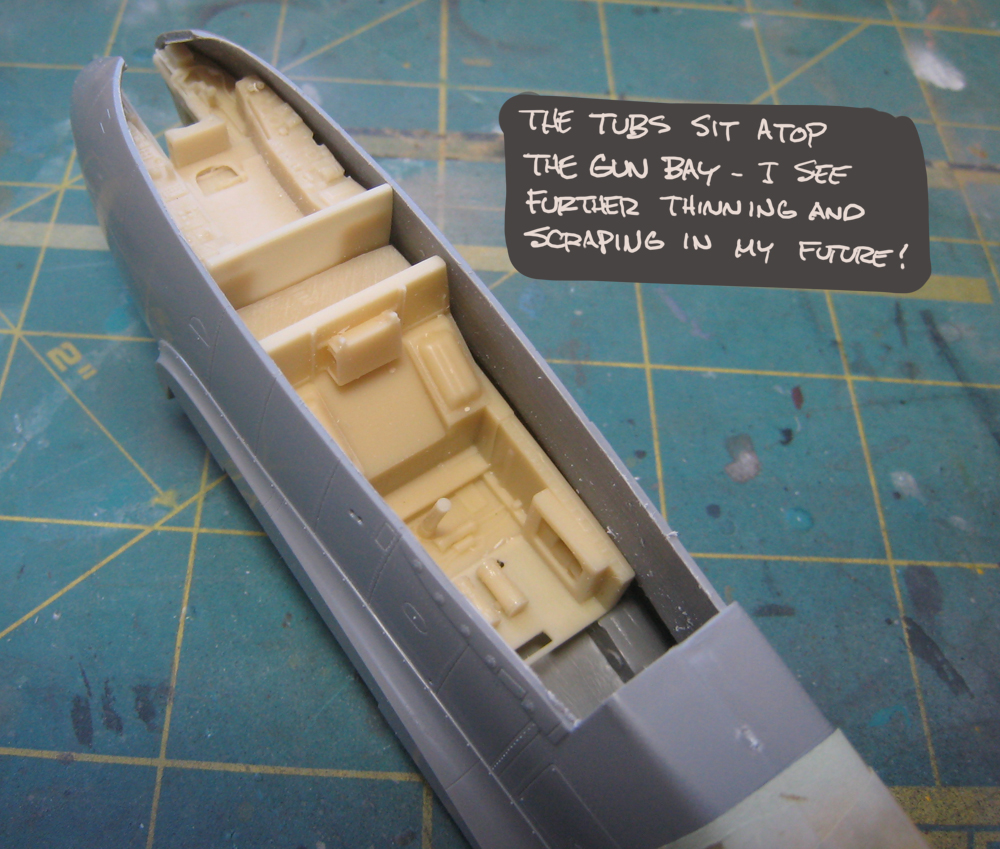
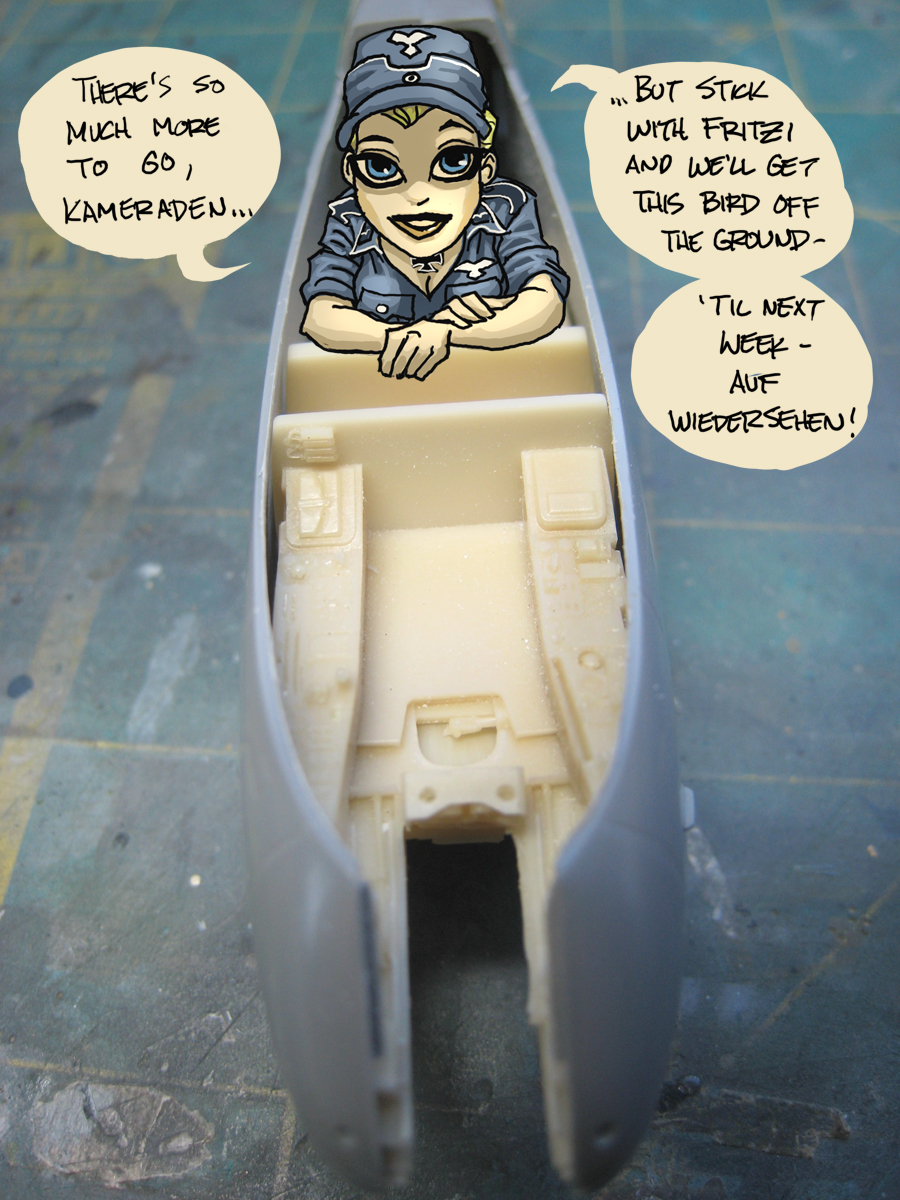
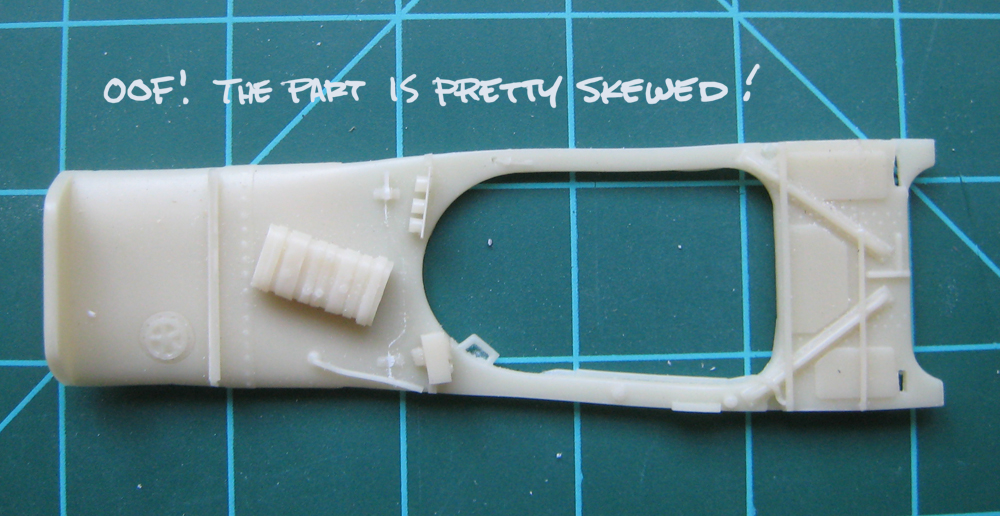
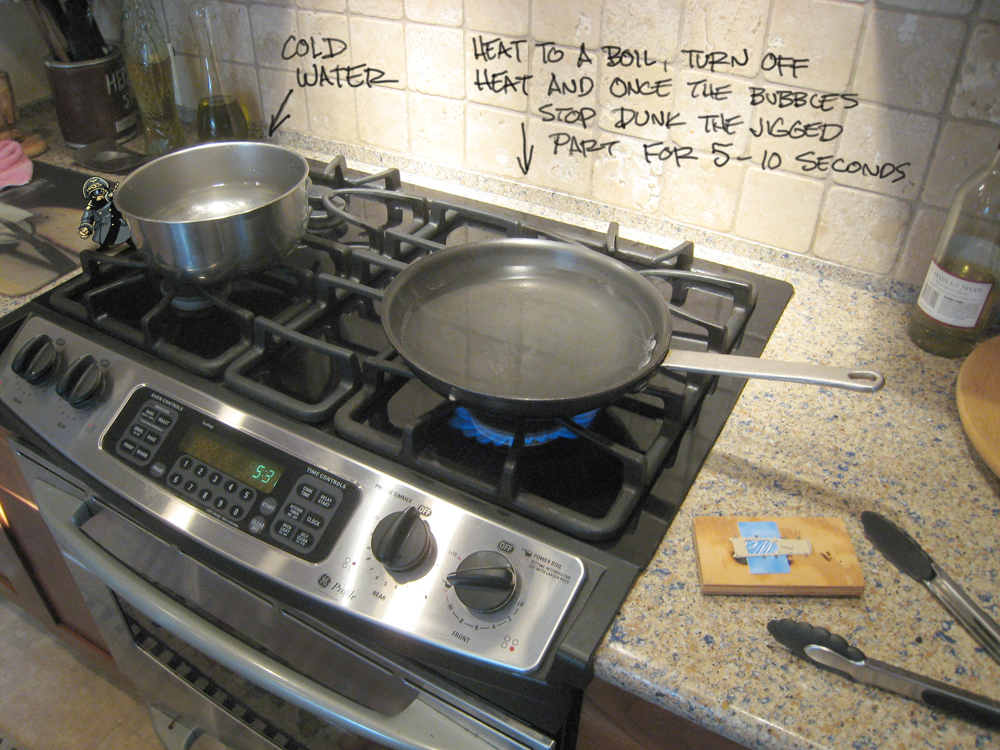
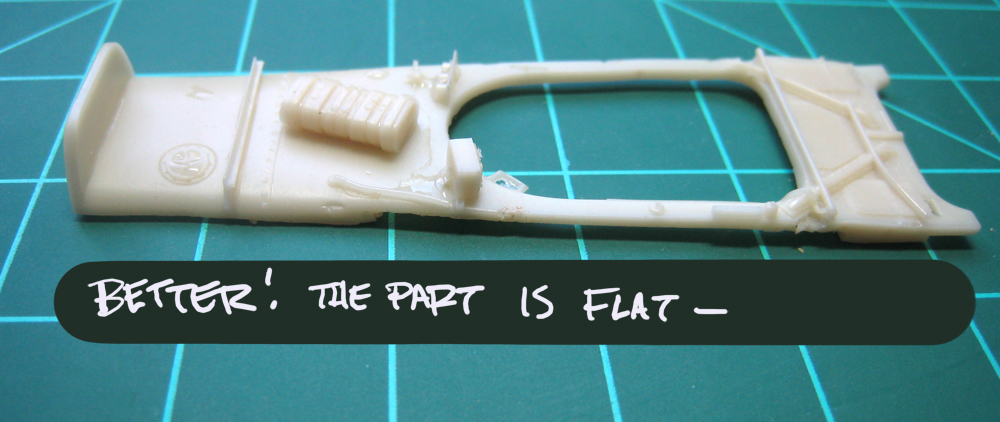
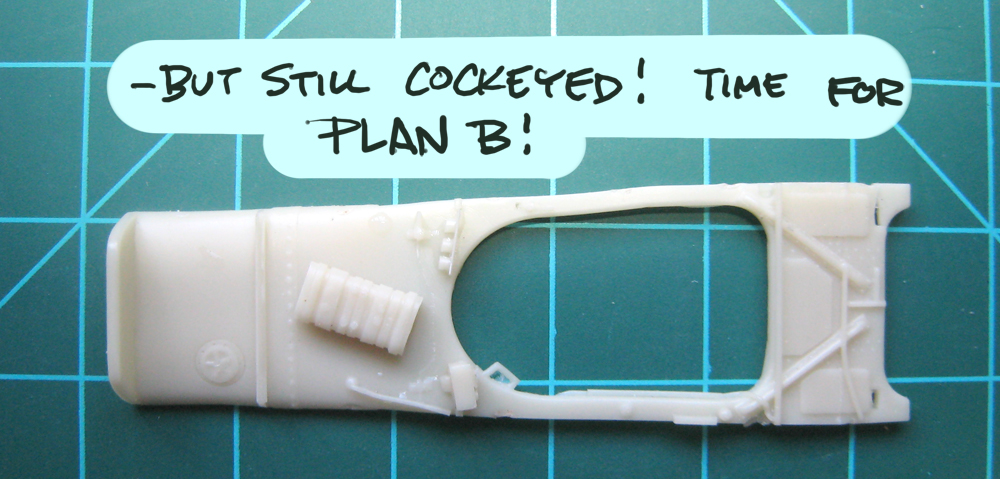
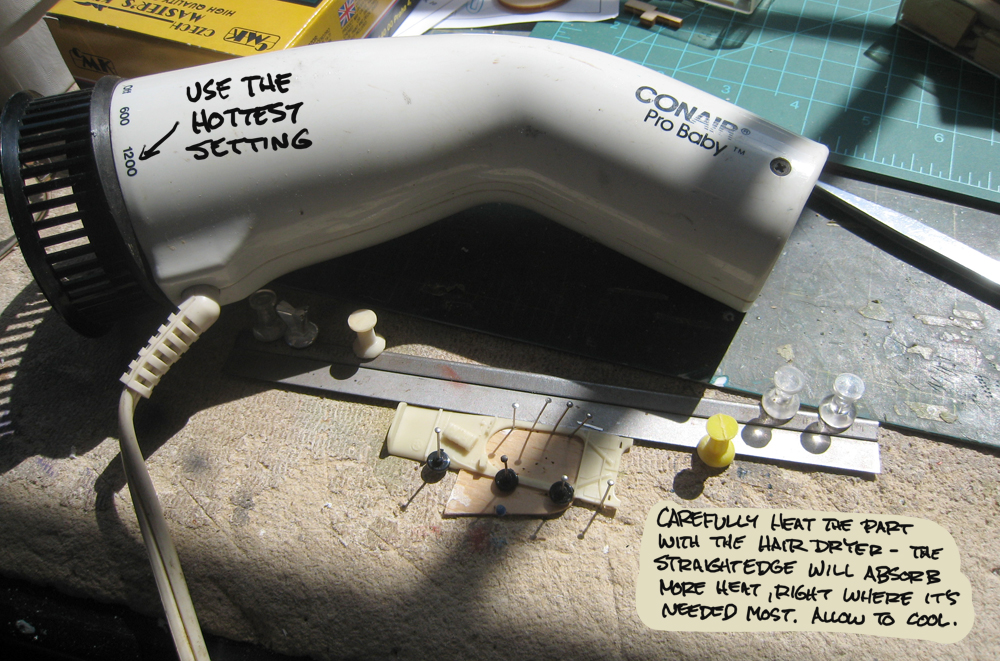
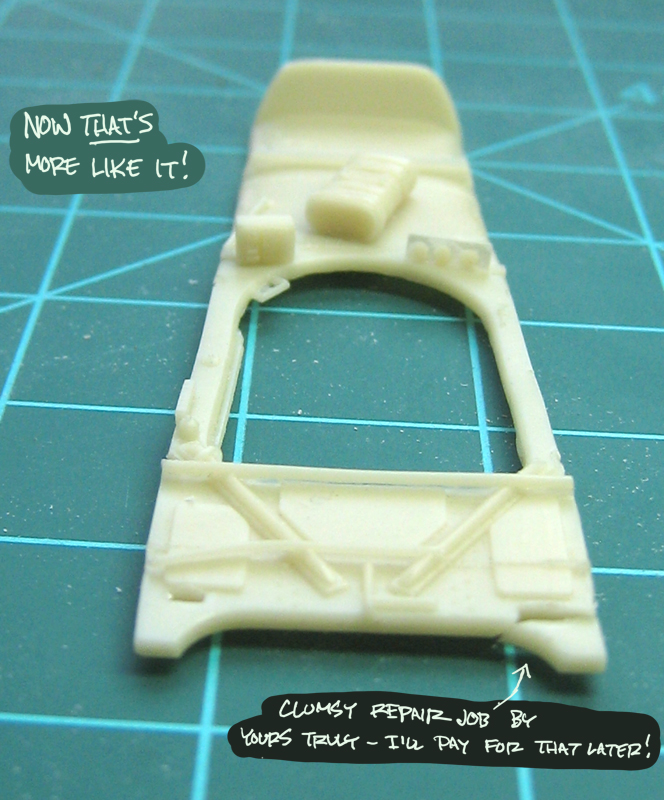
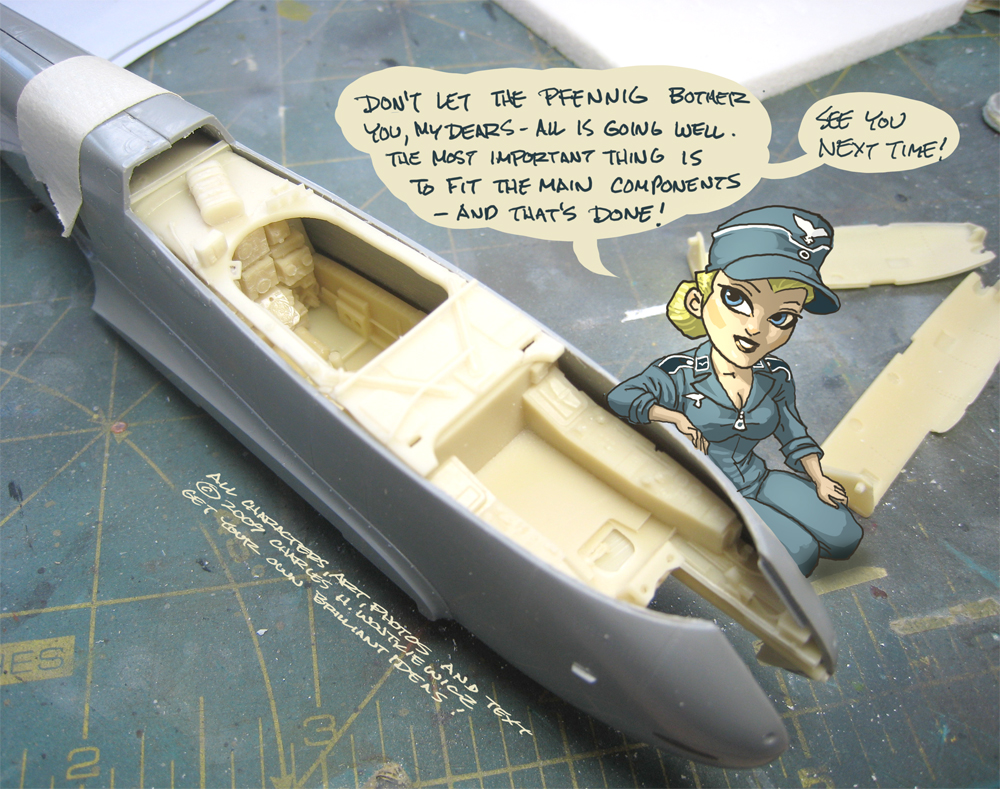
I think I’ve finally gotten this build over the initial hump. Fitting the main resin components is crucial, and it didn’t help that one was more than a bit warped. Fritzi, show 'em how we did it! 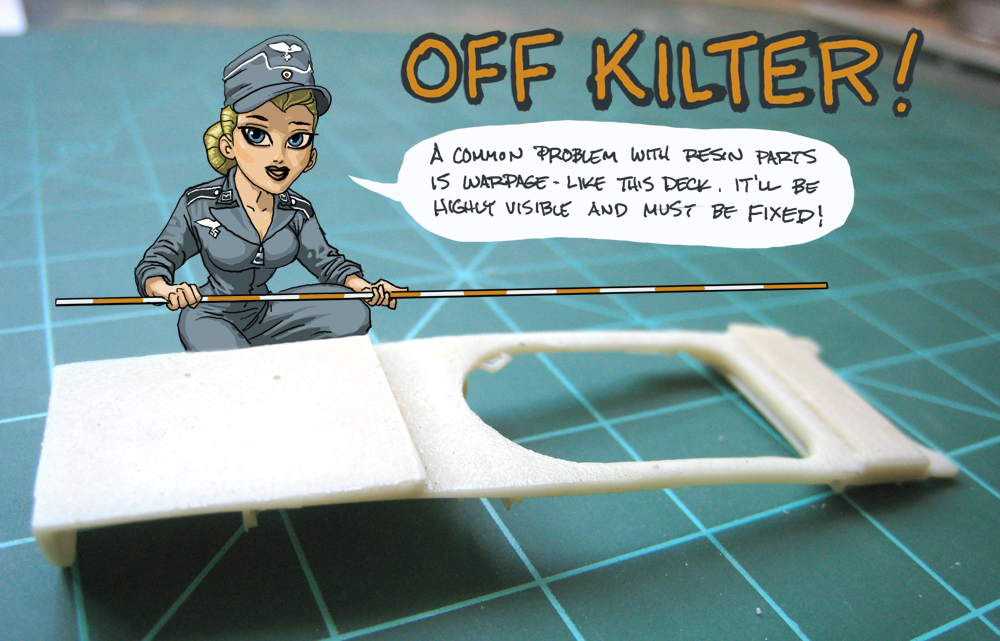
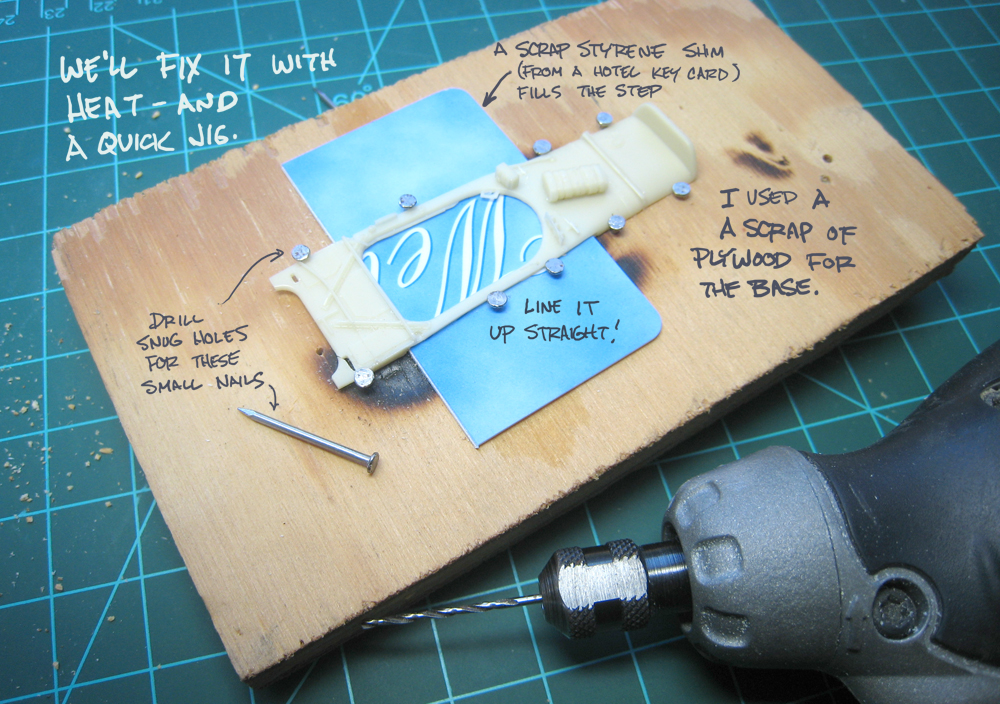
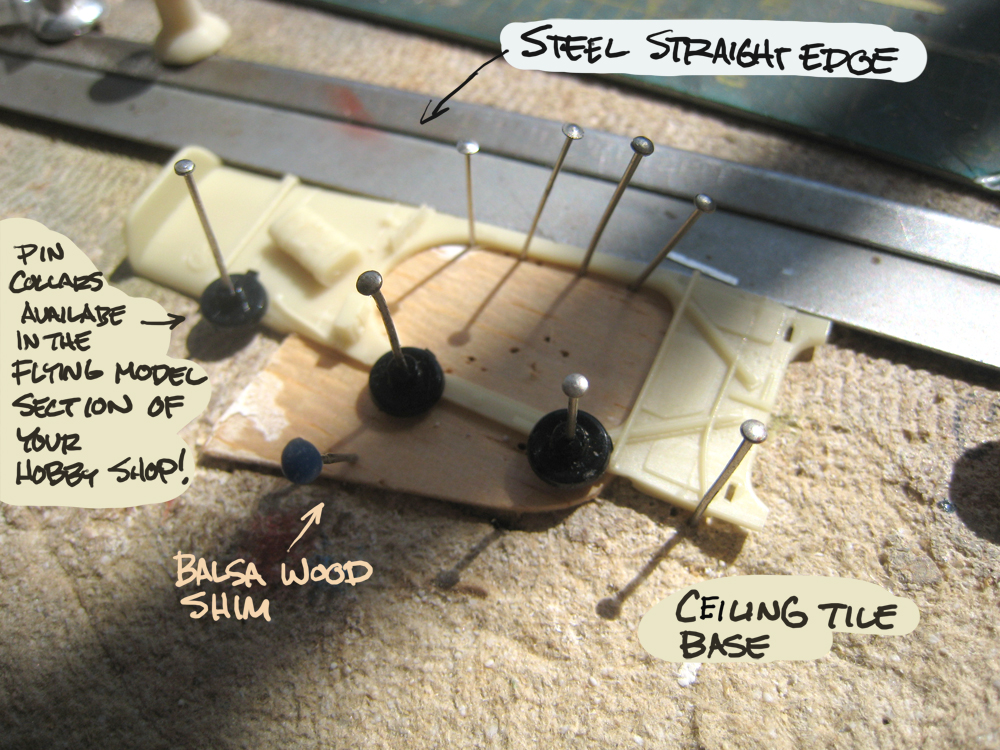
amazing as always chuck…i have some resin that has the same problem and will be using this in the near future…keep it up…