I bet hooking that bridge back up takes some really precise driving!
Lots of nice details for a modeller, too. Gino, check this out - the 1:1 bridge has preshading on it. Will you do the same thing to your bridge here? For me? Pleeese? :-)))
Thanks guys. It has been fun so far and is a huge bridge. I am not sure how I will finish it yet. I may do the chassis sand and bridge camo, or chassis camo and bridge green. It will not be preshaded though. I still don’t think it is realistic. The one in the video to me looks like it has paint tochups that don’t match, not preshading.
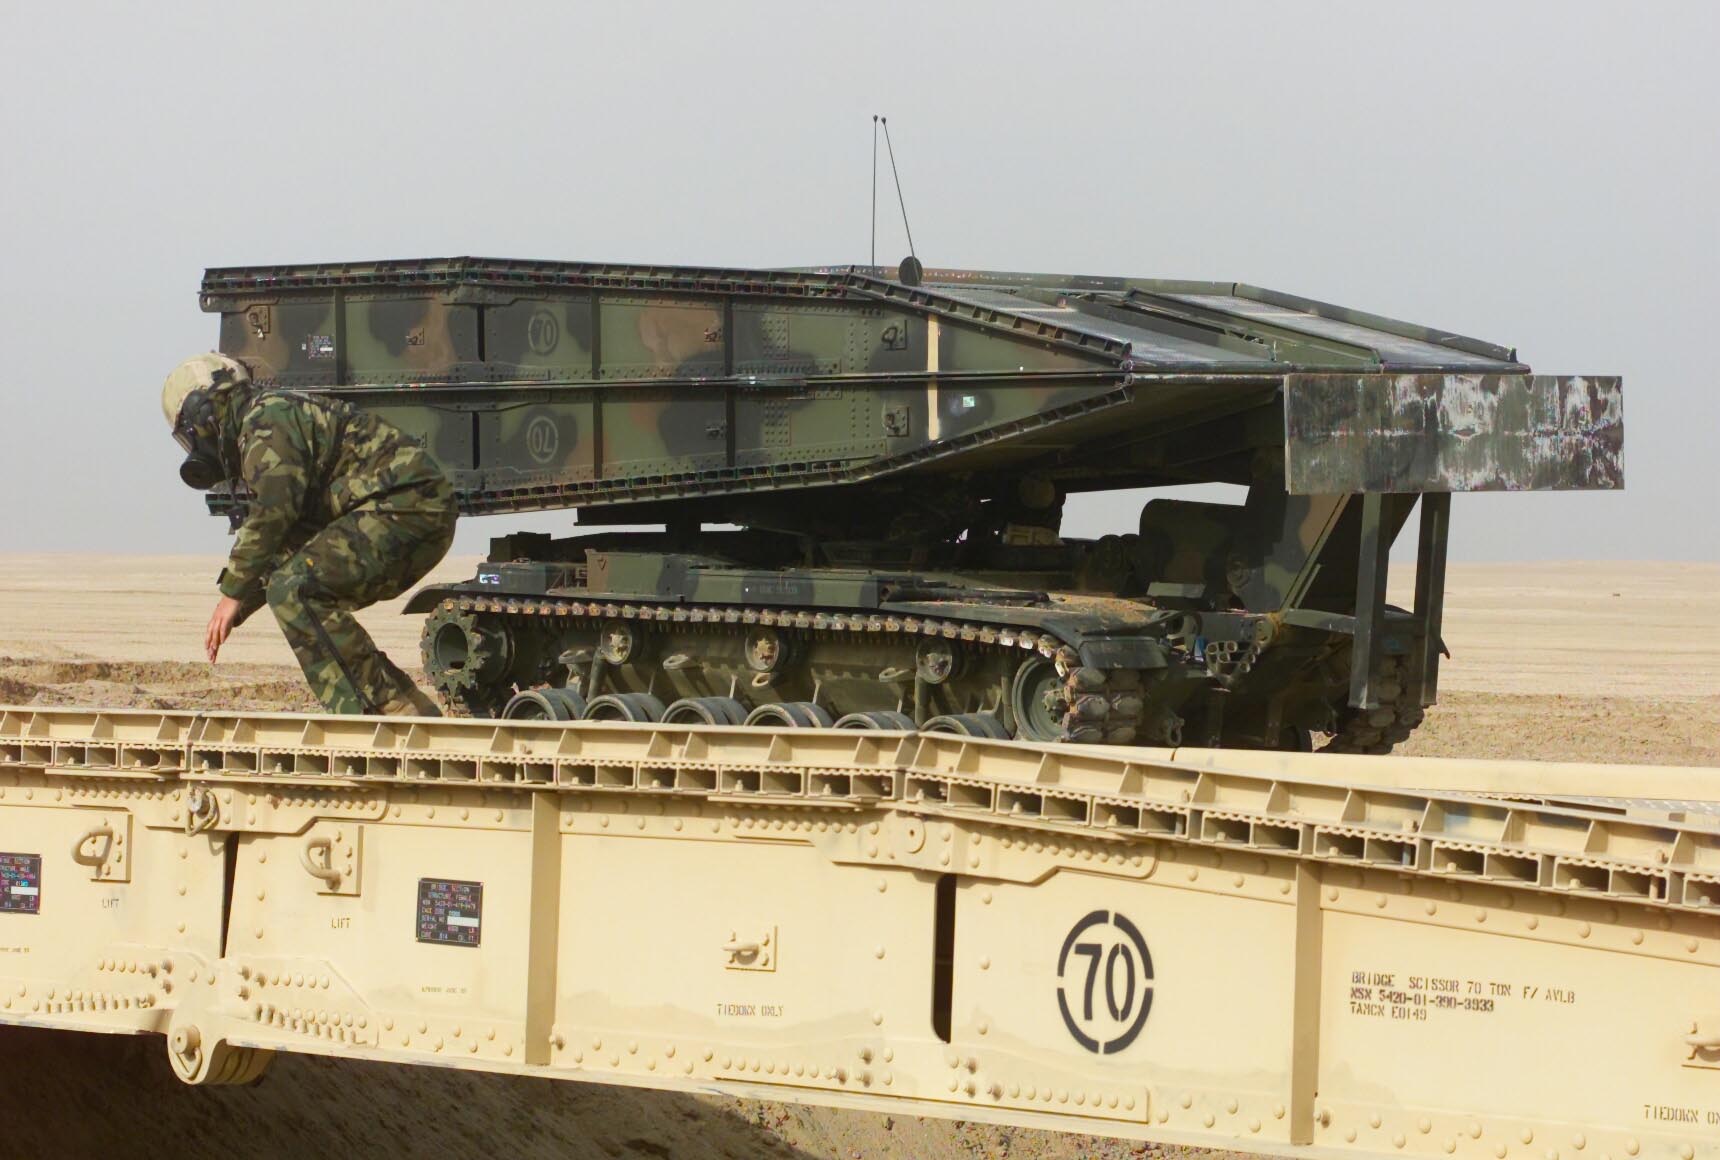
Gino and Pawel, I’m not sure that it makes any difference, but the video that Pawel referenced is a group of US Marines. I looked at other videos that had US Army engineers using the M60 AVLB. In each video the bridge was painted different; green, camouflage and sand color. I’m guessing here, but this bridge system was probably Army equipment the Marines adopted and repainted for their mission in Afghanistan.
The bridge is recovered the same way it is deployed, just in reverse. The carrier crosses, then turns around, lowers the erector arm, attaches it to the bridge, then lifts and folds it on top of the carrier.
CapnMac82, I read that it take 2-5 minutes to deploy the bridge and 10 minutes to recover it. I think that means load, secure and moveout in a non-combat environment. If the team was taking incoming fire it may be different.
That makes some sense, now that I think about it. Was a bit of a mind bender about how to reconnect the hydralic connections to the bridge hinge without having to dismount (and we all know how armor types feel about dismounting [[:)] ).
So, I’ll imagine that the disconnect has a way of operating quick disconnect fittings to the bridge, which will reconnect as a default on recovery.
My fault was in not imagining enough engineering complexity, juat a super-simple break-away system. Mea culpa.
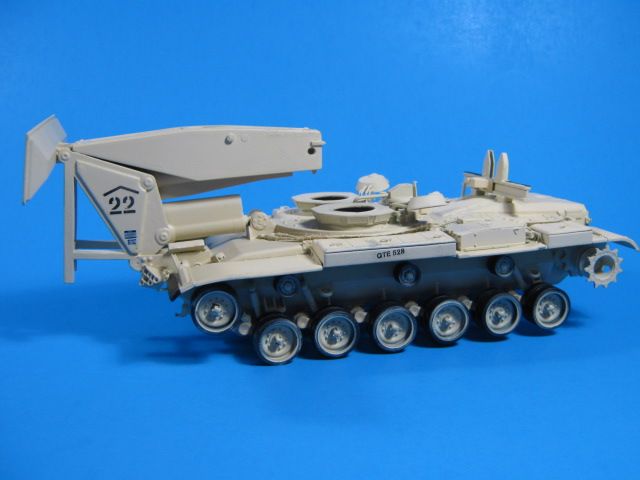
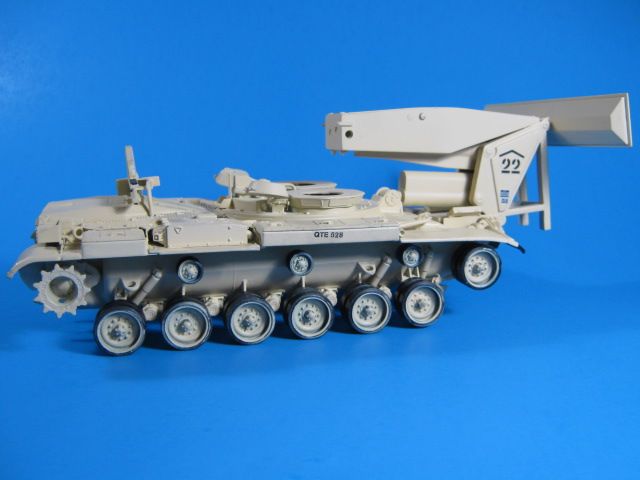
I have finished construction. It is ready for paint, which I will probably not get to until next weekend.
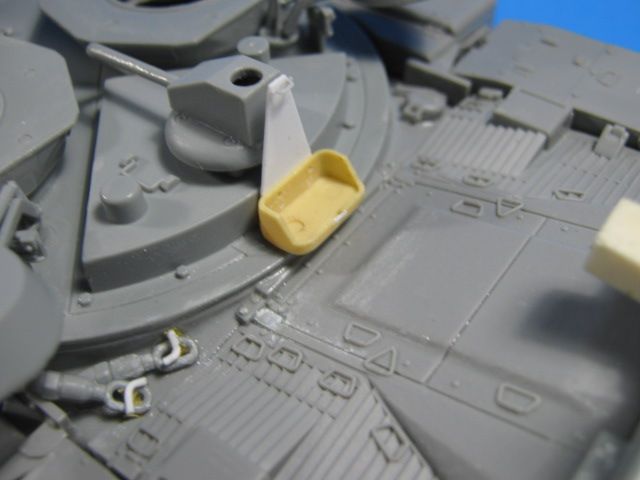
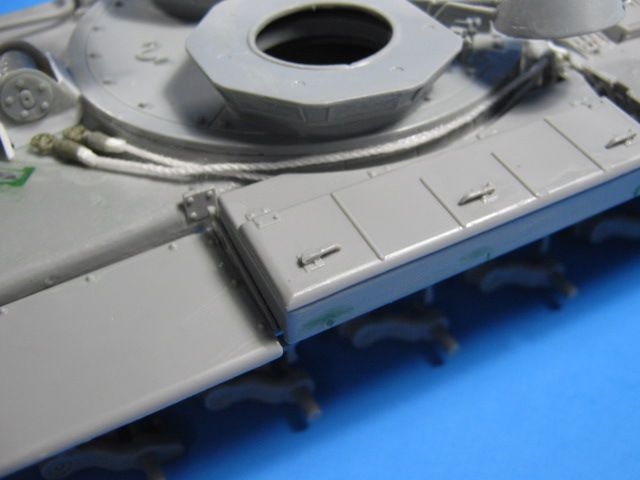
I finished up the details on it. First, I redid the water/fuel can holder on the rear of the turret ring. The kit one was chunky and undersized. I used a resin water/fuel can holder, some sheet styrene, and a resin footman’s loop at the top. A resin water or fuel can fits into it nicely.
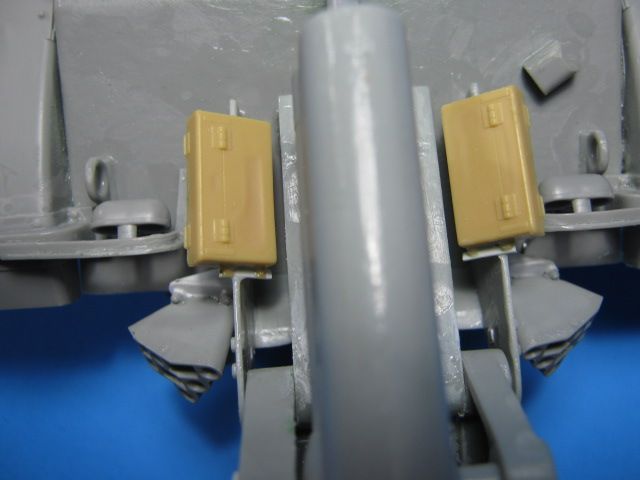
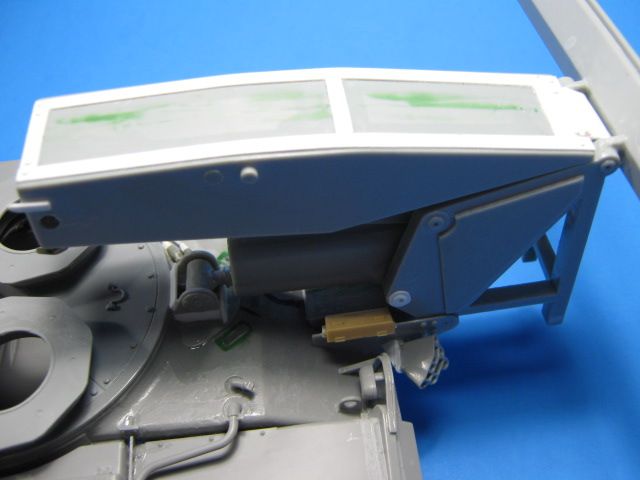
Next, I added the smoke grenade launchers and their storage boxes.
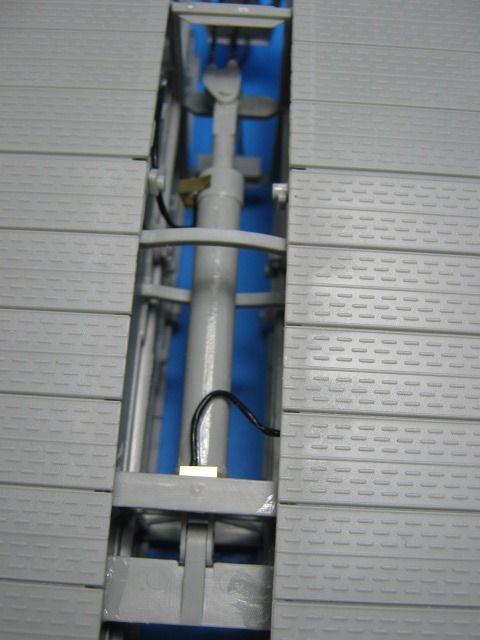
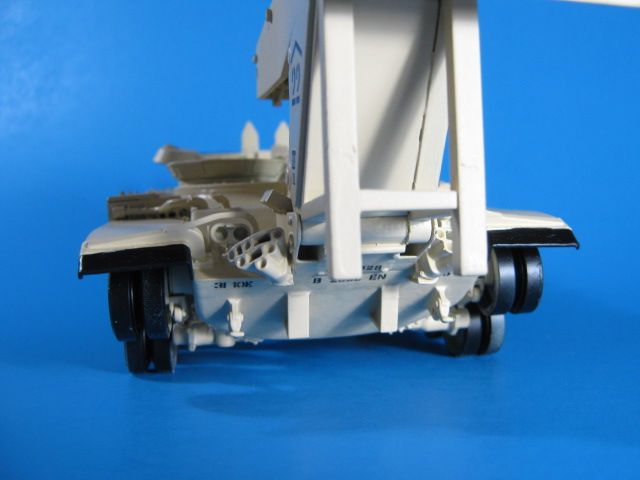
Then I added hydraulic lines for the piston on the bridge and the two on the erector mechanism.
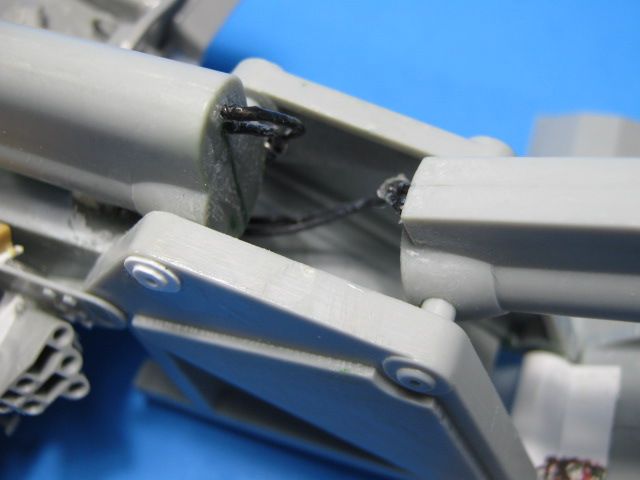
I also added stiffening ribs on top of the erector arm. I also had to rebuild the hinge on it after a super glue mishap locked it up. You can also see the smoke launcher and its storage box below as well.
Lastly, I added the tow cables on the left side of the turret ring.
Paint is next, hopefully soon. I still haven’t decided how I will paint it. I am leaning toward a NATO camo M60 chassis and green bridge so I can use the decals from the kit. Or I may do a sand M60 chassis and camo or green bridge w/homemade decals. We shall see.
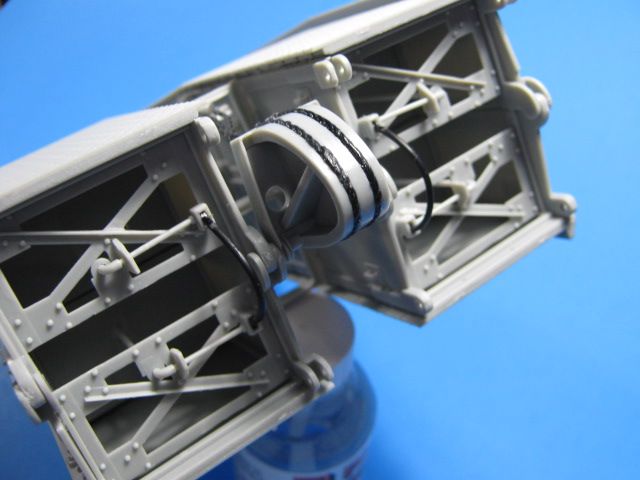
I have been working on some new details that I found after receiving some good images of the bridge sections.
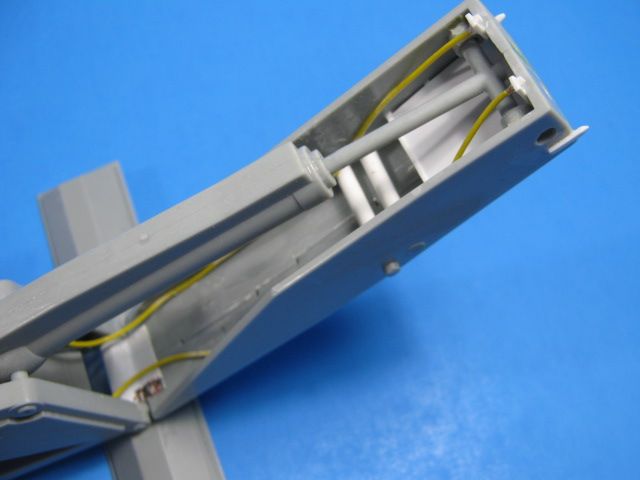
I added the hydraulic lines and connectors to the end of the erector head.
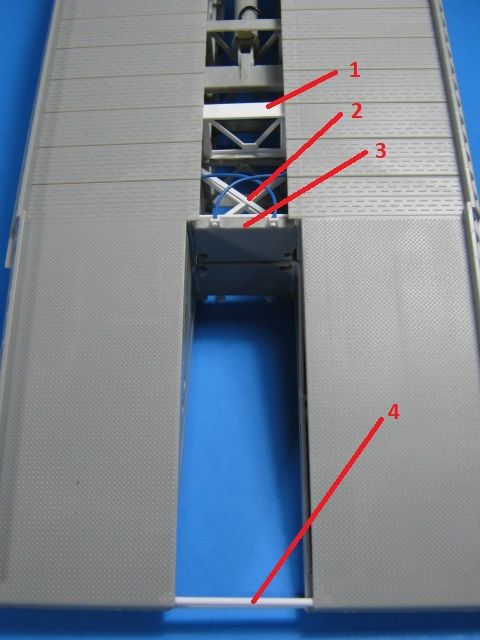
On the bridge sections, there are quite a few missing pieces.
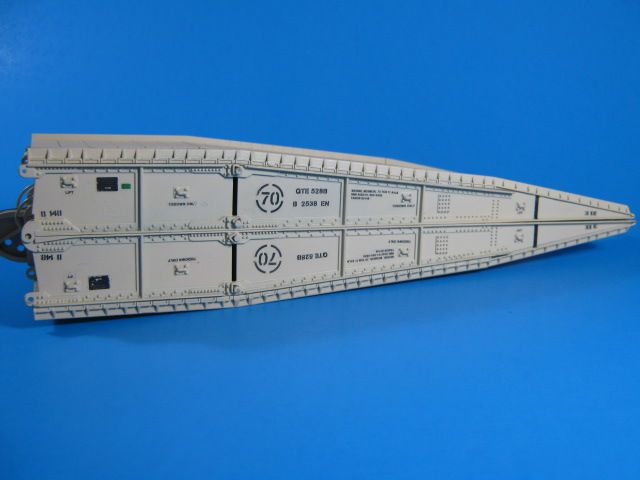
Both sections should be identical, with the exception of the piston and its parts used to raise them. The rest of the basic structure is the same though. First is a missing box brace (1), I rebuilt one and added the second missing “X” brace (2), then there should be a box and hydraulic hoses on each piece (3), not just one side as Dragon modeled. Lastly, there is a rod at each pointy end of the bridge (4).
I also added the curved hydraulic hoses between the upper and lower bridge sections out of flexible tubing. Dragon gives you a hard plastic part for these, which will not allow the bridge to move if installed. Lastly, inside the section behind the first brace on the bridge, I extended the hydraulic line back to the second bulkhead with a piece of styrene rod so it wasn’t just floating in mid-air. You can just see the white rod in the below shot.
Now each bridge section is identical, which will allow either bridge section to be picked up.
That machine is looking good! I like the extra detailing you did a lot. Good luck with your build and with the paint, looking forward to seeing more pictures here. Thanks for sharing and have a nice day!
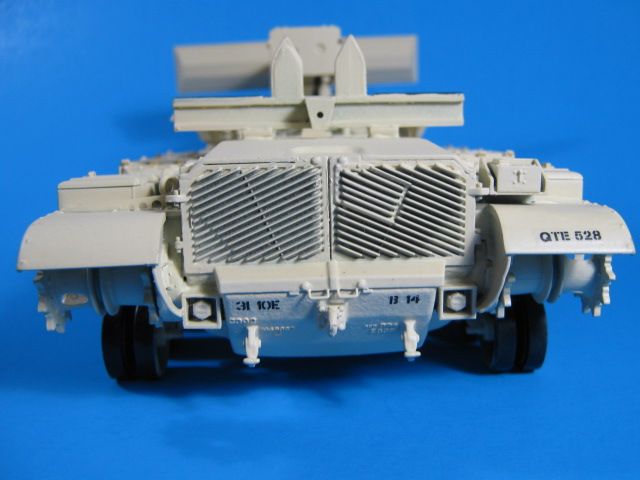
I finally got some paint on it. It is depicting vehicle 14 from B Co, 10th Engineer BN, 3ID during the initial invasion of Iraq in March '03. It is a PrePo stocks draw vehicle as part of 2 BDE. I used the below picture of a USMC AVLB as a reference.
I was able to find a few other pics of it that showed all the stenciling on the bridge. I created all the decals in PowerPoint and printed them on my home printer using computer decal paper.
I painted it using Testors Model Master Modern Desert Sand (FS33722) in the small spray can. It is a little more yellow than their Sand (FS33531) that I usually use. It looks pretty good and should represent modern CARC Tan/Sand pretty well once weathered.
Here it is so far.
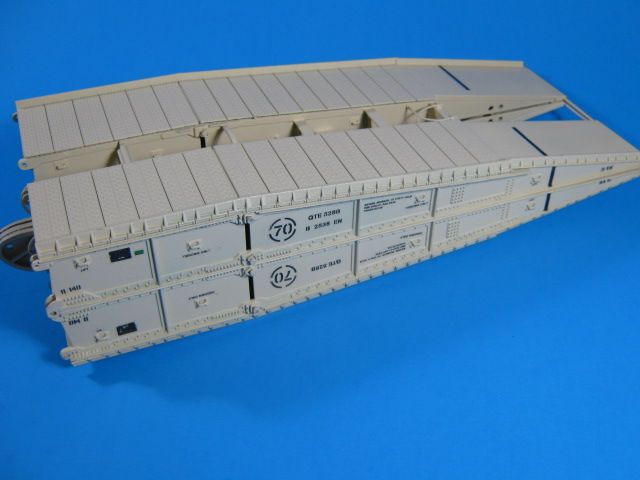
Here is the bridge with all its stenciling.
Next is the tracks and weathering it a bit. Then I will add some gear to it and a couple of figures.
This is a stunner. Your decals look the part. You have done a very nice modification. I’m sure it will even be better after the weathering and figures.
Gino, you did an excellent job! I’m particularly impressed with the decals that you created on your computer. I received some Archer Fine Transfer decals for my project and in the box was advertising for Archer decal paper, is that the kind of paper you used? Do you print with an inkjet type of printer? Please post some details about your cool decal making process. Thanks