M60 AVLB conversion Complete.

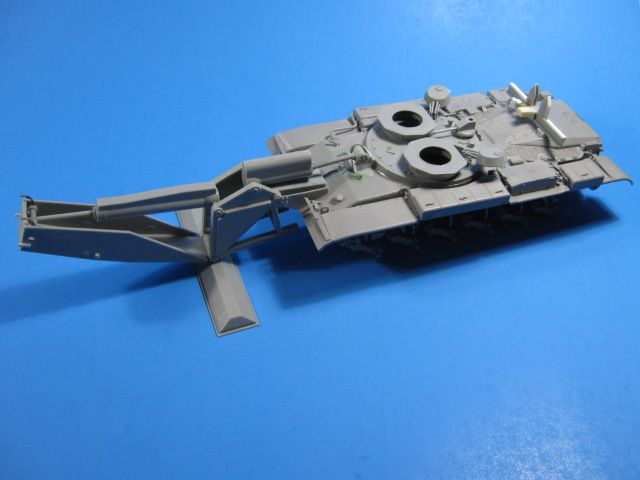
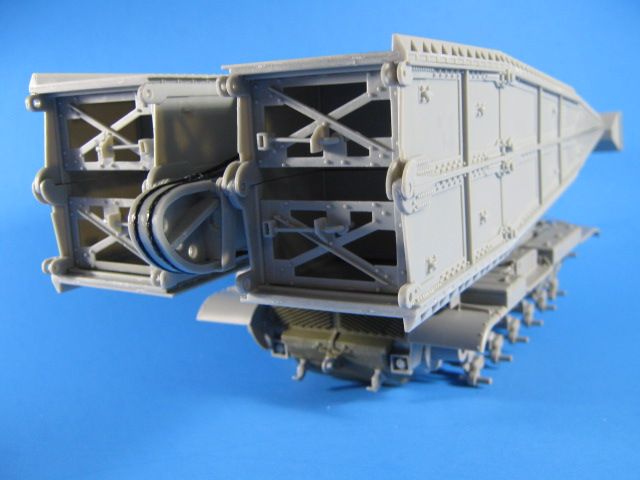
My latest project is an M60 ALVB. When Dragon first announced their M48 AVLB kit, I had the thought to build an M60 AVLB. To make it, I would use the Dragon AVLB parts and an M60 hull. The two vehicles used the same bridging gear, so it shouldn’t be too hard to do.

So I started gathering the parts I needed. I needed the Dragon M48 AVLB, which I was able to order as a Christmas present to myself for an OK price from Japan.

I next needed an M60 hull. I chose to use the Takom CM-11 (M48H) Brave Tiger kit. This is a special Tiawan variant that combines an M60 Hull w/an M48 turret mounting an M68 105mm main gun, updated fire controls, optics, etc. It is basically an M48A5/M60A3 equivalant.

Another option this leaves me is to use the left over Dragon M48 hull and the left over Takon turret parts to build an M48A5, so a win-win.

This is what I will build; an M60 AVLB that was built in the late '80s upon an M60A2 hull. These were left over hulls that were used in one of the last batches of M60 AVLB builds. Many of these are still in use today.

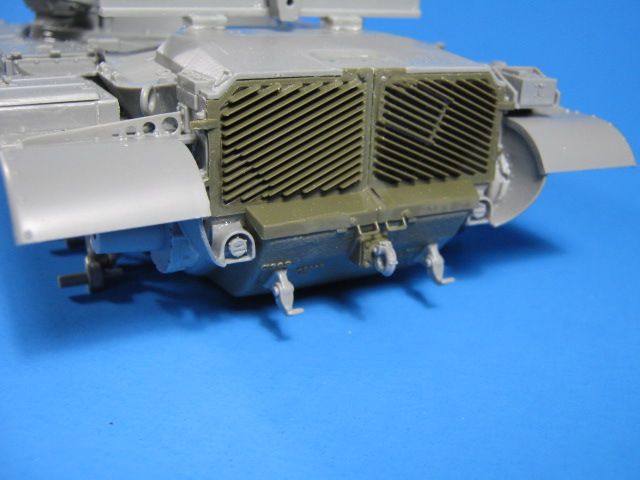
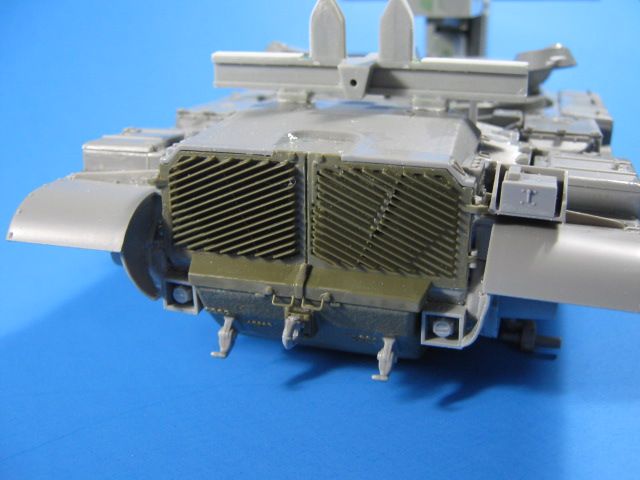
For the A2 parts, I have collected the “O” sprue from the AFV Club M60A2 kit, which includes the CBSS bulge and rear doors with extended bottom edge.

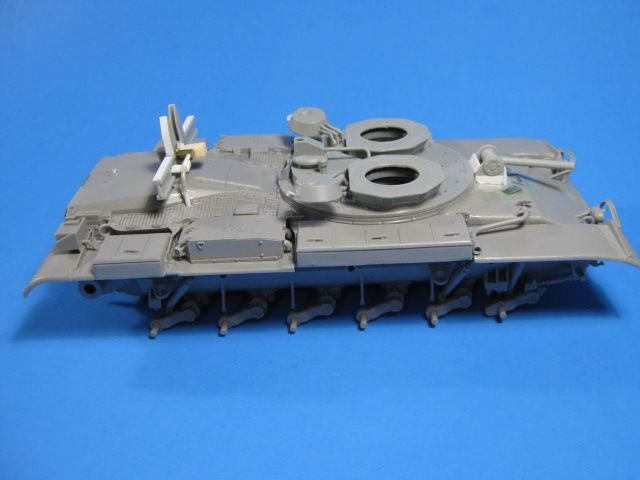
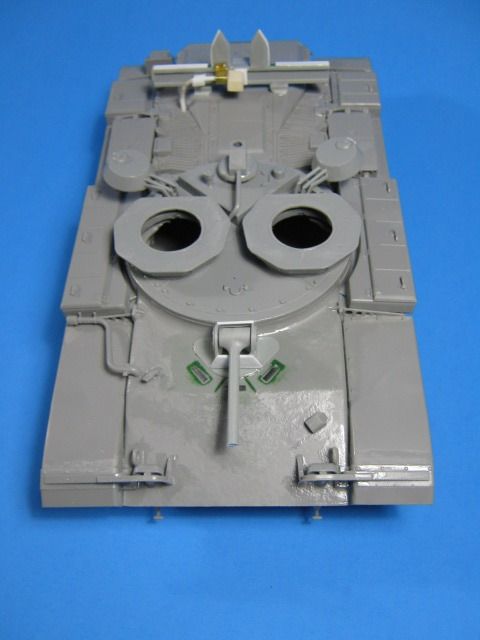
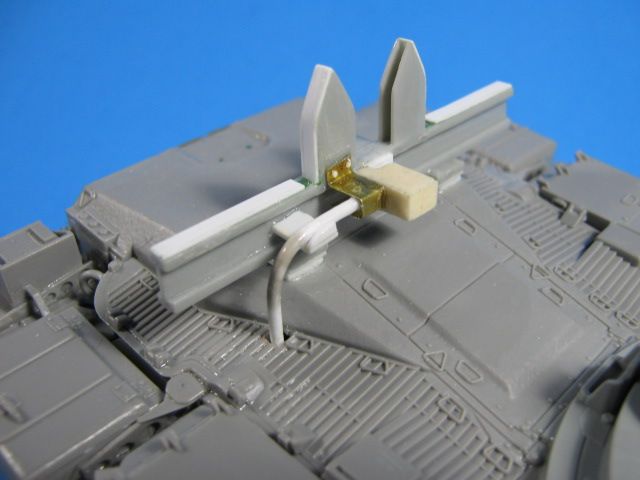
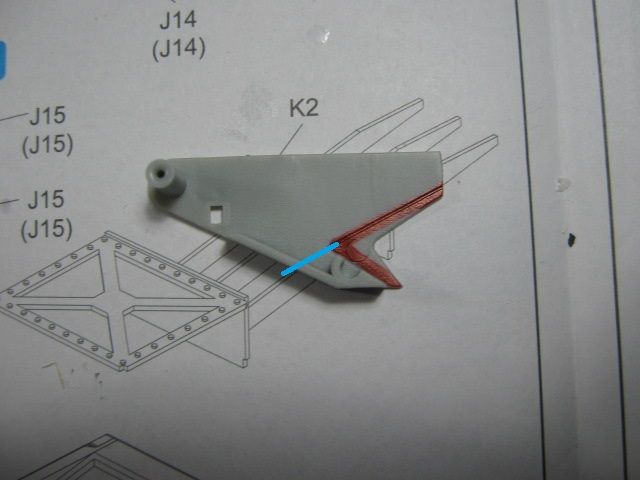
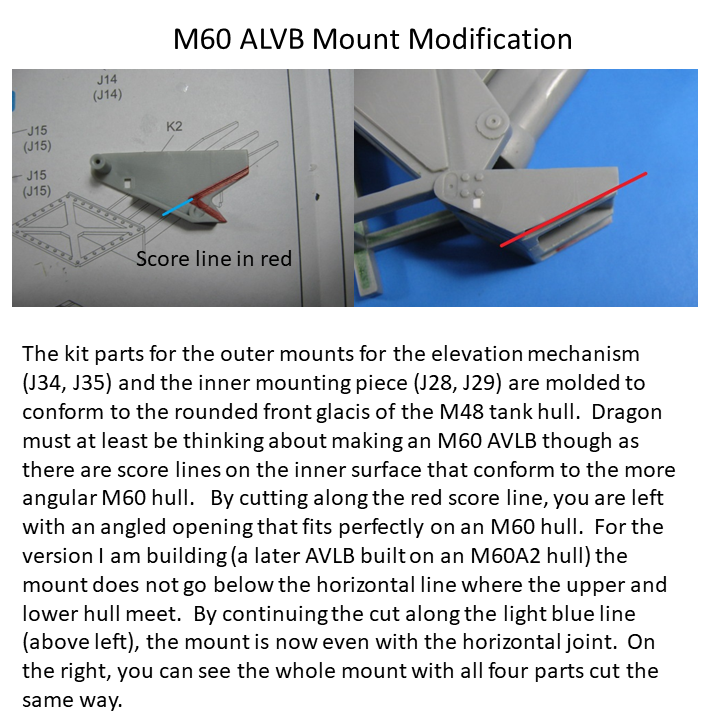
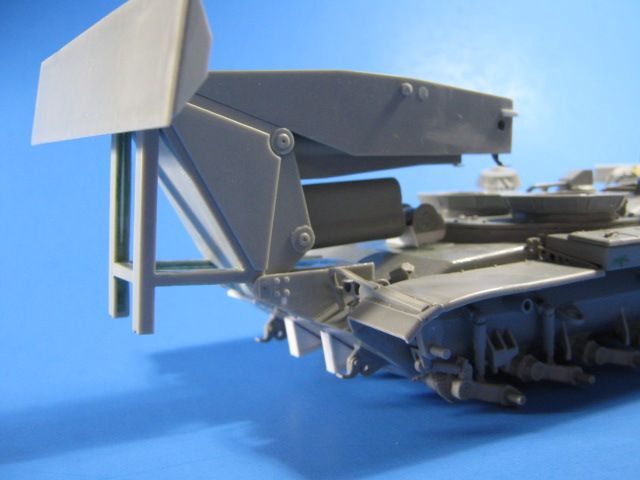
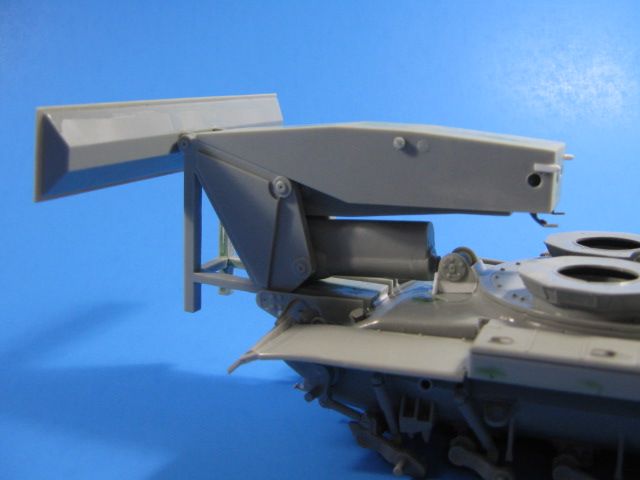
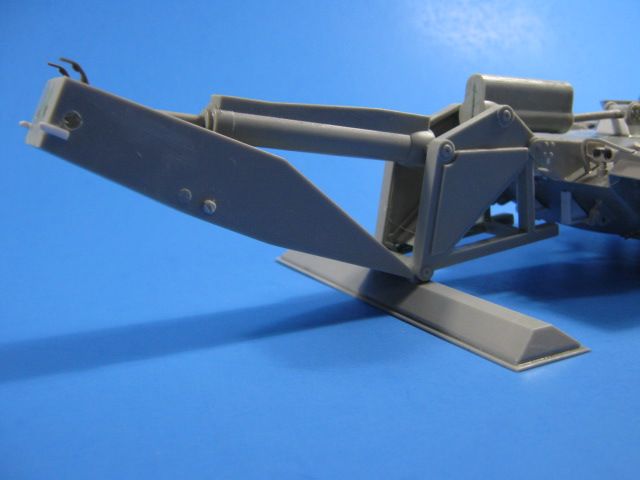
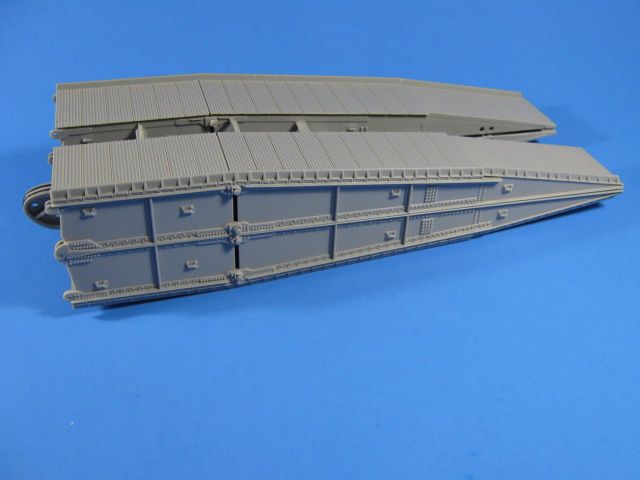
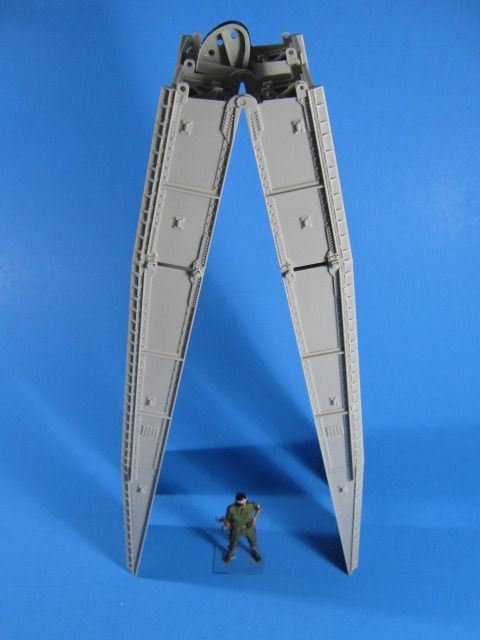
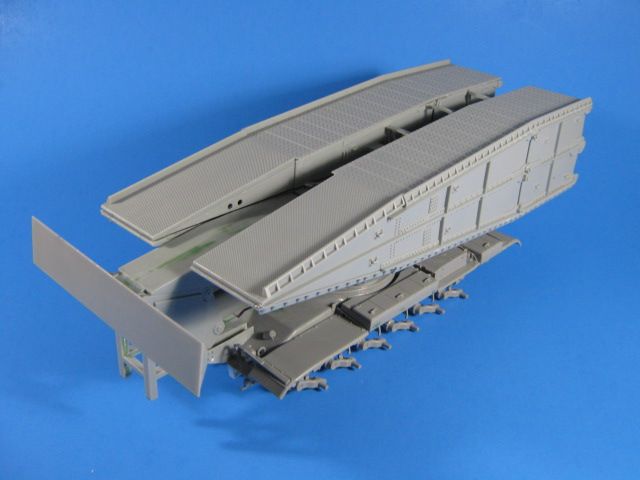
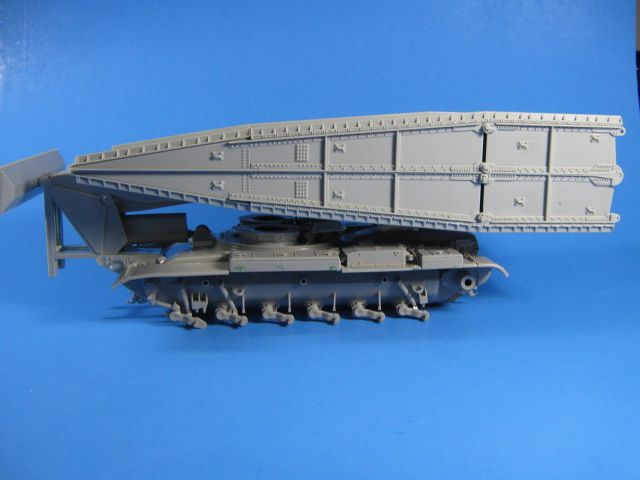
So far I have the hull complete with the cover for the turret opening and a few other parts added to it. I am now starting on the AVLB parts and have found a happy surprise.

I will describe the surprise and post pictures later today. It is going together really well so far though.

More to come later.

Following your new project with great interest Gino.

Very interesting subject and I will definitely be along for the ride.

Hello Gino!

Another of your famous conversions! I’m sure lookin’ forward to see that baby being built! Can you say something more about that -A2 specific rear end? Good luck with your build and have a nice day

Paweł

I was wondering why you didn’t start with the M60A2 hull until I saw the final photo of the A2 sprue at the end. Now it makes sense.

Here it is so far. I have the hull pretty much complete. I built it pretty much straight by the Takom instructions. I blanked off the driver’s hatch with the plate supplied in the Dragon kit (J57) and filled in the driver’s periscopes.

I added the M60A2 rear parts from the AFV Club M60A2 kit. These include the CBSS (Closed Breech Scavenger System) bulge and the rear doors with added shelf-like lower edges. The AFV Club parts fit the Takom kit like a glove and required no modification at all.

On the plate that covers the turret opening, I cut open the driver’s and TC’s hatches. I am not sure why Dragon molded them closed, but they were easy to open up. I gently cut around each dome-shaped hatch with an xacto knife. Once cut open, I cleaned them up and then built the hinge mechanisms per the Dragon instructions. The hatch pops up and then rotates to the outside and rear to open. To accomplish this, on the rotating base (F9), cut the key off the bottom and it can be glued in any position. I then added handles and lock mechanisms to each hatch.

For the rear bridge supports, I added details Dragon missed. These include closing in one side of the guides with strips of styrene. I also added strips along the horizontal supports. Lastly, references show that this later version also has a box ans conduit on the front side of the support. I built this using a block of resin, sheet brass, sheet styrene, and a styrene rod. It was glued onto the rear deck with a rearward tilt, as per references.

Ready for the surprise?? OK, it isn’t that big, but…

For the elevating mechanism mount at the front of the hull, it looks like Dragon is at least thinking about an M60 AVLB kit. On the inside of the front mount parts that meet the hull, there are score lines that match the profile of an M60 front hull perfectly.

I had to do a little more to it though. On these later version M60A2-based vehicles, the mount does not overhang the horizontal line where the upper and lower hull come together. By continuing the cut, you have the correct angle to mount it on the upper part of the hull. This does shift the whole mount back a coupe of millimeters though, as it is on the actual vehicle. I also had to raise up the pivot point for the lower hydraulic cylinder (per references) and shorten up the piston by about 2mm to get it all to fit.

Here is the full elevation mechanism awaiting to be added to the hull. On it, I filled in the back sides of the square bars as they were hollow and should be solid.

It has been fun so far and not that hard to do. Next up is mounting the elevation mechanism and starting on the bridge sections.

By the way, there is a great walk-around of this vehicle at Toadman’s Tank Pictures website: http://www.toadmanstankpictures.com/m60a1avlb.htm

Looks friggin’ awesome! Funny to see the goofs Dragon made but glad to hear they weren’t too hard to correct. And great that the different kits fit together as well as they did, on reading your first post here I was wondering how much putty you’d end up using.

Looking forward to more.

Thanks Gamera. I hope to have more progress over the weekend.

Gino, after reading about this vehicle you’re building I watched a couple of YouTube videos and read the specifications, it’s amazing how two men can place a 60-foot bridge in 2 to 5 minutes that will support 70-tons of equipment.

https://fas.org/man/dod-101/sys/land/m60a1-avlb.htm

https://www.youtube.com/watch?v=csC5jtvKjM0

Yes, it is a pretty awesome vehicle. Hard to believe the technology is almost 70 years old.

Wow Gino you’re off to a awesome start!! [Y][Y]

I agree with everyone else Gino, this is a really neat conversion. 3rd Armored Cav had some of these whern I was stationed with them (in the 80’s). Your attention to detail is fun to see; keep up the great work…

Ben

Thanks Ben. Still plugging away at it. More to come over the weekend.

It was part of my original MOS in 1983, 12F combat engineer vehicle crewman. At AIT we trained on the M60 chassis, but I couldn’t tell you if it was an M60/A1/A2 hull. My unit had the M48 AVLB. The controls inside were different between the two versions, but as far as the bridge and launcher fittings, they are common between the two.

Rob, you have another title too… You are a Mustang. In my book that makes you a super-Officer. Mustangs and Chief Warrant Officers are generally the most knowledgeable and specialized leaders in the military.

I’ll second Sergeant’s comment about Rob and Mustangs. That is an accomplishment.

Work continues on the M60 AVLB. I have completed the erector mechanism and mounted it onto the hull.

I added details to the top part of the erector arm where the bridge attaches.

I also changed out the rear tail light assemblies for armored ones after looking closer at reference pics.

I also completed the bridge sections. They were pretty straight forward, with no major issues. By the way, these things are huge.

I did change out the stiff metal cables that Dragon supplies for the piston on the bridges to separate them. They were way too stiff and wouldn’t sit right. I swapped them out for waxed thread used in ship model rigging. It worked out well in my opinion.

Mounted on the chassis.

I will be off on a business trip all week, so I won’t get any more done on it for a while. Next up will be some of the final details such as the smoke grenade launchers and their storage boxes.

Oh wow very cool! Dang straight about the size of the bridge- it’s dwarfing the M60!

Hello Gino!

One thing can already be seen - you’ve got yourself a beauty of a tank!

I’ve benn always fascinated by this design - had drawings of one in the book I’ve learned to read from. And from these drawings I couldn’t quite figure out how that baby works, but it was impressive, none the less.

Good luck with your build and have a nice day

Paweł

That 60-foot scissor-type bridge in reality weighs 14.65 tons (13.28 metric tons) that is over 28,000 pounds.