M48 Model B, Tamiya

Perfect timing, right? Takom has releaseda trio of very nice M48 models, reviewed as better than Dragon’s and at reasonable prices, so why not pull the next-to-the last Tamiya M48 out of the stash and build it? I admit to having wanted to build a Vietnam-era M48 for a while now, both to use the AM I’ve had stashed for a while and to have one in the case. The two I’d previously built were gifted or sold, the most recent built about ten years ago. Plus, I picked up the Model B Dragon kit recently, from a stack right next to a bunch of the Takom kits for less than the minimum amount of AM I’d feed to the Tamiya kit, giving me an example of better detailing and correct hull nose shape. I’ll also build the Dragon kit, maybe as a Model B, maybe something else in IDF service, not sure yet.

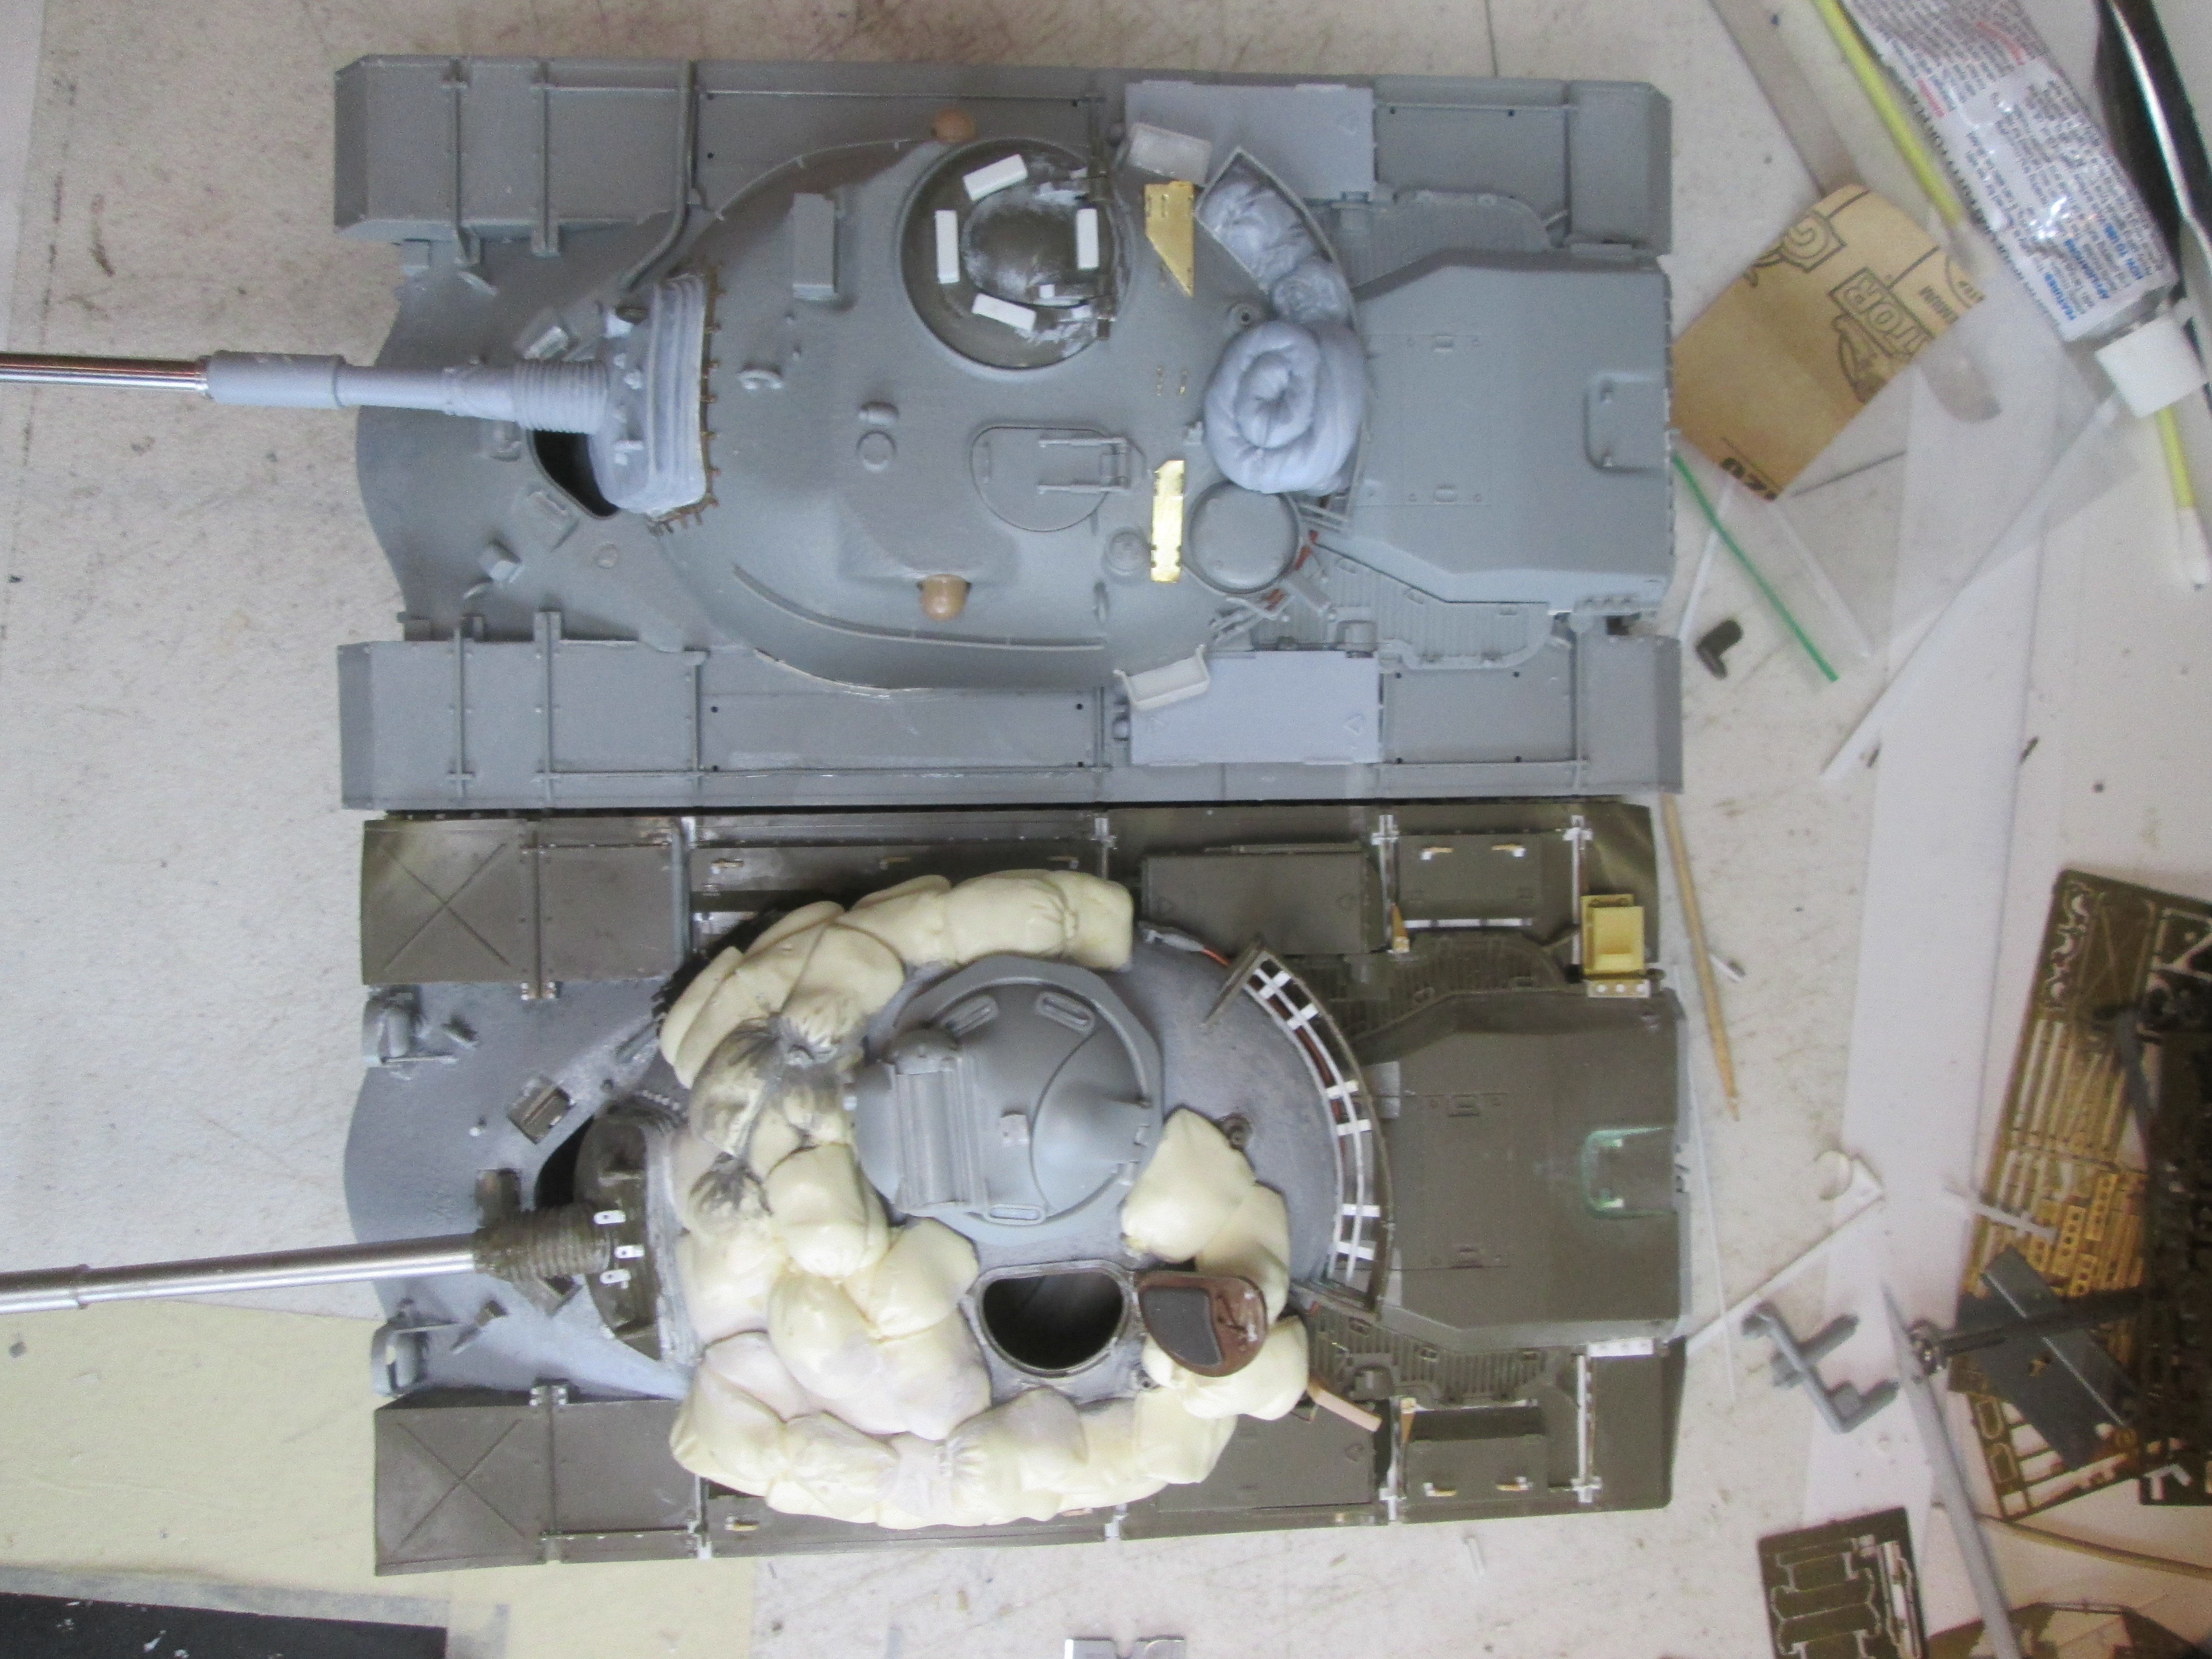
Item one to fix on the Tamiya kit is the hull’s nose. Tamiya missed the shape, making it blunt and pointy at the same time. Pic shows a Tamiya hull and the Dragon hull from the top.

IMG_3847 by Russel Baer, on Flickr

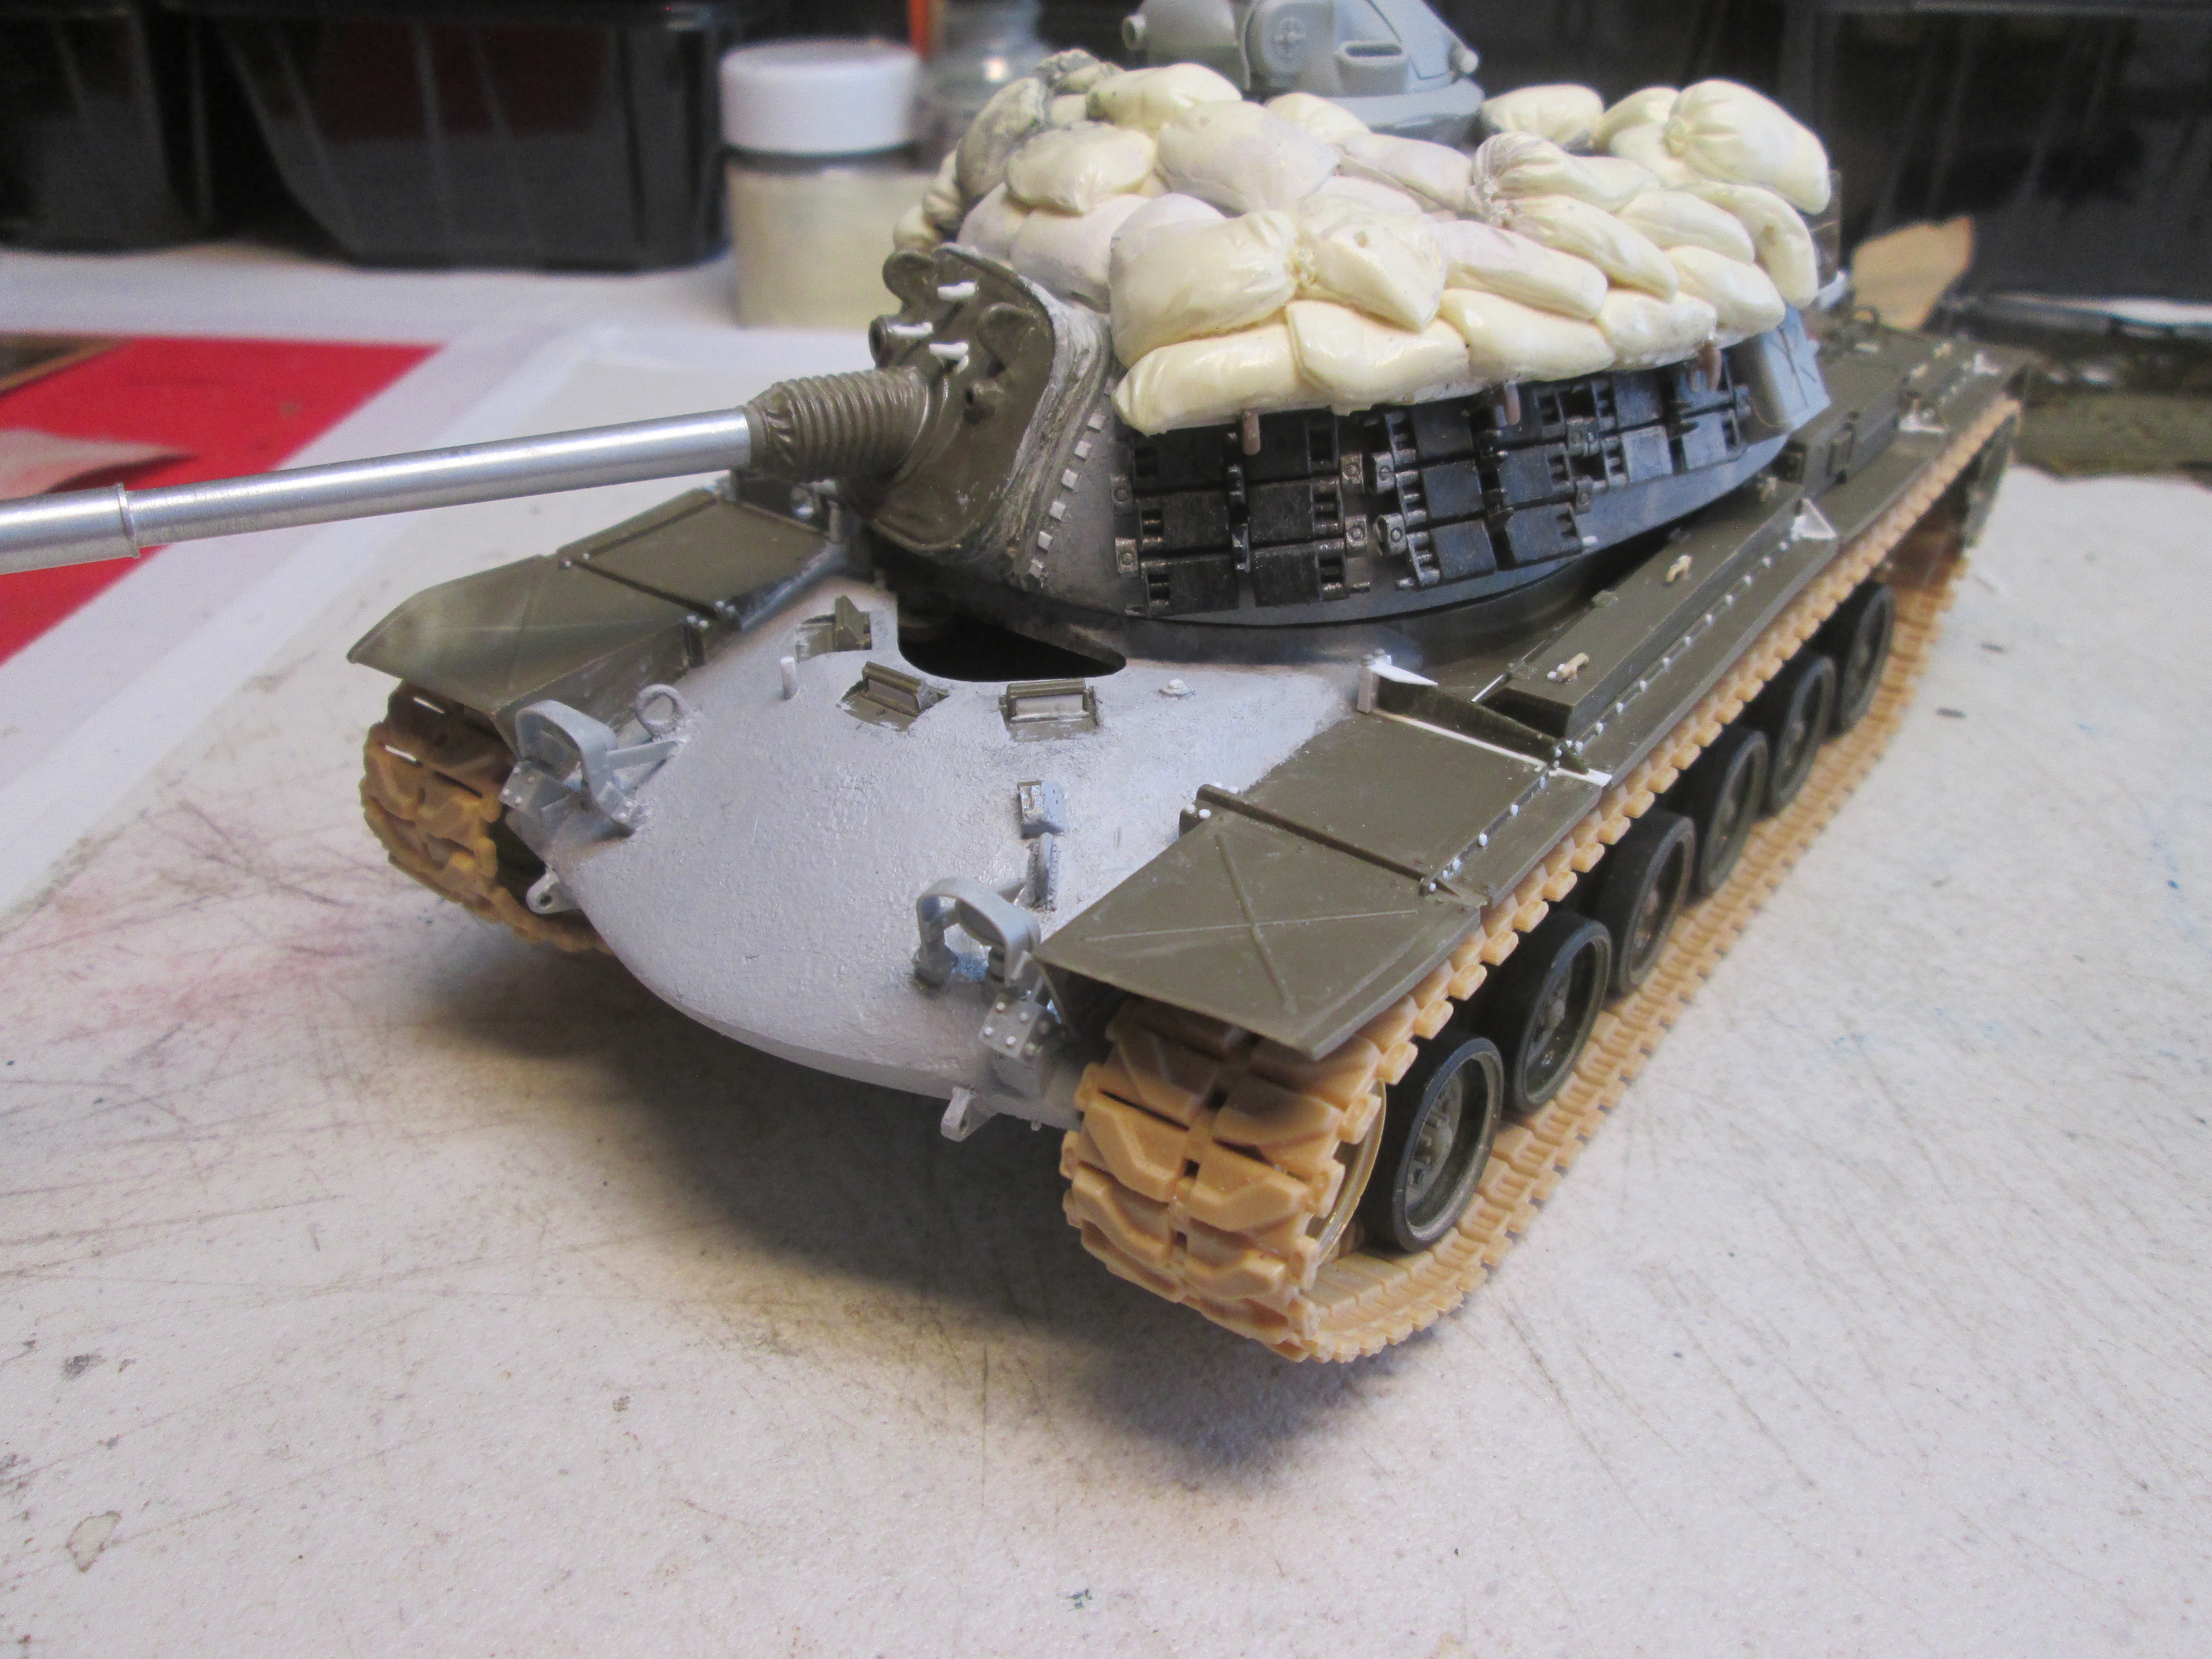
Using Aves putty and MrSurfacer, I sharpened the nose and softened the “beak”, seen below.

IMG_3849 by Russel Baer, on Flickr

IMG_3850 by Russel Baer, on Flickr

Motorization holes were plugged in the TAmiya hull and a spacer was made to enable use of a spare Dragon rear engine door set, with other bits scratched, Dragon parts or scrap box. Another issue with the Tamiya hull I’ll fudge on is its depth, to accomodate batteries and a motor.

IMG_3845 by Russel Baer, on Flickr

Tracks fitted are from the Dragon kit, new to me and not from the old DS material. They required cryo glue to join and appear to be more similar to AFV Club’s tracks. I’ll use them on one of these, not sure which yet.

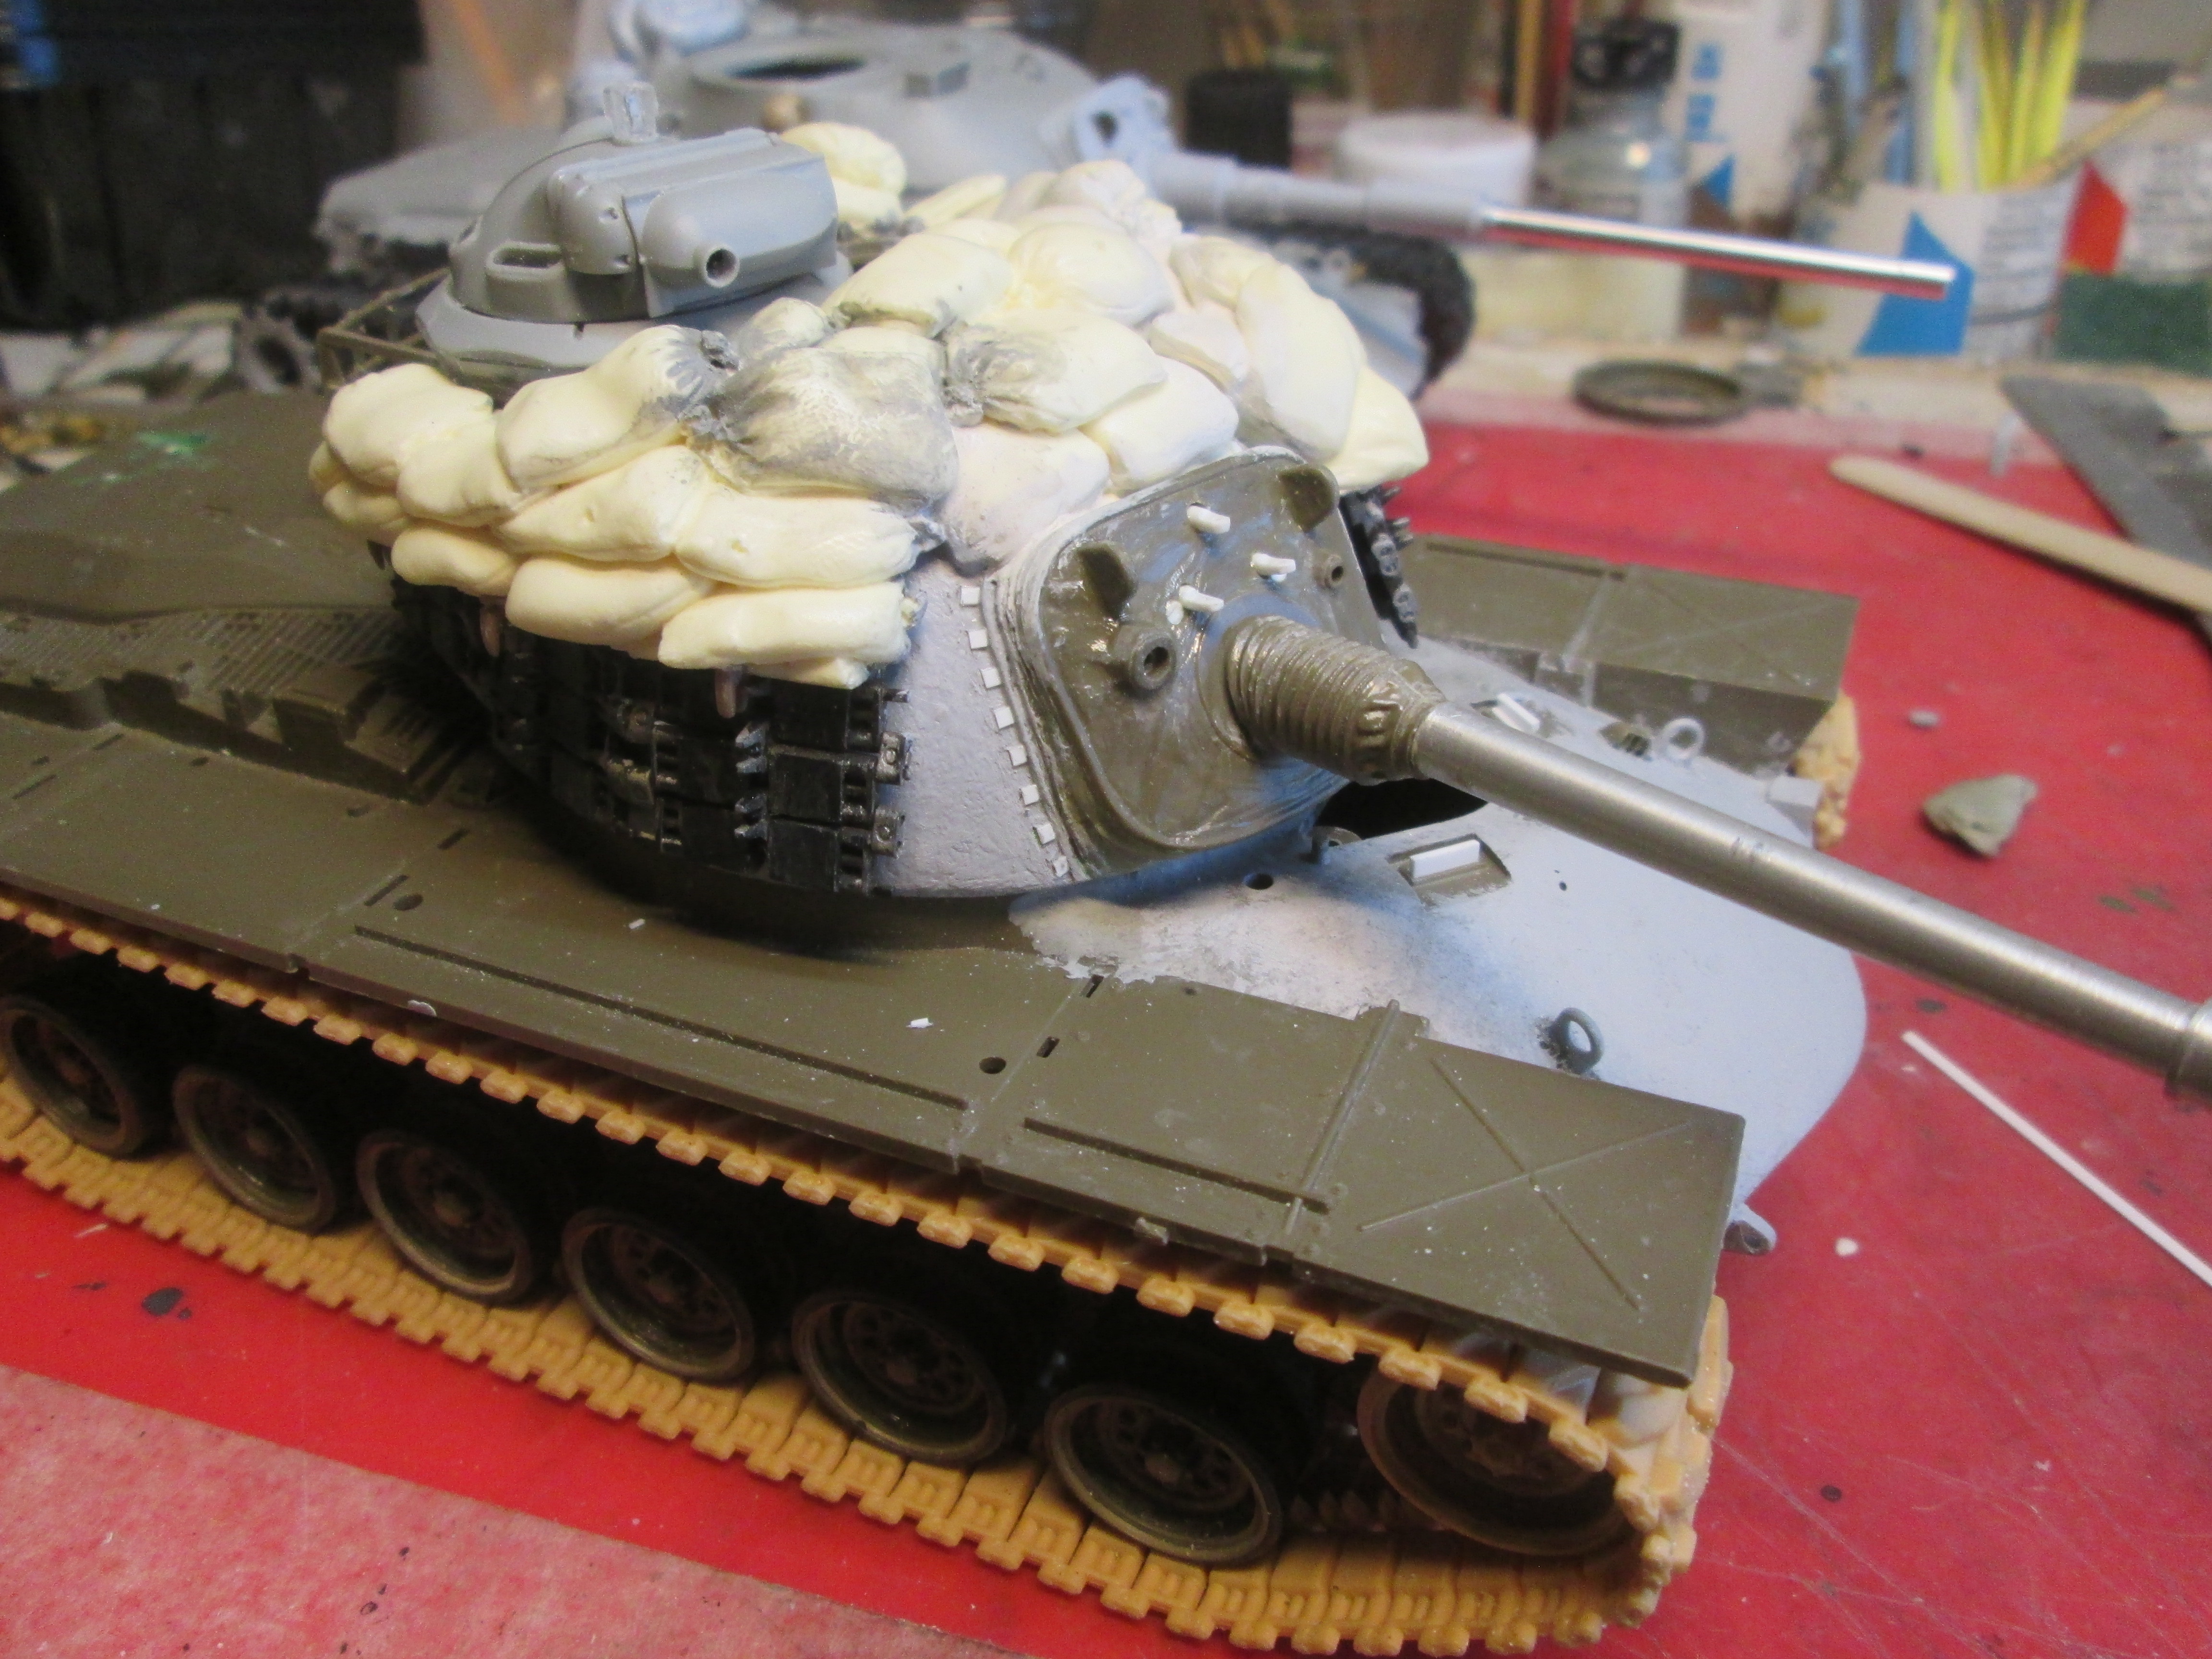
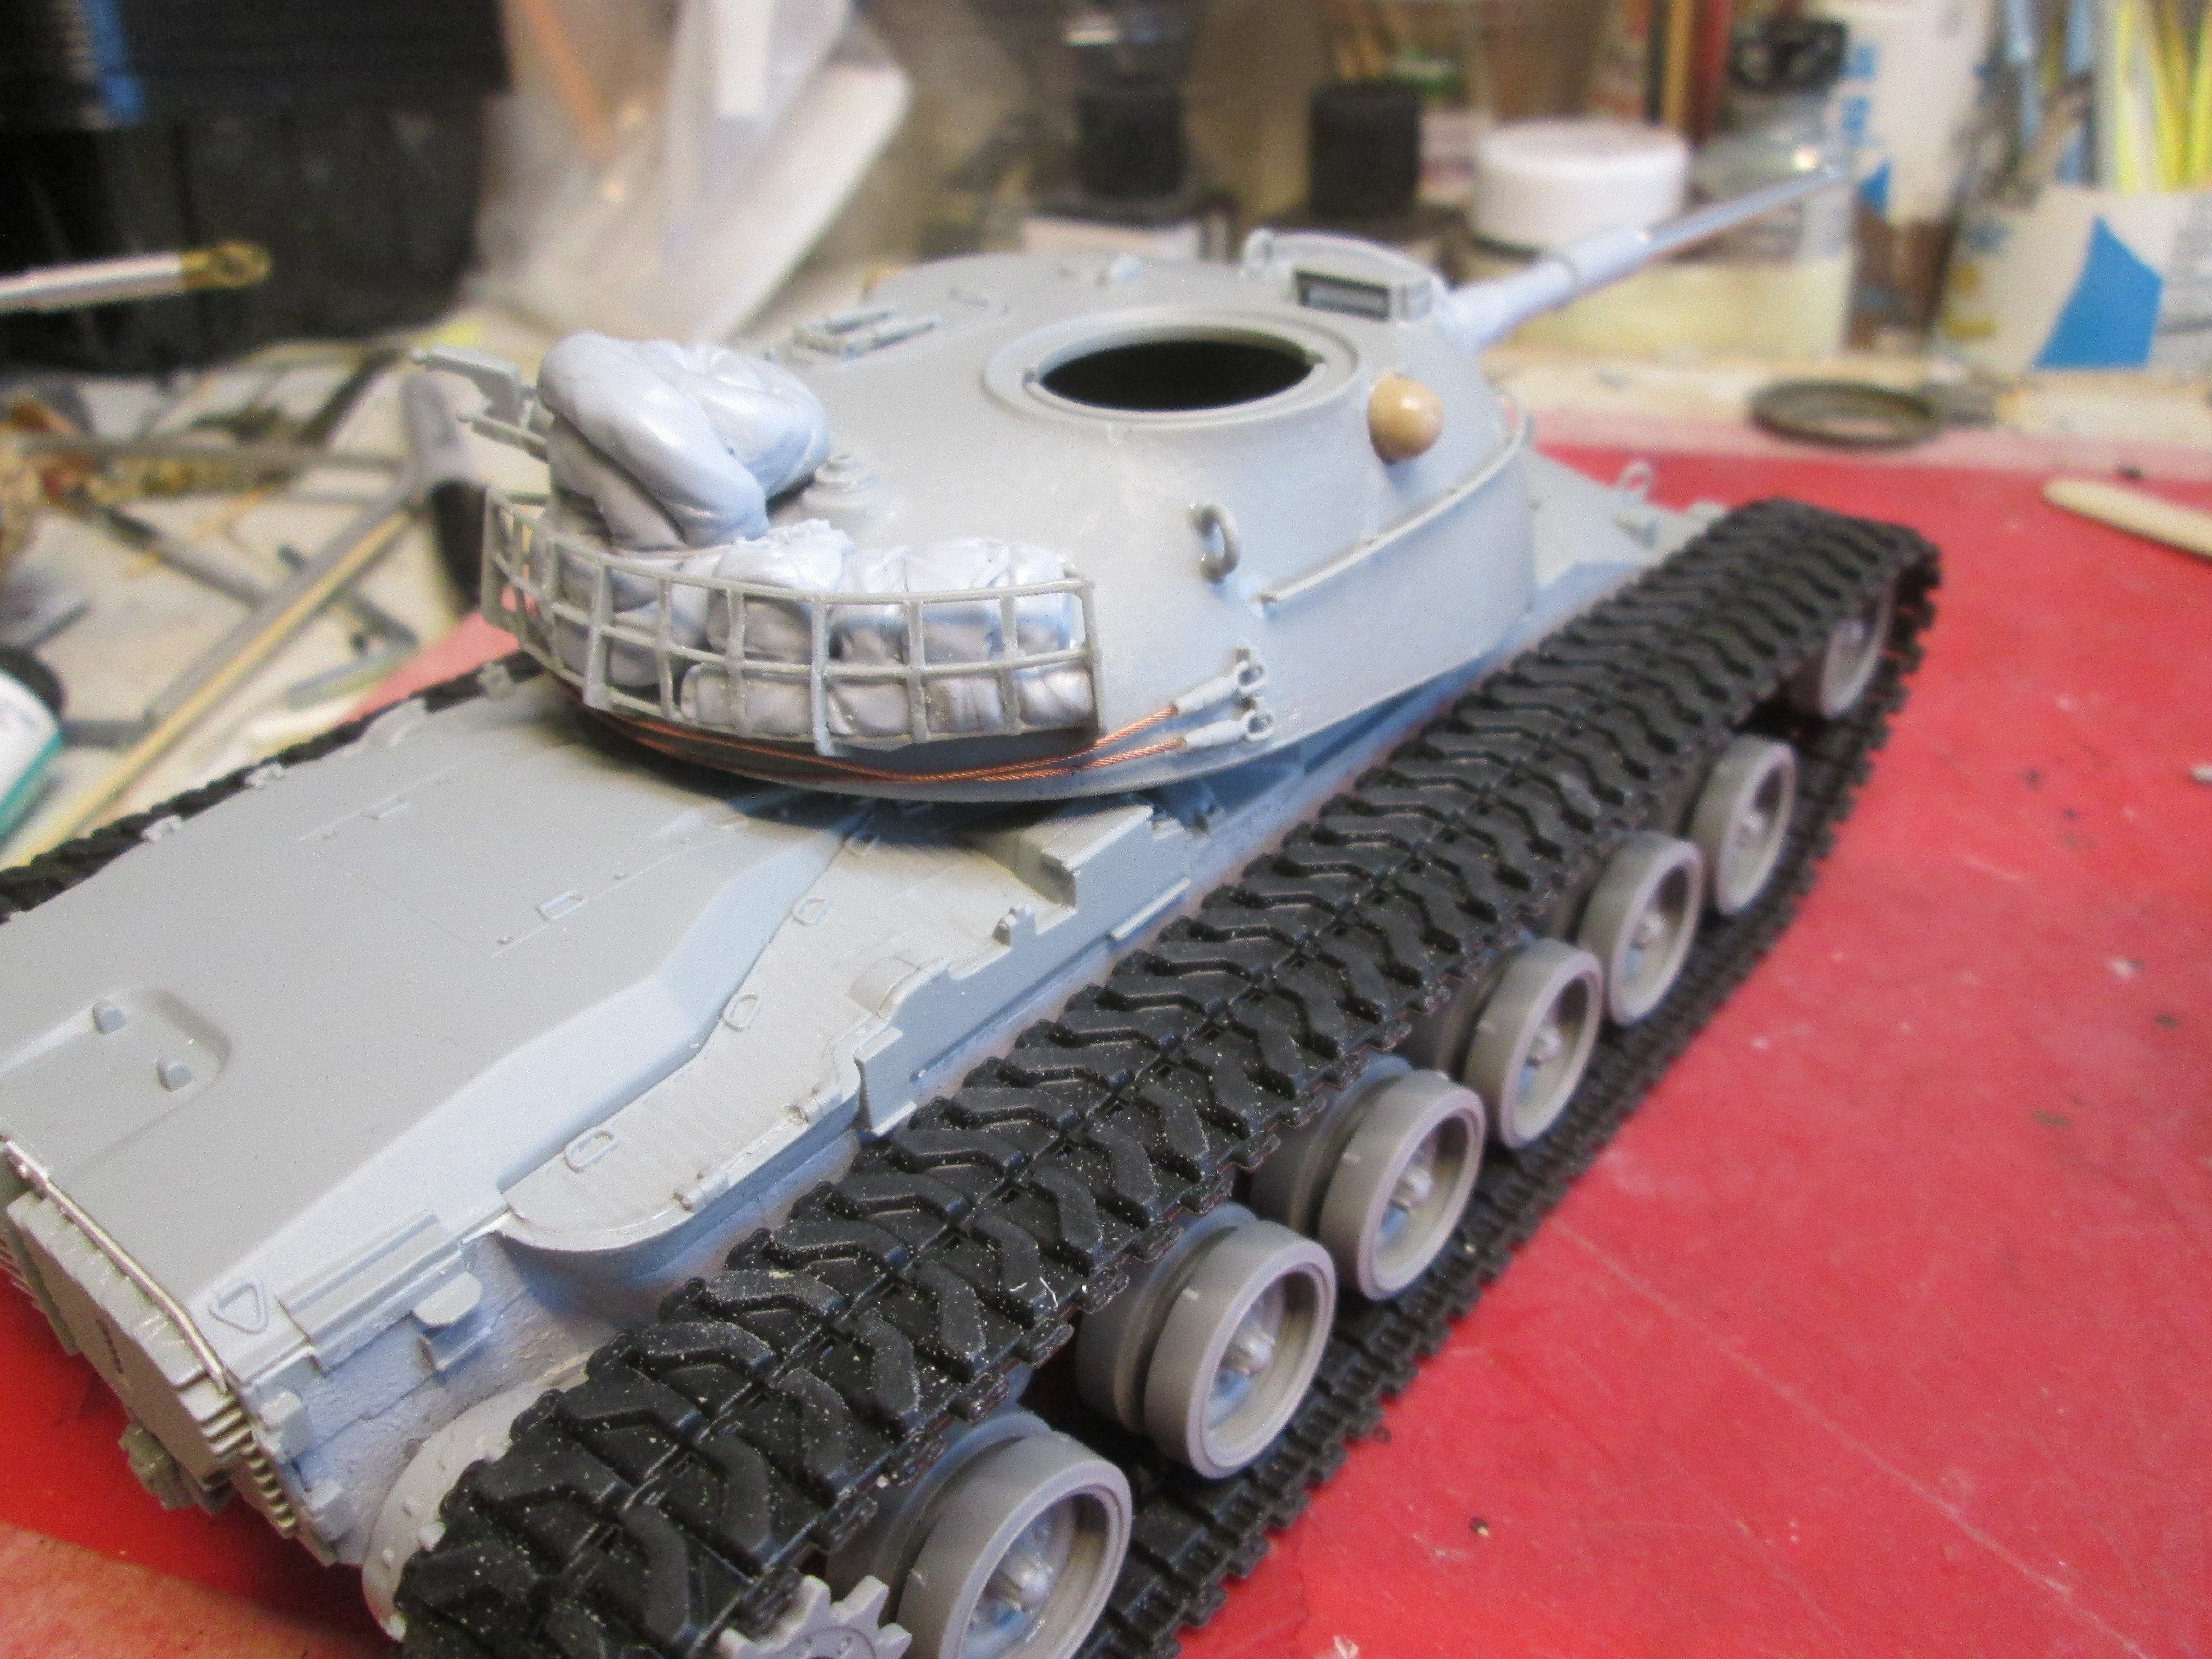
Then to the turret: After seeing a few pics of sandbags piles on turrets and having what I think is a cheap-o knock off of a Legends set, I decided to use it here. I already had a turret started with an old Barrel Depot gun tube and the mantlet cover filled in with Aves putty, so on it went, actually fitting well. I have a few more bags in the set, probably for the hull front. The only issue here is the poor molding quality of the side bag clusters. Apparently the real things were stacked on top of track links fastened to the turret side rails, and the molding was really poor, so I fudged in some parts to fill holes and blobs. Ther will be more links hung under there, below the rails.

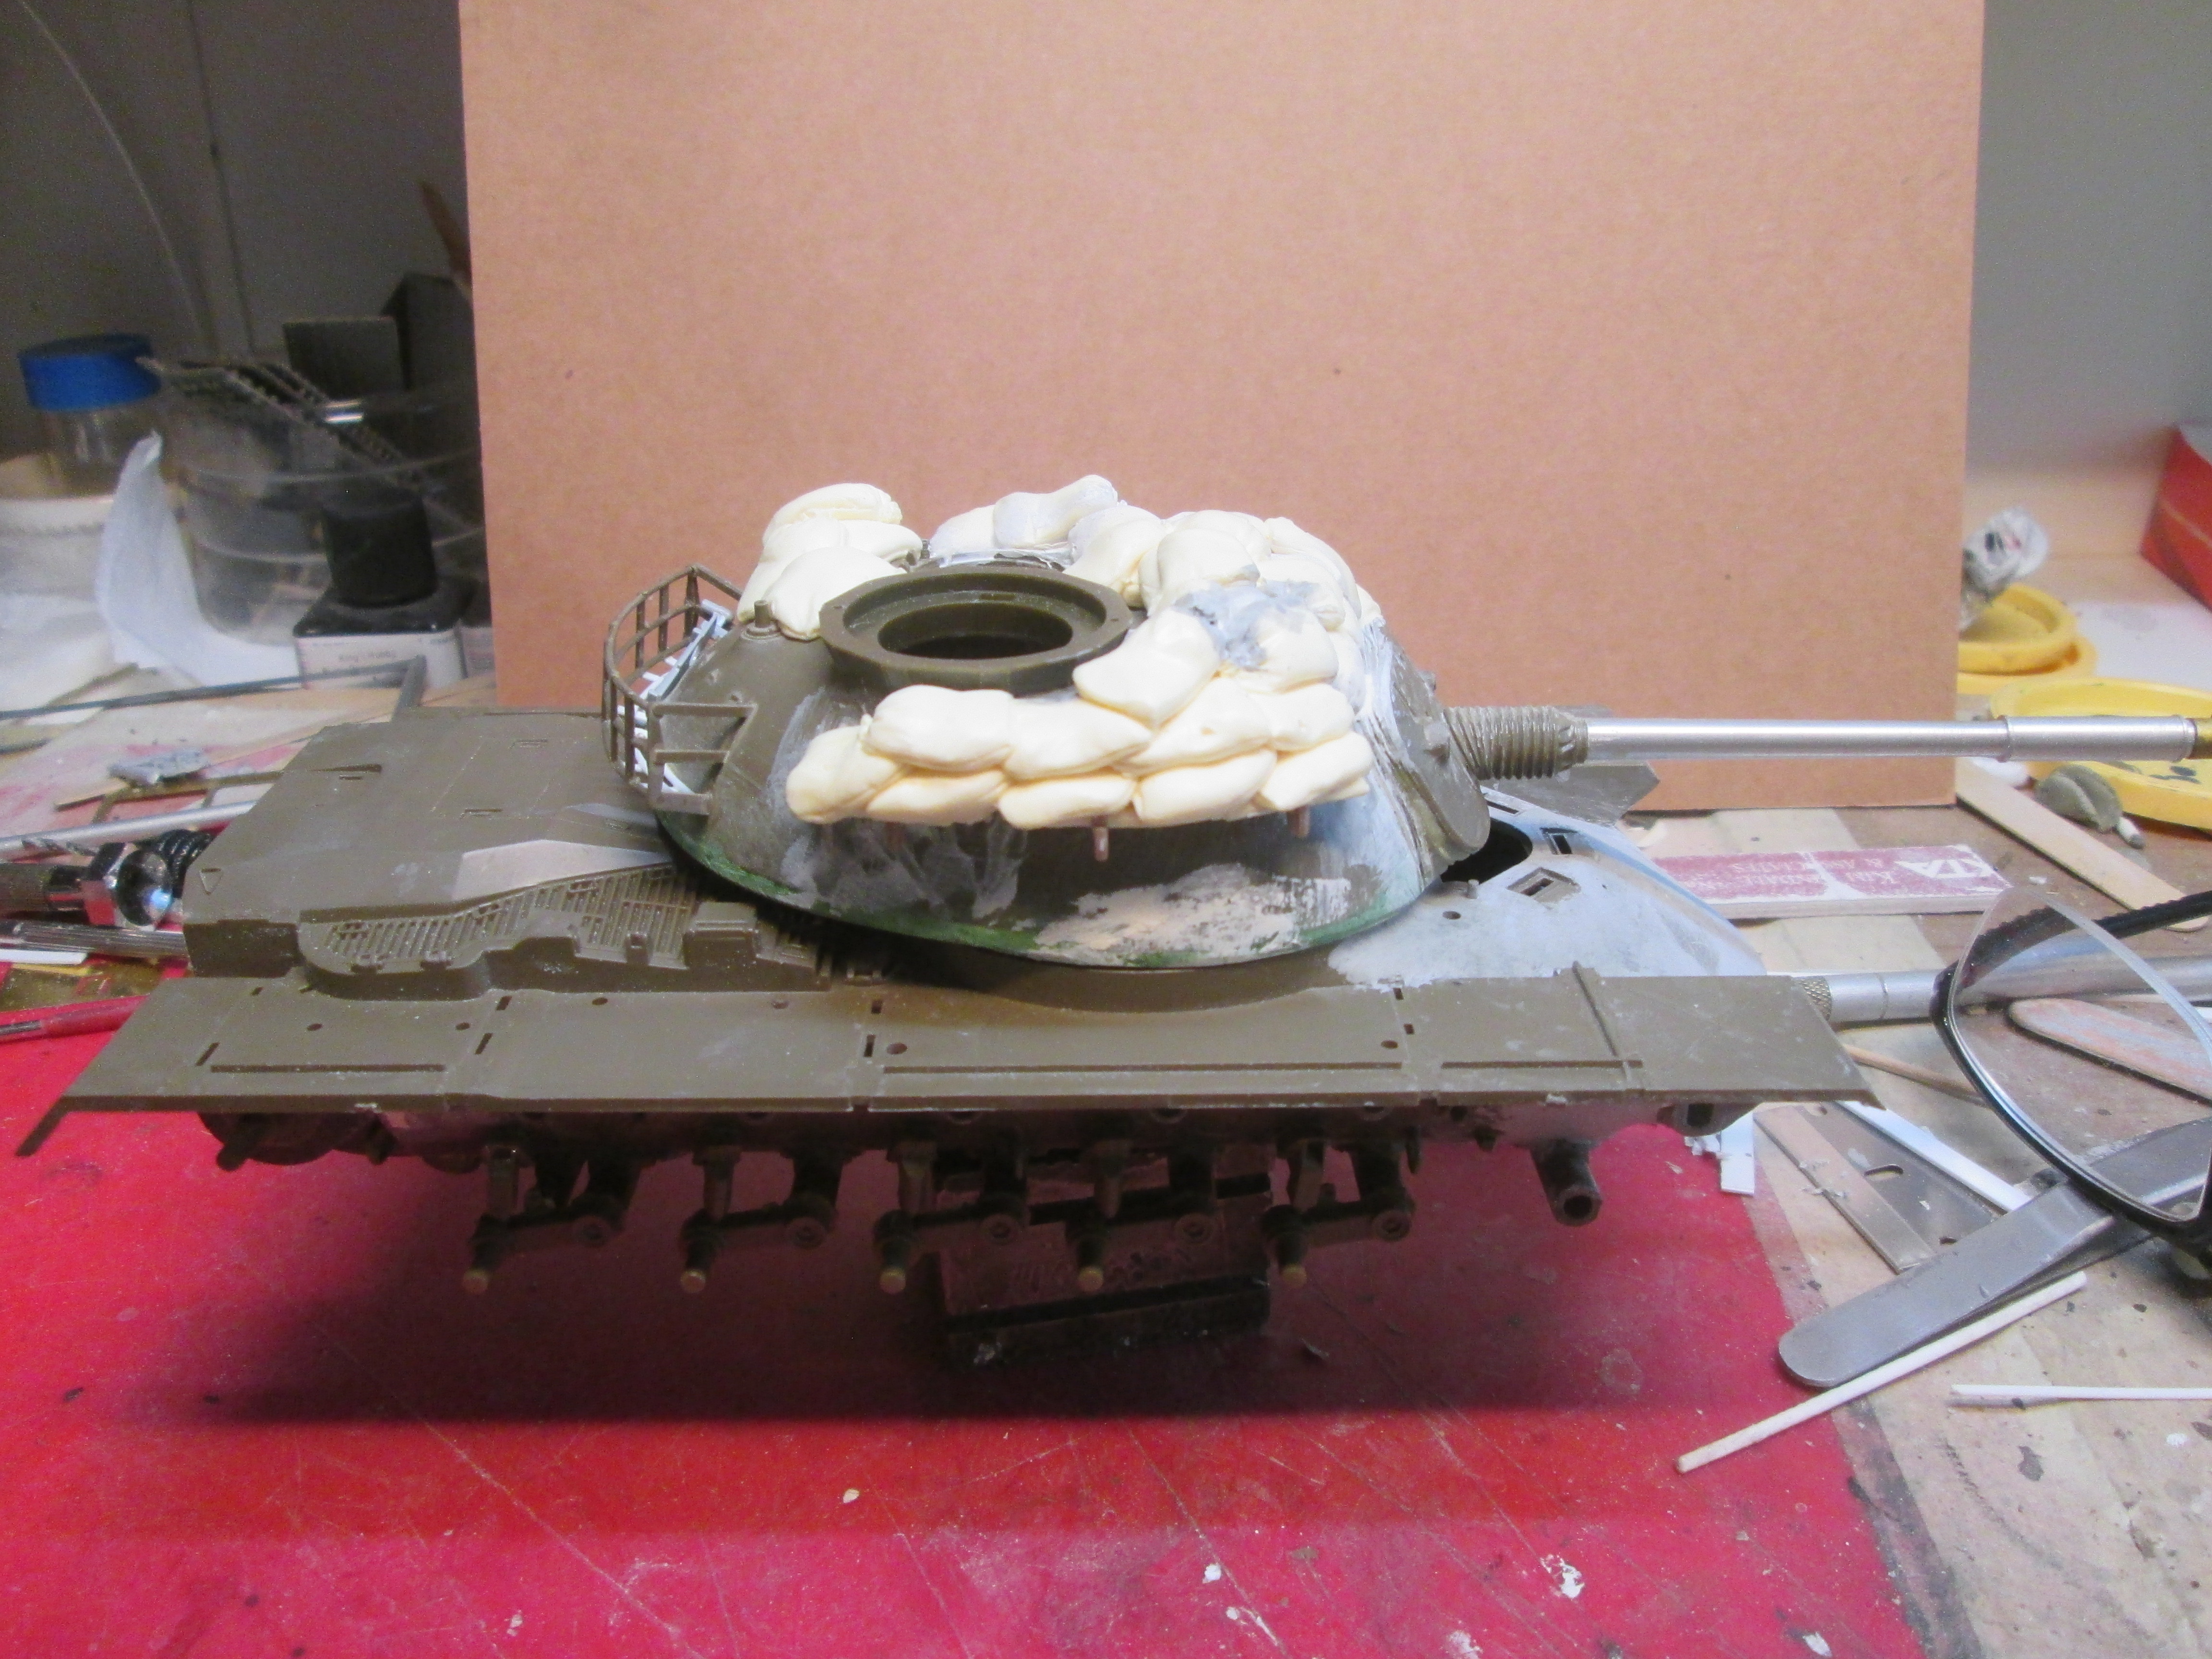
IMG_3837 by Russel Baer, on Flickr

On the Dragon kit, I assembled the basic hull added the swing arms, remembered the road wheels did not have the rims done correctly, so out came a Takom “Brave Tiger” kit I’d already robbed for parts to get the road wheels. Easy enough to do, much more accurate.

IMG_3838 by Russel Baer, on Flickr

And then I thought about the Tamiya wheels: thick rims with no lips at all, and shallow. I have a bunch of old Tamiya and Academy road wheels around, both unused and from recycled models, so I experimented. I rigged an arbor to chuck a wheel in my motor tool, made up a couple of cutting tools and cut a recess in the rim to at least give the impression of an “overlap”. The result is satisfactory, and I can save one of my Takom kits for something else.

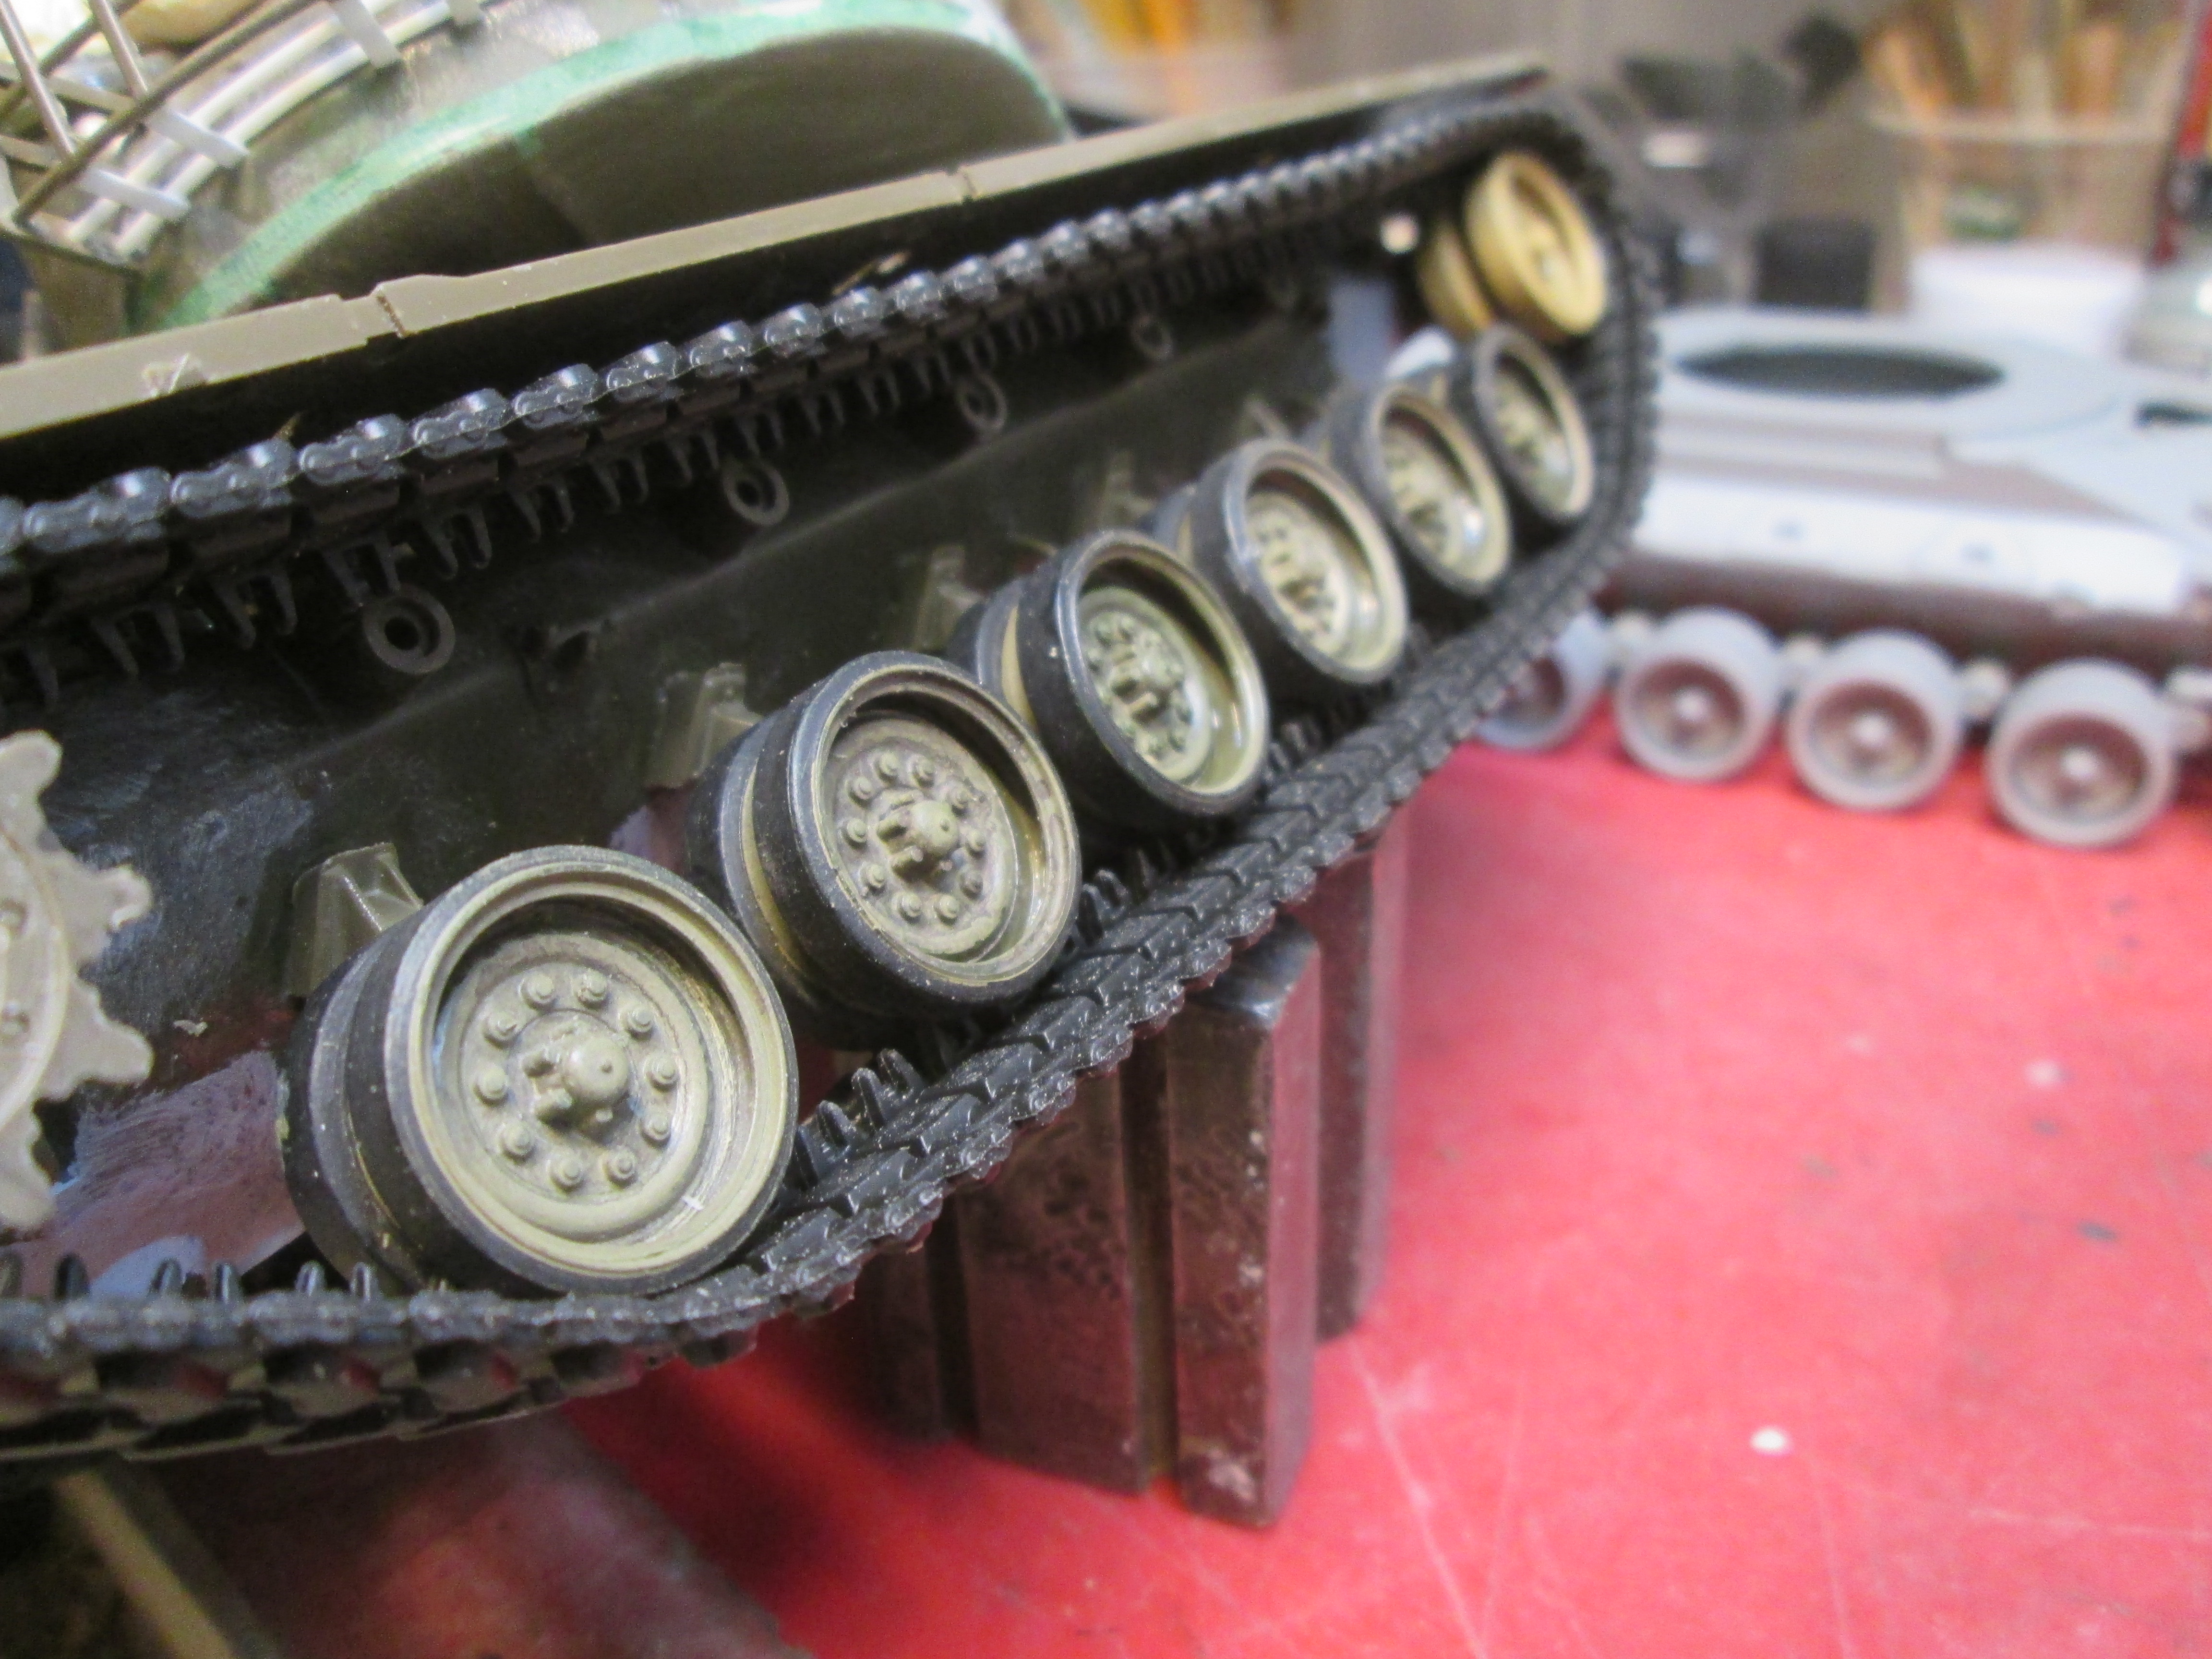
IMG_3846 by Russel Baer, on Flickr

Also done was separation of the Tamiya swing arms and bump stops to enable lowering the ride height to a more accurate level and moving the pivot of the front right swing arm to the correct position. Spare Dragon bits will be used to finish up the Tamiya suspension.

I give you credit. You are a glutton for punishment. I sell off all the older kits as new ones come out. I would rather spend the extra time building and detailing the superior kit than bring an old dog up to current specs; not that I can’t, just no desire to do all that extra work.

OOH! A cool project - I have watch this one!

Interesting mods, some day I hope to build a successor to my old Tamiya “Elvis Tank”, I could use those tricks, too!

Good luck with your build and have a nice day!

Paweł

Man, that is alot of work in corrections. Looks great. It’s kinda fun making these old, inaccurate kits look great. Very nice.

BK

Gino- I still enjoy the process, and when I finish one, I have something in the case that I did stuff to most people won’t, making it a very rewarding process. I will readily admit that the Dragon kit is a lot of fun too, and I really do enjoy more recent kits as well. I’m itching to get my hands on a Takom M48…

Pawel, Brandon, thanks. It’s a fun form of modeling for me, and since I havequite a few of these older kits in the stash, why not?

Very cool! Love the extra work you added there!

I just tend to toss the kits together out of the box with some extra storage and figures added. Guess I’m what some people call an ‘assembler’ rather than a ‘modeler’. I’ll own up to it.

I get enough stress at work without doing a pile of surgery to model kits. If it looks like a M48, walks like a M48, and quacks like a M48 it’s a M48 to me…

I can’t leave anything alone, but that’s just me. [:D]

That is some heavy-duty mods and improvements to the Tamiya kit!

I think I’ll just stick to OOTB when I get to mine, which is a departure from my old M.O. of “now you know, so you HAVE to fix it!” I’m getting too old to fight every fight. [:D]

I just can’t help myself, plus, as I’ve said before, working up old kits is fun, as long as I’ve got a good basic kit to start with.

On that note, I got some more done of the Tamiya turret- Dragon tow cables with Karaya wire on the back, and some mantlet details to set it up for either an Academy (from the M60A2) or AFV Club searchlight. Also starte is the mantlet dust cover clips.

IMG_3879 by Russel Baer, on Flickr

IMG_3877 by Russel Baer, on Flickr

The Dragon turret has the basket and stowage in, other bits on and only lacks the mantlet dust cover, PE parts from the DEF set.

IMG_3878 by Russel Baer, on Flickr

On both, I substituted Karaya .6mm copper wire for the Dragon steel wire since the Dragon was stiff even after annealing. I may use it for a couple of extra cables, stowed ready-to-use on one of these.

And while I was poking around my AM stash I found this handy set:

IMG_3880 by Russel Baer, on Flickr

Hello!

Nice progress here! Don’t you think the green one needs a bracket for stowing the searchlight when not in use? It was usually located around the ventillator housing.

The light bracket set is a funny one - I think PE would do better here than resin/3D print.

Good luck with your builds and have a nice day!

Paweł

Very cool!!!

Pawel has a point on the PE vs. 3D printed guards. I find the 3D printed plastic to be MUCH easier to work with though if it’s a little thick for scale though.

Correct Pawel, the green (Tamiya) turret will get a storage bracket for the searchlight. I just haven’t got it on yet. And yes, generally speaking 3D printed brackets and such seem to be easier to work with than PE but sometimes PE is the way to go, just depends on the part I think. The choice I have on the searchlight bracket is plastic from the stash or PE. I’ll probably use PE…

Since my new Dremel bits showed up, I thinned and beat up the fenders on the Model B, just enough (I think) to make them look used but not blown up.

IMG_3881 by Russel Baer, on Flickr

IMG_3882 by Russel Baer, on Flickr

She’s lookin’ good!

Nutz 'n boltz…

IMG_3884 by Russel Baer, on Flickr

IMG_3883 by Russel Baer, on Flickr

That’s what made the hobby enjoyable to me once again. Now I know plenty of modelers enjoy super detailing and recreating every actual item, but I would get stuck in details until I built a kit OOB (usually a WW2 German tank I knew nothing about) to cleanse the pallette.

Now, I’m doing it with kits in my normal building range. Of course, I don’t feel like the builds are up to my normal level of standard, so I tend to not share as much as I used to.

Really like the added texture to the front hull. And the sandbags look really good.

Here i was cruising along and I realized something. Keeping in mind I’m building the Tamiya kit as a Model B and the Dragon kit as a Magach 3 from the YKW, there’s a goof, and it just hit me today. It’s illustrated in the pic below:

IMG_3890 by Russel Baer, on Flickr

But moving on before I’m paralyzed by AMS, I converted an old Lo Model Urdan cupola to the Chrysler cupola that the Urdan was at least inspired by, as seen on several IDF Magach 3 tanks in pics during the YKW Sinai front.

IMG_3886 by Russel Baer, on Flickr

Fenders are on and the DEF armored air cleaners too, and as soon as I scrounge up some tool box lid handles, I’ll get the tool boxes on.

On the Tamiya kit, I’m close to finishing. I got on the web and searched stowage kits and bits and came up with a couple of interesting things: 1) the sandbags are in fact a knockoff of a Legends set, which also included lots of stowage bits, and 2) Legends also packages a similat stowage set for the Sheridan, no sandbags, so I got one on the way. It has a covered spotlight which I could use later, somewhere, probably, and lots of good individual items that will work perfectly on an M48 as well.

IMG_3888 by Russel Baer, on Flickr

They look good to me. Sorry I don’t know about the details, they look like M48s to me [:$]

Moving along nicely Russ.