Fenders “fixed”. I can cover any blemishes with stowage.
 IMG_3891 by Russel Baer, on Flickr
Fenders “fixed”. I can cover any blemishes with stowage.
IMG_3891 by Russel Baer, on Flickr
Yeah, they’re coming along nicely
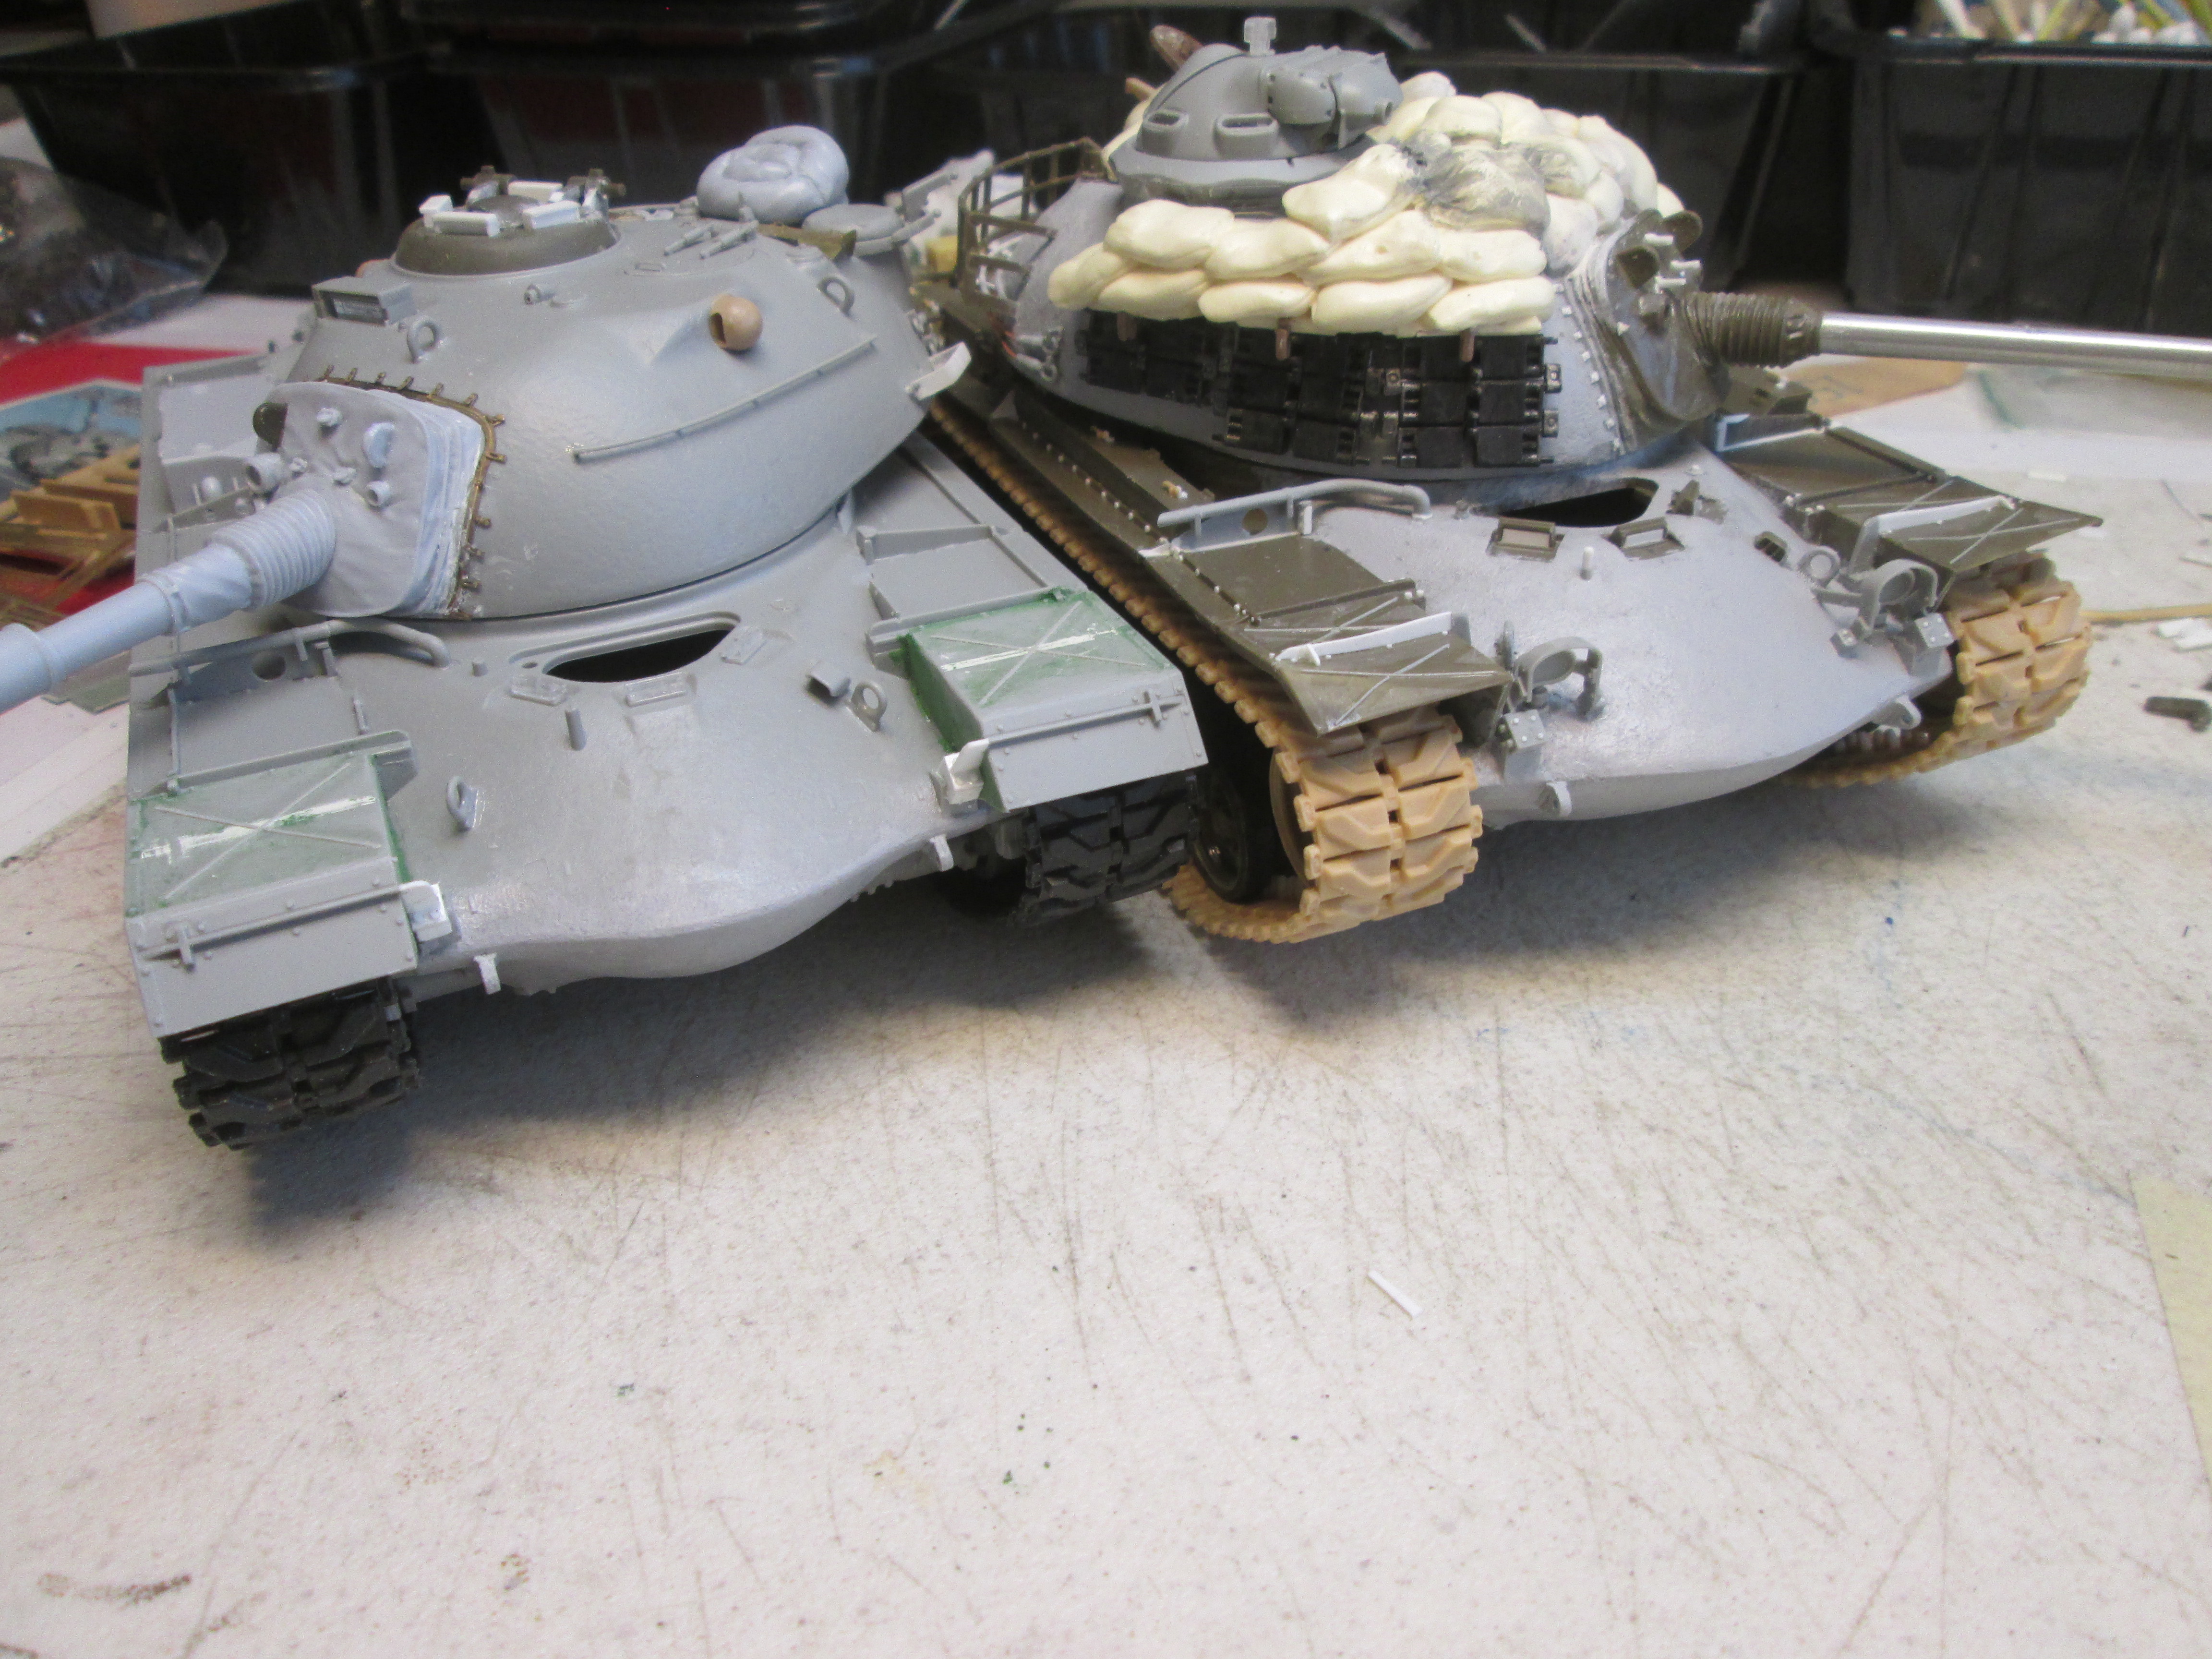
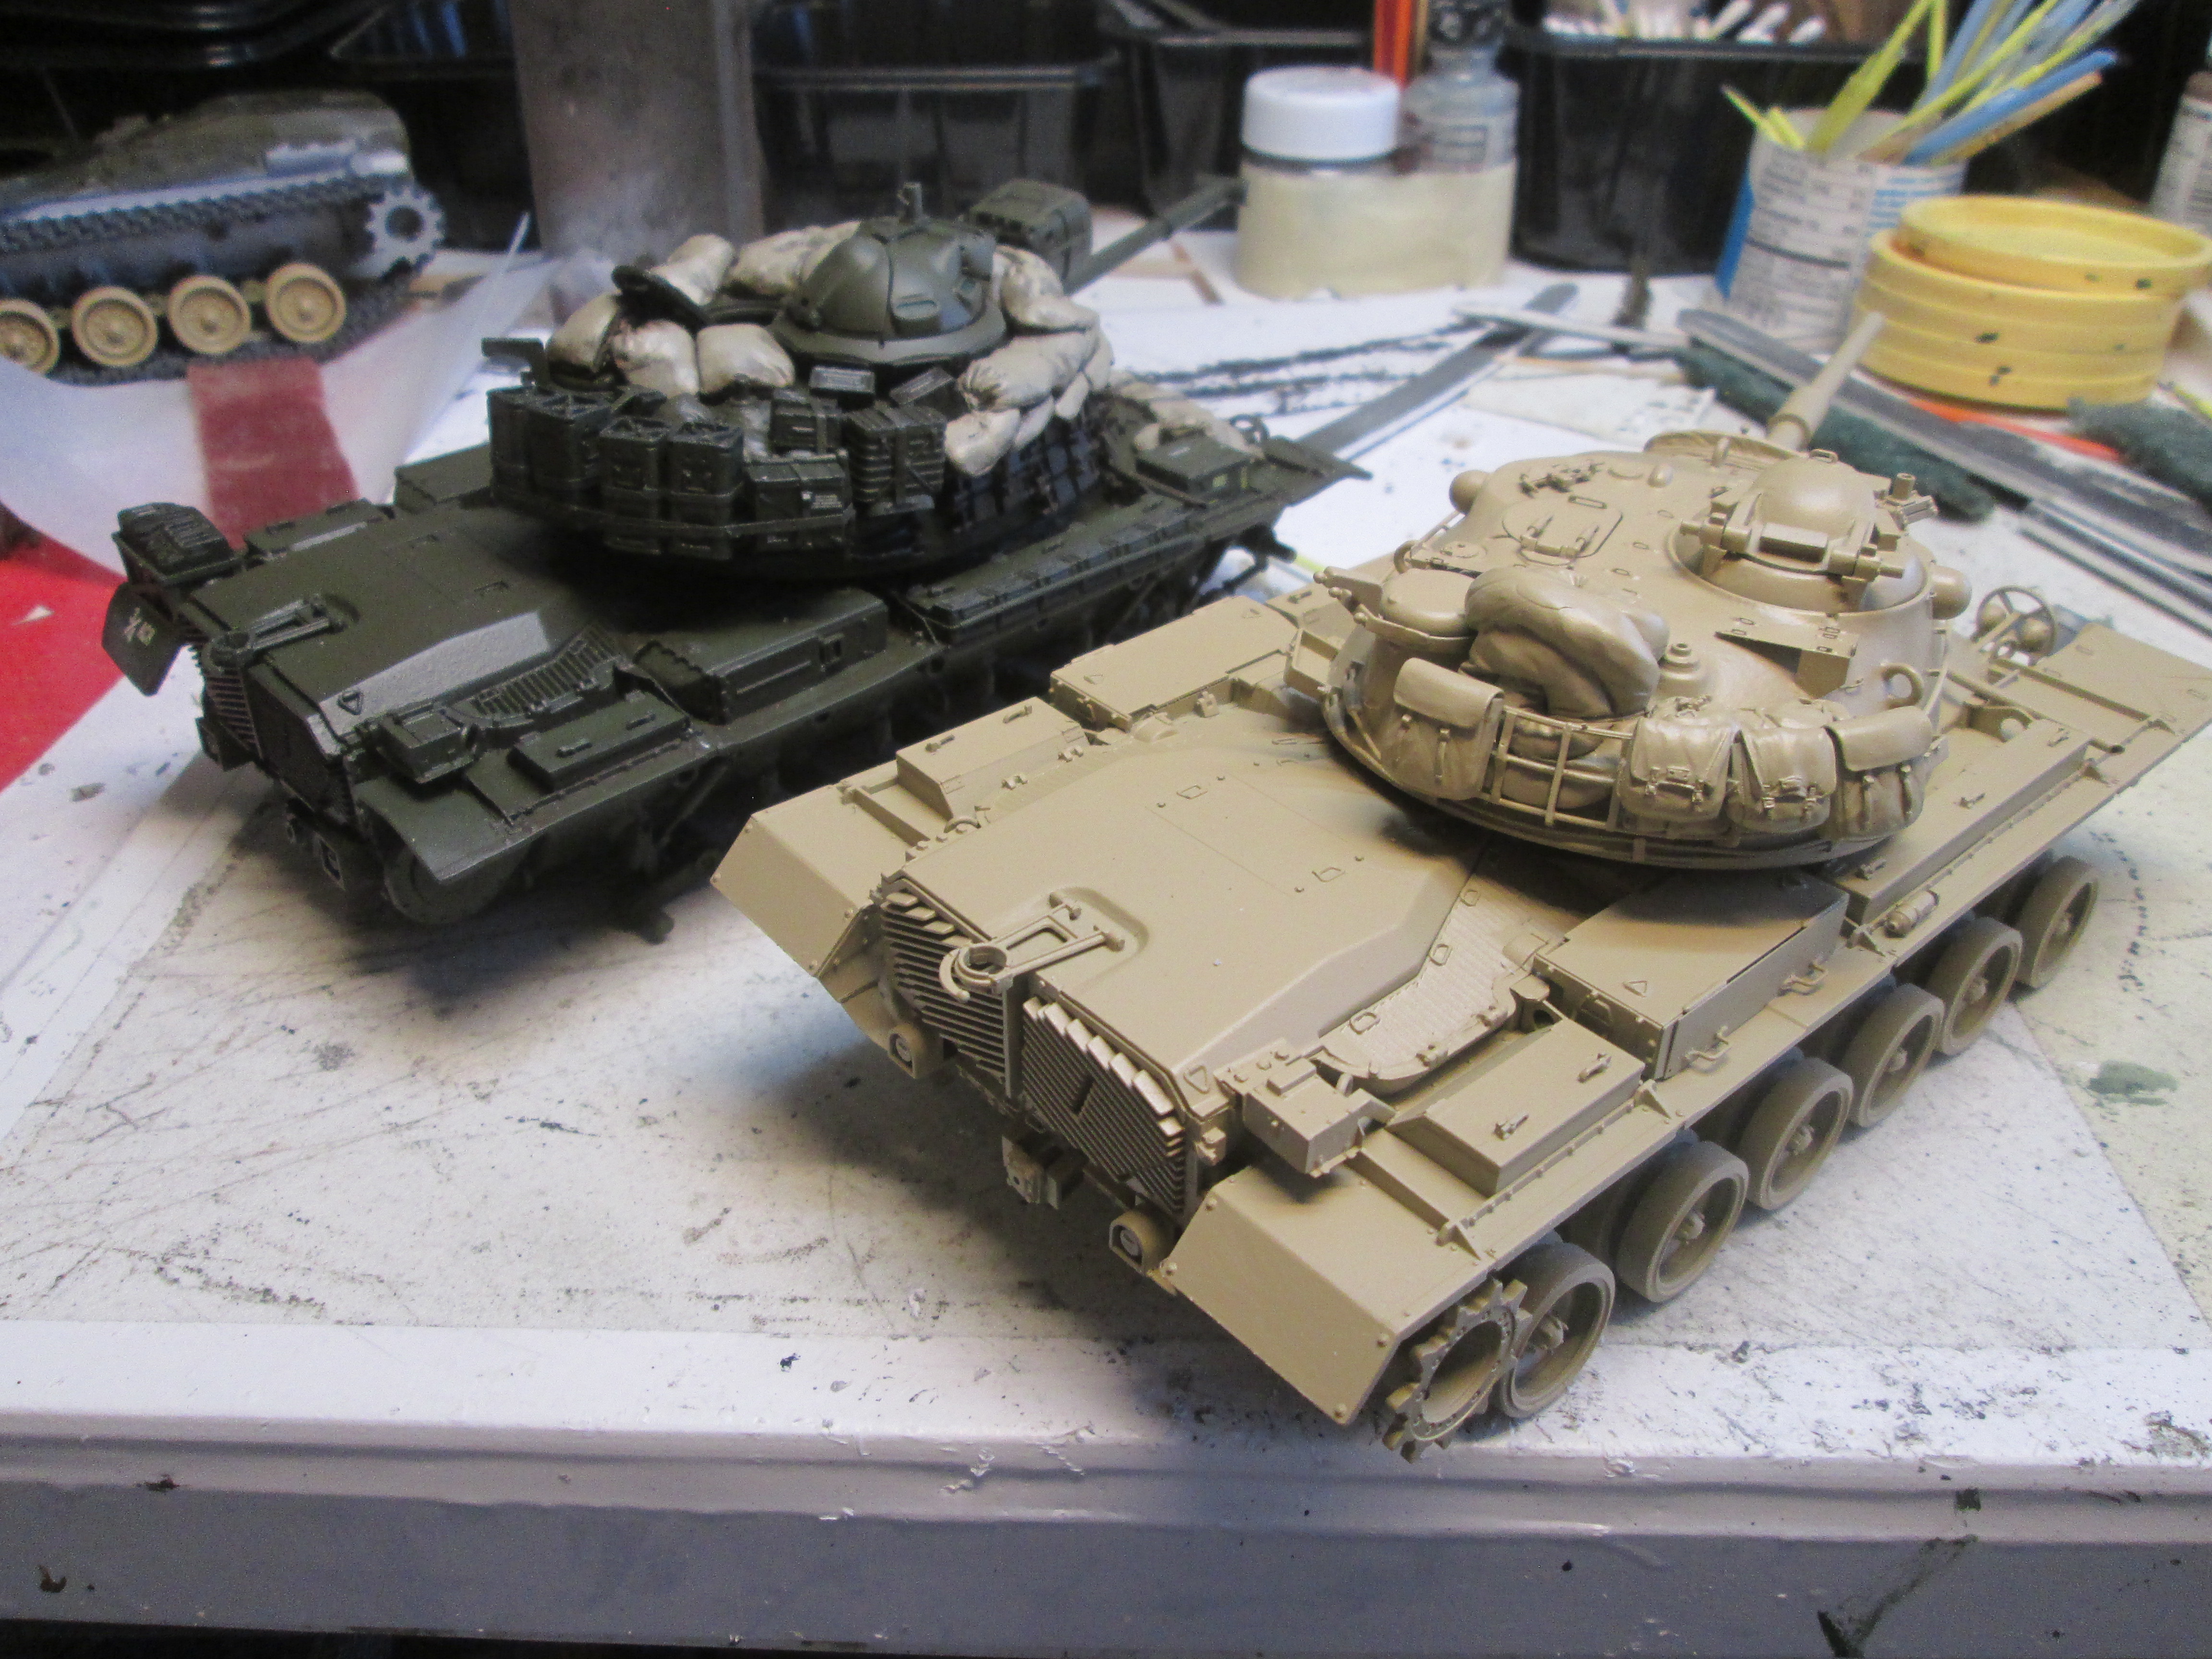
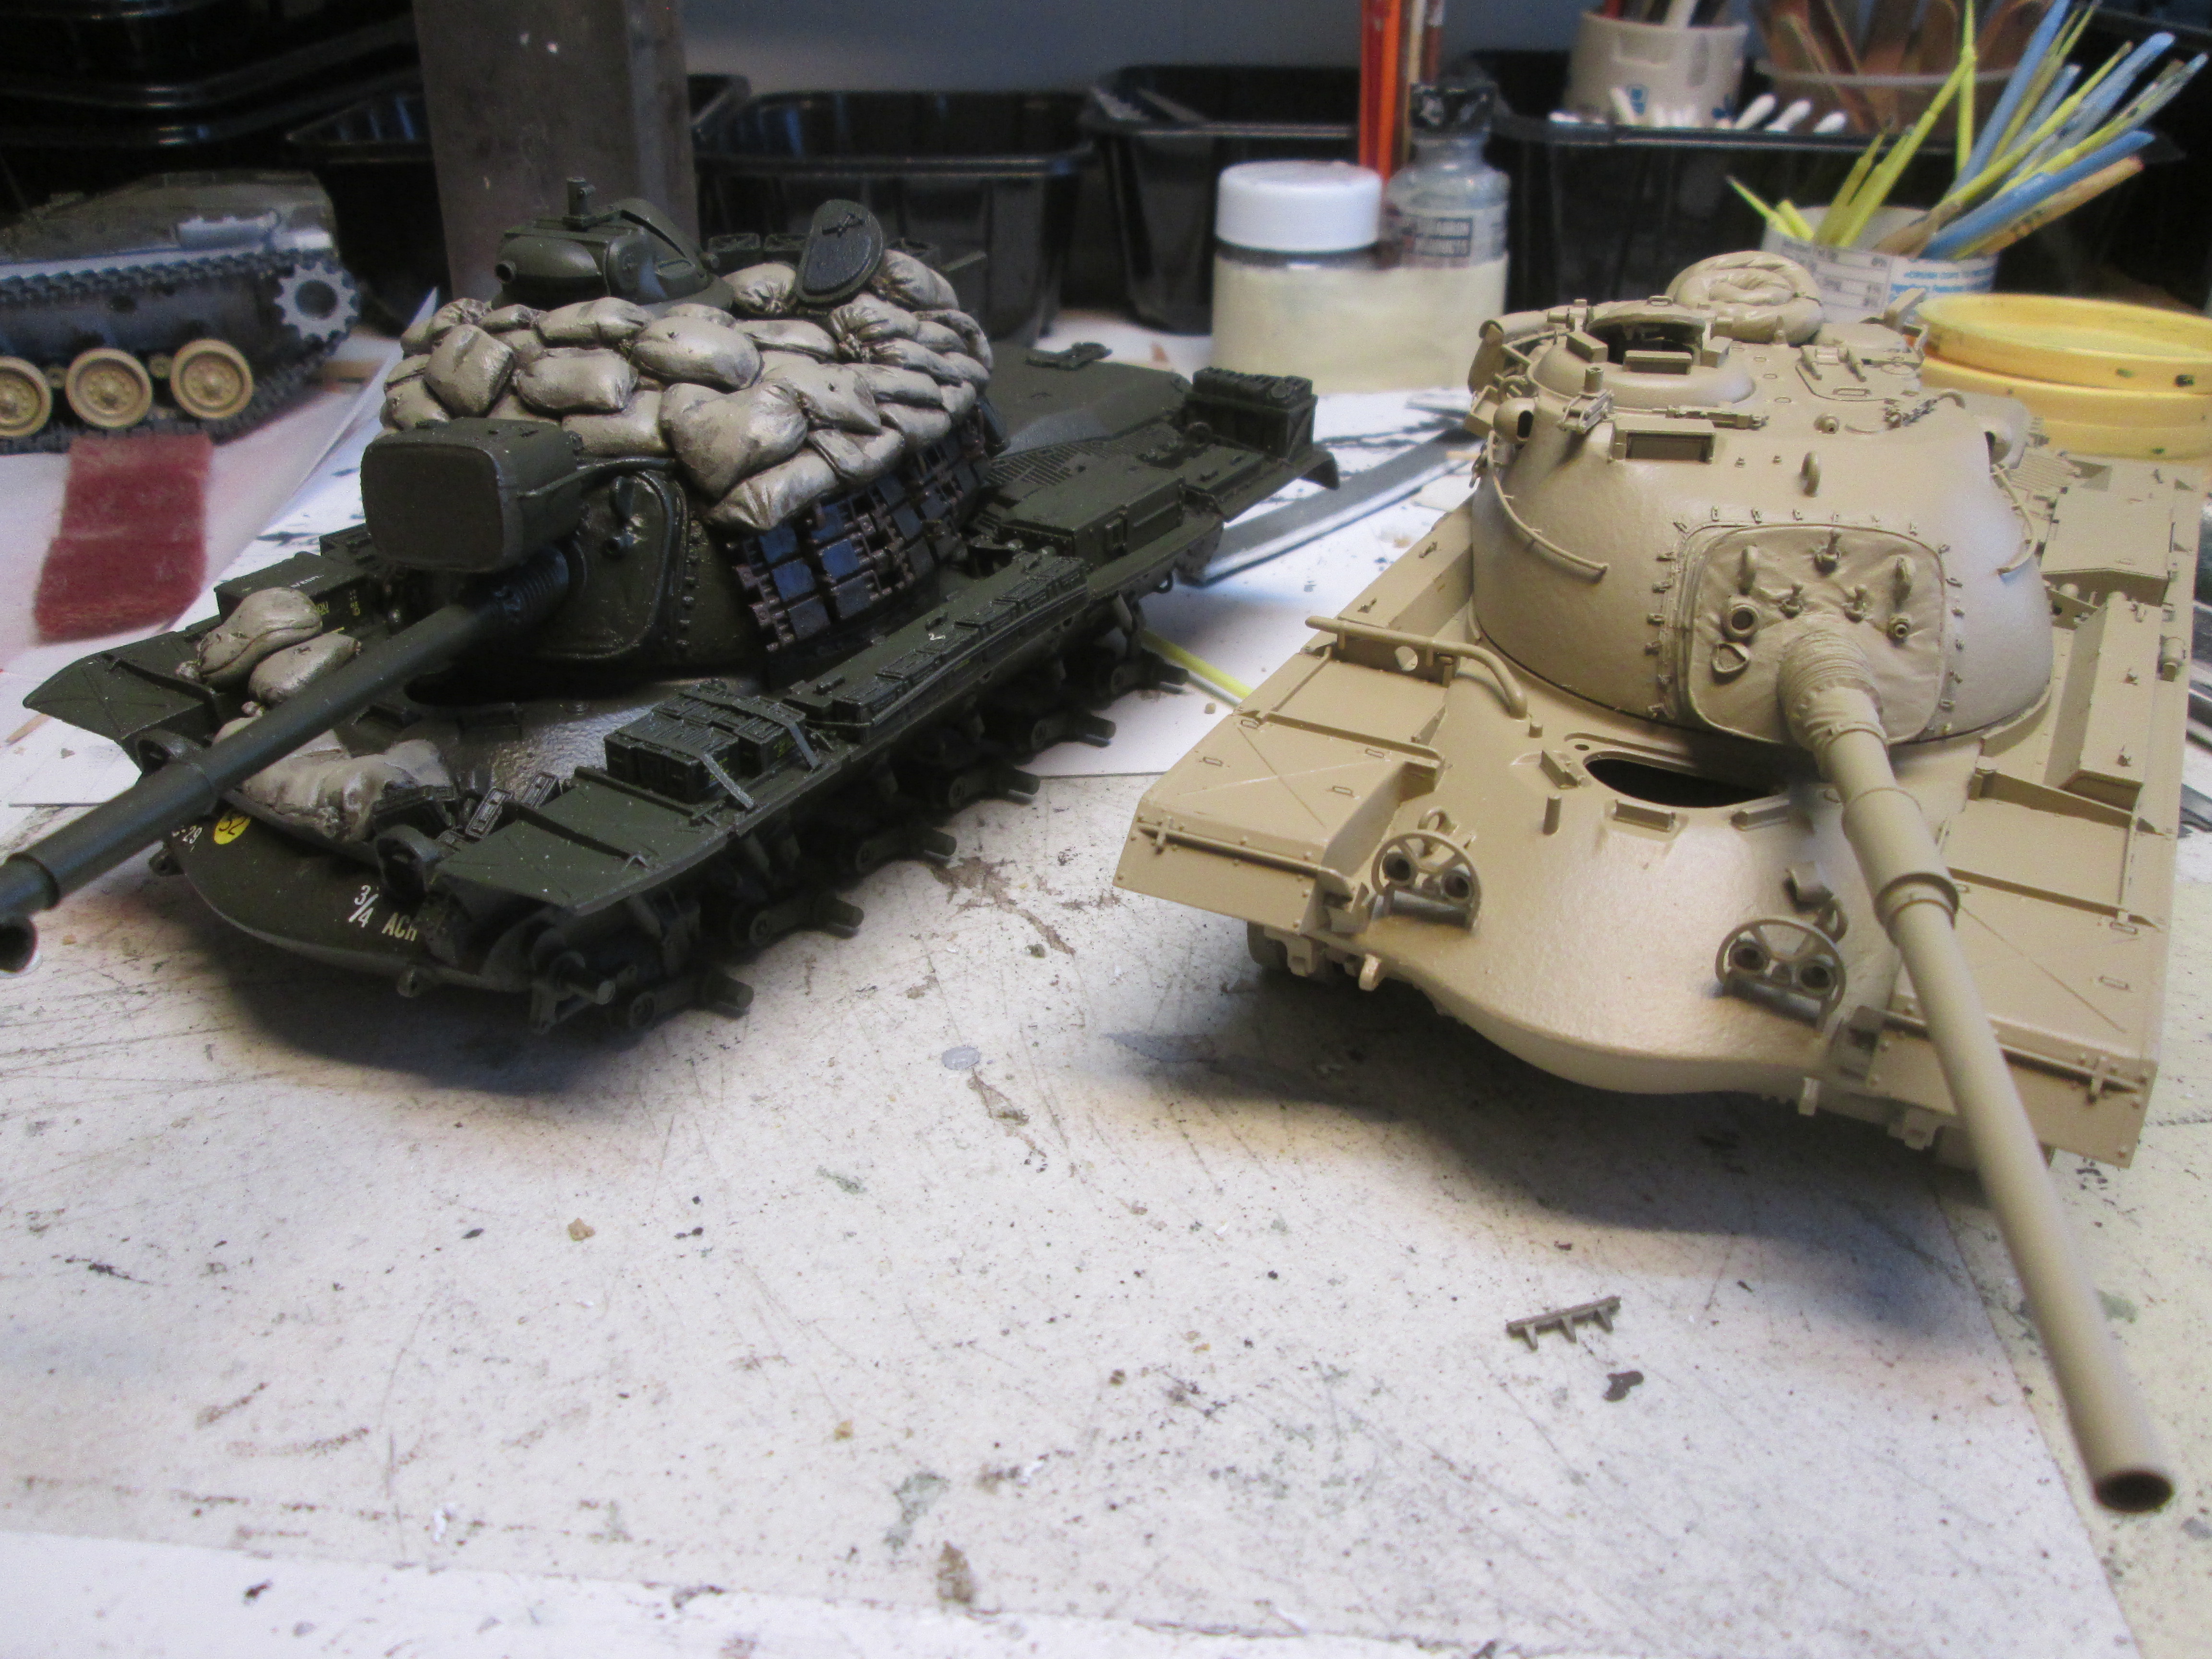
Okey dokey. Magach is ready for primer, then I can check for blemishes and glue marks, and decide if I need to cover my work on the front fender stiffeners with more stowage. The turret basket is full, all DEF parts. I plan on using a TC fig, just head and shoulders showing, and closing the driver’s hatch.
 IMG_3893 by Russel Baer, on Flickr
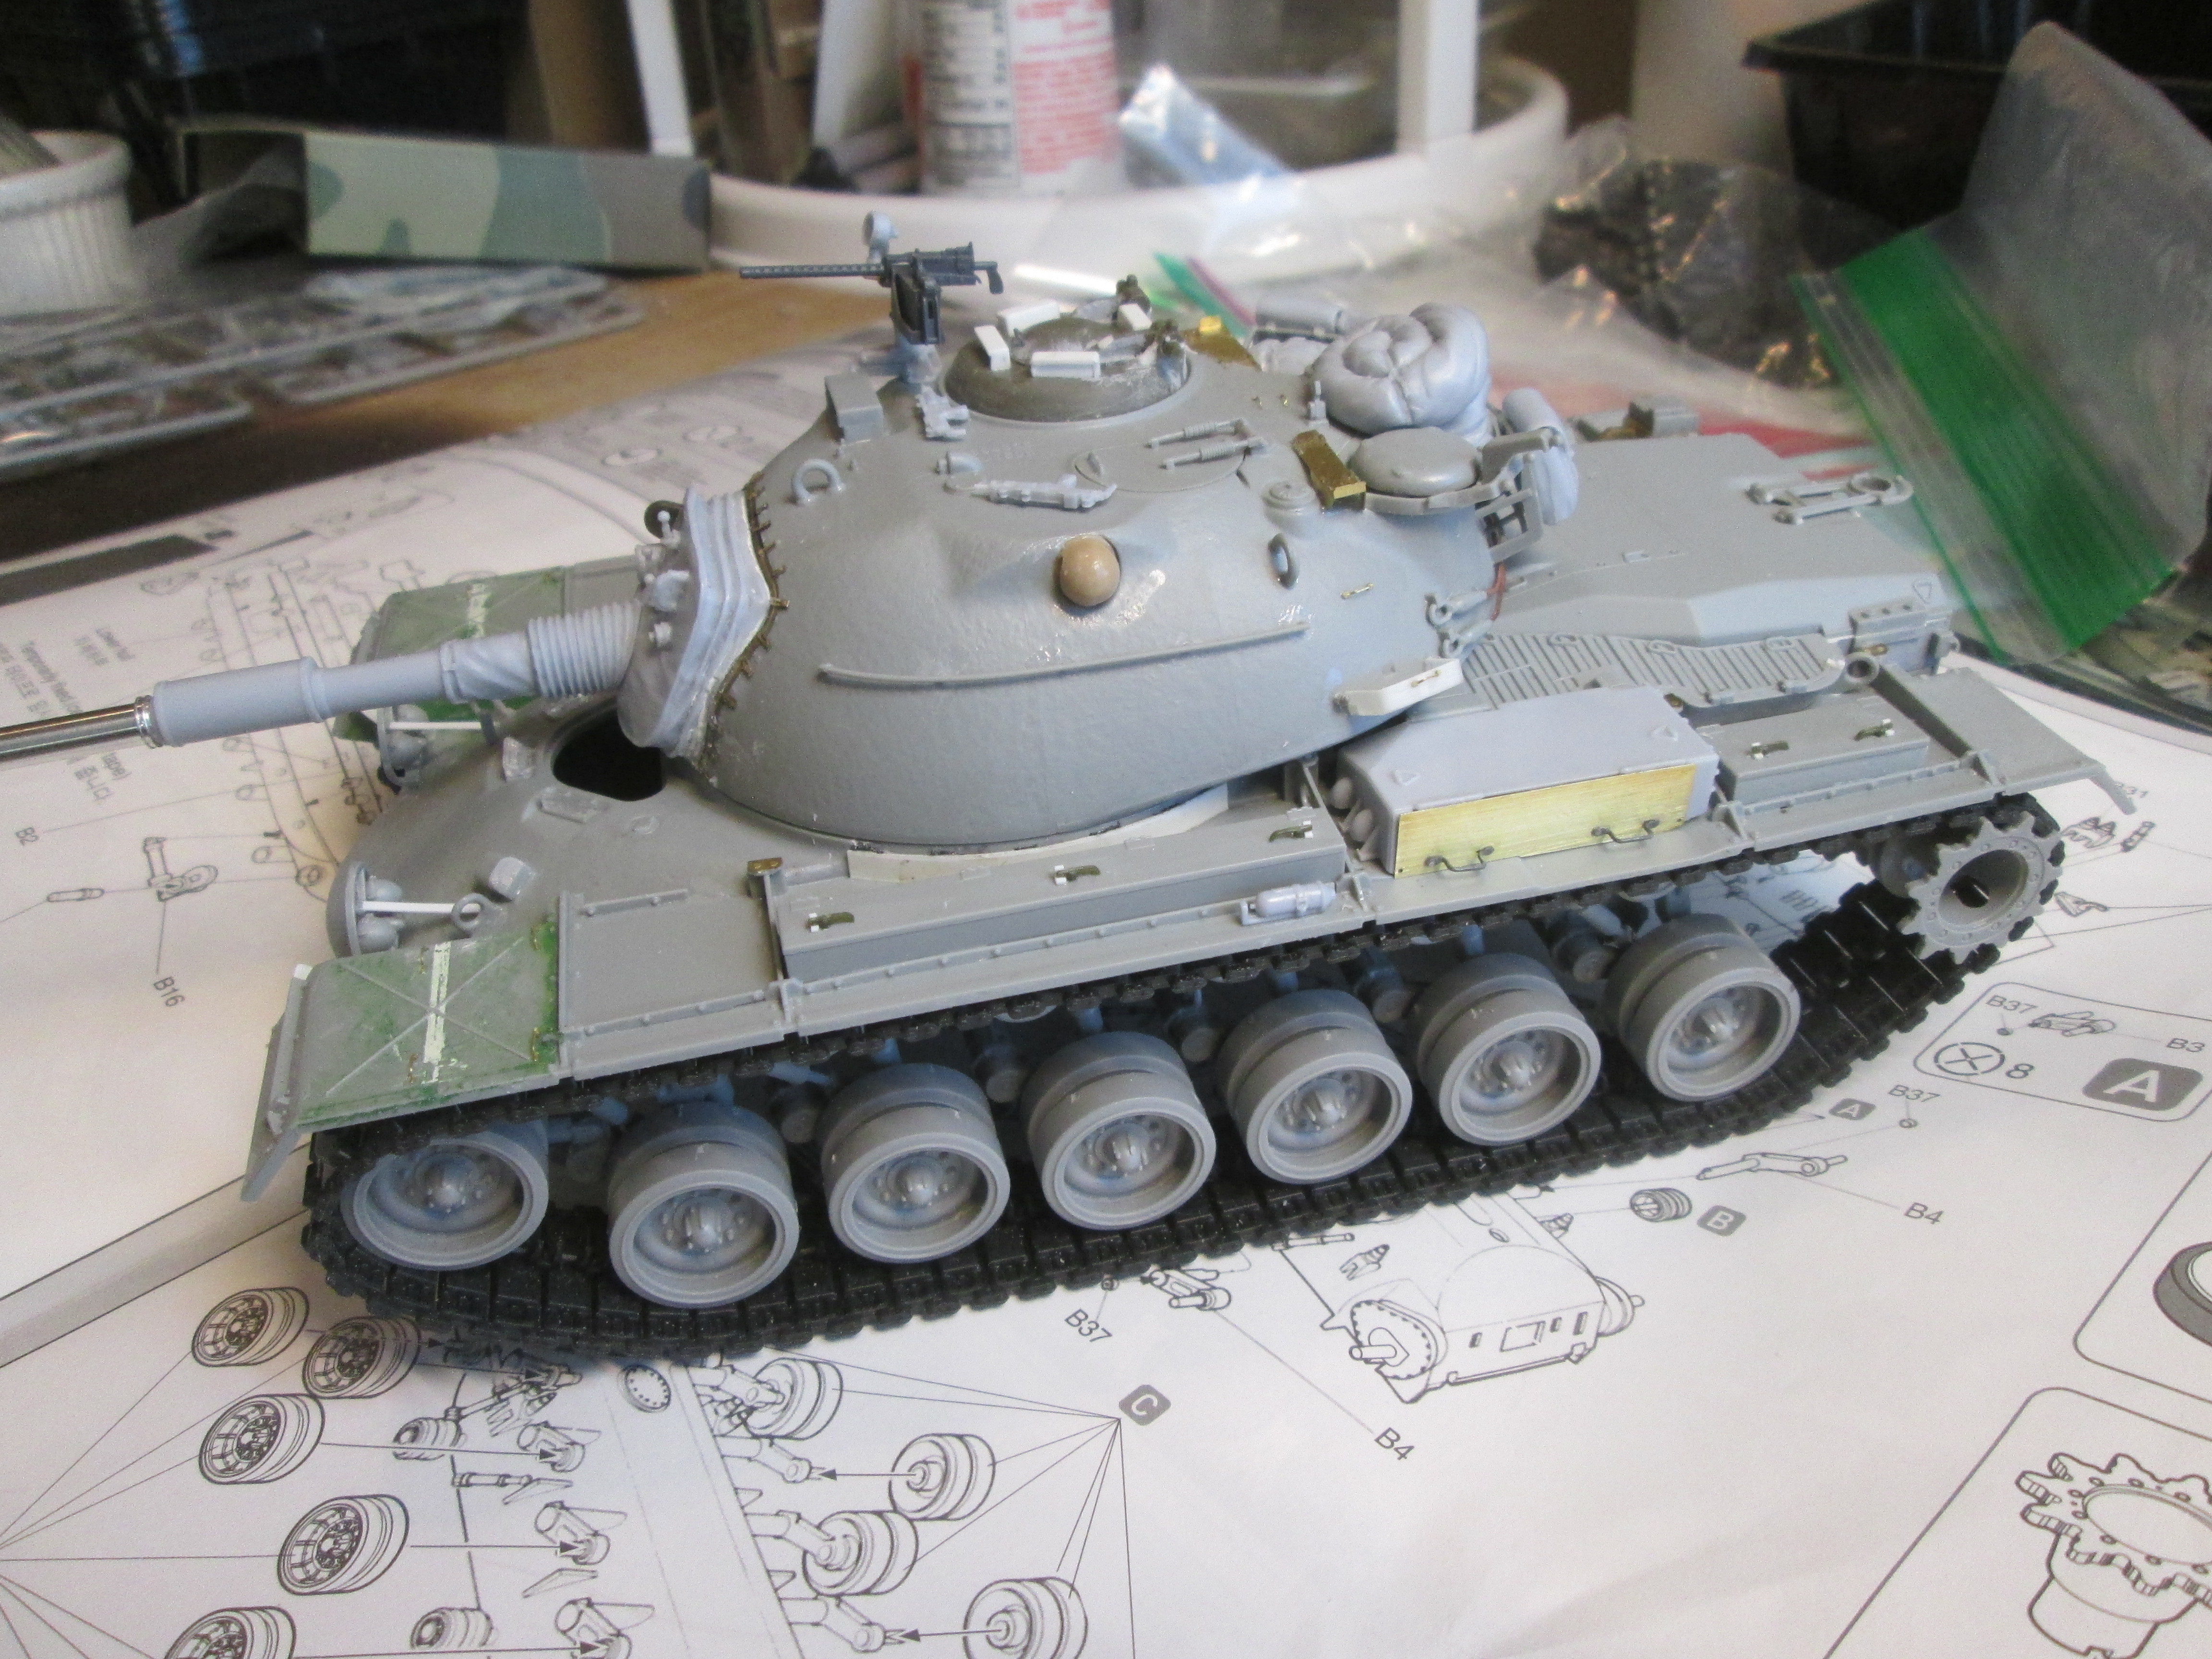
 IMG_3892 by Russel Baer, on Flickr
I gave the DEF 30 cal and mount my absolute best effort but was defeated by the PE and had to sub in an Academy gun and mount.
How’s the Dragon kit coming along? Any issues? I just traded for the M67 flame tank version for an old Tamiya Leopard 2A5 I won in an online contest over twenty years ago. I figured if I hadn’t built the Tamiya one in that amount of time, I never will and would rather pass it off to someone who will.
Aways nice to see one prepped for paint!
Rob, that’s the Dragon kit in gray plastic still, nearly done. The only real “error” is the lack of lips on the road wheels, which is why I used Takom wheels. Other than that, it’s pretty good. For a better model, I would suggest an AM mantlet cover as well, like from DEF Model as Dragon either leaves it out or supplies one in it’s DC plastic that is noticeably oversize. Since my model is an IDF Magach 3, I used the DEF Model upgrade/conversion set which contains a very nice cover in resin.
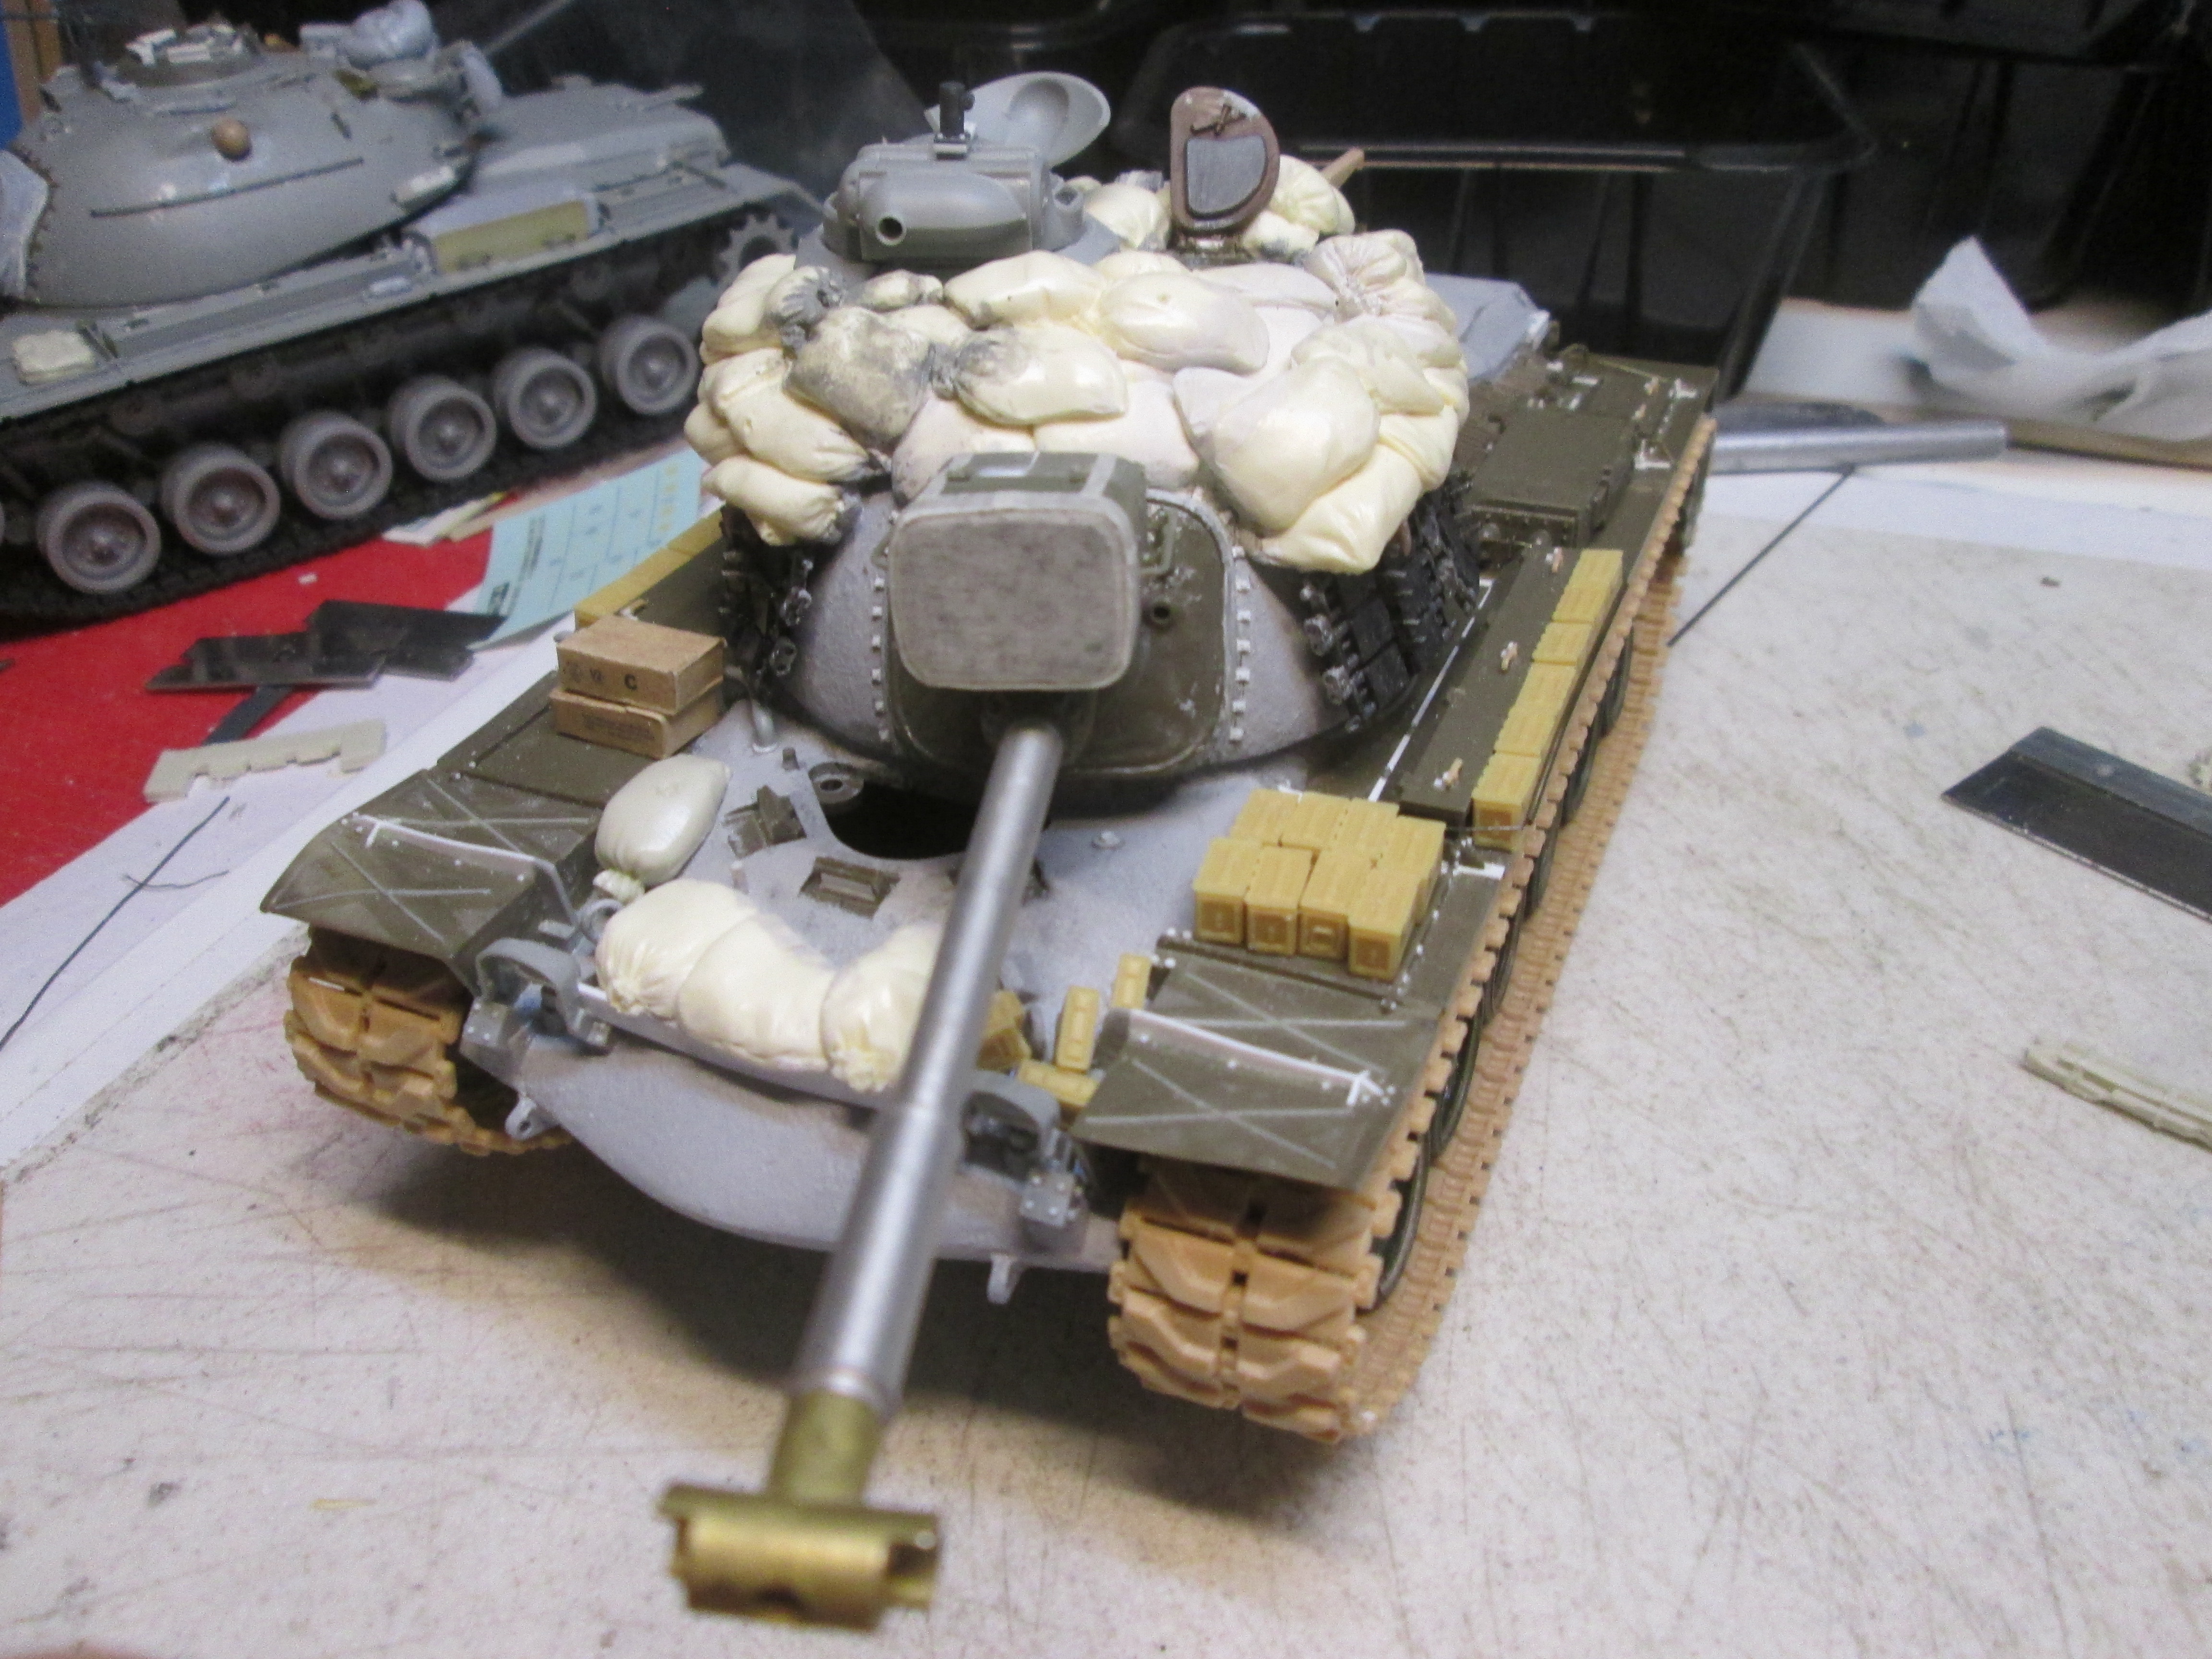
On to the Tamiya kit: I’ve got the spot light on, added most of the turret stowage and the sandbags on the front of the hull. More stowage will be added on the hull, mostly 50 cal ammo boxes, and I need to do the gun travel lock. For the TC’s MG, I used an Academy item on a mount I copied from a pic.
 IMG_3894 by Russel Baer, on Flickr
 IMG_3895 by Russel Baer, on Flickr
I have more ammo cans for the fenders and some miscellaneous items as well, still playing around with them.
Ammo cans on fenders outboard of tool boxes are on and secured based on a pic I saw somewhere, still moving stuff around on the front fenders…
 IMG_3899 by Russel Baer, on Flickr
Stowage to be painted with the tank (Model B) is all on, ready for primer:
 IMG_3904 by Russel Baer, on Flickr
 IMG_3903 by Russel Baer, on Flickr
I found a set of 40mm ammo and containers from AFV Club that supplied some nice items, and since the display base will be a road, I left the back deck clear to show the tank as in action, not parked up and loaded up like the Clampett’s truck. Next, primer.
And in primer:
 IMG_3906 by Russel Baer, on Flickr
I also started a set of Takom tracks, probably for the Magach as I used Takom drive sprockets on it and they’re not a good fit on the Tamiya sprockets on the Model B. Also, while the Takom tracks are very nice and relatively easy to assemble, it’s a slow process. Three hours to do 50 links…
 IMG_3905 by Russel Baer, on Flickr
HURRAH! Nice to see her almost done!
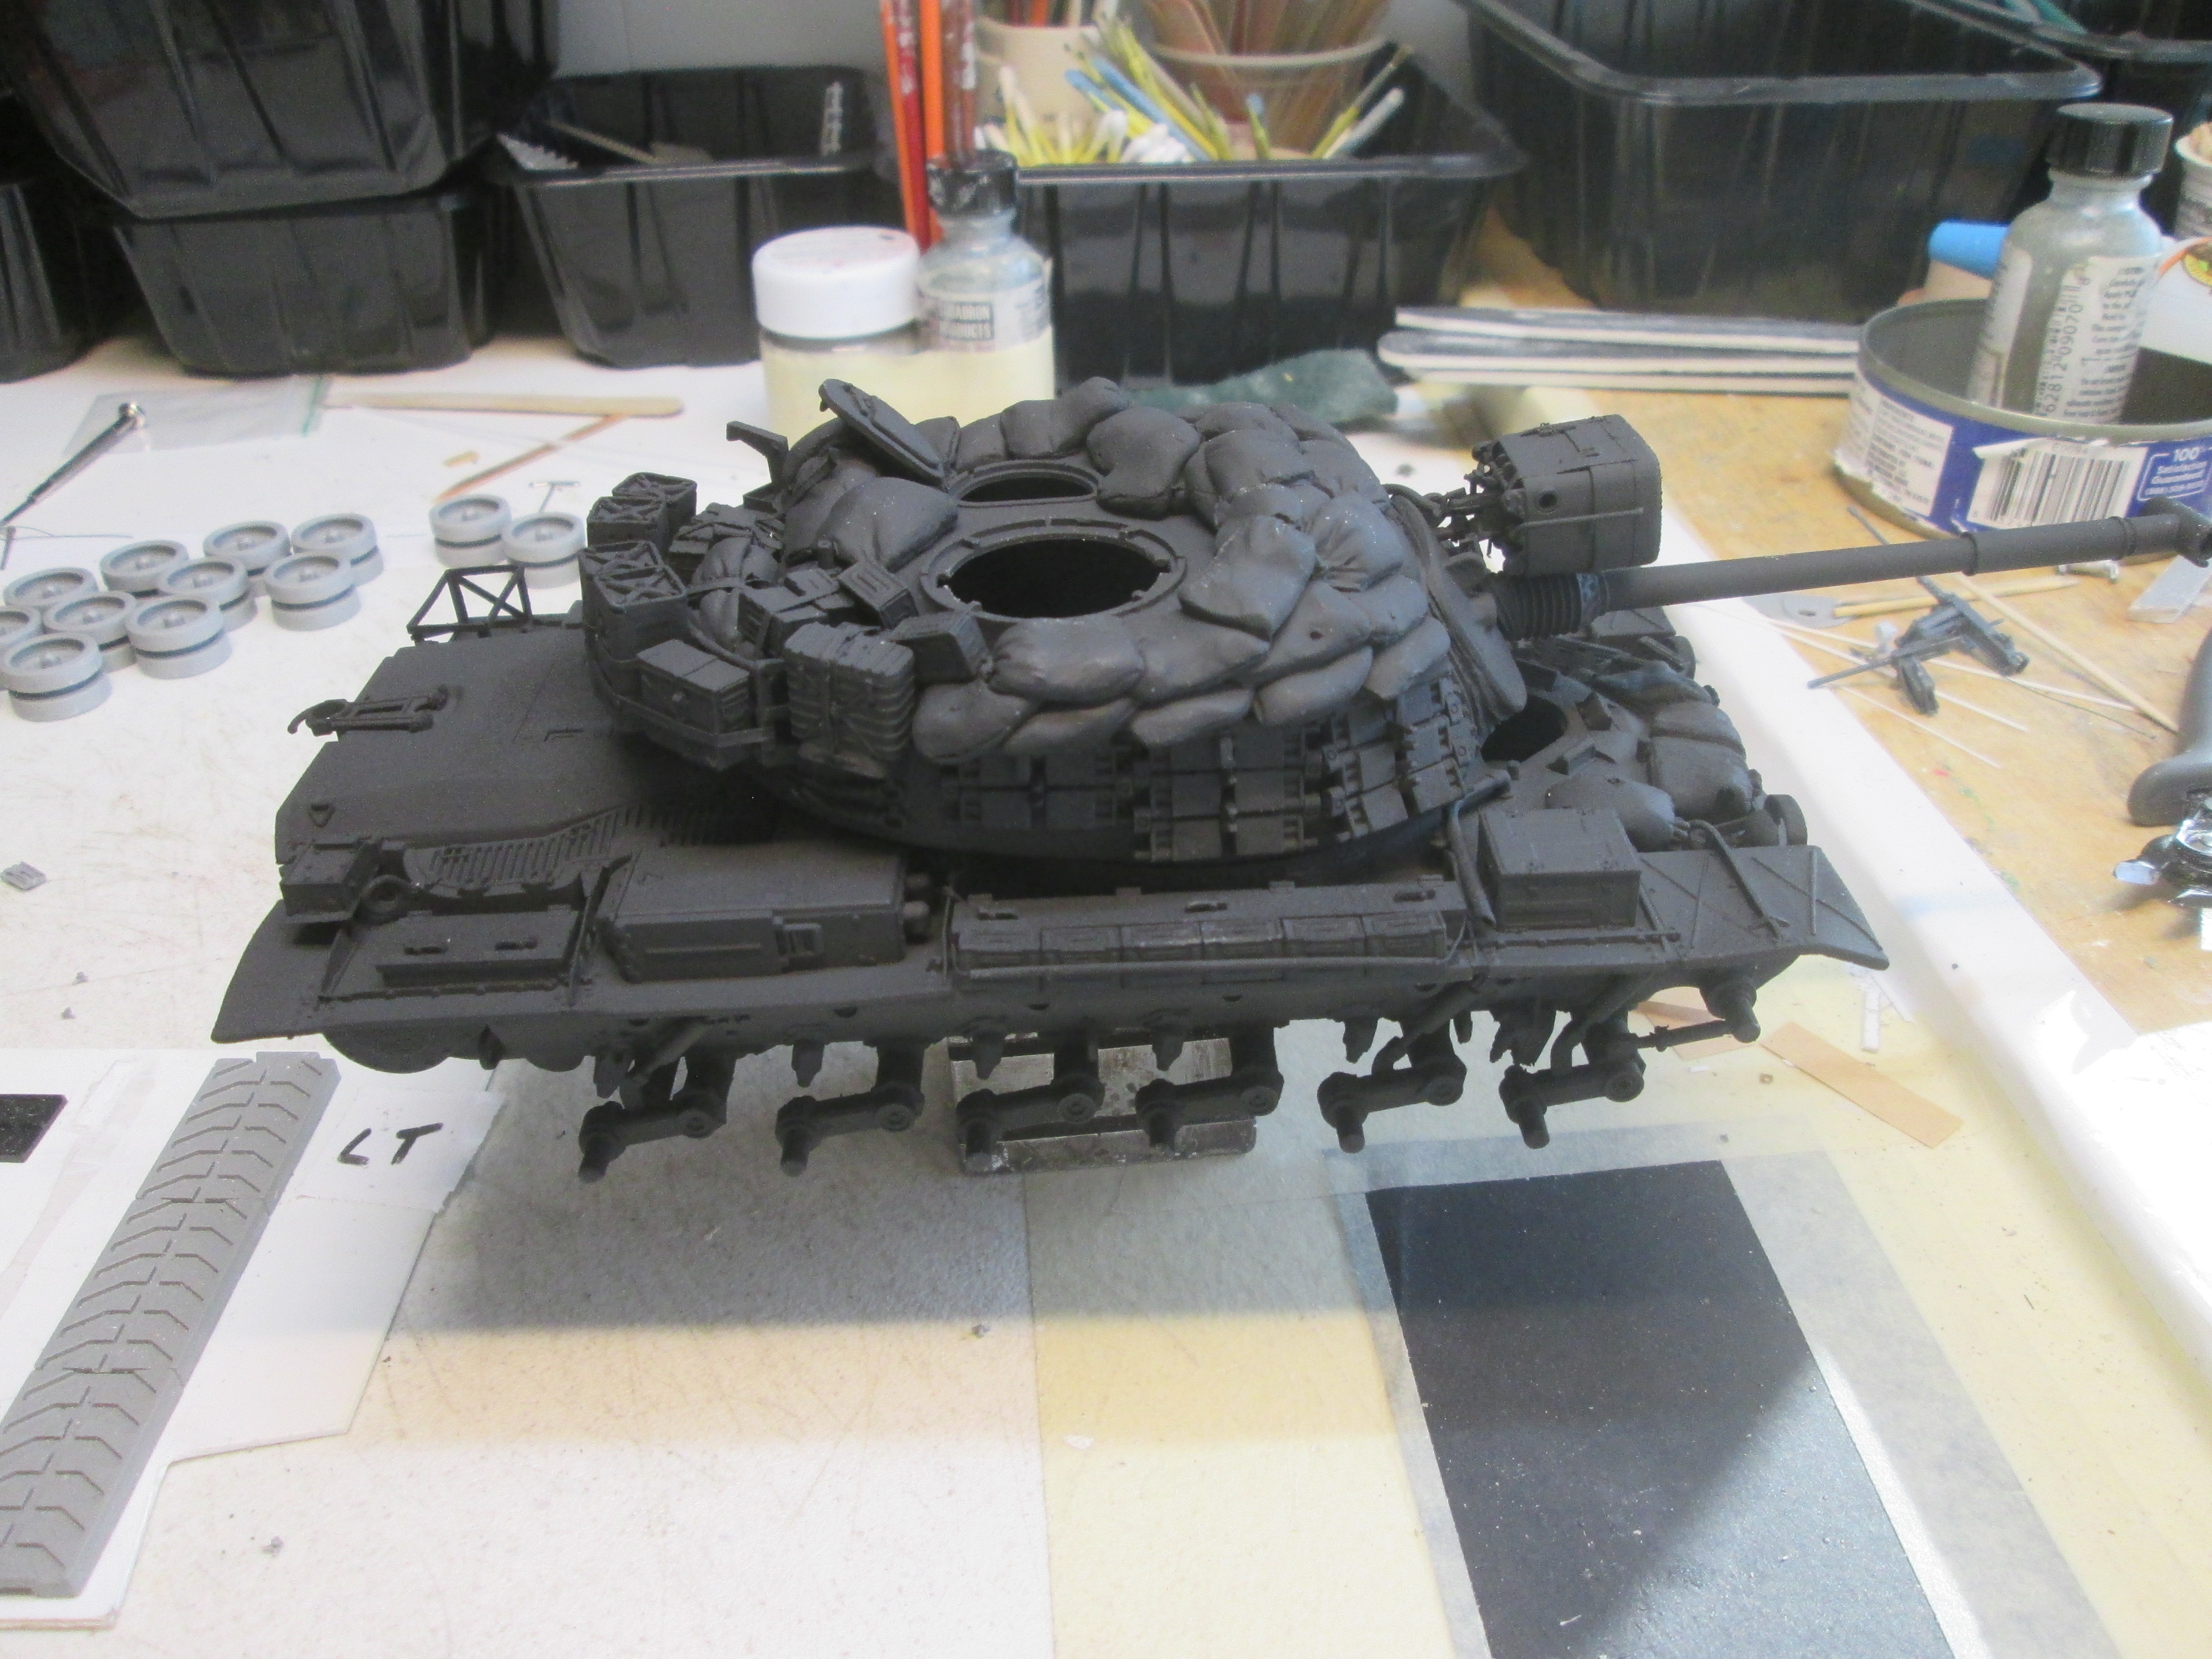
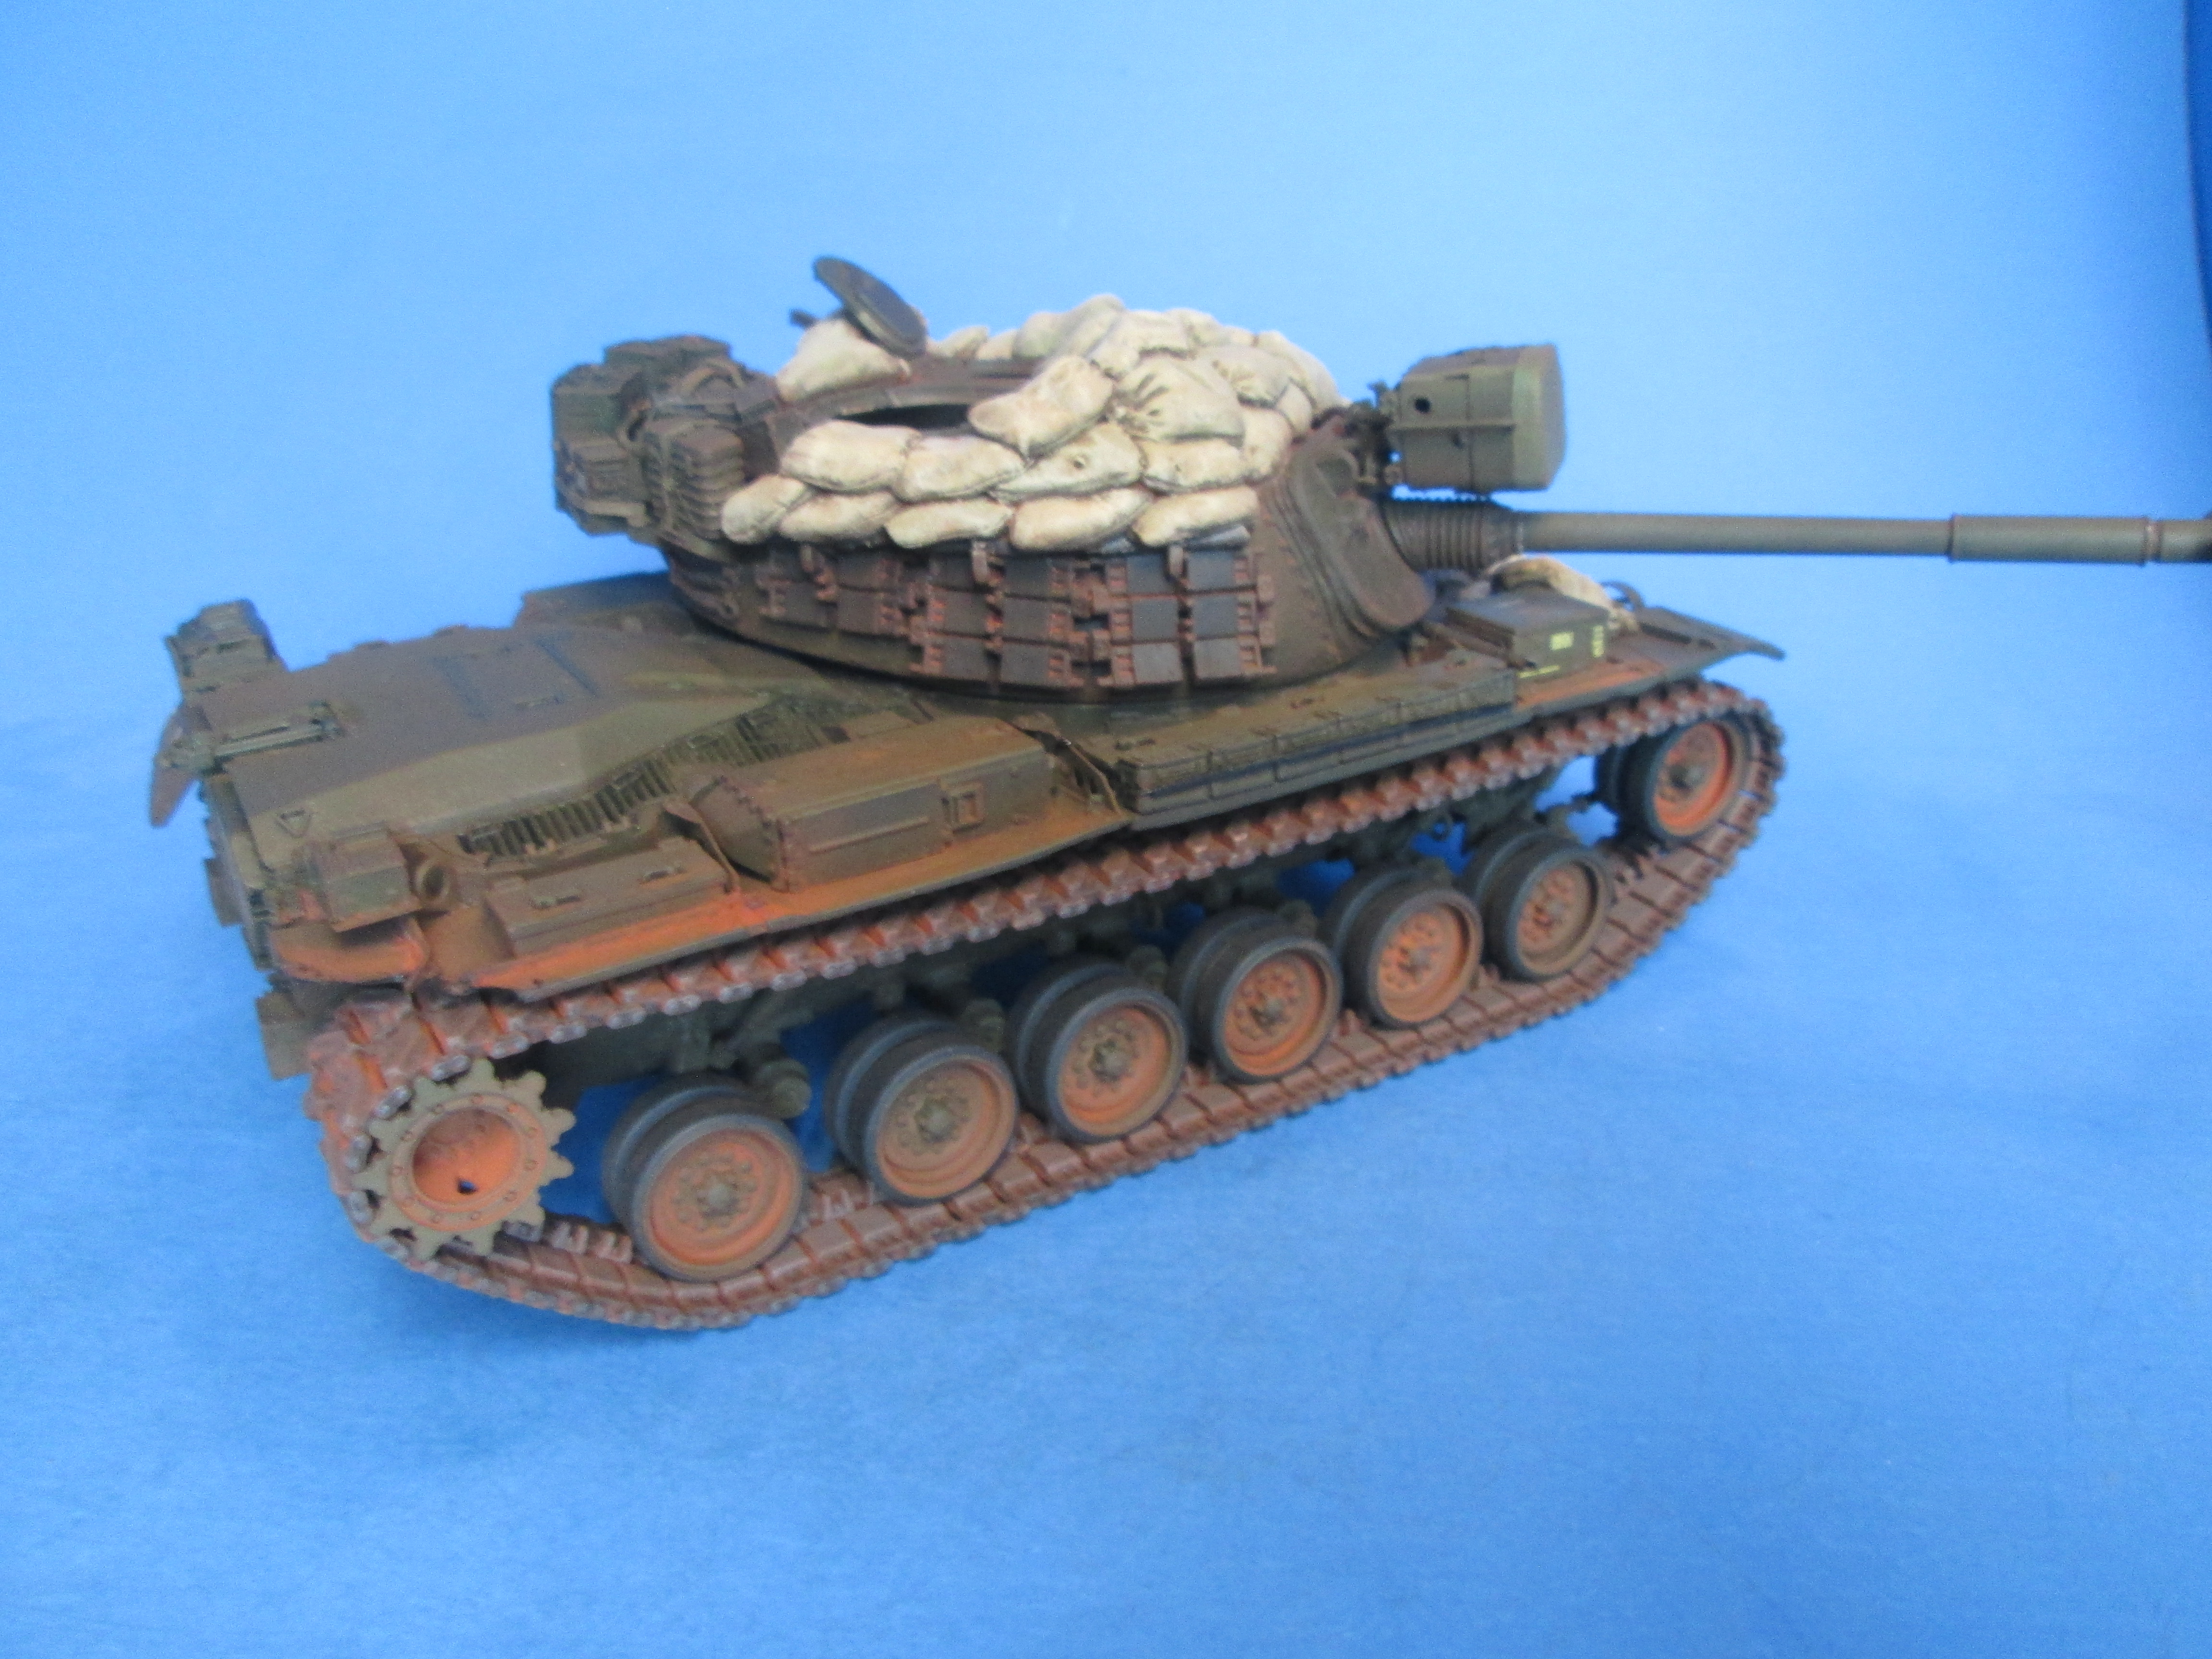
Yup, I’m getting the itch to start something else already. In the meantime, the Model B is in OD and the Magach in primer, gray so there’s nothing to show. The black primer I shot on the Model B pebbled horribly, my fault entirely, so I had to do some sanding with a worn out Scotchbrite pad befor I put color on. I used Vallejo OD from their rattle can, then Vallejo olive green wash, and got the basic other colors on before I sealed it up with clear.
 IMG_3910 by Russel Baer, on Flickr
Now I’m checking pics of tanks with sandbags on them to get a feel for their color, but all the color pics I have are poor quality and don’t give me a good idea. I’ll probably go with a raw burlap look.
Hmm, that’s interesting, the only paint I’ve ever had pebble is gloss.
Could you maybe just paint the tops of the sandbags and leave the brown on the bottom as shading?
I was too far away from the work on a warm, windy day. Oops.
And yeah, that’s my intention, to have the brown in the nooks and crannies as “pre-shading”, fancy term for what I’m using as an easy way to blend shadows. Each sandbag will have to be indivudually painted and shaded, should be fun.
Really.
As it sits now, sandbags coming along.
 IMG_3911 by Russel Baer, on Flickr
Hello Russ!
The sandbags are lookin’ good! The tank is very clean now though - I wonder how are you going to go about dirtying it up or shading it… Good luck with your build and have a nice day
Paweł
Those bags look just right
Looks good, she’s coming along well!
Thanks all.
Pawel, have no fear, it will be filthy. I’ll use my usual acrylic washes and dry pigments but I’m out of a bunch of stuff, waiting to get to my friendly local hobby shop. In the meantime, the other one is in color:
 IMG_3912 by Russel Baer, on Flickr
 IMG_3913 by Russel Baer, on Flickr
Decals are on the Magach and detail painting is started. Decals are out of a re-release of Monogram’s M48. Oddly enough, they were a very close match to a couple of pics in the Desert Eagle Magach 3 book.
 IMG_3920 by Russel Baer, on Flickr
 IMG_3918 by Russel Baer, on Flickr
And I’m pushing through on the -A3. Dusting is done, using Vallejo dry pigments, final detail painting is nearly done and some fluid stains still to be added. Then it’s figs, antenna masts, return rollers and a couple of other bits and I can move on.
 IMG_3916 by Russel Baer, on Flickr
 IMG_3915 by Russel Baer, on Flickr
They’re looking good! Esp love the Vietnam mud and dirt on the lower!
I’ve got on a weird Soviet Cold War kick lately, I need to get some done and post them as compliments to your Free World stuff!